
Head Gasket + Timing Belt DIY

Joined: Dec 2008
Posts: 15,189
Likes: 1,609
From: TN
Rep Power: 368 

Re: Head Gasket + Timing Belt DIY
MrJeChou,
your problem is not directly related to "how to change head gasket yourself", so your posts have been moved to this place.
https://www.civicforums.com/forums/3...hine-shop.html
it's better to have a DIY with not as many pages, so it's an instructional thread, which is the whole purpose of a DIY thread - if you ask how to do? it means there's nothing that you could contribute on a DIY articles section.

Thread Starter
Whachya lookin at?
iTrader: (1)
Joined: May 2009
Posts: 6,388
Likes: 13
From: Canada
Rep Power: 314 Re: Head Gasket + Timing Belt DIY
Yes there will be. I should be removing the head from the car again in the spring. The job won't be rushed as it was last time so you can expect a pretty detailed DIY and reassembly.

Registered!!
Joined: Oct 2013
Posts: 3
Likes: 0
Rep Power: 0 
Re: Head Gasket + Timing Belt DIY
Oh okay well great DIY its helped me get so far along this project..although I've taken two days and I haven't gotten the head off yet..some parts are difficult, specially for being my first big project.
I just want to know how to put the timing belt back on afterwards?
I just want to know how to put the timing belt back on afterwards?
Joined: Dec 2008
Posts: 15,189
Likes: 1,609
From: TN
Rep Power: 368 Re: Head Gasket + Timing Belt DIY
Oh okay well great DIY its helped me get so far along this project..although I've taken two days and I haven't gotten the head off yet..some parts are difficult, specially for being my first big project.
I just want to know how to put the timing belt back on afterwards?
I just want to know how to put the timing belt back on afterwards?
https://www.civicforums.com/forums/1...placement.html
i think there are some instructions in here as well, but this thread is getting too cluttered, i need to clean it up some...
https://www.civicforums.com/forums/1...t-diy-2-a.html
Registered!!
Joined: Oct 2013
Posts: 3
Likes: 0
Rep Power: 0 Re: Head Gasket + Timing Belt DIY
Thank you very much!
(Sorry maybe searching the forum would have been a good idea...)
It doesn't seem as hard as some people complained to me that it would be..very helpful people here, I'll definitely be coming here more often.
(Sorry maybe searching the forum would have been a good idea...)
It doesn't seem as hard as some people complained to me that it would be..very helpful people here, I'll definitely be coming here more often.
Joined: Dec 2008
Posts: 15,189
Likes: 1,609
From: TN
Rep Power: 368 Re: Head Gasket + Timing Belt DIY
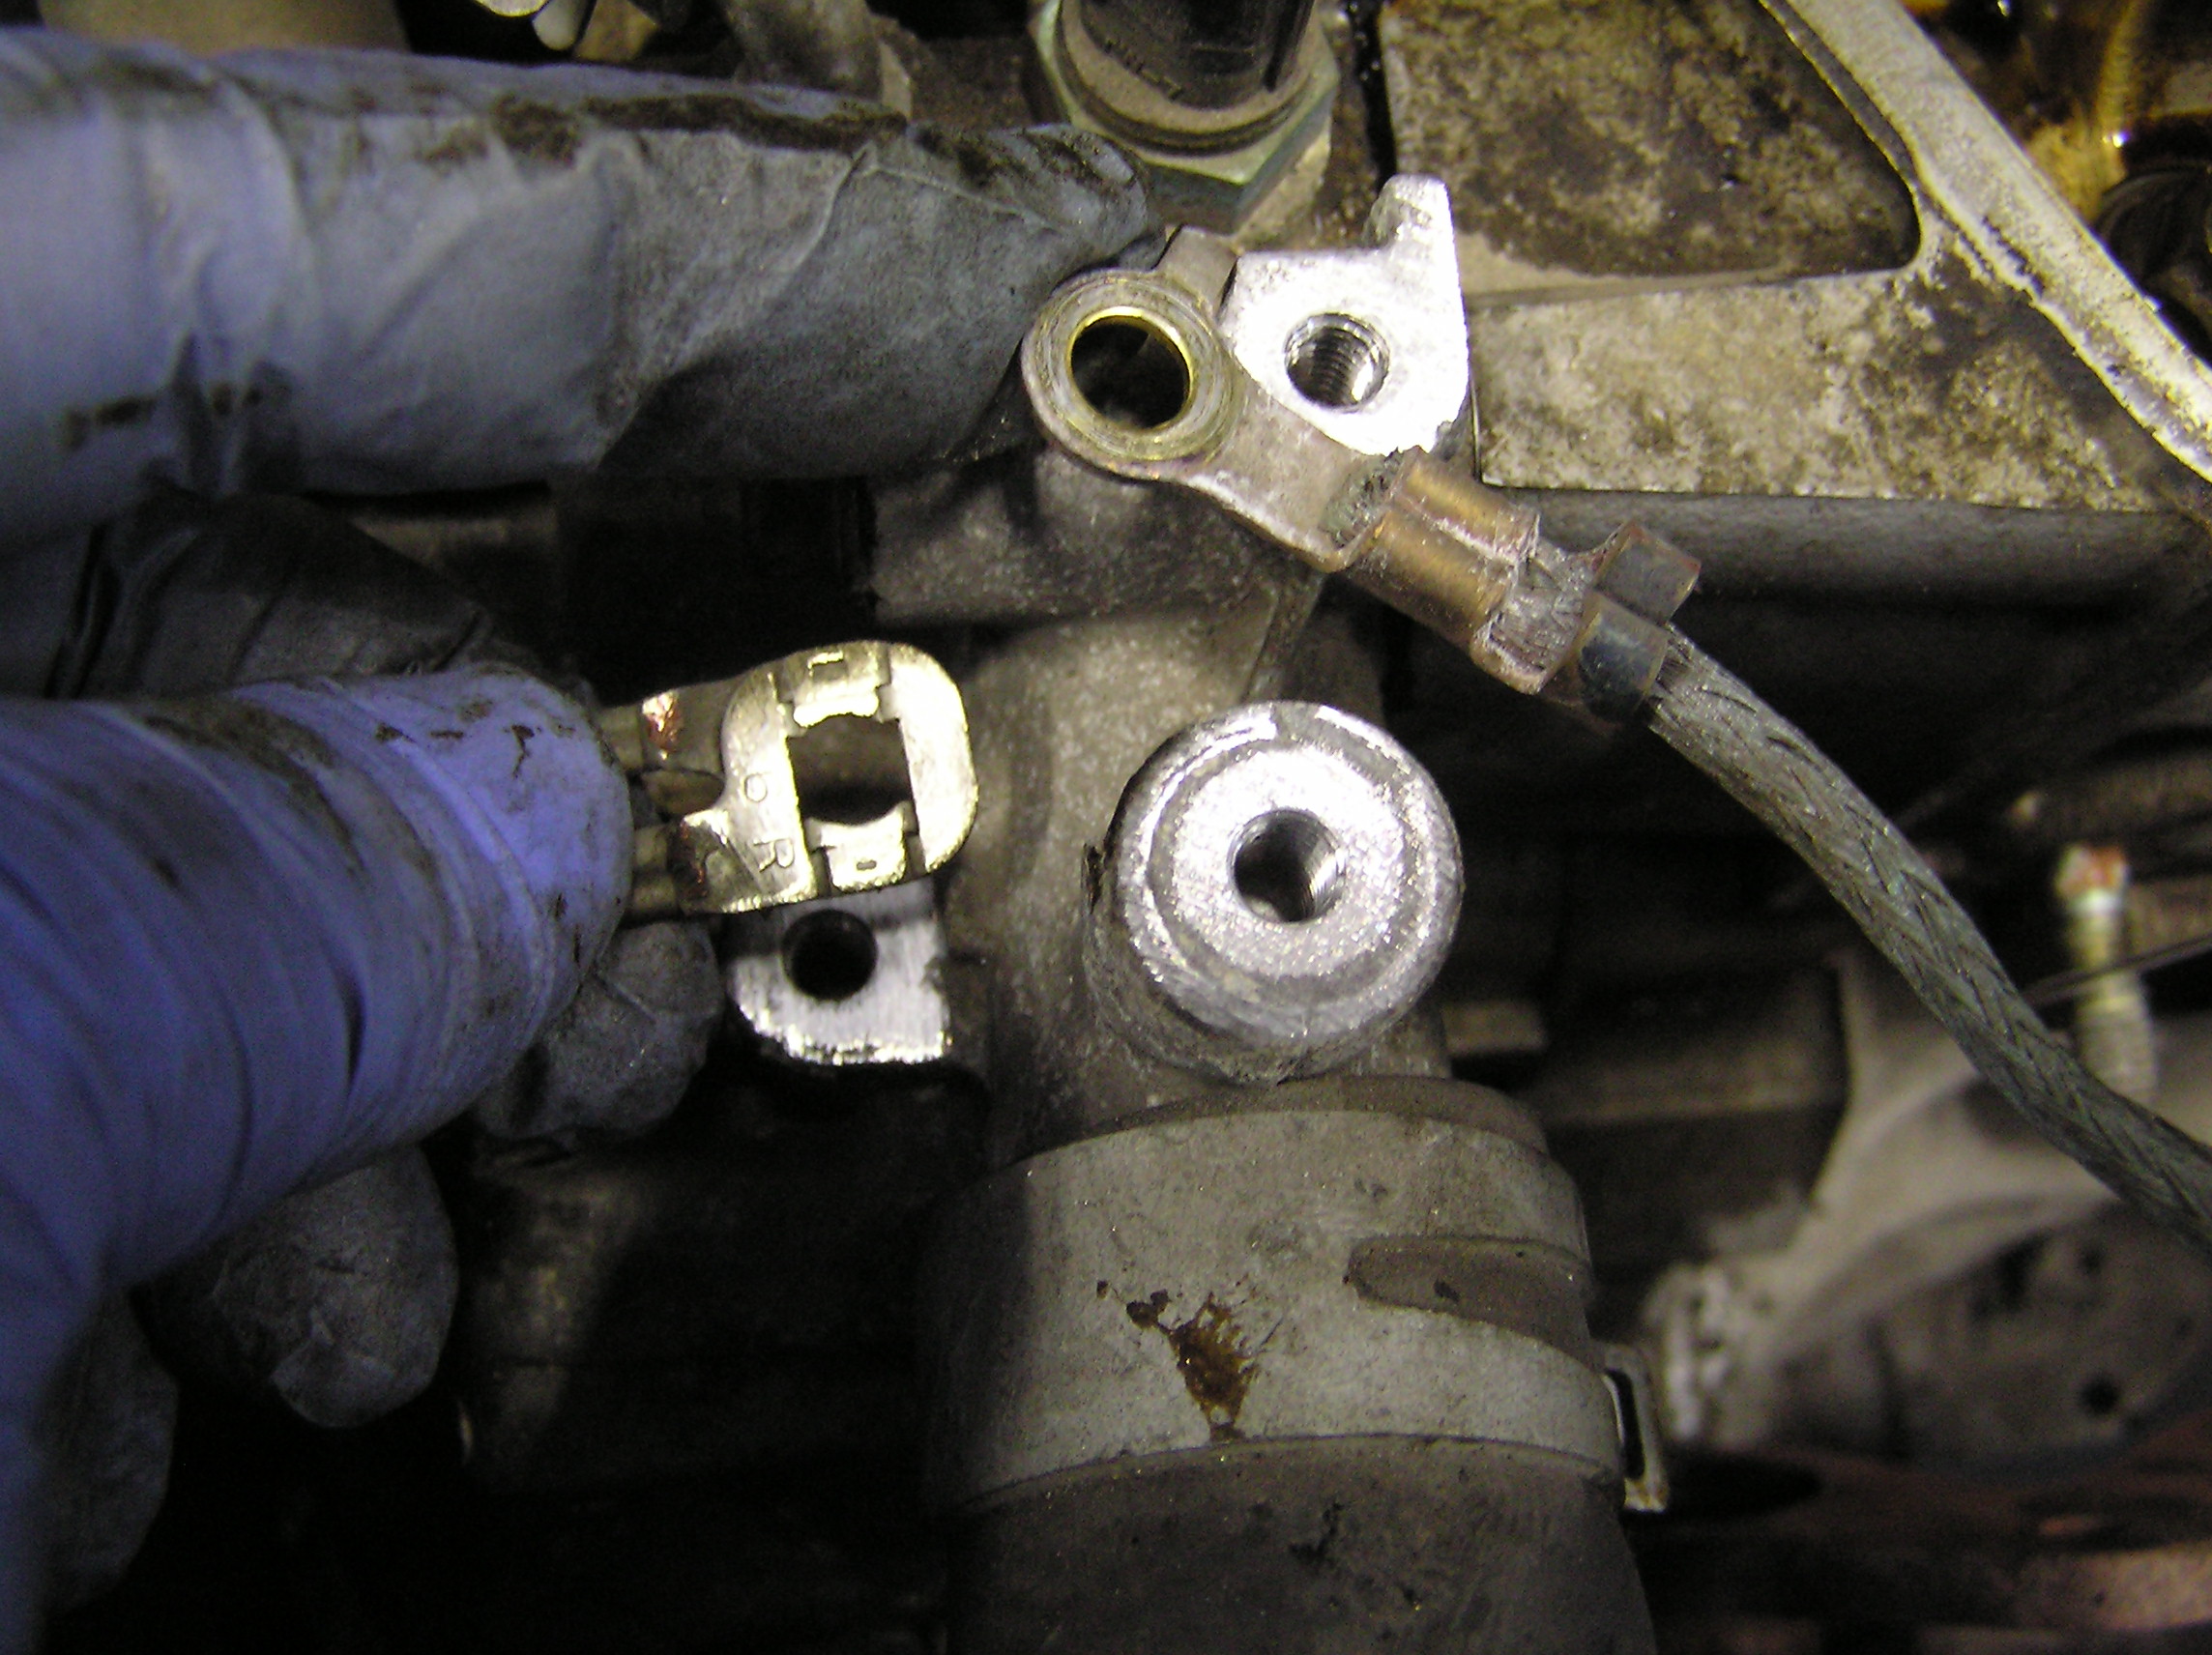
g'lucky, most of the sensors will not plug to the wrong ones, and the length will tell where they should be, so should be easy - i did not bother too much when i figured they all different
Thread Starter
Whachya lookin at?
iTrader: (1)
Joined: May 2009
Posts: 6,388
Likes: 13
From: Canada
Rep Power: 314 Re: Head Gasket + Timing Belt DIY
Holy crap Sandro. I'm starting to realize how much time I have contributed to this forum as my threads keep popping up lol.
If you think a good mechanic is expensive, try hiring a bad one
Joined: Dec 2011
Posts: 32,017
Likes: 256
From: Midwest. Aiming about mid-chest
Rep Power: 519 Re: Head Gasket + Timing Belt DIY
If anyone cares, I have the head off of an 05 Civic today....

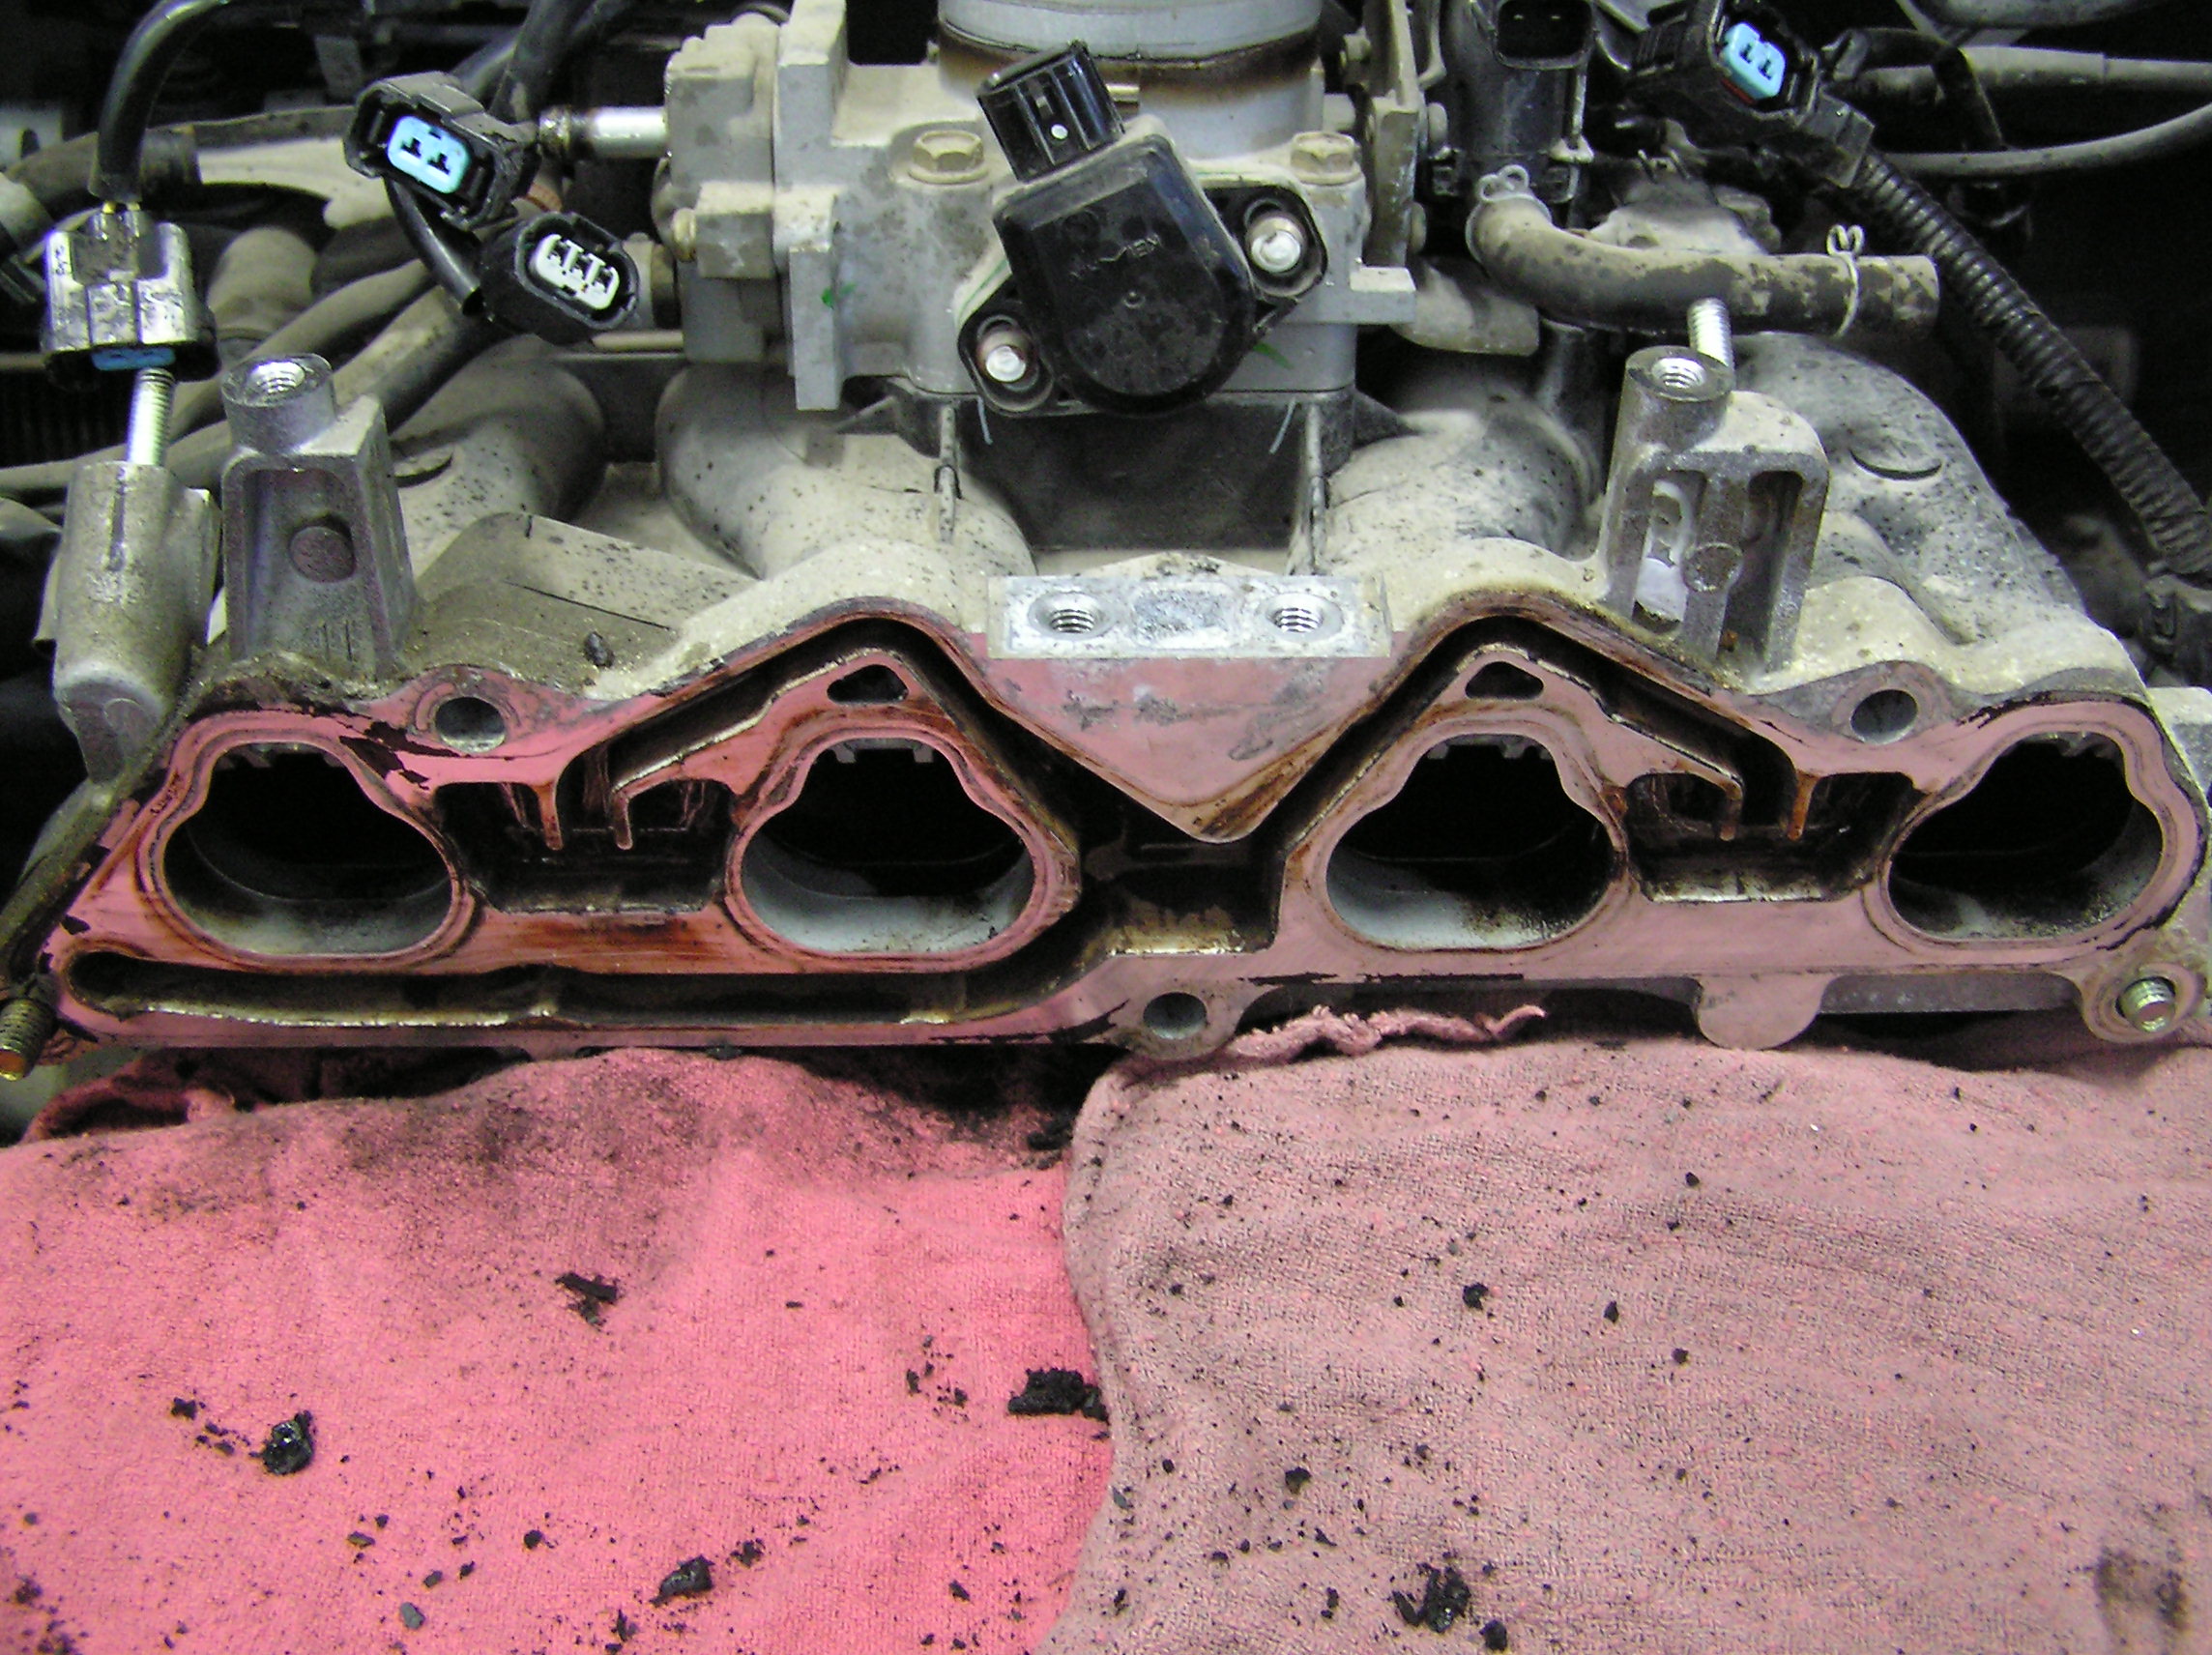
^^Cleaned the EGR passages while apart^^
Still need to scrape the gasket residue though.
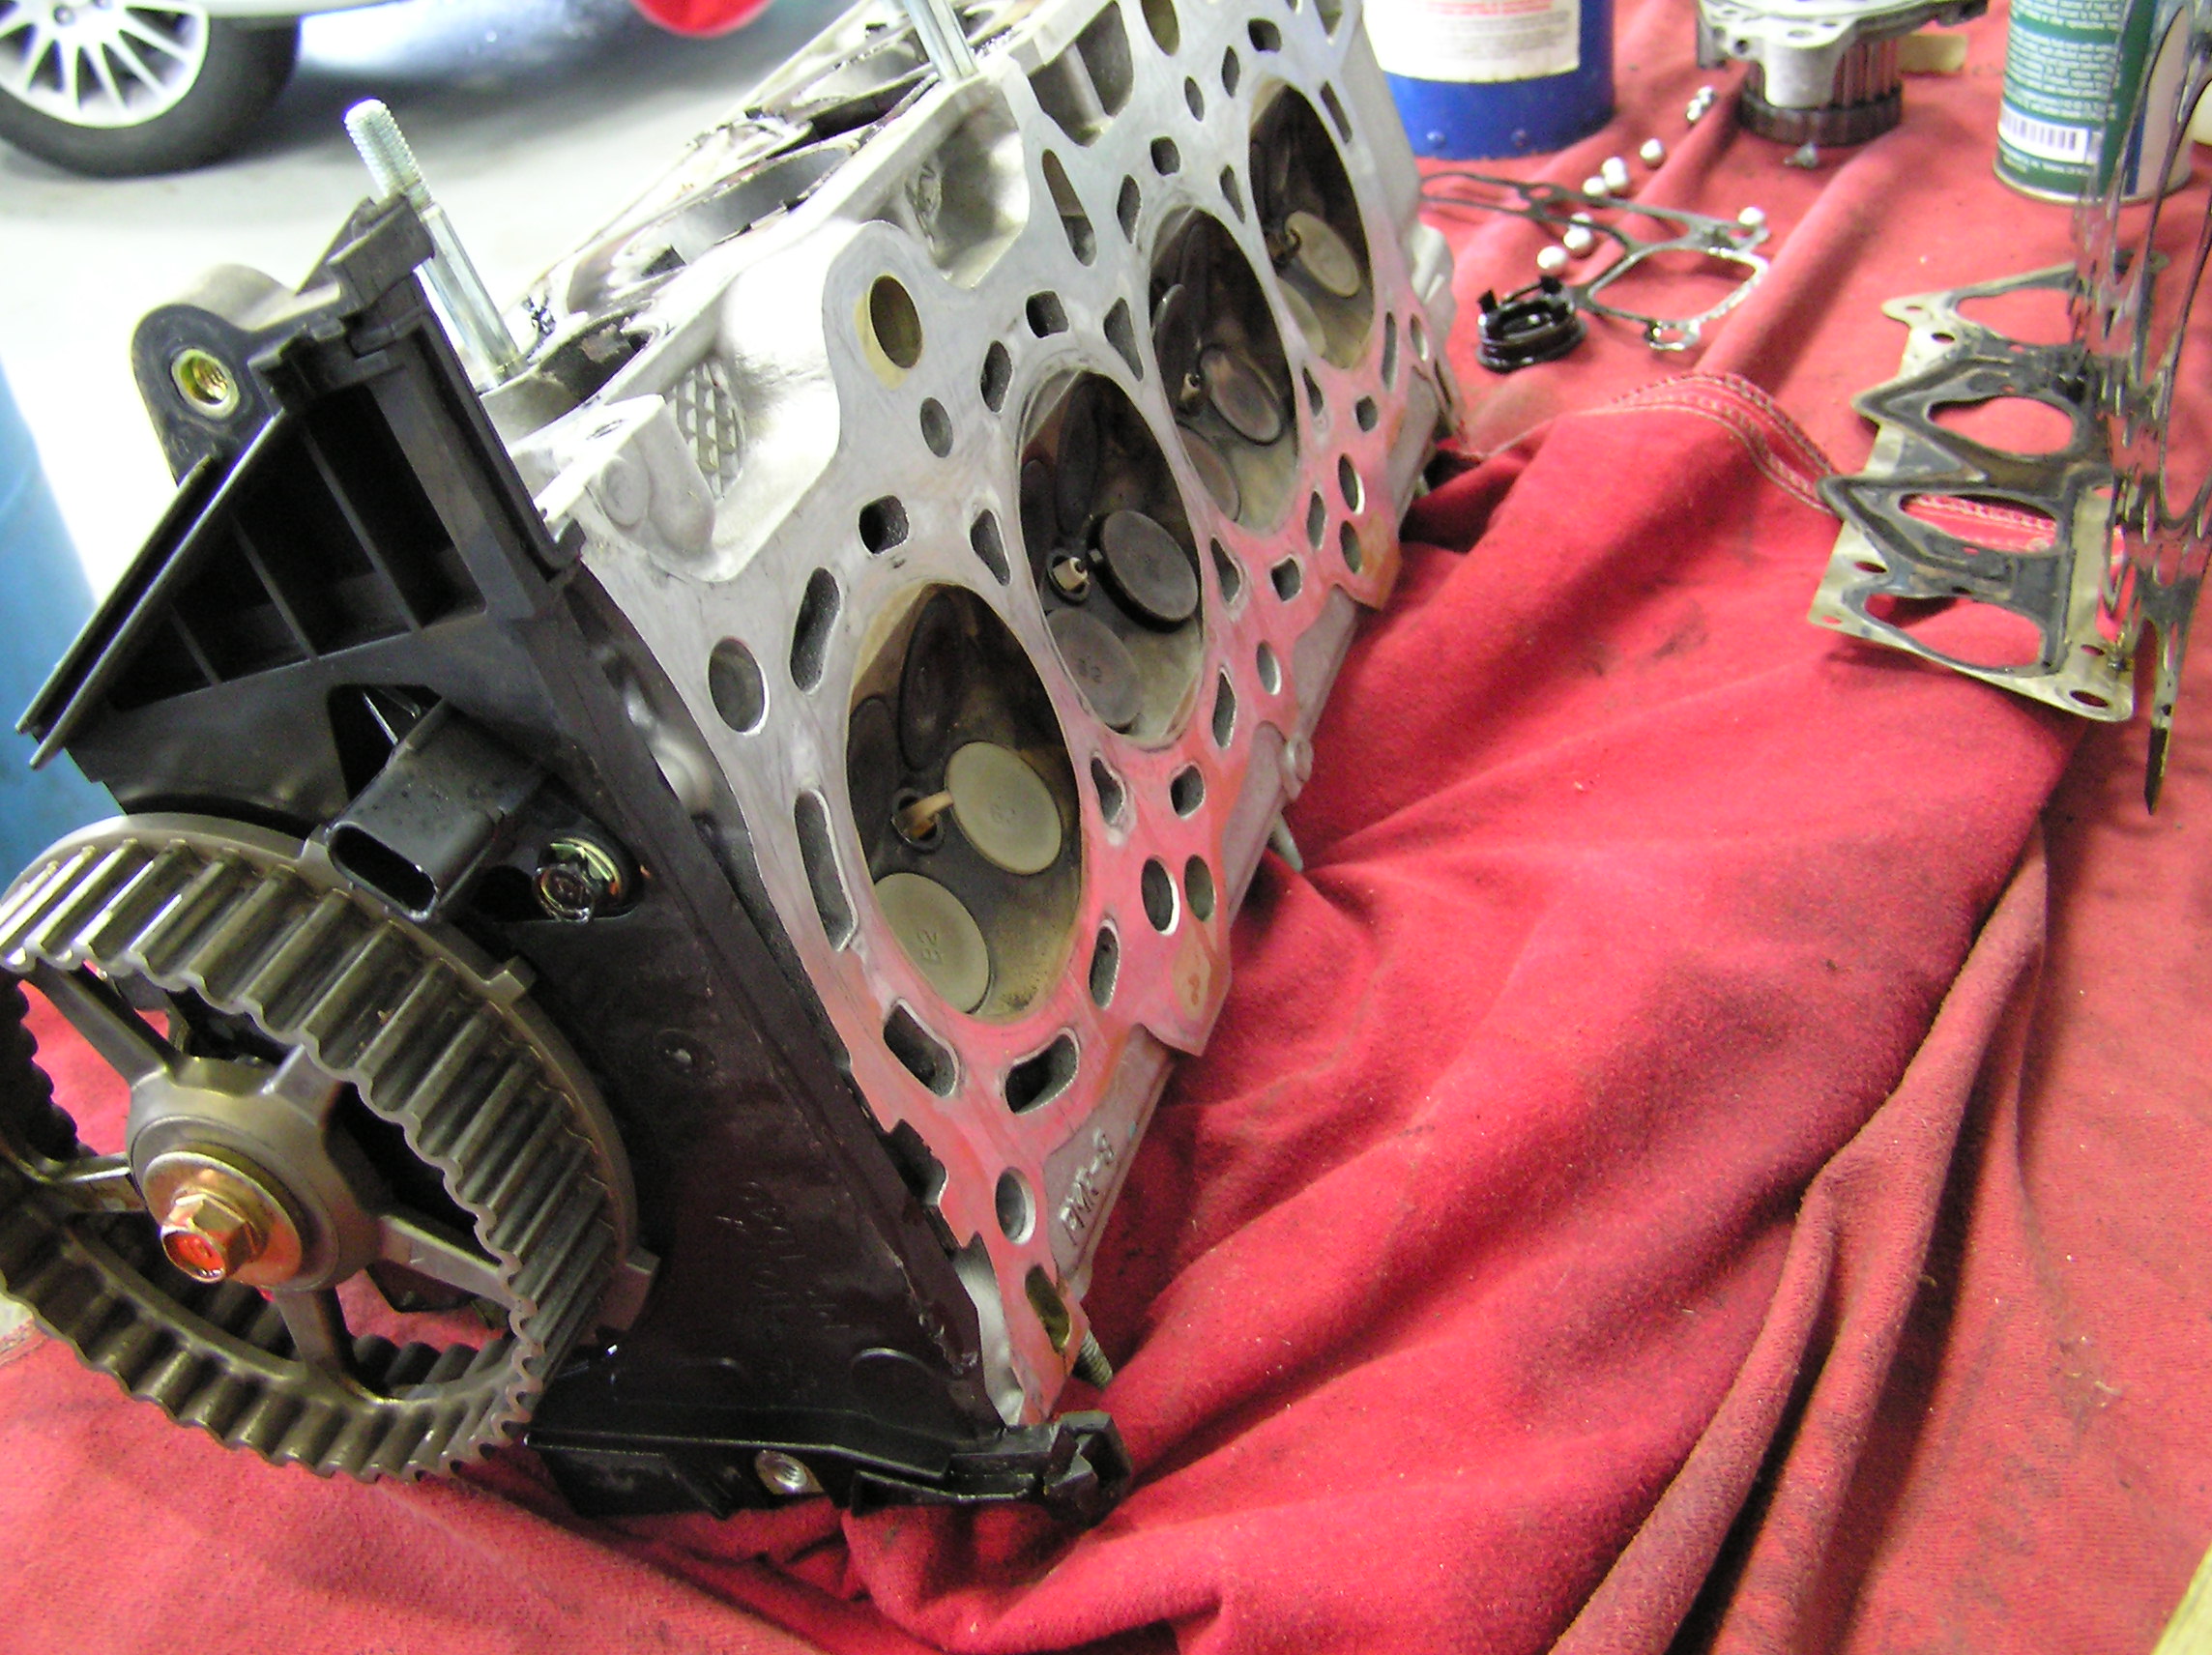
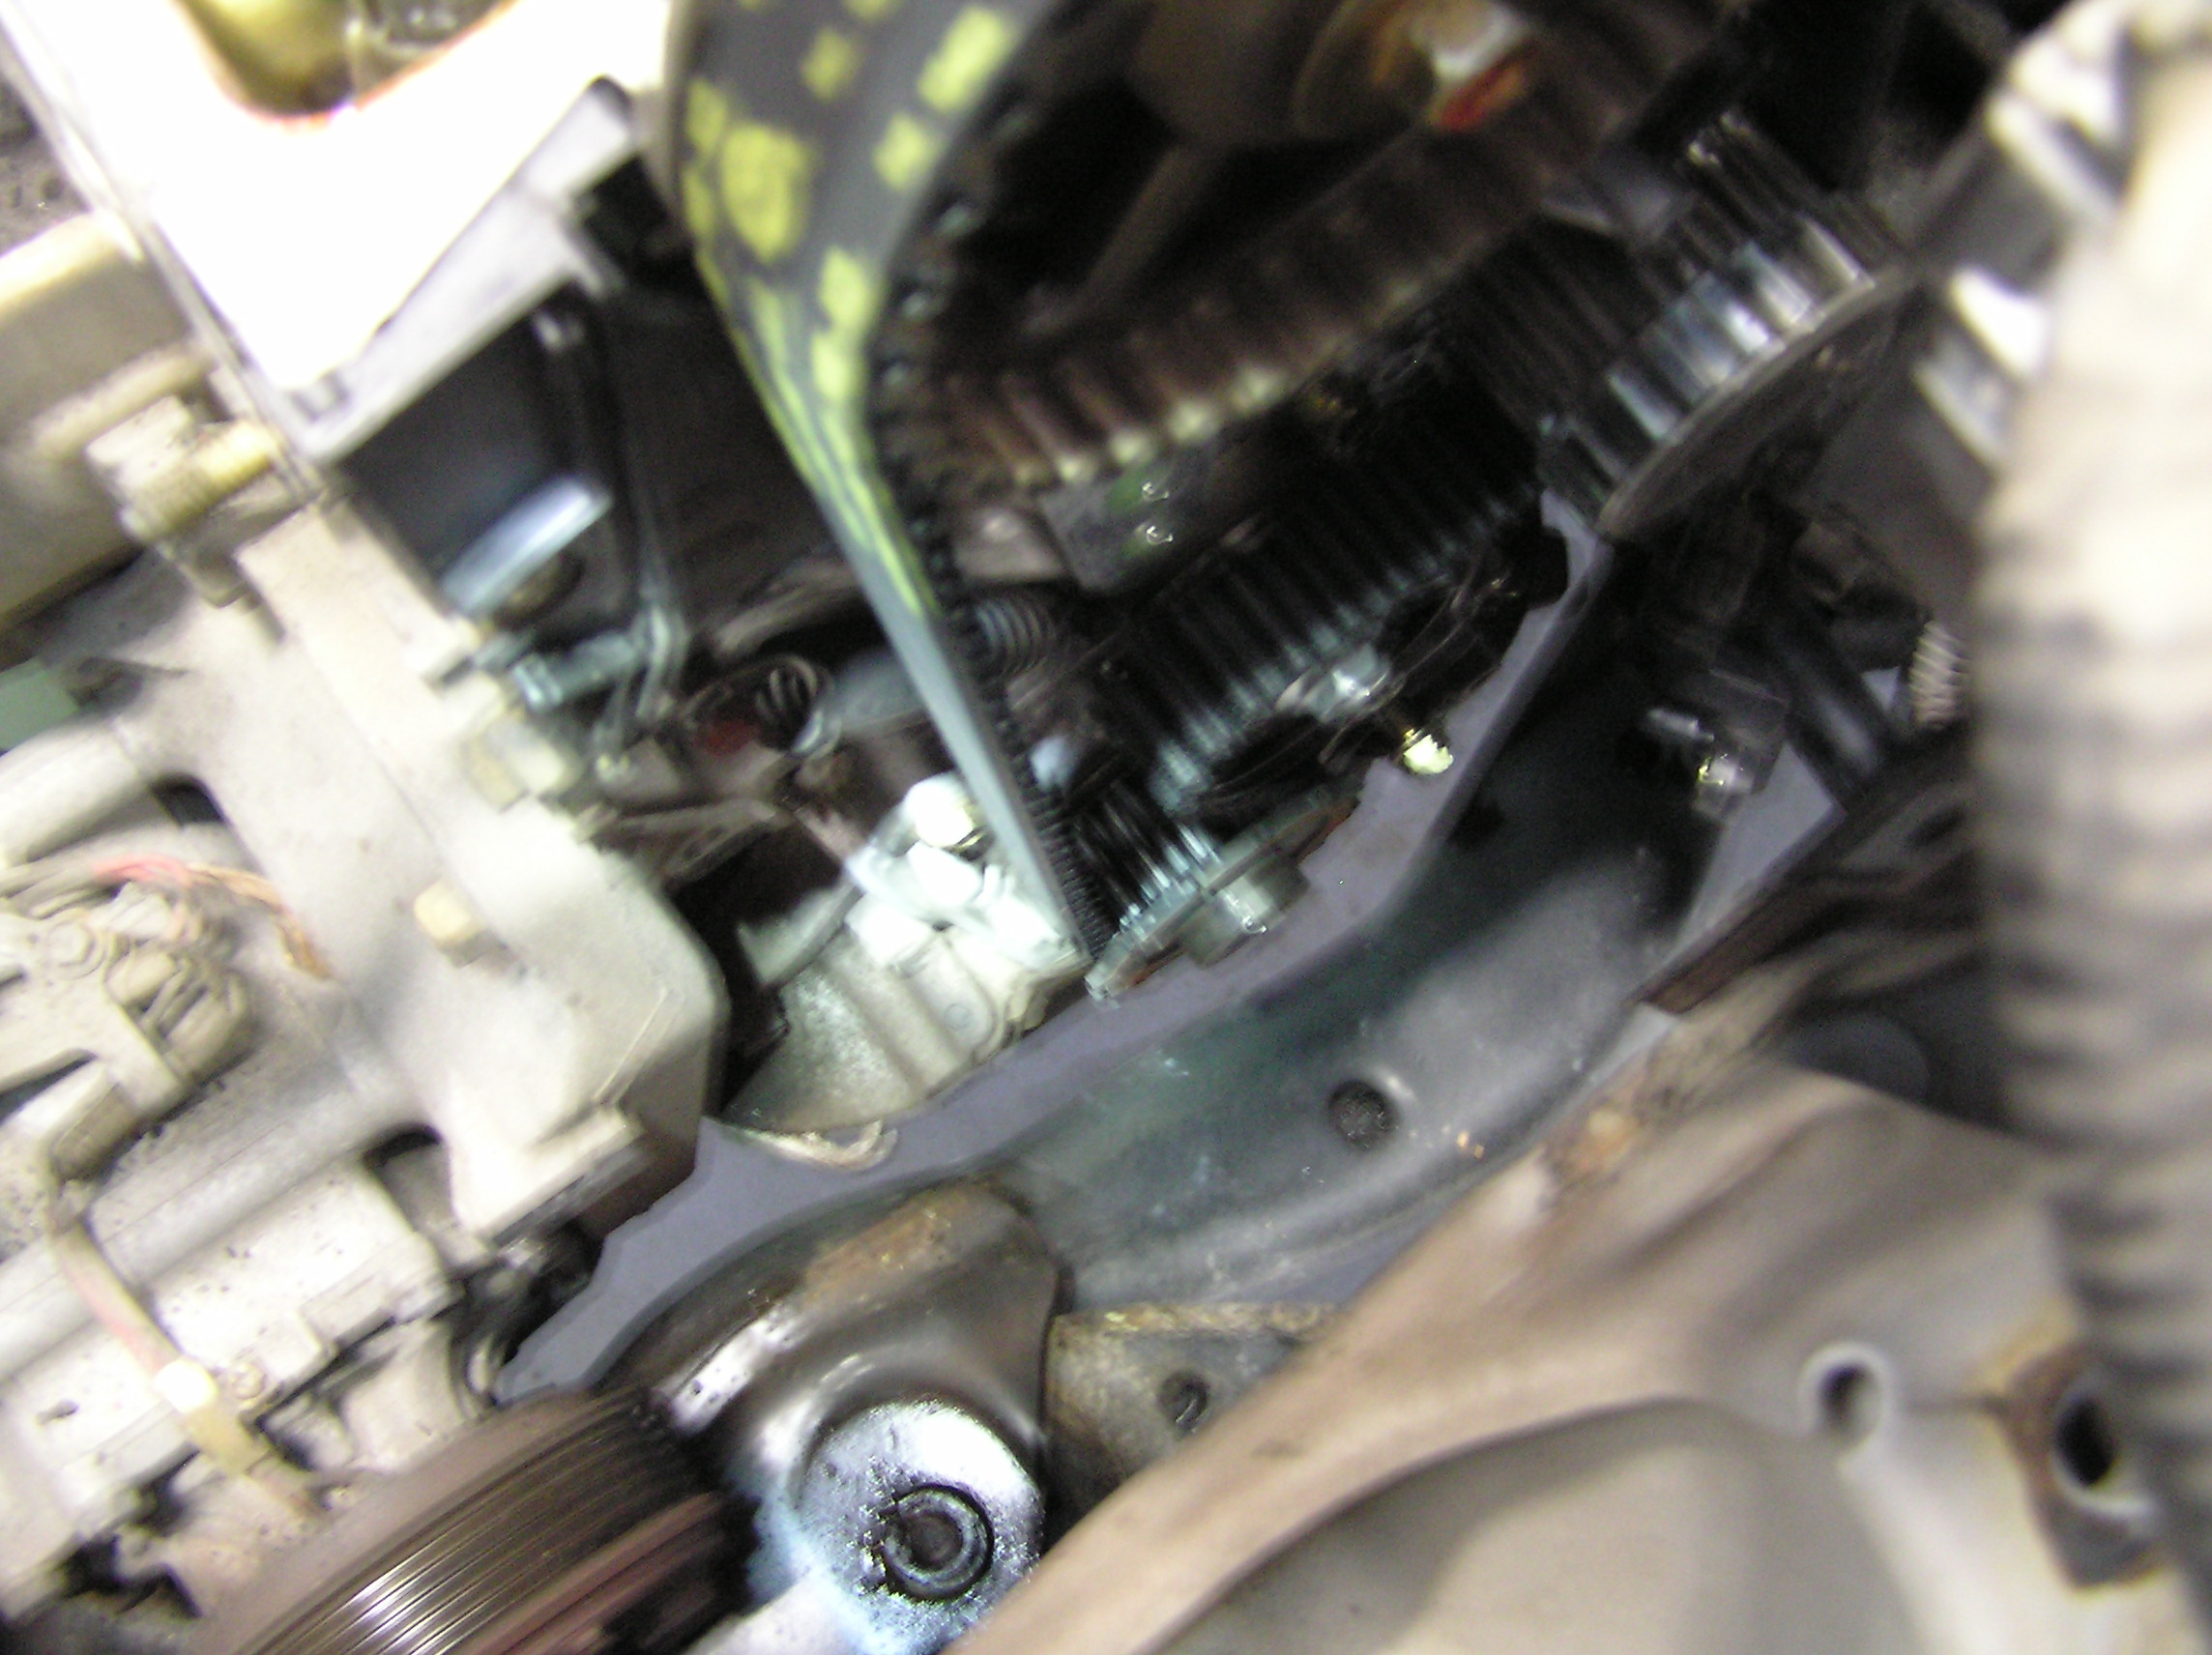
Notice in the last pic that I do not loosen the bolt holding the tensioner pulley to the block. I simply detach the spring and let the pulley rotate downward, and slip the belt off.
To reassemble, I slip the belt into place and reattach the spring to its peg.
^^Cleaned the EGR passages while apart^^
Still need to scrape the gasket residue though.
Notice in the last pic that I do not loosen the bolt holding the tensioner pulley to the block. I simply detach the spring and let the pulley rotate downward, and slip the belt off.
To reassemble, I slip the belt into place and reattach the spring to its peg.
If you think a good mechanic is expensive, try hiring a bad one
Joined: Dec 2011
Posts: 32,017
Likes: 256
From: Midwest. Aiming about mid-chest
Rep Power: 519 Re: Head Gasket + Timing Belt DIY
More reassembly

Gonna clean up the grounds here
Timing belt back on....I hate auto focus
Timing cover back on...... I think I shook the camera
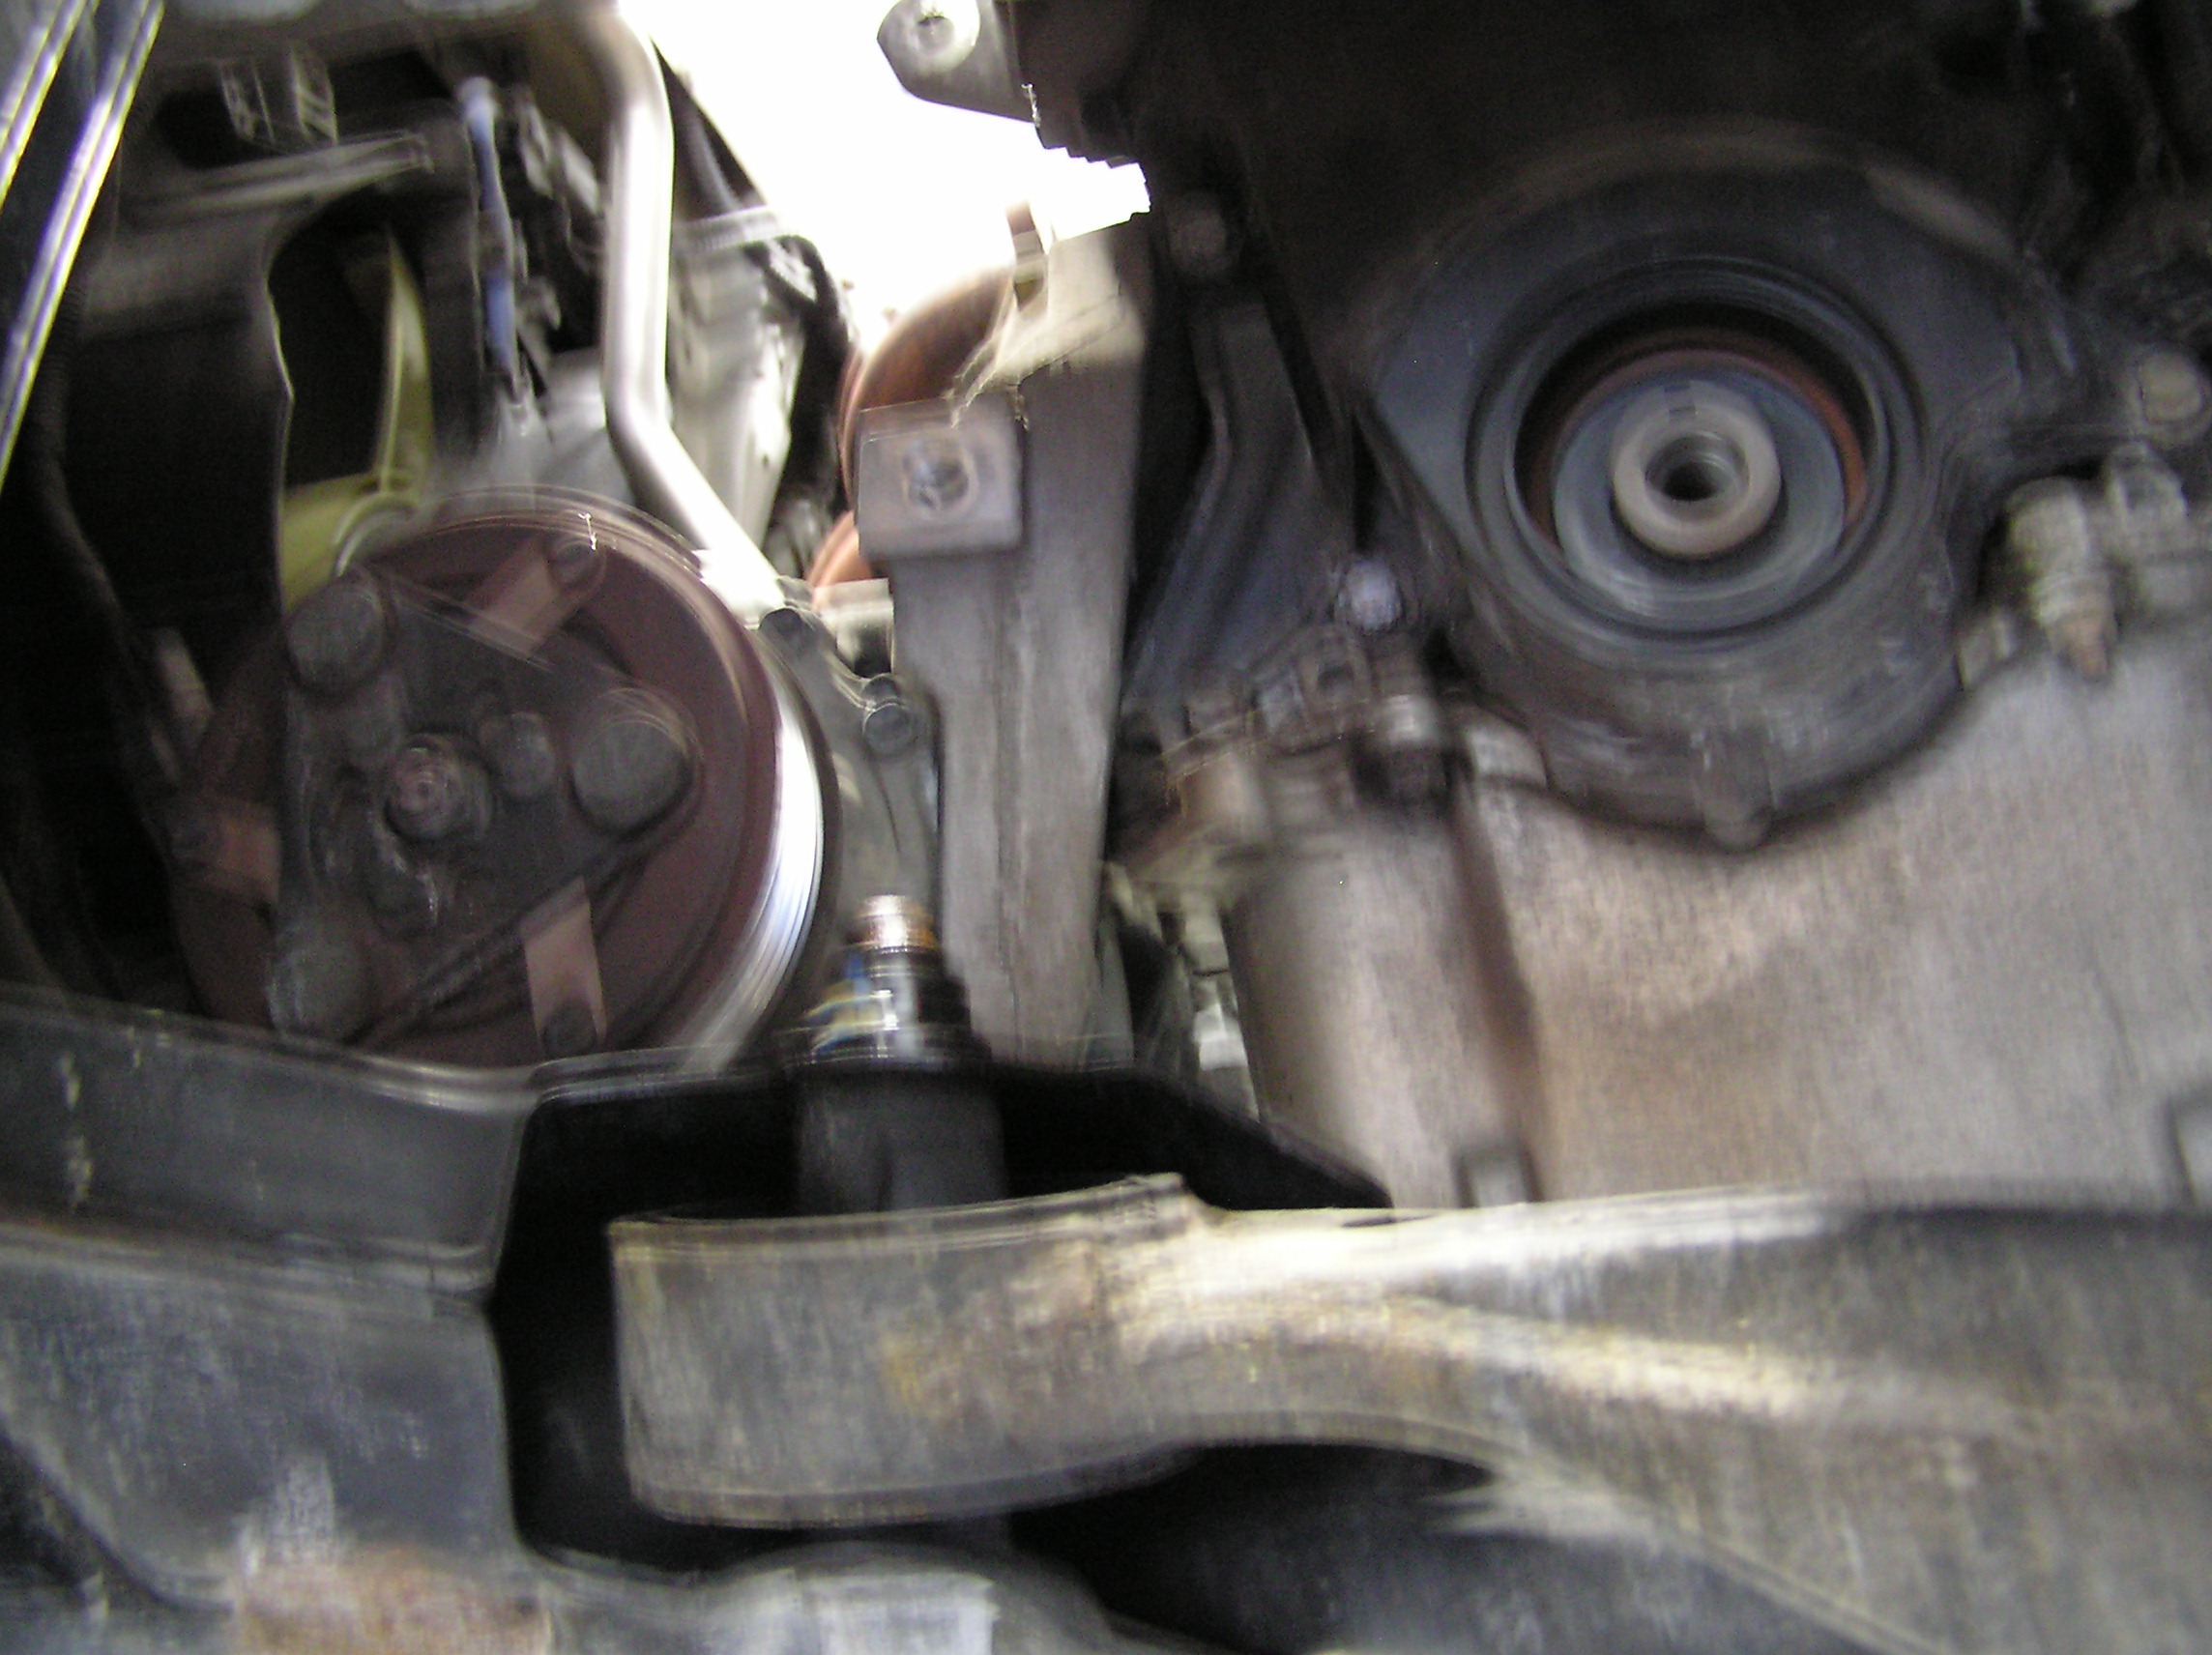
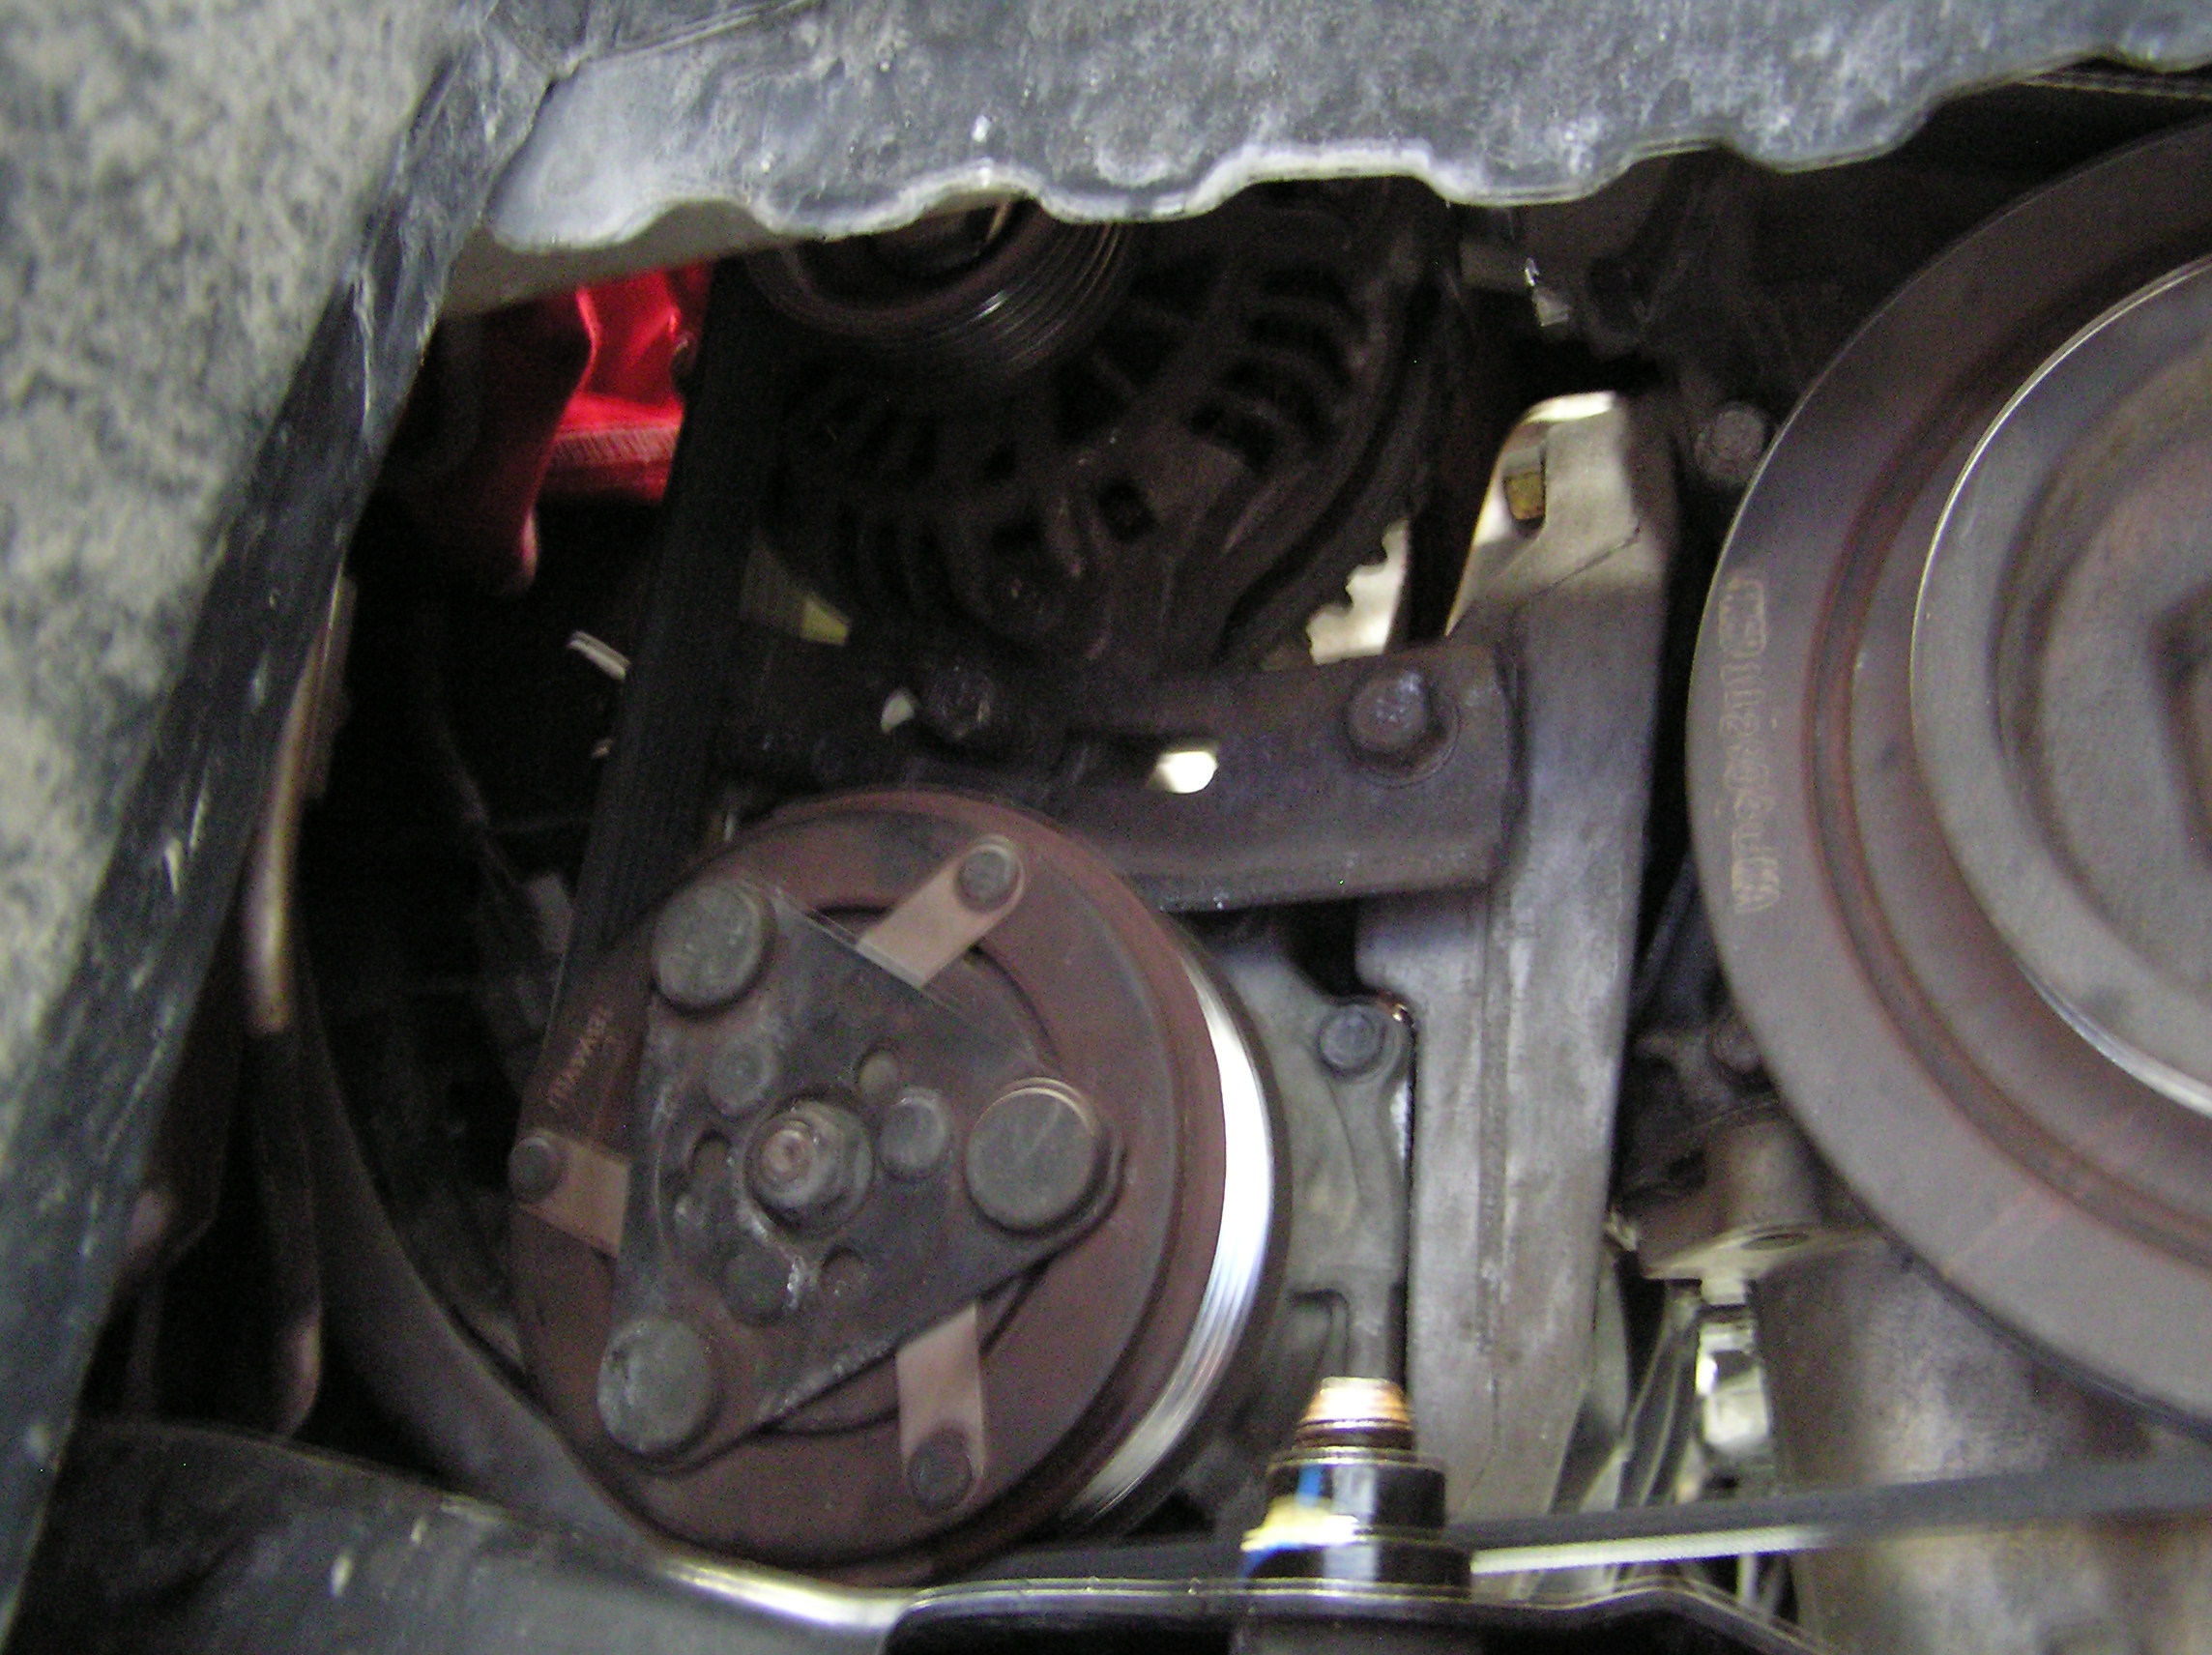
Meh, you all know what the engine is supposed to look like by now.
Here I'm filling and bleeding the cooling system, the front of the car is in the air. I'd raise the front end higher but some people in the shop tend to freak out when the car looks like it is ready for a launch.
The funnel in the radiator is about neck high to me.
Gonna clean up the grounds here
Timing belt back on....I hate auto focus
Timing cover back on...... I think I shook the camera
Meh, you all know what the engine is supposed to look like by now.
Here I'm filling and bleeding the cooling system, the front of the car is in the air. I'd raise the front end higher but some people in the shop tend to freak out when the car looks like it is ready for a launch.
The funnel in the radiator is about neck high to me.
If you think a good mechanic is expensive, try hiring a bad one
Joined: Dec 2011
Posts: 32,017
Likes: 256
From: Midwest. Aiming about mid-chest
Rep Power: 519 Re: Head Gasket + Timing Belt DIY
I can be lazy too....
========
A quote:
I want work less and get paid more.
But in order to achieve a high level of laziness I have to work much harder.
========
This car had 74,000 miles on it.
Complaint was no heat at idle.
Upon inspection, complaint was verified.
Found the coolant reservoir had puked all over the place.
Radiator APPEARED full, but coolant was really low.
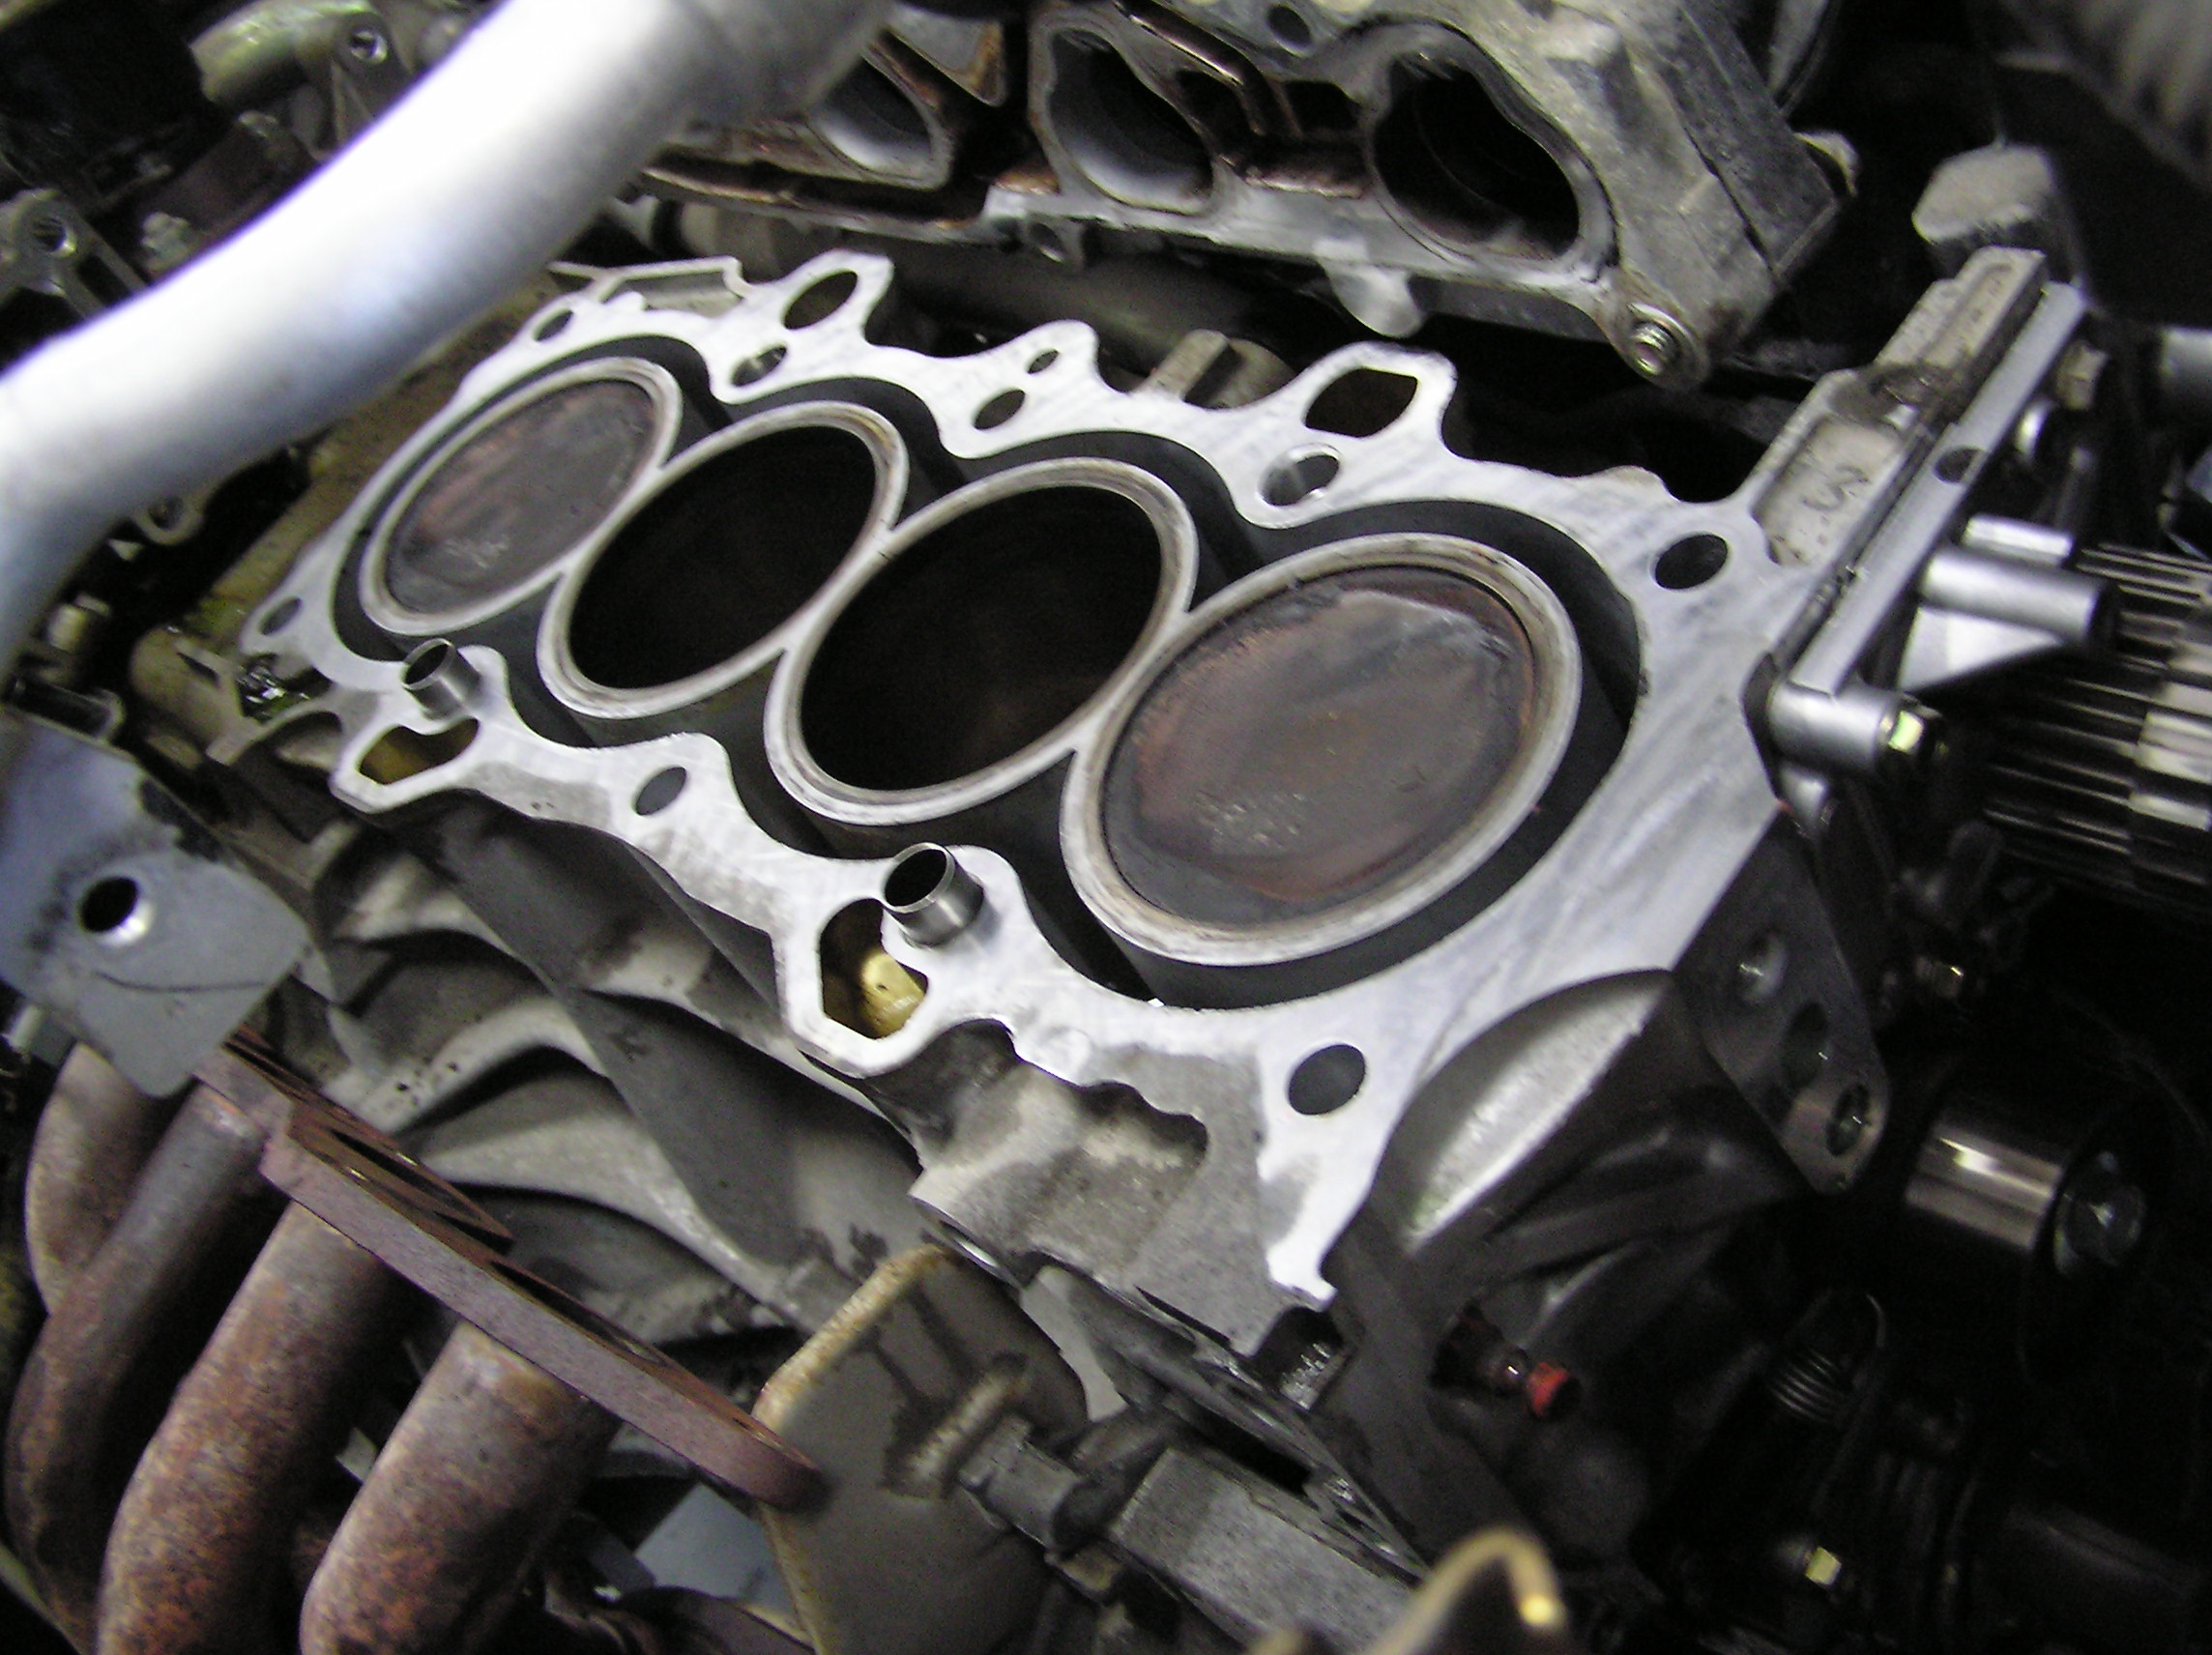
My standard test showed leakage on #2 and #3 cylinders, so I suspected head could be warped.
Turns out the head was not warped, so this customer saved on the extra disassembly and machine shop fees.
Head gasket set,
Plug for the distributor hole,
Timing belt and water pump job while apart.
Spiffy new battery and rotate the tires.
One of these days I need to make a video of how I check for the head gasket leakage on one of these.
========
A quote:
I want work less and get paid more.
But in order to achieve a high level of laziness I have to work much harder.
========
This car had 74,000 miles on it.
Complaint was no heat at idle.
Upon inspection, complaint was verified.
Found the coolant reservoir had puked all over the place.
Radiator APPEARED full, but coolant was really low.
My standard test showed leakage on #2 and #3 cylinders, so I suspected head could be warped.
Turns out the head was not warped, so this customer saved on the extra disassembly and machine shop fees.
Head gasket set,
Plug for the distributor hole,
Timing belt and water pump job while apart.
Spiffy new battery and rotate the tires.
One of these days I need to make a video of how I check for the head gasket leakage on one of these.
Re: Head Gasket + Timing Belt DIY
I forgot to come back to this thread and say that my HG replacement was a success! I had the head shaved and tanked by a friend's shop for $125.
Reassembly went well, but I did make a few mistakes and had to go back and redo some things a few times. No biggie, I was in no big hurry, and I wound up spending a lot of time cleaning parts before putting them back in.
Car runs good now and I owe a lot of that to this DIY. The Honda manual is a great source of information, but it can sometimes get confusing having to jusmp to different sections for different things. This thread brings it all together and has better pics.
Thanks again guys!
Thread Starter
Whachya lookin at?
iTrader: (1)
Joined: May 2009
Posts: 6,388
Likes: 13
From: Canada
Rep Power: 314 Re: Head Gasket + Timing Belt DIY
I'm glad this is still helping people a few years after I started and never completed it. It's not quite as comprehensive and definitely not the easiest way to change a head gasket but it's still a great source of information... ( No need to remove intake manifold or disconnect exhaust manifold to get head off). DIY ON!
It's not quite as comprehensive and definitely not the easiest way to change a head gasket but it's still a great source of information... ( No need to remove intake manifold or disconnect exhaust manifold to get head off). DIY ON! Registered!!
Joined: Mar 2011
Posts: 2,499
Likes: 5
Rep Power: 210 Re: Head Gasket + Timing Belt DIY

i realize it is marked "up" on the rubber grommet, but what i mean is, does it matter if the end of the spring at the tensioner end faces in toward the engine, or out toward the tensioner?
If you think a good mechanic is expensive, try hiring a bad one
Joined: Dec 2011
Posts: 32,017
Likes: 256
From: Midwest. Aiming about mid-chest
Rep Power: 519 Re: Head Gasket + Timing Belt DIY
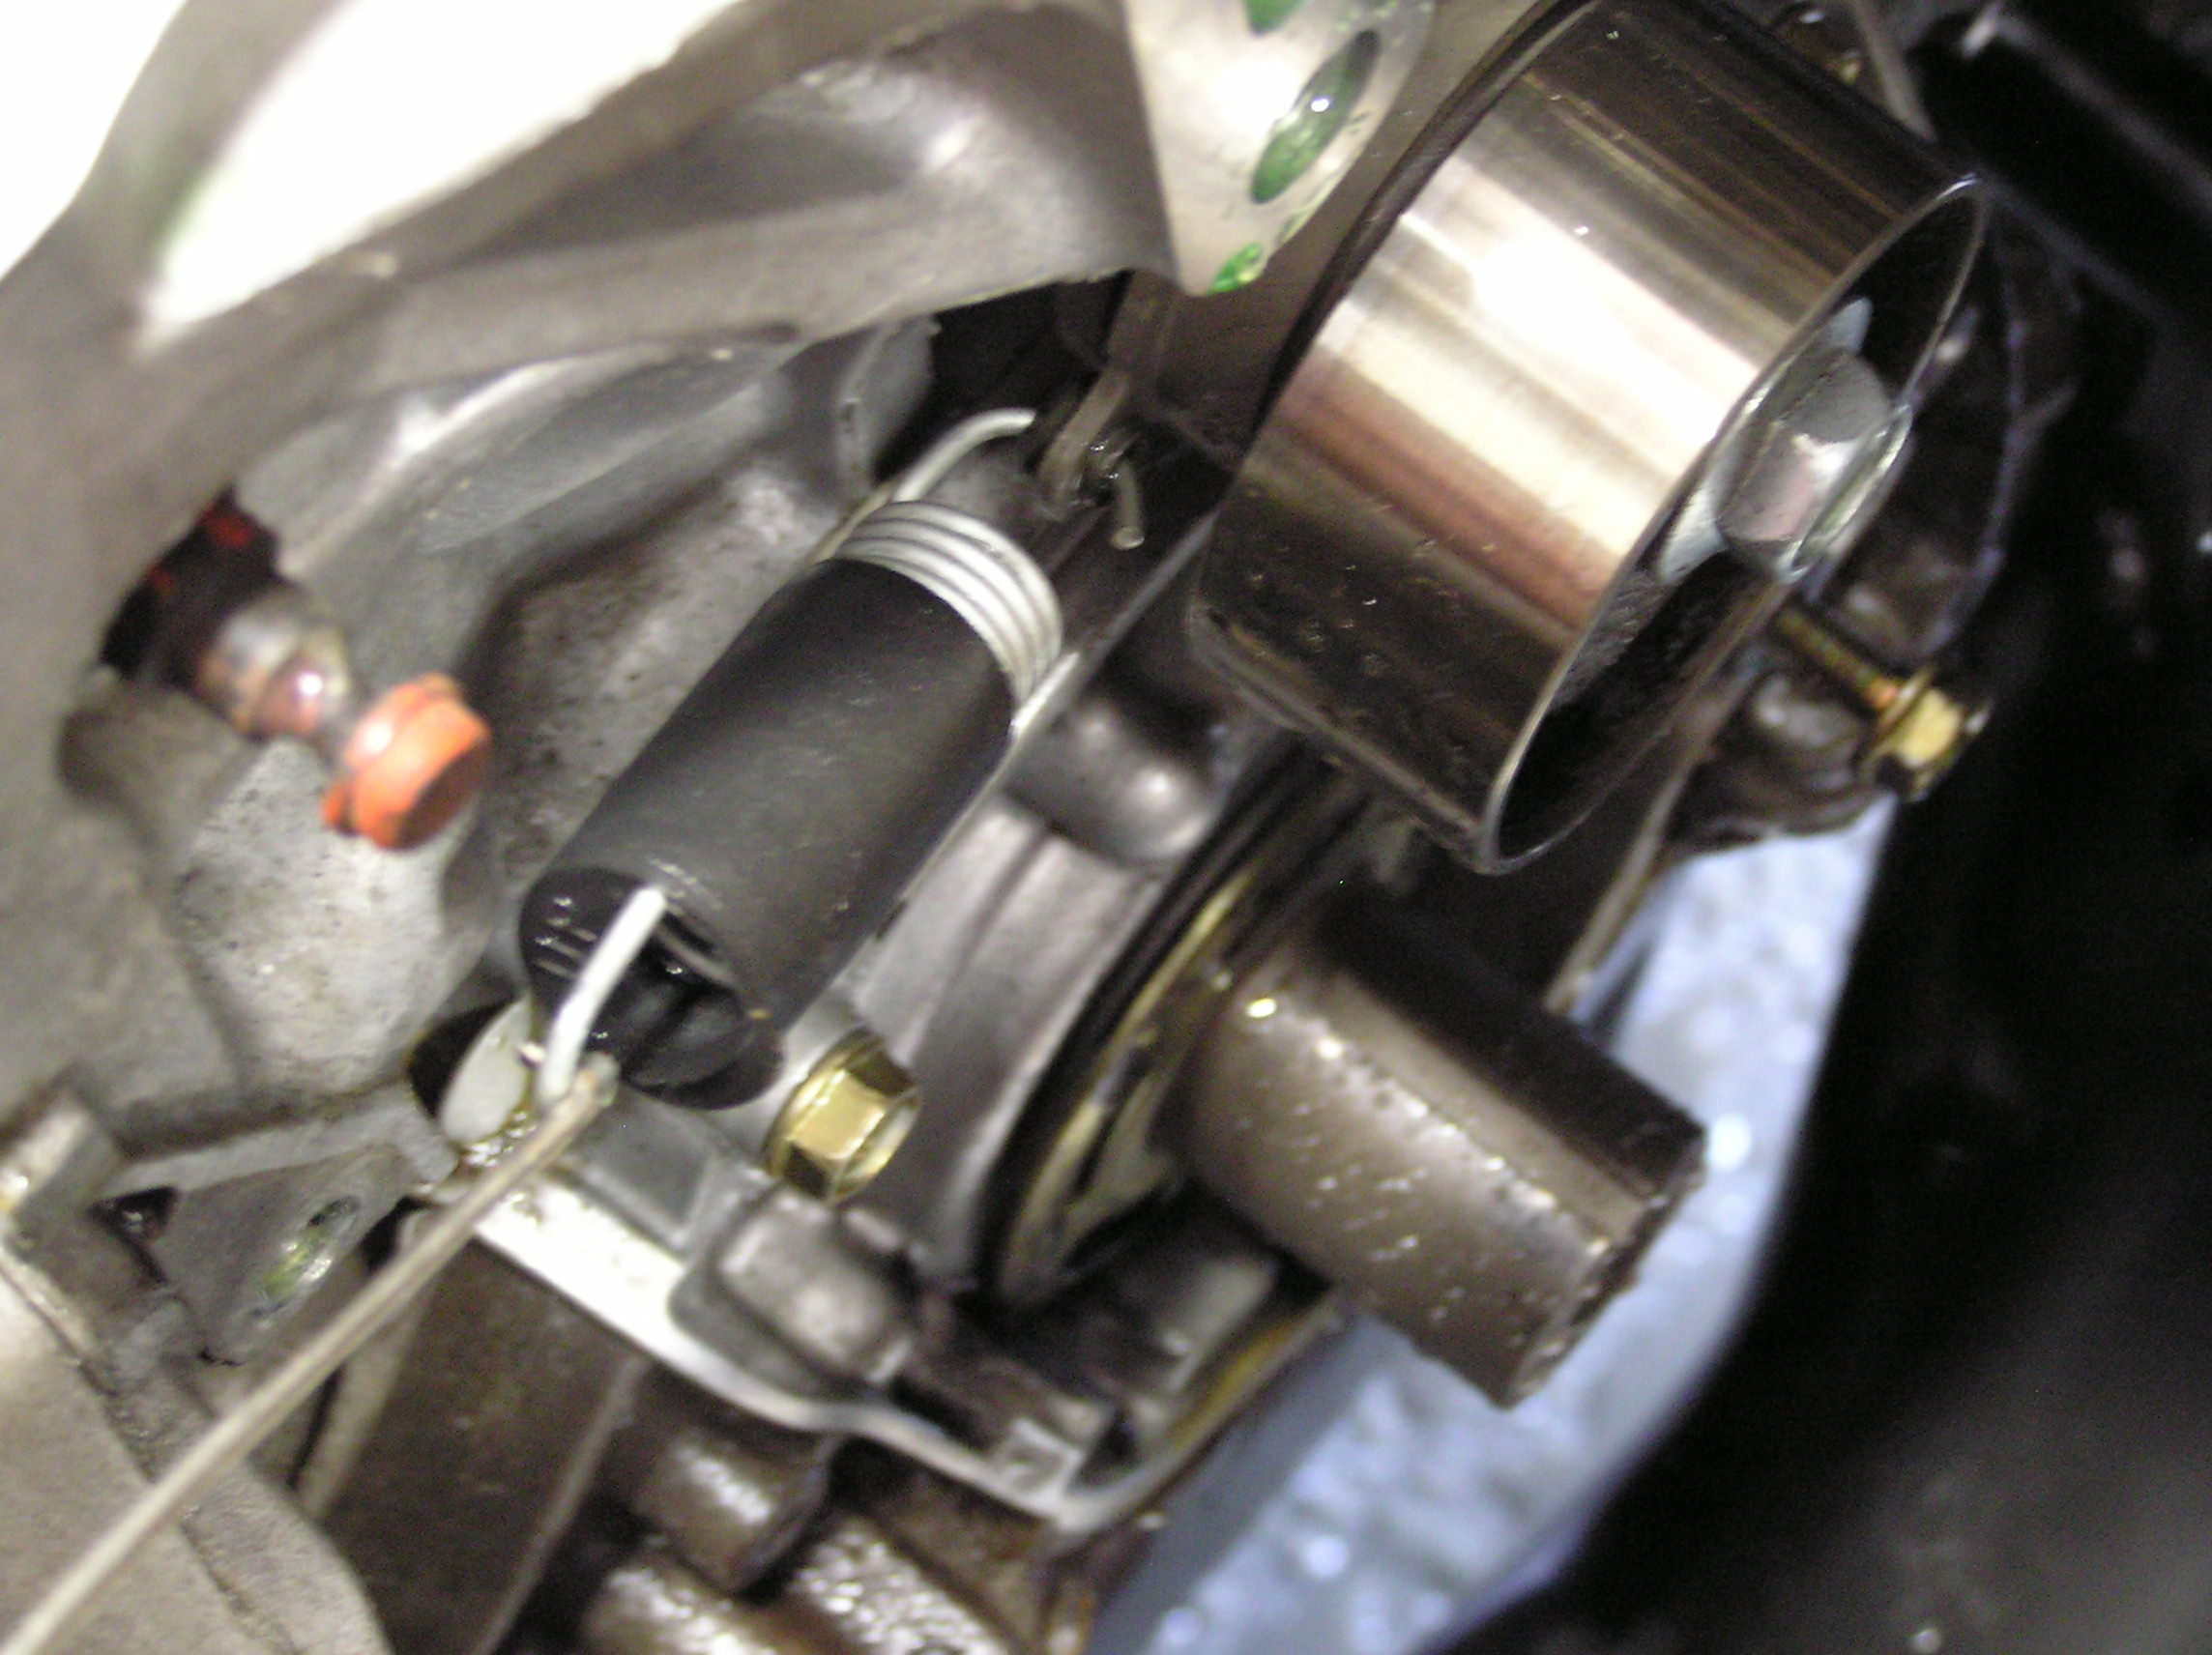
a bit off topic here, but im just wondering if it matters which way the tensioner spring is installed as i have read conflicting info about this,
i realize it is marked "up" on the rubber grommet, but what i mean is, does it matter if the end of the spring at the tensioner end faces in toward the engine, or out toward the tensioner?
i realize it is marked "up" on the rubber grommet, but what i mean is, does it matter if the end of the spring at the tensioner end faces in toward the engine, or out toward the tensioner?
I'm sure there is a real theory to it.....but I personally think it may have something to do with not allowing it to easily come out of the tensioner if the spring were to break in the middle (this is the theory I have heard for another manufacturer).
EDIT: Can you even get the spring in that hole if it is backwards? I'll have to try it sometime.
And I've been wrong before.....
Registered!!
Joined: Mar 2011
Posts: 2,499
Likes: 5
Rep Power: 210 If you think a good mechanic is expensive, try hiring a bad one
Joined: Dec 2011
Posts: 32,017
Likes: 256
From: Midwest. Aiming about mid-chest
Rep Power: 519 Re: Head Gasket + Timing Belt DIY
How's that sound?
Registered!!
Joined: Mar 2011
Posts: 2,499
Likes: 5
Rep Power: 210 Re: Head Gasket + Timing Belt DIY
the reason stated to do it that way is so the end of the spring is pointing away from the belt, instead of toward the belt, i have seen it done, and done it myself both ways, so i guess it makes no difference
If you think a good mechanic is expensive, try hiring a bad one
Joined: Dec 2011
Posts: 32,017
Likes: 256
From: Midwest. Aiming about mid-chest
Rep Power: 519 Re: Head Gasket + Timing Belt DIY
But the belt is nowhere near it when everything is right.

Registered!!
Joined: Oct 2011
Posts: 156
Likes: 0
From: Brampton, Canada
Rep Power: 180 Re: Head Gasket + Timing Belt DIY
Honda civic service manual to remove engine and cylinder head (see page 22).
http://www.mediafire.com/view/1odoyh...eplacement.pdf
http://www.mediafire.com/view/1odoyh...eplacement.pdf

Registered!!
Joined: Mar 2014
Posts: 19
Likes: 0
Rep Power: 0 Re: Head Gasket + Timing Belt DIY
Now you need to crack that stupid crank pulley bolt. This bolt has some major torque and if your attempting a head gasket job I'm sure youve heard of how difficult this will be to remove. There is a little key inside the crank pulley called the Woodruff key. It is TINY but it keeps the crank pulley spinning in time with the timing belt pulley that lies underneath it. DO NOT LOSE THIS KEY, IT IS T-I-N-Y It is sitting on the bottom left of the crank pulley in this picture taken from Cleft_Asunders timing belt DIY:

DenLorsTools has a great video on youtube showing you how to use your crank pulley removal tool.
The reason I ask is because I looked at the FSM and it doesn't mention removing it. Also, my thinking is that the crank pulley wouldn't need to be removed if just the head gasket were being replaced, because it doesn't seem like it would have any impact on the head other than adjusting the timing. But couldn't the timing belt just be loosened by the tensioner?
Registered!!
Joined: Mar 2011
Posts: 2,499
Likes: 5
Rep Power: 210 Re: Head Gasket + Timing Belt DIY
What is the purpose for removing the crank pulley? Is it required in order to loosen the timing belt (or other... Access to water pump?), or is it only to replace it if necessary?
The reason I ask is because I looked at the FSM and it doesn't mention removing it. Also, my thinking is that the crank pulley wouldn't need to be removed if just the head gasket were being replaced, because it doesn't seem like it would have any impact on the head other than adjusting the timing. But couldn't the timing belt just be loosened by the tensioner?
The reason I ask is because I looked at the FSM and it doesn't mention removing it. Also, my thinking is that the crank pulley wouldn't need to be removed if just the head gasket were being replaced, because it doesn't seem like it would have any impact on the head other than adjusting the timing. But couldn't the timing belt just be loosened by the tensioner?
if you cant remove the timing cover, then you cant remove the timing belt, and if you cant remove the timing belt, then you cant remove the cyl head
Registered!!
Joined: Mar 2014
Posts: 19
Likes: 0
Rep Power: 0 Re: Head Gasket + Timing Belt DIY
Ah, thanks for the clarification. Makes much more sense now. Thanks
One more thing... I posted this on Headgasket replacement parts list but didn't get a response, so I figured I'd post it here.
Thanks again,
Mark
One more thing... I posted this on Headgasket replacement parts list but didn't get a response, so I figured I'd post it here.
I agree with Josh on everything there. I didn't have the option to take the block to the machine shop because the engine was still in the car and it was in my driveway so I opted for the route my mechanic friend gave me. Which is a VERY FINE GRIT SANDPAPER. It's DEFINITELY NOT ideal and not the best way to do it but I chose to take the risk . I basically used 2000 grit sandpaper and a flat piece of wood ( a 2x4 ) and ran it across the block until all the old gasket was off. The problem I ran into was the cylinder walls are lower than the rest of the block so I got a smaller piece of wood and carefully and evenly sanded down the top of the cylinder walls. Again, not ideal. It did however work, I don't have a leak any more. I don't recommend this way, the actual absolute best way to clean the cylinder block/head is with a die grinder and an aluminum safe PLASTIC attachment. Most people don't have these and if they do don't use them very often. The plastic will be white and I tried but couldn't find a picture of it. It cleans all the crap off but does not harm the aluminum. I also didn't replace the cam or valve seals. I only had 80k on my car when I replaced the head gasket.
So I was searching for the aluminum-safe white plastic attachment for my die grinder and couldn't really find it. Instead, I happened to come across this:
http://www.ebay.com/gds/Do-not-use-g...5686042/g.html
Your thoughts?
Also, do you know where I can find/buy the attachment if it's in fact harmless? I found this, but it looks like it only comes in a box of 10 and seems pretty pricey:
http://www.amazon.com/DISC-ROLOC-BRI...=5336118837-20
http://www.ebay.com/gds/Do-not-use-g...5686042/g.html
Your thoughts?
Also, do you know where I can find/buy the attachment if it's in fact harmless? I found this, but it looks like it only comes in a box of 10 and seems pretty pricey:
http://www.amazon.com/DISC-ROLOC-BRI...=5336118837-20
Thanks again,
Mark
If you think a good mechanic is expensive, try hiring a bad one
Joined: Dec 2011
Posts: 32,017
Likes: 256
From: Midwest. Aiming about mid-chest
Rep Power: 519 Re: Head Gasket + Timing Belt DIY
When working on a 7th gen (and most other engines that use MLS type head gaskets)
I scrape surfaces with a single edge razor blade, then wipe down with shop towel and brake cleaner.
The only thing you are really scraping is like a black paint that was leftover from the old gasket.
The surfaces might never appear to be perfectly clean, and it doesn't matter. Perfectly FLAT is what is important.
Registered!!
Joined: Mar 2014
Posts: 19
Likes: 0
Rep Power: 0 Re: Head Gasket + Timing Belt DIY
In https://www.civicforums.com/forums/3...arts-list.html, xRiCeBoYx says we need the giant c-clamp valve spring compressor tool, but I didn't see any discussion about it in this DIY. Did anyone use this while replacing the HG? 
One more thing... Based on the parts list, the HG kit included intake and exhaust valve seals. When replacing the HG, under what circumstance(s) and/or how frequent do these seals (along with the spark plug tube seals, camshaft oil seal, valve cover gasket, water passage gasket, etc) need to be replaced? Is it every time they are exposed (i.e. intake and exhaust manifold gaskets) or only if there's wear (i.e. crankshaft pulley, water pump, etc)?
Thanks,
Mark
Joined: Aug 2003
Posts: 21,620
Likes: 1,252
From: Las Vegas, NV
Rep Power: 513 Re: Head Gasket + Timing Belt DIY
I completely took my head apart (e.g. valves, valve springs, seals, etc.) before I took it to the machine shop. Also, if you buy the head gasket kit from Honda, it comes with new valve seals. If you want to utilize those, you need the valve spring compressor to remove the valve springs, thus getting access to the valve seals.
I guess you don't need to replace them, but they're included, and it's not that much more work to do. You're gonna have the head off anyways, so since you're in there, might as well.
edit: I edited that tool's entry onto that post to reflect the pseudo-optional nature of that tool.
I guess you don't need to replace them, but they're included, and it's not that much more work to do. You're gonna have the head off anyways, so since you're in there, might as well.
edit: I edited that tool's entry onto that post to reflect the pseudo-optional nature of that tool.
Registered!!
Joined: Mar 2014
Posts: 19
Likes: 0
Rep Power: 0 Re: Head Gasket + Timing Belt DIY
Awesome, thank you.
Would you happen to have a write-up for it? Or is it in the manual and/or pretty simple to figure out? Are there any caveats/intricacies I need to be aware of before or while performing this?
If it's not apparent, this is my first time doing a major repair, and I just wanna cover all my bases and be thorough. So, far I've gotten as far as just before removing the timing belt, and haven't performed the valve clearance adjustment, so I might go back and do it before taking it off. I was gonna skip it and do it after I got it back from the machine shop because I was paranoid about them messing with it lol, but they said they don't touch the valve train at all when resurfacing the head. Noob paranoia, I guess haha.
Side note: This DIY (along with the other supplemental DIYs and parts list thread) are INCREDIBLY helpful. Thank you for putting them together! I've actually taken it upon myself to copy them into a word doc, and have been inspired to make somewhat of a user-friendly/printable manual in the form of a pdf. Once I finish the job and add my experience and everyone else's comments/experience, I'll be sure to share.
Registered!!
Joined: Mar 2014
Posts: 19
Likes: 0
Rep Power: 0 Re: Head Gasket + Timing Belt DIY
Another question... 
What sealant/lube/grease should we use for everything (nuts, bolts, o-rings, gaskets, etc) and which should be applied to what parts?
I read somewhere that someone mentioned to apply assembly lube on everything. So, for example, should we use blue loctite for nuts and bolts of low temp components (alternator, P/S, brackets, etc) and red(?) loctite for high temp components (head bolts, intake/exhaust mani bolts, etc)? What about the o-rings and gaskets? RTV silicone sealant?


