
DIY Lowering Springs

Thread Starter
A true genius admits that he/she knows nothing.....CLOSED SAT/SUN
Joined: Nov 2011
Posts: 1,040
Likes: 6
From: East Coast
Rep Power: 188 

DIY Lowering Springs
STARTING OFF
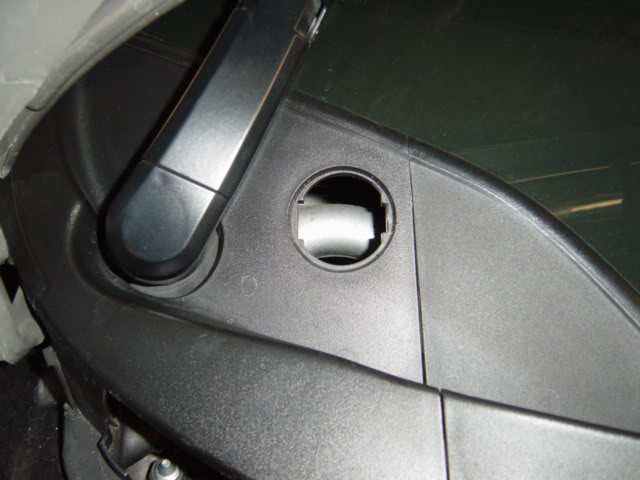
1) Put your window wipers up to take off round cover to better access the strut tower.
2) Take out cover to access strut tower.
3) Take off back trunk cover.
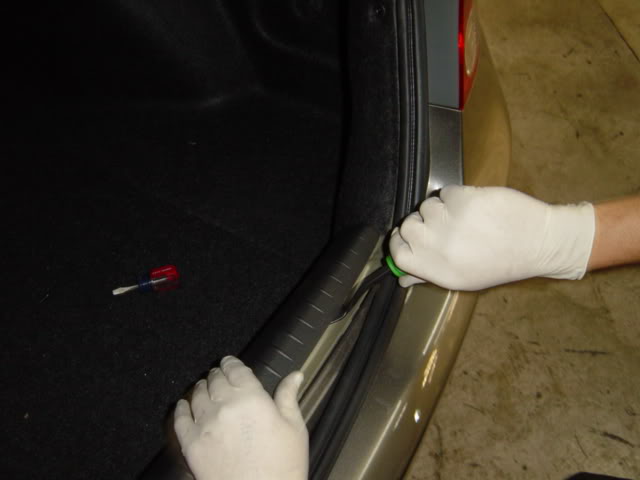
4) Take off tabs holding trunk carpet molding.
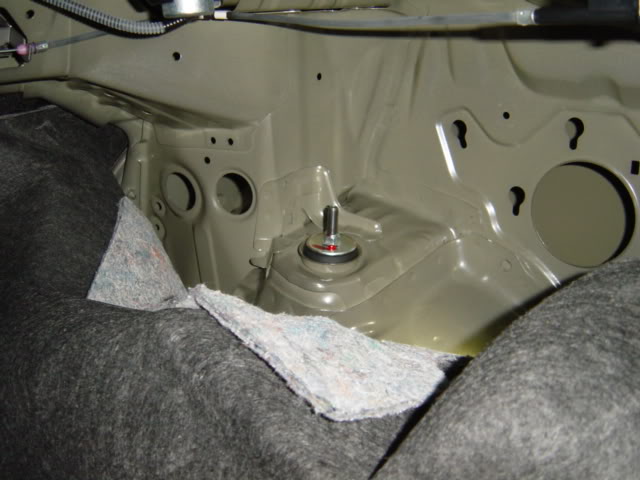
Here is what to get after step 4. It gives you better access to the rear strut.
FRONT SPRINGS
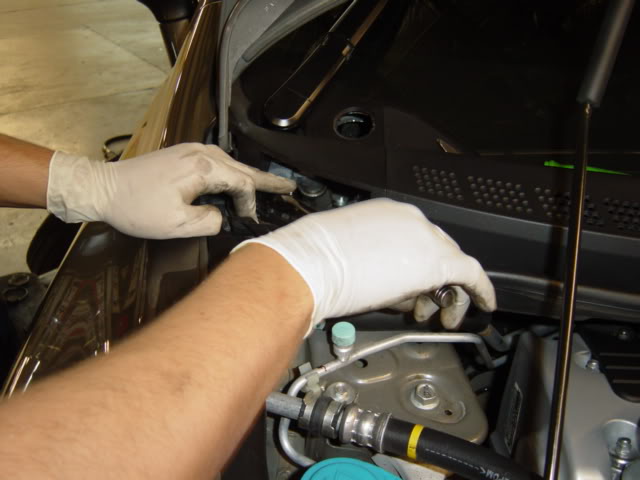
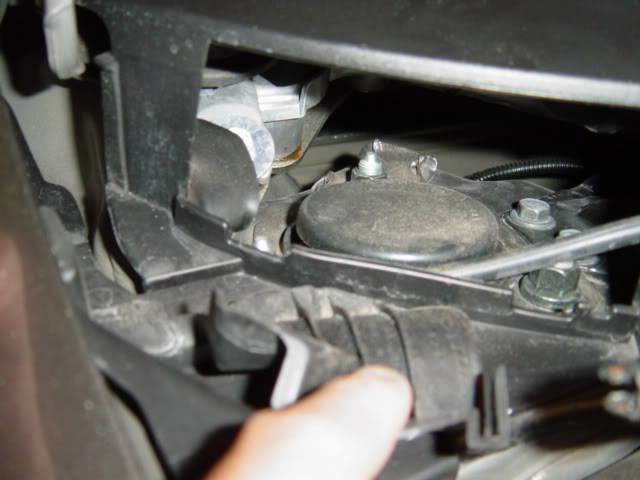
5) Loosen the three bolts for front strut.
Here are the three bolts I'm talking about in step 5.
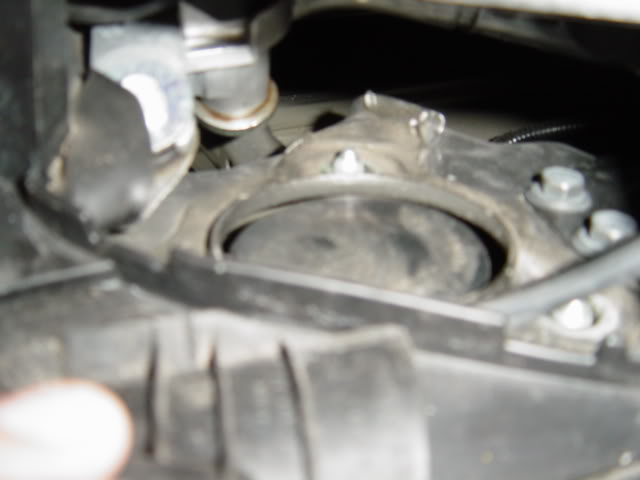
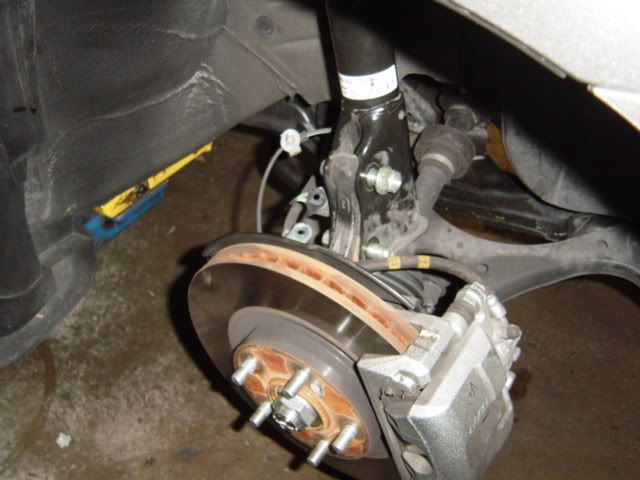
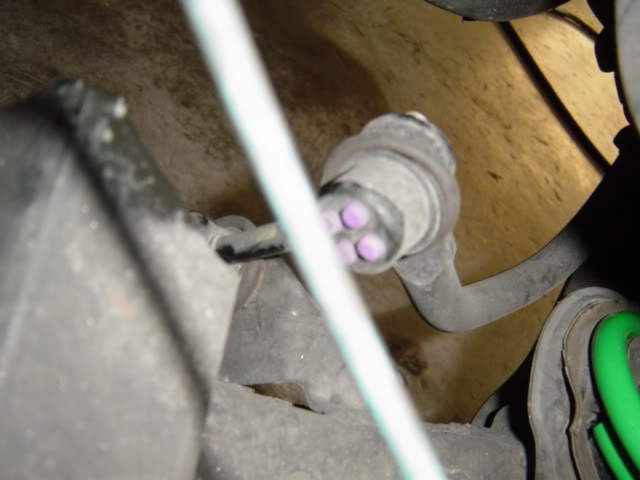
6) Unbolt break line and clip off ABS sensor.
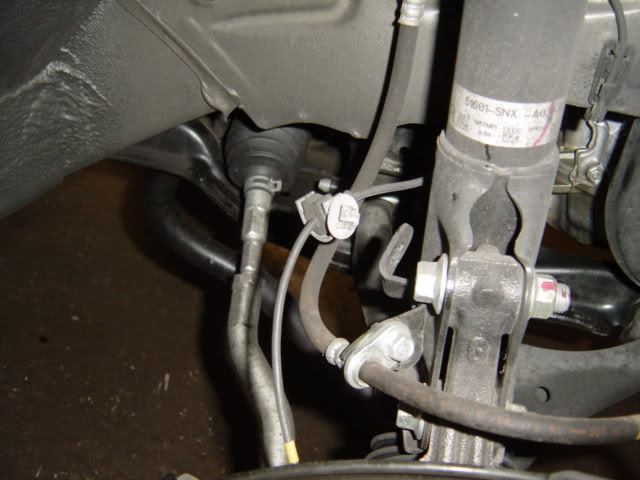
Here's what you get after completing step 6.
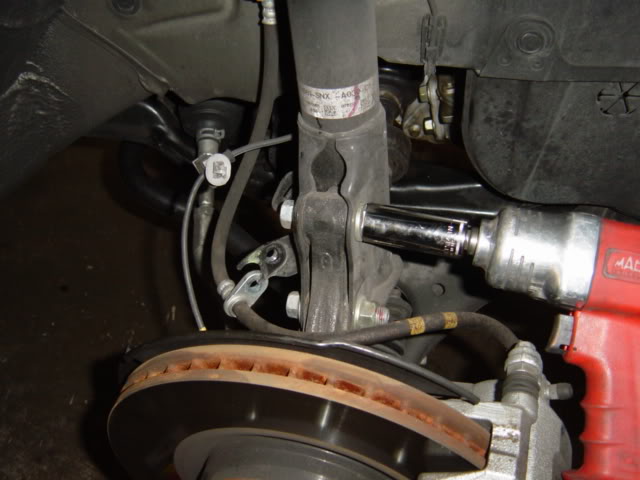
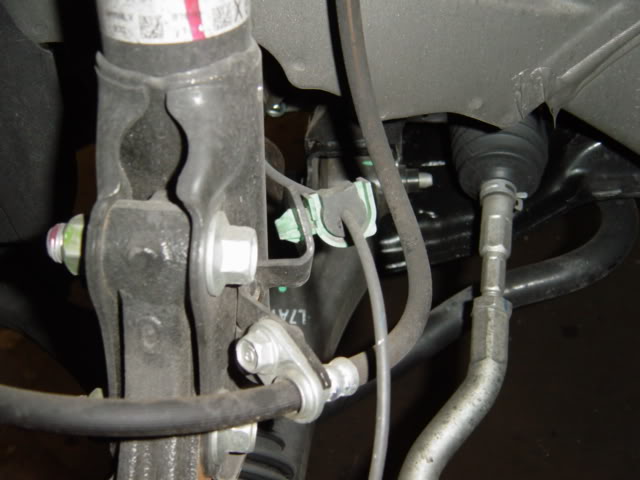
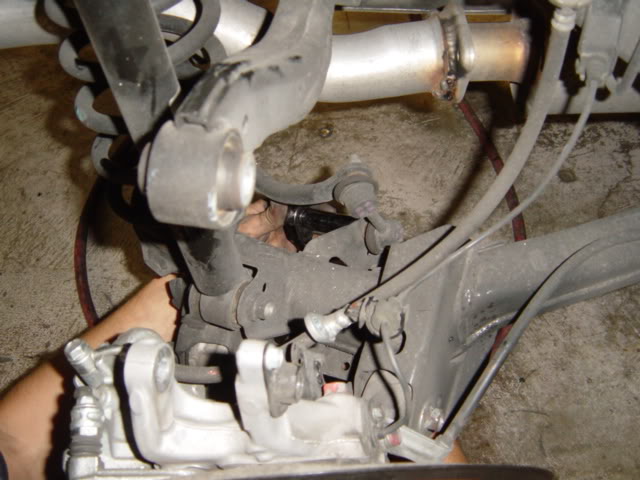
7) Take off bolts holding the strut tower link. If I remember correctly, it's 17 and 19.
8) Strut towers should come down. Just take it off.

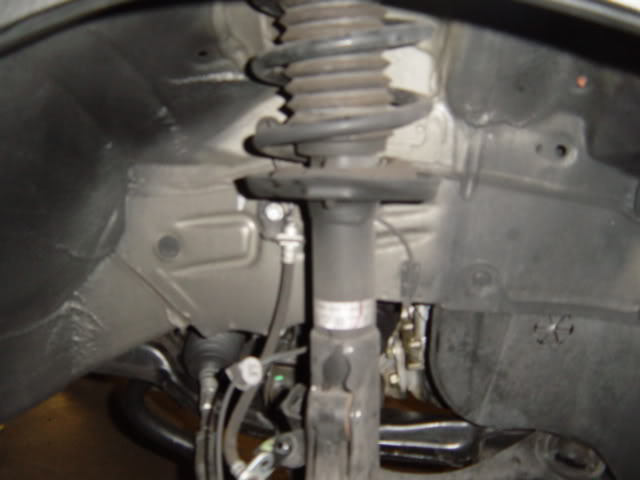
Here�s what the strut towers look like.
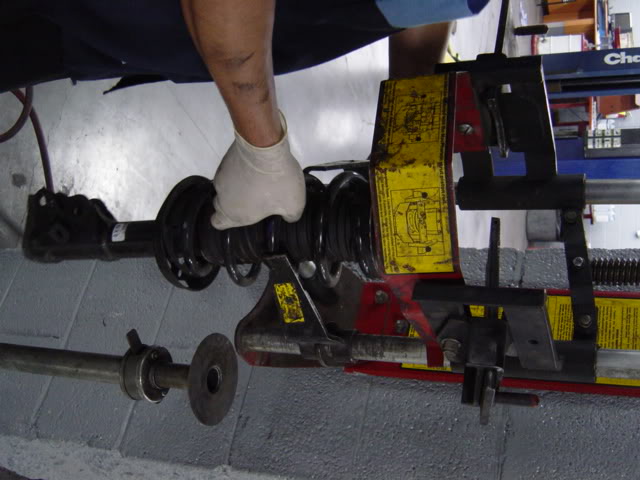
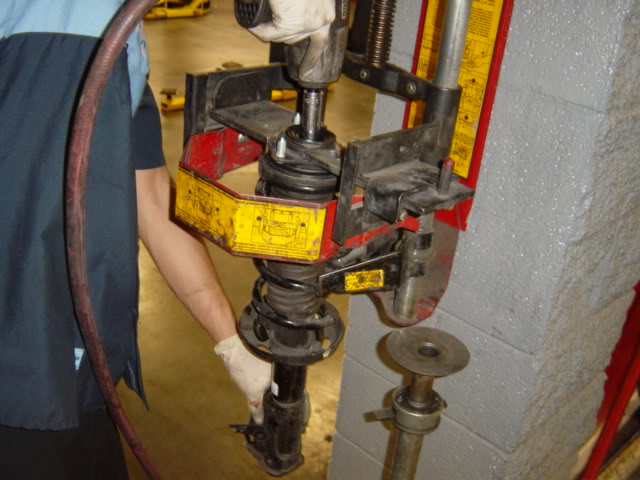
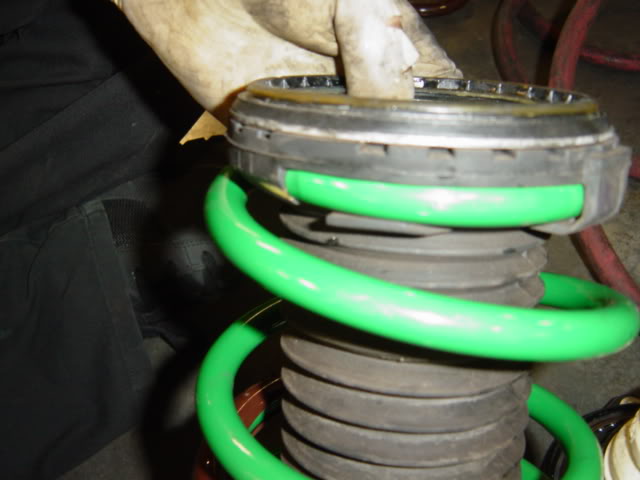
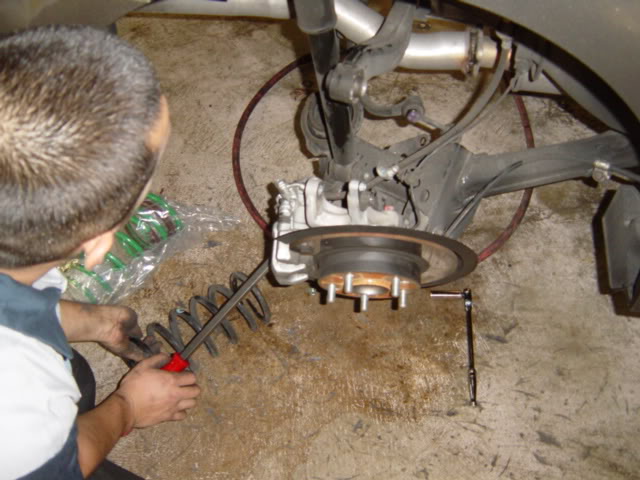
9) Use a spring compressor to compress springs. Make sure the bottom tip of the spring is facing you so that it�s more stable.
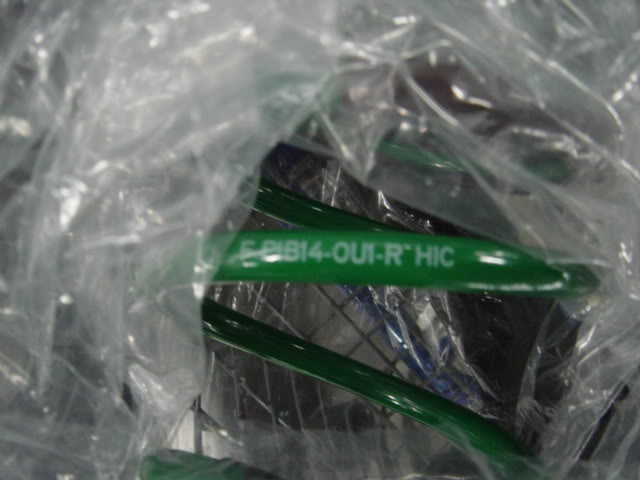
Each spring will tell you F 18GKX83 R. �F� for front and �R� for right. The rear springs will only say �R� for right or �L� for left.
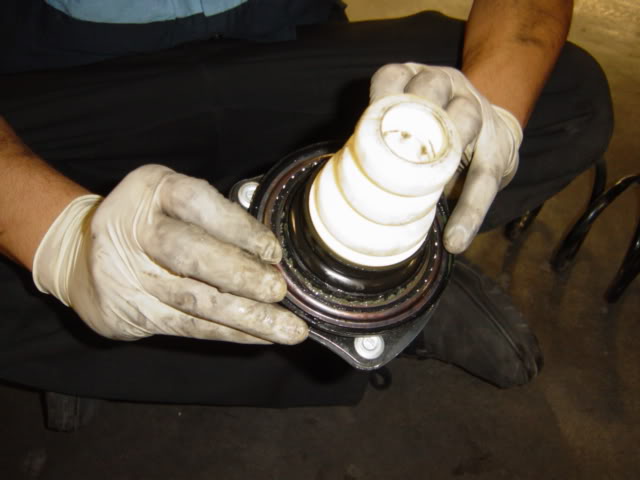
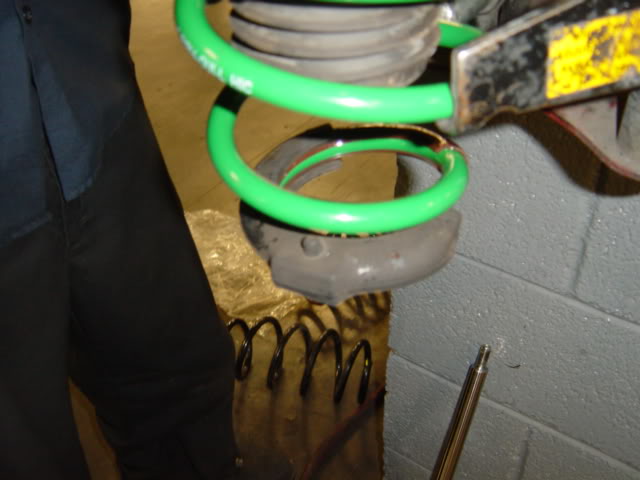
10) Unbolt strut tower assembly from spring.

Be careful when taking off the assembly for the bump stop. We had to pick up 30 ball bearings from the floor and took a long time looking for them. My suggestion is taking it off upside down.
Here is the bump stop.
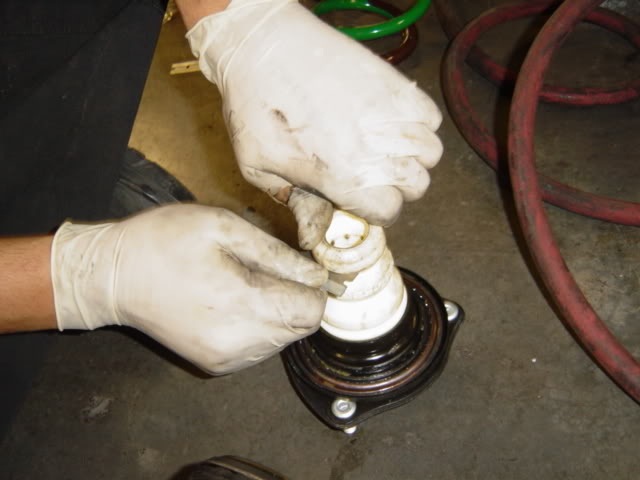
11) Approximately cut an inch from the bump stop. This is recommended by Teins.
12) Assemble spring by twisting it into the strut cover.
13) Use spring compressor to put strut assembly back together.

14) Put strut tower back, easier if you had help. Put bolts back holding the top of strut.
15) Put bolts back that link to strut to rotors and break lines with ABS sensors.
[Repeat steps for the other front side.]
REAR SPRINGS

16) Take off bolt holding break line and unclip ABS sensor.
Also take off sway bar link.
17) Take off bolt from rotor mount linkage to strut tower.
18) This is where good muscle is needed! Use a pry bar to pry down the strut tower. CAUTION�Make sure you head is nowhere near the tower! It comes off fast and hard.
19) Take off old spring and put the new spring in place.
20) Assemble everything back together.

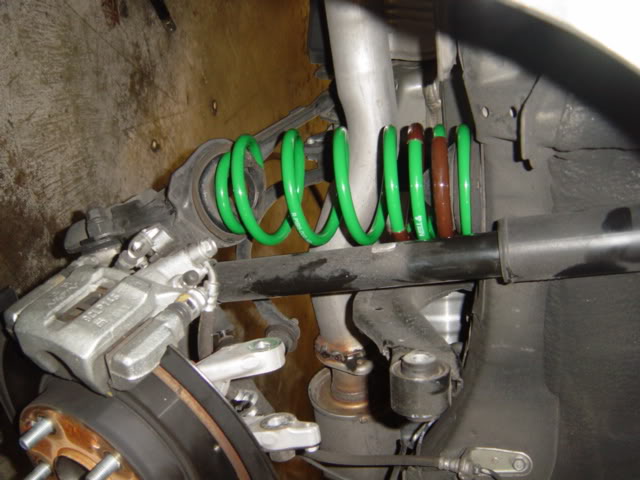
Difference between stock and Tien springs.
Initial drop is pretty decent. Wait +/- a few weeks for springs to settle.
The ride comfort still feels like stock springs, which is what you want.
Camber kit is recommended.
Project time took about an hour to an hour and a half.
Thanks to Si zx6r
1) Put your window wipers up to take off round cover to better access the strut tower.
2) Take out cover to access strut tower.
3) Take off back trunk cover.
4) Take off tabs holding trunk carpet molding.
Here is what to get after step 4. It gives you better access to the rear strut.
FRONT SPRINGS
5) Loosen the three bolts for front strut.
Here are the three bolts I'm talking about in step 5.
6) Unbolt break line and clip off ABS sensor.
Here's what you get after completing step 6.
7) Take off bolts holding the strut tower link. If I remember correctly, it's 17 and 19.
8) Strut towers should come down. Just take it off.
Here�s what the strut towers look like.
9) Use a spring compressor to compress springs. Make sure the bottom tip of the spring is facing you so that it�s more stable.
Each spring will tell you F 18GKX83 R. �F� for front and �R� for right. The rear springs will only say �R� for right or �L� for left.
10) Unbolt strut tower assembly from spring.
Be careful when taking off the assembly for the bump stop. We had to pick up 30 ball bearings from the floor and took a long time looking for them. My suggestion is taking it off upside down.
Here is the bump stop.
11) Approximately cut an inch from the bump stop. This is recommended by Teins.
12) Assemble spring by twisting it into the strut cover.
13) Use spring compressor to put strut assembly back together.
14) Put strut tower back, easier if you had help. Put bolts back holding the top of strut.
15) Put bolts back that link to strut to rotors and break lines with ABS sensors.
[Repeat steps for the other front side.]
REAR SPRINGS
16) Take off bolt holding break line and unclip ABS sensor.
Also take off sway bar link.
17) Take off bolt from rotor mount linkage to strut tower.
18) This is where good muscle is needed! Use a pry bar to pry down the strut tower. CAUTION�Make sure you head is nowhere near the tower! It comes off fast and hard.
19) Take off old spring and put the new spring in place.
20) Assemble everything back together.
Difference between stock and Tien springs.
Initial drop is pretty decent. Wait +/- a few weeks for springs to settle.
The ride comfort still feels like stock springs, which is what you want.
Camber kit is recommended.
Project time took about an hour to an hour and a half.
Thanks to Si zx6r


Registered!!
Joined: Feb 2008
Posts: 143
Likes: 0
From: Brooklyn NY
Rep Power: 0 
Re: DIY Lowering Springs
Nice job.
I just got my Skunk2 sport struts and shocks on tuesday, and can now get them installed with my new Eibach Pro springs... will have a shop do this work, even though you made it look easy.
relatively easy.
I just got my Skunk2 sport struts and shocks on tuesday, and can now get them installed with my new Eibach Pro springs... will have a shop do this work, even though you made it look easy.
relatively easy.

Thread
Thread Starter
Honda Civic Forum
Replies
Last Post
Dave Brabant
6th Generation Civic 1996 - 2000
20
Oct 6, 2015 12:44 AM
TheRiddicles
Suspension Performance Modifications
0
Sep 21, 2015 01:28 AM


