
NEW PICS. on pg4.

I like my commute
iTrader: (1)
Joined: Apr 2006
Posts: 3,237
Likes: 0
From: New Hampshire
Rep Power: 279 

Re: final product before install...pg 2. PICS
yeah...i'm kinda tired of modding my car and gettin things turning out the wrong way...pisses me off. for instance..my damn driver side headlight keeps foggin up. gotta get a new one, AND i got HID w/o retro (yes yes i know GLARE...) going to do that in the future. my suspension...well the neuspeed strut bar was great a great investment, but the tein basic wasnt. i dont like it at all. i will invest in new coils in the future also. i did get the spc camber and i will invest in sways bar wen i have money...now for the brakes...hopefully i'm doing everything right after doing alot of research what to get or not get. also my frame is freakin bent after doing my first oil change. (sigh) noob. thought i could put the jack on the support bar.
 don't let it discourage you about cars tho, and just chalk it up to experience
Joined: Aug 2006
Posts: 2,978
Likes: 4
From: Charlotte
Rep Power: 293 Thread Starter
Registered!!
iTrader: (2)
Joined: Jul 2005
Posts: 678
Likes: 0
From: s.f. , ca
Rep Power: 0 Re: final product before install...pg 2. PICS
yeah...i'm not gonna drop the whole moddin. i tink its hella fun. jus get frustrated sometimes wen things jus aint goin right.
as for the tein basic...for the back i had to cut the dust cover cause it was making noise. then now the front is makin a clicking sound jus cruisin on the freeway. its comin from the front and i took it our and greased the top of the mount to see if it would help but it didnt. also after gettin the basic...the only thing i could afford at the moment. i realize it didnt have damper and road here in the bay area sucks.
as for the tein basic...for the back i had to cut the dust cover cause it was making noise. then now the front is makin a clicking sound jus cruisin on the freeway. its comin from the front and i took it our and greased the top of the mount to see if it would help but it didnt. also after gettin the basic...the only thing i could afford at the moment. i realize it didnt have damper and road here in the bay area sucks.
Joined: Aug 2006
Posts: 2,978
Likes: 4
From: Charlotte
Rep Power: 293 Re: final product before install...pg 2. PICS
yeah...i'm not gonna drop the whole moddin. i tink its hella fun. jus get frustrated sometimes wen things jus aint goin right.
as for the tein basic...for the back i had to cut the dust cover cause it was making noise. then now the front is makin a clicking sound jus cruisin on the freeway. its comin from the front and i took it our and greased the top of the mount to see if it would help but it didnt. also after gettin the basic...the only thing i could afford at the moment. i realize it didnt have damper and road here in the bay area sucks.
as for the tein basic...for the back i had to cut the dust cover cause it was making noise. then now the front is makin a clicking sound jus cruisin on the freeway. its comin from the front and i took it our and greased the top of the mount to see if it would help but it didnt. also after gettin the basic...the only thing i could afford at the moment. i realize it didnt have damper and road here in the bay area sucks.
Thread Starter
Registered!!
iTrader: (2)
Joined: Jul 2005
Posts: 678
Likes: 0
From: s.f. , ca
Rep Power: 0 Re: final product before install...pg 2. PICS
yea good luck wit the set-up...
so guys. as for the install today there are good news and bad news. the good news is i got the ss brake lines on, and that was the only thing i got on the car. so i then proceed to put the super blue in, and now the brakes is soft as hell wen drivin so i dunt know wtf is goin on. wen the engine is off, the brakes are firm like before, but wen its driving, the brakes are not applyin until halfway. as for the rotors, i coud not get the damn screws off. i striped one of it and i dunt know what the hell i'm goin to do anymore. so since i could not install the rotors, i didnt install the pads either. i'm jus speechless right now...
so guys. as for the install today there are good news and bad news. the good news is i got the ss brake lines on, and that was the only thing i got on the car. so i then proceed to put the super blue in, and now the brakes is soft as hell wen drivin so i dunt know wtf is goin on. wen the engine is off, the brakes are firm like before, but wen its driving, the brakes are not applyin until halfway. as for the rotors, i coud not get the damn screws off. i striped one of it and i dunt know what the hell i'm goin to do anymore. so since i could not install the rotors, i didnt install the pads either. i'm jus speechless right now...
Joined: Aug 2006
Posts: 2,978
Likes: 4
From: Charlotte
Rep Power: 293 Re: final product before install...pg 2. PICS
did you bleed the brakes? sounds like there's air in the lines. that's what it feels like when you need to bleed em. any time you open a brake line, you have to bleed them. even a couple small bubbles will make a difference.
Thread Starter
Registered!!
iTrader: (2)
Joined: Jul 2005
Posts: 678
Likes: 0
From: s.f. , ca
Rep Power: 0 Re: final product before install...pg 2. PICS
yea...i did the bleeding procedure...when the car is off. the brake pedal is firm just like before. once the engine is on and driving. the pedals does not apply until haf way....
I like my commute
iTrader: (1)
Joined: Apr 2006
Posts: 3,237
Likes: 0
From: New Hampshire
Rep Power: 279 Re: final product before install...pg 2. PICS
i striped one of it and i dunt know what the hell i'm goin to do anymore. so since i could not install the rotors, i didnt install the pads either. i'm jus speechless right now...
 sorry to hear that bud... are you going to take it to a shop or what?
 Pwning Noobs 24/7
iTrader: (10)
Joined: Jun 2005
Posts: 1,040
Likes: 0
From: Westchester, New York
Rep Power: 267 Re: final product before install...pg 2. PICS
yea good luck wit the set-up...
so guys. as for the install today there are good news and bad news. the good news is i got the ss brake lines on, and that was the only thing i got on the car. so i then proceed to put the super blue in, and now the brakes is soft as hell wen drivin so i dunt know wtf is goin on. wen the engine is off, the brakes are firm like before, but wen its driving, the brakes are not applyin until halfway. as for the rotors, i coud not get the damn screws off. i striped one of it and i dunt know what the hell i'm goin to do anymore. so since i could not install the rotors, i didnt install the pads either. i'm jus speechless right now...
so guys. as for the install today there are good news and bad news. the good news is i got the ss brake lines on, and that was the only thing i got on the car. so i then proceed to put the super blue in, and now the brakes is soft as hell wen drivin so i dunt know wtf is goin on. wen the engine is off, the brakes are firm like before, but wen its driving, the brakes are not applyin until halfway. as for the rotors, i coud not get the damn screws off. i striped one of it and i dunt know what the hell i'm goin to do anymore. so since i could not install the rotors, i didnt install the pads either. i'm jus speechless right now...
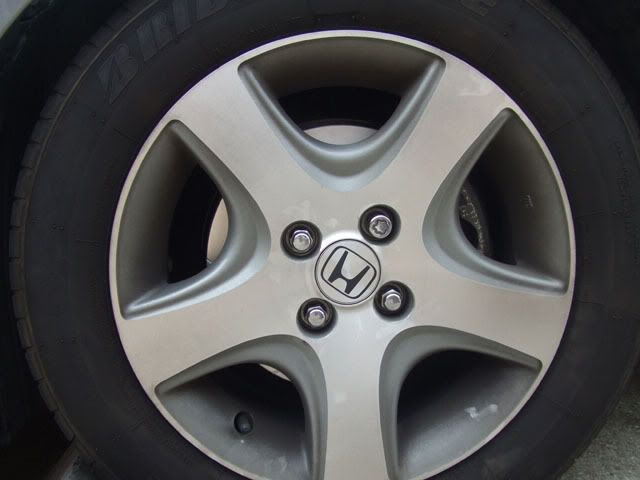
for the rotor bolts always use an impact driver ..i just did my rotors and pads today in under 5 hours with bleeding for the first time, impact driver you just smack it with a hammer and it loosens the screw a few millimeters until it becomes loose, i gave it like 5 smacks with a rubber hammer and the screws came off with ease, as for the bleeding you really need 2 people to bleed effectively, one person depresses the brake pedal to the floor while the other one quickly loosens the bleed screw and tightens it, only need to do it like 3 times, and with the brake pedal depressed the fluid squirts out so have a rag to catch it, had to do this on my brothers hatch too. Here are some pics
what i also did was get my dremel out and some polishing compound and polish the screws so they look nice you can see them in the pics
sorry for the dirty rims...Tina is a dirty girl lol


Pwning Noobs 24/7
iTrader: (10)
Joined: Jun 2005
Posts: 1,040
Likes: 0
From: Westchester, New York
Rep Power: 267 Re: final product before install...pg 2. PICS
i dont know, my brother got them for me for christmas, all i know is that they are the special extended ones lol
Red Hot Chili Peppers....bitch
iTrader: (3)
Joined: Oct 2005
Posts: 20,839
Likes: 0
From: Long Island, New York
Rep Power: 477 Re: final product before install...pg 2. PICS
to bleed the brakes just step on the brake pedal 3 times and on the 3rd time hold it down, repeat that step until all the old fluid is out and you can see new fluid. Than after that step on it a few times and it should firm up
Thread Starter
Registered!!
iTrader: (2)
Joined: Jul 2005
Posts: 678
Likes: 0
From: s.f. , ca
Rep Power: 0 Re: final product before install...pg 2. PICS
well guys..good news. i went to my gf's family shop and he got the screws out for me. i spent 1 1/2 tryin to get it out and it didnt even move. he took 2 mins with the impact screw driver and got all four out! so i will proceed with the install 2m morning. as for bleeding the brakes, i asked him why my pedal still feels soft, and he said its probably the drum brakes in the back that i need to be tighten? so i'll see wussup...he made my day since i was so frustrated yesterday. ty everyone for there inputs. i really appreciated! 
Joined: Aug 2006
Posts: 2,978
Likes: 4
From: Charlotte
Rep Power: 293 Re: final product before install...pg 2. PICS
as for bleeding the brakes, i asked him why my pedal still feels soft, and he said its probably the drum brakes in the back that i need to be tighten? so i'll see wussup...he made my day since i was so frustrated yesterday. ty everyone for there inputs. i really appreciated!
Thread Starter
Registered!!
iTrader: (2)
Joined: Jul 2005
Posts: 678
Likes: 0
From: s.f. , ca
Rep Power: 0 Re: FINALLY done with install. pics will be updated soon
sry i took so long everyone. just got a job and been busy lately. so here is the final piece, and i'm holding off until next summer before i do anymore mods to my car. want to save up for some konig imagine. maybe by that time they will come out with a set of gold trim.
as for the install, whoever follow thru with my thread know that i ran into a couple of problem, and i will address the problem and how to solve it. i myself thought it was going to be an easy install, but it turned out to be a pain in the a$$.
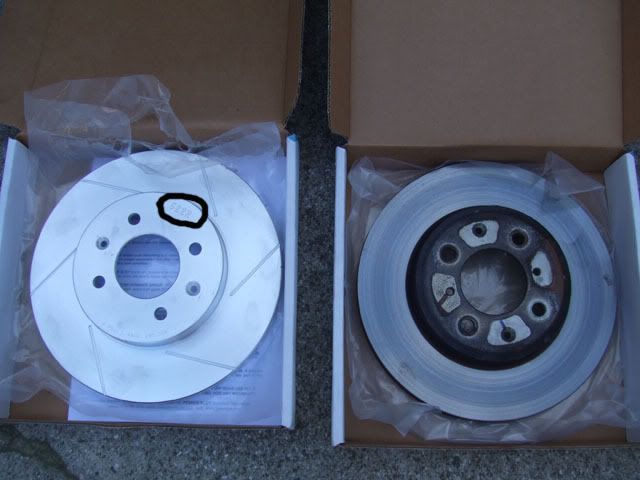
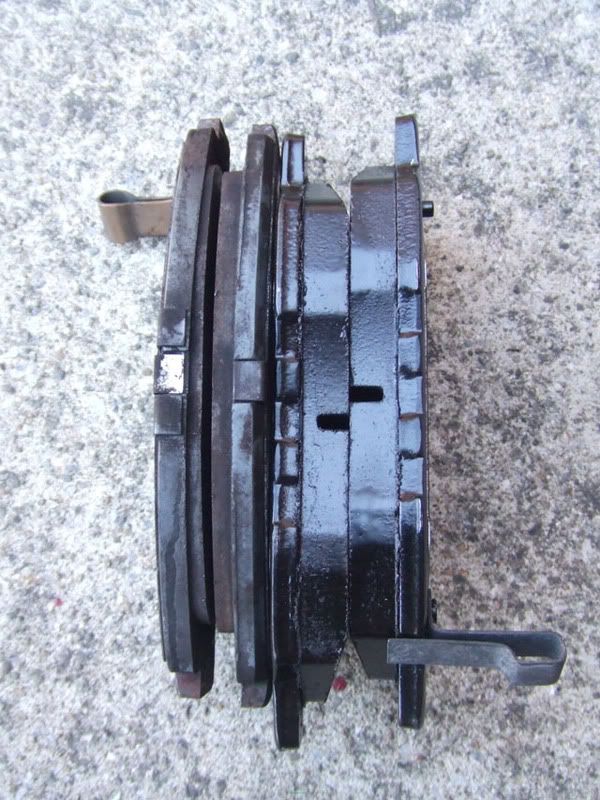
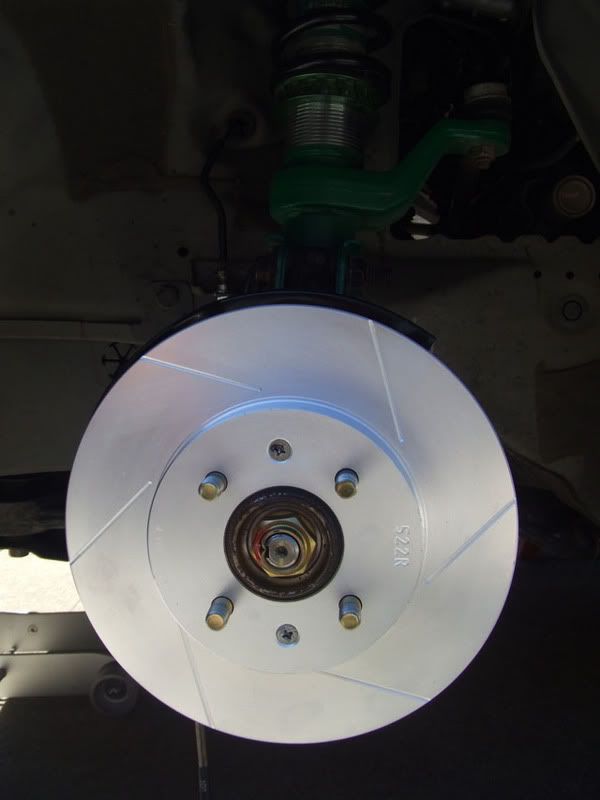
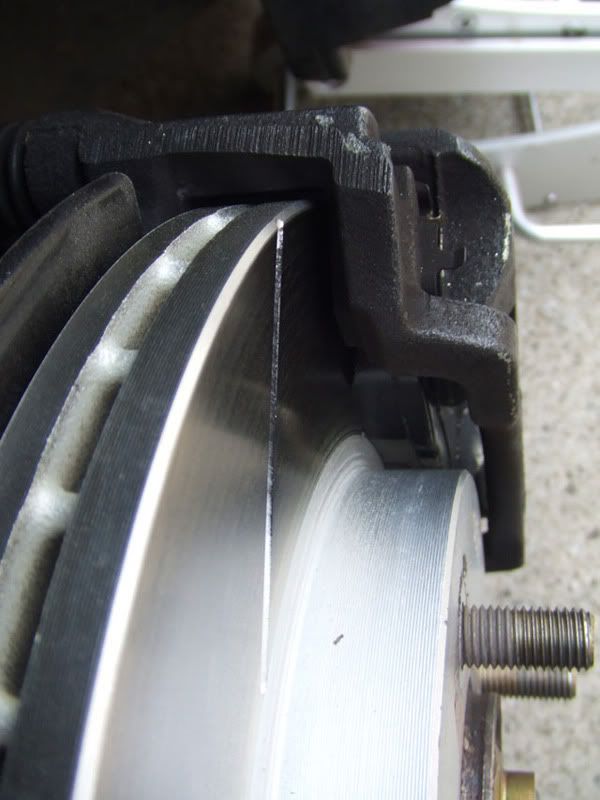
so here is the comparison of the rotors and brake pads. notice the inside pads is thinner then the outside . i will point out my first mistake here. notice the R that i circle which stands for "right" and this rotor should be installed on the drive side. i however did not read the instruction and installed the opposite, making the job longer!
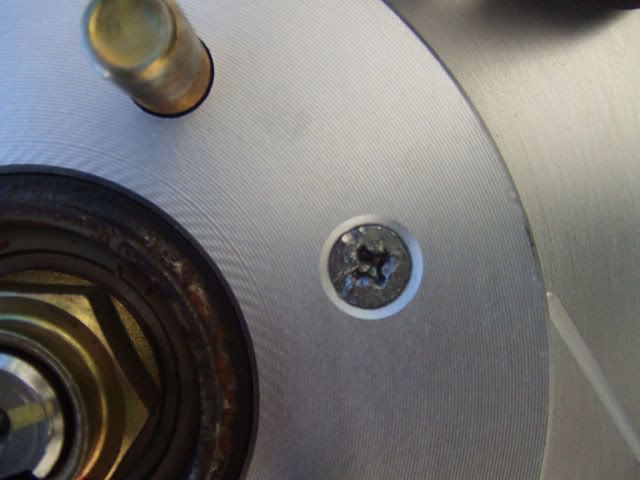
here in this picture, u can see the screw really messed up. which is the 2nd problemi had. i went at it for an hour and a half, and did everything i could but it would not even move 1/8 in. then the memeber on here gave the advice to use an IMPACT SCREW DRIVER. i HIGHLY recommend getting this as it will save time and your hands from pain. give it a few pound and it will pop out enough that you will easily screw out.
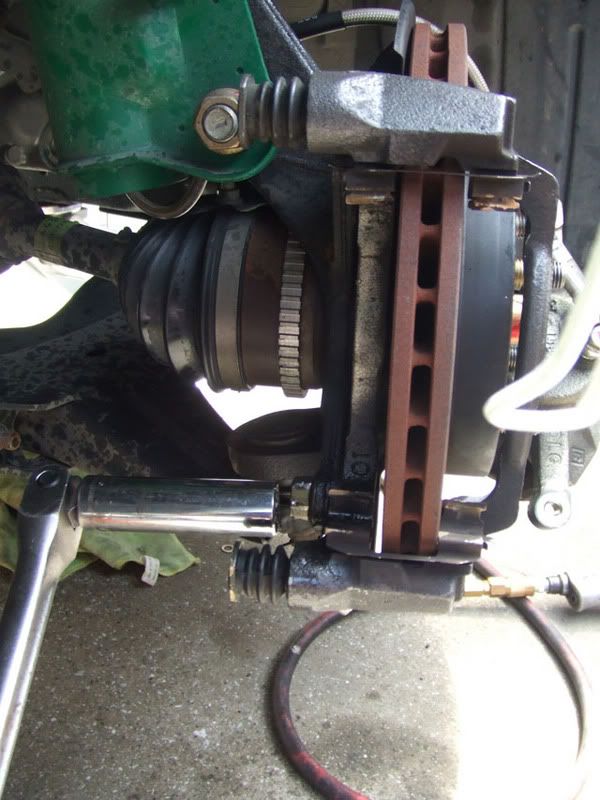
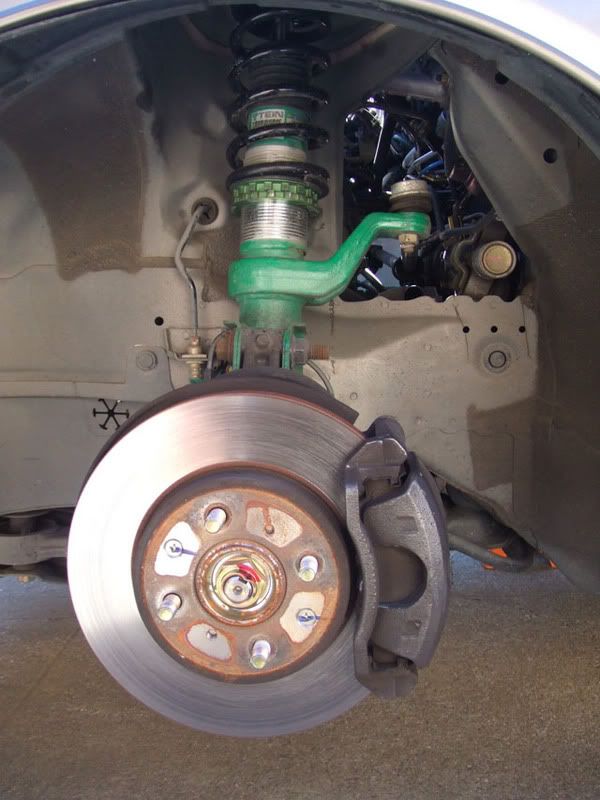
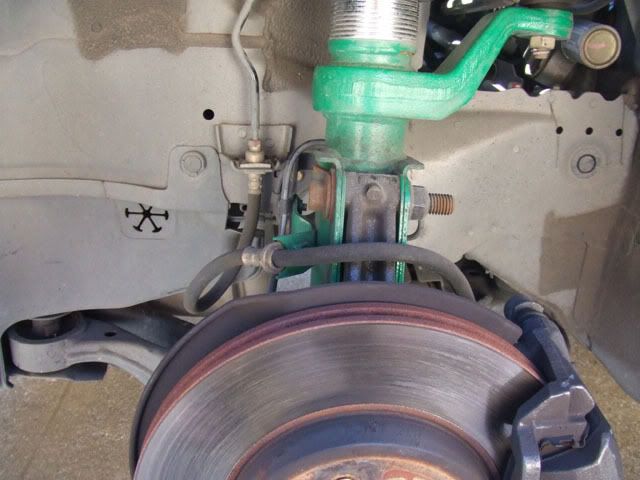
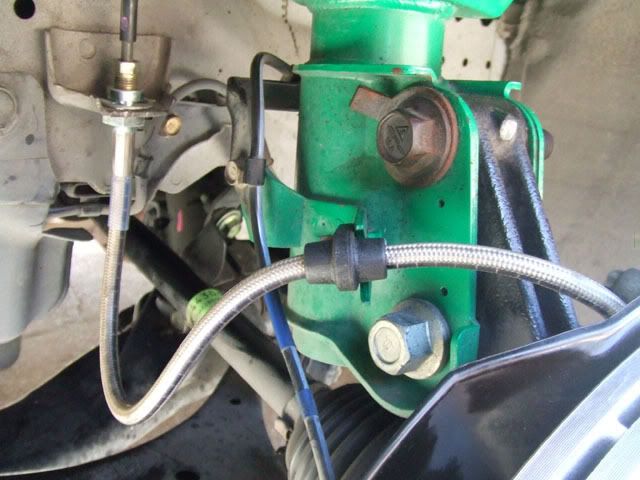
then there is the brake bracket. if anyone has tried to unbolt this by hand for the first time. it would be pretty difficult. 3rd problem. havin a power gun would be simple, but for those who does not have one. then i reccommend to first turn the steering wheel to the opposite side so you can have more room to work with and have more leverage to unscrew the bolt. as shown below.
last but not least the 4th problem. it is the brake line bolt. BE VERY VERY CAREFUL when trying to unscrew it because i almost stripped two of the bolts. make sure the wrench fits perfectly and give it a hard jolt so it can pop open. trying to force it slowly will increase the chance of it getting strip.
EDIT: use a flare nut wrench to unscrew the brake line bolt. DO NOT USE a regular wrench!
i hope this write-up will help the newcomer, and make it a more easier install.
now for the rest of the before and after pics.
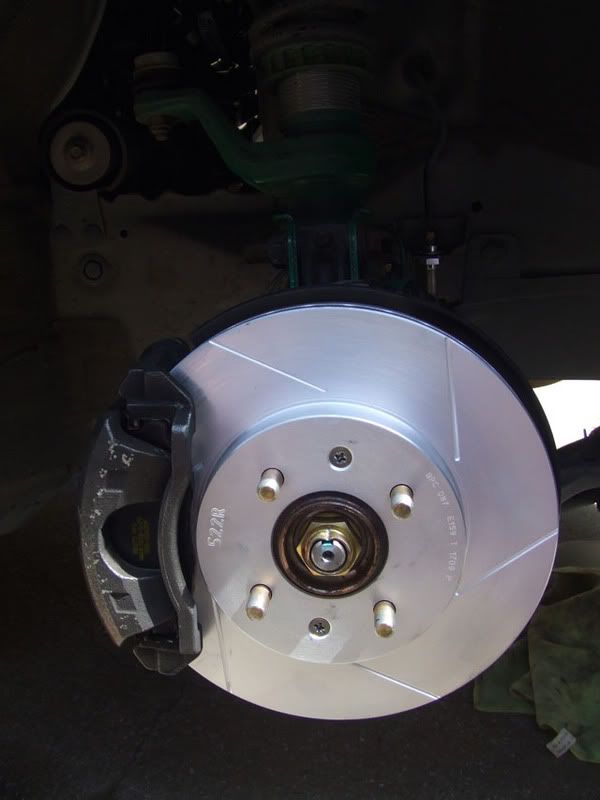
rotors:
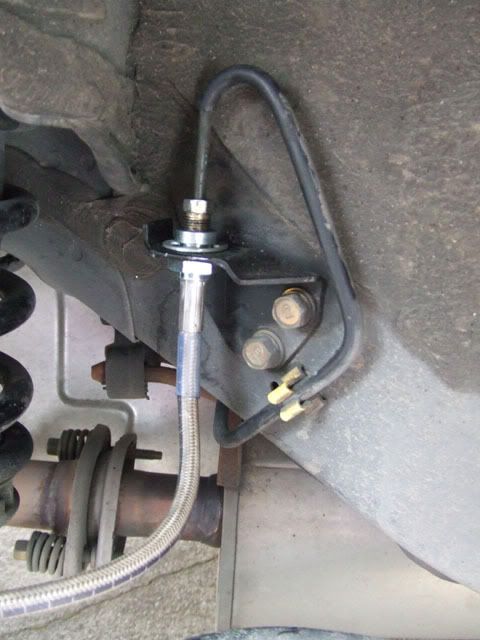
ss brake lines:
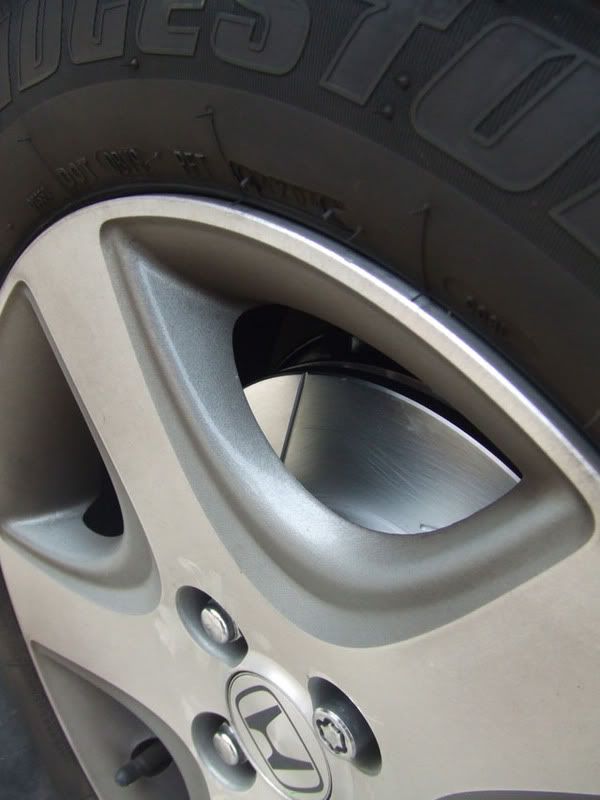
random shots: cant really see it with the ex rims. done! 
as for the install, whoever follow thru with my thread know that i ran into a couple of problem, and i will address the problem and how to solve it. i myself thought it was going to be an easy install, but it turned out to be a pain in the a$$.
so here is the comparison of the rotors and brake pads. notice the inside pads is thinner then the outside
here in this picture, u can see the screw really messed up. which is the 2nd problemi had. i went at it for an hour and a half, and did everything i could but it would not even move 1/8 in. then the memeber on here gave the advice to use an IMPACT SCREW DRIVER. i HIGHLY recommend getting this as it will save time and your hands from pain. give it a few pound and it will pop out enough that you will easily screw out.
then there is the brake bracket. if anyone has tried to unbolt this by hand for the first time. it would be pretty difficult. 3rd problem. havin a power gun would be simple, but for those who does not have one. then i reccommend to first turn the steering wheel to the opposite side so you can have more room to work with and have more leverage to unscrew the bolt. as shown below.
last but not least the 4th problem. it is the brake line bolt. BE VERY VERY CAREFUL when trying to unscrew it because i almost stripped two of the bolts. make sure the wrench fits perfectly and give it a hard jolt so it can pop open. trying to force it slowly will increase the chance of it getting strip.
EDIT: use a flare nut wrench to unscrew the brake line bolt. DO NOT USE a regular wrench!
i hope this write-up will help the newcomer, and make it a more easier install.
now for the rest of the before and after pics.
rotors:
ss brake lines:
random shots: cant really see it with the ex rims.
Last edited by CIVIC X3; Apr 12, 2007 at 01:06 AM.


Pwning Noobs 24/7
iTrader: (10)
Joined: Jun 2005
Posts: 1,040
Likes: 0
From: Westchester, New York
Rep Power: 267 Re: NEW PICS. on pg4.
no point in that upgrade if you cant show it off...as for the brake line bolt...you dont use a regular wrench..the nut is made of soft aluminum and you need a flare nut wrench to take it off properly...IMO should of done more research and you would of saved yourself alot of time. I did mine for the first time, rotor and brake pad change in under 3 hours


Thread Starter
Registered!!
iTrader: (2)
Joined: Jul 2005
Posts: 678
Likes: 0
From: s.f. , ca
Rep Power: 0 Re: NEW PICS. on pg4.
ty for all the positive feedbacks.
as for the research i did! you will not find any thread on here that tells you any of the problem i ran into. this is why i went into detail explaining my problems for those that are beginner like me. i know how to change brake pads, and thought this could not be 10 times harder to do so i did the mod myself. as for using a regular wrench for the brake lines, i did not know that. and ty for pointing that out. although i like modding my car, i'm still a noob and learning. if i knew so much i would have a k20 in my car by now. i wouldnt be running into problem with a simple rotor/brake lines swap.
as for the research i did! you will not find any thread on here that tells you any of the problem i ran into. this is why i went into detail explaining my problems for those that are beginner like me. i know how to change brake pads, and thought this could not be 10 times harder to do so i did the mod myself. as for using a regular wrench for the brake lines, i did not know that. and ty for pointing that out. although i like modding my car, i'm still a noob and learning. if i knew so much i would have a k20 in my car by now. i wouldnt be running into problem with a simple rotor/brake lines swap.

Thread
Thread Starter
Honda Civic Forum
Replies
Last Post
mistermenphis22
Mechanical Problems/Vehicle Issues and Fix-it Forum
5
Apr 3, 2016 08:06 AM
Wild Cranker
Mechanical Problems/Vehicle Issues and Fix-it Forum
427
Jan 28, 2016 06:49 PM
1khilari
6th Generation Civic 1996 - 2000
12
Jul 9, 2015 08:12 PM
stryder12
Archive - Parts for Sale
3
Jun 30, 2015 08:33 PM

