DIY - 2005 ciVic power steering pump rebuild
 02-20-2011
#1
TRUST me! I'm Idiot Proof!
Thread Starter
Join Date: Dec 2010
Location: Quackertown PA
Age: 41
Posts: 200
Likes: 0
Received 0 Likes
on
0 Posts
Rep Power: 165 
DIY - 2005 ciVic power steering pump rebuild
Here goes...
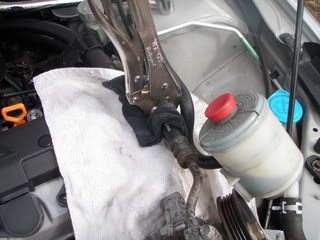
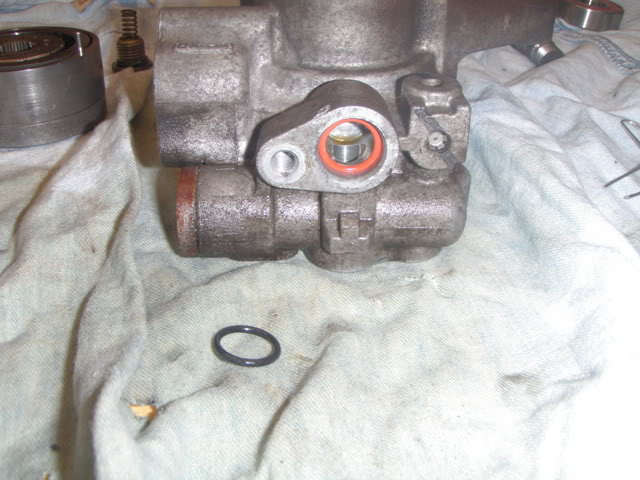
First, remove the mounting hardware from the pump. Swing it into a good position and place a rag or towel under everything (its may DRIP all over your alternator, LCA and belts). Crimp the lines with rags and vise grips and remove the bolts holding the lines on. Remove the pump:
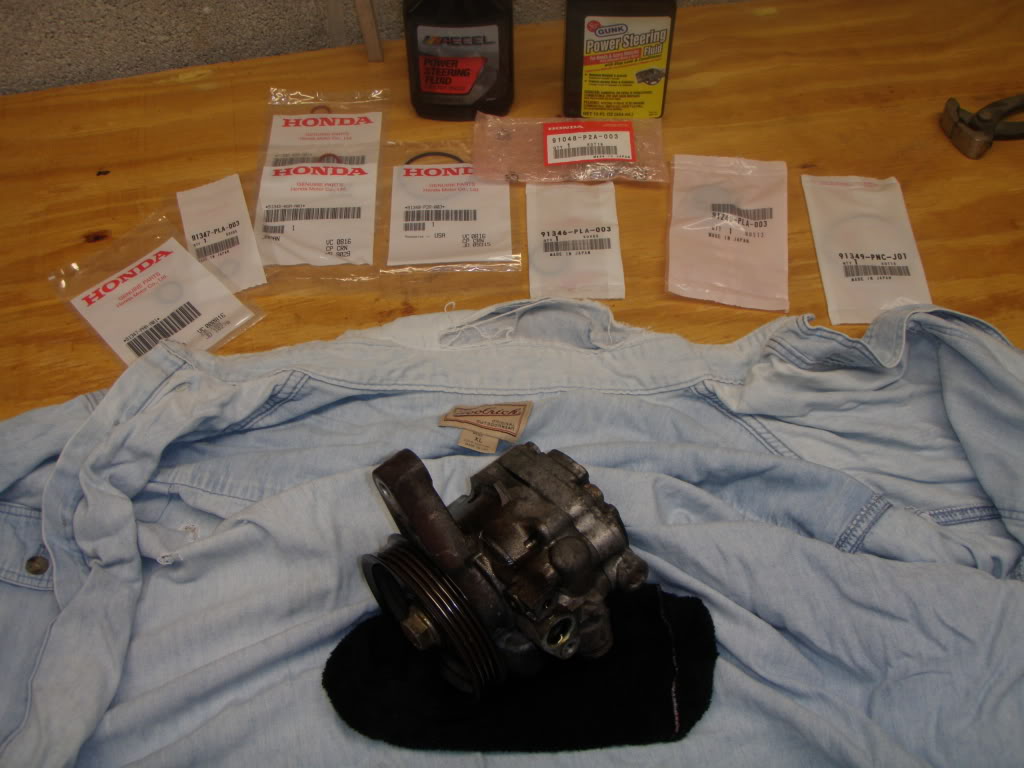
Clean your bench good and line up all your supplies. Get ready for the fun parts!
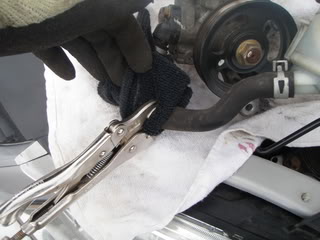
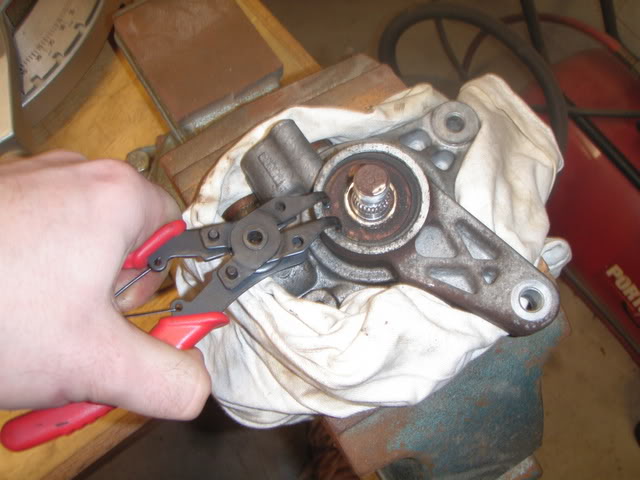
Place the pump body in a bench vise lined with rags to prevent damage. Wedge the pulley with a screwdriver or (ideas?) to prevent pulley rotation whilst removing the bolt. Remove and set aside. BTW its on there pretty good:
Now beak out your cir-clip spreaders and remove the cilp holding that damned, squeaky bearing:
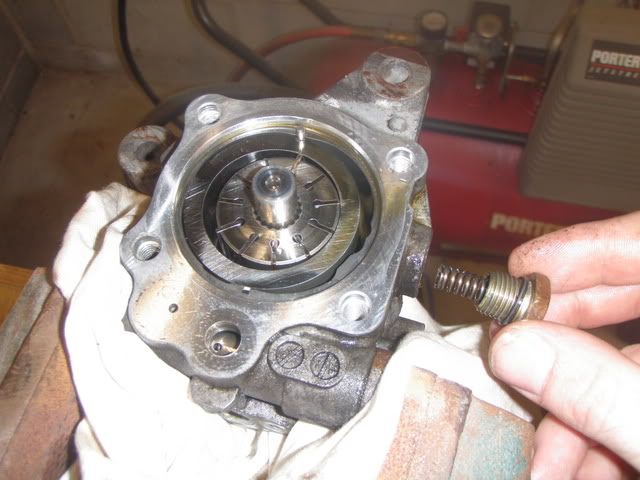
Now go ahead an remove the 4 bolts holding the pump together:
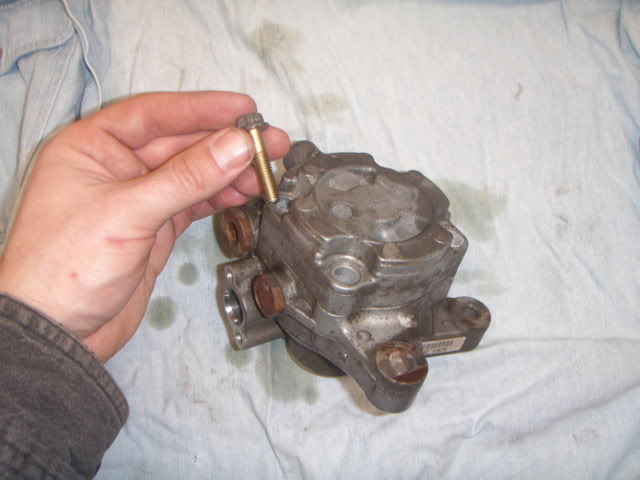
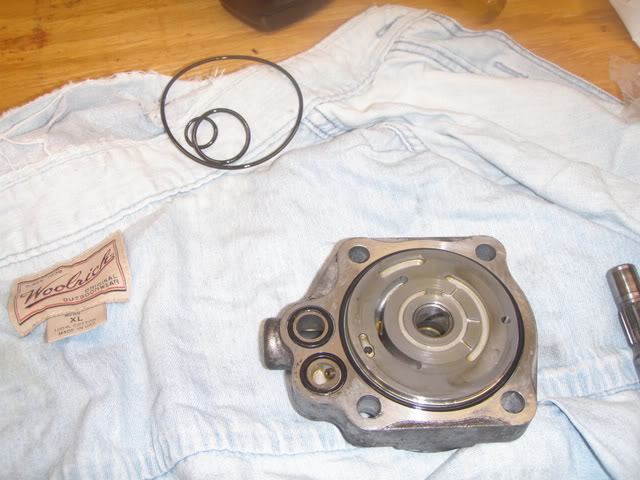
Remove the cover and set aside:
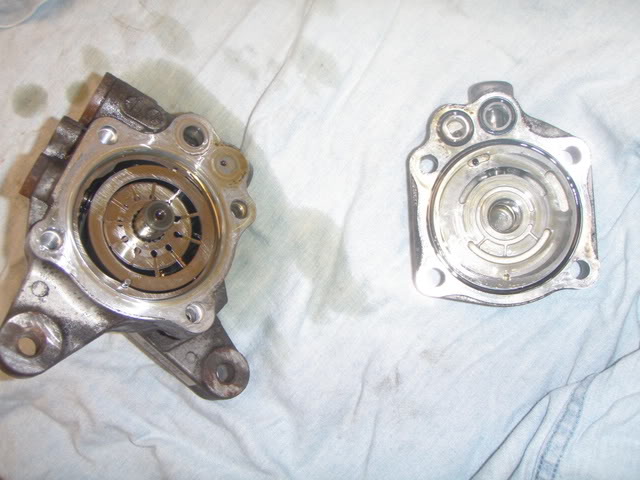
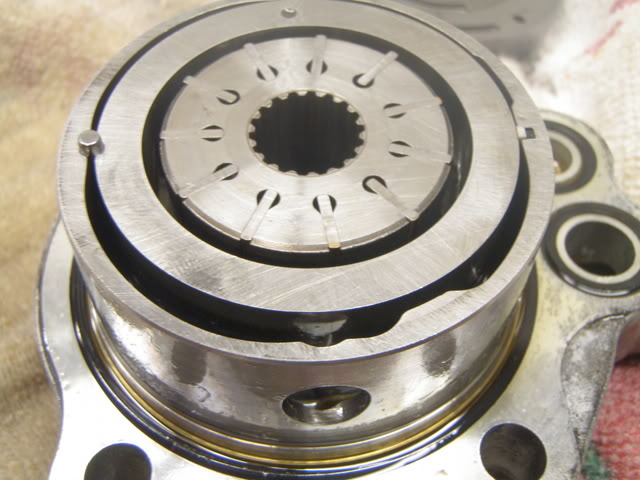
Remove the spring pressure thing. Observe the location of the though holes in relation to the spring (VERY IMPORTANT!):
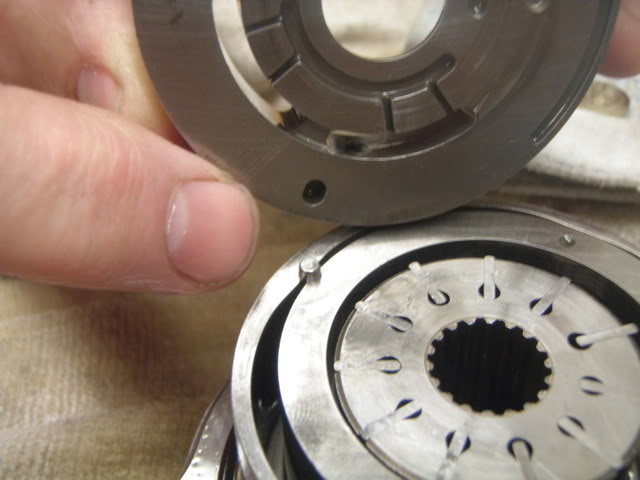
Seperate the internals. carefully note locations and placement/direction. try to keep as one unit as best you can. set aside:
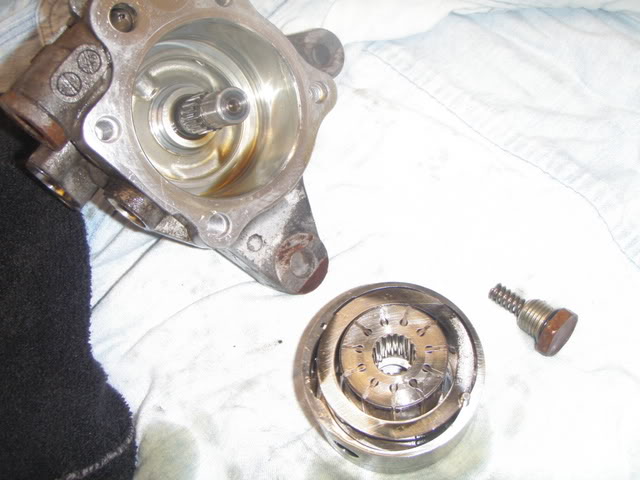
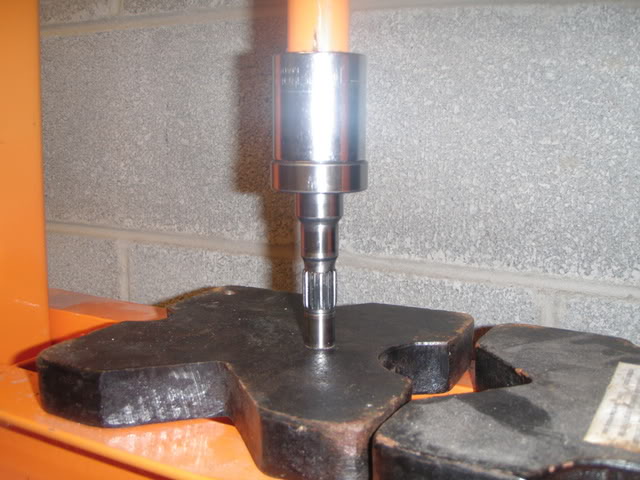
Press out the shaft/old bearing asmy from the housing as one unit. Use whatever means you have involving a mallet or large hammer; use wood to cushion the blows to the shaft:
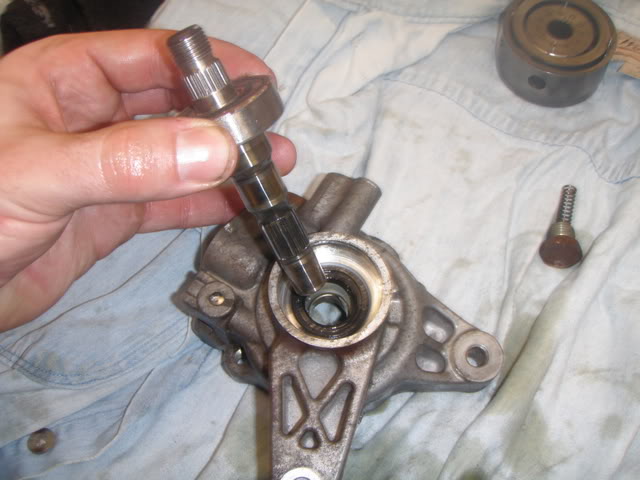
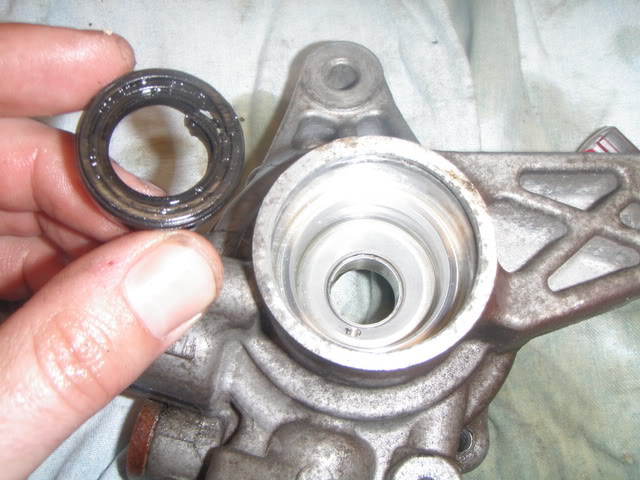
Remove the black shaft seal. Replace with a new one using your fingers or large socket if needed. set aside:
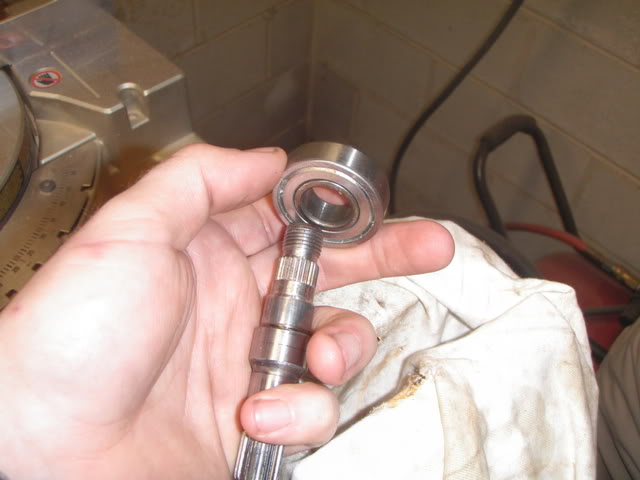
Grab that shaft/old bearing asmy. Force the shaft out of the press fit bearing. Use a vise to let the shaft dangle freely as you whack away with a large hammer and a 2x4 to cushion the blows. (tried to do it with a rubber mallet=no luck):
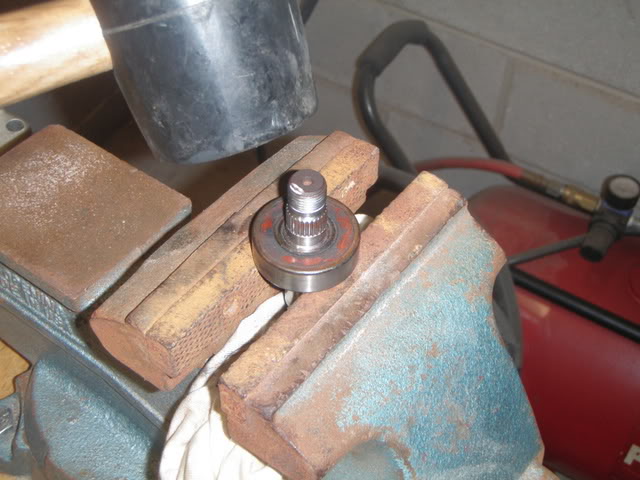
Dont be scared, it'll whack loose:
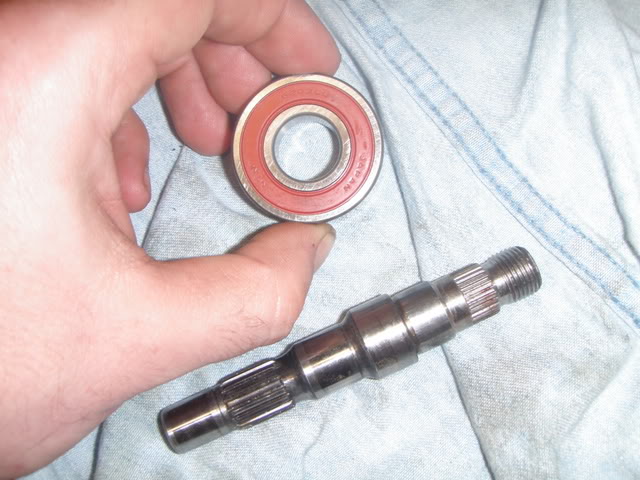
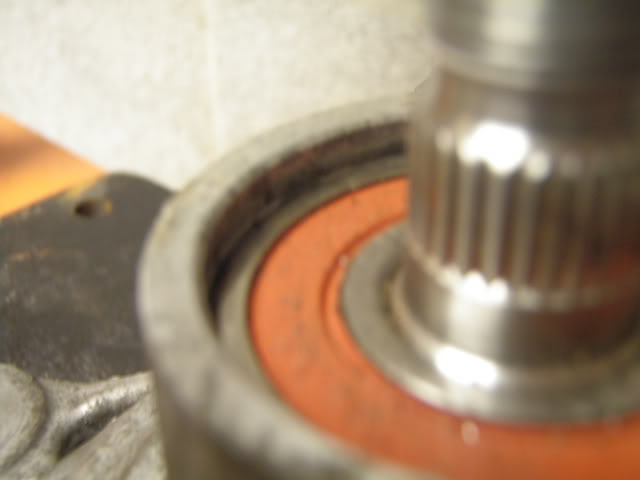
Install your new bearing. Orange side should be facing threads:
Press bearing onto shaft. I think I used a 1-1/16" socket. Fortunetly for me I had access to a 12 ton press!
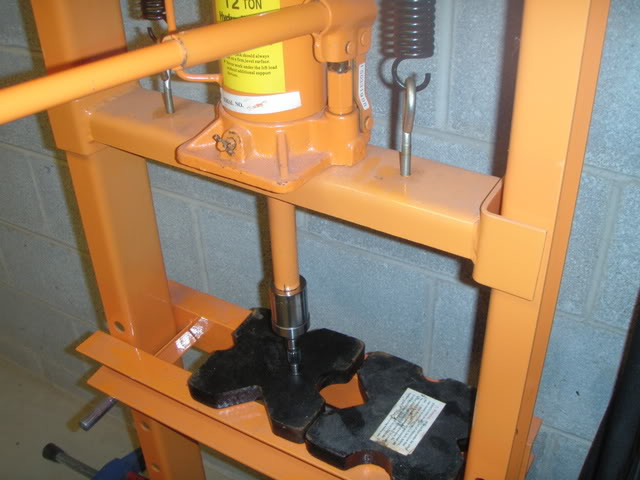
Make SURE its goin on strait!!
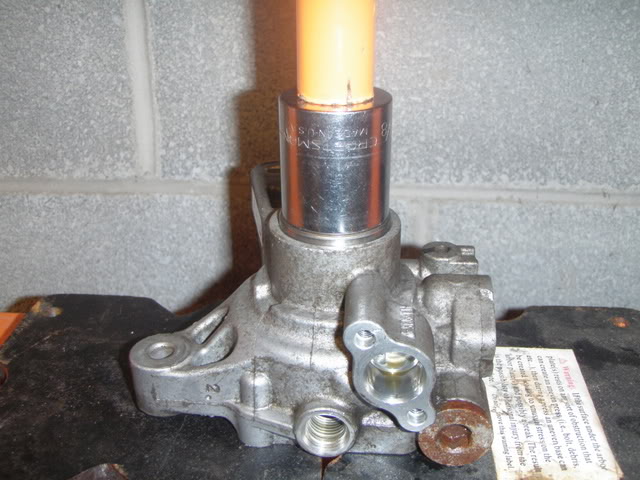
Now time to re-insert new shaft/bearing asmy into housing. Same basic rig, just different support:
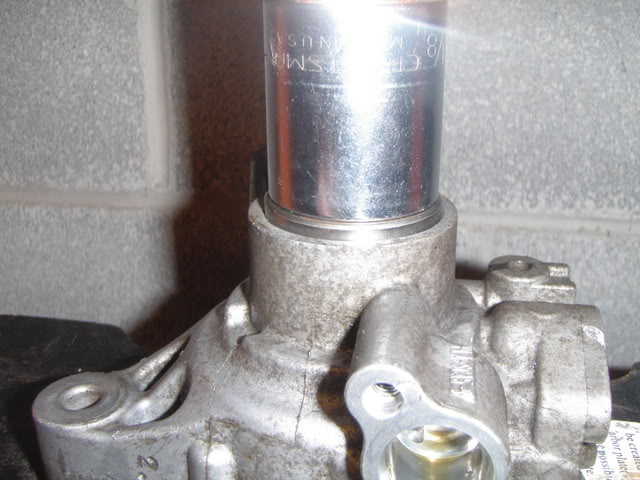
Showing proper depth to clear cir-clip:
Replace all your gaskets, if you have any:
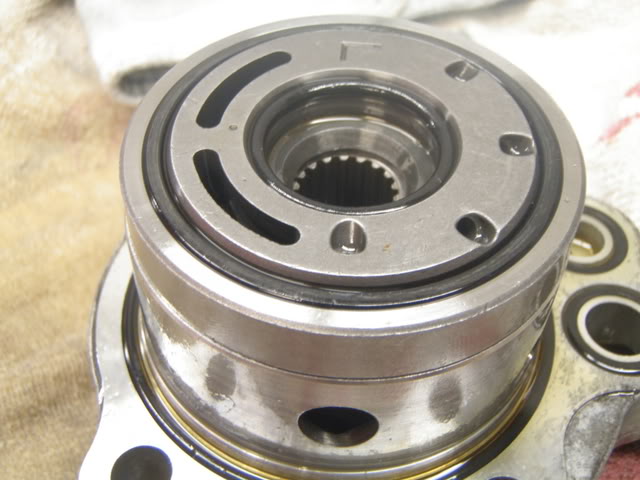
Now restack your components together. PAY ATTENTION!! It is keyed, but CAN be wrong. Observe pics CLOSELY for alignment reference. It should look EXACTLY the same:
Line up pin with SLOT, as pointed too:
Re-assemble housing/shaft/bearing asmy into your careful stack. Its a balancing act, so have patience and be kewl...
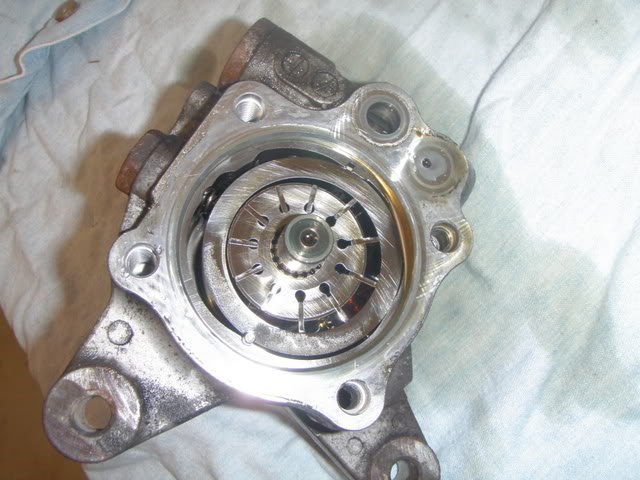
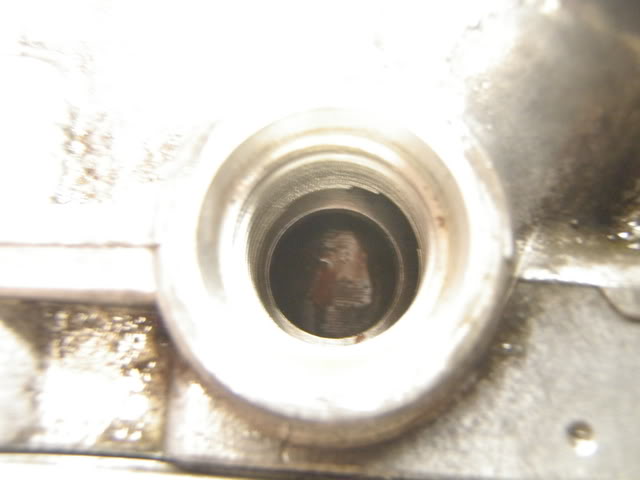
Look closely at that hole in the side...it should look EXACTLY like this through the housing when mounted:
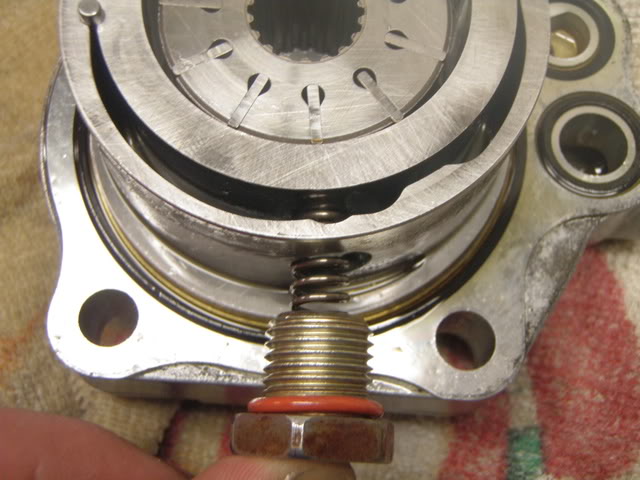
Now re-install your spring thing. it should ingage the inner circle of the pump, pushing against the vanes moving it to one side, with vanes still concentric to thru hole. the top peice and housing has been removed for clarity in the first pic:
Re-install 4 housing bolts.
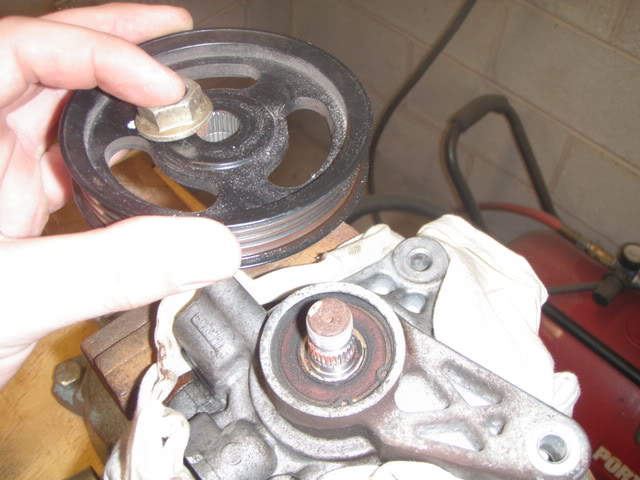
Re-attach the pulley using the same means as you removed it.
Vise it up again, plug inlet/outlet holes and bust out a wire brush so it dosent look like total ****.
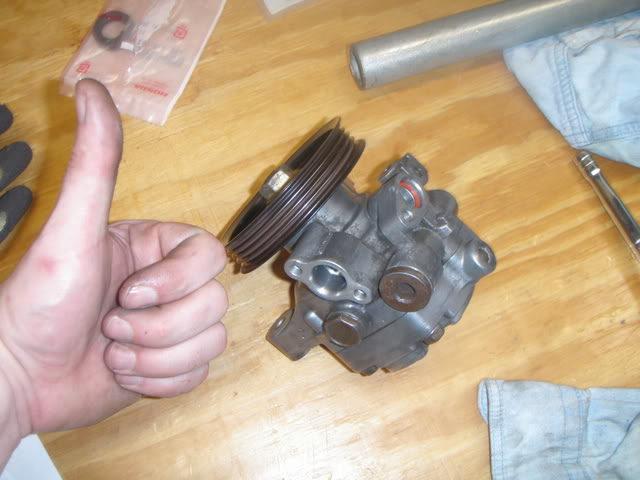
And BAM! Freaking saved yourself like...over a hundred bucks!!
Question? Comments? Better technique? Hit me up!!
Personally I think the P/S delete thread someone posted is ****, but hey, I like steering with my pinkie
First, remove the mounting hardware from the pump. Swing it into a good position and place a rag or towel under everything (its may DRIP all over your alternator, LCA and belts). Crimp the lines with rags and vise grips and remove the bolts holding the lines on. Remove the pump:
Clean your bench good and line up all your supplies. Get ready for the fun parts!
Place the pump body in a bench vise lined with rags to prevent damage. Wedge the pulley with a screwdriver or (ideas?) to prevent pulley rotation whilst removing the bolt. Remove and set aside. BTW its on there pretty good:
Now beak out your cir-clip spreaders and remove the cilp holding that damned, squeaky bearing:
Now go ahead an remove the 4 bolts holding the pump together:
Remove the cover and set aside:
Remove the spring pressure thing. Observe the location of the though holes in relation to the spring (VERY IMPORTANT!):
Seperate the internals. carefully note locations and placement/direction. try to keep as one unit as best you can. set aside:
Press out the shaft/old bearing asmy from the housing as one unit. Use whatever means you have involving a mallet or large hammer; use wood to cushion the blows to the shaft:
Remove the black shaft seal. Replace with a new one using your fingers or large socket if needed. set aside:
Grab that shaft/old bearing asmy. Force the shaft out of the press fit bearing. Use a vise to let the shaft dangle freely as you whack away with a large hammer and a 2x4 to cushion the blows. (tried to do it with a rubber mallet=no luck):
Dont be scared, it'll whack loose:
Install your new bearing. Orange side should be facing threads:
Press bearing onto shaft. I think I used a 1-1/16" socket. Fortunetly for me I had access to a 12 ton press!
Make SURE its goin on strait!!
Now time to re-insert new shaft/bearing asmy into housing. Same basic rig, just different support:
Showing proper depth to clear cir-clip:
Replace all your gaskets, if you have any:
Now restack your components together. PAY ATTENTION!! It is keyed, but CAN be wrong. Observe pics CLOSELY for alignment reference. It should look EXACTLY the same:
Line up pin with SLOT, as pointed too:
Re-assemble housing/shaft/bearing asmy into your careful stack. Its a balancing act, so have patience and be kewl...
Look closely at that hole in the side...it should look EXACTLY like this through the housing when mounted:
Now re-install your spring thing. it should ingage the inner circle of the pump, pushing against the vanes moving it to one side, with vanes still concentric to thru hole. the top peice and housing has been removed for clarity in the first pic:
Re-install 4 housing bolts.
Re-attach the pulley using the same means as you removed it.
Vise it up again, plug inlet/outlet holes and bust out a wire brush so it dosent look like total ****.
And BAM! Freaking saved yourself like...over a hundred bucks!!
Question? Comments? Better technique? Hit me up!!
Personally I think the P/S delete thread someone posted is ****, but hey, I like steering with my pinkie
Last edited by sdaidoji; 12-08-2017 at 03:32 PM.
 02-21-2011
#3
Whachya lookin at?
iTrader: (1)
Join Date: May 2009
Location: Canada
Age: 38
Posts: 6,388
Likes: 0
Received 11 Likes
on
7 Posts
Rep Power: 289 
Re: 2005 ciVic power steering pump rebuild
+1!!!
+10 if I could!
Thread moved to 7th gen engine DIY and unstickied !
+10 if I could!
Thread moved to 7th gen engine DIY and unstickied !
Last edited by BlueEM2; 02-21-2011 at 02:34 AM.
02-21-2011
#4
TRUST me! I'm Idiot Proof!
Thread Starter
Join Date: Dec 2010
Location: Quackertown PA
Age: 41
Posts: 200
Likes: 0
Received 0 Likes
on
0 Posts
Rep Power: 165 
 Kinda sucks it had to come apart again but alas, a job well done!
10-19-2012
Kinda sucks it had to come apart again but alas, a job well done!
10-19-2012
#6
Registered!!

Join Date: Oct 2012
Posts: 1
Likes: 0
Received 0 Likes
on
0 Posts
Rep Power: 0 
Re: 2005 ciVic power steering pump rebuild
Instead of buying various components from the dealer, you can also get all the necessary seals in a kit.
http://www.bestpartsonline.com/servl...mp-Seal/Detail
http://www.bestpartsonline.com/servl...mp-Seal/Detail
12-25-2012
#7
Registered!!

Join Date: Apr 2010
Location: Washington DC
Posts: 11
Likes: 0
Received 0 Likes
on
0 Posts
Rep Power: 0 Re: 2005 ciVic power steering pump rebuild
Thanks this helped a lot! I had to replace the old shaft as the threads got jacked up when the nut came off for some unknown reason (went over a bump on a new bridge and a mile later it was jacked up).
Last edited by jdc5490; 01-17-2013 at 06:18 PM.
12-08-2017
#8
Registered!!

Join Date: Oct 2009
Posts: 54
Likes: 0
Received 0 Likes
on
0 Posts
Rep Power: 178 Re: 2005 ciVic power steering pump rebuild
Nice write-up. The bearing is 6203LU, made by NTN. Ebay has it for under $10. My 2003 Civic's power steering pump was intermittently squeaking loudly for a couple of months. It seemed to be worst when the engine was idling. I went to my local salvage yard, spun a few of the power steering pumps to feel for roughness, and bought a used pump for $30. I had an easy time replacing the old pump per the following steps:
Buy a new O-ring for the PS pump discharge line, part number:
91370-SV4-000
O-Ring (14.4X1.9)
The O-ring cost me under $2 at the dealer in 2017.
Put a few layers of cardboard under your Civic's front wheels, so they are easy to turn when you go to purge the PS system of air at the end of this procedure.
Remove the ten or so bolts that hold the power steering pump and interference in place.
Slide the PS reservoir out of its holder.
Carefully set the pump and reservoir aside, still connected, in an oil drain pan with cardboard at the bottom and rags, sitting on the driver's side of the engine compartment.
Use a turkey baster from the dollar store to remove all the fluid from the reservoir.
Disconnect the two hoses, letting the fluid drain from them into small containers.
Connect the two hoses to the new power steering pump. Torque the two bolts holding the pump discharge hose to 84 inch-pounds.
I think I spilled all of one drop during the above steps.
Wash up.
Re-install the pump and reservoir.
Put OEM Honda Power Steering fluid into the reservoir, up to the maximum line only.
Start your Civic and let it run a few seconds. Then rotate the steering wheel through a cycle. Shut the car off. Check the PS reservoir level. Add fluid to max again and repeat, this time cycling the steering wheel from stop to stop a few times. Check the PS reservoir level. Add fluid to max.
Check the reservoir level a few times in the coming week and top off as needed.
12-10-2017
#9
Registered!!

Re: DIY - 2005 ciVic power steering pump rebuild
you can do that with everything, alternator,to ac compressor ..
i done them all, cheap fix,and use better quality parts than in those remans at the store.
i done them all, cheap fix,and use better quality parts than in those remans at the store.

Thread
Thread Starter
Honda Civic Forum
Replies
Last Post
mattdoc
Mechanical Problems/Vehicle Issues and Fix-it Forum
9
03-14-2017 12:10 PM
moorebl
Mechanical Problems/Vehicle Issues and Fix-it Forum
3
08-29-2015 08:39 PM


