When you click on links to various merchants on this site and make a purchase, this can result in this site earning a commission. Affiliate programs and affiliations include, but are not limited to, the eBay Partner Network.
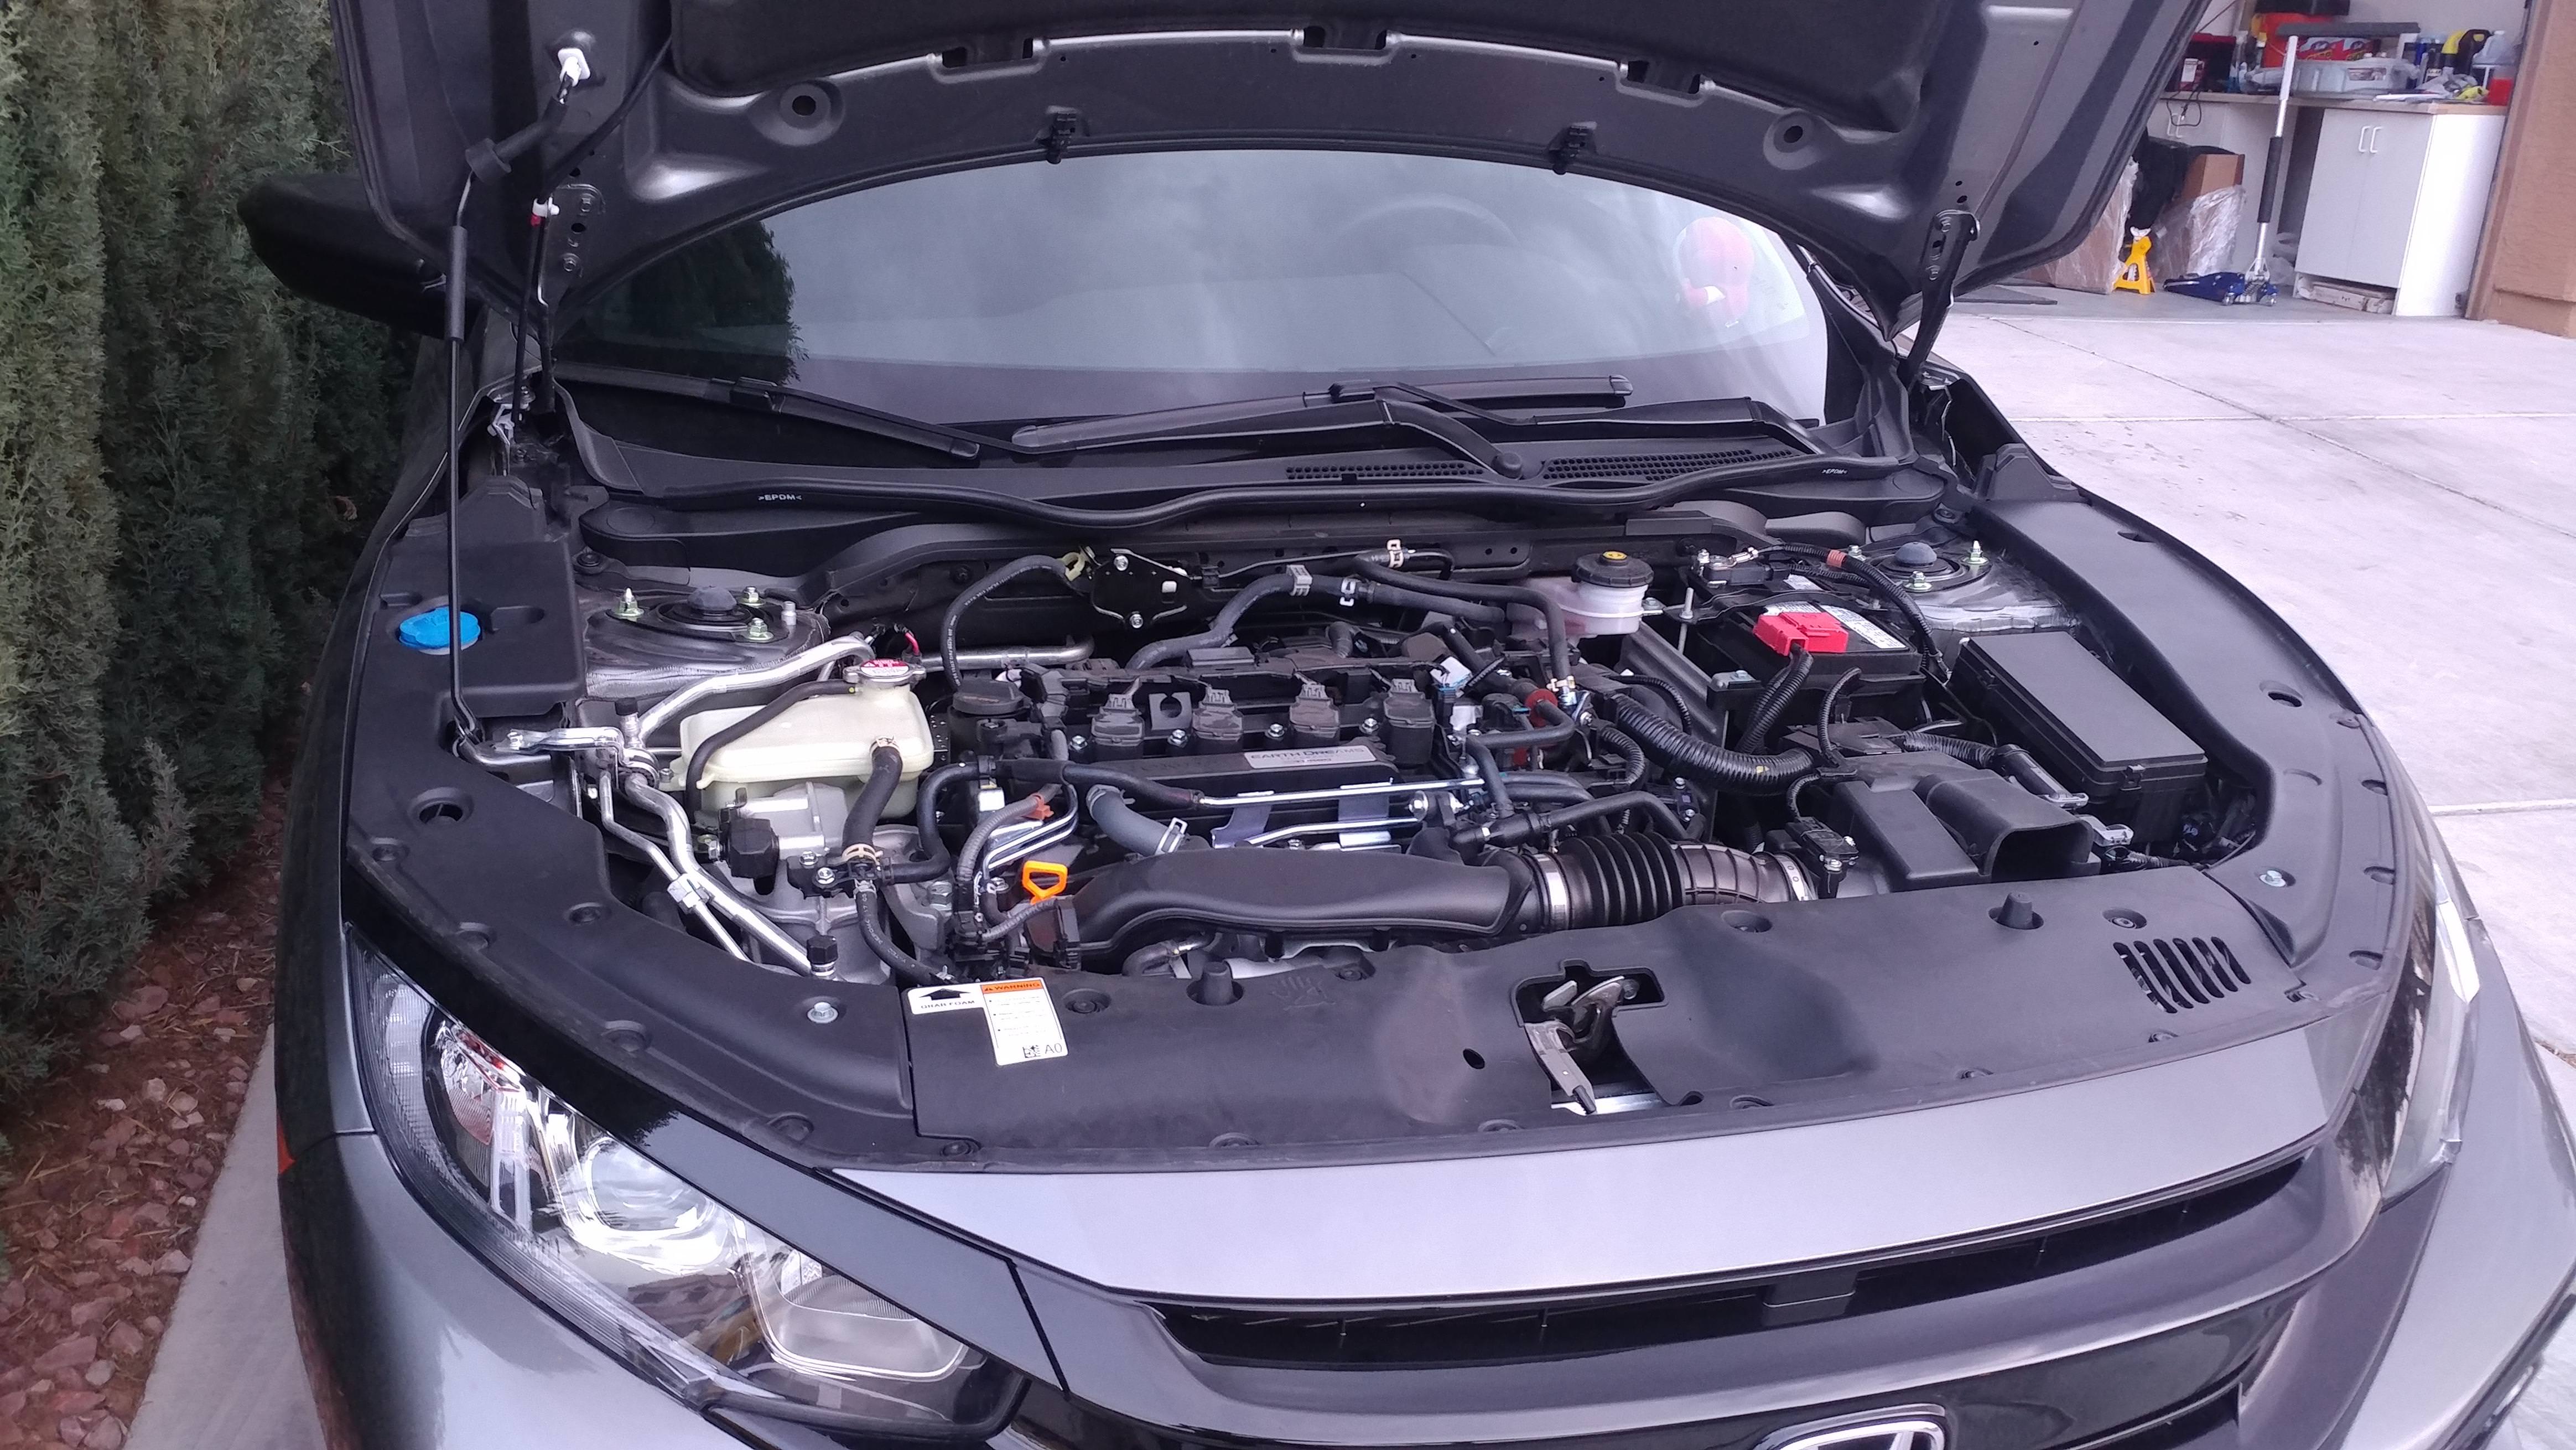
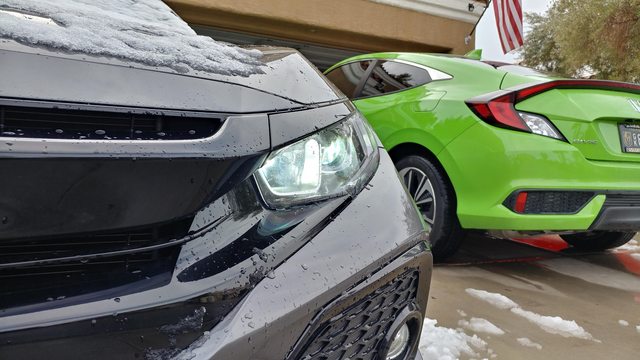
2018 Civic Sport Hatchback
Engine: L15B7 1.5 Turbo (180hp running 91 octane)
Transmission: CVT with paddle shifters
Color: Polished Metal Metallic
Codename: Miyuki
November 11, 2017 - Game Start
Drove Miyuki ('18 Sport Hatch) off the lot after pronouncing Azumi ('02 EX Coupe) dead (RIP). Any LED bulbs I was able to save and use from Azumi went over right away (Morimoto reverse lights, Morimoto 168 cargo light, Philips LED brake lights)
Azumi had some bright *** reverse bulbs
November 30, 2017 - First mod for the low price of $Free Fiddy - DIY guide here! Parts installed: Map light door mode hack
I vowed to keep her stock, but there was one thing about the "lower" trims that bugged me, only the one dome light illuminated when you opened the doors, so I fixed that by adding a jumper wire between the dome light and map light. Now, all 3 overhead interior lights come on when the doors open (with the switch in door mode, that is). Does this really count as a mod? More of a "hack" maybe?
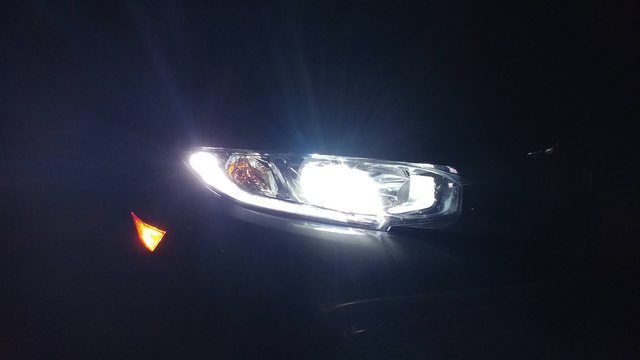
December 4, 2017 - HID install Parts installed: Morimoto Elite H11B HID kit (5500k bulbs, 35W ballasts) from TRS
Wasn't too wowed by the stock headlight output, so I went ahead and bought a Morimoto Elite H11B 5500k kit from The Retrofit Source. Nice and pure white, cutoff is like OEM halogens, much better light output. Dunno if this quite counts as a mod, since it's a bulb upgrade in the OEM projectors. Thank glob for TRS Black Friday sales. Nabbed the kit for $127 shipped
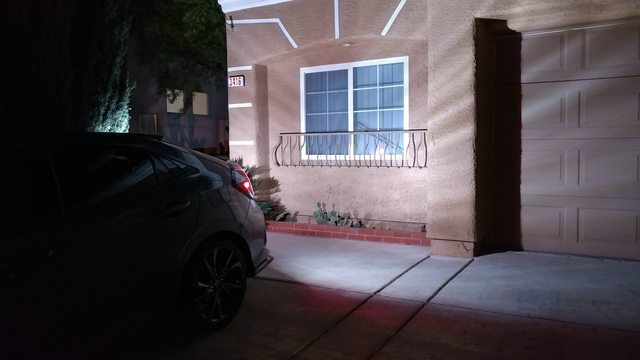
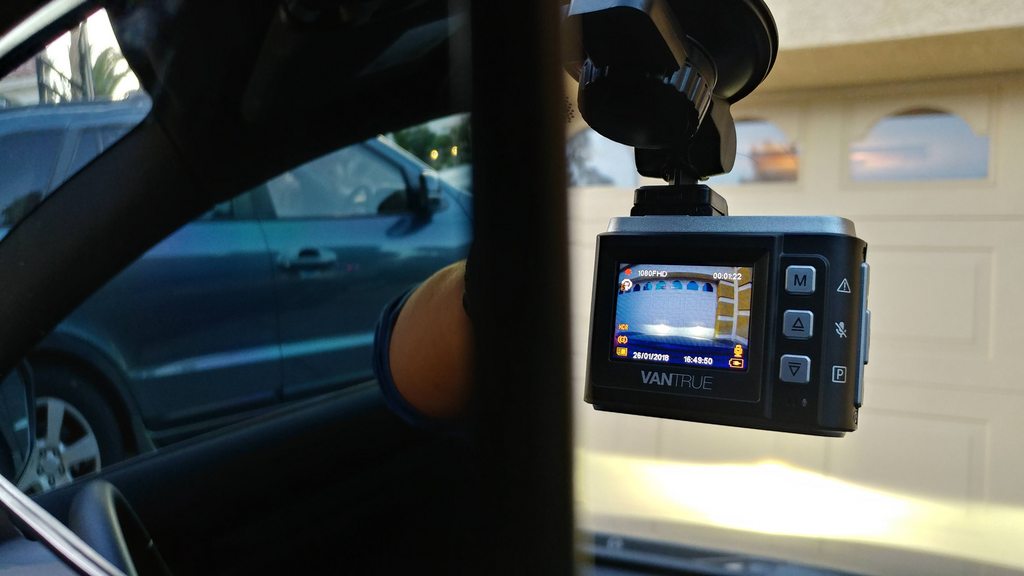
January 26, 2018 - Dashcam install and LED fogs - DIY guide here! Parts installed: Vantrue N1 Dash Cam & Calais (Amazon) 3000k H8 LED bulbs
Again, don't know if this counts as a mod, since it's a dash cam, and I got it as a Christmas gift. However, I bought a fusetap thingamajig for all of $10 on Amazon so I could a) hardwire it and b) not hack into factory wiring.
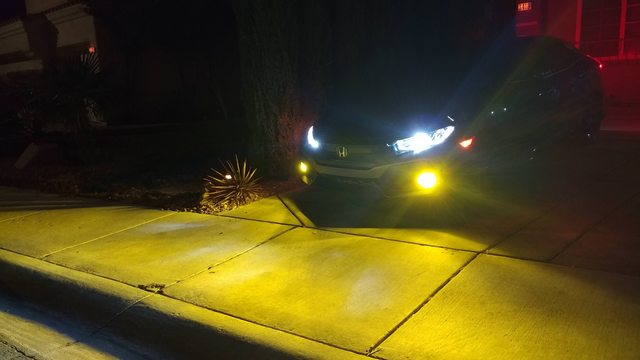
I also happened to get yellow LED fog light bulbs from Amazon for $20. Because JDM.
February 10, 2018 - Engine dress up Parts installed: UKDM style engine bay side covers
Yeah, yeah, the mods kept coming. Still only cosmetic. This time, I got some UKDM-style engine bay side covers to clean it up a bit. Not a bad way to spend $60
February 20, 2018 - And the mods officially start... Parts installed: OEM FK8 21mm rear sway bar (P/N 52300-TGH-A03)
Word on the street back then was that the FK8 Civic Type-R rear sway bar not only fit every other civic, but was half the cost of aftermarket rear sway bars. So I bought it. And installed it. And it fit. For only $120. New. Since then, Honda got wind of that and upped the price to something like $300
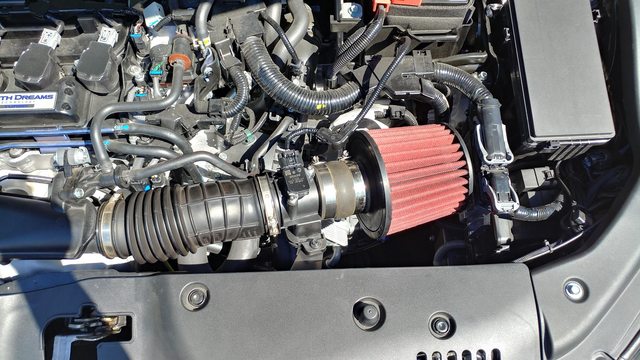
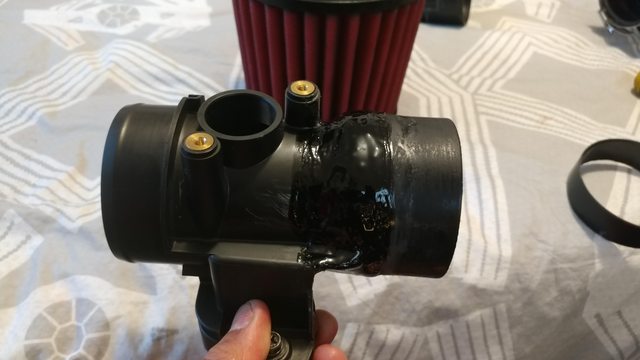
June 23, 2018 - DIY SRI what the hell? - DIY guide here! Parts installed: DIY SRI with AEM 21-202DK DryFlow filter
That's right. A DIY short ram intake. All because I didn't want to spend $300-400 on an actual intake just to hear turbo WOOSH noises. Hacked up the air cleaner cover to harvest the MAF housing and stuck an AEM DryFlow filter on it. The first pic is the first iteration. The second pic is the 2nd iteration. Filter: $30. ABS coupler from Home Depot: $1.
September 18, 2018 - Mod problems.... Parts installed: Replacement Calais LED H8 fog light bulb
Welp, with mods often comes headaches. Passenger side LED bulb went out, and wouldn't come back on. That's what I get for buying $20 LEDs off Amazon.
Oh wait. seller said there's a 2-year warranty on these bulbs. Just contact the seller to open a warranty claim? I did just that. Within literally 3 minutes, I got an e-mailed reply. Yes, literally. They said "We're sorry for the inconvenience. Send us the order number, your address, and phone number, and we'll send a new set out right away."
Within a week, I got a new replacement bulb in the mail (from China!), and all was right in the world.
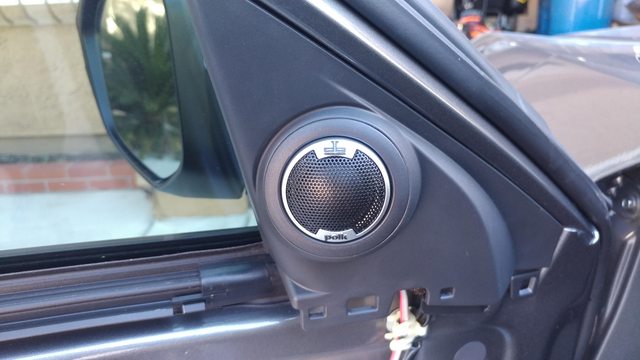
December 17, 2018 - delving into audio improvement - DIY guide here! Parts installed: Polk DB1001 tweeters and OEM FK7 tweeter sail panels (P/N's L:76270-TGG-A11 | R: 76220-TGG-A11)
The stock sound system was... there. It was missing something. So I ordered tweeter sail panels from a Sport Touring model and some Polk DB1001 tweeters and tapped them straight into the front speakers (literally soldered to the pins on the speakers). I didn't wanna go too cheap with tweeters, so I splurged on these guys for $60 and the sail panels for an additional $20
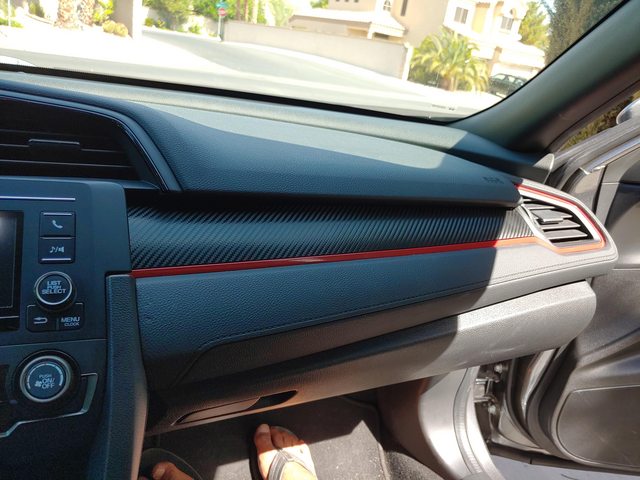
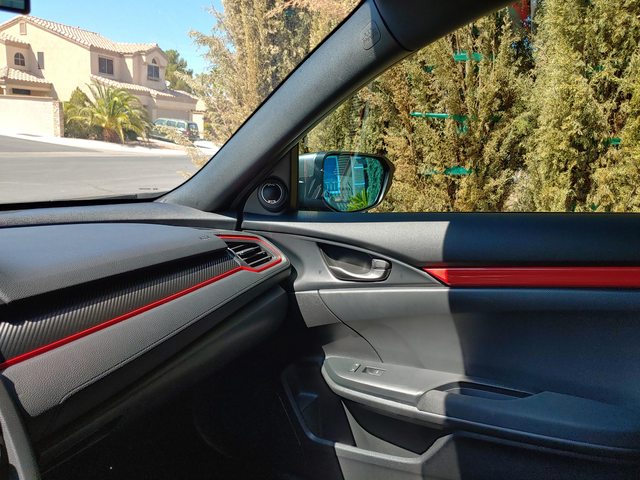
December 21, 2018 - Vinyl wrapping Parts installed: 3M 1080 CFS Carbon Fiber vinyl
I was feeling frisky and bought a $5 12"x12" swatch of 3M 1080 vinyl in carbon fiber pattern. Center console shifter trim was looking a bit plain, so I fixed that.
February 7, 2019 - The point of no return - How-to guide here! Parts installed: KTuner V1.2
Bit the bullet and bought a tuning solution -- KTuner v1.2 -- and loaded up the 21psi map. Opted for the 1.2 because I have a laptop and don't need the touchscreen tablet. Plus, I have a phone, and for an extra $5, bought the KTuner app. This really woke up the 1.5T. I highly recommend it for anyone that wants more (safe) power from their 1.5T
February 17, 2019 - less color on the outside - DIY guide here! Parts installed: Smoked sidemarkers with Amazon amber bulbs
Smoked sidemarkers from eBay came in and I dropped in some LED amber bulbs, from Amazon. $35 well spent.
February 19, 2019 - (almost) no more halogen bulbs on the car Parts installed: LED turn signals (front: Morimoto X-VR 7443 | rear: Amazon 7440) and V-LED 6W load resistors
Up until this point, I had LED everything, Almost. Except turn signals and high beam bulbs. Morimoto X-VR 7443 bulbs in the fronts (from Azumi) and some $20 amber 7440s from Amazon in the rears, and a pair of V-LEDs load resistors (one per side) to prevent hyperflash, and I'm one step closer to LED everywhere. Man, those load resistors were expensive ($35 for the pair), but they're clean af, gave me all the things I needed to make a water-resistant QD tap into the turn signals, and better yet, high enough resistance to only need one per side. Heat dissipation is pretty top-notch, too
February 20, 2019 - More luxury stuff! - DIY guide here! Parts installed: OEM 2019 Accord HomeLink module
Came across a dude on CivicX.com selling 2019 Accord Honda HomeLink modules. Fun fact, they fit into the civic. Even better, they work properly with minor modification. Even better, it looks stock. He was local to Vegas, so I met up with him and picked it up to save $10 and shipping time. The module from Honda usually runs in excess of $250, and I managed to snag this for $140
February 21, 2019 - No more halogens! Parts installed: Sampino (Amazon) 5500k 9005 LED high beam bulbs
Snow in Vegas. LED high beams came in. Yep, this desert rat isn't afraid of a little bit of snow. $23 LED bulbs from Amazon, 5500K color to match the low beam HIDs
April 11, 2019 - I hit a box on the freeway... Parts installed: everythingvinyldecal.com Mario Kart blank button v2 decals
And it had a very familiar question mark on it. Something happened with those blank buttons on my shifter console. For how small these decals were, they're kinda pricey at $10, but why not? lol
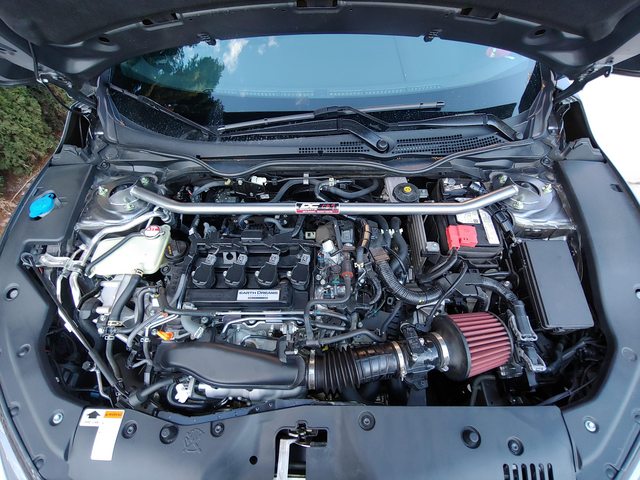
June 4 2019 - More suspension! - DIY guide here! Parts installed: DC Sports front upper strut bar
Stumbled upon a very affordable one-piece front upper strut bar from DC Sports. So I bought it. $190 plus shipping or $113 shipped. I'll go with the $113 shipped any day of the week.
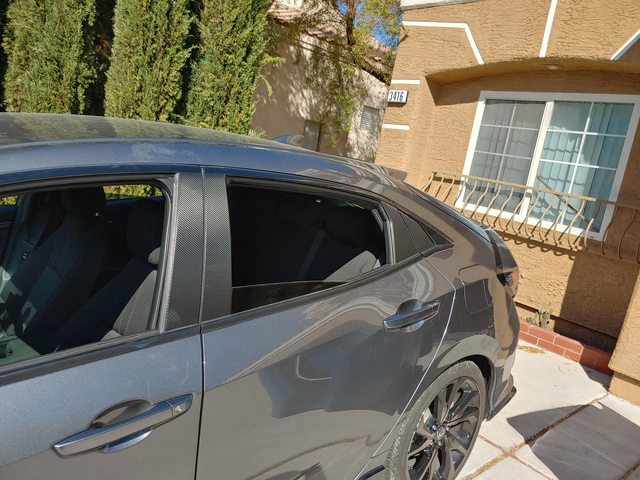
June 20, 2019 - VInyl Wrapping, Part 2 Parts installed: 3M 1080 CFS12 Carbon Fiber vinyl
Bought a 2' x 5' roll of 3M 1080 Carbon Fiber vinyl for $40 this time and wrapped a buncha stuff: instrument cluster hood, steering wheel trim, and exterior B/C pillars
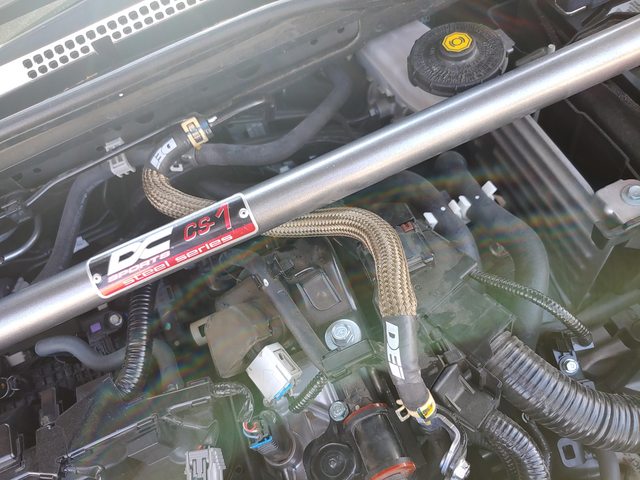
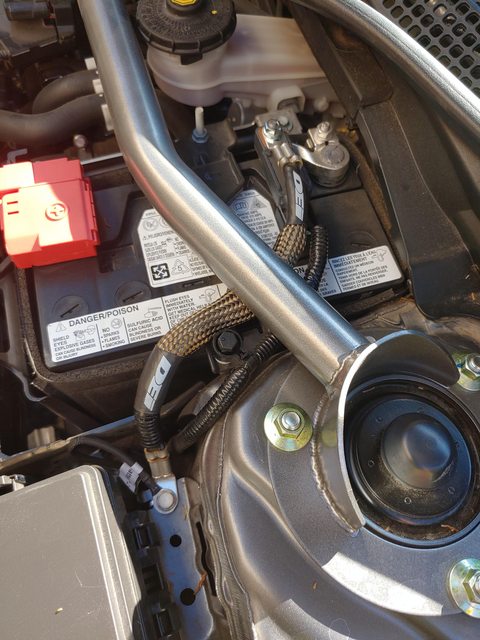
July 12, 2019 - Don't be silly, wrap your *****! Parts installed: DEI Titanium thermal hose wrap
Err... Protect your hoses so the.. yeah.. The DC Sports strut bar came with a cheesy wire loom to protect the fuel purge line and negative battery line from heat/abrasion damage by being in contact with the bar. It worked, but it was ugly. DEI Titanium thermal wrap to the rescue! Now it looks so much more pro. The $25 price tag for the wrap was a bit more than I wanted to spend, but to protect my stuff, I figured it was worth it.
July 30, 2019 - Vinyl wrapping, round 3 Parts installed: 3M 1080 CFS12 Carbon Fiber vinyl
Bought more carbon fiber vinyl off Amazon to fix the messed up B pillar, and now it looks doesn't **** me off
Also, a sneak peek of my current vinyl wrapping project...
The goal here: eliminate the silver trim in the interior
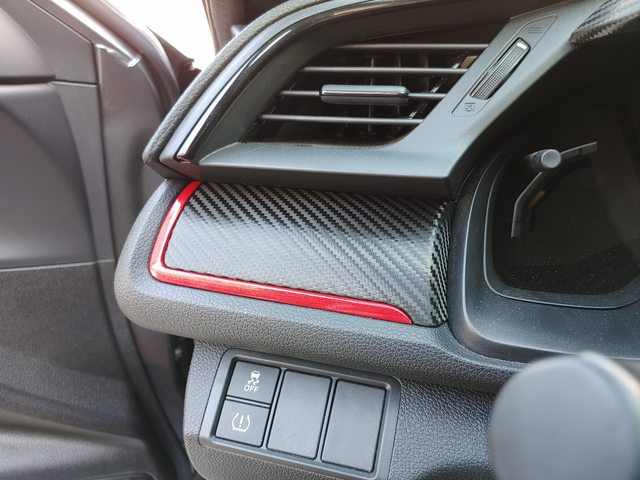
July 31, 2019 - Vinyl wrapping, round 3, part 2 Parts installed: 3M 1080 G203 Gloss Metallic Red and CFS12 Carbon Fiber vinyl
Almost done with Project: Silver elimination reduction. When all is said and done, there's still gonna be silver on the radio, but more of a chrome kinda deal, and I think below the airbag indicator below the radio, and the interior door handles. As it sits right now, all that's left that I'm gonna wrap is the steering wheel trim. I also decided that the carbon fiber trim Honda included from the factory needed an upgrade, so I wrapped all that in the same carbon fiber vinyl. Now it all matches
Before:
After:
August 1st - A Wild Pinstripe Appears! Parts installed: ProStripe 1/4" red pinstriping tape (AutoZone)
Showed my buddy Matt @mdd1994 my interior wrap job. He suggested I start putting red on the outside. So I bought some red and put it on the outside. Added my own CTR-style pinstriping on my OEM ground effects.
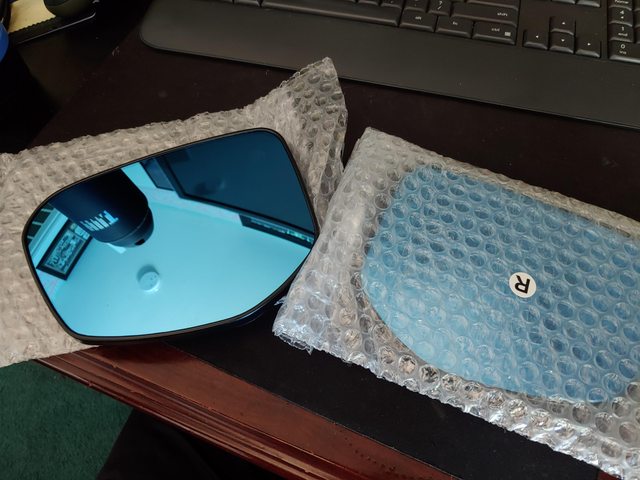
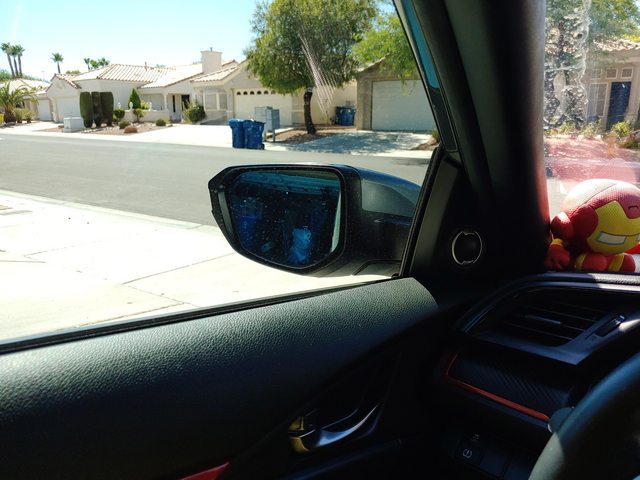
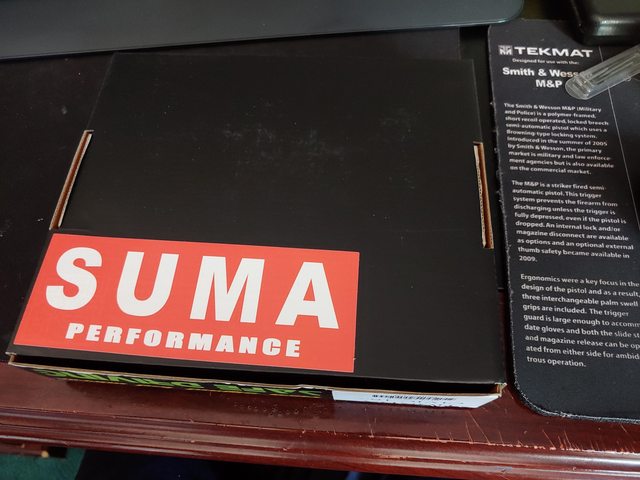
Turn signal LED mirror? No.. That's a lie...
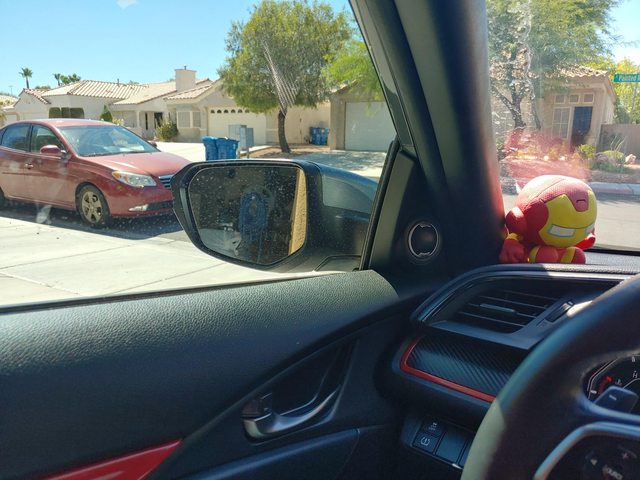
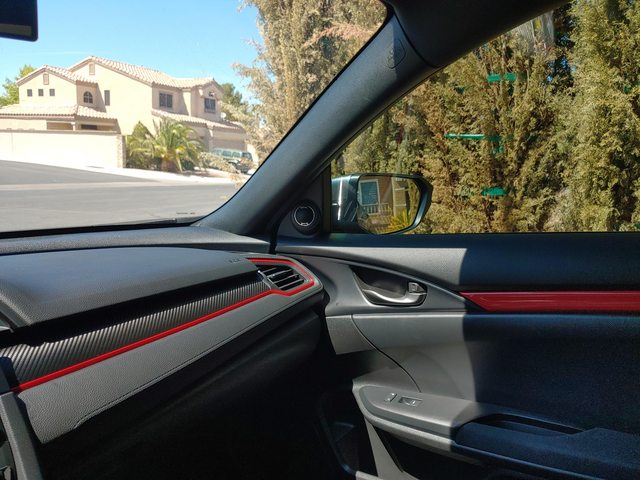
No turn signals. That's definitely a lie. But they're blue. And the unwrapped one is a funky shape. That's right kids, convex side view mirrors from Suma Performance, and I had a coupon code for 15% off. They retail for $150, and I got these for $135 after shipping. These suckers are blue for anti-glare reasons and wide angle to kill blind spots. Also, they're hydrophobic (their website says hydrophilic, but that's wrong, too. lol) so water will should bead right off of them.
Before:
After:
The passenger side is a hair more convex than stock, and the driver's side is gonna take some getting used to. Not a terrible way to spend $135. lol
August 8, 2019 - Vinyl wrapping, round 4: The big one Parts insatlled: Avery Dennison SW900 Carbon Fiber and VViViD Red Carbon Fiber vinyl
Alright guys, I decided to take on a large-ish vinyl wrapping project today. After my buddy Matt said I needed more red on the outside (after seeing the inside), I had this idea in my head. Then I saw a picture on Google of a dude that did exactly what I wanted to do. So I did it. Bought a roll of red carbon fiber vinyl (VViVid premium; $20 from Amazon), a 5'x5' piece of black carbon fiber (Avery Dennison SW900 this time; $85 from metrorestyling.com), and a 50M roll of 3M finish line knifeless tape ($30 from metrorestyling.com). Post #14 has a work in progress pic but here's the finished product, ladies and gents. About 3 hours of work (including surface prep and front bumper removal/reinstallation) and she's looking good af. Talked to a few of my buddies, easily would've been a $400 job to get it professionally done, and they would've done the same **** I just did. If I had to do it all over again, I would've just used 3M 1080 again. Like I mentioned in post #15, this Avery stuff is like velcro for any dry rag I use. It turns lint-free cloths into linty af cloths. It looks good and easy to use, however. I just worry about when it rains or its time to wash my car. We'll see when the time comes, I guess.
August 14, 2019 - Miyuki gets a bit louder. But it's not what you think... -> DIY guide here! Parts installed: Wolo Maxi Sound 320-2T horns with College Hills Honda 0S18 aftermarket horn adapter
Today, Miyuki was complaining about how whiny her "voice" was. Told her I'd take care of it. Out with the "meep meep" Roadrunner horn, and in with these:
That's a pair of Wolo Maxi Sound 320-2T horns, and they cost me all of $26 +tax at Pep Boys. I was gonna go with the Hella SuperTones or SharpTones since they have such a high rep, especially in the Suby world, and they look kinda cool, but after hearing them, oh hell no. To me, I couldn't justify going from a single tone whiny sound to a dual tone whiny sound. Sure, it sounds kinda "European," but I wanted something that was gonna get someone's attention, not make them think, "wtf, did I run over a fckin clown?" So, no. Hella SharpTones and SuperTones were a hard no from me, dawg. The only Hella horns I'd consider were the Hella Twin Trumpets, but these sounded just about the same for a lower price, and I could take them home today. Nabbed me a horn adapter harness from College Hills Honda, made my own little harness to run these in parallel, and called it a day. No extra relay, no extra wiring ran to the battery. These guys draw 7A combined, whereas the OEM horn draws 3.5A by itself. OEM fuse in the fuse box is 10A, so all good to go here.
Here's a couple size comparison pics:
specs comparison:
OEM horn: 12V, 3.5A, 110dB, ~400Hz tone
Wolo Maxi 320-2T: 12V, 7A, 115dB, 410/510Hz dual tone
Ever so slightly louder, dual tone, higher pitch, but the added acoustic increase due to the horn part as opposed to just a vibrating diaphragm. Sound a whole helluva lot better.
Hol up tho. This would be worthless without a sound clip. It'd be better if I had a comparison sound clip, huh? Well, here ya go, ya filthy animals. Before anyone says anything, yes, the video shot in vertical mode. Dunno why. idgaf tho, since it's purely for sound purposes only. And yes, I am wearing a headband bc it's hot as *****.
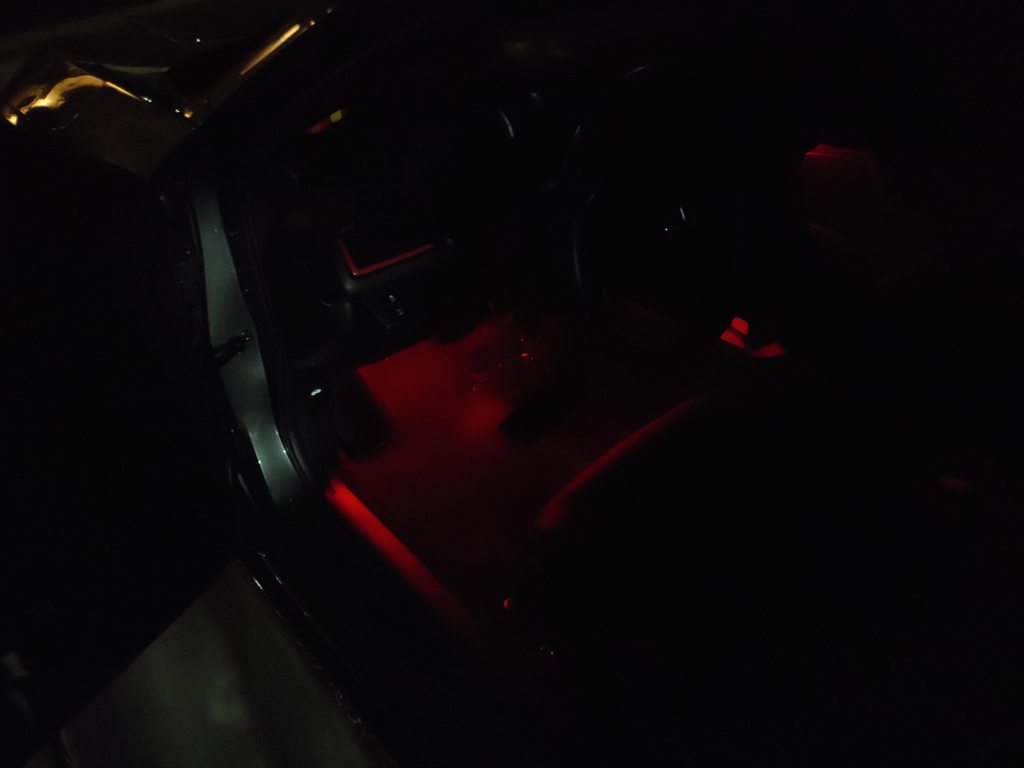
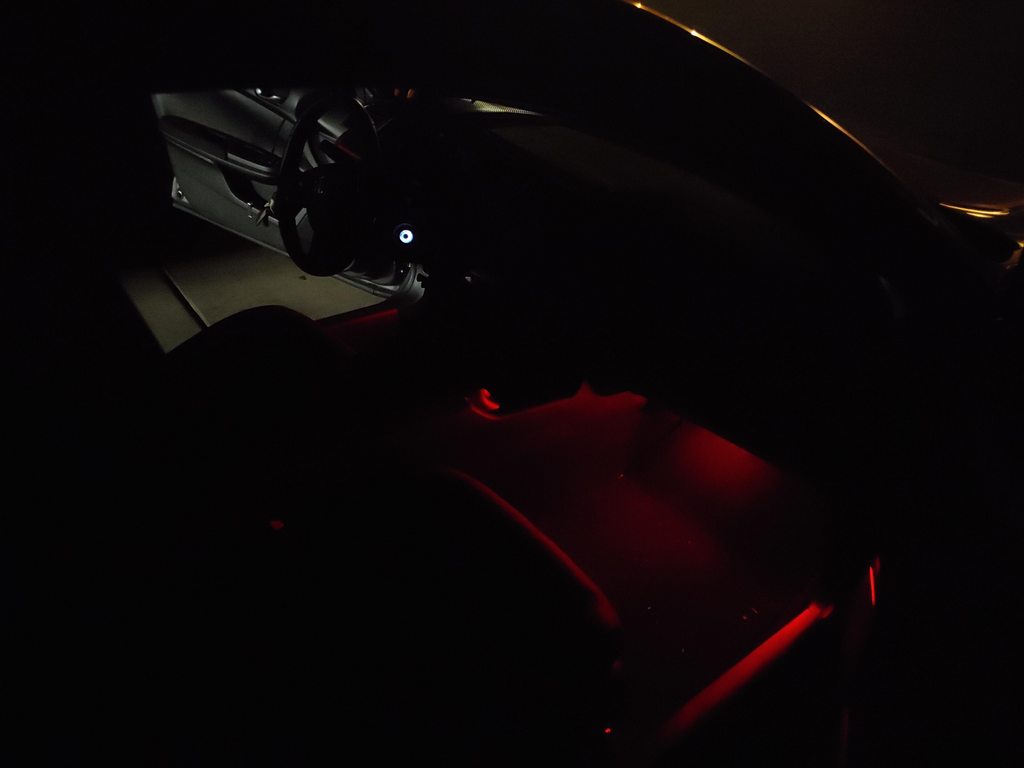
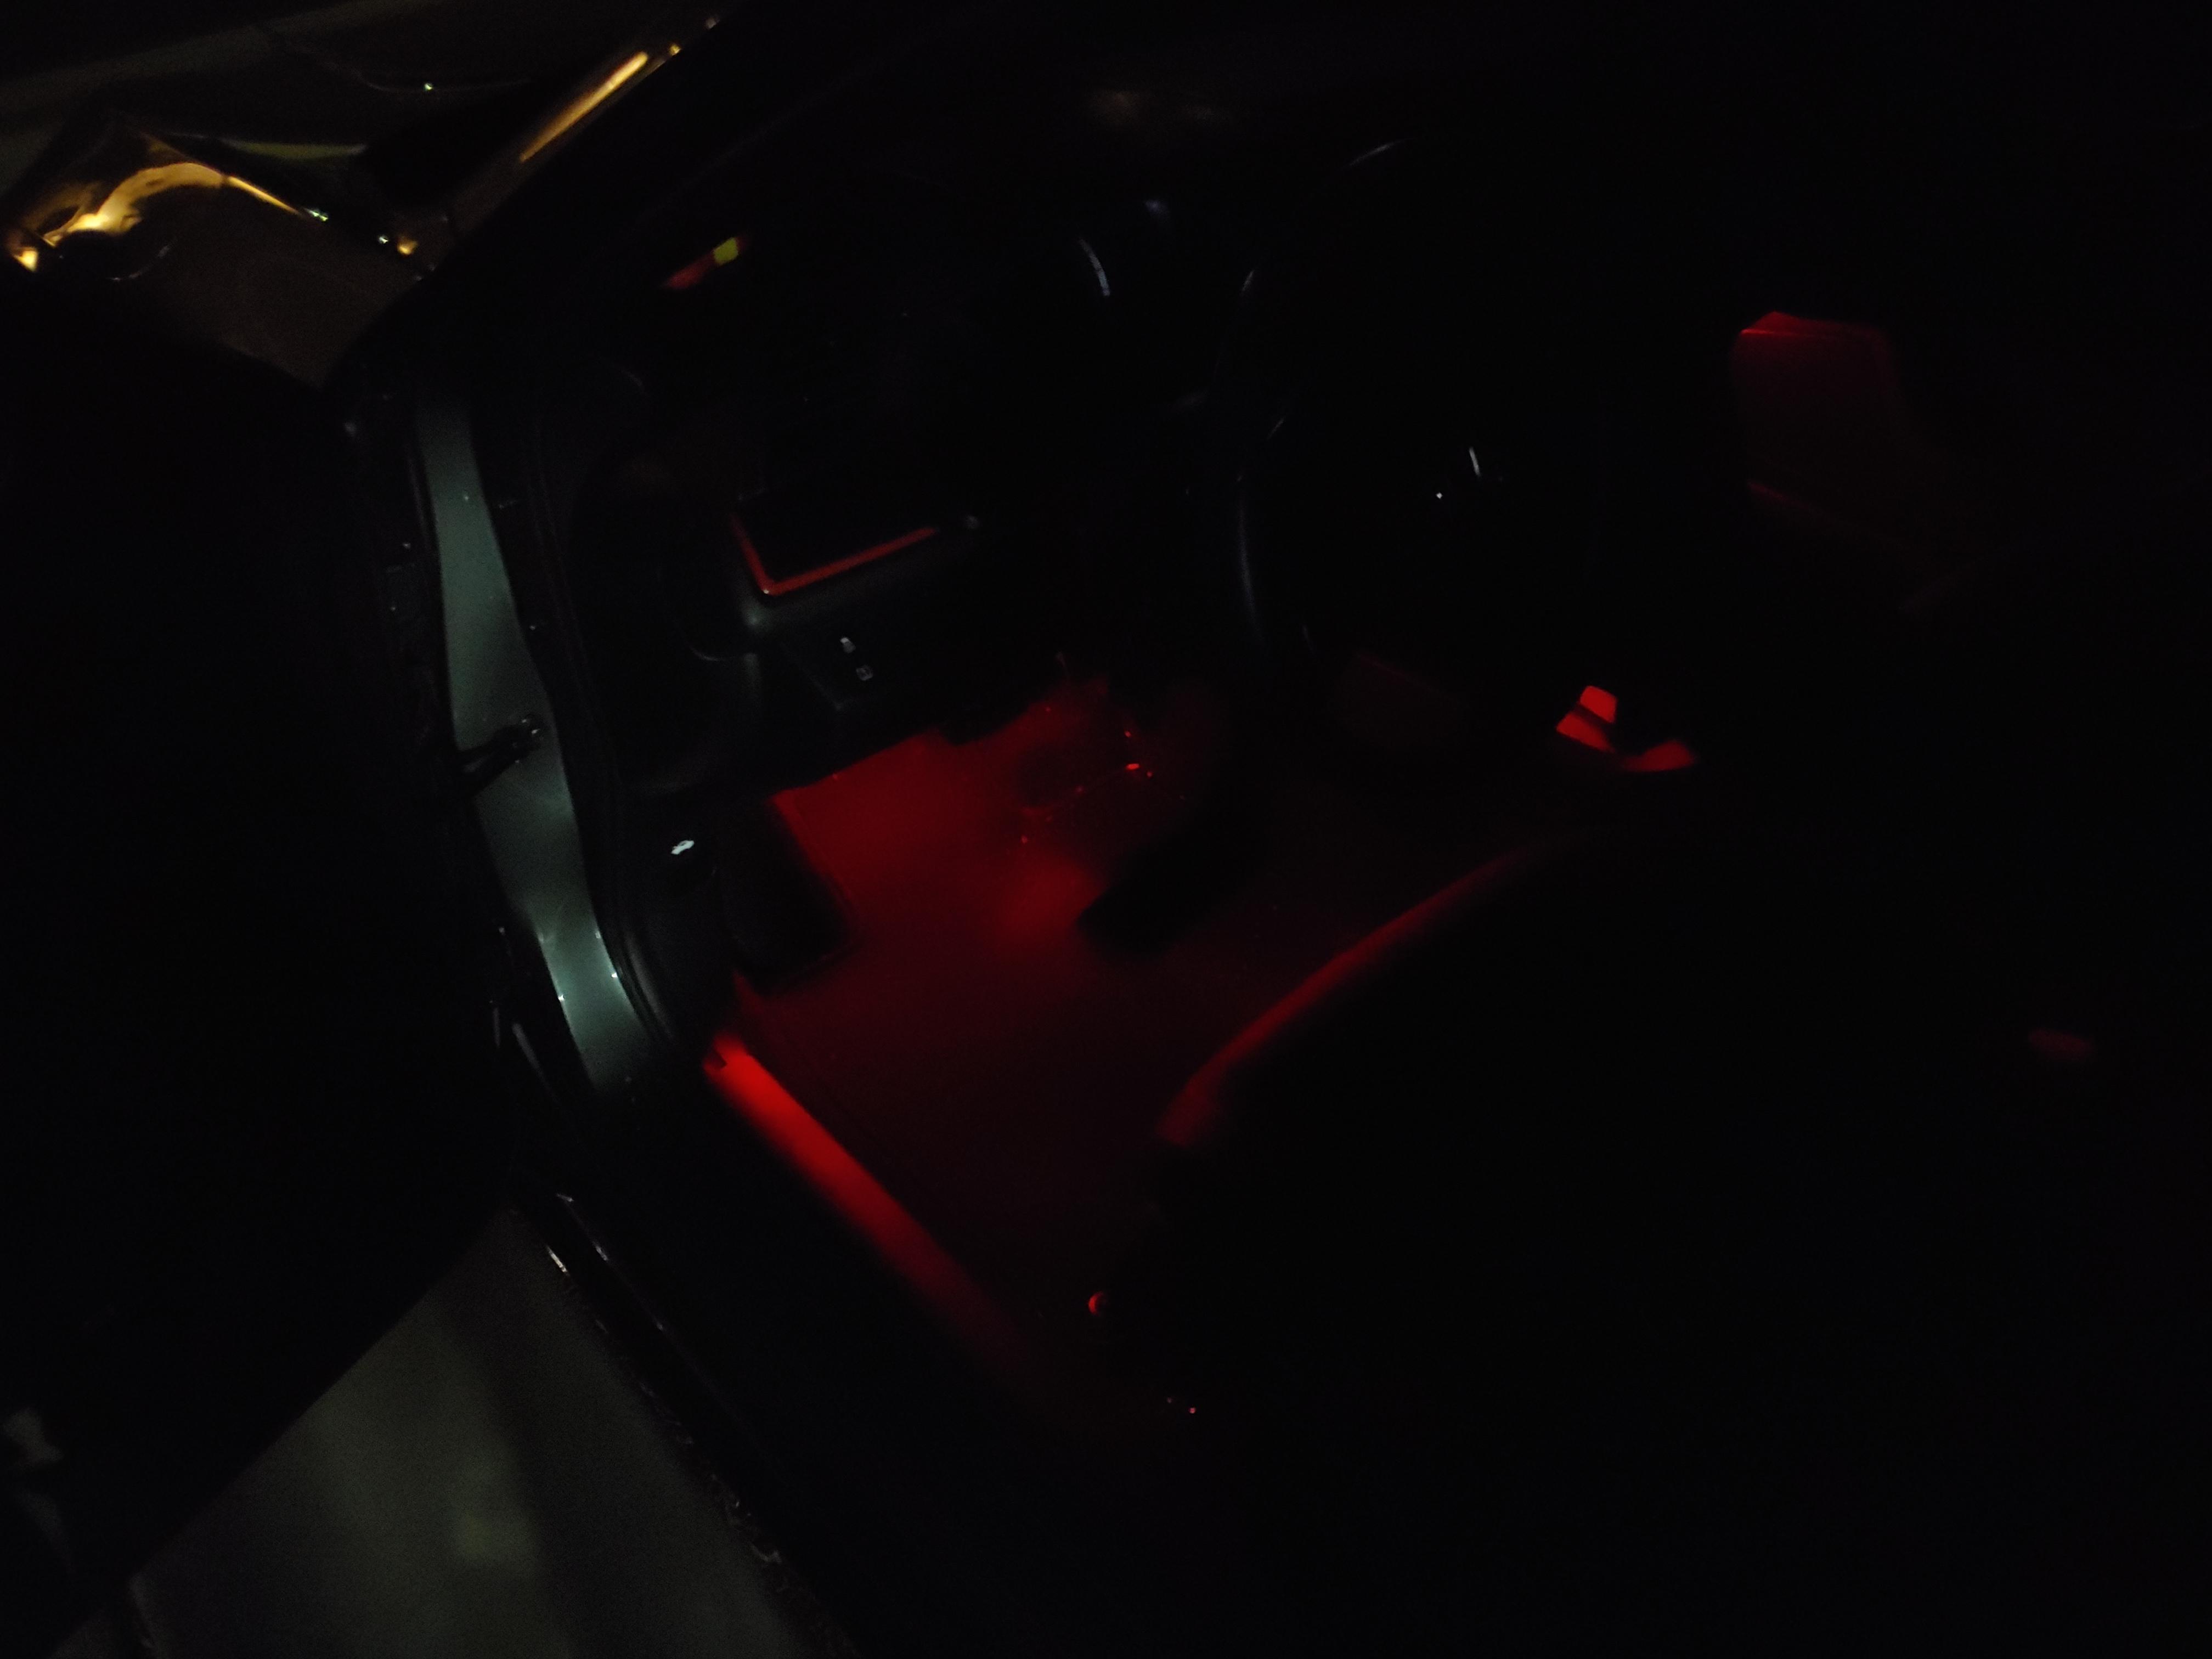
August 19, 2019 - Mah feetses has lights! Parts installed: DIY red footwell lighting
I don't know what I was thinking with the caption for today.. But I have already committed, so f- it. Made some LED footwell lights for just the fronts, for now. From a waterproof 3528 red LED strip, I used 2-3 LED segments, one per footwell. Made some custom female disconnects, insulated them, and slid them on the accessory plug pins by the in-cabin fuse box. Took far longer than I had anticipated, but I'm super happy with how it looks in person. These dark *** pics don't do them justice. At all..
Driver:
Passenger:
August 23, 2018 - Miyuki gets more bling Parts installed: Knockoff PasswordJDM fender washers from wish.com
Miyuki was yelling at me that I don't buy her shiny bling. So, of course, I bought her some shiny bling. A set of PasswordJDM fender washers. Ok, not really. They're knockoffs from wish.com. Let's see.. $17+shipping for 5 sets on their website? Or $2 shipped and wait a month for 10-sets of knockoff bling. I'll take my chances with the knockoff bling. They're non-structural bolts, and even the "important" bolt that secures one of the top tabs of the headlight, I can always upgrade the hardware for that. It was also bugging me that the engine side covers were fairly asymmetrical, as the passenger side had a hole which mounted nowhere (had to make that hole on my car's support beam) and the driver's side had a place, but no hole for one, so I made them both the same. Had a set of RivNuts in M6x1.0 from a while back, so I used those, too
August 25, 2019 - Updated bling, and more! Parts installed: painted hardware for knockoff PasswordJDM fender washers
Well... the knockoff PasswordJDM fender washers may look the part, but the bolts they came with are likely hot garbage and I decided to upgrade them to stainless steel bolts from the hardware store. But I couldn't just leave them all silver looking like that. Ruins the color scheme. So I painted them gold. They ended up being a "burnt bronze" kinda color because I coated them with VHT satin clear and baked them to cure the ceramic clear coat. I also changed out the hood mounting bolts on the hood hinge since I had 6 extra fender washers laying around. Those were tightened down by using a 4mm impact allen bit and a 1/4" socket and socket wrench, and only tightened down one at a time. It's secure, I promise you. LOOKIE!
August 31, 2019 - More vinyl?! Parts installed: vinylmod.com SPORT emblem red vinyl overlay
Yes, more vinyl. Bite me. Sport badge vinyl overlay came in from Vinylmod.com. Yeah, it was like $11, but it was precision cut to allow a chrome outline around the red. Great effect there. They send it in such a manner that you can apply one letter at a time. It took a while to come in (8 business days or so?), but kinda understandably so because it came from Canada. I kinda messed up the "R" but managed to salvage it best I could. That's what I get for applying vinyl in the sun/heat.
September 4, 2019 - MORE VINYL JOSH!? Parts installed: 3M 1080 CFS12 Carbon Fiber and G363 Gloss Dragon Fire Red
I know I said I was done vinyl wrapping... but I'm not. I had to re-do my hood. The Avery stuff was pissing me off and the red carbon fiber turned pink. I got refunded the $15 for the roll, then they changed the Amazon listing to say "for interior use only." Oh well. Decided to go back to old faithful 3M 1080 carbon fiber and used 3M 1080 Gloss Dragon Fire Red for �" pinstripes (as opposed to the �" pinstriping I had before). That gloss dragon fire red is some pretty stuff man. It's like.. a metallic candy red. Best way I can describe it. And it's not metallic in the sense that they put a metallic flake in the color like my interior, the backing is actually silver colored. I also re-did the interior red to match. Fancy pants stuff, yo.
Before. Bonus sample swatch. lol. Look how faded that crap is. After. much better. Had the red continue down below the grill this time. Little red fang looking bits.
September 12, 2019 - What's cooler than being cool?! ICE COLD! ALRIGHT ALRIGHT ALRIGHT ALRIGHT ALRIGHT ALRIGHT ALRIGHT Parts installed: Custom RAM induction for DIY intake
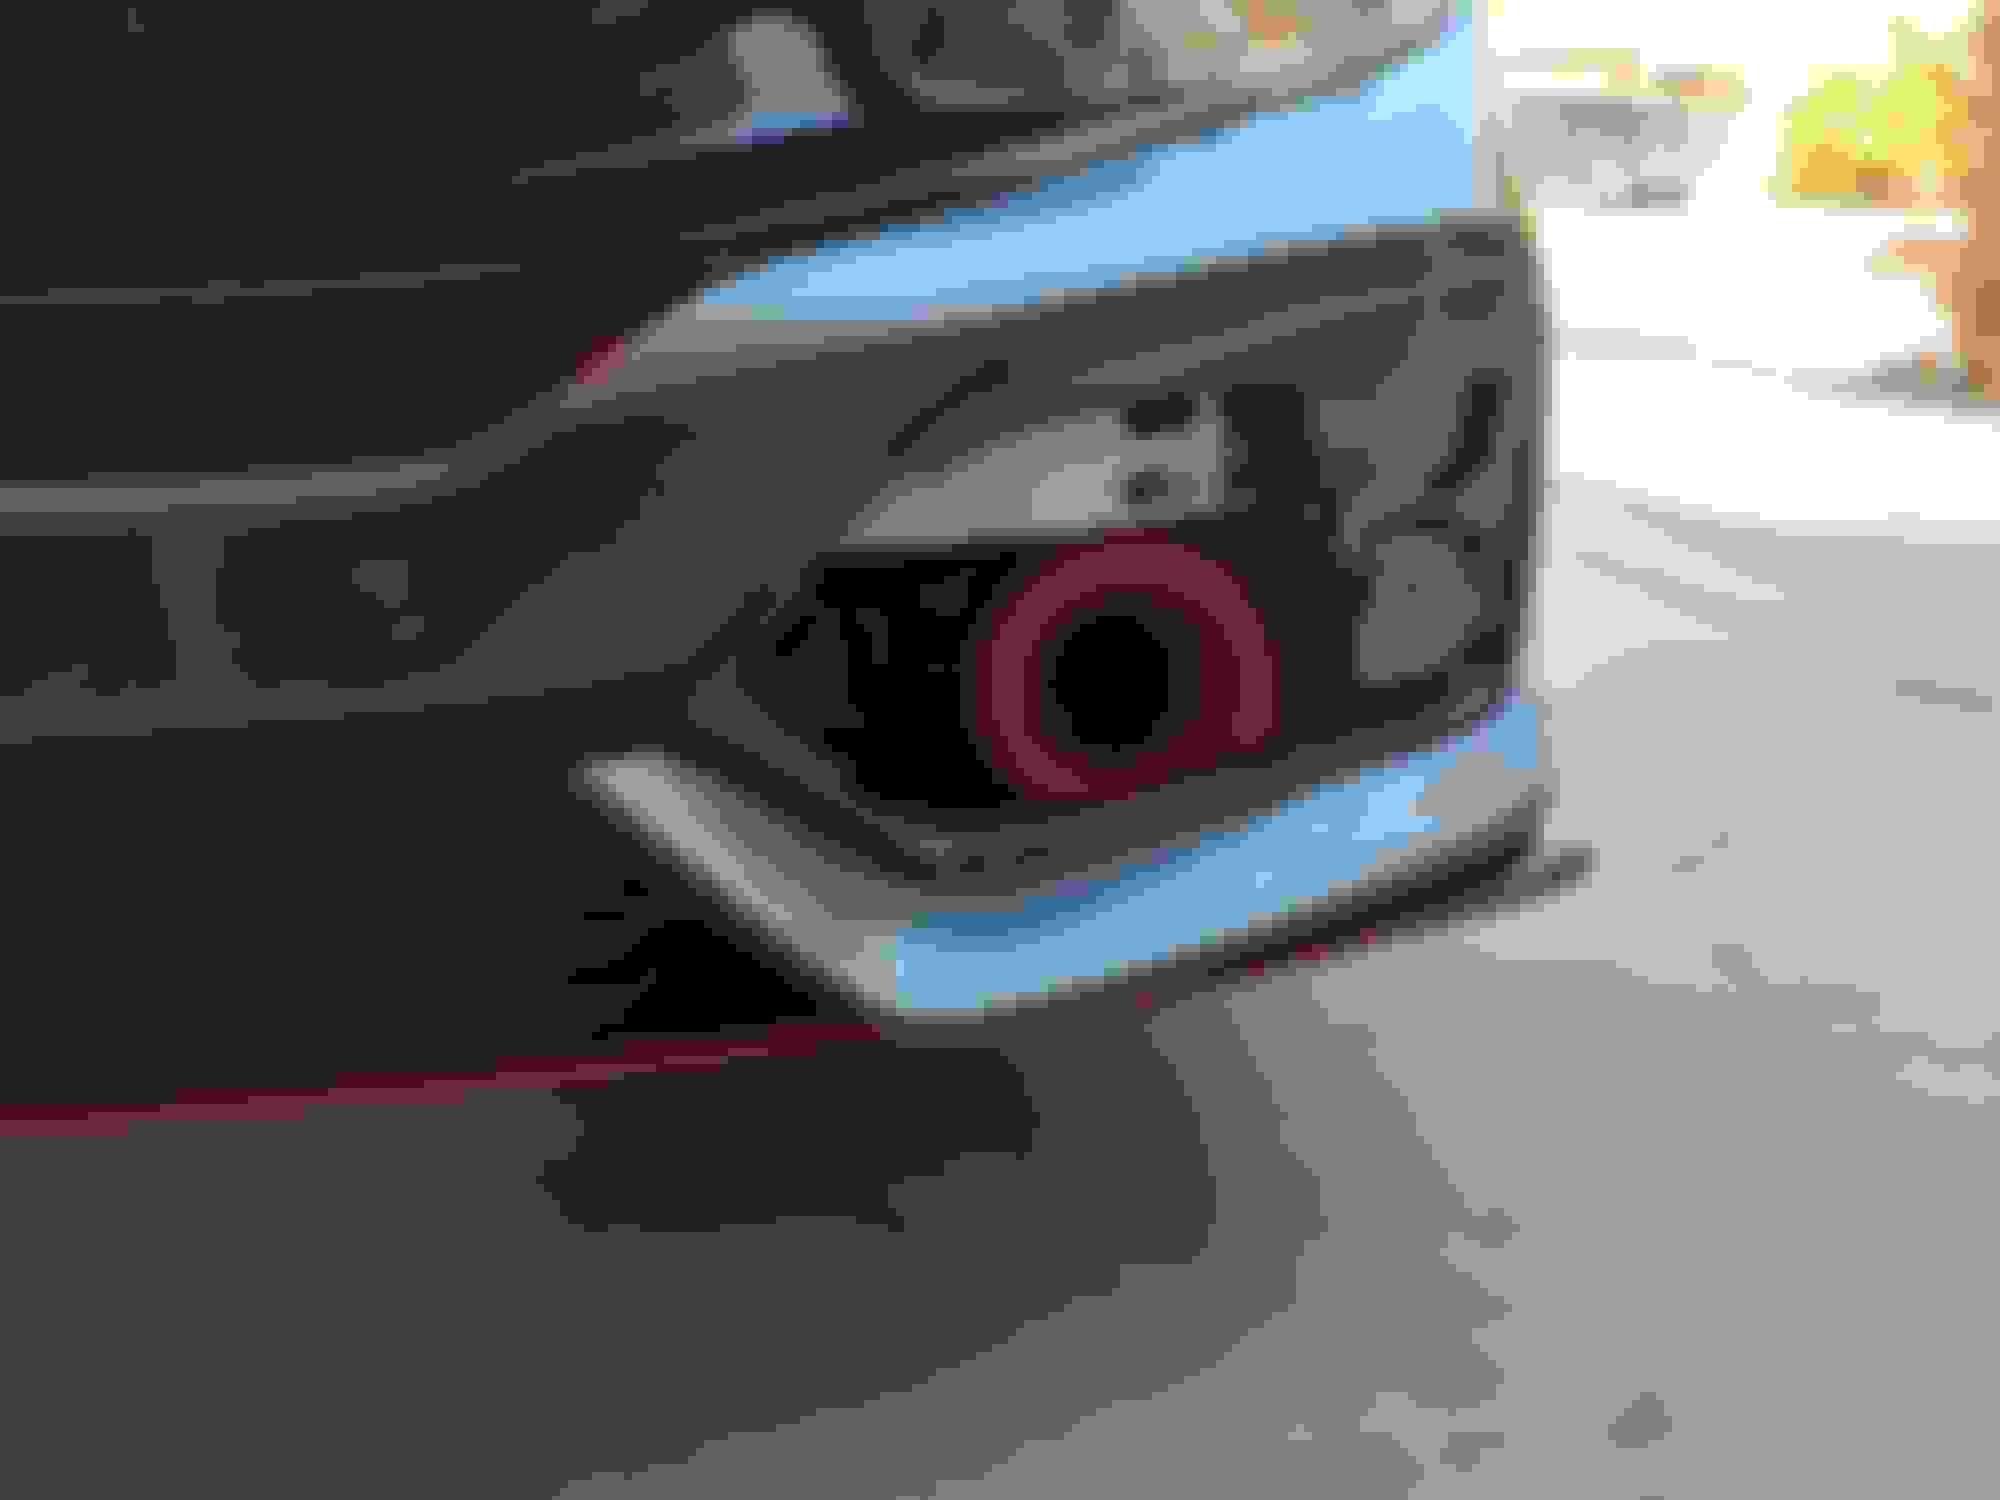
Okay, maybe not ice cold, but a lot closer to ambient than before Finished up the reason why I cut out the holes in the faux vent
Mounted an intake duct in the bumper. The stupid funnel thing was a TIGHT fit.
But, I got it sitting pretty behind the vent. It's kinda pushing up against the soft shroud next to the fog light, but it's posing no issues that I can see.
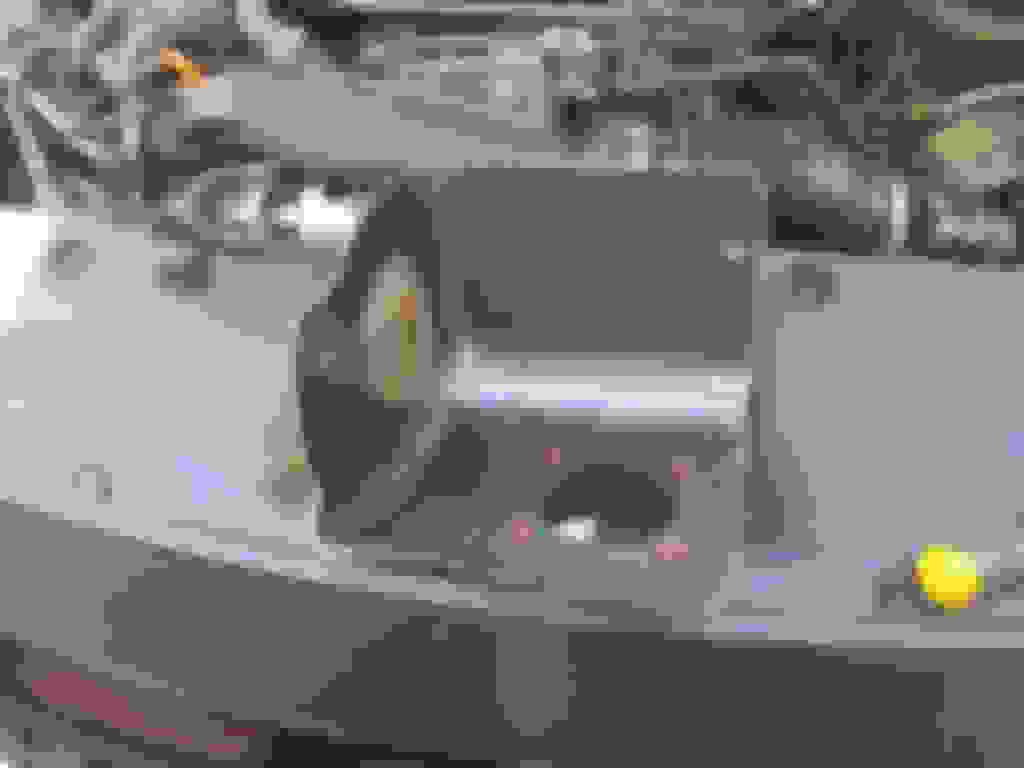
Inside the engine bay, I fabbed up a heat shield to perform 2 functions: 1) help radiate heat away from the intake filter and 2) serve as a mounting point for the intake funnel duct The heat shield box itself. Its made of 2 layers of fiberglass cloth, and 2 extra layers of resin, with some black mica powder mixed into the resin to give it the color. The right (passenger) side and underside have heat barrier tape (roomie gave it to me bc he had extra) and since I only had enough for those 2 faces, the backside has a layer of adhesive-backed silver carbon fiber (dry) that I bought a LOOOOOOONNNNNGGG time ago and never got around to using it. In fact, I forgot what I originally bought it for. lol. I have some rubber edge guard on the way and I'm gonna put that on the edges to help prevent delamination of the layers of fiberglass/rolling of the tape edges
And pics of just the heat shield installed
And the whole shebang installed. 2 brackets made, one on the front side. I doubled up the mounting points for the MAF bracket and the heat shield bracket. On the backside, I used a factory intake mounting point. Both brackets were made from aluminum stock bought from Home Depot, painted in black BBQ grill paint. from the backside of the heat shield, the duct going into the bottom of the box
and proof of function: painter's tape stuck onto the radiator cover, doubled over so it didn't stick to the filter. Leaf blower aimed right into the intake funnel in the bumper. Sure, this mod was really because I was bored and felt like fabricating something. lol. BUUUTTT, it did help quite a bit. Check out my thread on IATs
September 12, 2019, Part 2 - The vinyl wrapping never ends... Parts installed: 3M Scotchcal 70203 1/8" pinstriping tape)
So.. about that stupid gap in the vinyl on my hood....
Sure, there's a little bitty *** bump there, but it's covered now. You'd have to be looking for it at this point. I think the color scheme is great. I may be biased (Iron Man.. SF 49ers.. Vegas Golden Knights..), but it really does look good.
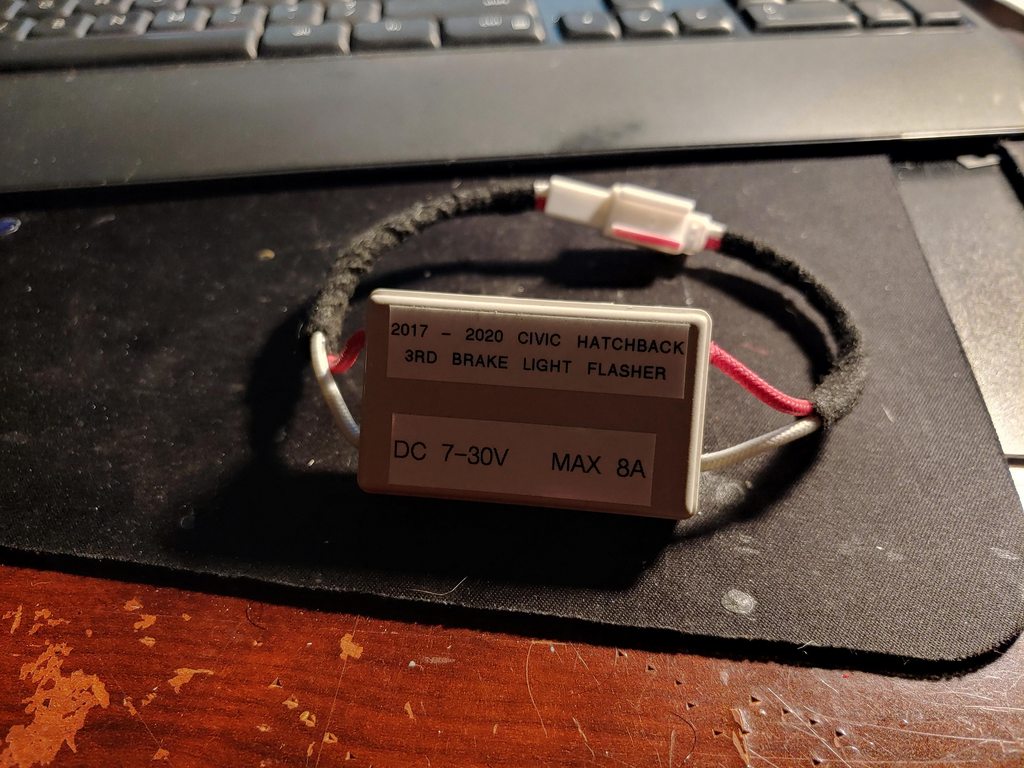
More OEM+ modification, this time a 3rd brake light flasher. Got it for $40 shipped from a guy on CivicX that sourced all the parts. If you're interested in one, it fits all 10thgen hatches, but he's backordered until November. He's also sourcing parts for at least the sedan (not sure if the coupe uses the same connectors). I also used my label maker to put the labels on bc the original stickers were doodoo. But I digress.
There are 16 different configurations, and the one I have it on is flashing 5 times followed by a "breathing" effect. We'll see if this garners any unwanted attention from the boys in blue. lol.
The statute
authorizes a motor vehicle to be equipped with one or more 5 supplemental stop lamps. The lamps may be mounted on the rear of the vehicle or 6 in the rear window, and may emit a flashing or pulsing light for not more than 5 7 seconds when initially activated. Additionally, the lamps: (1) may display a red, 8 amber or yellow light; (2) must be activated upon application of the brake; (3) may 9 be integrated into the high-mounted stop lamp of the vehicle, if any;
Yeah, this'll pulse for more than 5 seconds. lol. Oh well, It's an easy fix if I get cited for it
OEM (just for comparison sake):
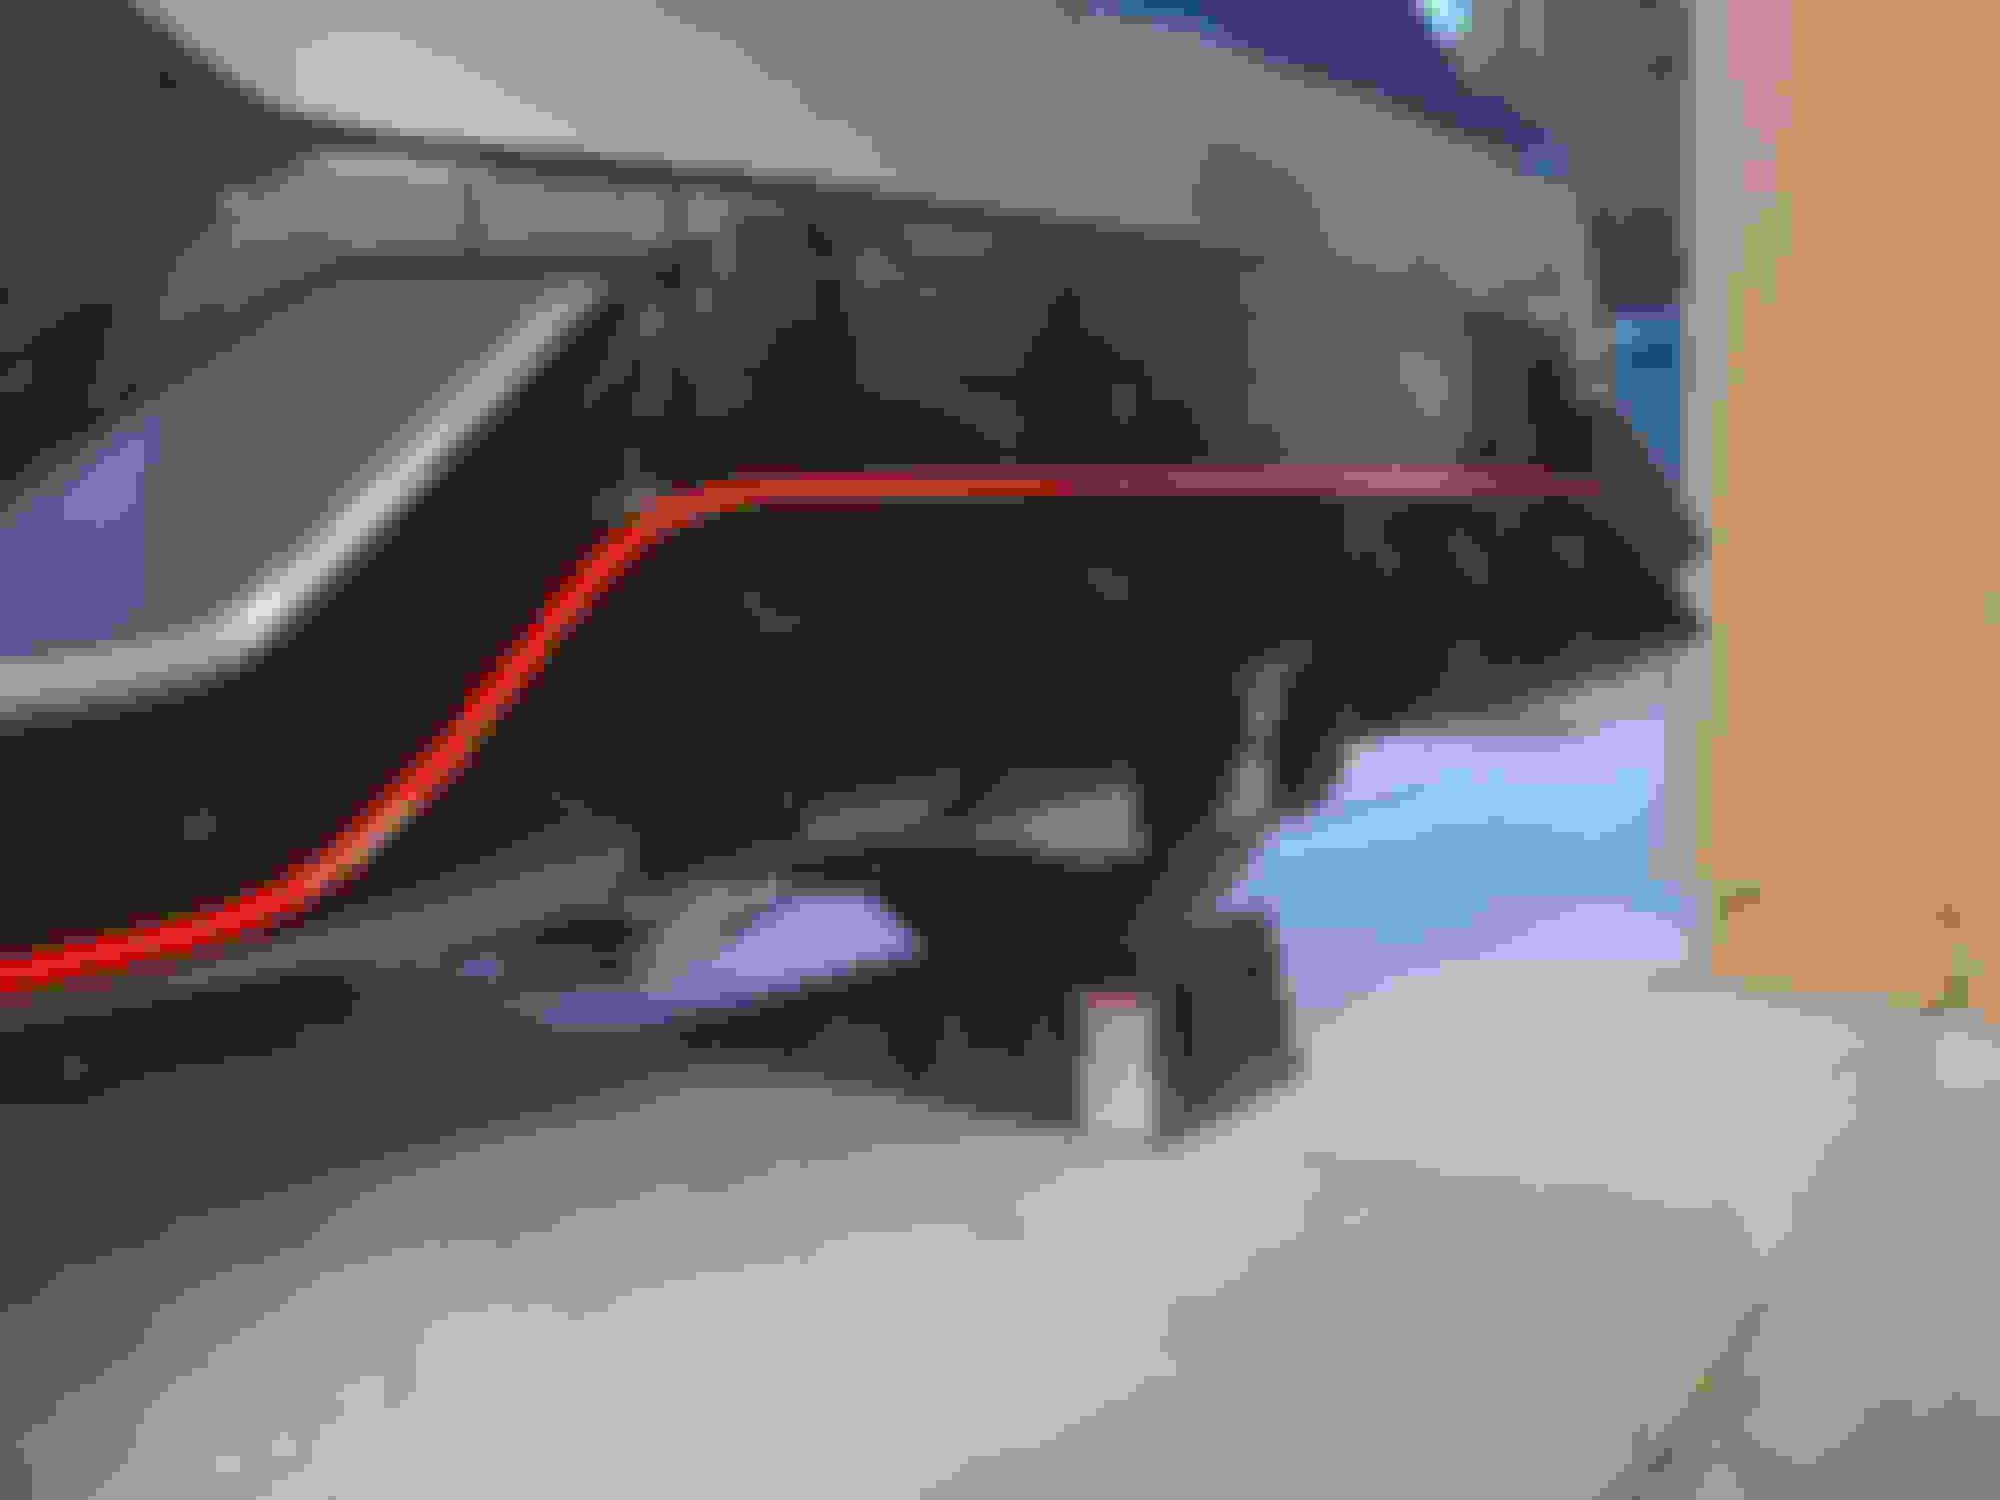
And with the flasher module installed:
and another angle. Realized idgaf if people know my license plate number. Do something.
October 24, 2019 - DAS BOOOOOOOOOOOOOOT Parts installed: DboyShiftz red BRIDE fabric CVT shift boot
CVT Shift boot? What? Why? Because ***** and giggles. Seriously. lol. I mean, it came with one stock, but boring pleather? C'mon man.
Shift boot is from dboyshiftz.com, red BRIDE fabric. $28 prolly could've gone somewhere else, but I can't own a car and not continuously tinker with it. I was going through withdrawals. haha
Also wrapped the shift indicator panel in some scrap carbon fiber vinyl I had laying around, just because. And painted the shift boot collar satin black because the chrome was most definitely out of place.
November 3, 2019 - I thought grilling season was over...? Parts installed: FKX Racing high flow cooling grill with red emblem Azumi Miyuki (oh god, I called her the wrong name.. Nobody say anything! RIP Azumi) gets to breathe a bit easier now. Or.. get cooled off easier.. You'll understand what I mean.
Got this honeycomb grille from fkxracing.com for $149.99 shipped! Ordered on a Sunday night, got the grill on Wednesday (with zero tracking info, I should add.. FedEx dude just showed up while I was working out in my garage with a big *** box), but there was no emblem included. Sent an e-mail and pondered installing it without the emblem (though it said it included it). Dude on another forum brought up a good point, and said "you didn't get what you paid for." Nevertheless, the next day, via USPS, I got a small box with the emblem, mount, and a random *** shift ****.
Anyways, got around to installing it today. Saw that a big issue regarding aftermarket grilles is the fitment on the seam across the top usually sucks, but this one lines up like a dream.
Sure, had to kinda coerce it in place (a la pliers to pull the tabs through), but no fitment issues here! Side note, you lose one bumper clip/mount for the under-headlight bracket. No big deal though. There are 2 more on that bracket, a couple on the bottom of the fender, 2 clips on the eyebrows, and 4 push-rivets holding it in place, along with a metric crap ton of clips, screws, bolts on the underside. It's not going anywhere. For you chrome grill people that want an aftermarket black grill, I'd recommend this one. It comes with piano black overlay pieces for the eyebrows, so it's not all mis-matchy.
November 6, 2019 - Hear her rawr Parts installed: OEM muffler delete/custom exhaust tips from exhaust shop
So, out of sheer boredom, decided to go to a muffler shop and get a price quote on the gundo mod. After talking with the dude, he said a muffler delete would be cheaper and easier, and sound just about the same. He had me at cheaper and sound just about the same. I asked about an appointment, and he said, "if you want, give me 30-40 minutes and it'll be done." I gave him 30-40 minutes and it was done. $150 out the door after tax for the labor and exhaust tips. I expected $150 plus the cost of the tips, before tax. I decided on stock-ish looking tips, but something that looks better. Settled on the polished dual slant tips. It has a little bit of drone at 2000 RPM, but only under load. If my foot is off the throttle and it's hanging at 2k, it's not noticeable. I weighed the OEM muffler assembly on a bathroom scale after I got home, and from where the exhaust pipe was cut, the whole thing weighs in the realm of 35lbs. Assuming the new setup weighs like.. 5-10lbs, she lost about 25-30lbs in her ***.
November 7, 2019 - Miyuki getting silicone implants parts Parts installed: Mishimoto silicone induction hose
Wanted to get an aftermarket intake pipe (the soft pipe between the MAF and turbo inlet) but couldn't justify the $50+ price tag. Then a dude comes along and has one for sale for $20. Yeah, I took it. It's a Mishimoto brand. Four layer silicone tube. I might have to tinker with the bracketry I made for my DIY SRI, but for now, it's solid. Just kinda.. coerced into place. I may trim a half inch off the end, too. We'll see. Also, dunno if its an actual thing, or because i's a bit warmer out, or just placebo, but the new intake tube seemed to kill a bit of the drone I had at 2000RPM. Exhaust still sounds good, though. New video below. Features cold start, a cyclist that prevented me from an uninterrupted take off from my driveway, and a bit of a blip of the throttle to hear her growl. Don't mind the dead *** trees to the right. lol
December 11, 2019 - Baby got back Parts installed: OEM FK7 rear bumper garnish (P/Ns Lip: 71502-TGG-A70 | exhaust finisher: 71509-TGG-A70) The swap was so damn easy. I almost wrote a DIY guide, but if you can't figure it out, step away from the vehicle. Or learn to watch YouTube videos. I put the *** end up on ramps because I intended on doing the swap without removing the bumper, then I watched a video and realized it's far too easy to remove the bumper to not do so. Anyways, here are a few pics. I'll snap more when it's light out. I paid $120 for the lip from a local Honda dealer and $7 for the exhaust finisher (the little piece that surrounds the exhaust tips). The lip comes with a factory piano black gloss finish. There are also plastic.. bracket.. thingies.. that are on the 2020s, but they're definitely not necessary for installation. That, and they're at least $25 per side. Yeah, screw that.
Raceseng? Don't they make those purdy but spendy shift *****..? That's some fancy packaging, laser cut foam and ****...
kevinhart_itsabouttogodown.jpg
But... Miyuki's rocking a CVT Josh.. What you getting at...?
I'M FANCY AF MOTHERFORKERS
It came in, guys, and I couldn't be happier. My unecessarily spendy raceseng ****. On a CVT. lol. I teased it in a DIY guide (that I will finish when I make V2.0)
A 3D cutaway the apparatus I fabbed up to make a MT shift **** work on the CVT is like this:
Basically, a 14mm ID stop collar at the bottom, a spring to keep upwards tension, and a sleeve (made of carbon fiber, in this case) that bolts to the shift **** adapter and limits up and down travel (to keep the shift **** from flying off) and limit rotational travel, as well. Simple, right? It was a bit of an ordeal, but I had committed to the fabrication at that point. I'll update my AT to MT shift **** DIY thread so you can read all about it. This isn't the place to discuss that. This is to admire it. lol.
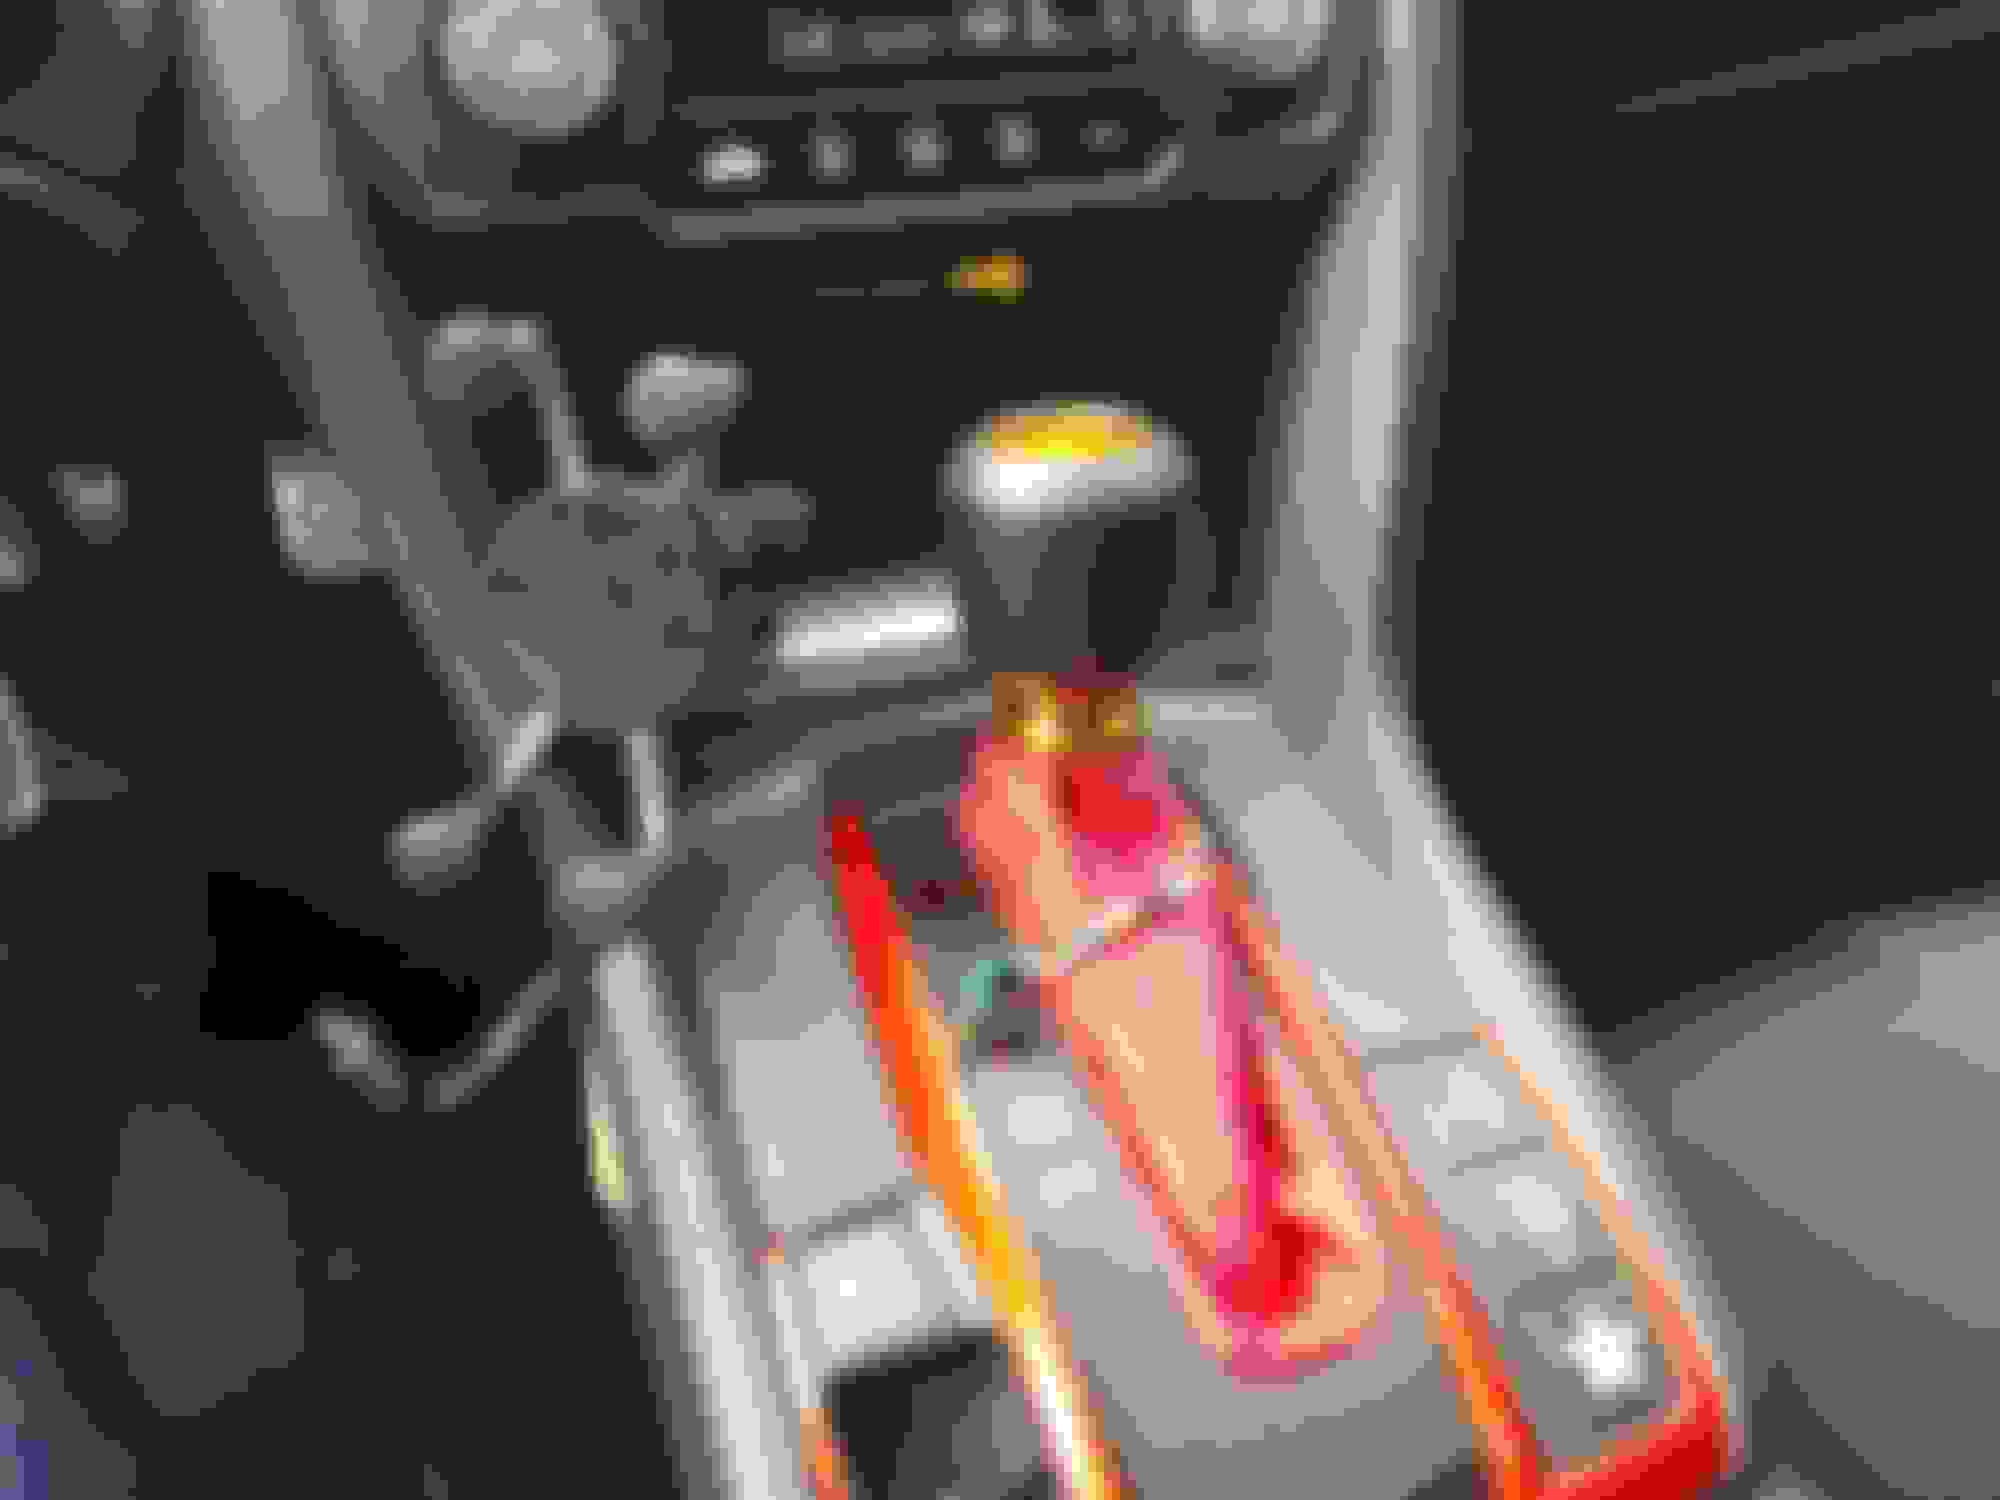
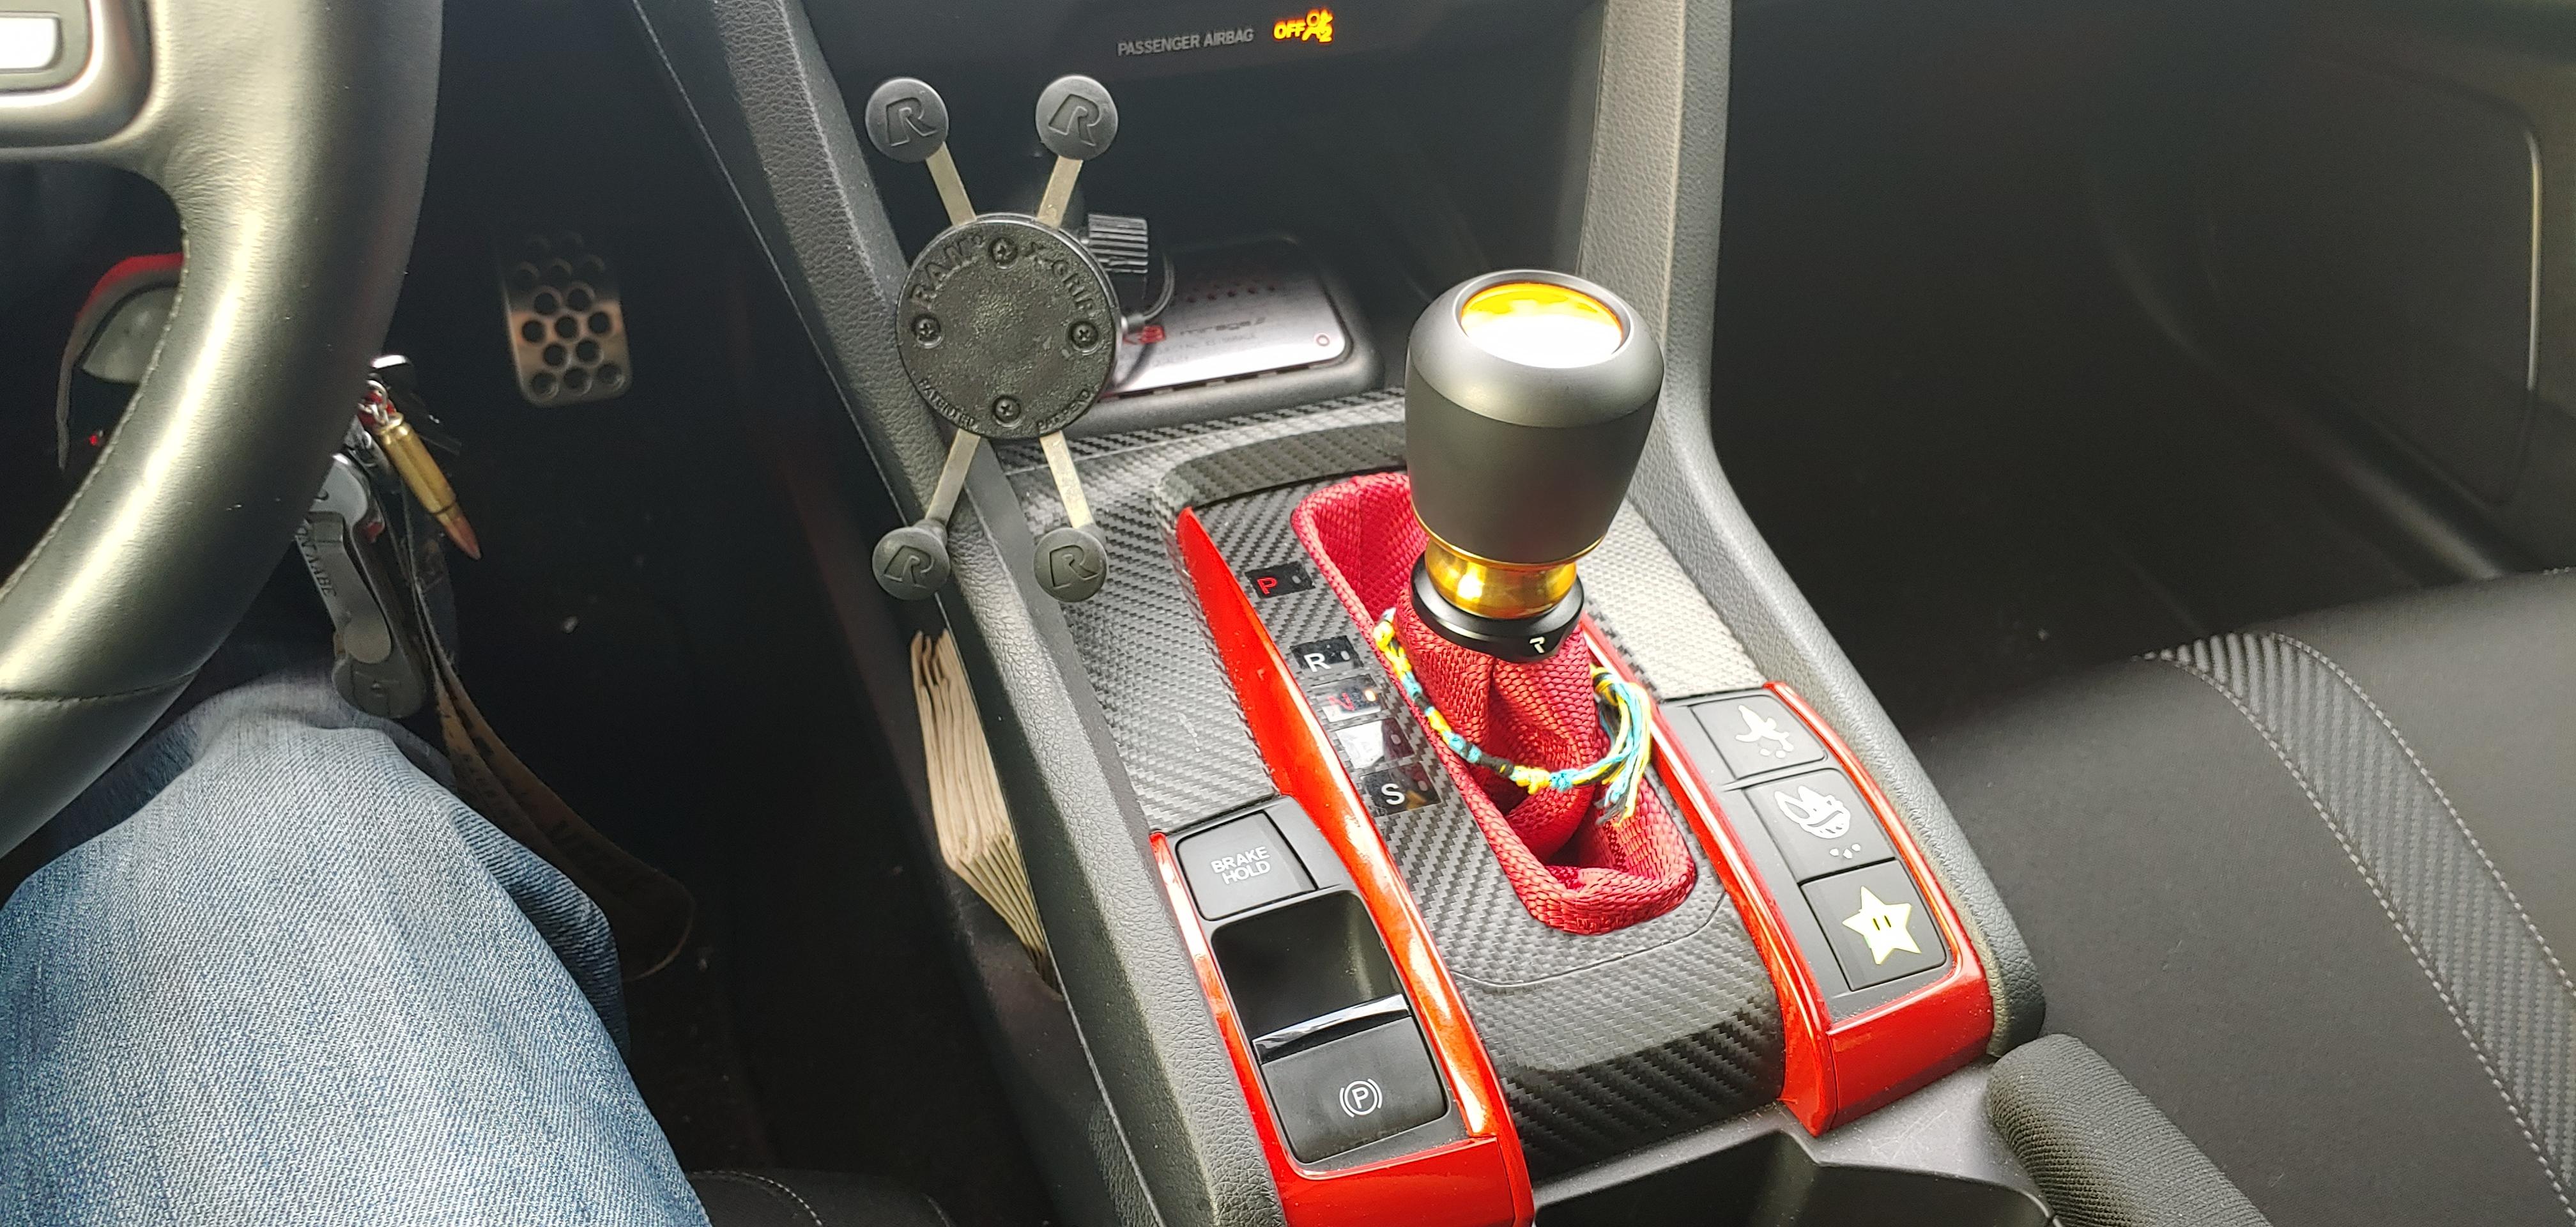
I went with a gold core because my color theme in my car is red/grey/black with a little bit of gold. It was inadvertent that my favorite sports teams (Vegas Golden Knights and SF 49ers) and Marvel superhero (I am Iron Man) kinda match that color scheme, but I can always claim the OG Mugen colors, too, as they were red, black, and gold, as well. Grey just bc my car is dark grey.
December 27, 2019 - LET THERE BE LIGHT and a couple black eyes.. - DIY guide here! Parts installed: TRS Morimoto Mini H1 retrofit (retroquick kit), 5500k bulbs and DIY blacked out housings) Today marks the... 4th retrofit I've done? One on some EM2 TYCs (then replaced with a much more pro version I bought from another member), one on some EM2 OEM third-party replacements, one on my buddy's EJ6, and now a set of FK7 headlights. I never would have guessed that they would make it easier to retrofit headlights than the Morimoto Mini H1's into H4 headlights, but lo and behold, TRS did it again. Part list is gonna be in the semi-DIY I'm working on. I always find myself taking advantage of TRS black friday coupons and got all my pieces for $164 shipped to my door. I planned on starting the retrofit at like.. 10AM, but it was cold and windy, and I pussed out. It warmed up a little at like noon, and decided to pull the trigger on doing it. I finished up and preliminarily aimed around 6PM (bc I had to let roomie borrow the oven for her cookies). I'm still rocking that preliminary aiming job bc.. well, I'll get to it in the mini DIY. I also took this opportunity to black out the chrome bezels using Rustoleum semi-gloss paint+primer black from Home Depot. I rushed it a bit with 2 heavier-than-I-should-have coats and got a little bit of running, but you'd have to be looking hard af to see that and any other paint imperfections. Damn the wind. when people opened the garage door. lol. But I digress. Anyways, PICS! The teaser from post 67 Driver's side. Stupid reflections.. Passenger side. You can actually see the chrome v black on this one. After preliminary aiming. Might be some slight rotational misalignment, but not enough for me to care about busting them open and fixing it. Not nearly as bad as my EM2 did when I installed those. I'll touch on why that is down in the DIY portion. That, and in the DIY, I'll explain why I'm content with just the preliminary aiming job I did.
January 7, 2020 - ♪ I wear my suuuuuunglaaassses at night.. ♪alright, that was a bit of a stretch.. I'll show myself out. Parts installed: PRO design MG Style window visors
Mmm.. visory.. I got these visors from ProCivic.com. PRO Design MG-style (Mugen style, for the uninitiated). I was on the fence about getting window visors bc a) I was "eh" on the look of Honda accessory/style visors and b) didn't really feel like spending $300 on genuine Mugen ones. Also read so-so reviews on the $40 ebay mugen style ones. Then read better reviews on the OEM style procivic ones, but was still on the fence since, well, OEM style. THHEEEEENNN, randomly viewing their product page for the visors (since I kept going back and forth) and saw "MG style" ones for the hatch for $82 shipped. Realized I was gonna buy them at that point so I ordered 'em.
Pros:
They look good. Well crafted
Tint on them is a nice black tint, as opposed to some purple or green hued ones you may see out there.
Install was a breeze. Only took me like 15-20 minutes
Cons:
Install is only 3M tape, compared to OEM/OEM style/genuine Mugen which uses 2 in-channel clips and 3M tape. Took her out for a test drive on the freeway almost immediately after install to see how sturdy the install was. Got her up to 80 and tested it out with varying degrees of window level, and when I went to go fill my gas tank after all that driving, they showed no signs of budging.
Curvature on the fronts seemed off when I first did a dry fit. Laying the back end of the visor, the front was about an inch off target. Actually wasn't bad when it came to install, though. I laid down the top edge and let it "curl in" a little, then flattened it down. There didn't seem to be enough tension on it to make it want to spring off any time soon, nor did it look like it was forced on.
The length on the rears seems a hair short. There's about a 3/16" "gap" on the for and aft ends of the visor if I have it centered on the door. You can see that "gap" on the 2nd picture. It's only noticeable if you're looking for it.
They have some dumb looking metal badges on the aft end of the fronts. Notice they're not on mine, however. They're only attached with a mild adhesive and I was able to get them off with the aid of a plastic spudger (cell phone repair tool). Some rubbing alcohol and a bit of rubbing with my finger and it's like they were never there.
(July 2020 update) After a while with hot Vegas summers (excess of 120F/48C), the rears didn't seem to hold up well to the heat. Started to get some heat deformation in the very center of the rears which caused the lower lip to rattle against the window. ProCivic was good about getting me replacements though. I still might upgrade to the genuine Mugen ones down the line after that though.
For people wondering how secure these are just being mounted with 3M double sided tape, since it was chilly out, I used a heat gun to warm up the adhesive prior to installation. Almost immediately after installation, I took her for a test drive. Got her up to 80MPH (128KPH) with varying degrees of window level. None of them flew off, lost an adhesive edge or otherwise made me think I was gonna lose one in the future. I tugged on the driver's side one when I was filling up and that sucker ain't going anywhere unless I want it to.
January 21, 2020 - FIRST MOD OF 2020. Miyuki got braces. Well, brace. Parts installed: OEM FK8 front subframe brace (P/N 50290-TGN-E00)
You know what the best thing is about sharing a chassis with the FK8 Civic Type R? FK8 Civic Type R chassis parts fit. Case in point, I have an FK8 rear sway bar that was a direct drop in on my OEM endlinks. Furthermore, the FK8 has a front subframe brace installed from the factory, whereas the FK7 doesn't. Well, fun fact, the threaded mounting points are there on the FK7, and, if I recall correctly, the Si coupe and sedan. I'm unsure if the the non-Si coupes and sedans are threaded, but has the holes for it. Also, one guy did the install on an EX-T sedan. I vaguely recall one model not having the threaded holes. I'll update this post if I find any validity on that.
Here's another cool thing about the brace: I paid $28.17 shipped from Majestic Honda for the brace and the two bolts. With the brace installed, steering response has improved, and it feels... sportier, to say the least. Mind blowing change? No. Noticeable change? Definitely so, especially if you're like any other driving enthusiast out there and you're attentive to how your car handles, especially after driving it for 2 years. The best quotes I saw on civicx about the brace install:
Car feels more planted and steering more responsive; feels like a Type R in Sport Mode (steering). Most satisfying $25 upgrade.
Now, I've never driven an FK8, much less in sport mode, but I can agree with the rest of the quote.
This brace shined at highspeed sweeping turns. It didnt increase corning speed like maybe a sway bar would. It doesnt increase the "limit" of the car. It does, however, make finding the limit and riding it much easier. The car felt settled much sooner during turn in and made holding a line much less work.
I can agree with the finding the limit part, and yet to be on any long sweeping highway parts. Will have to try that out at some point. There's one good one I like to push the limits of my car on whenever I head that way. Now, unfortunately, I didn't take any pics during install because a) I forgot bc I was using my phone to play the Golden Knights game and b) seeing how simple the install was, I didn't feel the need to take DIY pics. I managed to take one shitty pic after I had installed everything, It's really the only clean black metal in the area, but kinda hard to see, so I outlined it for you
February 28, 2020 - Miyuki got a collar!Parts installed: Raceseng shift boot collar
First addition in a while, but nothing major. Pre-ordered a shift boot collar from Raceseng back in November, and it finally got to me today (they did state they were shooting for Feb delivery time frame).
For those of you asking wtf the difference is.. It's the black ring under the **** and above the shift boot
January 4, 2021 - FIRST MOD OF 2021!!Parts installed: OEM FC1/FC3 Si springs (P/N's FL: 51406-TBF-A01 | FR: 51401-TBF-A01 | Rear (x2): 52441-TBF-A01)
Well, I didn't take pics bc I suck, and I was trying to get this done quickly, but a couple weeks ago, I nabbed a set of 10thgen Si springs. According to Vincent, the owner of 27WON, they are a direct fit to the hatch. I was on the fence of buying them new from Majestic Honda, then this dude on CivicX offered a set for sale for $30 picked up, and this dude lives 10 miles from me. Damn right I snagged those. The fronts were a bit of a bitch, and one of the strut mounting bolts decided to yeet itself into the abyss. Luckily, I have a **** ton of grade 10+ fasteners in my tool box, and found a flanged nut that fit perfectly. I legit spent an hour searching for that damn thing, pulled off damn near every splash panel I could, looked around all the moving parts, and nothing. Just. Nowhere to be found. In any case, took me about an hour for the front passenger side, 15 minutes for the front driver's side (because I did it second and knew exactly wtf I was doing at that point), and like 10 minutes each for the rears. Holy **** those rear springs are easy as hell to drop. Literally the 17mm bolt that attaches the control arm to the knuckle, the 12mm bolt that connects the sway bar endlink, and it pops right out. Well, I supported it with a jack so it didn't spring open like a jack-in-the-box. I will say, the drop isn't quite noticeable. The springs are physically about an inch or so shorter than the OEM Sport hatch springs, but they also have a higher spring rate.
OEM FK7 Sport springs: 126lb/in front, 158lb/in rear
OEM Si springs (~0.4"/~10mm drop compared to OEM FK7): 144lb/in front, 208lb/in rear
18lb/in increase in the front, 50lb/in increase in the rear. It is definitely noticeable in the *** end.
January 10, 2021 - MORE POWWWAAAHHH Parts installed:Phearable.net Ktuner Stage 1.5 Tune 2016+ Honda Civic NON-SI 1.5L Turbo Alrighty then kids, another installment of "Josh said he initially wasn't going to mod this one then does anyways".. I purchased a third party tune from Phearable.net. Here's the dyno they have on their site from an MT non-Si
and the estimated change for the CVT tune
I can feel the dampened throttle down low, almost like I have to push the pedal down a bit more than normal to get the desired result. It really makes [map 3 - 24psi] very daily drivable. It's really there to protect the CVT. As you can see on the projected dyno, John Vega limited torque to below 250ft-lbs (estimating around 245ft-lbs), which is the supposed upper limit of the CVT. WHP on this tune tops off at the same 220hp as the MT tune. On top of that, acceleration, down low and up high are stupid smooth. Once I get in the 3000RPM range, man this thing pulls. I don't drive around all Speed Racer style like I used to back when I was in my 20s, but this tune makes this car that much more fun. Like most tunes, 91 octane is a minimum requirement. Phearable recommends 93 octane, but 91 as an absolute minimum. I don't have access to 93 octane, nor do I feel like calculating how much 100 octane it would take to get me there (or paying $9 for a gallon of it anyways..). Only thing I've noticed as a detriment with regards to fuel availability is that I see knock control spike from the 0.49 (where it should be sitting) to 0.7 after a good pull. A good little bit of driving at around 0psi brings it down pretty damn quickly though, as opposed to the starter 21psi that took forever to drop back down. Now, that huge spike may seem like a lot, but the factory tune has the knock control sitting at around 1.0 (per KTuner). My understanding, a higher knock control will just pull timing a little bit to decrease a bit of power. Nothing super noticeable, tbh.
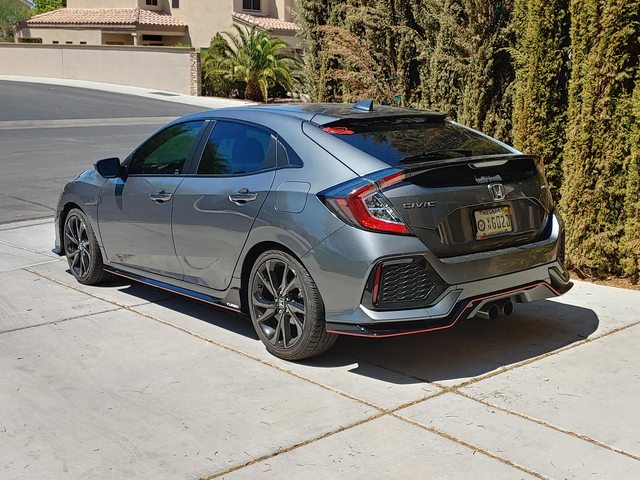
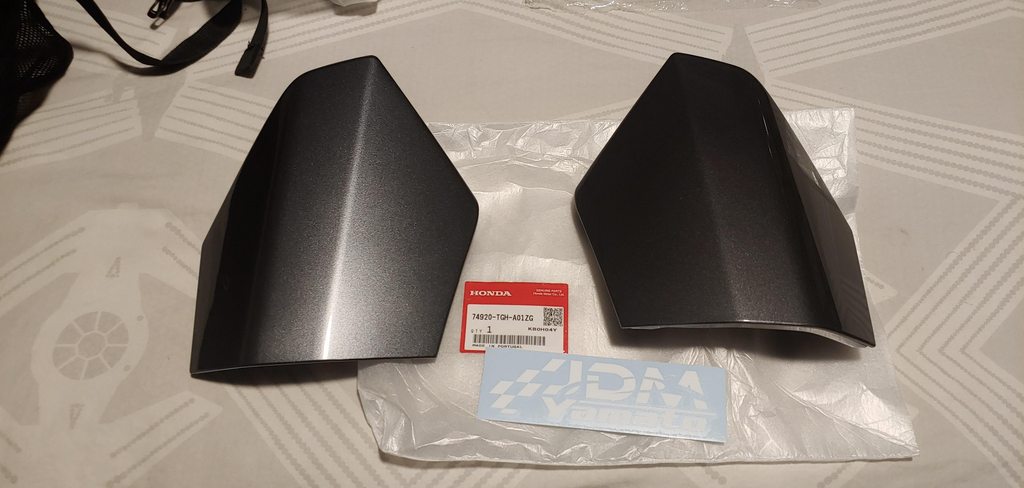
February 6, 2021 - Spiky headed vortex goodness! One step closer to fake-R status. lol Parts installed: OEM FK8 upper tailgate garnish (P/N's - Left: 74970-TGH-A01ZG | Right: 74920-TGH-A01ZG)
More aero today. In today's installment, I ditched the OEM upper spoiler and slapped on some OEM FK8 vortex generator winglet thingies (upper tailgate garnish, so Honda calls them) on my hatch. And no, they're not replicas, they're genuine Honda OEM
Peep the part number. And yes, I tossed the website's sticker in there on purpose. These things have a list price of $211 each and these came from Japan via jdmyamato.com at $35 each with $29 shipping. Just under $100 shipped from Japan for the pair. And yes, they have Honda stamps on the underside. I placed the order on Jan 28 and got them in just over a week later. More impressively, they left Osaka, Japan on Feb 3, and got to my doorstop on Feb 5th. About as close to overnighting parts from Japan as I can get
Install was a breeze, literally a minute per side to install. Uninstallation of the OEM wing took some brute force, but still took less than 2 minutes. The OEM spoiler is held on by 2 10mm bolts and 4 black clip things that don't like to come out. In fact, they broke on the way out. Luckily, the winglets come with new clips and grommets and install of these were literally reverse of removal. Now I just have to get either the FK8 spoiler or the UKDM Type R Sportline spoiler and the little vortex generators to finish out the look. I'll just grab some adhesive replicas for the smaller bits.
February 12, 2021 - Where we're going, we don't need roadsParts installed: Rally Armor 2017-2020 Sport Hatchback mud flaps
So, last week, washed my car. A few days later, drove through a small wet patch of road. Got to work and saw the entire side of my car covered in road ****. Been dancing around the idea of buy either OEM Sport hatch splash guards or Rally Armor mud flaps. Well, I went with the latter. They're expensive bitches (MSRP is like $157), but Amazon had them for $20 cheaper than MSRP, so I grabbed some black with red logo ones. Install takes about an hour, fairly straightforward. Mind the shitty pics. It rained for a minute, and the sun decided to poke its head in the worst spot to take pics. lol
May 13, 2021 - Redbull does give you wings...Parts installed: UKDM Civic Type R Sportline-style lower spoiler
I spilled a can of Red Bull in Miyuki, and something happened....
So, for the longest time, I've been eyeing the [expletive deleted] out of the UKDM Civic Type R Sportline spoiler (pic for reference). It's an FK8 spoiler that's not so much *BAM* in your face, and quite frankly, not very commonly seen in the US since, well, UKDM. I found a source on CivicX and dude was selling them at $650 shipped stateside (full lower spoiler direct replacement, no drilling, no tape). I thought that was a bit steep back then, so I held off (plus I had other financial obligations). Well, late 2020, Honda Europe damn near doubled the price, and dude is now importing the spoiler (again, full replacement) for $1200! Nah bruh. I'm not that rich. That money could almost buy me a rim and tire set.
Fast forward to early 2021, and I find what seems to be a replica on AliExpress for $100, but shipping brought it up to $180, and I'd be waiting until July to receive it. Better, but for a stick on spoiler and half the reviews saying "meh," and that shipping from China wait, I held off. Fast forward to Tuesday morning, and my buddy at work (that just bought a 2014 BMW 328i) talking about thins he found on eBay. On a whim, I search for FK7 spoilers. I found people selling the aforementioned UKDM FK8 Sportline spoiler, and those were going for $1300+ shipped. Then I find the same replica I saw on AliExpress. With the same stock photos. For $100 shipped. From Cali. You bet your sweet *** I hit that "Buy it Now" button. Today, fedex delivers me a big *** box. 15 minutes later, I have a lower spoiler. Now, fitment wasn't 100%. The curvature is ever-so-slightly off (curved a bit more than the OE lower spoiler by about 2mm on both distal ends -- not a huge deal), but the finish was pretty spot on with the OEM gloss piano black. There was also a small square (maybe 19mm x 19mm?) on the top they forgot to 100% level off when they painted it. Noticeable if you're looking closely at it, but not enough for me to make a big stink about.
Anyways, enough talk, here are pics.
May 21, 2021 - MORE VINYL!?!??! Parts installed: 3M Scotchlite 79904 reflective red �"
Yes, more vinyl. Well, kinda. I re-did the pinstriping on my lip kit because the front driver corner of my lip kit rubbed up against a curb at a park. Dude at the entrance gate (it's a protected Bureau of Land Management park) and what I didn't realize is the curb that was just forward of the kiosk shack thingy jutted out further than I had expected. Not much damage, just looks like someone took some 400 grit sandpaper to it. But, it also fcked up the pinstriping there. Also, I've been toying with the idea of reflective pinstriping. So I got reflective pinstriping. 3M Scotchcal, to be specific. I splurged for the good stuff. I also decided to try it out on the new spoiler, too. Not sure how I feel about it, as some times I look at it and like it, and other times I think it's too extra. It stays for now. In the daytime, it looks like regular red. However, at night it lights up like a laser beam when the light hits it right. I've also seen people do the vertical bits on the lip kit and I have not liked any one of those I saw, so that's not happening.
May 25, 2021 TRON LIGHTCYCLES NOW!? Parts installed: 3M Scotchlite 79904 reflective red �"
Greetings users *ahem* I mean....
Yeah, more vinyl. I had have a bunch left over from when I pinstriped the lip kit and spoiler with the reflective stuff, so I went (almost) full send and put a red reflective ring around the lip of my rims. I must say, it does help in covering some gnarly curb rash. Anyways, I'll keep the commentary short and sweet today and let the pics speak for themselves. There are gaps in the red ring bc that's where the little dips in the rim spokes are. That's literally the only thing that made this a pain in the ***. The 2020 Sport hatchback rims would be so much easier to do. I was staring at my roomie's 2020 Sport hatch's rims as I was doing mine and glaring in envy of the ease that those rims would've been. Anyways, without further ado...
Flash / No flash:
and some night shots I couldn't tell this wasn't in focus until I got home. lol May 30, 2021 mini update: did a small change on the spoiler pinstripe. Took off the original stripe that followed the bottom of the spoiler and re-did it to follow the top line. Gives it a bit more pop. I think that's what was originally bugging me about it And a shot from last night after it got dark And for comparison's sake
June 9, 2021 - Just a bit of a teaser of what's to come..Parts installed: blue *****
So.. got this in the mail (posting on the 10th, but technically got it in yesterday..). FK8 steering wheel (yes, it swaps into all other trims, everything else on the wheel-- airbag, controls, paddle shifters, etc. -- swaps right over) and 2017+ Accord Sport endlinks (Aluminum endlinks, beefier than the FK8 ones) going in.. .sometime..
Awaiting more vinyl (yes. more vinyl) to come in so I can wrap the silver on the steering wheel, then this bad boy is going in. The endlinks will prolly be tomorrow. More important things happening tonight (Game 6 Avs at VGK )
June 12, 2021 - MORE VINYL?!?!??!!!??!?! Yes, but a steering wheel, as well.Parts installed: FK8 CTR front lower subframe brace (P/N 50290-TGN-E00), 3M 1080 G363 gloss dragon fire red vinyl
Welp, I didn't install the endlinks yet. I underestimated the time it took to wrap the silver trim on the steering wheel. For those of you that want to wrap that, I'd advise against it. It's definitely to easy to wrap. So much wasted vinyl....... ANYWHO, instead, I just did the steering wheel today, and by golly, it's purdy. I was gonna make a DIY guide, but there's a really good one on YouTube:
Only special tools you'll need is a T30 torx bit (for the airbag screws) and a 10mm hex bit (for the steering wheel mount bolt). I used a 3/8" drive hex bit socket and an impact wrench to take it off. My torque wrench was buried and nowhere to be found, so I just used 1.5 ugga duggas to tighten it back down (36ft-lb is the spec, 6.9ft-lbs for the airbag screws). Without further adieu.... PICS!
For comparison's sake..
Yes, it's turned ever so slightly. There were reference marks on the steering wheel spindle, and I made extra pencil marks when I was removing the old one to make sure the FK8 wheel would be aligned.
Doesn't it just tie everything together? lol
June 17, 2021 - [Insert terrible Zelda/Link reference here, might change later]Parts installed: CV1 Accord Sport rear endlinks (P/N 52320-TLB-A00 x 2)
Allllllrrriiiggghhhtttyyy then... I finally got around to installing the endlinks, and for some reason I decided it was a good idea to do it when it was 115F (46C) outside. The ground was hotter than ****, but alas, I committed to doing the swap. Only took me longer than 15 minutes because I took a break to snap some comparison pics of the old vs. new endlinks. For those wondering, the endlinks between the FC1-4 Civics (2016-2021 coupe/sedan), FK7 Civics (2017-2021 hatches), FK8 Civic (2018-2021 Type R), CV1-3 Accords (2018-2020), and RW-chassis CRVs (2017-2020) are all interchangeable. The CRV and Accord use cast aluminum endlinks (same part number for both Accord and CRV), the FK8 are metal, also (steel maybe?), and the FC1-4/FK7 Civics use plastic endlinks. Every single one of them are direct drop ins across all chassis . Literally just a 12mm bolt (torqued to 28 ft-lbs and a 14mm nut (you may or may not need a 5mm hex key to remove the 14mm nut. Torque spec is 36 ft-lbs, good luck getting a crows foot in there).
Here's a pic (shamelessly borrowed from eBay) of the FK8 endlinks. Part number 52320-TGH-A01, list price on these guys is $56.36/ea ($39.22 at Majestic)
And here's my comparison pics of the FK7 vs the CV1 endlinks (FK7 on the left, CV1 on the right)
Now, why the Accord endlinks over the FK8 ones? Because I paid a whole $16.81/ea (plus shipping) for the Accord ones, that's why. Aftermarket endlinks are upwards of $100/pair, and I snagged these for $33.62 for the pair. That, and they seemed to be constructed similarly to the EM2 rear endlinks that had a nasty habit of snapping with a 21mm bar. I'd rather avoid those second-hand PTSD feels since I upgraded those endlinks when I upgraded to the RSX bar back then.Also, why you may ask. Did some research, and while the OEMs will do their job with an upgraded RSB (a good time to remind you that I upgraded from the OEM 16.5mm to the FK8 20.5mm RSB), they'll fail a bit prematurely. Figured I'd nip it in bud sooner rather than later. For the price of 5 venti Starbucks drinks, these endlinks can be had. A worthy sacrifice.
Oh, I also removed the rear window vent visors. They were warped something crazy. I'm just gonna save up until I can justify spending $300 on the genuine Mugen ones.. Or get plain *** OEM ones. We'll see.
June 18, 2021 - Miyuki wants some leather, I got her some leatherParts installed: RedlineGoods center console armrest covers (black Nappa leather with red stitching)
MORE NEW STUFF?!?!
Yes! Well, my hand was kinda forced. About a week or 2 ago, I done messed up and spilled a bit of superglue onto my center console armrest. Turns out, cyanoacrylate and the center console don't play nice, since a bit of smoke and a nice little divot formed in the foam/fabric padding of it. I looked up replacements, and just the one side piece alone costs $100 new from Majestic Honda, and there aren't any junkyards around that have anything newer than 2008s. eBay was a bust, too. That prompted me to buy some fancy pants stuff, particularly, RedlineGoods center console covers. I've had one of their shift boots in my EM2 and holy crap, that was some quality leather they sent. Figured I'd give 'em another shot, and I'm glad I did. I opted for black Nappa leather (which incurred a 30% upcharge over the standard leather) with red stitching. I also had a 20% coupon for signing up for their emails, so that helped. Still ended up being like $155 shipped (from Poland, $14.95 tracked shipping). They also have free untracked shipping for those so inclined to choose that route. Install was only a pain in the *** since I'm **** retentive and wanted to make sure everything was as perfect as I could get it. lol. Spray adhesive, contact cement, and a **** ton of patience is all it took. Well, that, and 2 bolts to hold on the center part of the center console cover. Nevertheless, this leather is so much nicer than the **** fabric Honda opted for from the factory. Anyways, pics!
June 25, 2021 - MORE F***ING VINYL!???!!!Parts installed: 3M 1080 CFS12 Carbon Fiber vinyl
This vinyl thing.... I just wanna wrap everything. lol. I had some scrap and decided to wrap the center of the rear spoiler with the same 3M 1080 CFS12 carbon fiber. We'll see how I like it in the daylight. It's just the top (didn't wrap it around the front or rear edges).
p.s. knifeless tape is a beautiful thing
Edit: I dig it in the light.
June 29-30, 2021 - SHE'S MINE MINE! Also, celebratory present for Miyuki!
So... I no longer have a car payment. I have an overly extra spreadsheet where I keep track of my hours worked, paycheck, budgeting, etc. and made a realization: "I have $195 left on my car loan and I'm window shopping for other pew pew parts that are far more expensive than that? Let's pay this bish off."
So, yeah, I made a payoff on my car, and assuming everything is copacetic, should have my title delivered to me in a few weeks. Paid her off 18 months early, no less, so hooray! lol
I mean, I knew I was gonna pay it off here soon, so I pre-emptively purchased a celebratory gift. There's evidence of what it actually is, but, for now, I'll just leave this here as a teaser..
edit: 糞。。。日本語をどうやって読むのか忘れてしまいました。。。
June 30, 2021 - MUGEN POWER! Well, aesthetic...Part installed: Mugen FK7/8 window vent visors (P/N 72400-XNCD-K0S0)
Anyways, the box had genuine Mugen FK7/FK8 window vent visors. The replicas I had warped badly (oddly, the rears only, and in the same exact spot on both), and, while still useable, they rattled something fierce against the window and had a fatty divot in the top center where it warped. Let's just hope the Mugen ones don't warp, otherwise I'll prolly be a bit sad and just keep on keeping on. lol
Overall, the replicas looked great. They definitely looked the part. They had extremely minor fitment issues that only someone as **** retentive as me would notice, but the positive is they were much cheaper and darker than the genuine Mugen set. If you didn't know they were real Mugens without looking that hard, you really couldn't tell. In fact, the car, with the Mugen visors, looks just about the same as it did when I first installed the replicas So Josh... why not just buy another set of the replicas if they look the same...?
Well... I wanted some gucci stuff, and I figure that if they're made to the same spec as the non-Mugen OEM ones, they'll put up with the heat. That, and there are a few differences:
None of the fitment issues I noticed with the ProCivic replicas
The fronts have a rubber piece that hovers just above the windows and is on about the back third of the visors. I'm pretty sure they're for water and wind deflection purposes.
The Mugens have plastic pins that connect to brackets that go under the weather seal. A bit of extra security as opposed to the 100% adhesive attachment of the replicas.
This sexy little bit on both of the rears:
Also, back off. I just paid her off and she deserves the best. Haters, bring it on. They make me happy, and she's my car.
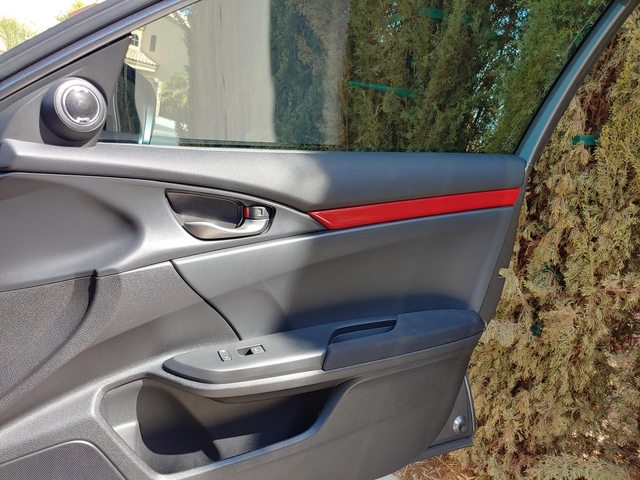
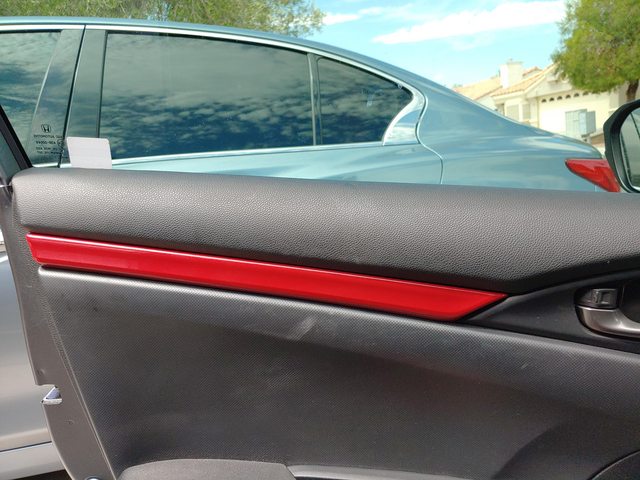
July 23, 2021 - Fuzzy wuzzy..Parts installed: microsuede overlay on the interior door panels
In today's episode of "Josh has a perpetual need to f--- with s---" I started wrapping my interior door panels. I know what you're thinking.. F'in more vinyl Josh...?
HAH, jokes on you sucker. Today's wrap is fabric. Picked up some 2-way stretch microsuede from etsy for like $20 ($11 before shipping and tax) and decided to cover up the ugly scratch prone plastic above my door arm rests. It'd be stupid easy if Honda didn't plastic weld the one section in place... I will say though, all 4 doors only took me a few hours. Burned through the first 2 Fast and Furious movies, and about 1/3 of the way through Tokyo Drift.
Before (passenger side for reference, yes, the sun sucks for pics sometimes)
Wrapped and laying on my bed for pics
Closeup
aaaand installed.
August 13, 2021 - A look at what's to come Parts received: 2021 Sport Sedan head unit
Got my first piece of my next project: a touchscreen head unit from a 2020-2021 Civic Sport. I guess these head units can sense what peripherals are attached and will grey out/not display functions that aren't present. They also have external AM/FM tuners, so I have that on the way, got it for $70 on eBay. I also have an OEM GPS antenna on the way. $25 for the Honda Hack (rooting the Android system), and I can add damn near anything I want to add to this. MSRP for the head unit alone is just about $2k, and I snagged this used unit (used for appx 1000 miles) for $250 shipped from a member on CivicX. There's also a dude on CivicX selling a harness for $80 to make it effectively PnP install. Only other thing(s) I'm waiting on are some antenna adapters
August 18, 2021 - ♫ 'Cause every time we touch, I feel the static ♫*eurobeat intensifies*Parts installed: OEM 2021 touchscreen head unit with volume **** + HondaHack
Sooooooo.. Everything came in, and in normal Josh fashion, I could not wait to install everything. So I installed everything. I was waiting on the dude that sold me the head unit to give me the radio code, but I got impatient (it's been a few days since I've asked) so I plugged my roomie's 2021 Sport Hatch VIN into the Honda radio code site. And it worked. I did a happy dance. Just FYI, list price on this head unit (screen + brains) is in the realm of $2800 + shipping from Honda. Using sites like Majestic Honda, in the realm of $1800-1900. On eBay, the screen alone is like $400, and the head unit itself is like $125. I nabbed this guy for $250 shipped. The downside to upgrading to this head unit, I needed to buy an AM/FM tuner (the OEM one for this head unit is external and mounted rear passenger side) and luckily the eBay shop accepted my offer of $70 shipped (OEM is like $250), and I bought an OEM GPS antenna (like $25). Add some antenna adapters, and a PnP harness some dude on CivicX makes for $80, and I got me fancy *** touchscreen. I also bought the HondaHack Pro version ($25) so I can do fancy **** with it, and I now have Android Auto functionality in my car.
August 30, 2021 - I like 'em round, and big, and when I'm throwing a gig I.... uh.. yeah..Parts installed: Raceseng Sphereology **** - translucent red
So.. PSA. Don't drink and internet shop, kids. Okay, I wasn't really drinking and window shopping. Just rifling through my e-mail and saw Raceseng (the company whose shift **** I used in my DIY **** adapter setup) was having 30% off discontinued items, which so happened to include the "series" (ish...) of ***** I used. Above, I have a Raceseng Topology **** in gold. What I impulse bought was a Raceseng Sphereology (same core, different delrin cover shape. This one is spherical instead of.. whatever you wanna call the other shape. Cylindrical? idk) in translucent red. I'll prolly swap them out as my mood changes, or I'll just make a stick of beatingpimp cane walking cane with the shift **** as the handle. Maybe I'll make it and give it to my semi-crippled friend (he has a degenerative spinal disc condition and has been prescribed a cane full time, even walking around his apartment). Or... I'll get it cerakoted the color I was hoping the gold would be and make the red one the cane handle. Or I'll swap the covers and have a red cylindrical one and a gold spherical one. Who knows? Unless someone wants to toss me an offer for the gold one with their cover of choice (retail is like $145, just FYI). Anywho, I installed the red one today. That is all.
October 16, 2021 - Buzz off! - Parts installed: 74700-TGG-A02 - fuel door lock actuator
Sooo.... a few days ago, I was startled when I locked my car and it made this loud *** buzzing noise coming from the back driver's side. Turns out, a semi-common problem with the 10thgen's is the fuel door lock actuator will half fail and buzz like a full auto airsoft gun (yes, I shot this video and used a 12-V power supply to test it out):
Luckily, the part is fairly inexpensive at like $30+shipping online, and takes all of 10 minutes to install.
For anyone that needs to replace it, this video I found was super helpful:
March 4, 2022 - Miyuki got a sidepiece - Parts installed: Unity Performance side markers, smoke with amber LEDs (with sequential startup) & peeking Anime girl decal (Sinon from Sword Art Online)
It's been a while since any progress has been made.. Work has been.. Interesting, to say the least. They decided that they wanted me as the new office manager for a 24/7 operation. I mean, I did use a Cricut vinyl cutter to make a new shifter assembly vinyl overlay (brushed black instead of carbon fiber), but I suck and forgot to take pics, post pics, or provide that update. Whatever.. lol
BUT, Miyuki got some new shinies today. Her smoked sidemarkers were looking.. meh.. to say the least. The insides were fogging up or something, and the Morimoto xB LED on the driver side started flickering. It was a bad look. Miyuki deserves better. I decided to pick up some Unity Performance sidemarkers. Stuck with the smoke motif and amber LEDs, but these LEDs are built in to the assembly, they're kinda Porsche style, in the fact that it's kind of an outline, and they have a sequential startup to them. They're kinda nifty. $50 bucks, but still kinda nifty.
Here's what they look like lit up:
And the fancy pants sequential startup (don't mind me shaking around. I was in a weird posture holding the camera out that far so I could still reach my headlight stalk):
OH! I can't forget that I also did this: I'm a bit of an anime nerd, and Sinon from SAO ended up being one of my favorite characters in that series. Girl with big gun and funky colored hair. Yep.
Love it or hate it, idgaf. It's my car. Not yours. Bring the haters.
March 21, 2022 - Miyuki gets a paddlin'Parts installed: Thenice aluminum shifter paddle extensions (red)
Nothing big today. Roomie (who also has a 10thgen Sport Hatch) was asking about interior cosmetic mods, and that prompted me to say screw it and buy these aluminum paddle extensions I'd kinda been looking at for a while. Half wanted to go with the red carbon fiber ones, but I didn't feel like spending $90. The aluminum ones were only like $30, so I said why not. Anyways, look at the shiny!
Rice? Maybe. Is it yours? No. Therefore, I have no fck's to give whether or not you like them. lol
y'know.. it's kinda funny. I never really liked having red on my cars before, but with the dark grey car, it feels right.
May 7, 2022 - *click click click click* ****... - Parts installed: Die Hard AGM Group Size 51R battery
Nothing huge, but the first thing I've done since March.. After 1638 days (about 4.5 years) of owning her, I had to replace the battery. Had enough juice to light up everything, but not enough CA to start the car.
Decided to go to Advanced Auto and drop in a Die Hard branded AGM battery. Let's hope this lasts at least 5 years. Almost went for their "top tier" flooded acid battery, but the price difference was only like $20. Military discount brought the battery cost down to $200 after taxes, so I'm not complaining. I def spent more on Azumi's Optima Yellow Top, and, from the looks of it, Optima ain't what they used to be.
June 29, 2022 - POP POP! Awww...- Part installed: Yokohama ADVAN A/S+ 235/40-18 tires
Welp, my hand was forced in this latest addition. As some of you may have known, I've been out of town a lot on work trips to Salt Lake City, UT. For some of the trips (3 of the 8 total I've done between April and June), I decided to drive my car from Vegas to Salt Lake City so 1) I could be flexible on when I leave, 2) not be subjected to flight delays, and 3) not have to rely on Lyft/Uber when I was in SLC. Whhhaaaaalllleeeeee... this last trip (June 28-July 5, yes I got home a couple hours ago), I managed to pop a tire. Luckily, it was because of a hidden *** pothole in the turn-in into the hotel parking lot. Also luckily, hitting the pothole just compromised the sidewall just enough to not fully pop the tire, just to the point where it finally popped it after I drove 100 feet then cut the wheel hard to back into a spot. That's when it became apparent that I popped a tire. Also luckily, there was a discount tire a half mile from my hotel. I made the guy's sales life easy by telling him I wanted a full set (since I had 62.5k on all 4 tires), even when he said, "well, the treadlife on the the other tires is still within acceptable range, but I'd still recommend replacing at least 2.." Me, being car guy, went into it already planning on replacing at least 2, then saying screw it and grabbed a full set. My "wishlist" of tires were, in order, Michelin Pilot Sport 4's, BFGoodrich Sport Comp 2, Firestone Firehawk Indy 500's. The manager overheard my wishlist and was like, "man, you want some nice tires, huh?" Unfortunately, I needed tires that day, or first thing the next day, and none of them were available in local warehouses. The manager then said he could get me a set of Yokohama ADVAN Sport A/S+ that day and for a better price than the 3 on my initial wishlist. You're damn right I went with those. I will say, they're noticeably grippier and quieter than the OEM Continental ContiProContacts.
No pics bc they're just new tires and I was busy af the last... week... Now it's sleep time.
p.s. also had to buy new front turn signals bc one of them broke on my 2nd to last SLC trip. The ones that broke were Morimoto X-VF transplants from Azumi
To be continued... >>>CLICK HERE FOR PART 2!<<<
Leaving this thread open if anyone wanted to comment on something that happened in this half.
Last edited by xRiCeBoYx; Aug 26, 2022 at 12:10 AM.
Re: Building up Miyuki (a.k.a. Josh's mod progress thread)
Bought more carbon fiber vinyl off Amazon to fix the messed up B pillar, and now it looks doesn't **** me off Also, a sneak peek of my current vinyl wrapping project... The goal here: eliminate the silver trim in the interior
Re: Building up Miyuki (a.k.a. Josh's mod progress thread)
Almost done with Project: Silver elimination reduction. When all is said and done, there's still gonna be silver on the radio, I think below the airbag indicator below the radio, and the interior door handles. As it sits right now, all that's left is the steering wheel trim. I also decided that the carbon fiber trim Honda included from the factory needed an upgrade, so I wrapped all that in the same carbon fiber vinyl. Now it all matches
Re: Building up Miyuki (a.k.a. Josh's mod progress thread)
Showed my buddy Matt @mdd1994 my interior wrap job. He suggested I start putting red on the outside. So I bought some red and put it on the outside. Added my own CTR-style pinstriping on my OEM ground effects.
Re: Building up Miyuki (a.k.a. Josh's mod progress thread)
Oh lord.. what did Josh get now...?
Turn signal LED mirror? No.. That's a lie...
No turn signals. That's definitely a lie. But they're blue. And the unwrapped one is a funky shape. That's right kids, convex side view mirrors from Suma Performance, and I had a coupon code for 15% off. They retail for $150, and I got these for $135 after shipping. These suckers are blue for anti-glare reasons and wide angle to kill blind spots. Also, they're hydrophobic (their website says hydrophilic, but that's wrong, too. lol) so water will should bead right off of them.
Before:
After:
The passenger side is a hair more convex than stock, and the driver's side is gonna take some getting used to. Not a terrible way to spend $135. lol
Re: Building up Miyuki (a.k.a. Josh's mod progress thread)
Here's the finished product, ladies and gents. $145 worth of vinyl and vinyl tools ($20 for the roll of VViVid red carbon fiber from Amazon, $85 for a 5'x5' piece of Avery SW900 black carbon fiber, $30 for a roll of 3M finish line knifeless tape, the last two both from metrorestyling.com), and about 3 hours of work (including surface prep and front bumper removal/reinstallation) and she's looking good af. Talked to a few of my buddies, easily would've been a $400 job to get it professionally done, and they would've done the same **** I just did.
A few notes
First, vinyl is a bitch to work with. Luckily, it's very forgiving. So many times I had it stick to itself, sticky side to sticky side, or I got hella wrinkles or creased bubbles, but pulling it up and applying some heat made it all good again.
I'm not sure I'm a fan of Avery's SW900 carbon fiber vinyl. I read that it lasts longer than the 3M 1080 I've previously been working with, and it's easy to apply (about as easy as the 3M was), but man, this stuff is like velcro when it comes to wiping it down. Lint free cloth? Nope. It'll make it leave lint flecks. If I had to do it again, I would've gone with the 3M 1080. At least that stuff I can wipe down without any repercussion.
This is the first time I've taken off the bumper on Miyuki. Gun to my head, I could have Azumi's front bumper off inside of 3 minutes. Not so much with Miyuki. It's still not difficult, but holy crap, it's like they added those stupid bumper clips because they drilled too many holes and said f--- it. At least I know how to do it though. I only broke 2 clips and lost one of the christmas tree clips in the process. lol
Re: Building up Miyuki (a.k.a. Josh's mod progress thread)
August 14, 2019...
Today, Miyuki was complaining about how whiny her "voice" was. Told her I'd take care of it. Out with the "meep meep" Roadrunner horn, and in with these:
That's a pair of Wolo Maxi Sound 320-2T horns, and they cost me all of $26 +tax at Pep Boys. I was gonna go with the Hella SuperTones or SharpTones since they have such a high rep, especially in the Suby world, and they look kinda cool, but after hearing them, oh hell no. To me, I couldn't justify going from a single tone whiny sound to a dual tone whiny sound. Sure, it sounds kinda "European," but I wanted something that was gonna get someone's attention, not make them think, "wtf, did I run over a fckin clown?" So, no. Hella SharpTones and SuperTones were a hard no from me, dawg. The only Hella horns I'd consider were the Hella Twin Trumpets, but these sounded just about the same for a lower price, and I could take them home today. Nabbed me a horn adapter harness from College Hills Honda, made my own little harness to run these in parallel, and called it a day. No extra relay, no extra wiring ran to the battery. These guys draw 7A combined, whereas the OEM horn draws 3.5A by itself. OEM fuse in the fuse box is 10A, so all good to go here.
Here's a couple size comparison pics:
specs comparison:
OEM horn: 12V, 3.5A, 110dB, ~400Hz tone
Wolo Maxi 320-2T: 12V, 7A, 115dB, 410/510Hz dual tone
Ever so slightly louder, dual tone, higher pitch, but the added acoustic increase due to the horn part as opposed to just a vibrating diaphragm. Sound a whole helluva lot better.
Hol up tho. This would be worthless without a sound clip. It'd be better if I had a comparison sound clip, huh? Well, here ya go, ya filthy animals. Before anyone says anything, yes, the video shot in vertical mode. Dunno why. idgaf tho, since it's purely for sound purposes only. And yes, I am wearing a headband bc it's hot as *****.
Re: Building up Miyuki (a.k.a. Josh's mod progress thread)
Real talk though, do I wanna ditch the OEM upper spoiler and install the FK8 CTR vortex generator/winglet set? I know a lot of our responses are usually, "its your car, you do you, boo" kinda things, but I want opinions on how it looks
Re: Building up Miyuki (a.k.a. Josh's mod progress thread)
Because y'all know how I like to do stuff.. Like, serious DIY mode... I wanted footwell lighting. I didn't wanna pay $90 for the Honda accessory footwell lighting kit that uses a weak *** single LED. And would you look at that, I have a roll of waterproof red LED strip lights.
18awg wire I had laying around, a $3 sheet of acrylic to make some mounting points, another $4 for hardware from Home Depot, and
for $10 on Amazon, and I was in business. Kinda. I don't wanna tap wires if I can help it. The only wires I've legitimately tapped in my car thus far has been the front turn signals to wire in some load resistors. On the 10thgen in-cabin fuse box, there's a little white, probably unused plug. It's there. I promise you. That plug is reserved for accessory accent lighting: Footwells, door sills, console, etc. So why the hell not use it for what it's made for?
Yeah, it's really hard to tell what you're looking at. Just pay attention to the ominous red glow going on. First pic is driver's side foot well. Second is passenger. There are a total of 6 LEDs that I installed, one 3-LED piece per footwell, and, in my opinion, a perfect amount of light. Not too much that you get blinded by it, but not too little that you can't tell it's there. I mounted the LED strips on a couple pieces of acrylic I cut from the sheet. On the driver's side, a straight piece a bit longer than the LED strip + quick connect thingamajiggers, and a couple 3/16" holes drilled into it for mounting points. I then poked holes through the carpet backing and used some aluminum binding posts from Home Depot to mount the LED-mounted acrylic... bar... thing.. to the carpet backing. Passenger side, I made an inverted t-shape from the acrylic. Mounted the LED strip on the cross piece and on the vertical piece, a single 1/4" hole for mounting. Pulled the bottom plastic cover from below the glove box, and there's a black screw that mounts the HVAC ducting. Removed that, put the LED-mounted acrylic upside-down T, and reinstalled the screw nice and tight. I would have done a DIY, but there is very little room to play with down there.
Last edited by xRiCeBoYx; Aug 19, 2019 at 11:42 PM.
Re: Building up Miyuki (a.k.a. Josh's mod progress thread)
Ya kno, I was gonna go with blue in this car, then everything just ended up being red. I might throw a bit of gold in the mix, too. Rims, for sure, once I get Miyuki a new pair of kicks. Either gold or broze rims, for sure. I'm not going black, gunmetal, white, silver. Gold or bronze for sure
Re: Building up Miyuki (a.k.a. Josh's mod progress thread)
So.. if you've been creeping on me seeing what I've been posting, I'm slowly working on a ram air induction sorta thing to get cooler air inside the engine bay. Well, stage 1 started today, and boy, it's a huge pain in the ***.
I initially thought about using a dremel, but I've never had any good luck using a dremel on plastic. Read over on civicx that some guy opened up every hexagon on the front fake vent using a box cutter, taking him 5 hours per side to do. I don't know how the hell he managed to do an entire fake vent in 5 hours, seeing as how those 3 took me about an hour or so. I need to find out his tricks. You can see faint sharpie marks on 6 more hexagons, and I'm only cutting those specific ones out, since the passenger side has those 9 cut out for the horn. Figured I'd make it symmetrical.
Also remade the brackets for my footwell lighting. The old acrylic I was using was really thin and was prone to too much flex and breakage. I thought getting thin acrylic (.05") was gonna be flexible but strong enough, but I was wrong and it messed it all up. Had some leftover .354" acrylic and .118" lexan as well as a random little metal bracket, and made new LED strip mounts out of that. Here's what they look like, driver's side on the left, passenger on right:
Re: Building up Miyuki (a.k.a. Josh's mod progress thread)
Made a little more progress this morning, Only took me an hour and a half for the remaining 6 holes I wanted to cut out. Figured I'd save my hands and look up how to use a dremel and not melt the crap out of the plastic. I literally googled "cut thick plastic dremel." Turns out Dremel has a tutorial video for how to use a dremel to cut out RC car bodies. Yes, I know RC car bodies are thin plastic, but their video didn't melt the plastic when it cut, so I figured it was worth a shot.
They recommended to use the detailer's grip and a 561 fluted cutting bit. Lucky for me, the dremel kit I bought included both of those. It still grabbed a bit and cut into some pieces I didn't want it to, but it was a whole hell of a lot easier to do than force a box cutter through 1/8" ABS. And yes, I found out that the faux vent is made of ABS by giving the backside of the vent a wipedown using acetone. I did it on purpose to find out if it was PE or ABS, and the almost immediate melting told me it was ABS, and I'm kinda glad it is. Was able to smooth out minor blemishes and fill hollow parts on the back with ABS glue I made a while back. Makes it a bit easier to figure out a way to mount the intake "stack" to the backside of the vent. At least these opened holes will allow air to enter the engine bay thanks to the architecture, so I theoretically should be seeing a slight decrease in IAT temps. Stage 1, done. Stage 2: fab up the inlet. Stay tuned, kids
Edit: just took a look a it installed on my car in the daylight. You have get reeeeeeaaaaalll close to tell it's not like that from the factory. I was only able to notice the Dremel marks when I was within 12" of it
Last edited by xRiCeBoYx; Aug 23, 2019 at 02:09 PM.