When you click on links to various merchants on this site and make a purchase, this can result in this site earning a commission. Affiliate programs and affiliations include, but are not limited to, the eBay Partner Network.
So my new to me pendulum mount has a very loud and annoying rattle at idle. From info on the forums this is not normal so I contact APR for some assistance. They want me to send it to them to be evaluated and said they will fix it (for free) if there is an issue. After I removed it I checked the spherical bearing and it has some play in it which I think is where the rattle is coming from. The previous owner said it was only on his car for 2 weeks but he had a TDI (diesel) Golf. APR does not list that as compatible (it does fit a TDI) and the guy I bought it from said his car shook way to much so he removed it. He didn't give me the feeling like he was lying and the part looked barley used but I think the diesel engine destroyed the bearing. I explained this to APR and they still asked if I could send it in. I removed it last night and will ship it out next week.
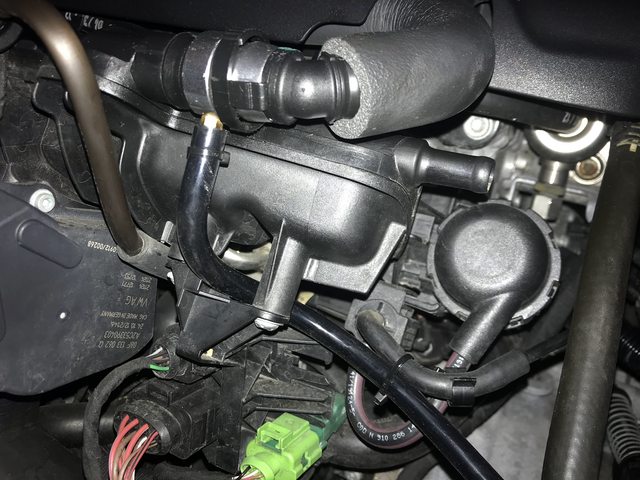
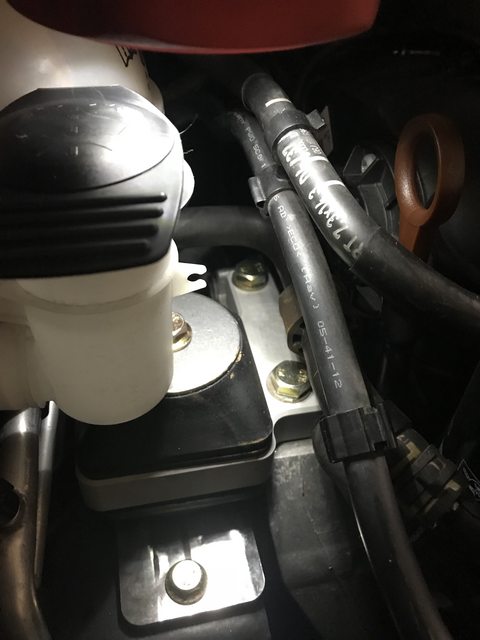
While removing the pendulum mount I noticed something shiny on my splash shield...oil, WTF!!! Started investigating and found that my boost line that runs to my gauge was sweating oil. The PCV prevents most oil from getting into the intake manifold but some still makes it's way in and my boost tap barb is on the bottom of the port so gravity helps it get in there. Ordered some nice silicone hose from Amazon and some small inline filters to help filter out any oil that might make it to the gauge. A filter is not "needed"with a mechanical gauge but it certainly won't hurt.
Placed the filter under the dash as soon as the line comes through the firewall.
Re-routed the boost line a little before connecting it to the boost tap at the intake manifold/PCV.
A GTI forum member sent me some free smoked side markers that he no longer wanted so I popped them in as well. I think I am going to vinyl match them to the body color. The smoked is better then the amber but I think if it matched the paint it would look better.
Scored some used "Monster Mats" for the winter. The carpet mats look better IMO, but if we get snow these will not get salt stained and will hold up better over the winter.
Picked up a black radiator cap and washer fluid cap. Cleans up the engine bay a little by keeping all the colors cohesive. Ehh for $20 bucks why not.
Mailed my pendulum mount to APR today. On standby to see what they find.
Happy New Year too all!! Hope your holidays went well.
So I had some time off recently and decided to finally take the plunge and go stage 2. Stage 2 consists of a 3" down pipe with hi-flow cat. I have been Stage 1+ for abour 12k miles and it has been a blast. From a fun or power perspective I did not feel the need to upgrade but I had the time so figured it would be a good time. The install went pretty smooth with the only issue really being a stuck nut on the OE downpipe. After some friendly advice from a golfmk6 member I ran to HF and bought an extra long wrench which was just the extra torque I needed. The turbo flange stud ended up coming out with the nut but it didn't break!! Went to the local dealer and bought a new stud along with 4 new nuts.
OE vs CTS 3"
Everything bolted up.Fresh nuts, 1 stud and gasket.
Installed a J-spacer on the downstream oxygen sensor to keep the CEL off and to pass emissions readiness. SO far no CEL but I have not checked my rediness.
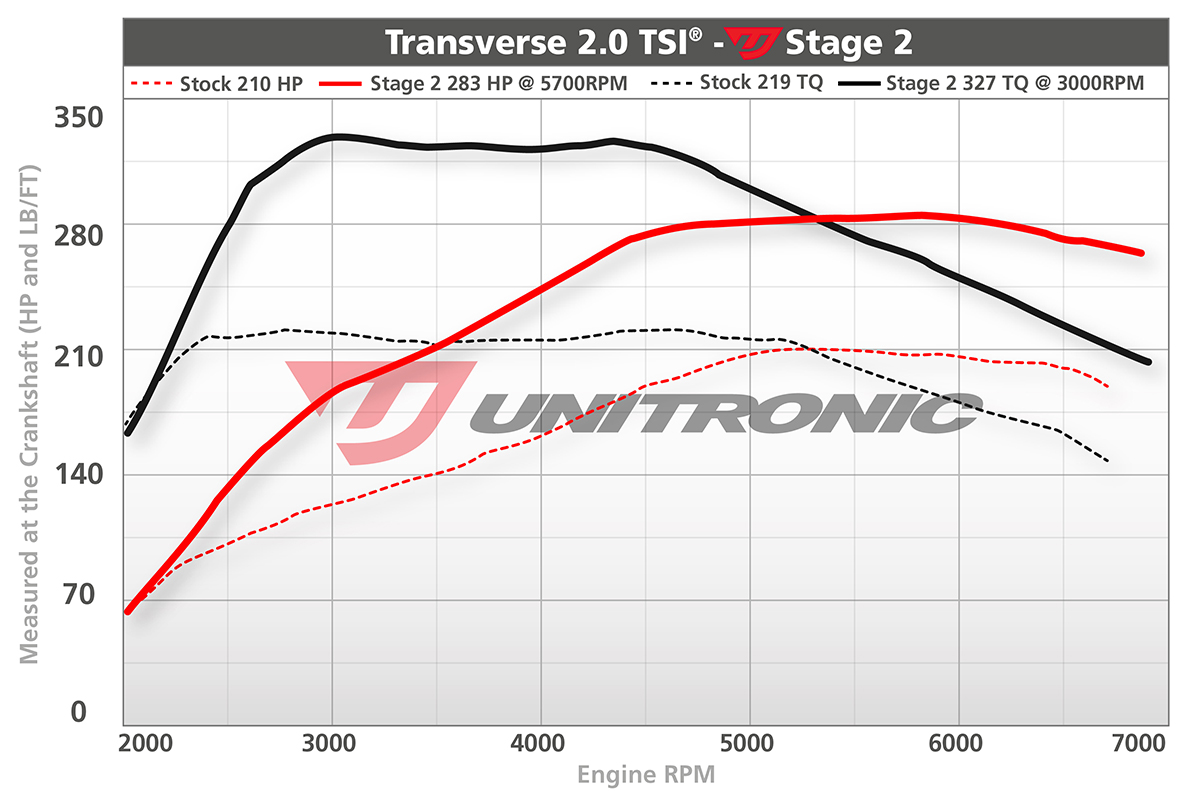
Yes that's the one I want!! Give me more power all mighty programmer!!
Unitronic dyno graph showing potential gains. Not sure what other mods are done to obtain these numbers but the only thing "required" for stage 2 is a downpipe. PSI is bumped up to 20 from 18.
Initial impression are holy hell so much torque!! The power just keeps coming and the turbo feels like it spools faster. Rev matching on downshifts seem to come quicker. Oh and the extra throaty sound from the exhaust is awesome too. It sounds so much meaner now!! I might upgrade to an actual cat-back as the OEM exhaust with the res delete can be a little high pitched between 3k-4k. I like it at the moment but I think I will want a more refined sound eventually.
During my initial test drive to make sure everything was okay I down shifted into 5th to do a pull. Upon mashing the gas the car slowed down and I was greeted with a hot brakes sort of smell :-|. Yeah the clutch is starting to slip now with the added power. Completely expected especially seeing as I put 12k miles of 1+ through it. I will "baby" it until I get the clutch replaced.
So I am now in the process of piecing together an upgraded clutch. I would like to retain the OE DMF so that limits my options and the best one for the money seems to be an OEM unit that you can piece together for under $900. This OEM unit can handle upgraded turbo levels of torque. I have called the dealer and NGP out of Aberdeen, MD for quotes. Dealer wanted $900 and NGP wanted around $650. I am contemplating doing it myself but am going to read more of the DIY's that are out there and see if I can get some time to do it. Have never done a clutch but having the correct tools and staying organized seem to be the key. Will also replace the rear main seal while it's apart.
Oh and APR got back to me about the mount that I sent them. The tech that I talked to said that QC checked the mount and it was fine. They even mounted it and could only hear a slight rattle. There is definitely some bearing slop and apparently what the QC department see's and what the tech's see conflict with each other. They decided to send me a new mount free of charge which I think was great on their part. I told them I purchased it used and they still stood behind their product. Go APR!!!
Small update. I bought a DEI soft chirp siren from eBay a while back and finally decided to install it. From the factory the GTI comes with 2 regular horns and one alarm horn. The alarm horn is what goes off when you lock the car. Well since it is a horn it is rather loud and annoying. It's not like most cars where you press once for silent lock and twice for confirmation, it always honks when locked unless you disable it with VCDS or OBD11. One of the first things I did when I got the car was to turn that feature off. So for a while it has been disabled but I do like having a confirmation sound. I discovered through the forums that you can just wire in a soft chirp siren in place of the alarm horn and problem solved. So I got work on it this past weekend and am very pleased with the results.
The factory alarm horn is mounted in the fender well toward the cowling. It is a tight fit with the siren since it is much bigger then the stock disc horn so I mounted the siren in the bumper behind the fog light. I ended up removing one of the 2 regular horns and modifying the bracket to mount the siren. This was kinda by mistake as I thought the horn behind the fog light was the alarm horn (no the car just has a low and high regular horn). So after locating the correct horn I just left the siren mounted in the bumper and routed the wires over to the alarm connector. Soldered and heat shrunk all my connections so it should hold up great.
Here is the stock bracket.
I ended up just cutting off the one section and welding a piece of 1/8 stock to the mounting bracket.
Painted it so it didn't rust and tapped 2x 10-24 holes to mount the siren. Ignore the welds, it had been a while lol.
Overall a very cheap effective mod. The siren cost like $10 off eBay and I already had the other supplies.
Still piecing together my clutch. I have the throw out bearing, clutch plate and the pressure plate is on it's way. Still need the flywheel, rear main seal, hardware and miscellaneous tools (transmission jack, engine support bar, 24mm triple square). I am seriously contemplating adding an LSD while the transmission is out. Might call a shop to see how much it would cost with me giving them the transmission.
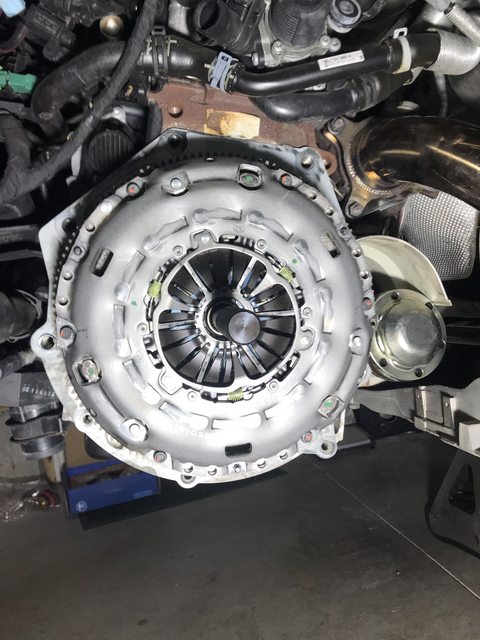
Got all my clutch parts. All new so I don't have to do this again for a while hopefully.
TT-RS pressure plate
Golf TDI clutch disk
Standard GTI DMFW
Revised all metal throw out bearing
USP Motorsports stainless clutch line while I am in that area
Waiting for my billet rear main seal and misc bolts. Still need to get an engine support bar and maybe an extension or two. Might drain and fill MTF with RedLine. Got a quote of $730 to install an LSD so I will be passing on that at the moment. I will be doing the clutch install in a few weeks.
Trying to score some coilovers too. I'll just tell the wife they are for the clutch
Took a drive up to Newark, NJ which is basically New York City to pick up some coilovers from a forum member. BNIB and a good discount from new. They are KW's without the Inox coating on them. Should give me a nice finger gap all around and keep it comfy for daily duty. I'm hoping to get it installed along with my clutch but I'll see how the clutch install goes first.
New clutch is installed. First time doing a clutch install and it was a pain the ***. The most difficult part was getting the transmission back on. Everything else was pretty straight forward. I tagged and bagged parts and hardware as it was removed so that I did not loose anything. Had a really hard time getting the transmission back onto the engine until a golfmk6 forum member offered some suggestions. I also drained the MTF and replaced it with new VW MTF. Attempted to put on a SS clutch line but it kept leaking while I was trying to bleed the system so I put the OEM one back on.
HF engine brace did a great job:
Cleaned the bell housing out. No oil but had clutch dust I'm guessing. The slave cylinder is incorporated into the throw out bearing.
Installed an upgraded rear main seal while I was there. This billet aluminum piece is really nice.
New DMFW< disk and PP installed and lined up.
A cool tip someone on the forum suggested. Worked great for keeping track of the different sized transmission bolts.
Took it for a short 3 mile test drive and everything feels great. Pedal effort is increased by about 30% but engagement is nice and smooth and there is no chatter. If it wasn't for the increased pedal effort I would have not known it was upgraded. I will do a 500 mile in period before running it hard.
Coilovers are next on the list. I'm thinking in a week or so depending on work.
Clutch is broken in and it feels awesome. Finally got a chance to really hit boost and see how stage 2 feels and it's amazing!!! I am still monitoring my master cylinder fluid and oil for any leaks, so far it's all been good.
I have been in contact these past few weeks with a company who was looking for some people to do some beta testing for a franken turbo that they have developed. It is a cheaper alternative to upgrading to a K04 (Golf R) turbo and is a bolt on addition to a stage 2 tune. One member on the forum did some testing for them and got a 36 WHP increase from swapping in the fraken turbo. I reached out to the company to see if they could use me for testing. They said yes since they have not tested Unitronic software with the turbo. I first had to do some boost and engine load logs for them to see if my tune was capable of providing more then the the stock turbo can handle. Turns out my tune does not leave much room for growth as it is a more conservative tune (one of the reasons I chose it). The company was unsure how the fraken turbo would behave seeing as my boost and engine values are close to what the computer is telling the car to do. I decided to not get the turbo kit from them as they were not able to really guarantee any gains and the discount was not the best after factoring in the 2 mandatory dyno runs.
The logs just for fun.
Put the car up on jack stands last night to install my coil overs and did not have a 14mm triple square bit to remove the shock mount bolt. WTF!!!! Ordered a socket and will try to do the back tonight depending how I'm feeling.
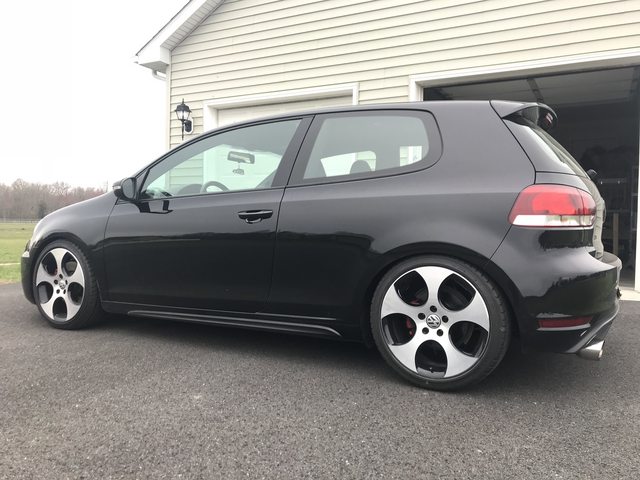
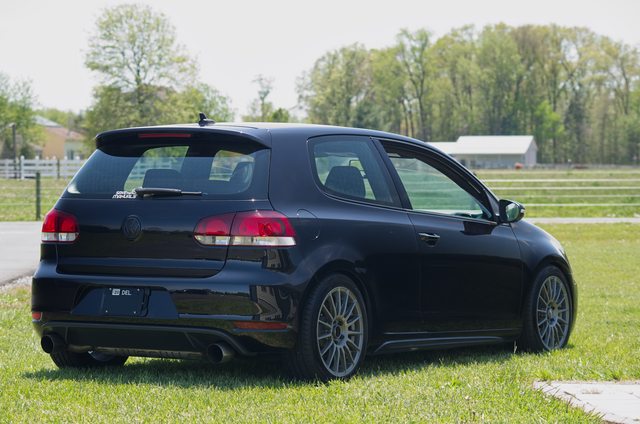
Coilovers installed and she is riding amazing. Nice balance of sport and comfort. KW knows how to valve a shock. Need to dial in the rear as it is sitting too low but will give it some time to settle. Alignment is scheduled for Tuesday. After that I will buff the paint and hopefully go out and get some good DSLR shots now that it is warming up. Should be able to find lots of places since everyone is staying home.
On the look out for Euro LED tail lights to finish up the rear and meth injection.
Installed Black Forest Industries stage 1 mounts over the Easter weekend. I had bought the transmission mount a while ago used and have been on the look out for a used motor side mount but one never came up. Decided to just buy a new one for the one side after seeing that the engine was rocking so much it was starting to wear a hole in the intake tube.
Should have done them sooner. The stock ones were not tore but the added stiffness really helps get the power to the pavement. Added very little NVH if any. I got the most added NVH when I put the dog bone insert in with the stock mounts. The mounts are beautifully made. It's a shame the transmission one gets covered up by the battery and intake.
Also got out the DSLR for some front yard pictures. I really need a polarizing filter.
Will be transitioning into summer mode shortly. Summer wheels are washed and waxed.
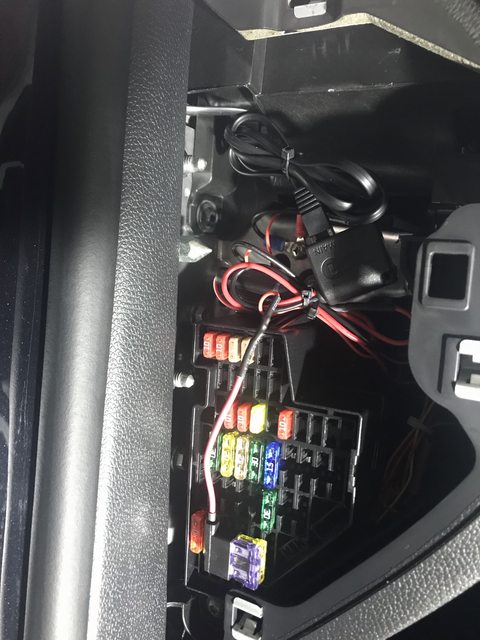
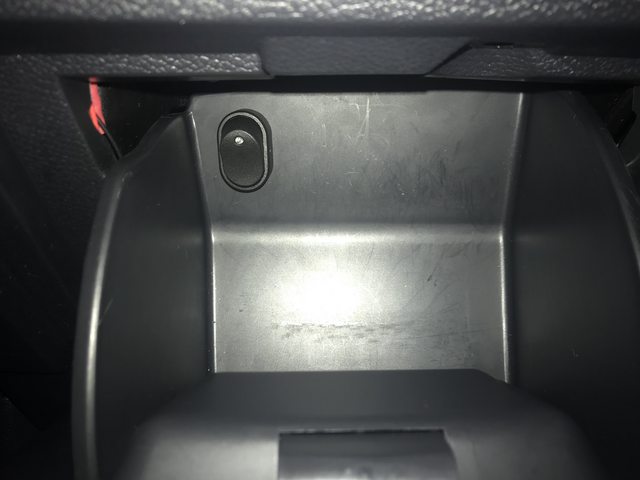
Scored a great deal on a used Valentine One radar detector and did a hard wire install over the weekend. The only bitch part is the stupid A pillar trim which does not have to be removed. It is a real PITA to get it put back on but once you get it, all future A pillar installations will go a lot smoother. Struggled with it for like an hour one night and left it until the next day out of frustration. Came back the next day and got it in a few minutes. I tapped into the fuse box with a fuse tap and cut all crimp connectors off and soldered everything. Also added an on/off switch in my cubby because this detector does get chatty which I will go into further explanation below.
Stupid J clip is at the bottom of the picture. You basically have to push the clip into the hole with a long object from the side/bottom while the A pillar is up against the dash and windshield.
Install
The mirror mount is very solid. $36 on Amazon. I was hoping to be able to get it closer to the mirror but that's about as high as I can get it. Mount it as high as you can for best results. I have seen 2 other detectors people had that were mounted down by the dash which is not as effective.
The radar detector as been working great but I can understand why some people have issues with it. Due to it not having GPS you can't tell it to ignore certain areas that may have other radar sources like automatic doors and traffic signals. I didn't realize how many new traffic signals around me use a newer form of radar to trip red lights rather then the plates in the road. I always wondered what the little black things above the traffic lights were and now I know. So every time you come up to a light with one of these the detector will go off. With a GPS enabled unit you can tell the detector to ignore these areas however Valentine offers a bluetooth module that you can get to add to a Gen 1 as long as your unit has had the software/hardware update. Valentines website is not up so I can't get all the info on the bluetooth adapter but this article outlines it pretty well. Still does not look to be location based but radar type based. This would be a great help as most police radar is Ka and the false alarms I am getting from doors and traffic lights are X and K band. So overall I am pleased with the Valentine One Gen 1 and am glad that they have adapted with the times and offer software and hardware upgrades to people with older units. For someone looking to buy a used unit I would consider the areas that you travel and when you will want to use the detector. The cost of a used unit plus updating and adding bluetooth might not be worth it compared to a new Gen 2 or other detector brand. I have ordered a bluetooth adapter so that I can reduce the amount of false alarms and turn the display off so it is not visible.
There are ways to change settings with an older one by diving into the menu. So for example I could turn off X band since it is not used in my state.
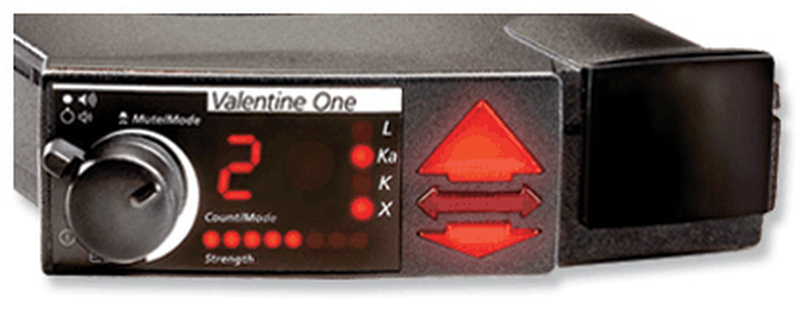
Also at night you need to remember which location the different radar bands are as the letters are not illuminated. As you can see in this picture the Ka and X band are active but the letters do not illuminate so you just need to remember where they are. If the top 2 (L and Ka) are active LOOK OUT is what I go with.
These are what the traffic light radar things look like. I have read that they also allow emergency vehicles to change the light from red to green when they need to get through an intersection quickly.
My hardwired radar connection has been doing great but had one issue that really bothered me. It would come on when you turned the key to accessory and then when you turned the key to ignition to start the car it would turn it off and on again (which is what I would expect). Well it bothered me due to the start up noise it would make and the fact that I don’t like power cycling electronic stuff more then I have too. So I started digging through my old electronics stuff from school looking for a 555 timer to make a delay to start circuit when I thought I could probably just order one. Yep sure enough I could get 5 mini delay boards for $14 From eBay. So I wired that into the radar detector and it now waits about 10 seconds before powering on, perfect . It’s got a surface mount 555 timer and a nice 10A relay with adjustable time delay
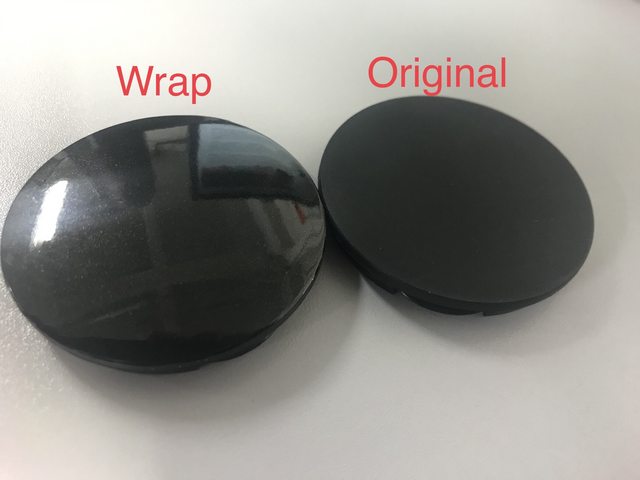
A few weeks ago I discovered one of my OZ center caps had flew off somewhere. Okay I’ll order a new/used one. A single cap was $25 (cause carbon fiber bro). I then saw a set of 4 OZ non painted center caps for $26 and thought I‘ll just get them and then I can paint match them to the car. Instead of paint I decided to go with vinyl wrap. Oh great I can do my side markers at the same time. So I vinyl wrapped my center caps and side markers.
The vinyl wrap is 3M 1080 and was super easy to work with
I also downloaded an app to compliment my Valentine radar detector and it has been an excellent addition to po-po detection. It’s called V1Driver and gives you all the features of more modern radar detectors but done better. I’m still playing around with it but I am enjoying it so far.
Have some minor suspension stuff coming in. I'm wanting to add a new head unit for Carplay but......I really want to upgrade the turbo so putting money aside for that.
Took some summer mode pics too (before new center caps and wrapped side markers). Got a polarizing filter but need to practice with it.
Some more minor stuff. Replaced my ugly license plate holder with one from a Volvo. It is a much more compact design that fit's my narrower license plate. I was concerned about it not fitting because my plate is made out of porcelain and it a lot thicker then a standard plate but it fit just fine. You can see some of the bronze color a little so I might remove it and paint the tabs that the studs are on black to blend it in a little better.
Before with the black plastic bracket.
After with the Volvo bracket. It's subtle but I like it.
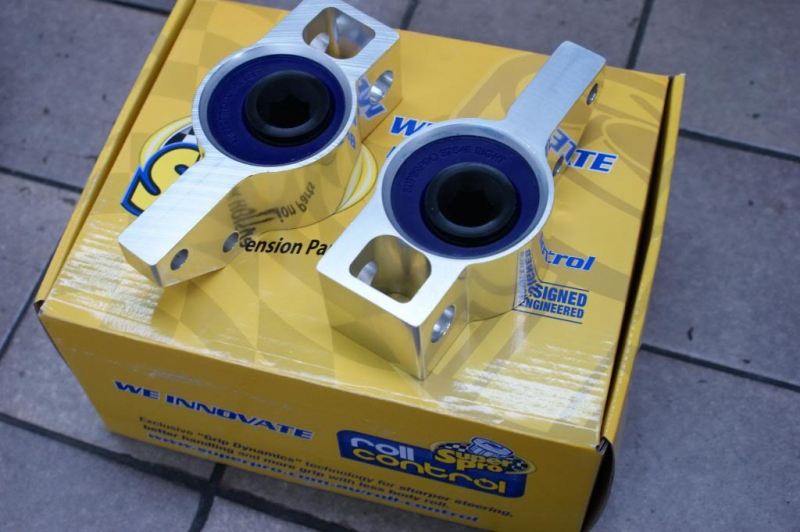
I am also in the process of replacing the LCA bushings. There is nothing wrong with mine but someone listed a set of anti-lift caster brackets BNIB for a decent price so I grabbed them up. At full price I would probably wait but for 35% off I figured why not. A popular mod while doing the LCA bushings is to replace the stamped steel arms with aluminum ones from a Passat. This was a very large improvement from the MK5 GTI LCA that were very heavy but not as much of an improvement for MK6 GTI's. It is still a weight savings and I like to press the old bushings out and have the new ones ready to go to save time. The anti-lift brackets should add about 0.5 degrees of caster to improve turn in and steering response.
Arms are all cleaned and bushings have been removed. Got the pair of LCA's off eBay for cheap. They came off a 2006 Passat. I forgot to include the brackets in this photo but they are Super Pro ones (I'll add a Google image).
Google image of the bushing but you can see that the LCA will not be centered in the bushing and this is where the added caster comes from.
I have a K04 turbo upgrade fund going as I want more power. Waiting for a used one to come up for sale.
ALK kit is installed and front LCA bushings have been replaced with Super Pro poly ones. Car still needs an alignment but I decided to get a subframe bushing kit before I get another alignment. The subframe on these cars has a lot of slop which over time can cause clunking noises and mis-alignment. I also did not replace my subframe bolts back when I did the clutch and they are torque to yield bolts so not reusable 0_0
The bushings came out easily once I stopped trying to make everything straight and pretty. Just get er close enough and push it out.
Make sure you use a lot of lube. You get a tube with the ALK and a tube with the other LCA bushings so that's a tube per arm. I used about 75% of each tube on each arm.
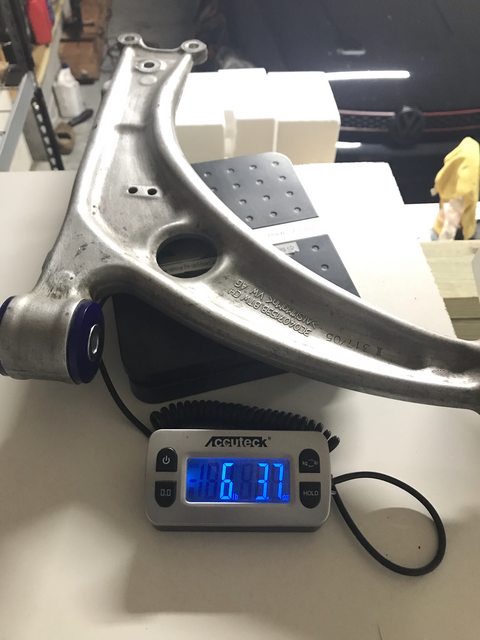
Original GTI LCA weight with bushings.
Passat LCA weight with bushings.
Installed on the car.
Also got another used shift **** to try. This is one of the most popular ones and I understand why people love it. Raceseng Slammer shift ****. Super high quality and heavy AF (600 grams). I need to get used to it. It has brought to light some of the short comings in the OEM shift assembly and I don't think that is helping. I can see a Diesel Geek shifter in my future as well.
Started installing the subframe kit Sunday night and had some troubles. The subframe is a real PITA to deal with. I may have cross threaded a bolt when I put on the LCA bracket. I ordered a M10x1.5 tap to try and repair it. If that doesn't work I'll Helicoil it. Worse comes to worse I'll but a used subframe mount off eBay for $70. Once installed I can get it aligned and ready for the twisties.
Finished up the subframe with no issues besides it just being a PITA...like everything on this car. After going to 2 alignment shops and getting the run around about the car being lowered and them charging me more I decided I'll just do it myself. I didn't want to take it back to the dealer for a $160 alignment again and all it needs is the toe adjusted in the front. Ordered some toe plates but might give the string method a try. Seems to take more time but is more accurate.
A K04 turbo popped up for sale on the forum so I jumped on it. OEM Borg Warner turbo with 11k miles on it. All I need to get is an install kit for $40, a K04 tune for $150 and I should be set. I'd like to upgrade the intercooler also so if one comes up for sale before the install then I'll do that but I'm not going to wait around as it is not needed.
K04 is officially up and running!!! Install went pretty smooth with the exception of the turbo outlet pipe hitting the timing cover. Ended up having to clock the compressor housing a bit and it's still pressed up against it. I'll keep an eye on the coupling. I noticed today when putting the fender liner back in that I have 2 8mm triple squares left. Not sure where these went but I think one is for a bracket that is no longer used and the other I'm not sure. I'm going to review the install instructions and see if I can figure it out.
Install Tips:
Not all K04 hardware kits come with the "thicker" washer that you need in order for the return coolant line to clear the plug on the CHRA. Luckily the guy that I bought the K04 from included it.
It's very important that you have 2 washers on the oil feed, coolant feed and coolant return lines. One below the banjo and one above. So you need 6 of these washers. 4 are not as wide and I used them on the coolant lines. The 2 wider washers went on the oil line.
Before installing the K04 check the orientation of the the outlet to make sure it matches the IHI. I had to pull it back off to adjust it. I thought tightening up the exhaust manifold would move it out enough but it didn't.
I used about a gallon of coolant to get it back to the full mark. Make sure it's pink. My local Import parts shop gave me blue coolant which is BMW/Mercedes. Honest mistake as the part # that was written on the bottle was correct but the PN of the bottle was not.
Install time was about 10 hours I'd say not including having to clock the housing. 1 hour of that is searching for crap that gets lost in the sub frame :-/
You can drive the car on Unitronic Stage 2 software it just won't run well at full boost.
Don't have many pictures. It's a pretty simple install as long as everything comes apart and nothing is seized.
I did end up cutting the bracket for the coolant return line. Made it fit better.
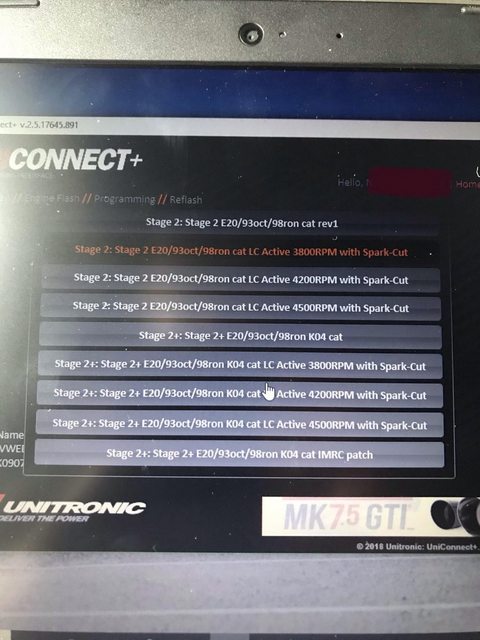
Unitronic UniConnect+ Software.
The car eFin moves!!!! It's in such a none dramatic fashion that it is deceivingly fast. Above 70 into the 100's it just keeps pulling.
Just been enjoying the car before it gets really cold out. Picked up a used intercooler and some used LED Euro tail lights. The intercooler will probably go on next year, LED tails I'm going to try and put on by the end of the year. With the holidays coming up extra cash and time will be hard to come by.
I also ended up picking up a new daily as the Pilot is being used for other purposes. I have always loved wagons and wanted something with great gas mileage as I will be doing a lot more driving then I have been. Found a super low mileage TDI wagon
Wonderful daily driver. Averaging around 37mpg (can get over 40 on the highway), super comfy and very fun on the back roads. I have some minor plans for it, suspension, tires/wheels and tune. Don't want to take too much money away from the GTI. It really needs a brake upgrade and I'm still wanting to do water/meth.
I have been quarantined for almost a week now. Took the time to instal my LED tail lights and give her a good wash. Went for a couple hour drive the last few days which was really nice. Intake valves do need cleaning so that is the next big maintenance item.
Used OBD11 to verify cam phasing on startup and I am within spec for chain stretch 👍
Finally came across a used Water/Meth kit. Happens to be the best one For this platform from Aquamist. It�s going to be a serious instal and I still need to buy a tank and a nozzle kit so I can run 5 injectors. I will also need to change my tune to a more custom option. I�d like to do an intake valve cleaning and then install the WMI to keep the valves clean and provide more power. Should be able to push close to 400HP once tuned. Also got a Diesel Geek Sigma shifter. I�ll put that on the GTI and put the GTI one on the SportWagen cause it could use some sportier shifting.
Replaces all the OEM plastic pieces for metal to really tighten everything up.
Been a while. Was gonna sell the Wagon as I changed jobs and don�t want the extra car payment. Had it sold to Carvana and the clutch pedal went to the floor and didn�t return. Haven�t looked into it fully but hoping it�s not the slave cylinder. It�s internal (like the GTI�s) which means the transmission needs to come apart :-| fml. Not what I want to deal with at the moment but whatever. GTI is running strong. Still have the intercooler, shift kit and WMI kit to instal but will wait for winter to do that. Gotta enjoy the nice driving weather while I can.
I did add some lighting to my garage which I�m really enjoying.
Picked up a Prelude from my dad for a great price. Needs some TLC and a key cylinder as it keeps cutting off on me but it�s a work n progress. I�ll either keep it stock or do an engine swap. I�m thinking J series since it�s got a nice long hood. Feels nice having an old school Honda.
How much power would that net me? Im looking for most HP per $, just a nice NA sleeper. I have the GTI for turbo and with how easy it was to make power I�m kinda spoiled in a way I guess. The Prelude is not the lightest for its age 3000lb.
How much power would that net me? Im looking for most HP per $, just a nice NA sleeper. I have the GTI for turbo and with how easy it was to make power I�m kinda spoiled in a way I guess. The Prelude is not the lightest for its age 3000lb.
I think I read a while ago that you�ll yield about 250whp on a mild build, but I can�t remember. It�s somewhere in that ballpark, anyway. That�s what I bought the F22 for when I had the EG


 . It’s got a surface mount 555 timer and a nice 10A relay with adjustable time delay


")


