
Track build in progress


Thread Starter
Registered!!
Joined: Nov 2010
Posts: 42
Likes: 0
From: WA
Rep Power: 0 
Track build in progress
Thought I'd do a build thread in hopes of getting some motivation to finish this thing up, and maybe get a better way of doing certain things. This is my second EK, and when I picked it up the car was on its last leg. I wasn't even sure I could make the two hour trip home in it. The alternator belt was going to snap soon and the tires had worn down to the wire belts inside.
Once I got home I noticed all the issues I missed. No big deal I was going to re-due everything. I'm retired and need to keep busy. The front seat mounting points were busted and need welding. The wiring inside was a fire hazard, and the ECU was just floating around behind the kick panel. It was a real mess. I was saving this hatchback from the grave yard. So here is a story board of my current progress.
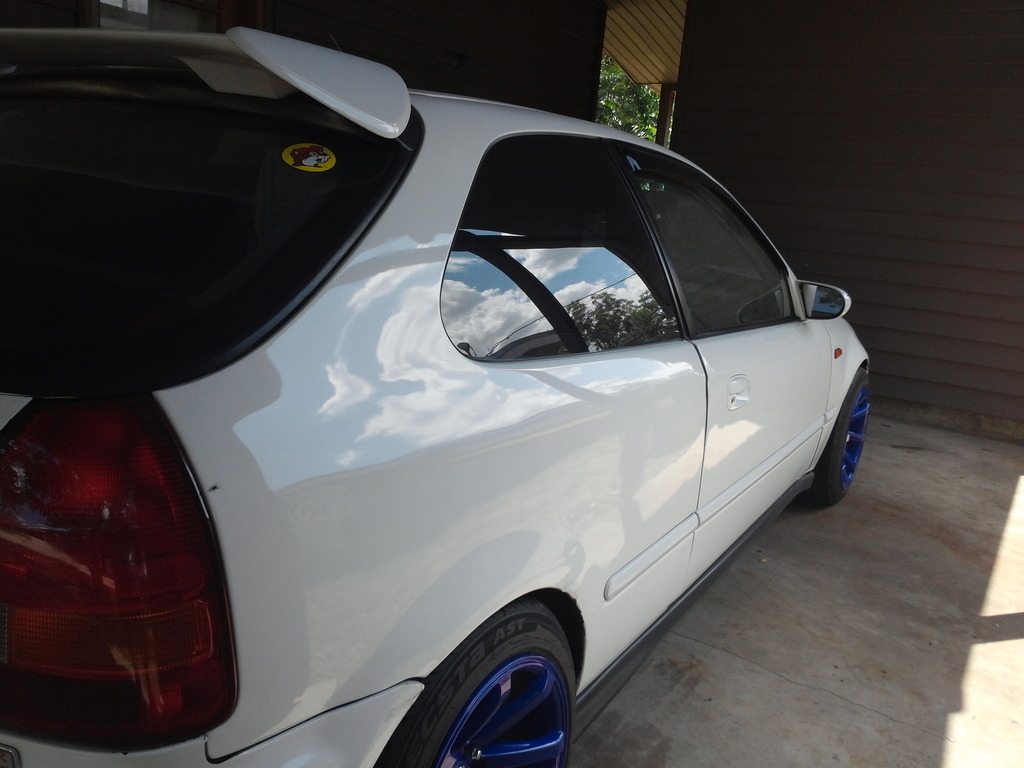
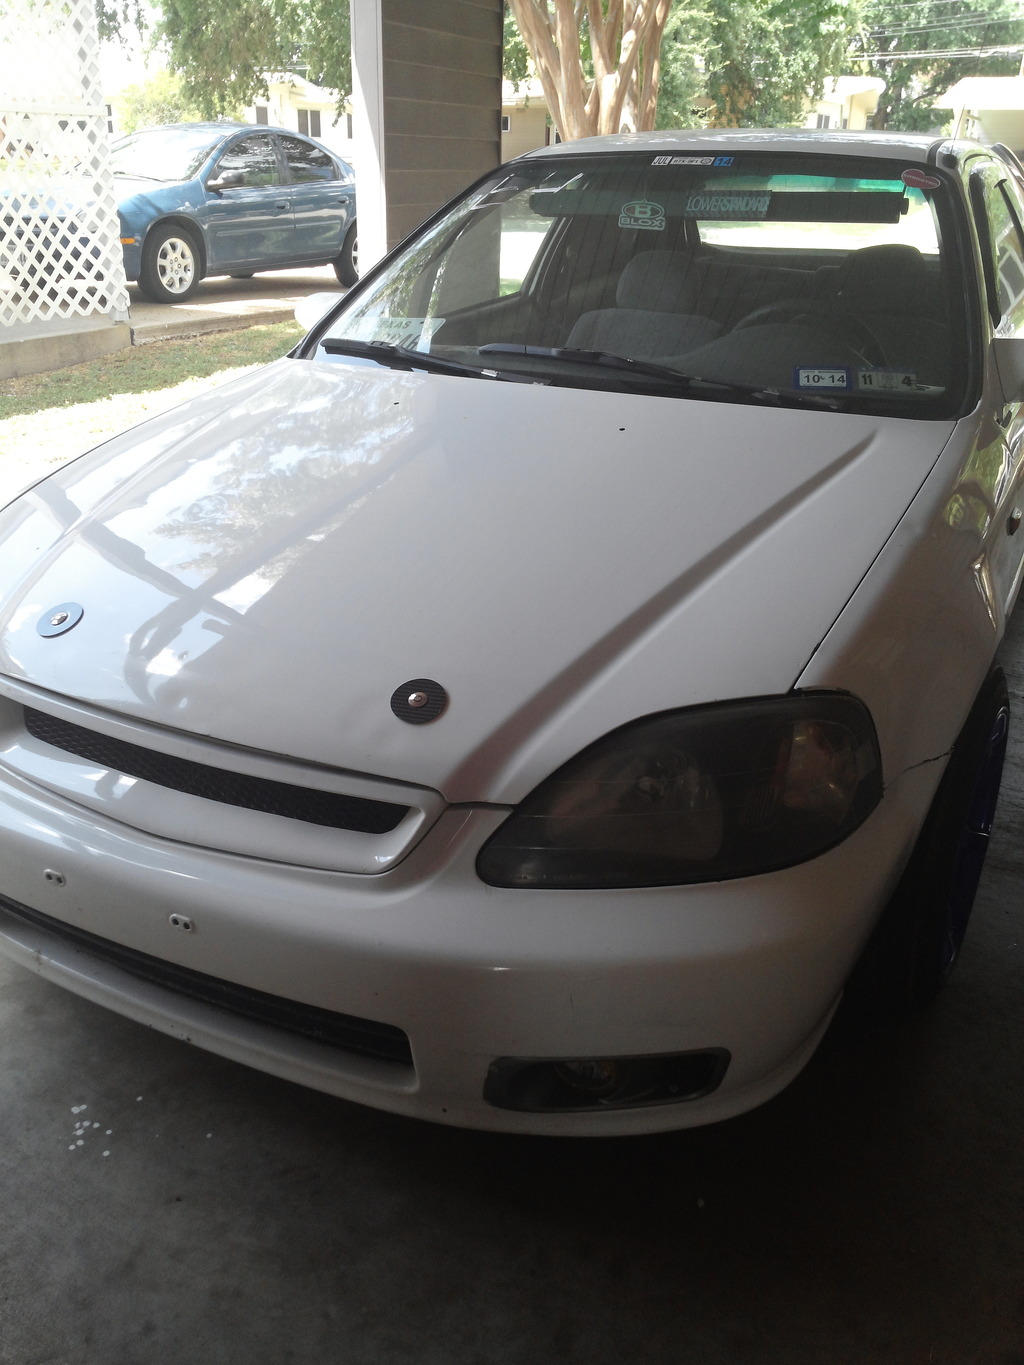
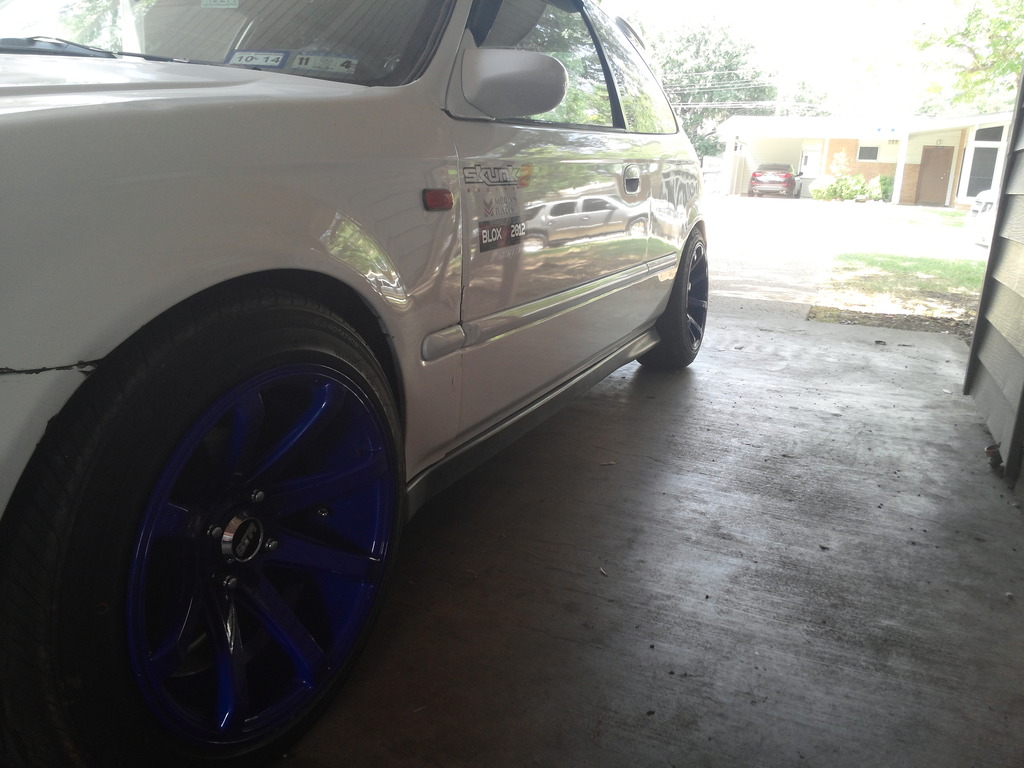
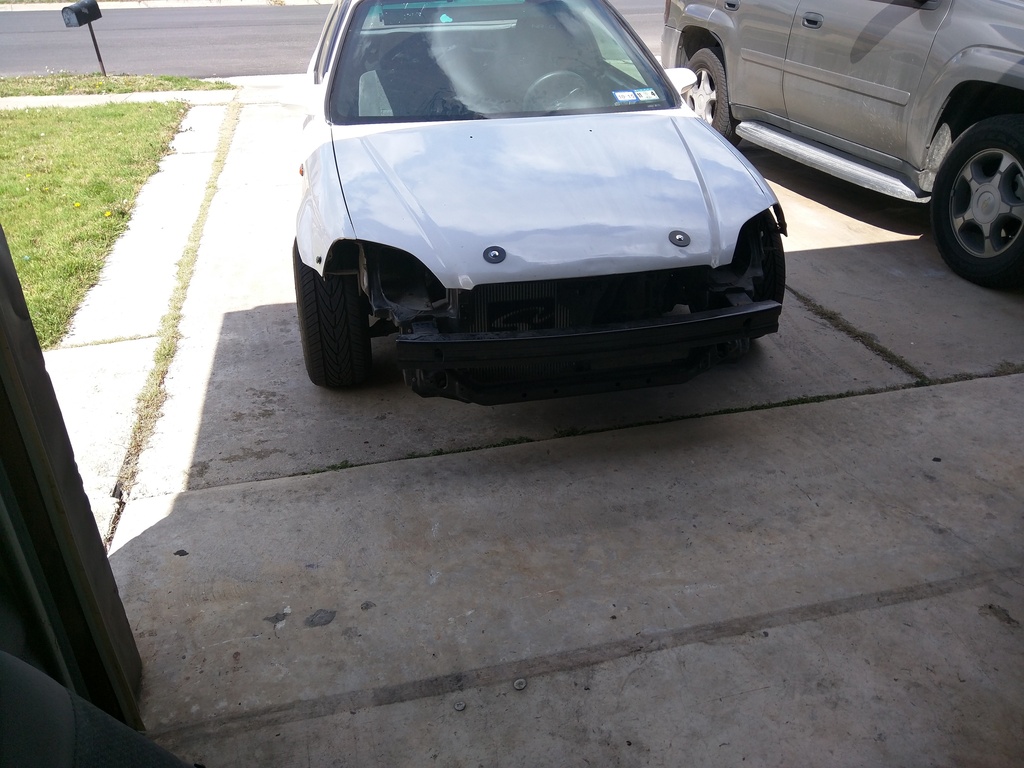
This is what the car looked like when I picked it up. I did correct the stupid extreme camber the car had before taking these pictures.
The car wasn't that bad looking. I chose this car because they are cheap, easy to work on, and fun to drive even with the limited HP and TQ. Also, I wanted something I didn't mind getting a little tore up. I'll be using this car to brushing up on my driving skills. Iv'e done some drag racing, autocross, and some other things, but I need to work on getting better. My heal to toe shifting techniques sucks.
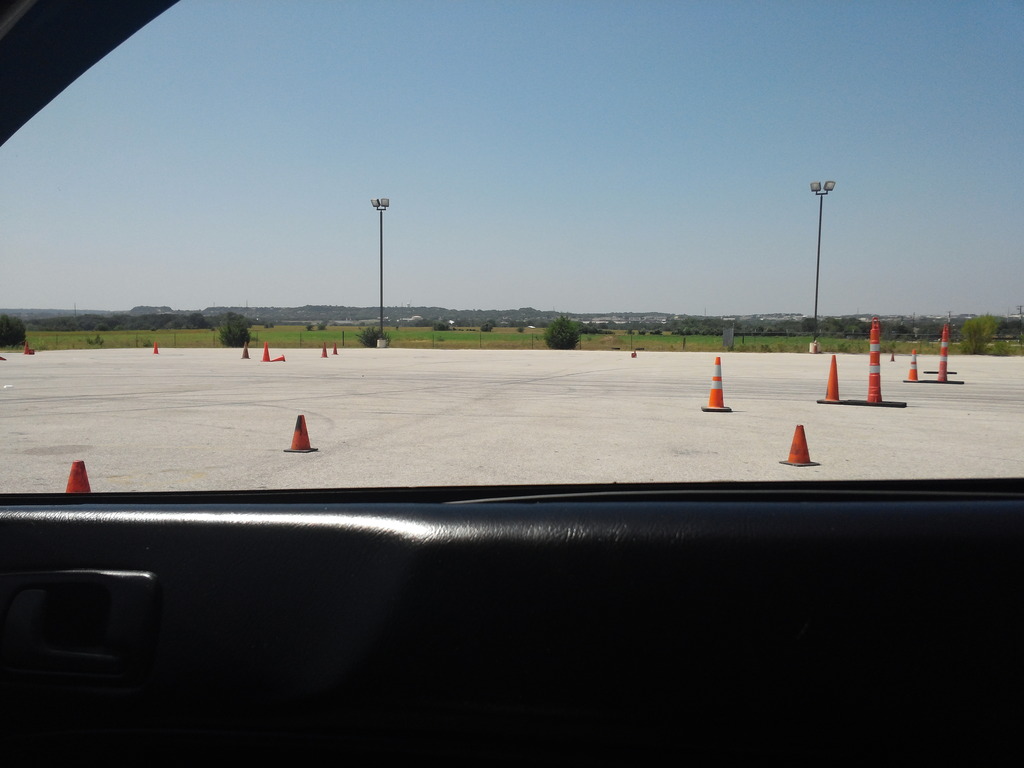
I took the car autocrossing to get a baseline line so I could compare it to all the work I'm putting into it. The car got a few compliments, but the stock breaks were weak and the steering was extremely loose. That was all about to change.
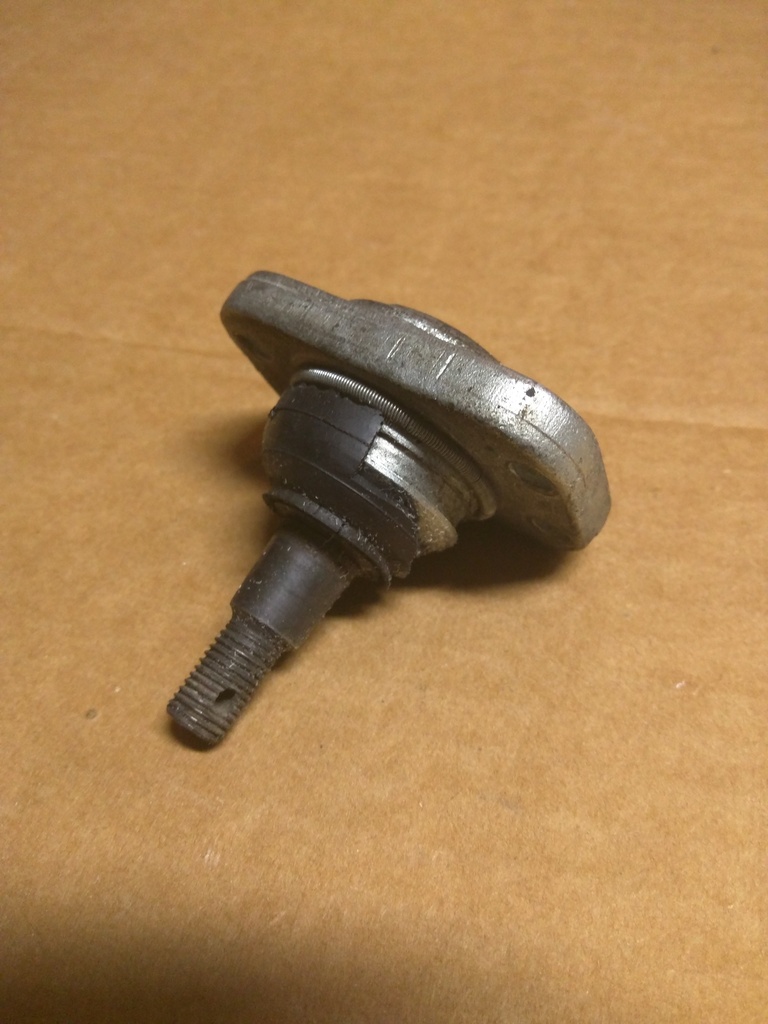
The old upper ball joints were beyond useful. As you can see the rubber boot was deteriorated badly. The rubber bushings on the lower control arms were so bad they just crumbled apart.
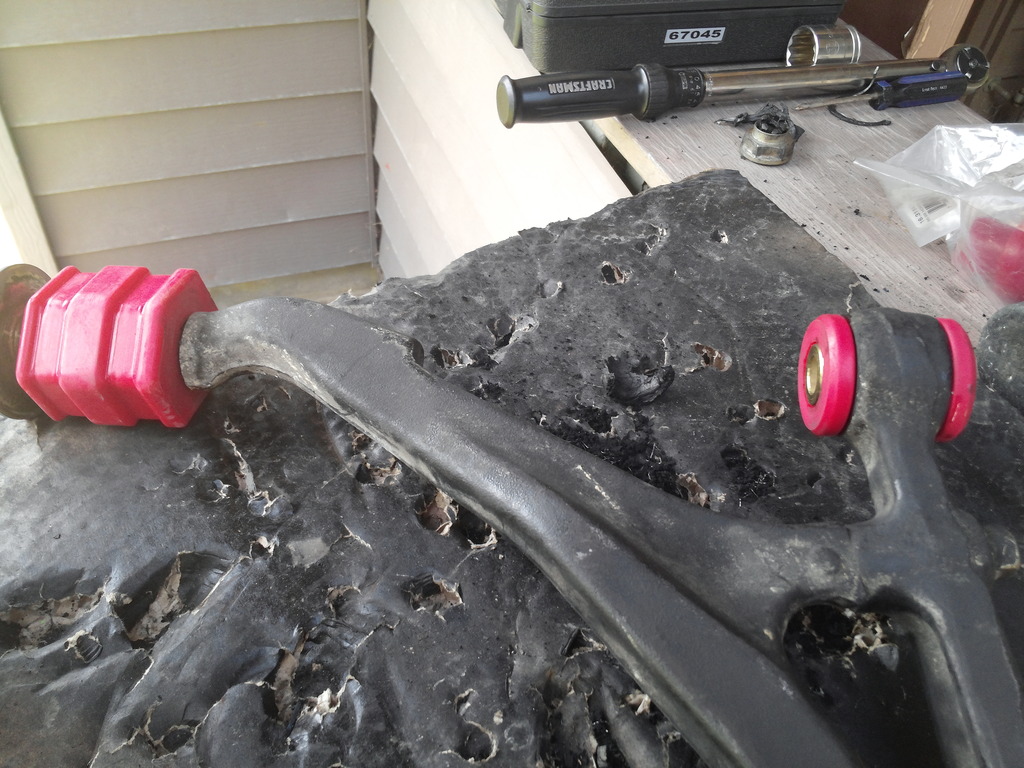
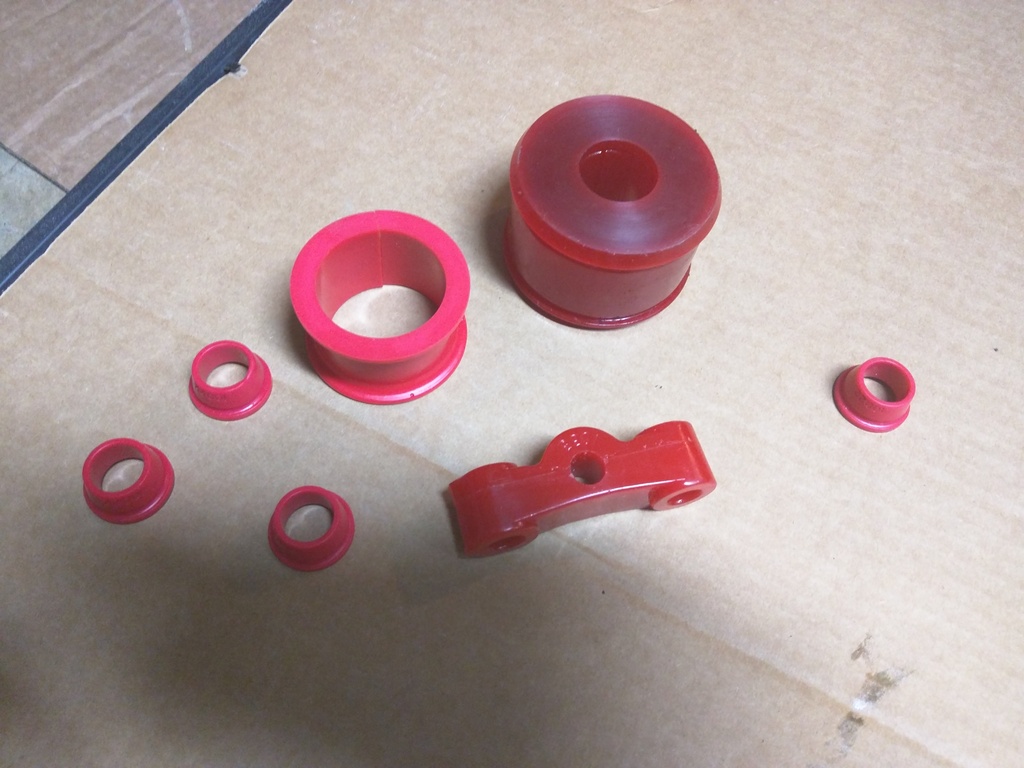
The old bushings were disintegrating, so I put Energy suspension bushings on everything. Trail arm bushing, LCA bushings, upper control are bushings, shift linkage bushing, etc
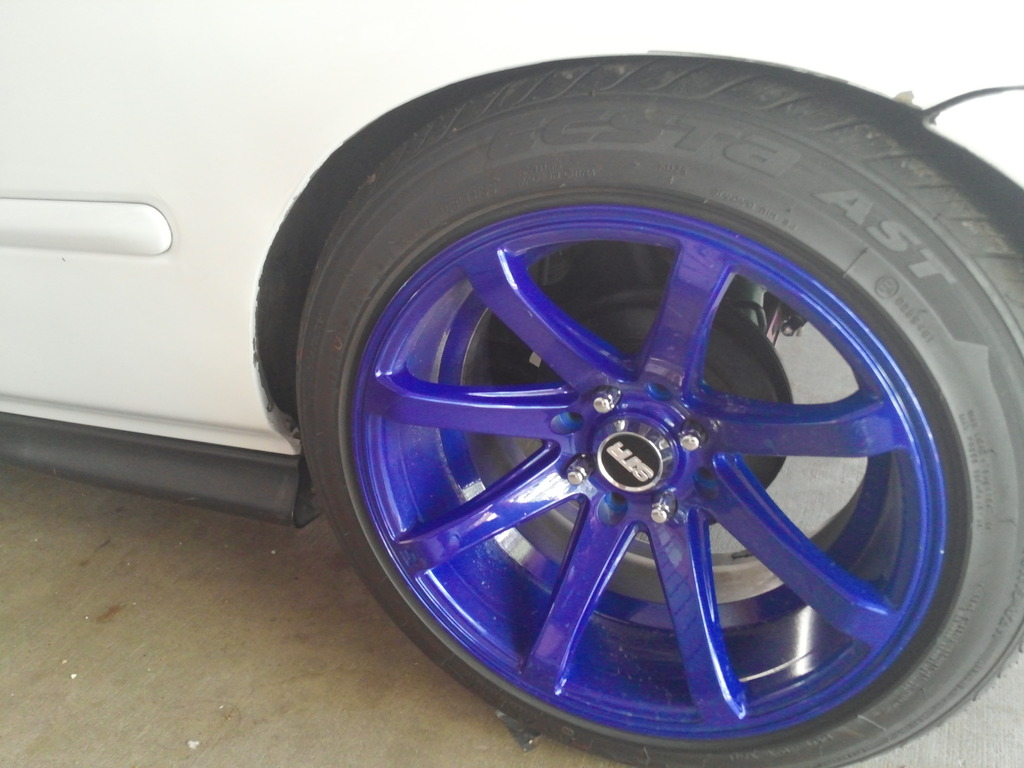
The rack and pinion bushings on the left made some major improvements on the steering.
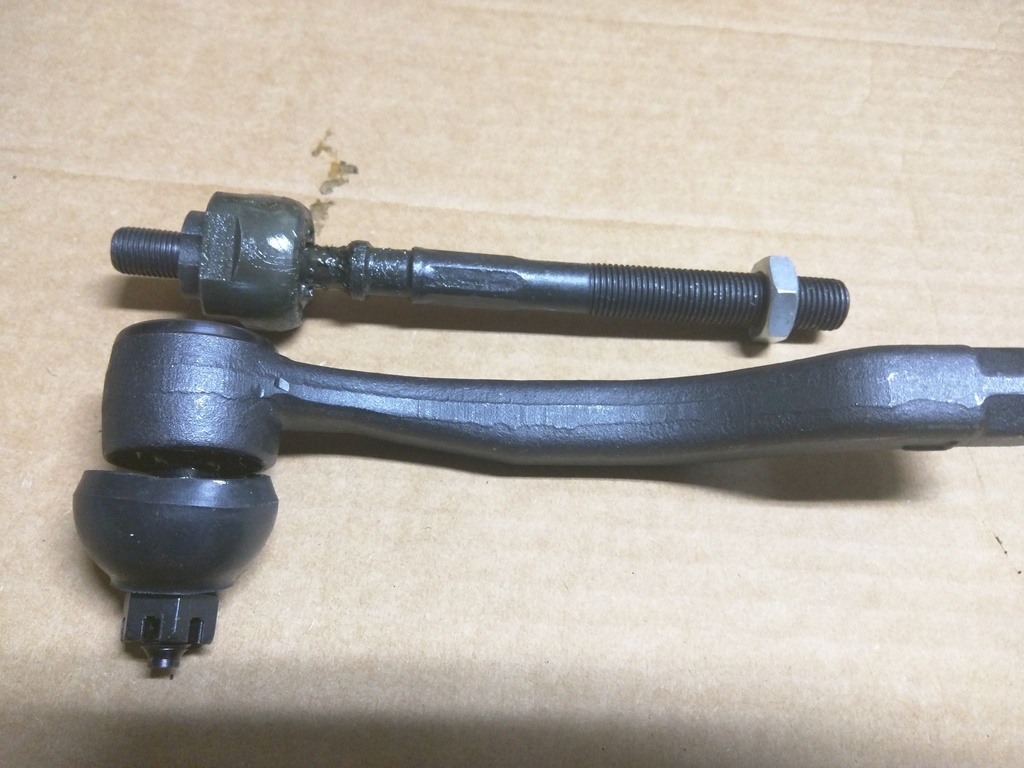
I wish I had a picture of the old ones. The outer tie-rods easily lifted up during removal, and the rubber boots were gone. No cotter pins on either side. The inner tie-rods had about a quarter inch of play at the rack and pinon.
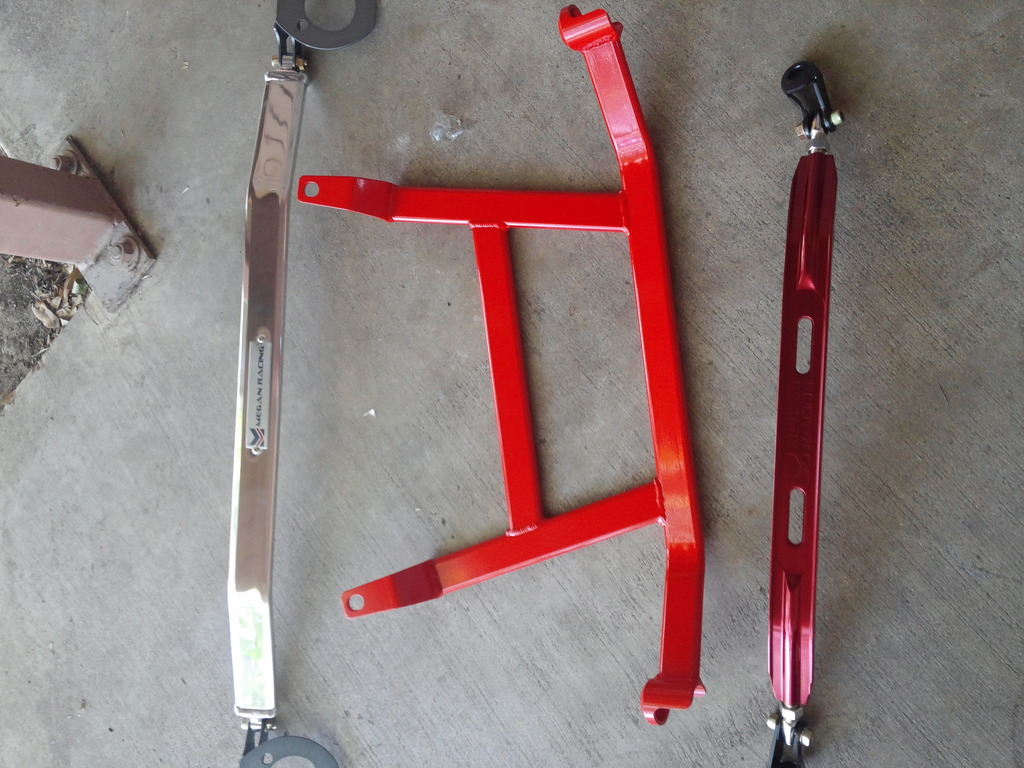
Trying these out for now. I might switch over to all blackwork's suspension parts.
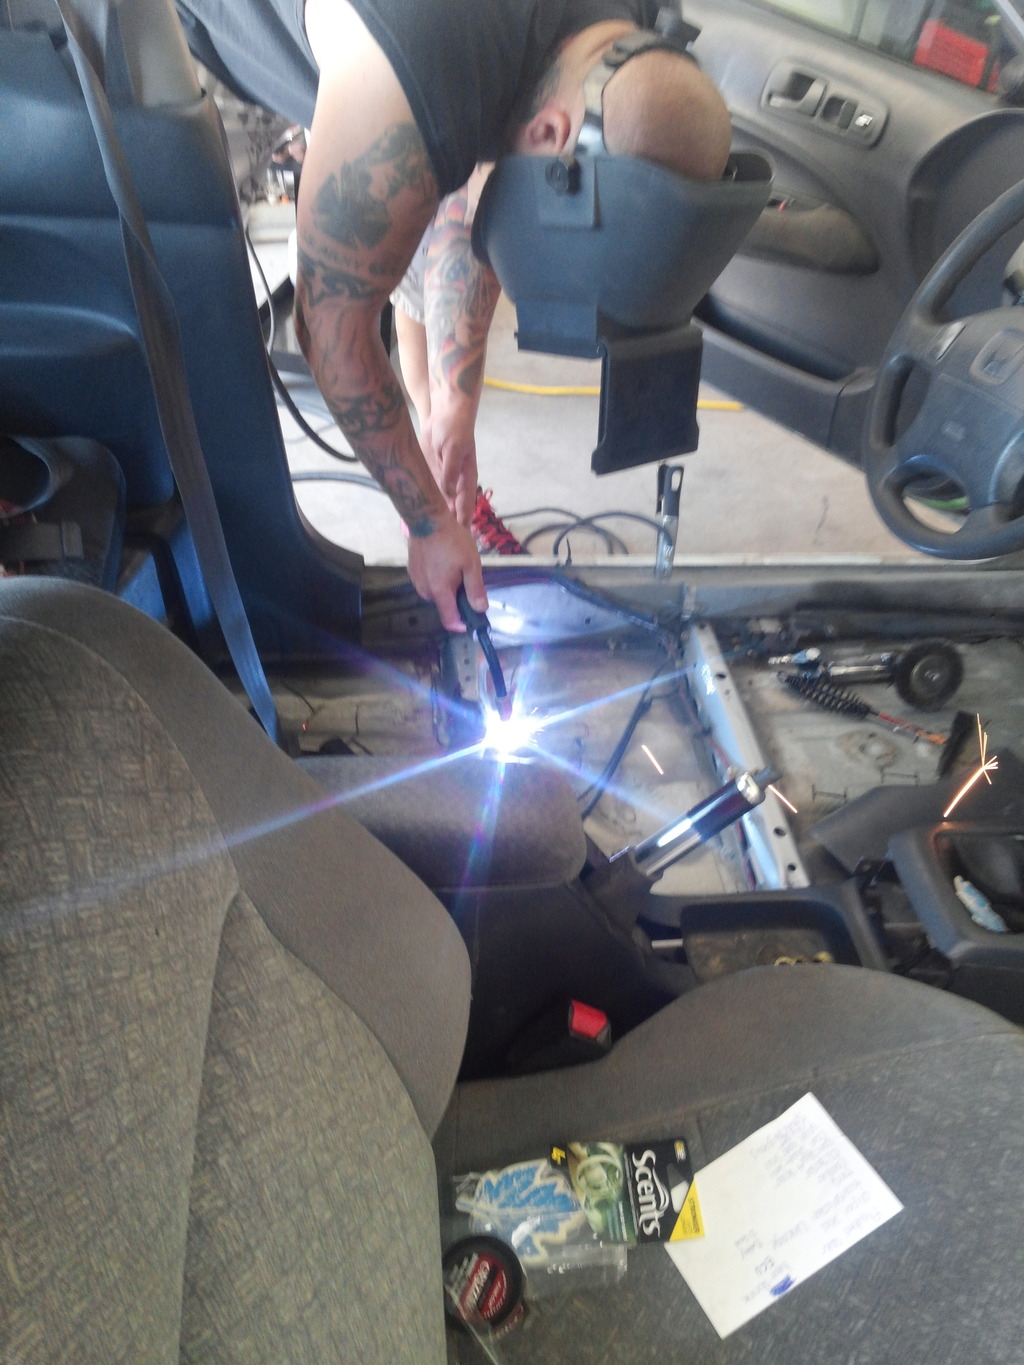
One of the mounting brackets for the driver's side seat was busted, so that had to be welded on. Too bad I didn't have my seat, so I could have welded that in using some square tubing.
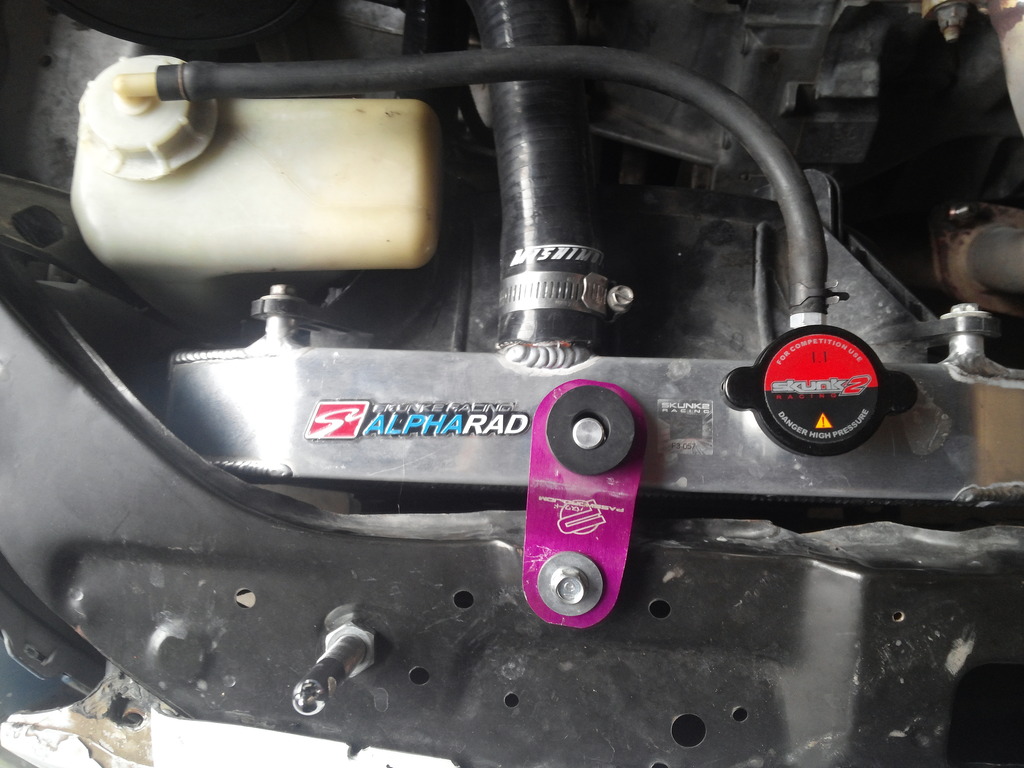
The old one was leaking, so I went with the skunk2 alpha line-up
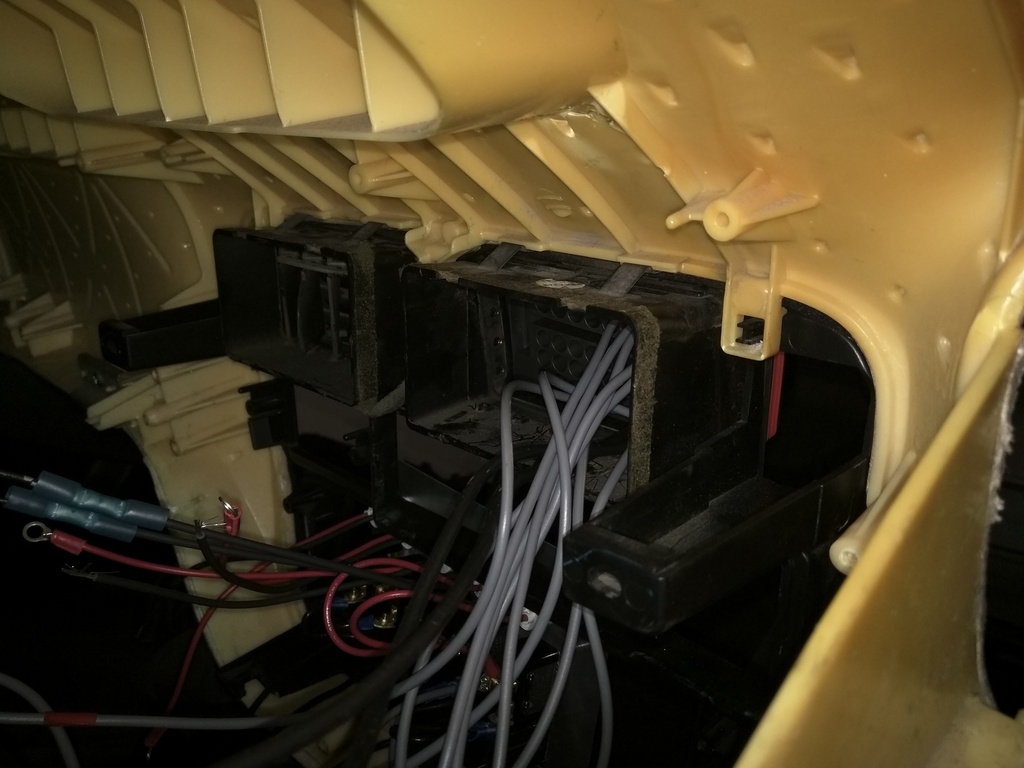
Like I said the wiring was a fire hazard, so I just ripped it all out. I tore the main relay out as well. I'm using an oil pressure switch with the fuel pump. This will prevent the fuel pump from staying one, the oil pressure switch will shut the fuel pump off when ever the motor is turned off.
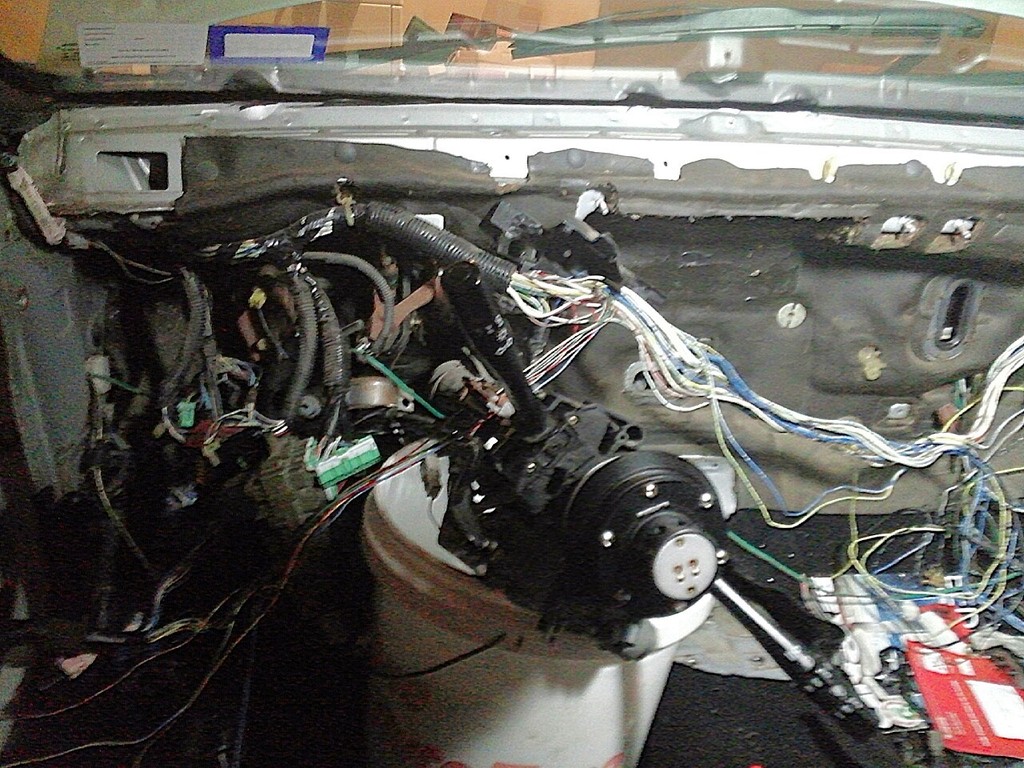
Pulling more wires and HVAC system out. If you pull your heater core out like I did, make sure you loop the cooling hoses together. This is preferred over blocking off the coolant lines.
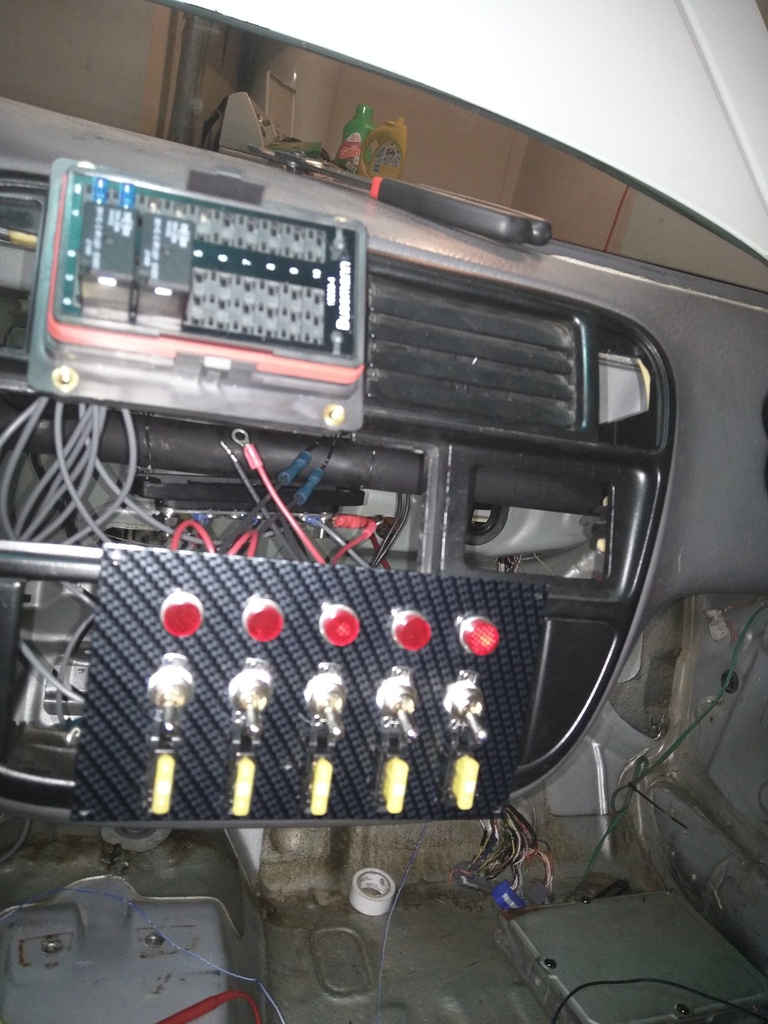
Temporary set-up until my custom dash is done. Just wanted to run the wires to length and make sure everything was working before making a permanent set-up. Custom fuse panel is awesome and very easy to wire up. I used the Busmann 15303-4. It uses micro fuses and micro relays

Just finished a test run to make sure everything was connected right and working properly. Now I can start making a more permanent set-up. I tested the head light outside the car. It had been a while since I drove the car and was too excited to wait and install the lights and bumper.
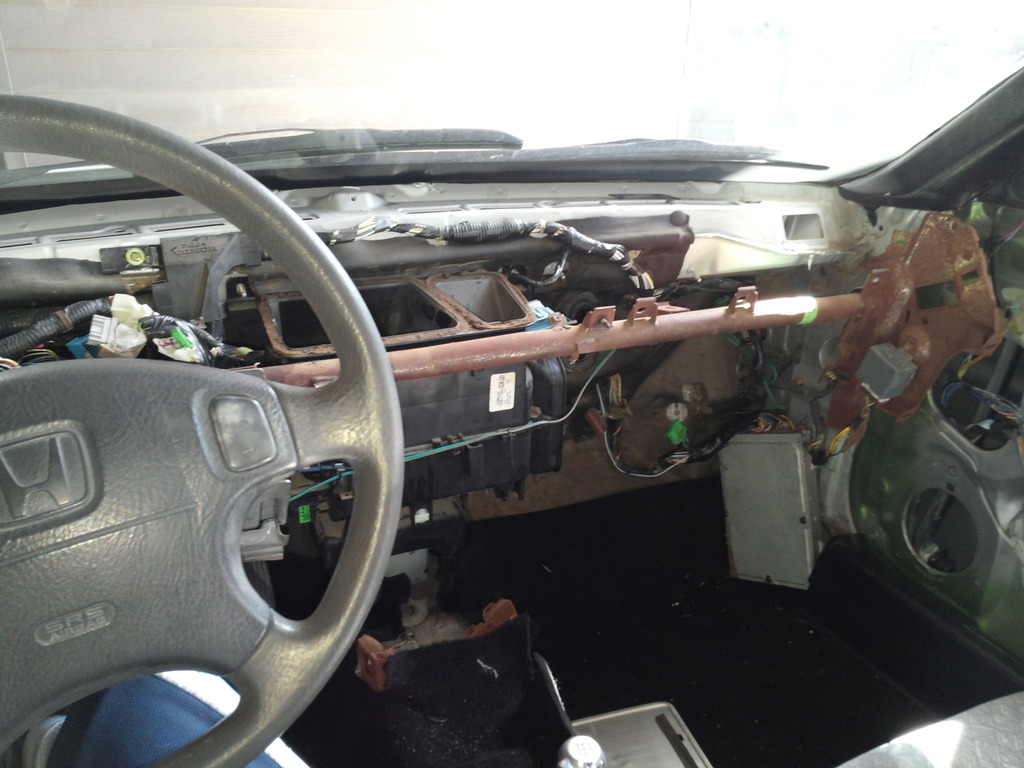
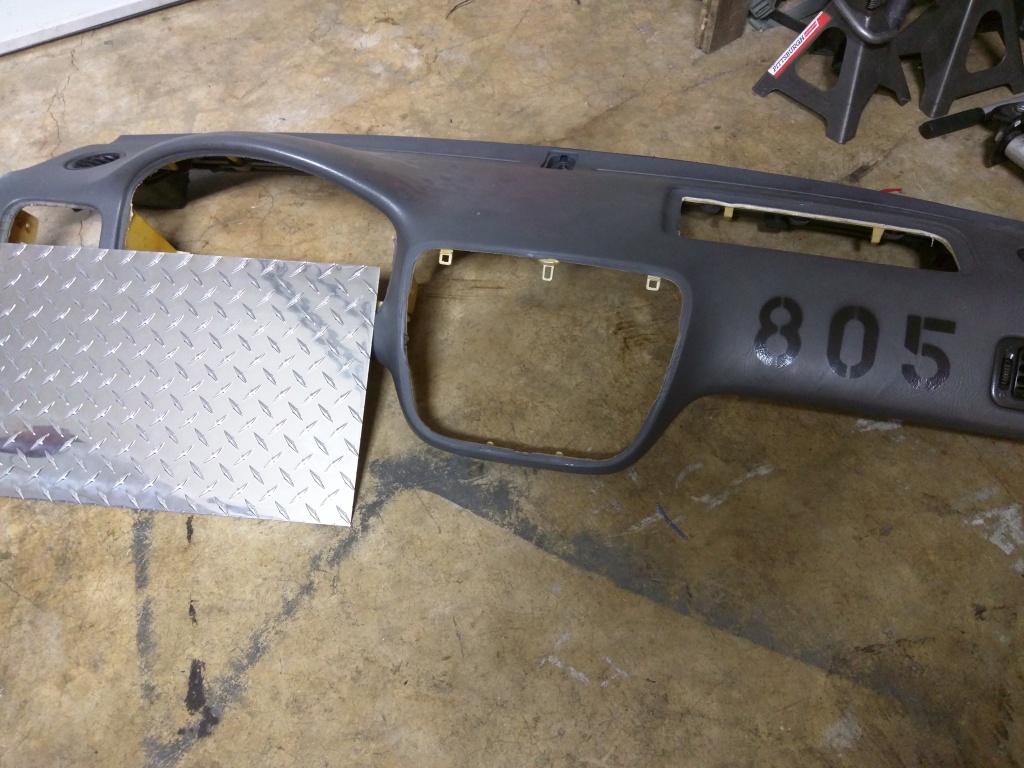
Still waiting for the custom dash
I need my dash!!! This the back of the custom fuse panel. Not fully done since its just a test run until the final dash is ready.
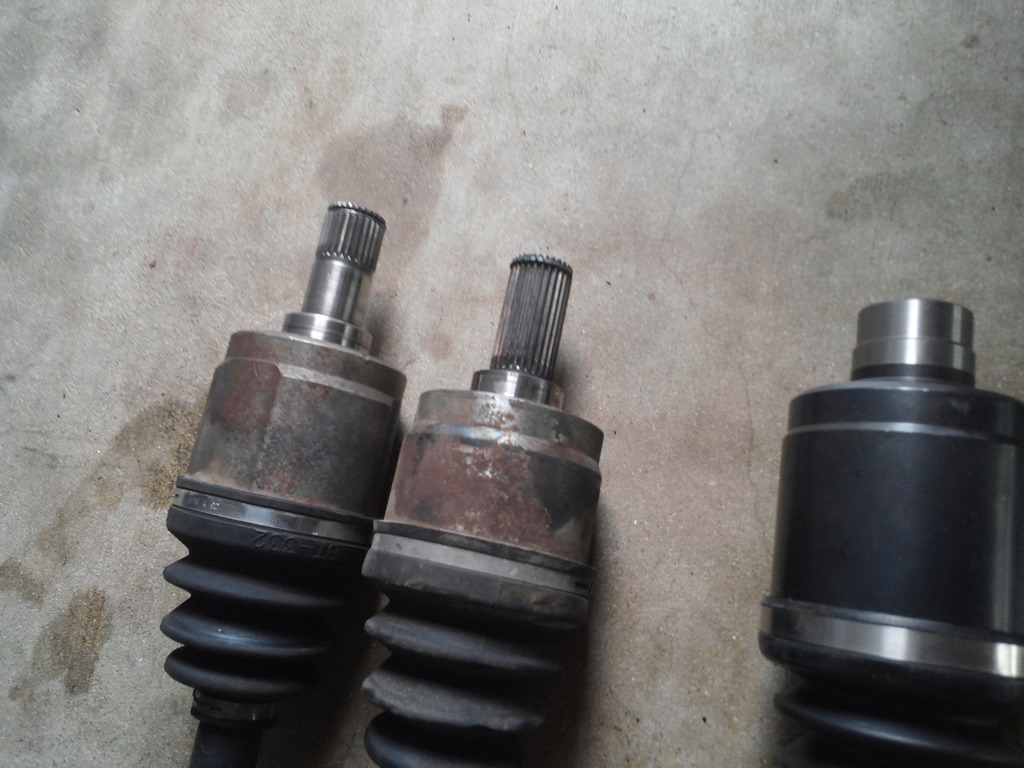
Out with the old axles. The right axle is the new one from driveshaftshop.com
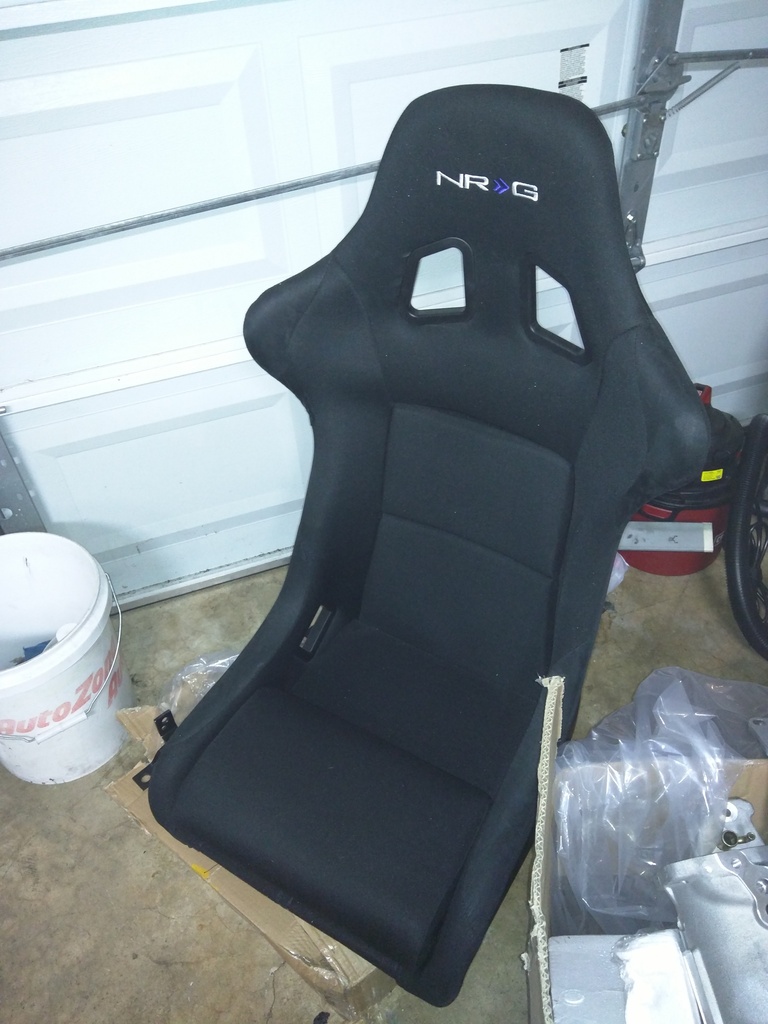
I usually only use seats like the Recaros in the EVO 9, but I wanted to try out some bucket seats. I shopped around online and picked this seat from NRG at THmotorsports.com. They offer free shipping on orders of a $100 dollars or more. Which is good because most others site wanted around $100 to ship large items. I thought for sure that THmotorsports was going to call and tell me large or over sized items didn't qualify for the free shipping, but they never did. Free shipping can be a huge money saver!
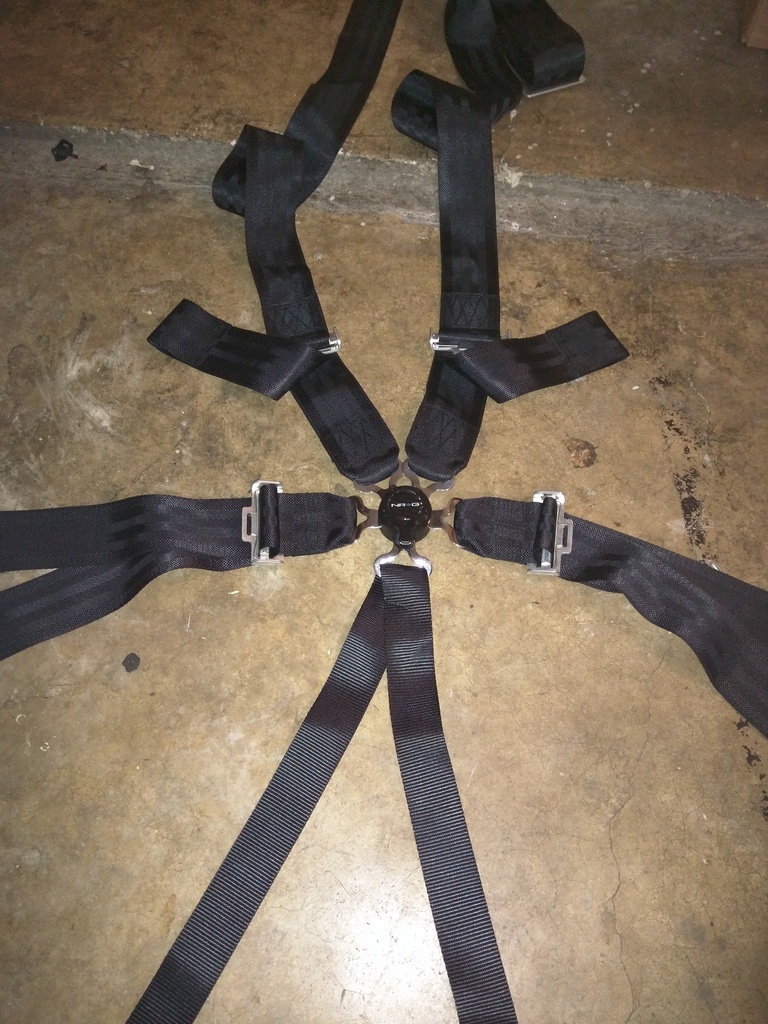
Six point harness to keep me in the seat during time trail runs.
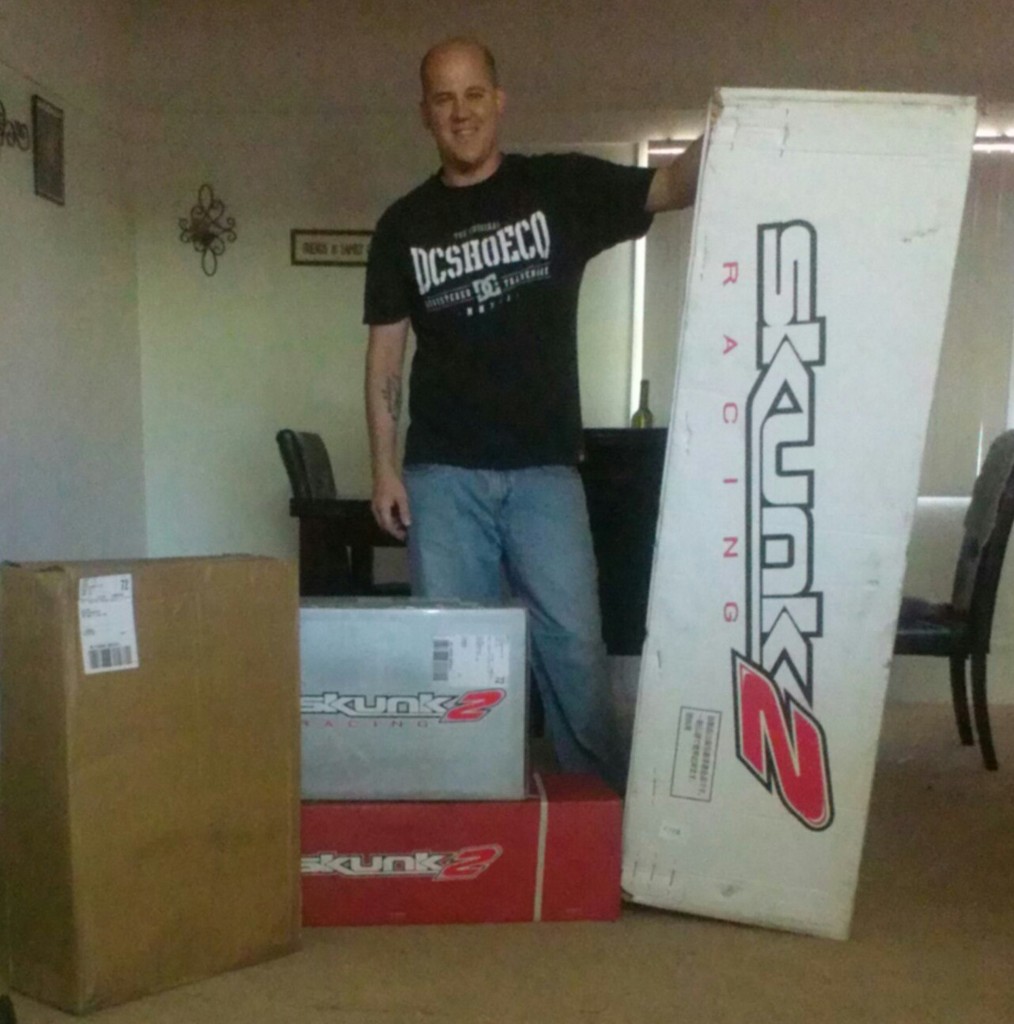
Getting car parts will always put a smile on my face!
Ordering my rywire harness. Will post pictures when I get it. Also if you do order from them and need the C101 wires not connected and left as a flying lead or open lead chose the other/race chassis instead of your actual chassis.
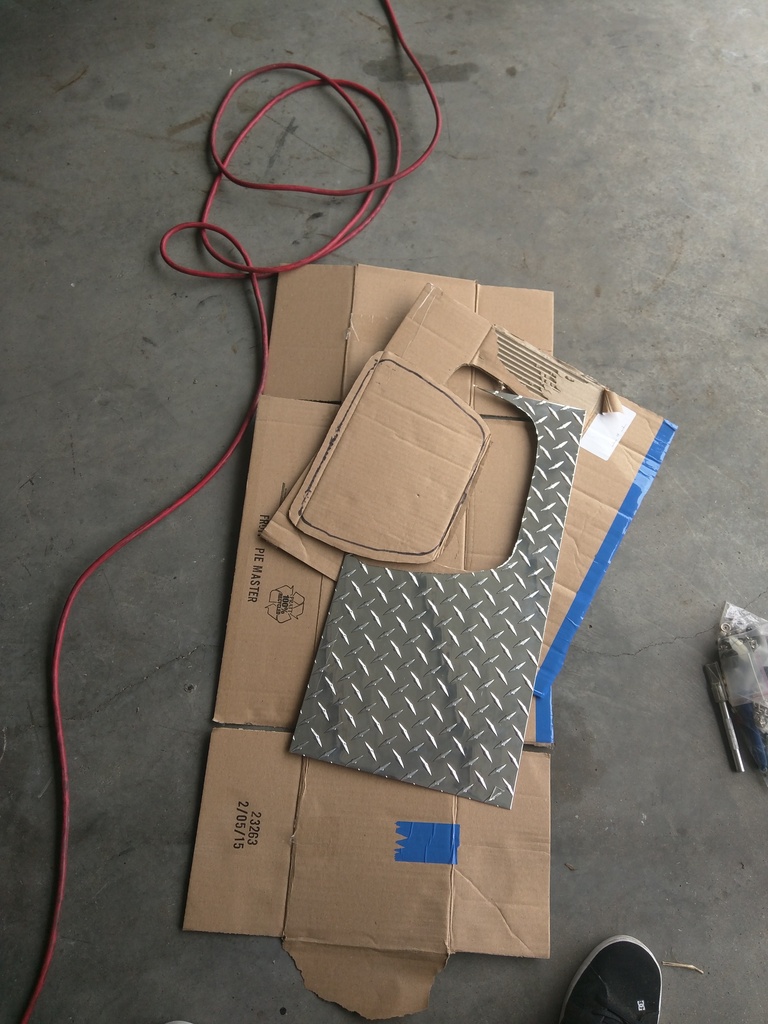
Finally going to get my dash done. I'm going to cut the bottom part where the radio and HVAC use to be. This will make a straight line down the whole dash. I'll rivet the diamond plated aluminum were the radio went, and then rivet the fuse block and switch panel on the sheet of all aluminum. After that I can tighten up all those wires. I'm also going to paint the dash Cherry Black. I'll post pictures as I go along with this dash build. Should be starting it tomorrow.
Started work on the dash. Just make the cutouts.
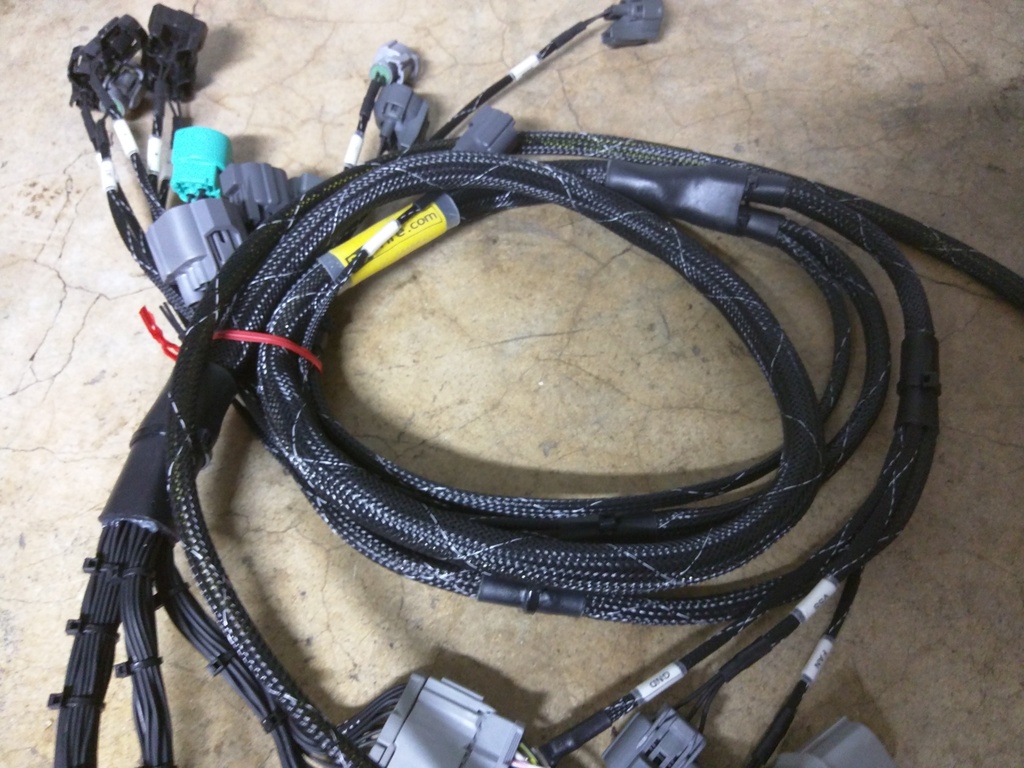
YES, YES, YES!!! My rywire harness came in a day early. It is awesome, and it's made with excellent quality.
Once I got home I noticed all the issues I missed. No big deal I was going to re-due everything. I'm retired and need to keep busy. The front seat mounting points were busted and need welding. The wiring inside was a fire hazard, and the ECU was just floating around behind the kick panel. It was a real mess. I was saving this hatchback from the grave yard. So here is a story board of my current progress.
This is what the car looked like when I picked it up. I did correct the stupid extreme camber the car had before taking these pictures.


The car wasn't that bad looking. I chose this car because they are cheap, easy to work on, and fun to drive even with the limited HP and TQ. Also, I wanted something I didn't mind getting a little tore up. I'll be using this car to brushing up on my driving skills. Iv'e done some drag racing, autocross, and some other things, but I need to work on getting better. My heal to toe shifting techniques sucks.
I took the car autocrossing to get a baseline line so I could compare it to all the work I'm putting into it. The car got a few compliments, but the stock breaks were weak and the steering was extremely loose. That was all about to change.

The old upper ball joints were beyond useful. As you can see the rubber boot was deteriorated badly. The rubber bushings on the lower control arms were so bad they just crumbled apart.

The old bushings were disintegrating, so I put Energy suspension bushings on everything. Trail arm bushing, LCA bushings, upper control are bushings, shift linkage bushing, etc

The rack and pinion bushings on the left made some major improvements on the steering.

I wish I had a picture of the old ones. The outer tie-rods easily lifted up during removal, and the rubber boots were gone. No cotter pins on either side. The inner tie-rods had about a quarter inch of play at the rack and pinon.

Trying these out for now. I might switch over to all blackwork's suspension parts.

One of the mounting brackets for the driver's side seat was busted, so that had to be welded on. Too bad I didn't have my seat, so I could have welded that in using some square tubing.

The old one was leaking, so I went with the skunk2 alpha line-up

Like I said the wiring was a fire hazard, so I just ripped it all out. I tore the main relay out as well. I'm using an oil pressure switch with the fuel pump. This will prevent the fuel pump from staying one, the oil pressure switch will shut the fuel pump off when ever the motor is turned off.

Pulling more wires and HVAC system out. If you pull your heater core out like I did, make sure you loop the cooling hoses together. This is preferred over blocking off the coolant lines.

Temporary set-up until my custom dash is done. Just wanted to run the wires to length and make sure everything was working before making a permanent set-up. Custom fuse panel is awesome and very easy to wire up. I used the Busmann 15303-4. It uses micro fuses and micro relays

Just finished a test run to make sure everything was connected right and working properly. Now I can start making a more permanent set-up. I tested the head light outside the car. It had been a while since I drove the car and was too excited to wait and install the lights and bumper.

Still waiting for the custom dash

I need my dash!!! This the back of the custom fuse panel. Not fully done since its just a test run until the final dash is ready.

Out with the old axles. The right axle is the new one from driveshaftshop.com

I usually only use seats like the Recaros in the EVO 9, but I wanted to try out some bucket seats. I shopped around online and picked this seat from NRG at THmotorsports.com. They offer free shipping on orders of a $100 dollars or more. Which is good because most others site wanted around $100 to ship large items. I thought for sure that THmotorsports was going to call and tell me large or over sized items didn't qualify for the free shipping, but they never did. Free shipping can be a huge money saver!

Six point harness to keep me in the seat during time trail runs.


Getting car parts will always put a smile on my face!

Ordering my rywire harness. Will post pictures when I get it. Also if you do order from them and need the C101 wires not connected and left as a flying lead or open lead chose the other/race chassis instead of your actual chassis.
Finally going to get my dash done. I'm going to cut the bottom part where the radio and HVAC use to be. This will make a straight line down the whole dash. I'll rivet the diamond plated aluminum were the radio went, and then rivet the fuse block and switch panel on the sheet of all aluminum. After that I can tighten up all those wires. I'm also going to paint the dash Cherry Black. I'll post pictures as I go along with this dash build. Should be starting it tomorrow.

Started work on the dash. Just make the cutouts.

YES, YES, YES!!! My rywire harness came in a day early. It is awesome, and it's made with excellent quality.

Last edited by fewall11b; Apr 16, 2015 at 03:02 PM. Reason: build update


....
Hey! Look At Me!! I'm a Supporting Member!!
Joined: Dec 2010
Posts: 1,582
Likes: 5
Rep Power: 205 
Re: Track build in progress
Nice work....
I listen to so many people do alot big talking about what they are going to do to thier Civic but it's actually refreshing to see the people who just get it done.
I listen to so many people do alot big talking about what they are going to do to thier Civic but it's actually refreshing to see the people who just get it done.

Thread Starter
Registered!!
Joined: Nov 2010
Posts: 42
Likes: 0
From: WA
Rep Power: 0 Re: Track build in progress
Thanks guys. I just sent my intake manifold back, wrong bolt patter.  The stock one has a crack running around one of the runners. Currently using some permatex high temp copper to seal it up 'til the correct manifold shows up.
The stock one has a crack running around one of the runners. Currently using some permatex high temp copper to seal it up 'til the correct manifold shows up. 
Thread
Thread Starter
Honda Civic Forum
Replies
Last Post
Bruce2
Mechanical Problems/Vehicle Issues and Fix-it Forum
0
Sep 27, 2015 08:45 PM
Touge
Canada East
0
Sep 22, 2015 11:55 PM
Touge
Ottawa
0
Sep 22, 2015 11:52 PM
Touge
Canada East
0
Sep 22, 2015 11:52 PM
Touge
Canada East
0
Sep 18, 2015 12:13 AM

