
DIY: Cam and Crank Seal Replacement

Thread Starter
Prelude Owner
iTrader: (7)
Joined: Sep 2011
Posts: 6,202
Likes: 358
From: DE
Rep Power: 245 

DIY: Cam and Crank Seal Replacement
This was performed on a 95 Civic Ex with a D16, but will be similar to D15 and D17 engines. All pictures are from a 95 Civic Ex.
Items:
12mm Socket
3/8%u201D Drive wrench
Drill Bit or other hard straight object
Small flathead or metal pick
PB Blaster
Small rubber hammer
Buy from local hardware store:
1 %u00BC%u201D PVC Pipe
%u201CT%u201D adapter
Honda Part Numbers-These are for an Ex Coupe with ABS
Cam Seal - 91213-P2F-A01 (found under Camshaft-Timingbelt category)
Crank Seal - 91212-P2F-A01 (found under Oil Pump-Oil Strainer category)
This is best done while doing a timing belt job, since the belt needs to be removed in order to access the seals.
Crank Seal Procedure:
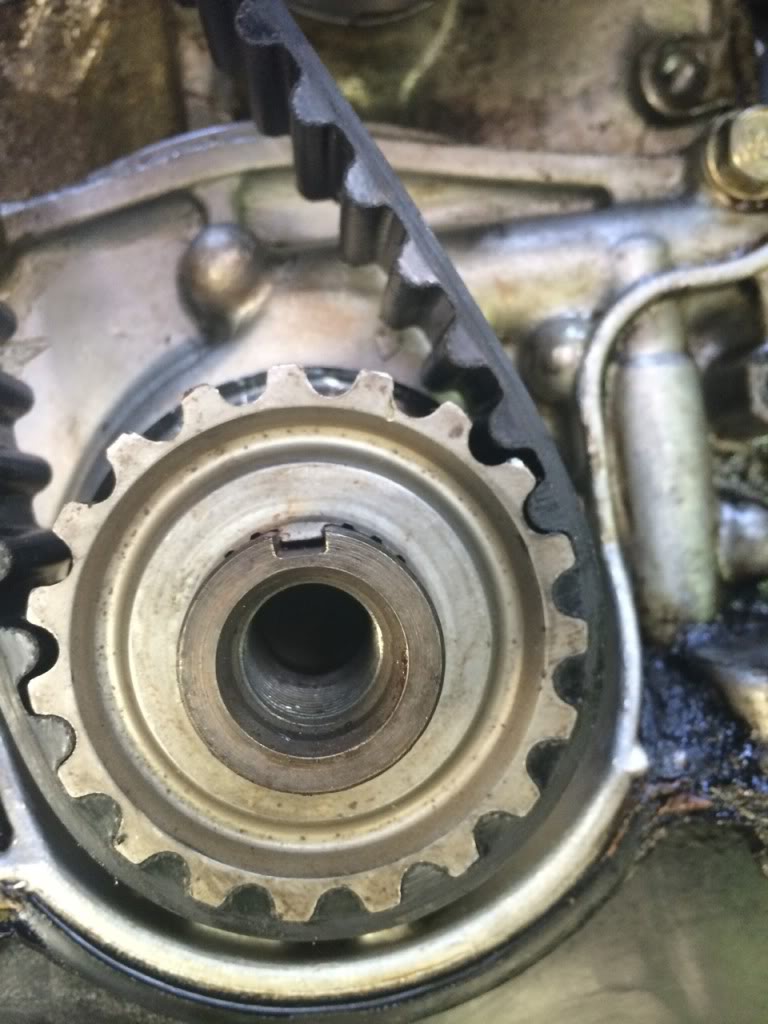
1.) Once you timing belt is removed you are left with:
Crank Sprocket:
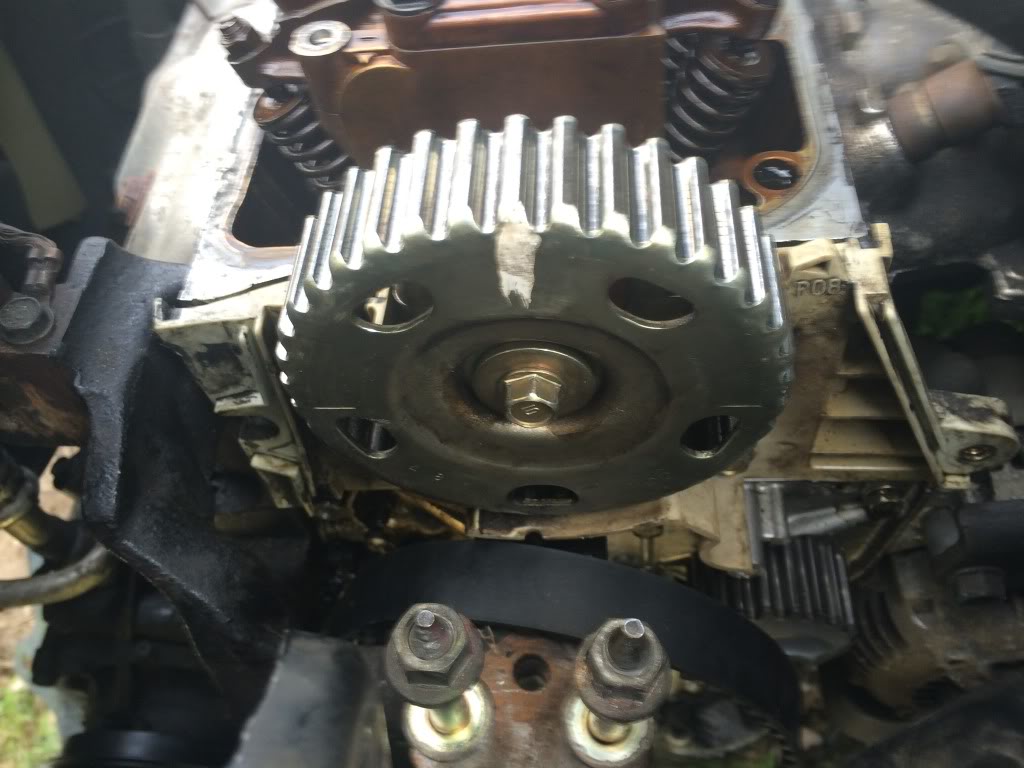
Cam Gear:
2.) We will start with the crank seal. Remove the crank sprocket from the crankshaft. Mine was a little difficult to remove so I had to use PB Blaster and a small hammer. If you are having difficulty pulling it off, spray some PB Blaster in between the crank and sprocket, let it soak and then hit the face of the sprocket with the small hammer. Be careful not to damage the sprocket teeth! Use a rubber hammer to tap around the outside edges of the sprocket. Wiggle the sprocket back and forth with a firm grip. Repeat process if needed. It will eventually slide off.
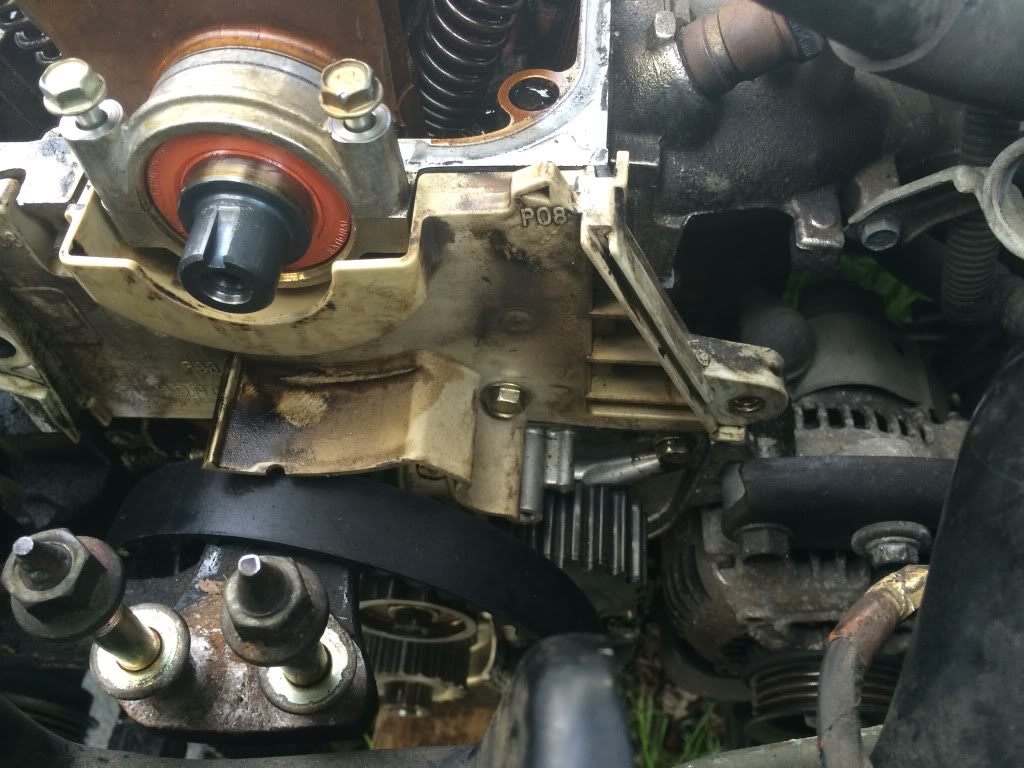
3.) Once the sprocket is removed you will be able to see the crank seal. Take a mental note of how far recessed the seal is. The new one will need to be pressed in equally as far.

4.) Use your small flathead or metal pick to remove the seal. Mine came out rather easily since it was leaking and worn out.
5.) Once removed get your new seal ready. Place the new seal around the crankshaft. Don't push it in all the way into the block Grab you Home Depot seal installer tool and use that to press it further into the block. Make sure it goes in straight!
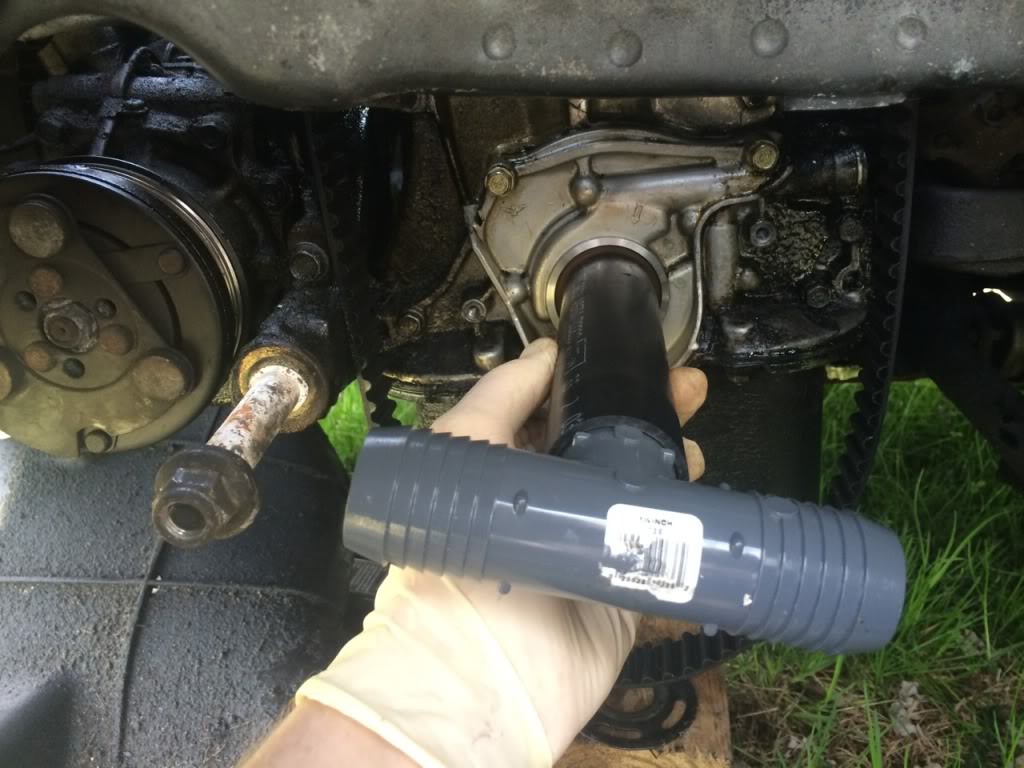
Using your hammer gently drive the new seal into place, making sure to keep it going in straight. Once it stops going in and it is at the point where you took that mental picture you are good to go.
6.) Put sprocket back
Cam Seal Procedure:
You should be looking at this:
1.) Remove the Cam gear. I used a drill bit to hold the gear in place while I loosened the bolt which is a 12mm. Stick the drill bit through one of the holes in the gear and let it rest against the block.
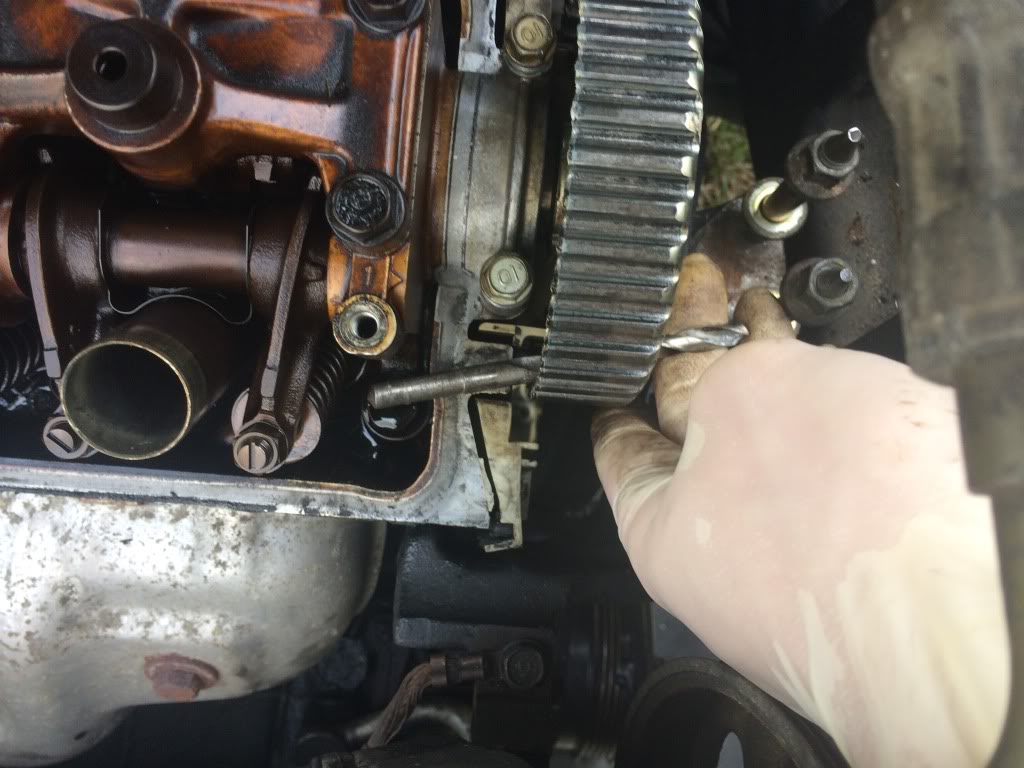
2) Use your 12mm socket and ratchet (I used a serpentine belt bar and it worked great) to break the bolt loose. I had to hold the drill bit with one hand while I loosened the bolt. I moved the gear back to TDC before removing it. Not sure if it is necessary since the gear slides on one way. Once removed you are left with:
3.) Take another mental pictureUse your flat head or metal pick to remove the old cam seal. I found it came out easiest if I pulled it from the center. This seal also came out easily since it was worn.
4.) Grab your new seal, and place it onto the camshaft. Don't Press it in all the way; just let it kiss the edge of the head.
5.) Use your Home Depot tool to press this seal in as well. You need a short piece of pipe and your T won't fit so you will have to fashion a flat surface for you to tap with the hammer. Press it on until it stops and it looks like it did before you took it out.

6.) Put the cam gear back on.
Proceed with the remainder of your Timing belt job!
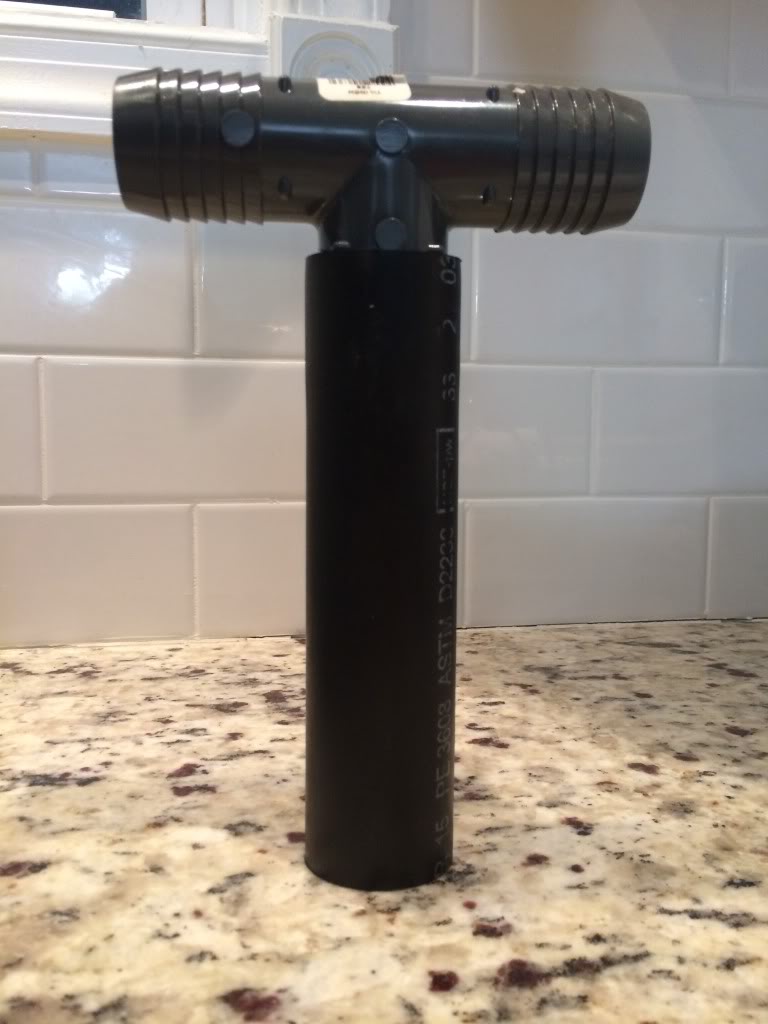
Closer picture of the seal installer tool. You need to make sure that the side of the pipe hitting the seal is flat. When I bought the pvc pipe the end was not flat so i used a compound miter saw to cut it straight. The pipe is 100psi poly pipe and came in small 2 ft sections. Total cost of pipe and T was $2.97
I will add torque specs later.
Items:
12mm Socket
3/8%u201D Drive wrench
Drill Bit or other hard straight object
Small flathead or metal pick
PB Blaster
Small rubber hammer
Buy from local hardware store:
1 %u00BC%u201D PVC Pipe
%u201CT%u201D adapter
Honda Part Numbers-These are for an Ex Coupe with ABS
Cam Seal - 91213-P2F-A01 (found under Camshaft-Timingbelt category)
Crank Seal - 91212-P2F-A01 (found under Oil Pump-Oil Strainer category)
This is best done while doing a timing belt job, since the belt needs to be removed in order to access the seals.
Crank Seal Procedure:
1.) Once you timing belt is removed you are left with:
Crank Sprocket:
Cam Gear:
2.) We will start with the crank seal. Remove the crank sprocket from the crankshaft. Mine was a little difficult to remove so I had to use PB Blaster and a small hammer. If you are having difficulty pulling it off, spray some PB Blaster in between the crank and sprocket, let it soak and then hit the face of the sprocket with the small hammer. Be careful not to damage the sprocket teeth! Use a rubber hammer to tap around the outside edges of the sprocket. Wiggle the sprocket back and forth with a firm grip. Repeat process if needed. It will eventually slide off.
3.) Once the sprocket is removed you will be able to see the crank seal. Take a mental note of how far recessed the seal is. The new one will need to be pressed in equally as far.
4.) Use your small flathead or metal pick to remove the seal. Mine came out rather easily since it was leaking and worn out.
5.) Once removed get your new seal ready. Place the new seal around the crankshaft. Don't push it in all the way into the block Grab you Home Depot seal installer tool and use that to press it further into the block. Make sure it goes in straight!
Using your hammer gently drive the new seal into place, making sure to keep it going in straight. Once it stops going in and it is at the point where you took that mental picture you are good to go.
6.) Put sprocket back
Cam Seal Procedure:
You should be looking at this:
1.) Remove the Cam gear. I used a drill bit to hold the gear in place while I loosened the bolt which is a 12mm. Stick the drill bit through one of the holes in the gear and let it rest against the block.
2) Use your 12mm socket and ratchet (I used a serpentine belt bar and it worked great) to break the bolt loose. I had to hold the drill bit with one hand while I loosened the bolt. I moved the gear back to TDC before removing it. Not sure if it is necessary since the gear slides on one way. Once removed you are left with:
3.) Take another mental pictureUse your flat head or metal pick to remove the old cam seal. I found it came out easiest if I pulled it from the center. This seal also came out easily since it was worn.
4.) Grab your new seal, and place it onto the camshaft. Don't Press it in all the way; just let it kiss the edge of the head.
5.) Use your Home Depot tool to press this seal in as well. You need a short piece of pipe and your T won't fit so you will have to fashion a flat surface for you to tap with the hammer. Press it on until it stops and it looks like it did before you took it out.
6.) Put the cam gear back on.
Proceed with the remainder of your Timing belt job!
Closer picture of the seal installer tool. You need to make sure that the side of the pipe hitting the seal is flat. When I bought the pvc pipe the end was not flat so i used a compound miter saw to cut it straight. The pipe is 100psi poly pipe and came in small 2 ft sections. Total cost of pipe and T was $2.97
I will add torque specs later.
Last edited by GolNat; May 3, 2014 at 07:35 PM. Reason: Added Part #'s and Picture of tool
If you think a good mechanic is expensive, try hiring a bad one
Joined: Dec 2011
Posts: 32,017
Likes: 256
From: Midwest. Aiming about mid-chest
Rep Power: 519 Re: DIY: Cam and Crank Seal Replacement
I'm lovin the special tool seal installers there.
The only thing I'd do different with those is I'd look for tubes that are slightly larger diameter, if that's even possible. I prefer to push on the outer area of the seal instead of the inner, less chance of deforming if you have to use a lot of pressure or a hammer IMO.
The only thing I'd do different with those is I'd look for tubes that are slightly larger diameter, if that's even possible. I prefer to push on the outer area of the seal instead of the inner, less chance of deforming if you have to use a lot of pressure or a hammer IMO.
Thread Starter
Prelude Owner
iTrader: (7)
Joined: Sep 2011
Posts: 6,202
Likes: 358
From: DE
Rep Power: 245 Re: DIY: Cam and Crank Seal Replacement
Thanks. It was your idea.
I would say thats a good idea. The next size up that they had in stock was to big but I possibly could have found another round object. The home improvement store has lots of round objects.
The only thing I'd do different with those is I'd look for tubes that are slightly larger diameter, if that's even possible. I prefer to push on the outer area of the seal instead of the inner, less chance of deforming if you have to use a lot of pressure or a hammer IMO.

Thread
Thread Starter
Honda Civic Forum
Replies
Last Post
LionSpratt
General Automotive Discussion
14
Jan 29, 2017 11:07 PM
Blaster30
Mechanical Problems/Vehicle Issues and Fix-it Forum
8
Apr 22, 2015 12:21 PM
thesushiboy
Mechanical Problems/Vehicle Issues and Fix-it Forum
1
Apr 12, 2015 07:40 PM
thesushiboy
Mechanical Problems/Vehicle Issues and Fix-it Forum
6
Apr 12, 2015 02:54 AM

