
DIY: EF::Upgrade to Si Cluster


Thread Starter
Registered!!
Joined: Feb 2014
Posts: 20
Likes: 0
Rep Power: 0 
<!--3 :,( so i decided to upgrade my DX or STD cluster to a Si cluster.
Here is how i changed it
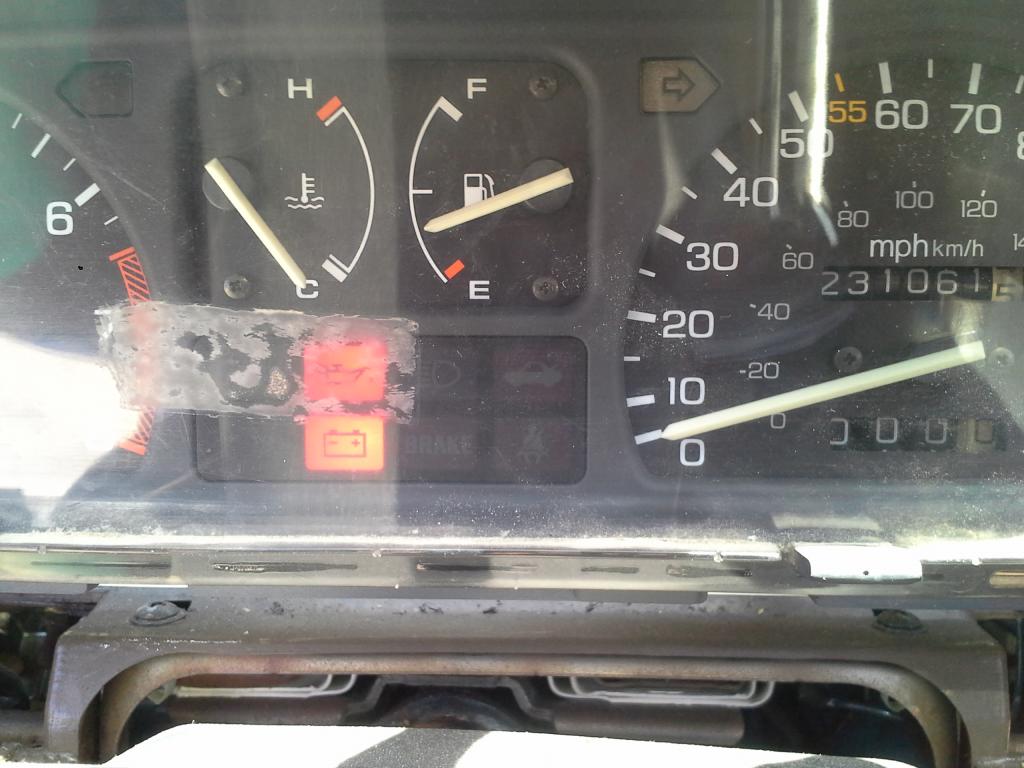
So! i dont know about you but driving with no tachometer got kinda bothersome
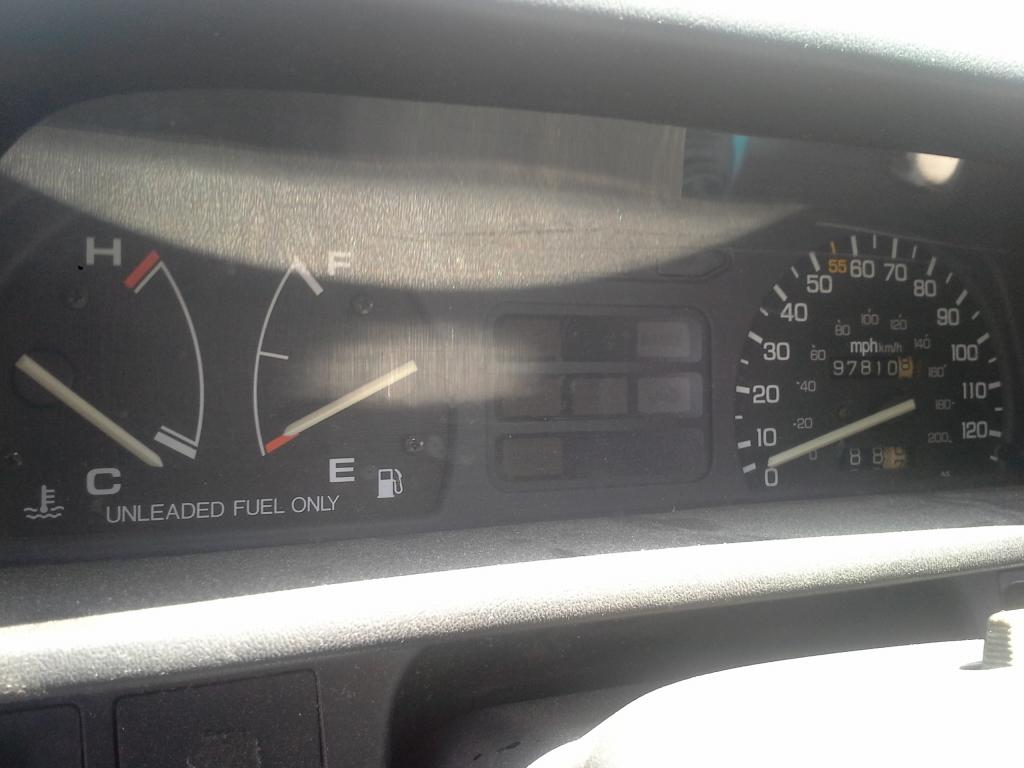
See? no RPM Here is how i changed it
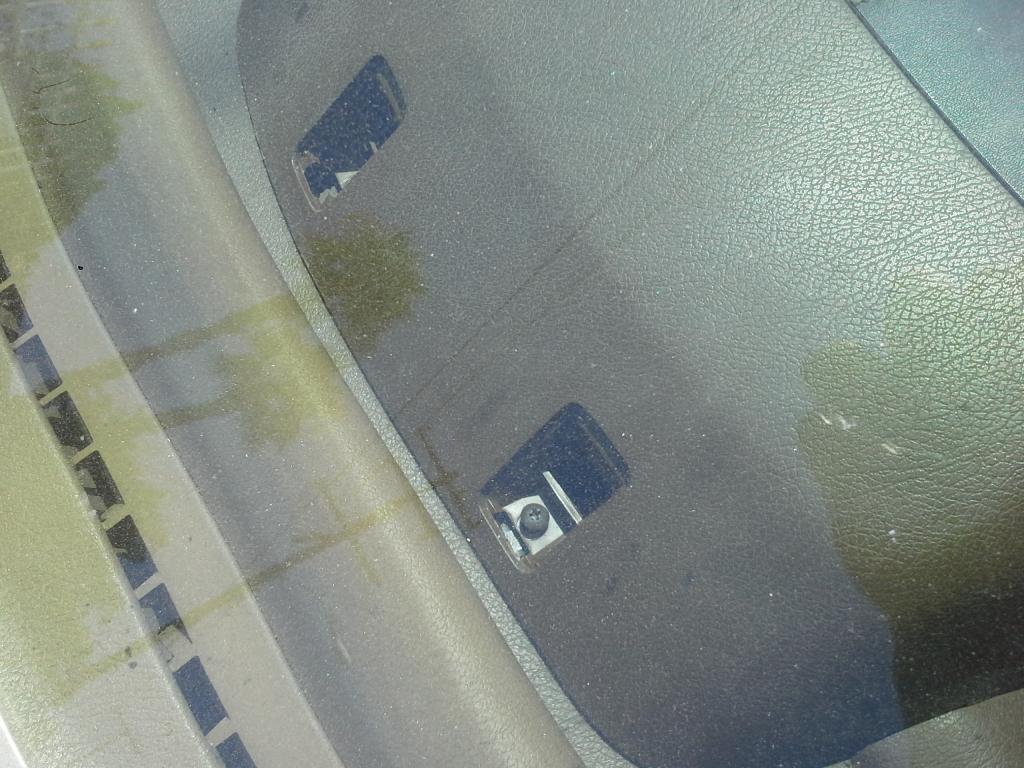
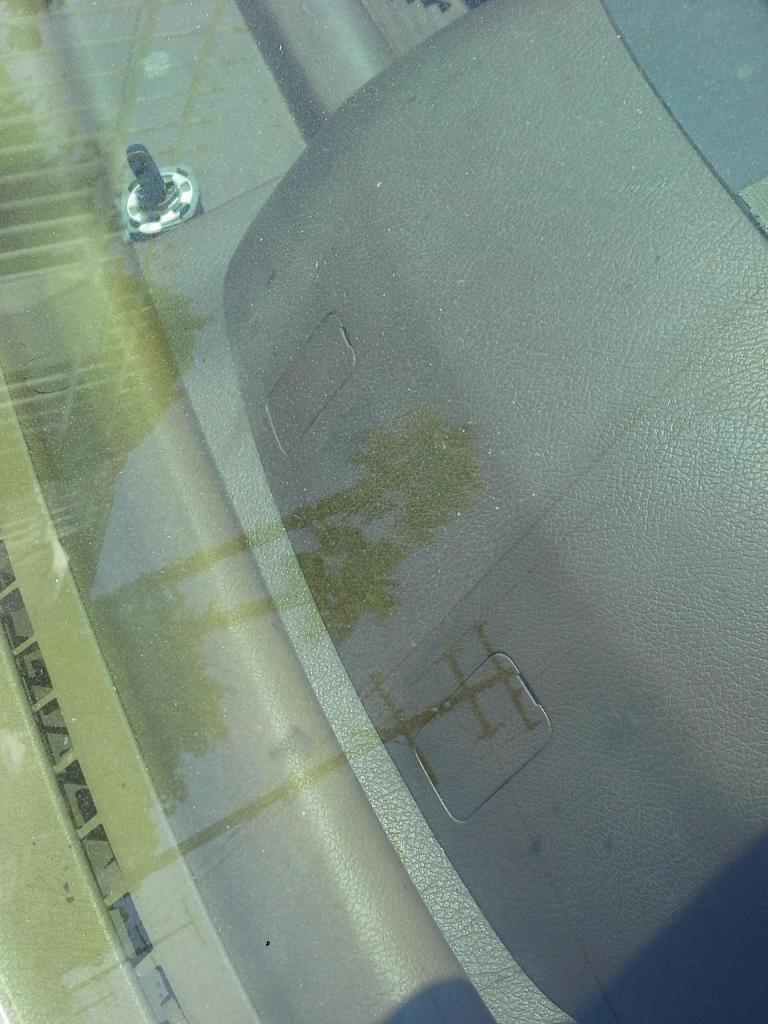
Step 1: Pop screw covers off (i used a small flat-head) which are located right under neath the windshield on top of the cluster housing/dashboard and unscrew the screws

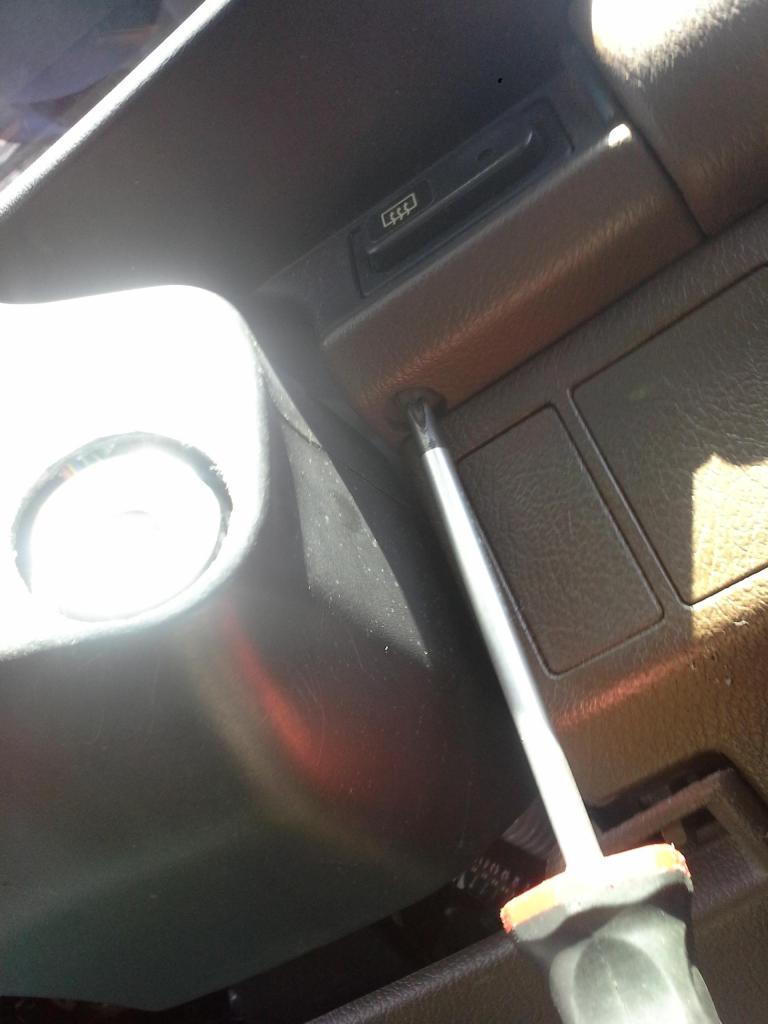
Step 2: Unscrew both screws from beneath the cluster (one is on each side of the steering wheel
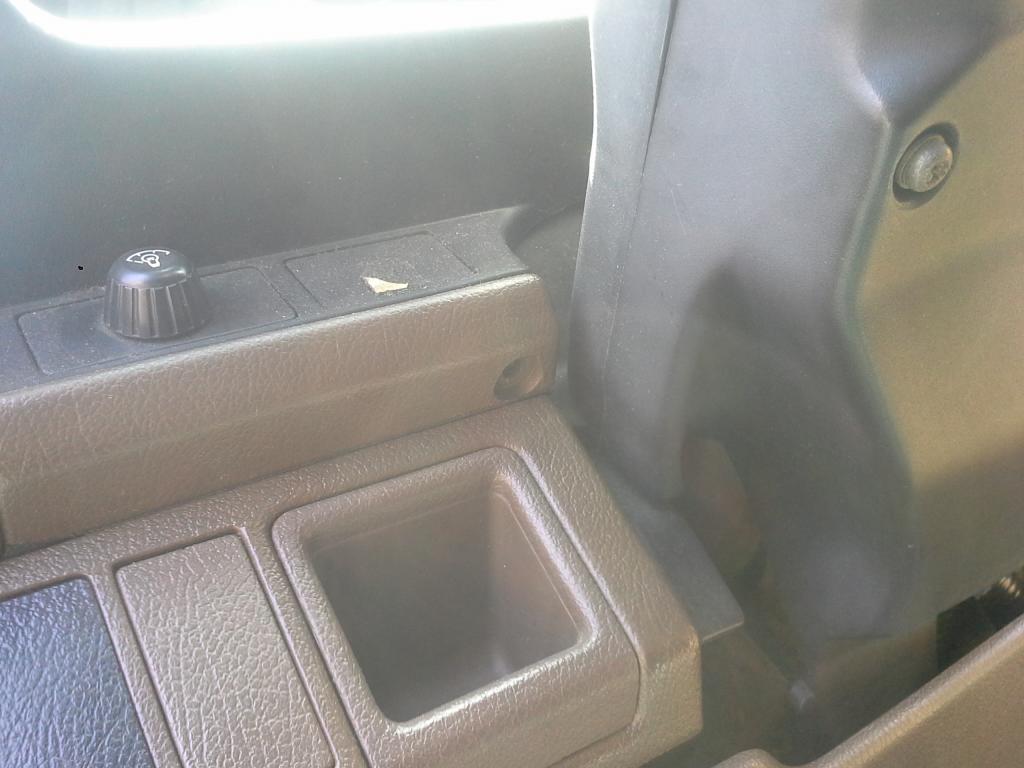
Step 3: Wiggle off the cluster housing (not sure what the actual name is)
**On my civic my light dimmer and rear glass vent switches are being housed on this piece, simply undo the clips that wire them so that the whole cover can be completely removed.
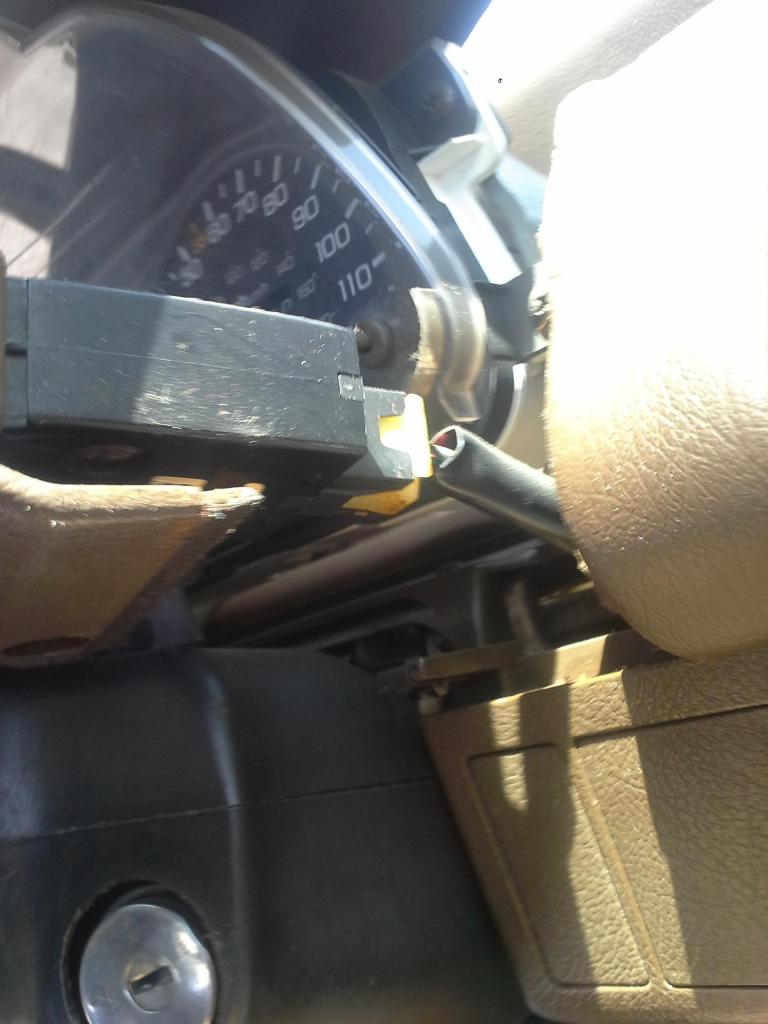

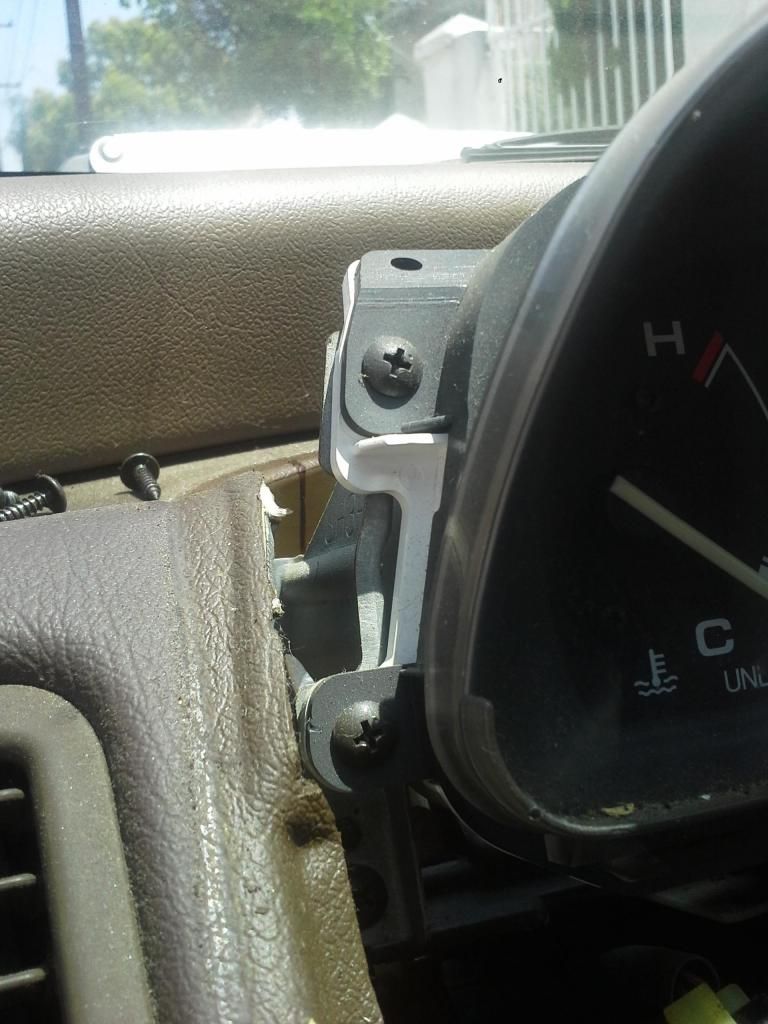
Step 4: After the housing is removed you will be able to see that the cluster is held up by two brackets it is screwed on. Remove the two front screws. This will make the cluster removable without removing the brackets
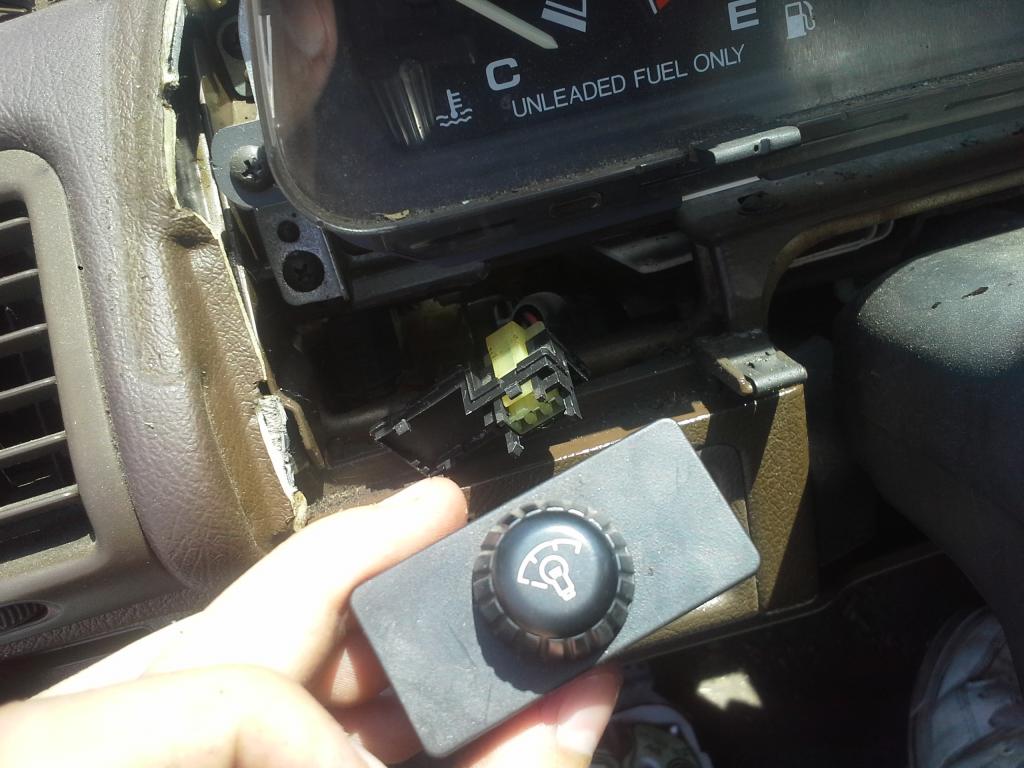
Step 5: On the back of the cluster you can see that there are 2 bunches of wires and one cable plugged in to it. Undo the clips and disconnect the cable (with your fingers press down on the clip and gently pull them out of the cluster)
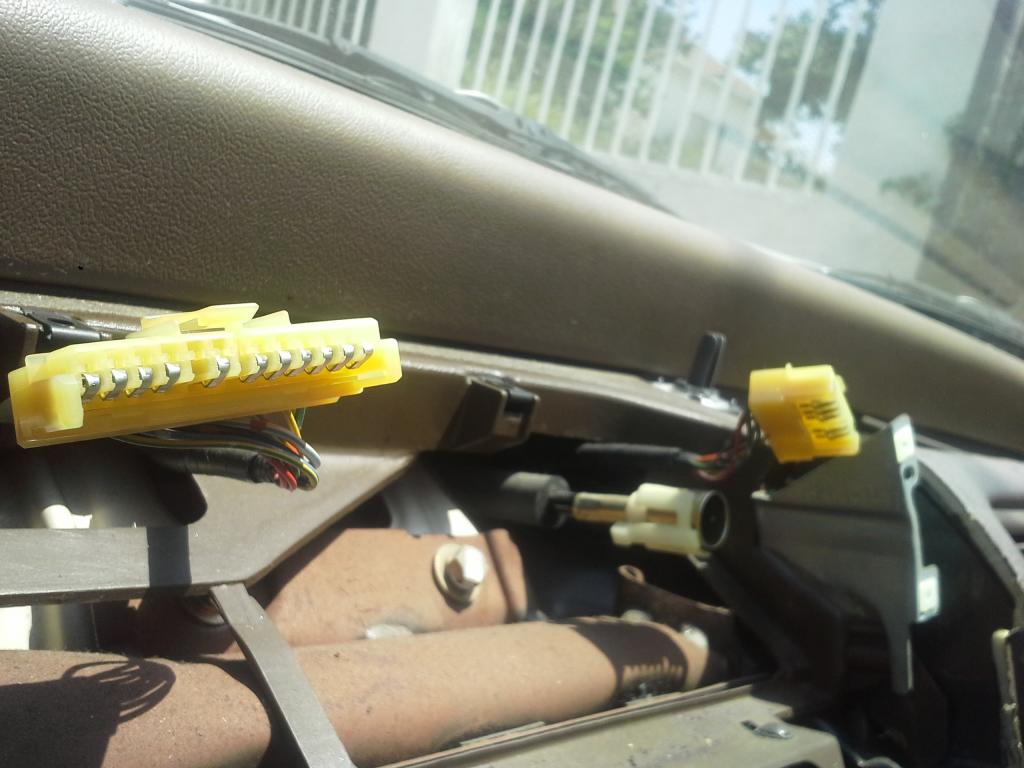
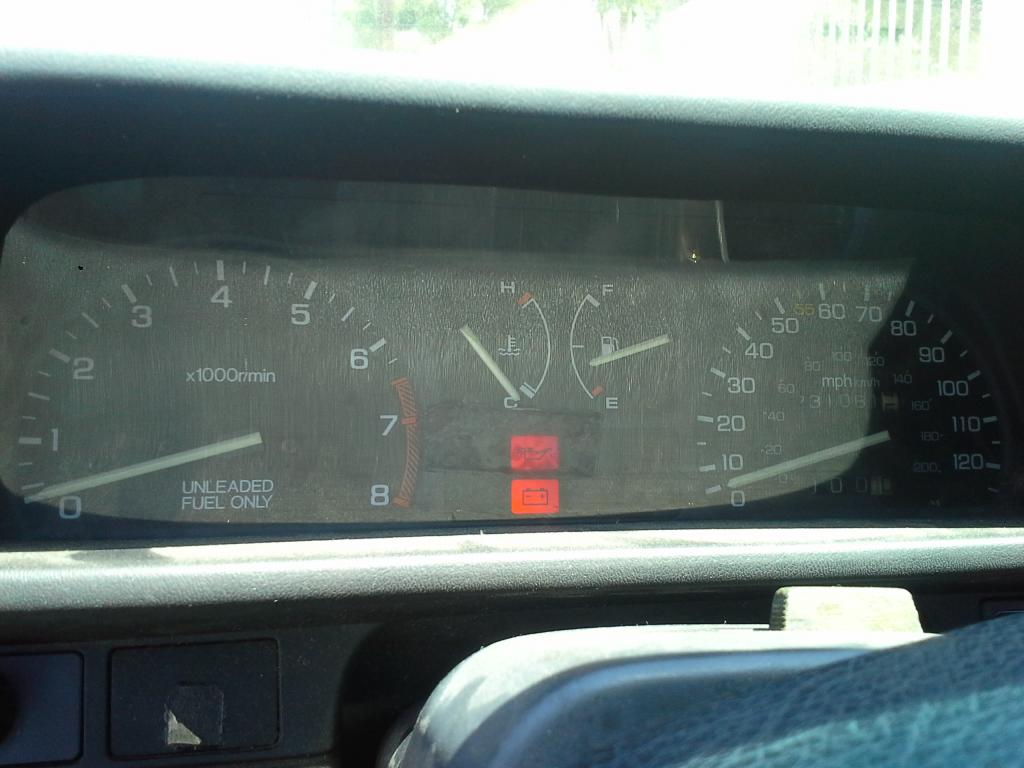
Step 6: Remove your old cluster and place in your "new" Si cluster and plug all the wires back in (Do not mount the cluster onto the brackets just yet, you must first check to see if your "new" cluster is functioning properly. To do this, I turned on my car and drove around the block and refilled on gas checking to see if all the gauges like my temp. speed gas RPM are working properly.) **dont drive like a maniac, this is just a test drive and plus your cluster is loose lol
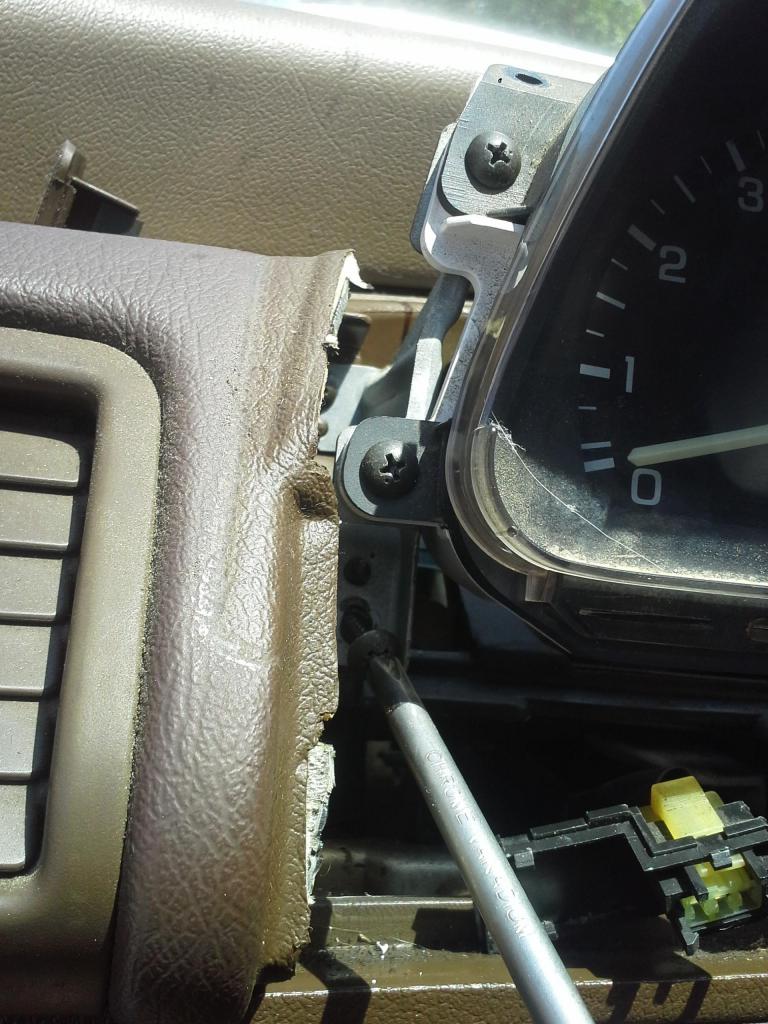
Step 7: If you got yourself a working cluster, Mount it to both of the brackets and fit the cluster housing back into place. **in the picture im screwing in a screw into the bracket because i accidentally took it off. There no need to take the brackets off just screw the two front screws back in
At this point i hooked up my light dimmer and rear glass venting switched in and they just slide right back into place
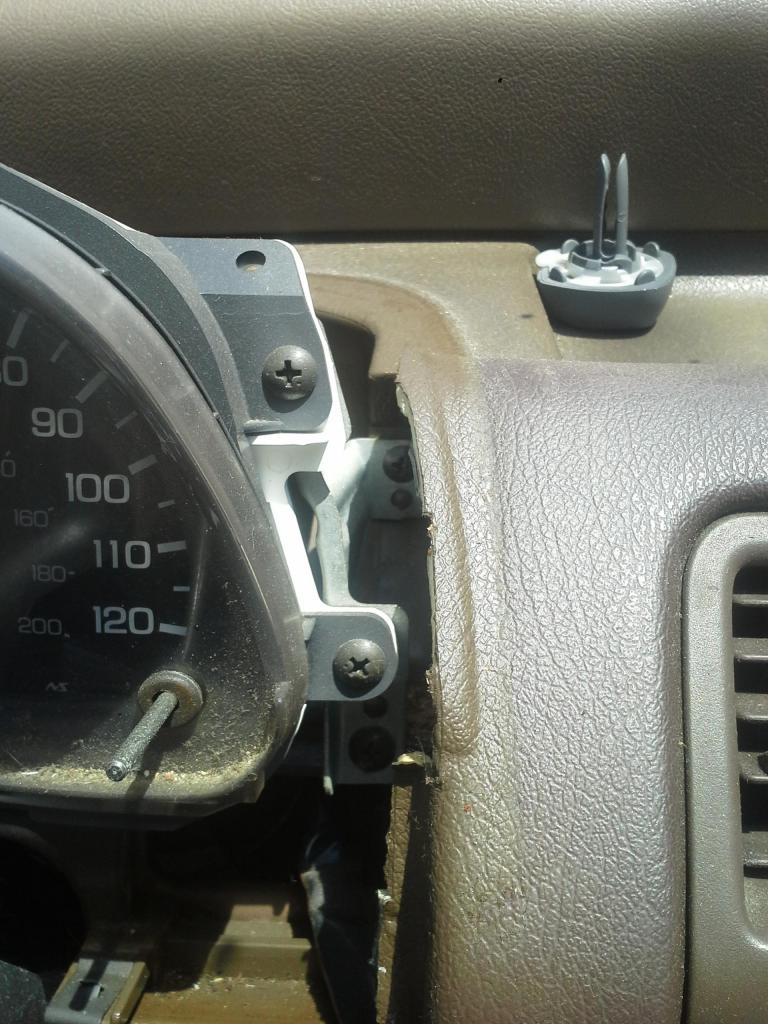
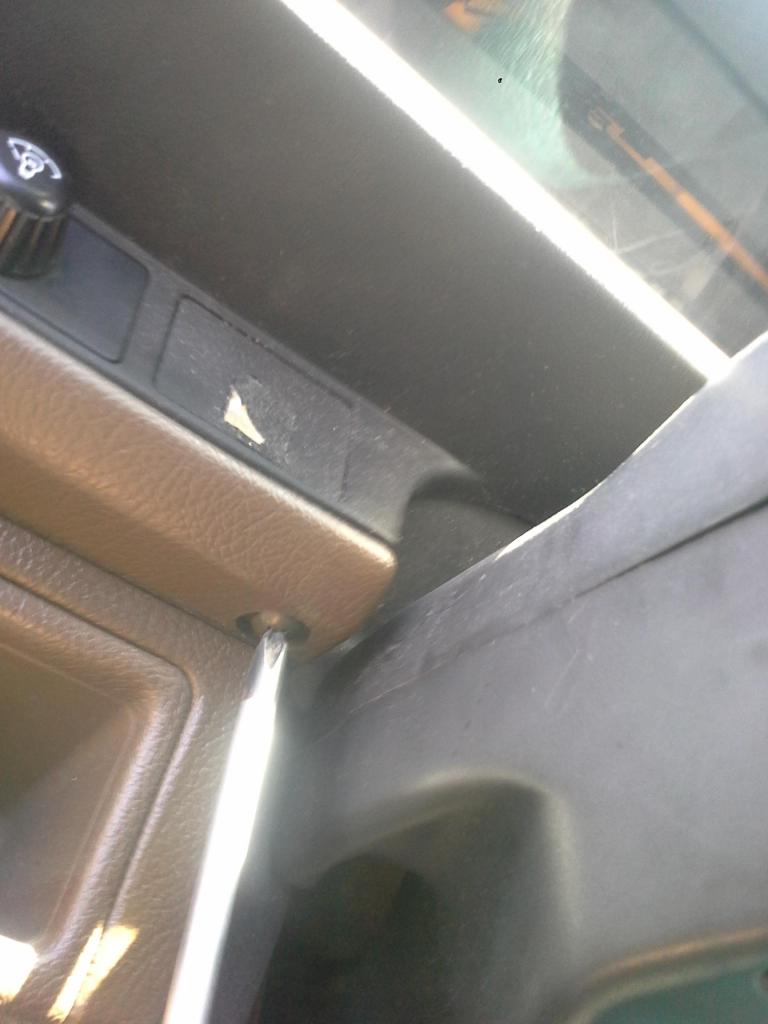
Step 8: Screw in the same screws that hold the housing in place
*2 underneath the housing and 2 more under windsield on top of the housing/dashboard
and put the screw covers back into place (they clip in real easy)
ENJOY YOUR "NEW" Si CLUSTER!!!!
Here is how i changed it
So! i dont know about you but driving with no tachometer got kinda bothersome

See? no RPM
Here is how i changed it Step 1: Pop screw covers off (i used a small flat-head) which are located right under neath the windshield on top of the cluster housing/dashboard and unscrew the screws


Step 2: Unscrew both screws from beneath the cluster (one is on each side of the steering wheel


Step 3: Wiggle off the cluster housing (not sure what the actual name is)
**On my civic my light dimmer and rear glass vent switches are being housed on this piece, simply undo the clips that wire them so that the whole cover can be completely removed.


Step 4: After the housing is removed you will be able to see that the cluster is held up by two brackets it is screwed on. Remove the two front screws. This will make the cluster removable without removing the brackets


Step 5: On the back of the cluster you can see that there are 2 bunches of wires and one cable plugged in to it. Undo the clips and disconnect the cable (with your fingers press down on the clip and gently pull them out of the cluster)

Step 6: Remove your old cluster and place in your "new" Si cluster and plug all the wires back in (Do not mount the cluster onto the brackets just yet, you must first check to see if your "new" cluster is functioning properly. To do this, I turned on my car and drove around the block and refilled on gas checking to see if all the gauges like my temp. speed gas RPM are working properly.) **dont drive like a maniac, this is just a test drive and plus your cluster is loose lol

Step 7: If you got yourself a working cluster, Mount it to both of the brackets and fit the cluster housing back into place. **in the picture im screwing in a screw into the bracket because i accidentally took it off. There no need to take the brackets off
just screw the two front screws back in
At this point i hooked up my light dimmer and rear glass venting switched in and they just slide right back into place
Step 8: Screw in the same screws that hold the housing in place
*2 underneath the housing and 2 more under windsield on top of the housing/dashboard
and put the screw covers back into place (they clip in real easy)

ENJOY YOUR "NEW" Si CLUSTER!!!!

Last edited by sdaidoji; Aug 16, 2014 at 08:59 AM. Reason: for some reason as i post thread only a portion was posted i just replied my actual write up ENJOY :)
Thread Starter
Registered!!
Joined: Feb 2014
Posts: 20
Likes: 0
Rep Power: 0 DIY: EF::Upgrade to Si Cluster
So! i dont know about you but driving with no tachometer got kinda bothersome

See? no RPM Here is how i changed it
Step 1: Pop screw covers off (i used a small flat-head) which are located right under neath the windshield on top of the cluster housing/dashboard and unscrew the screws

Step 2: Unscrew both screws from beneath the cluster (one is on each side of the steering wheel


Step 3: Wiggle off the cluster housing (not sure what the actual name is)
**On my civic my light dimmer and rear glass vent switches are being housed on this piece, simply undo the clips that wire them so that the whole cover can be completely removed.

Step 4: After the housing is removed you will be able to see that the cluster is held up by two brackets it is screwed on. Remove the two front screws. This will make the cluster removable without removing the brackets


Step 5: On the back of the cluster you can see that there are 2 bunches of wires and one cable plugged in to it. Undo the clips and disconnect the cable (with your fingers press down on the clip and gently pull them out of the cluster)

Step 6: Remove your old cluster and place in your "new" Si cluster and plug all the wires back in (Do not mount the cluster onto the brackets just yet, you must first check to see if your "new" cluster is functioning properly. To do this, I turned on my car and drove around the block and refilled on gas checking to see if all the gauges like my temp. speed gas RPM are working properly.) **dont drive like a maniac, this is just a test drive and plus your cluster is loose lol

Step 7: If you got yourself a working cluster, Mount it to both of the brackets and fit the cluster housing back into place. **in the picture im screwing in a screw into the bracket because i accidentally took it off. There no need to take the brackets off just screw the two front screws back in

At this point i hooked up my light dimmer and rear glass venting switched in and they just slide right back into place
Step 8: Screw in the same screws that hold the housing in place
*2 underneath the housing and 2 more under windsield on top of the housing/dashboard
and put the screw covers back into place (they clip in real easy)

ENJOY YOUR "NEW" Si CLUSTER!!!!

See? no RPM
Here is how i changed it Step 1: Pop screw covers off (i used a small flat-head) which are located right under neath the windshield on top of the cluster housing/dashboard and unscrew the screws
Step 2: Unscrew both screws from beneath the cluster (one is on each side of the steering wheel
Step 3: Wiggle off the cluster housing (not sure what the actual name is)
**On my civic my light dimmer and rear glass vent switches are being housed on this piece, simply undo the clips that wire them so that the whole cover can be completely removed.
Step 4: After the housing is removed you will be able to see that the cluster is held up by two brackets it is screwed on. Remove the two front screws. This will make the cluster removable without removing the brackets
Step 5: On the back of the cluster you can see that there are 2 bunches of wires and one cable plugged in to it. Undo the clips and disconnect the cable (with your fingers press down on the clip and gently pull them out of the cluster)
Step 6: Remove your old cluster and place in your "new" Si cluster and plug all the wires back in (Do not mount the cluster onto the brackets just yet, you must first check to see if your "new" cluster is functioning properly. To do this, I turned on my car and drove around the block and refilled on gas checking to see if all the gauges like my temp. speed gas RPM are working properly.) **dont drive like a maniac, this is just a test drive and plus your cluster is loose lol
Step 7: If you got yourself a working cluster, Mount it to both of the brackets and fit the cluster housing back into place. **in the picture im screwing in a screw into the bracket because i accidentally took it off. There no need to take the brackets off
just screw the two front screws back inAt this point i hooked up my light dimmer and rear glass venting switched in and they just slide right back into place
Step 8: Screw in the same screws that hold the housing in place
*2 underneath the housing and 2 more under windsield on top of the housing/dashboard
and put the screw covers back into place (they clip in real easy)
ENJOY YOUR "NEW" Si CLUSTER!!!!
Last edited by sdaidoji; Aug 16, 2014 at 08:57 AM. Reason: Added DIY to title


Thread
Thread Starter
Honda Civic Forum
Replies
Last Post
fatih717171
Archive - Wanted Parts (WTB's)
2
Jul 25, 2016 06:22 PM
hondacivic0253
7th Generation Civic 2001 - 2005
7
Sep 29, 2015 08:06 AM
260000milesgoal
I.C.E. (Audio) & Electrical Upgrades
2
Sep 25, 2015 07:41 PM
rayman009
I.C.E. (Audio) & Electrical Upgrades
3
Sep 12, 2015 08:30 PM
Bricoleur
I.C.E. (Audio) & Electrical Upgrades
4
Sep 9, 2015 12:23 PM

