
My new project


Thread Starter
Registered!!
Joined: Apr 2009
Posts: 54
Likes: 0
Rep Power: 208 
My new project
Well guys, last night I started the first of my 'major' bodywork and dove headfirst into my latest project..
Replacing:

Note: This is just for illustration purposes only. The best shot of the fugly square fuel door we have. This is a 7th gen GX, my car is an 05DX coupe.
With:

Professionally of course, no shade tree hackjob that screams rice.. So, with a 12 pack of bud and some good tunes I got to work. Got most of the fiberglassing done, and started the molding process but it's still very rough.. Here is a shot test fitting the ring in place, not the greatest pic in the world but you get the idea. I will post up some nicer ones when I get back to my camera. Lemme know what you guys think, and by the way - kudos for refraining on the unpainted 'ricer' bodykit jokes

Replacing:
Note: This is just for illustration purposes only. The best shot of the fugly square fuel door we have. This is a 7th gen GX, my car is an 05DX coupe.
With:
Professionally of course, no shade tree hackjob that screams rice.. So, with a 12 pack of bud and some good tunes I got to work. Got most of the fiberglassing done, and started the molding process but it's still very rough.. Here is a shot test fitting the ring in place, not the greatest pic in the world but you get the idea. I will post up some nicer ones when I get back to my camera. Lemme know what you guys think, and by the way - kudos for refraining on the unpainted 'ricer' bodykit jokes
Last edited by V84Lunch; Jun 26, 2009 at 01:54 PM. Reason: Clarification
 what kinda car is that?

Registered!!
Joined: Apr 2007
Posts: 10
Likes: 0
Rep Power: 0 
Re: My new project
Fiberglass and metal don't go together. I made that mistake. When I shaved the handles on my car I used a short strand body filler to do the bulk of the filling. Over time the expansion and contraction rates differ and cause a visible outline in your part. I would start over and at least use all metal filler.
Thread Starter
Registered!!
Joined: Apr 2009
Posts: 54
Likes: 0
Rep Power: 208 Re: My new project
Fiberglass and metal don't go together. I made that mistake. When I shaved the handles on my car I used a short strand body filler to do the bulk of the filling. Over time the expansion and contraction rates differ and cause a visible outline in your part. I would start over and at least use all metal filler.

Registered!!
Joined: Apr 2008
Posts: 954
Likes: 1
From: Calgary, Alberta
Rep Power: 231 
Re: My new project
that car is a civic gx, its also 7th gen like all of ours. if you look on the inside of the fuel door it says 'CNG FUELED' cng means compressed natural gas. it basically goes onto that hole you see and fills it up somewhat like a propane tank for your bbq.
Thread Starter
Registered!!
Joined: Apr 2009
Posts: 54
Likes: 0
Rep Power: 208 ** Project Update! **
Hey everyone, just got some photos arranged and wanted to post up my progress on the fuel door. I originally took this project on as sort of a 'primer' to body work and sorta get my feet wet. Love the look of these gas doors, and I thought it would add some originality and custom 'flare' to my ride, as I've never ran across another 7th gen with this mod. Couple of you guys weren't too excited, maybe these pics will give you somethin a little tastier to check out 
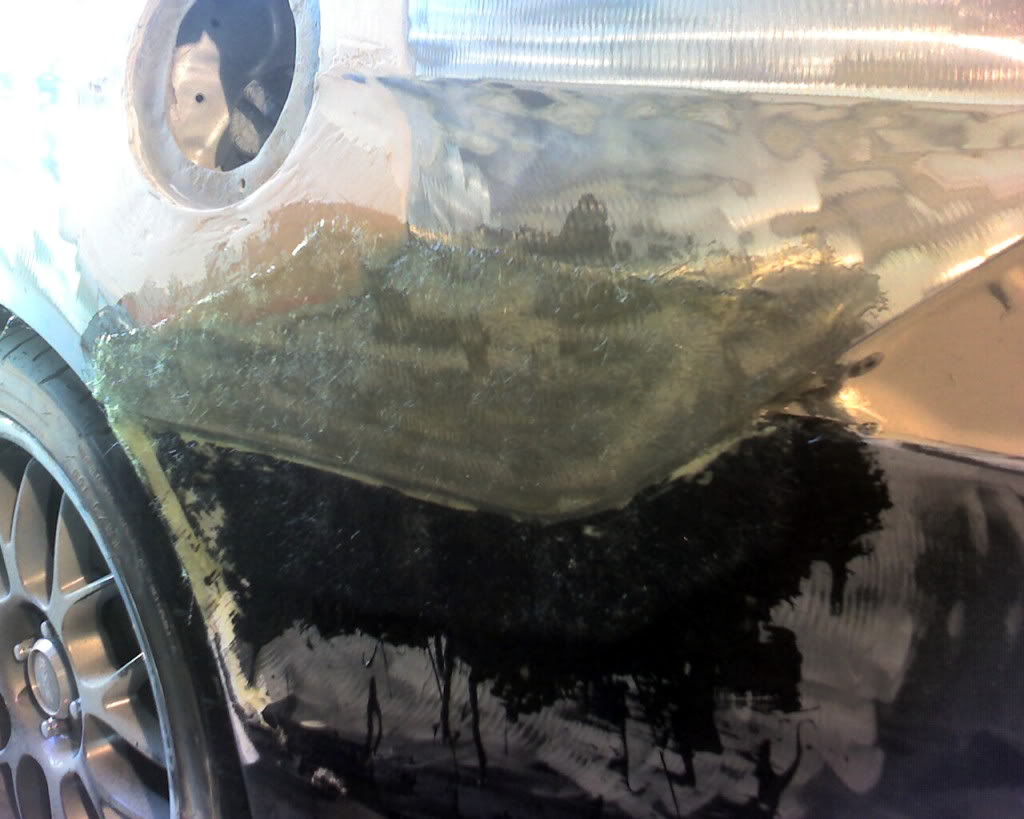
This is after I ground down a pretty large section around the fuel door to feather in my work. Also layed my fiberglass mat to start molding in my rear valence. Notice how much I overlapped each side: trying to isolate the movement/expansion and help these pieces move together. Theoretically this should stop cracking and whatnot, as it's much much better than just slapping bondo. We shall see!
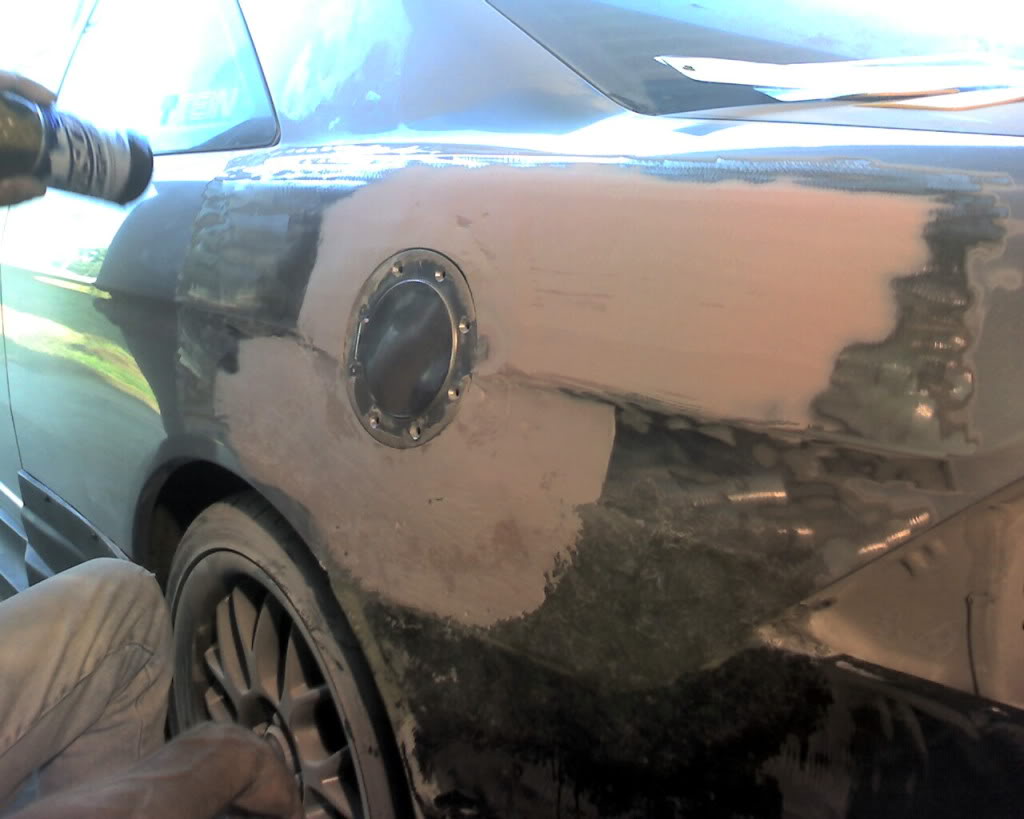
Here I started 'building up' to get my lines right, and help that billet door conform to the side of the car.
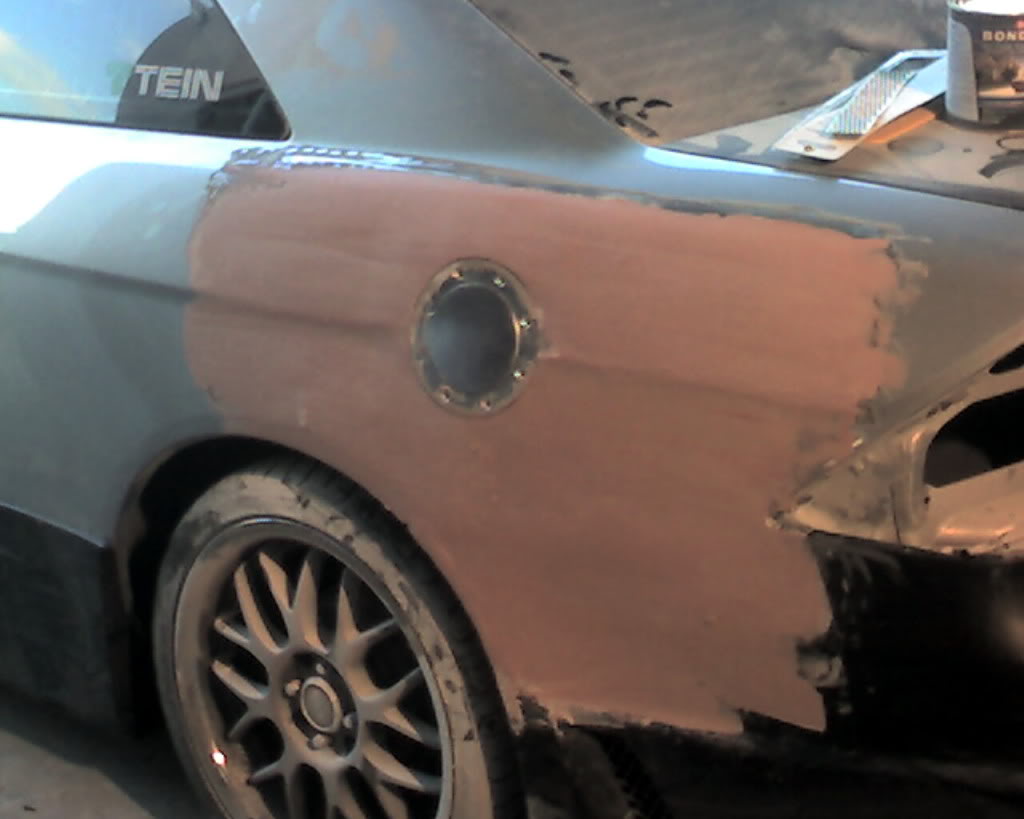
After much work and sanding, I layed down my skim coat to begin the final shaping and feathering. I've still got a lot of work to do, as far as smoothing and finalizing my lines but it was getting late and my arm was quite sore lol.
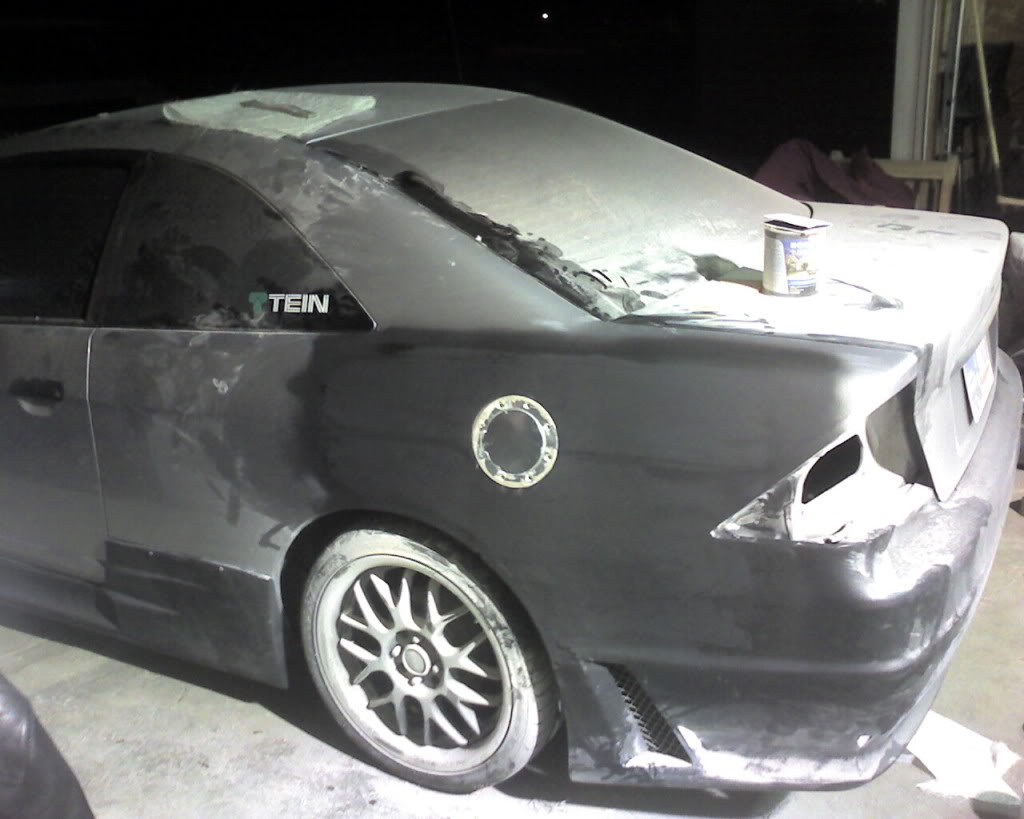
I shot some cheap *** rattle can primer to seal it off for now, once I return to the project this will serve as a nice guide coat for finish sanding. This also gave me a pretty good idea of what my finished product would look like. My opinion:
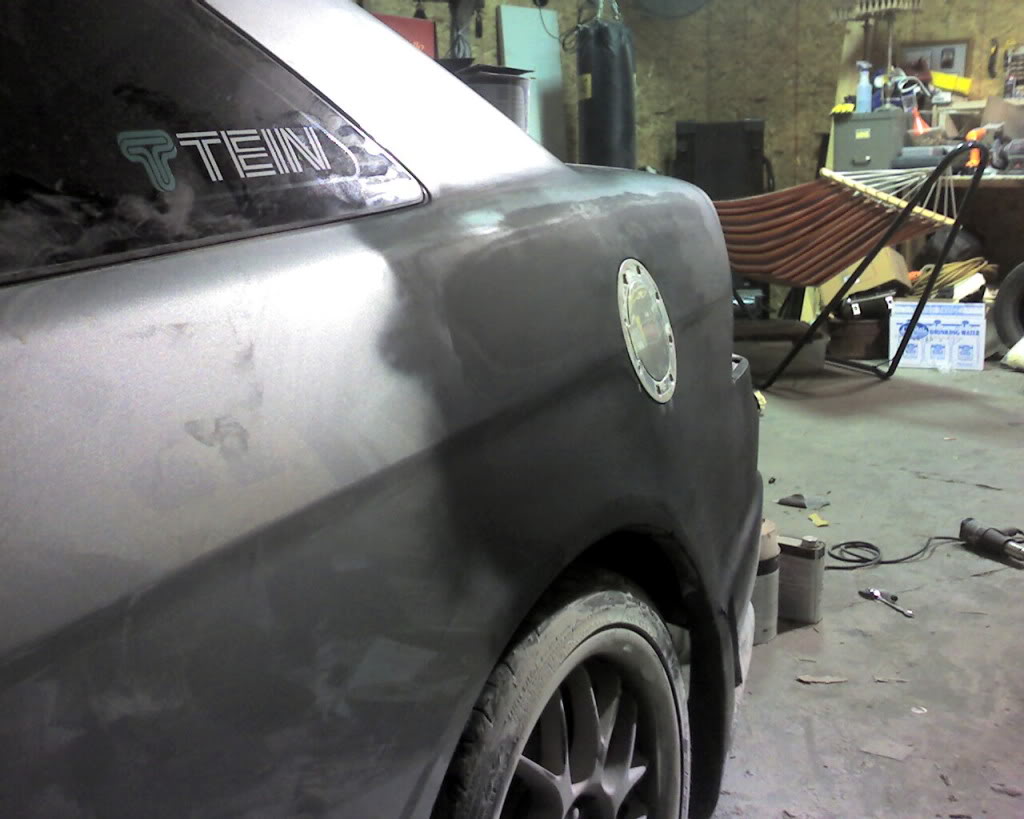
Here is the last pic for now, it shows the body line and how I'm retaining it throughout the mod. If I jack up the lines of the car it will surely look like ****.. So far I think I've done a decent job - what do you guys think?
This is after I ground down a pretty large section around the fuel door to feather in my work. Also layed my fiberglass mat to start molding in my rear valence. Notice how much I overlapped each side: trying to isolate the movement/expansion and help these pieces move together. Theoretically this should stop cracking and whatnot, as it's much much better than just slapping bondo. We shall see!
Here I started 'building up' to get my lines right, and help that billet door conform to the side of the car.
After much work and sanding, I layed down my skim coat to begin the final shaping and feathering. I've still got a lot of work to do, as far as smoothing and finalizing my lines but it was getting late and my arm was quite sore lol.
I shot some cheap *** rattle can primer to seal it off for now, once I return to the project this will serve as a nice guide coat for finish sanding. This also gave me a pretty good idea of what my finished product would look like. My opinion:
Here is the last pic for now, it shows the body line and how I'm retaining it throughout the mod. If I jack up the lines of the car it will surely look like ****.. So far I think I've done a decent job - what do you guys think?
Registered!!
Joined: Apr 2008
Posts: 954
Likes: 1
From: Calgary, Alberta
Rep Power: 231 Re: My new project
now that its all on there i think it actually looks pretty good. way better than i expected it to. even though its not really my thing, i can definitely appreciate when someone takes a lot of care in what theyre doing and do it properly.
one thing im wondering now though...you molded the rear bumper to the side of the car as one piece...did you or are you going to do it to the other side as well? and is it just me, or is it going to be a huge bitch if you ever want to change bumpers or do work underneath?
keep pics updated.
one thing im wondering now though...you molded the rear bumper to the side of the car as one piece...did you or are you going to do it to the other side as well? and is it just me, or is it going to be a huge bitch if you ever want to change bumpers or do work underneath?
keep pics updated.
Thread Starter
Registered!!
Joined: Apr 2009
Posts: 54
Likes: 0
Rep Power: 208 Re: My new project
Heh heh, I do throw quite a few punches but I've never been in that damn hammock
Thanks for the kind words guys, and kudos to unTuned for noticing my attention to detail - definitely makes this stuff worthwhile. Everyone is biased towards their own work, but when other respectable folks take notice it's awesome. Looking forward to Gearbox leaving his thoughts
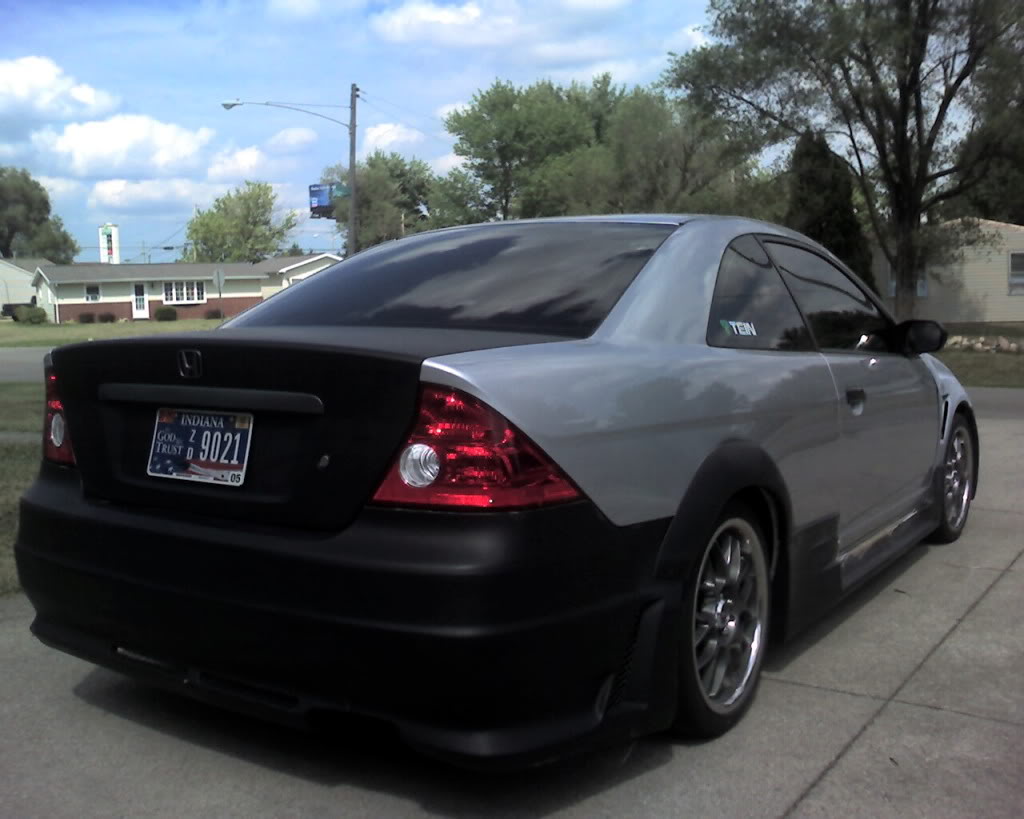
To answer some questions I did completely mold it in, and will be doing the same thing to the other side. The reason being is mainly due to the fender flares I'm going to install for a psudo wide-body appearance. I snapped a shot of one of the flares 'tacked' onto my quarter and a wider shot to see the profile of the car. I bought the style of skirts I have in order to make everything flow correctly. Once I get it all done, it should look pimp. It's definitely on there for good - but I don't anticipate any issues. Any work I would do beneath the car wouldn't require the removal of the rear valence. If it does -
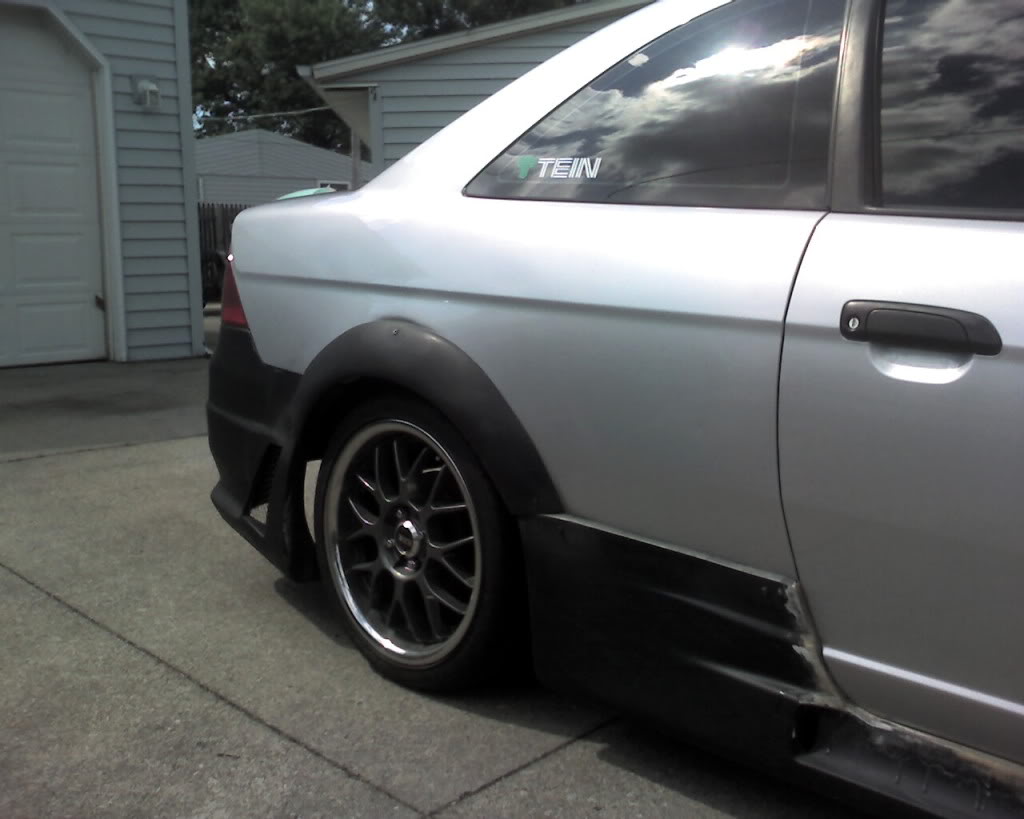
Whatcha think?
Thanks for the kind words guys, and kudos to unTuned for noticing my attention to detail - definitely makes this stuff worthwhile. Everyone is biased towards their own work, but when other respectable folks take notice it's awesome. Looking forward to Gearbox leaving his thoughts
To answer some questions I did completely mold it in, and will be doing the same thing to the other side. The reason being is mainly due to the fender flares I'm going to install for a psudo wide-body appearance. I snapped a shot of one of the flares 'tacked' onto my quarter and a wider shot to see the profile of the car. I bought the style of skirts I have in order to make everything flow correctly. Once I get it all done, it should look pimp. It's definitely on there for good - but I don't anticipate any issues. Any work I would do beneath the car wouldn't require the removal of the rear valence. If it does -
Whatcha think?
Registered!!
Joined: Apr 2008
Posts: 954
Likes: 1
From: Calgary, Alberta
Rep Power: 231 Re: My new project
i figured any work would be done from under, but its still a very risky job. knock on wood..but if you ever get rear ended its going to be nasty job. especially if a shop has to work with it.
anyway, looks good so far. keep the pics coming of updates, i want to see the turnout. good work. +1 rep for a good project with follow up.
anyway, looks good so far. keep the pics coming of updates, i want to see the turnout. good work. +1 rep for a good project with follow up.
Thread Starter
Registered!!
Joined: Apr 2009
Posts: 54
Likes: 0
Rep Power: 208 Re: My new project
Damn unTuned - I'm not gonna lie, the thought of getting rear ended never crossed my mind lol.. I dont think I would've been able to make it look right though had I not molded it, especially since I'm taking the widebody/flared route.. Thanks a ton for the rep - much appreciated!
If I do get rear ended though:
If I do get rear ended though:
Registered!!
Joined: Apr 2007
Posts: 10
Likes: 0
Rep Power: 0 Re: My new project
You are correct in stating the expansion rates of fiberglass and metal are different. However, molding pieces together with glass can be done. I'm no expert, but I believe you're mistake was using tiger hair to do the bulk of you're work.. Thats basically like filling in the hole with bondo, only it's stronger due to the fiber strands. Of course that's gonna show over time. The way I'm going about this should work just fine. I was gonna write up an in depth DIY on this project, but the interest here on the forums isnt what I expected it to be. Regardless, I'ma have a badass gas door
Good luck with your project and I hope you don't run into any major problems.
Direct sunlight everyday is what did it to my car so maybe a good car cover would help out some, just a thought.
Registered!!
Joined: Apr 2007
Posts: 10
Likes: 0
Rep Power: 0 Re: My new project
Forgot to mention one thing. Those bondo brands sand like ****! Get evercoat products or even SEM. You don't have to get the expensive rage gold, just get the z-grip. It sands down much easier. Also when you do your skim coats thin out the glaze with a little fiberglass resin. It help out a lot when you do large areas.
Thread Starter
Registered!!
Joined: Apr 2009
Posts: 54
Likes: 0
Rep Power: 208 Re: My new project
Forgot to mention one thing. Those bondo brands sand like ****! Get evercoat products or even SEM. You don't have to get the expensive rage gold, just get the z-grip. It sands down much easier. Also when you do your skim coats thin out the glaze with a little fiberglass resin. It help out a lot when you do large areas.
I must say though, I'm pretty stoked about experimenting with adding resin to the glaze coats to help things out. I'm not gonna lie, I've done a lot of research and ****, but what you guys are seeing is my 'learning curve' with bodywork. I have no previous experience lol.. How much resin do you add, if you mix up the recommended 3 inch diameter circle 1/2 thick..? A tablespoon or so?
Registered!!
Joined: Apr 2007
Posts: 10
Likes: 0
Rep Power: 0 Re: My new project
So like I said before I use evercoat z-grip for the main thick body filler. The main idea is to get your panel as straight and as perfect as possible before you move on to the metal glaze. I'm sure you know a lot of this stuff but make sure to catch the body filler just after it tacks over with aggressive sand paper 36-40 grit or like you said a body filler file. That alone can save hours of sanding. I usually finish it up with 80 grit before I move on to the glaze.
I usually use evercoat metal glaze, not to be confused with the oem metal glaze. We had trouble with that stuff when it first came out. Depending on how straight I got the panel I might apply one coat of the glaze and sand it down before I thin it with the resin. I generally only do this when the area I'm wiping is large. Also, I don't really have a set ratio of how much I add. I just add some and mix together until I can see a thinner consistency that I'm looking for. Another note about the glaze is usually I let it cure almost all the way before I sand it unlike the body filler. Start out with 80 grit to shape and finish with 180.
These materials are more expensive but they will yield a better more professional result. So in the long run they are worth it. I'm doing a restoration on my fathers car right now and I think we've spent somewhere around $1500 just on all the materials, so it does add up.
Heres a link to that if you want to check it out.
http://photobucket.com/rx7_build
The pictures are not in order but you'll get the idea. I've already learned 2 things with this project. Always lay the epoxy primer down directly after stripping to the metal, not after you repair the body! Rust! The second one was don't expect a $200 paint gun to give the results of a $600 one, Already sent that shitty one back! So everyone's always learning something. I would have had that damn car painted by now but I got this pinched nerve in my neck holding me back!
If you have anymore questions feel free to ask. Good luck!

Thread
Thread Starter
Honda Civic Forum
Replies
Last Post
ricer_em2
Mechanical Problems/Vehicle Issues and Fix-it Forum
2
May 11, 2016 08:09 PM
AffliictiioN
General Automotive Discussion
12
Sep 16, 2015 02:21 PM


