DIY: Front brake pad install (7th gen) without clamp!
 01-20-2011
#1
DIY: Front brake pad install (7th gen) without clamp!
Okay, since some of you know, I recently bought some new Hawk HP+ brake pads from ebay for $30.
I decided to take some pictures a long the way to create a DIY, not just for others, but for myself and to learn from my mistakes.
Anyways, on to the guide:
Materials:
WD40
Rags
Brake Cleaner
17mm Socket
12mm Socket
Antiseize (YOUR BEST FRIEND) (and/or Antisqueal)
Jack+stands
Various materials (maybe screw driver, wrench, oil catch pan, etc)
Some ingenuity, and lots of elbow grease
Step 1:
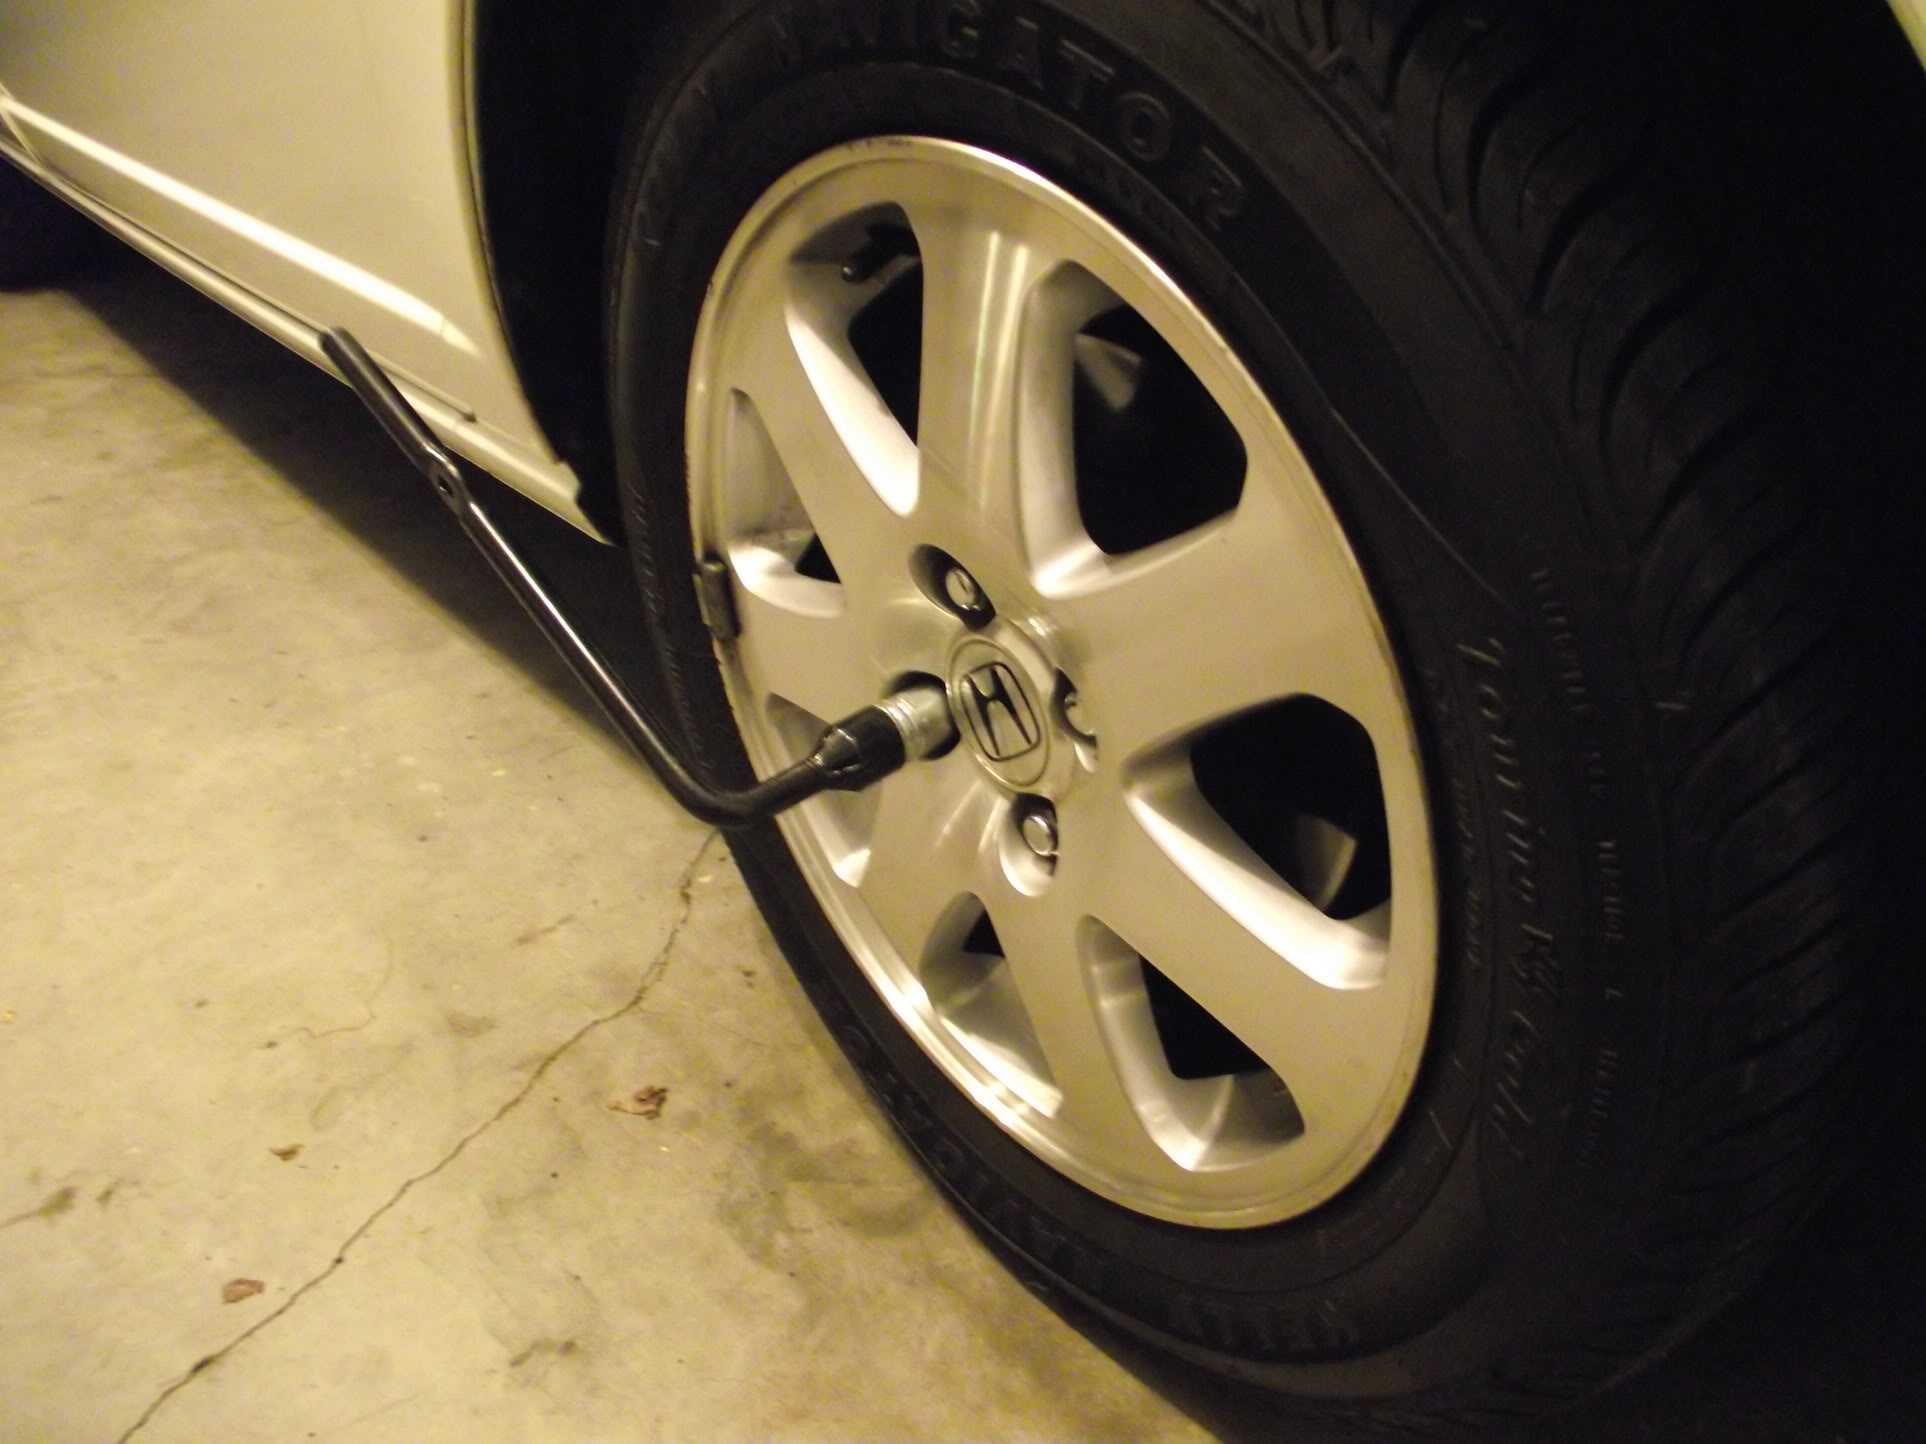
Loosen Lug nuts first! While car is on floor, if you have tuner lug nuts, or a OEM Security nut, use the adapter to loosen your lug nuts
Step 2:
Jack up car and set it on stands
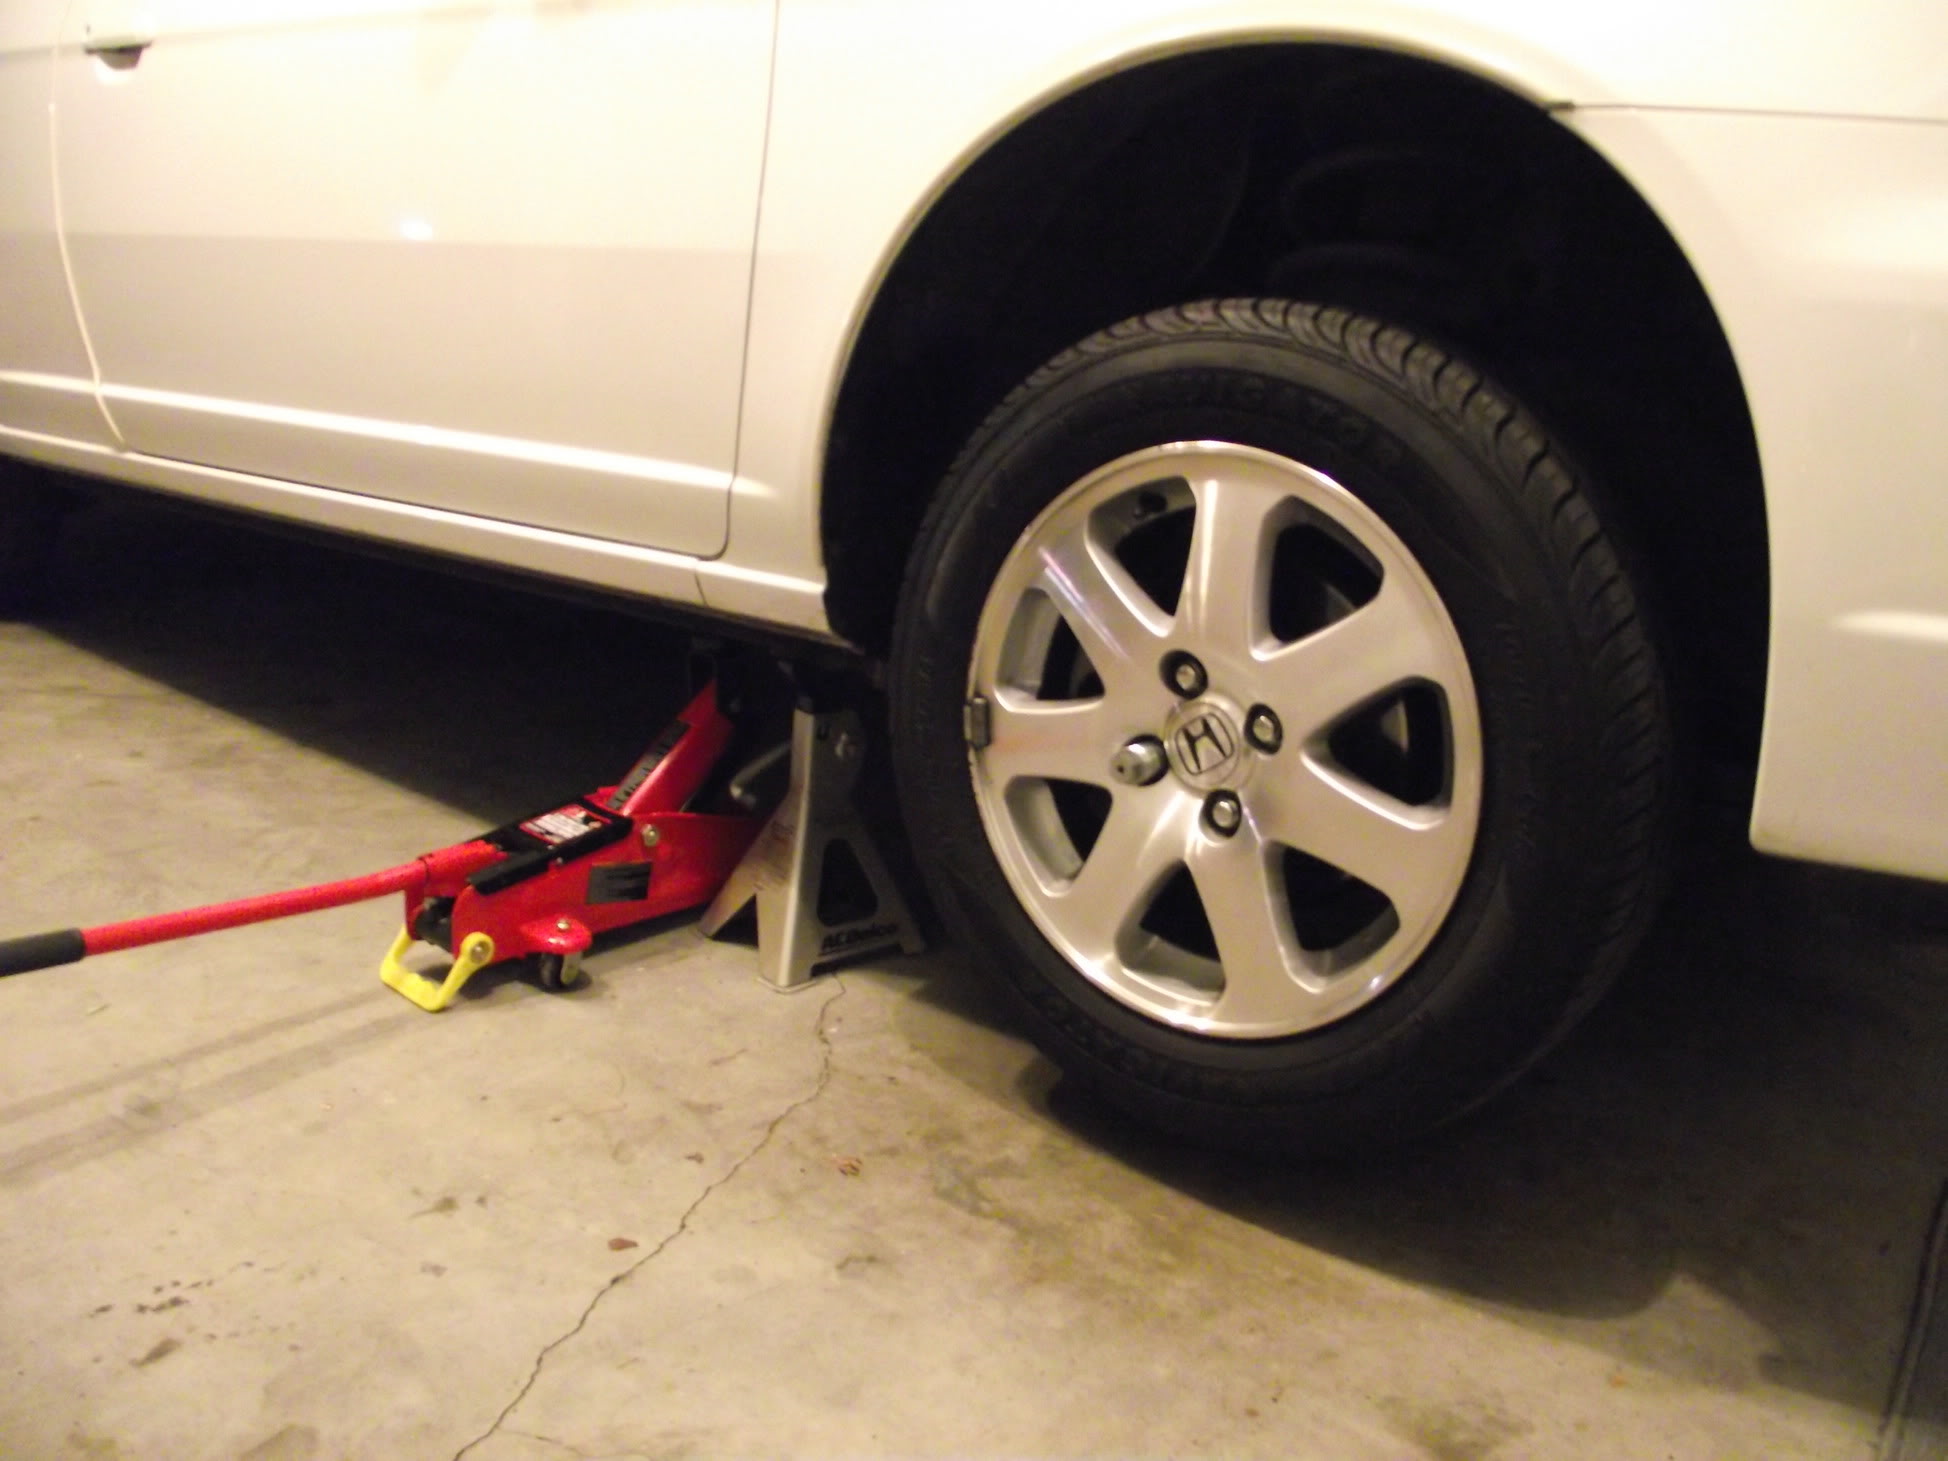
Step 3:
Remove lug nuts and then proceed to remove wheel
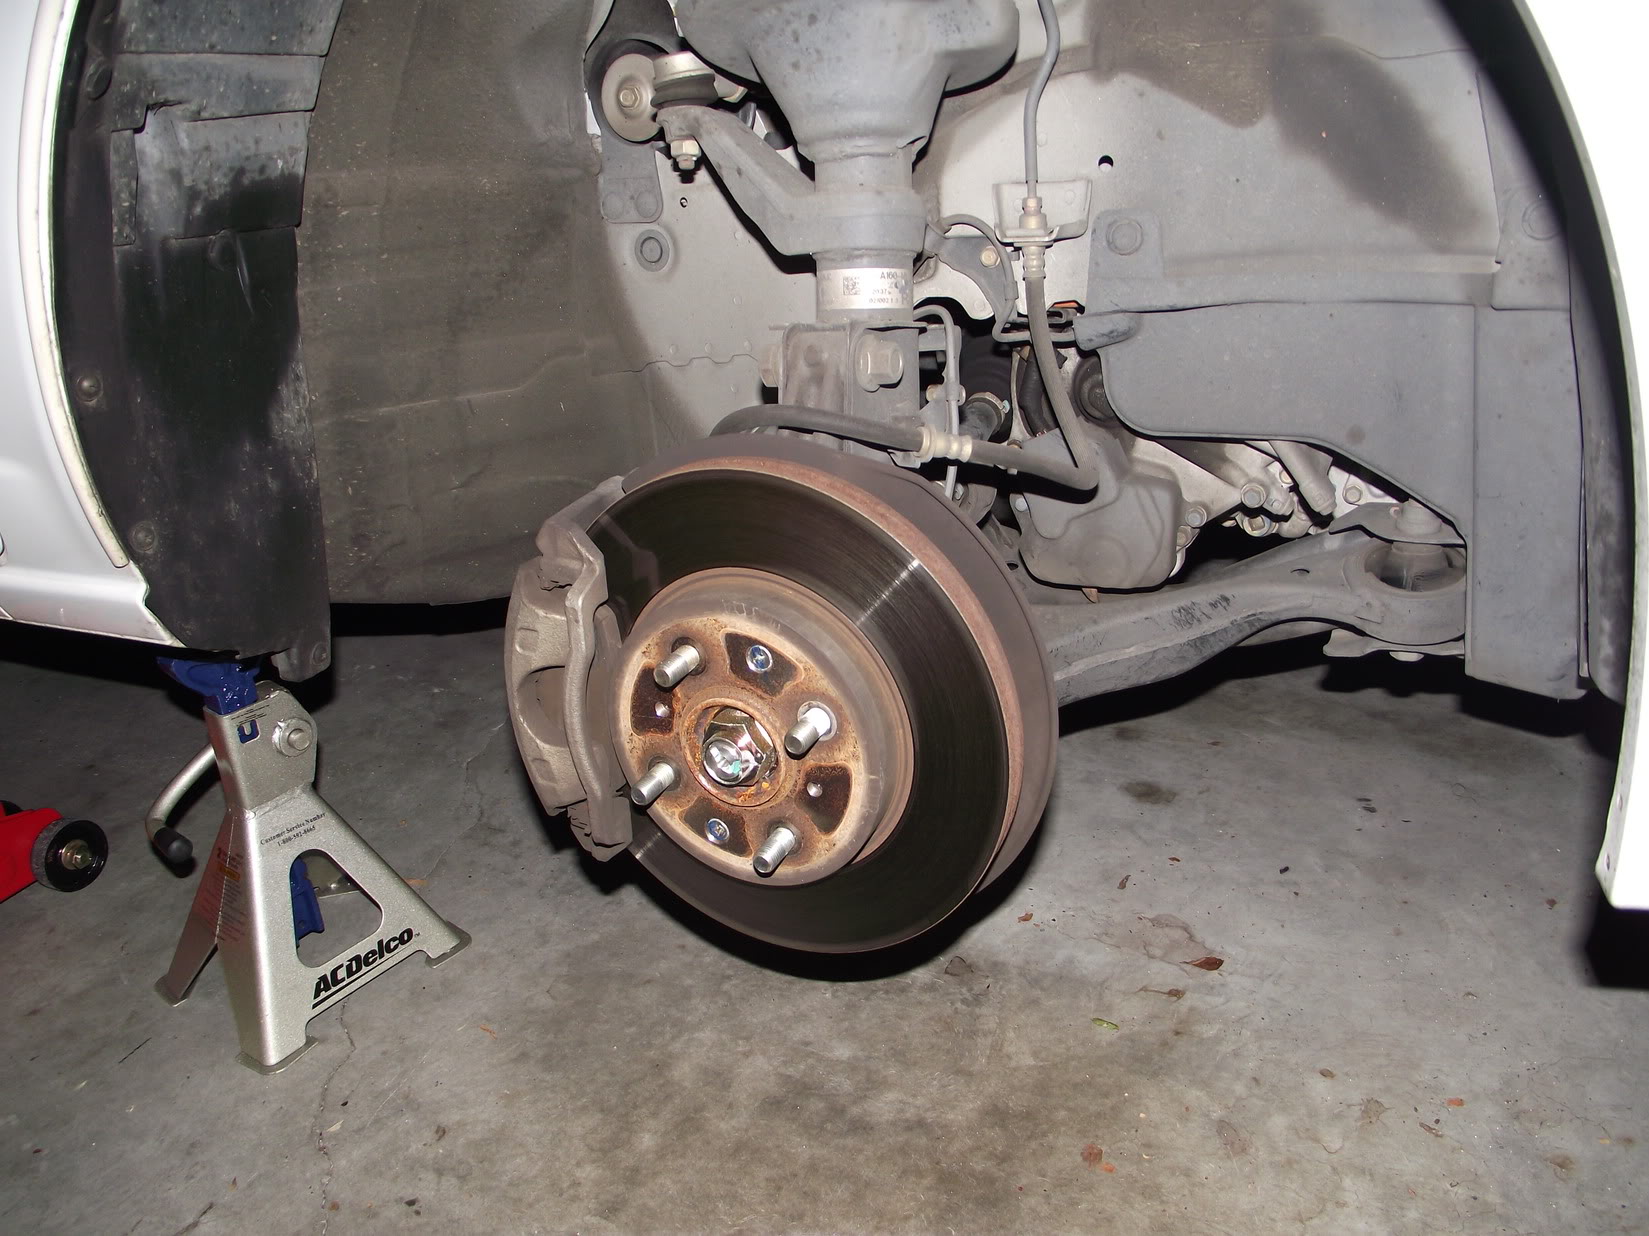
Step 4:
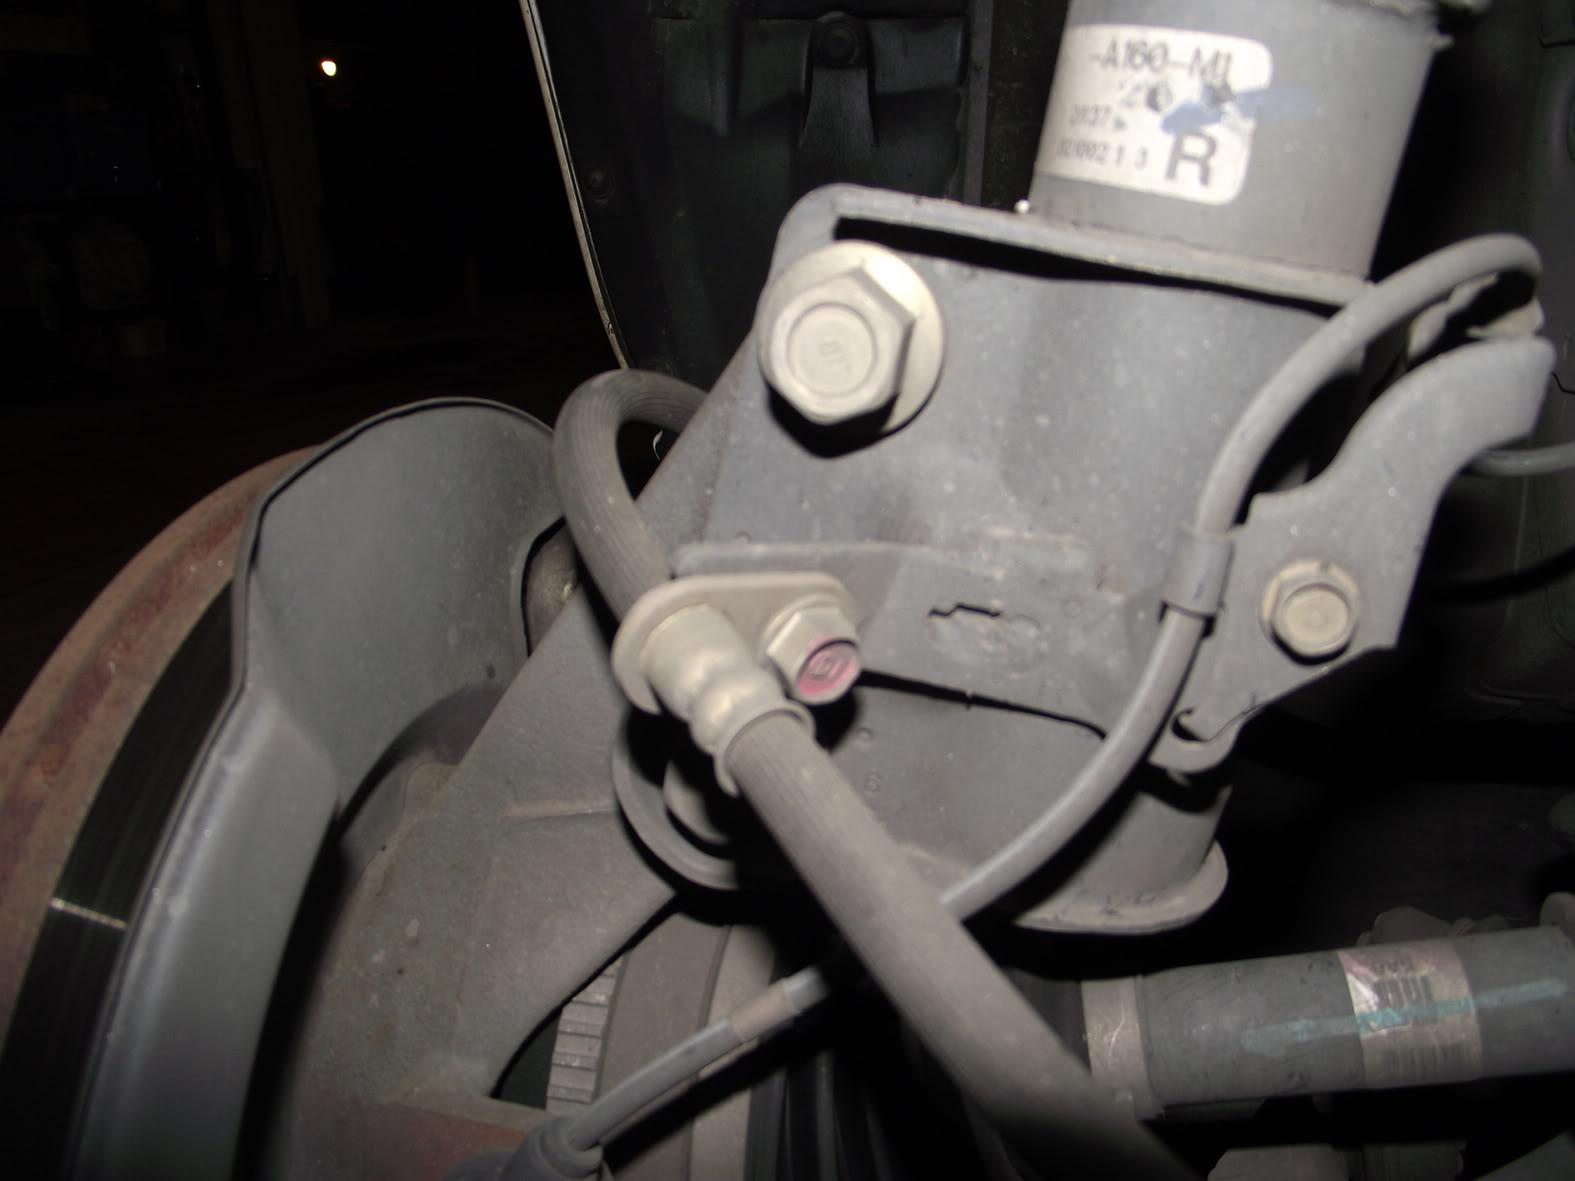
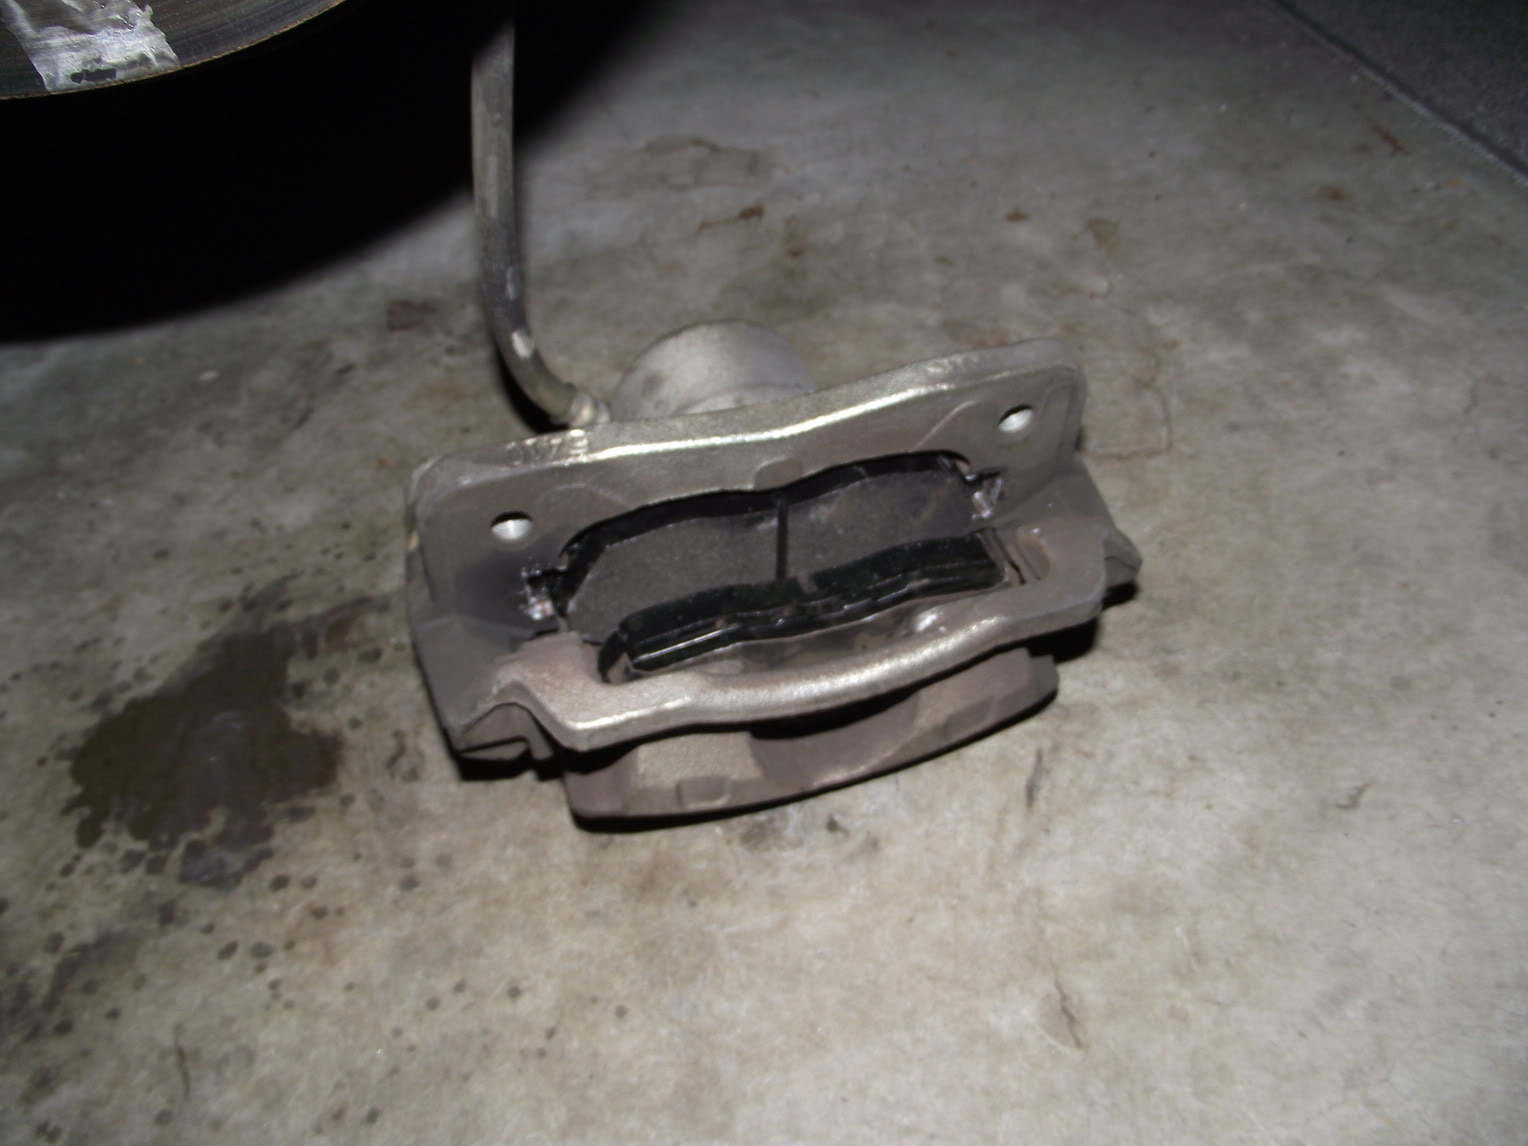
Grab your handy dandy 12mm socket and remove this bolt that holds the brake line to the strut
Step 5:
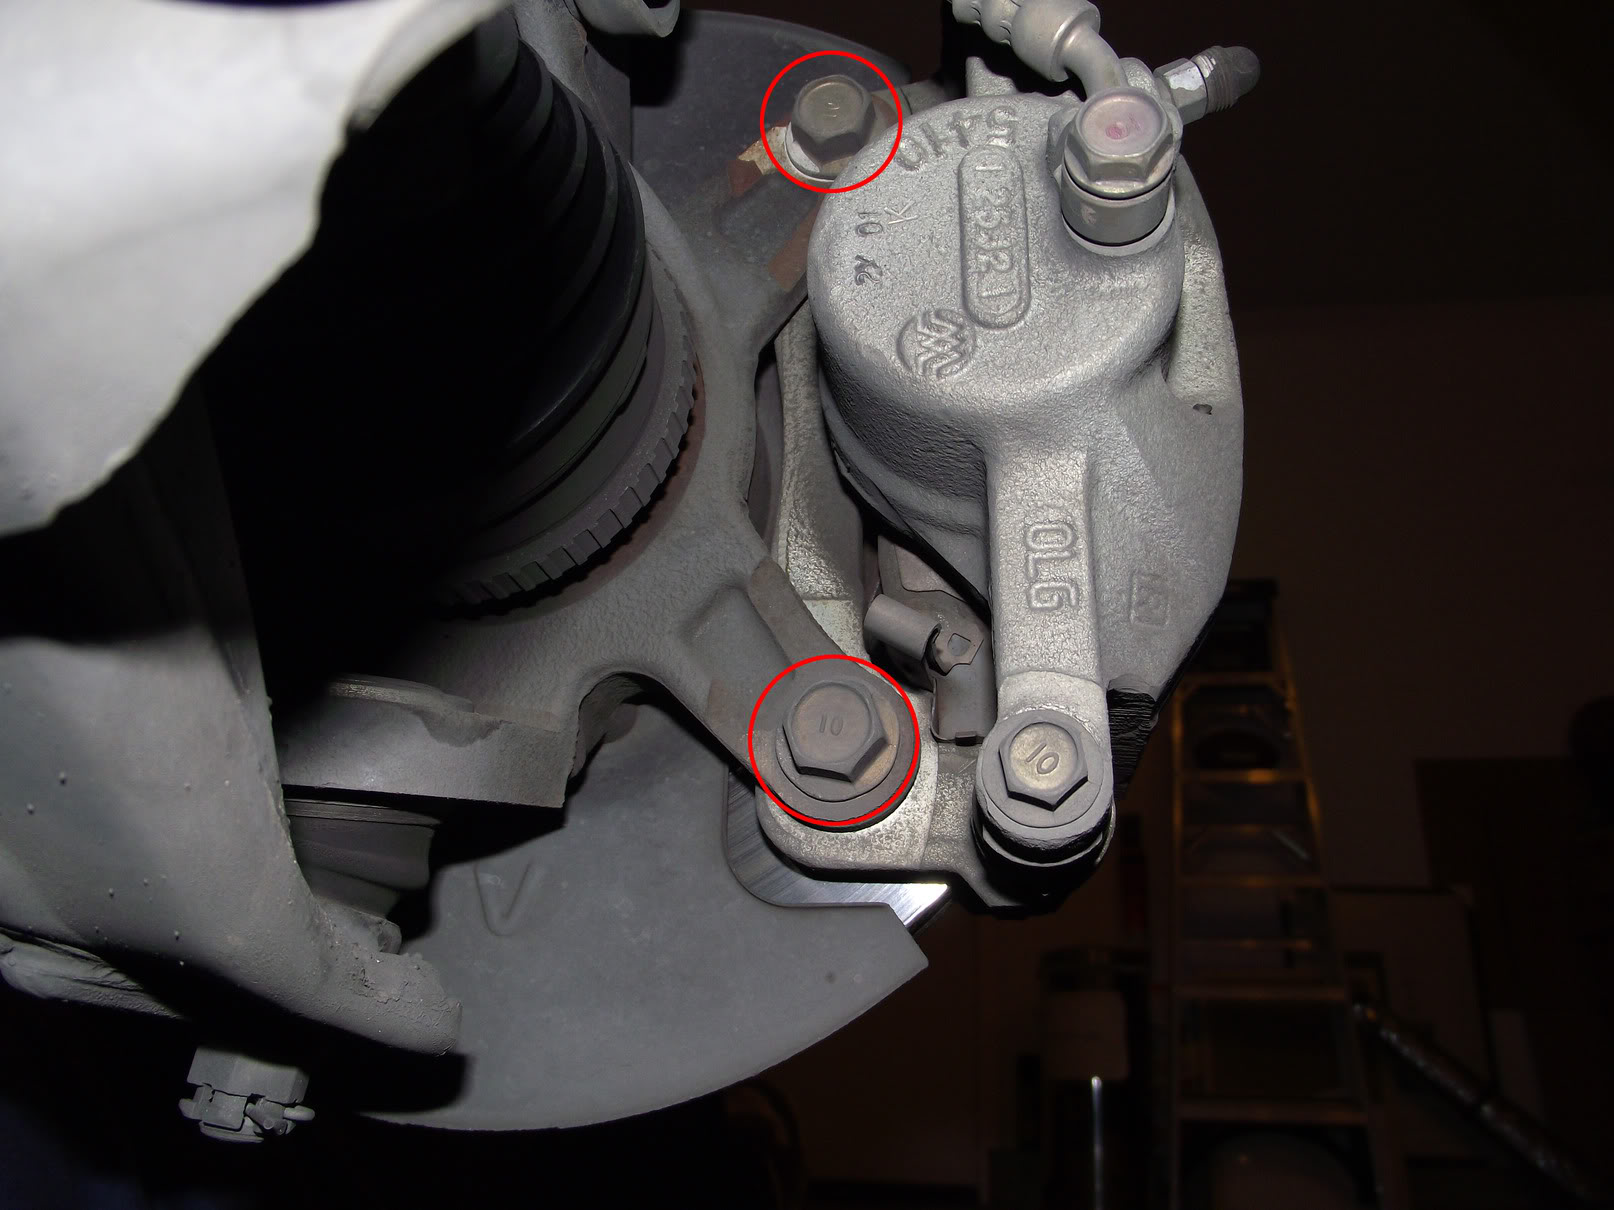
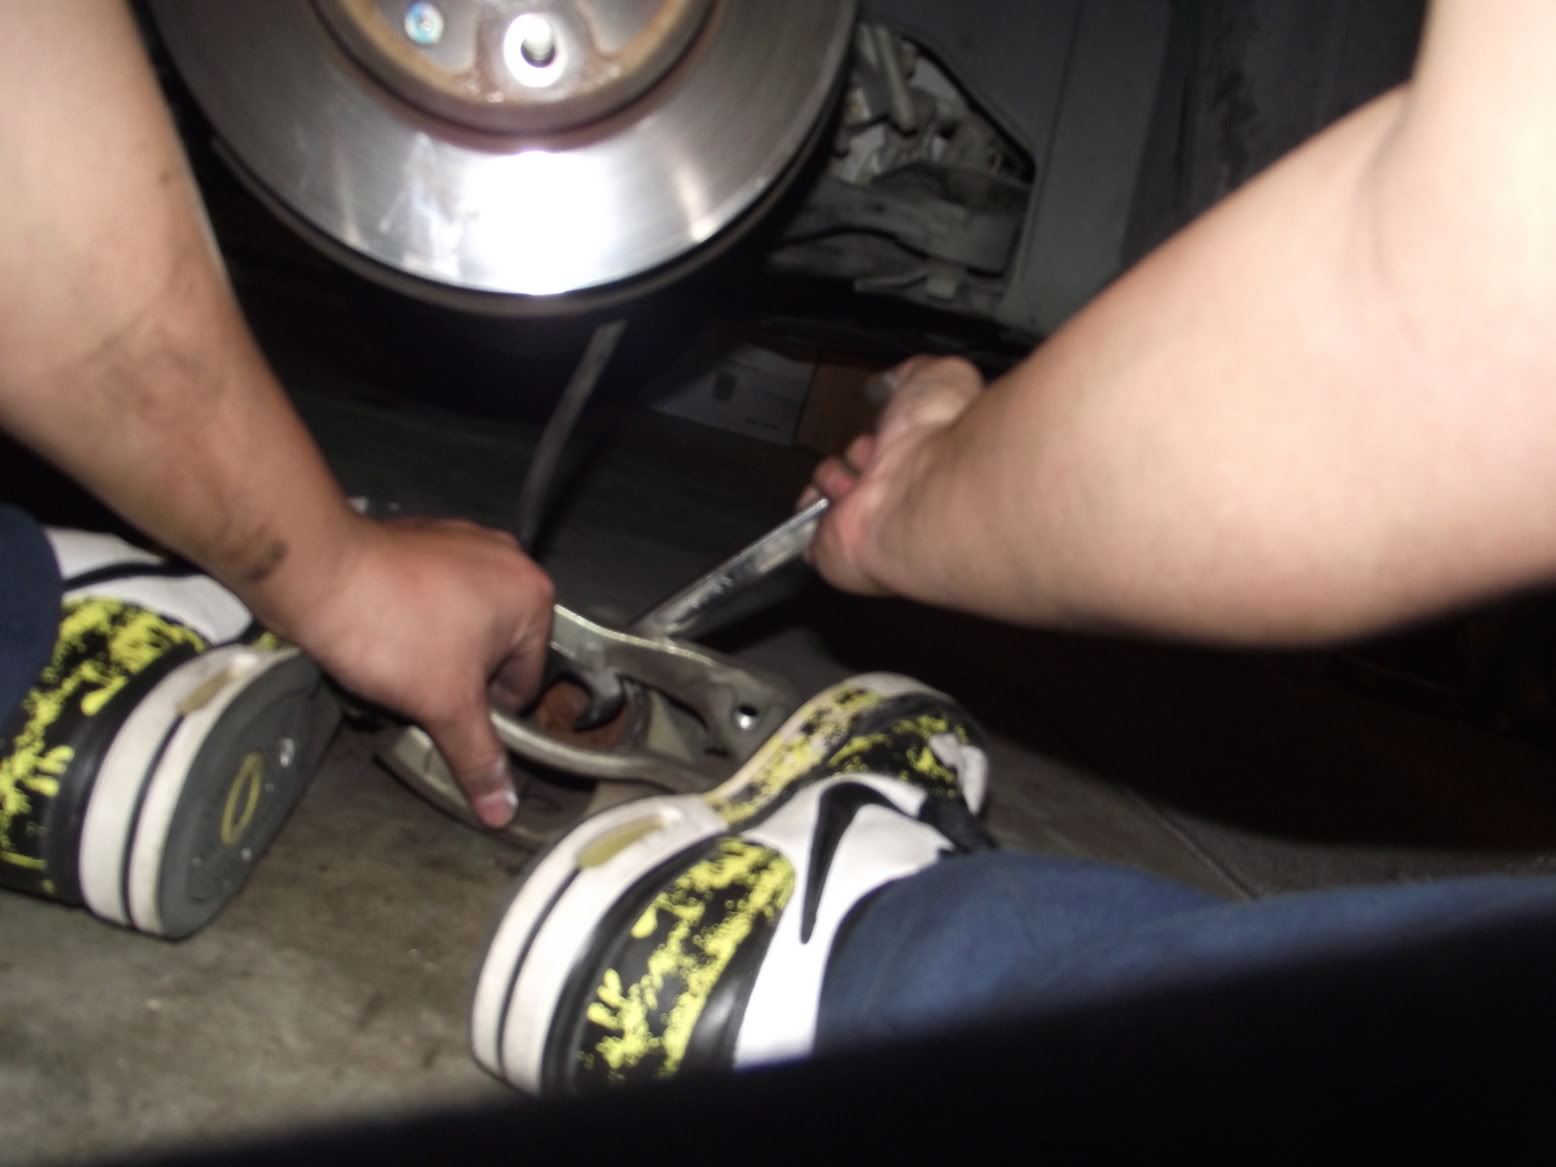
Grab your other handy dandy 17mm socket and remove these two bolts that hold the caliper on the rotor
Step 6:
Realize that top and bottom bolts are seized, and kick the top one a couple times, remove the bolt.
Continue to bang and hammer and pull on lower bolt for 2 hours, and making a life discovery that asian men are small enough to fit all the way inside the front fender of a civic.
Step 7:
Continue WD40 soaking the seized lower bolt, then have a moment of ingenuity. Grab a 2x4 and pry that bad boy loose.
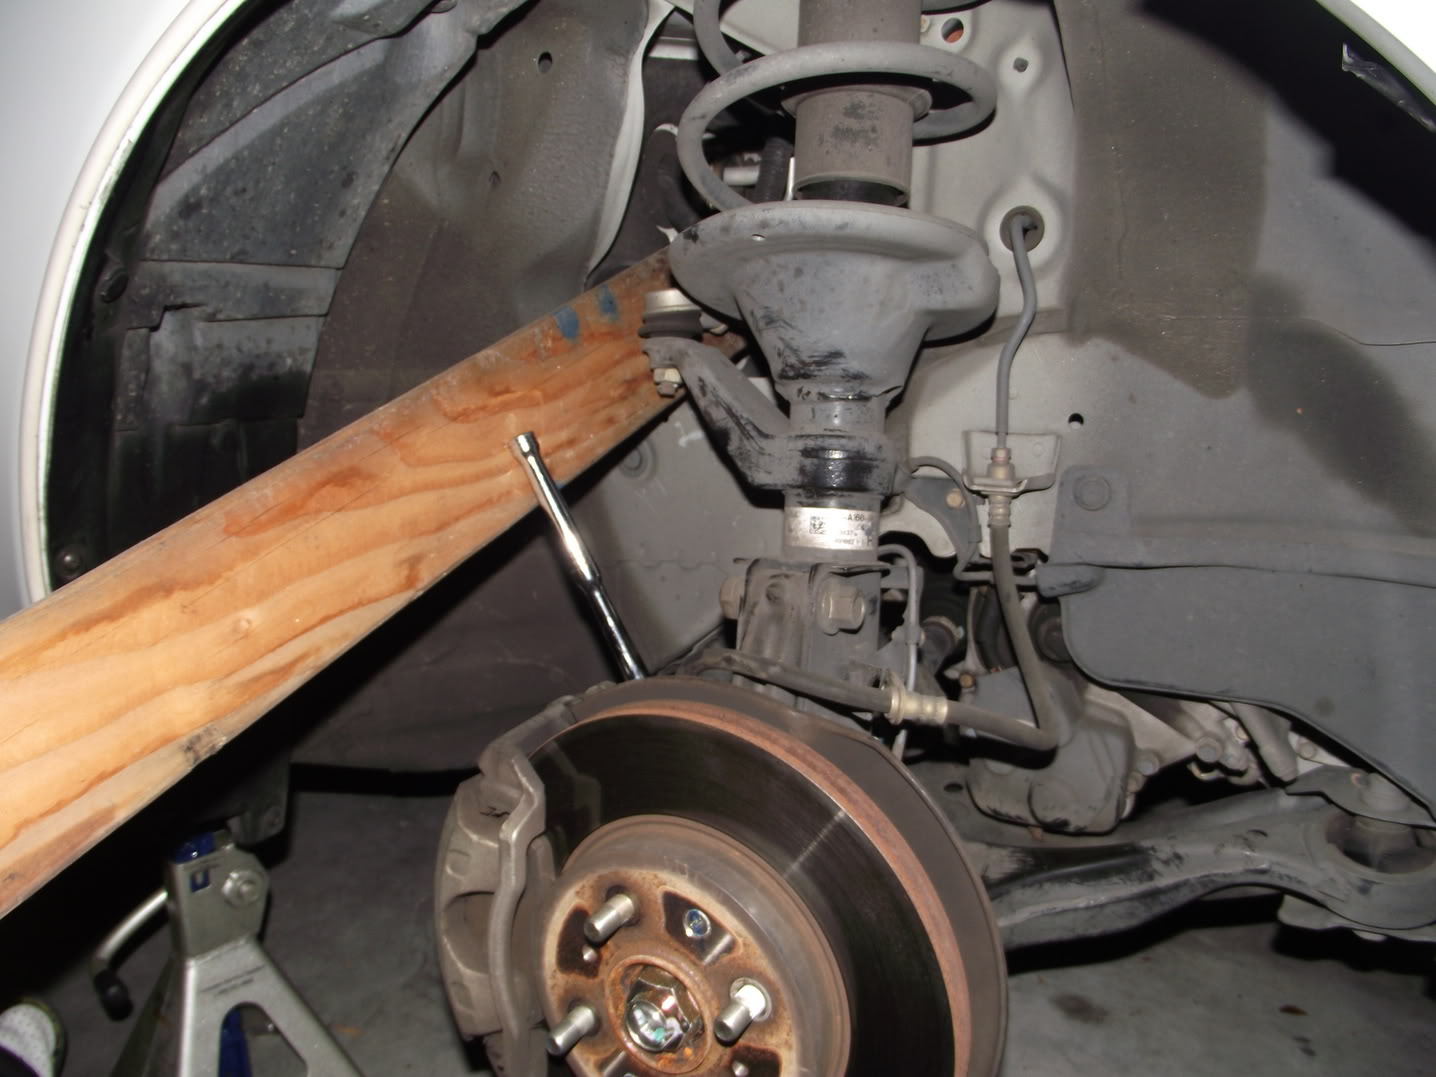
Sigh of relieve when hearing the first crack.
Step 8:
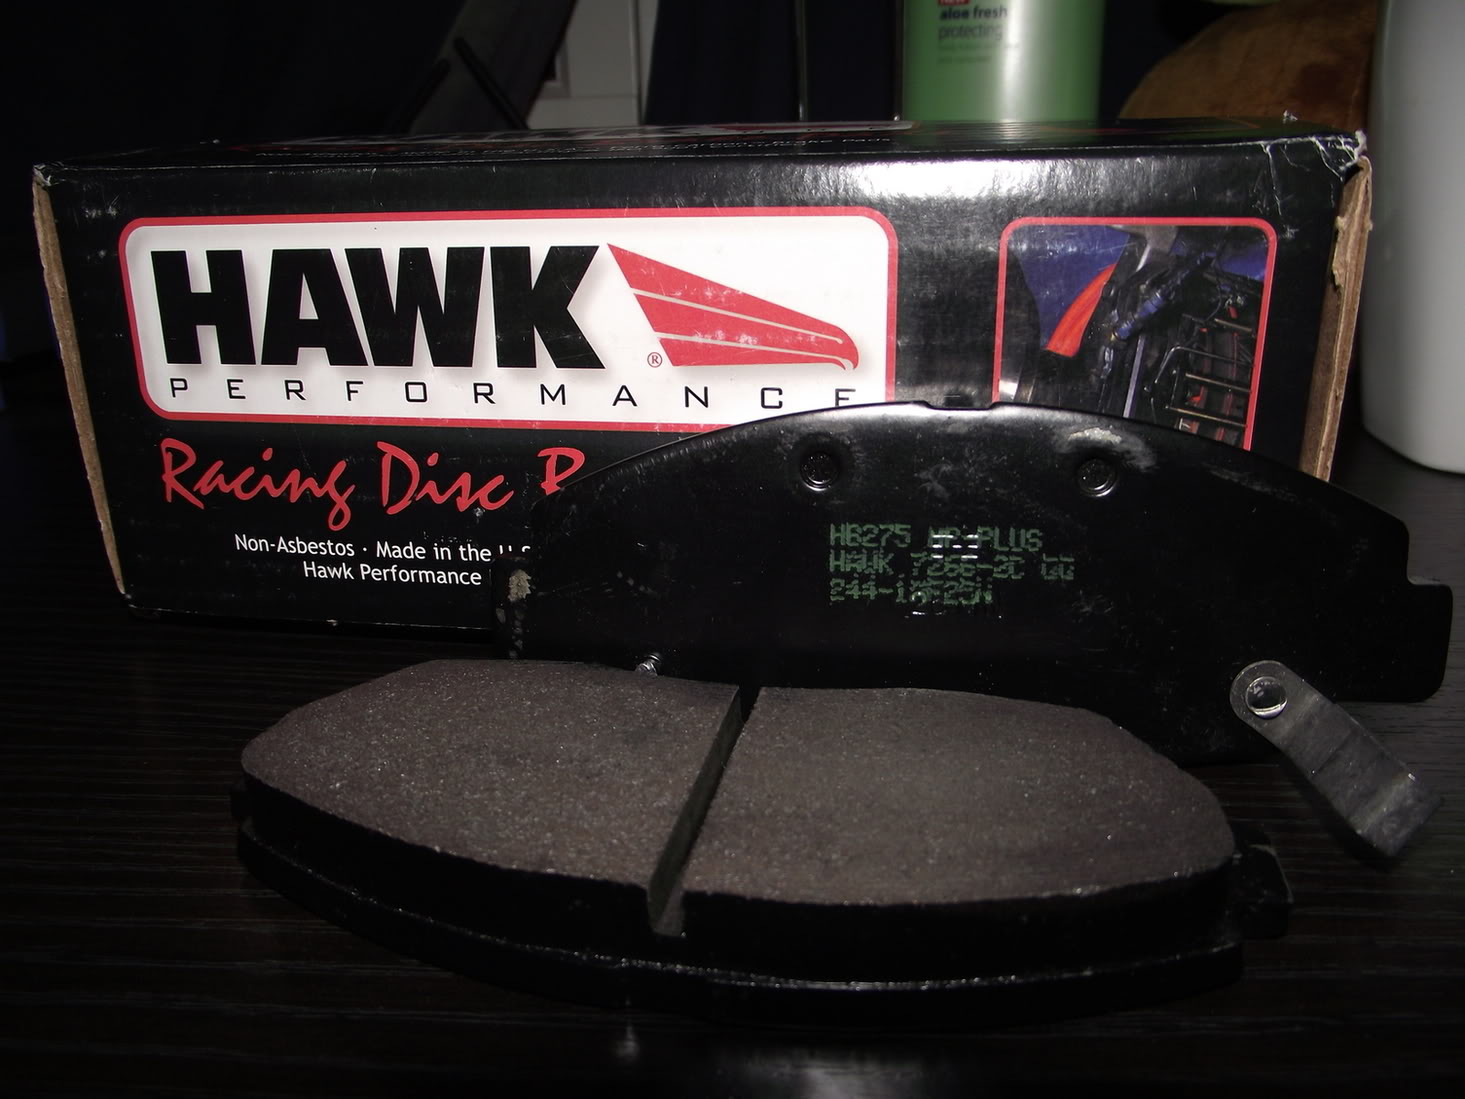
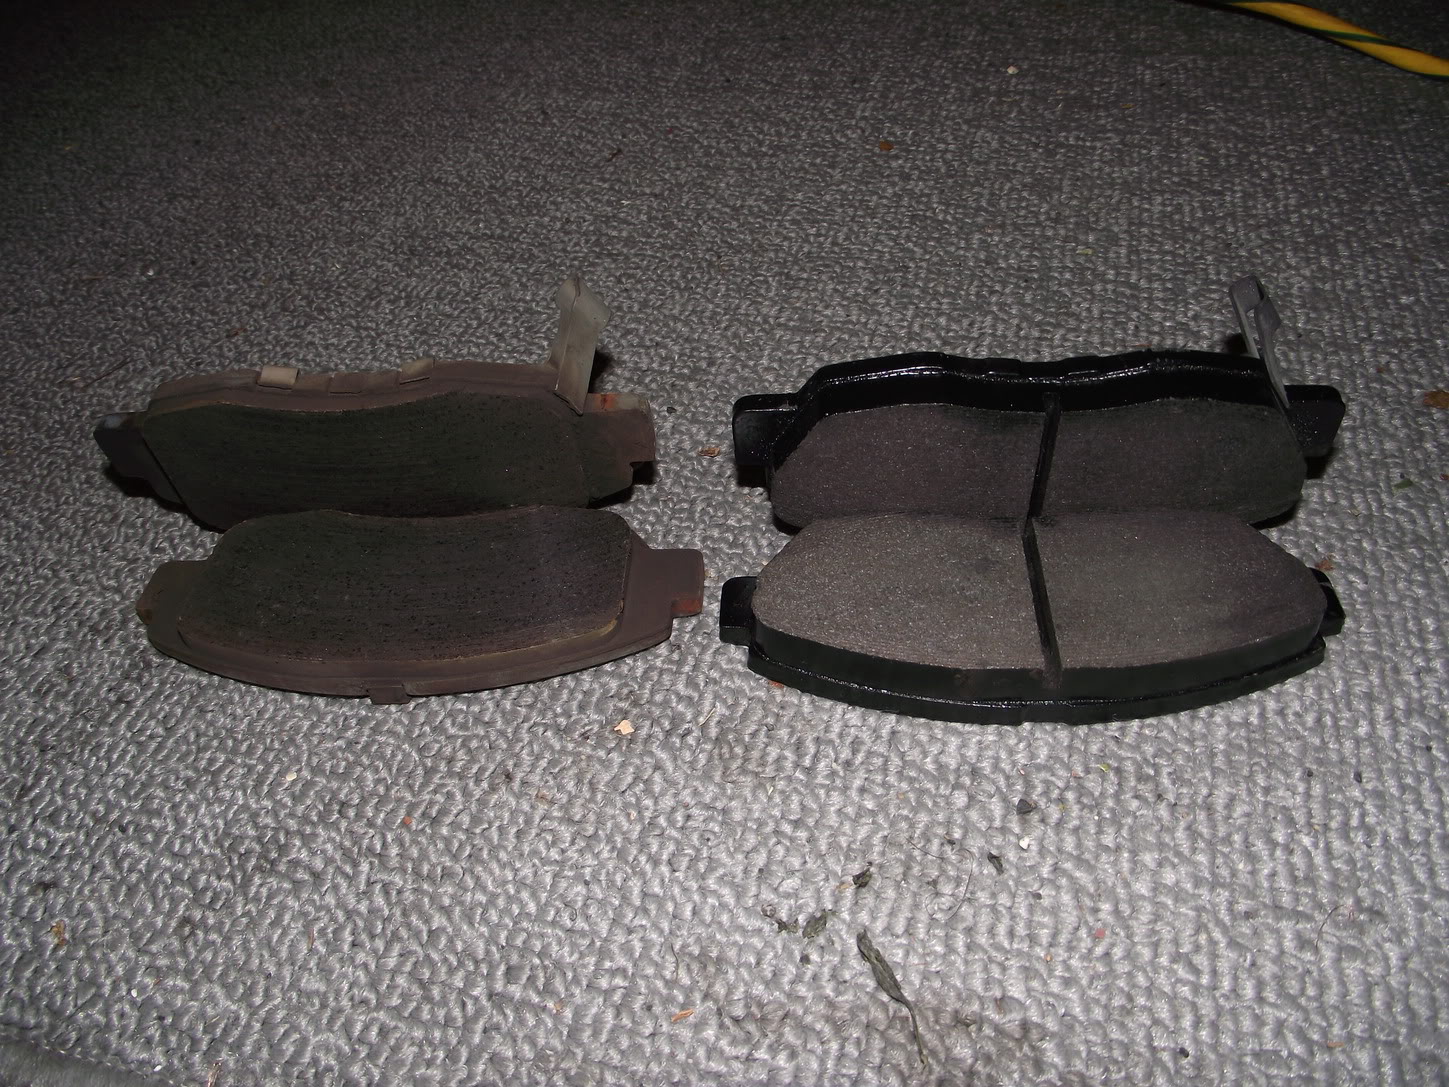
Lay the caliper on the floor and pop out the original brake pads
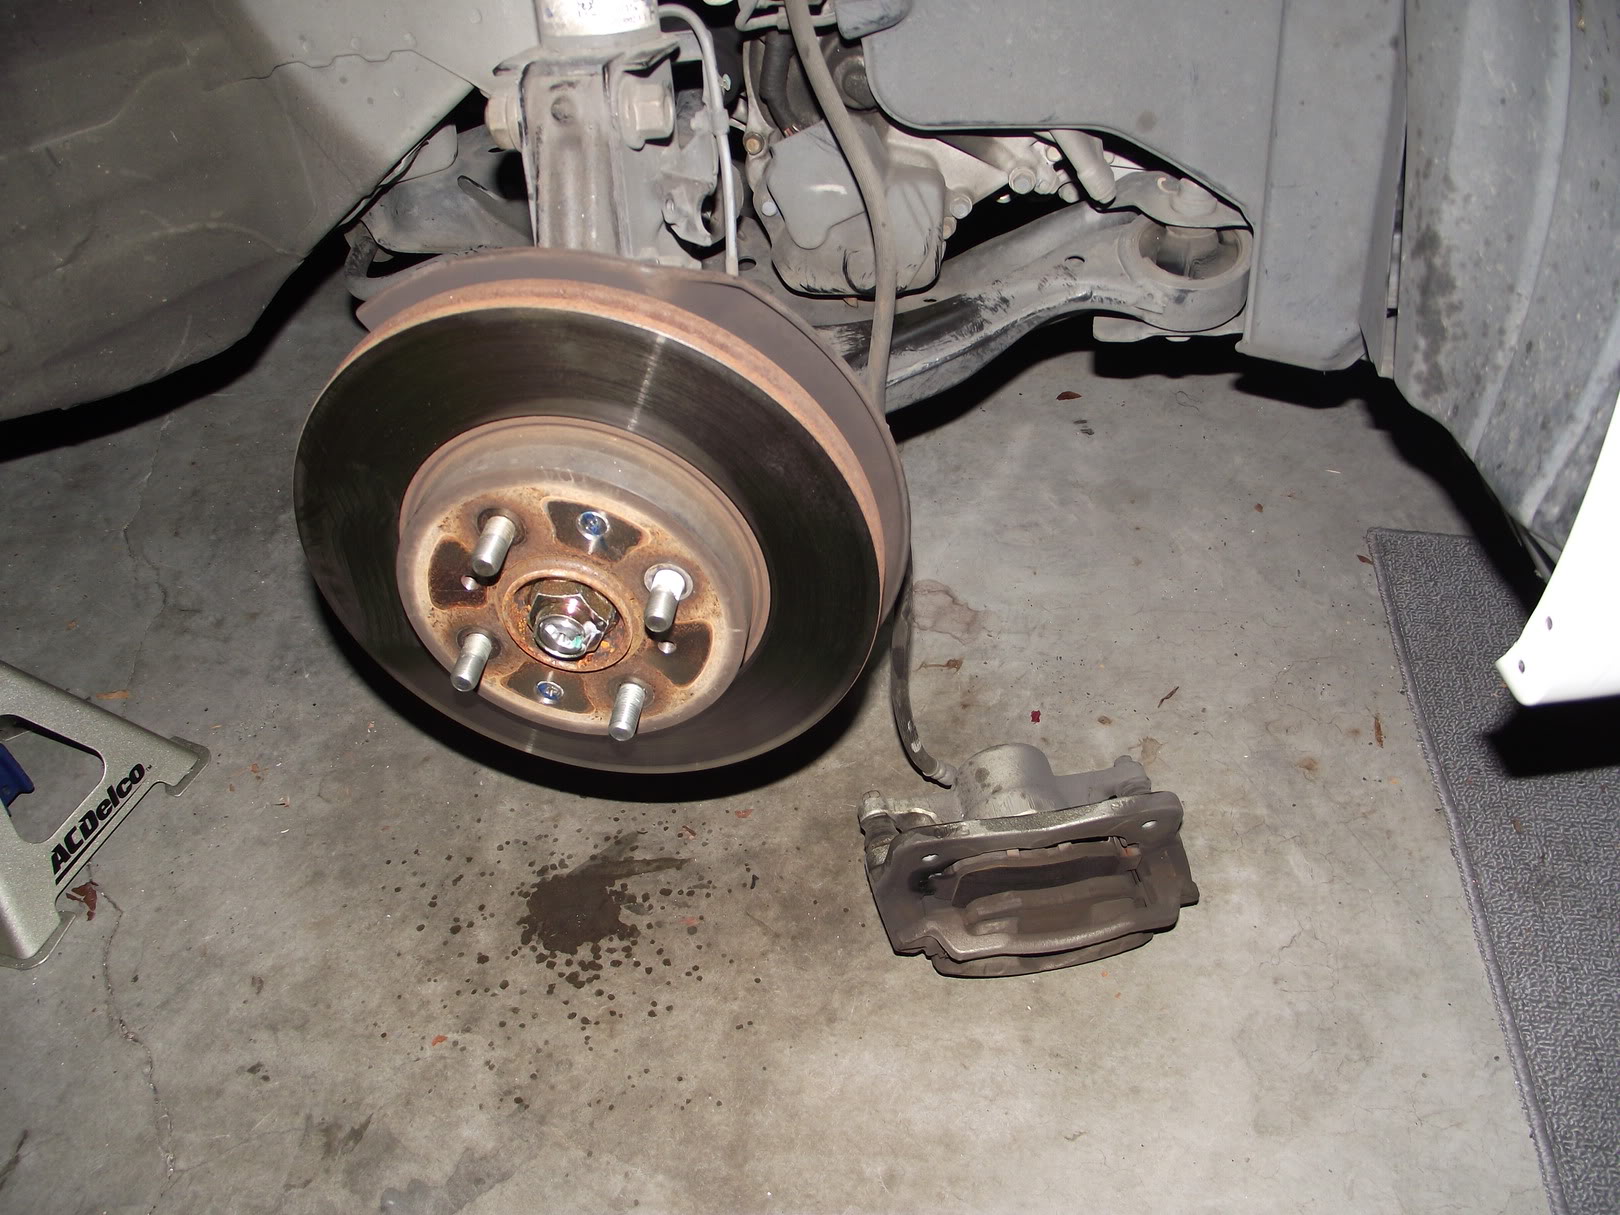
Then compare them to the new brake pads

Step 9:
Remove cap of brake fluid reservoir
Spend a couple minutes fiddling with a screwdriver and wondering how to pry the piston back in.
Realize that God made a......SPANNER/Wrench.
Find an odd enough position for you to pry and push the piston back in without a clamp
(The other side didnt work with this method, but a adjustable pipe wrench squeezing the side and piston worked)
Step 10:
Remove shims from old brake pads and apply them to the new ones.
Then add antiseize (permatex advanced forumula 1600 degrees works great), or antisqueal on the back sides of shims, and any areas that touches metal
MAKE SURE YOU DO NOT TOUCH ANY GREASE/LUBE ON THE BRAKE PADS THAT COME IN CONTACT WITH THE ROTOR
Be very conservative with the use of lube.

Step 11:
Put the new brake pads in the caliper and spray brake cleaner all over the caliper, rotors, and everything else.
Step 12:
Reassemble.
REMEMBER TO PUT THE 12mm BOLT BACK FOR THE BRAKE LINE BEFORE PUTTING THE WHEEL BACK ON
Now would be a VERY good time to put antiseize on every single bolt, and lug nut threads. Antiseize will be your best friend in the future if you ever have to remove anything again.
Just a small dab at the end of the bolt will be enough, it will coat itself while you thread in the bolts
Put the caliper back in position and put the 17mm bolts back in, tighten.
Step 13:
Attach wheel and tighten all lug nuts up, make sure you tighten them up star pattern! (Opposite from each other)
Lower the car off the jack stand, and get inside the car
Test to see if brakes are activating by stepping on the brakes a few times
Step 14:
Bedding your brakes
One of the most important steps after installing your new brake pads
1. On an empty street, away from traffic, speed up to about 30~35mph and make hard slows to 10mph (Do not come to a full stop)
Accelerate quickly back up to 30mph and make hard slows again. Repeat 6~10 times.
2. Accelerate to 45~50mph and make hard slows to 5mph, with slight activation of ABS
Repeat 2~3 times
3. Accelerate to 70mph and make hard slows to 5~10mph without activation of ABS (Do not lightly drag brakes)
4. Drive around for 15~20 mins for brakes to cool down
Step 15:
Step back and enjoy your work well done
Hope you enjoyed this, and helped you
Total time consumed for a newbie: 3.5 hours
Time spend on seized bolts: 2 hours
I decided to take some pictures a long the way to create a DIY, not just for others, but for myself and to learn from my mistakes.
Anyways, on to the guide:
Materials:
WD40
Rags
Brake Cleaner
17mm Socket
12mm Socket
Antiseize (YOUR BEST FRIEND) (and/or Antisqueal)
Jack+stands
Various materials (maybe screw driver, wrench, oil catch pan, etc)
Some ingenuity, and lots of elbow grease
Step 1:
Loosen Lug nuts first! While car is on floor, if you have tuner lug nuts, or a OEM Security nut, use the adapter to loosen your lug nuts
Step 2:
Jack up car and set it on stands
Step 3:
Remove lug nuts and then proceed to remove wheel
Step 4:
Grab your handy dandy 12mm socket and remove this bolt that holds the brake line to the strut
Step 5:
Grab your other handy dandy 17mm socket and remove these two bolts that hold the caliper on the rotor
Step 6:
Realize that top and bottom bolts are seized, and kick the top one a couple times, remove the bolt.
Continue to bang and hammer and pull on lower bolt for 2 hours, and making a life discovery that asian men are small enough to fit all the way inside the front fender of a civic.
Step 7:
Continue WD40 soaking the seized lower bolt, then have a moment of ingenuity. Grab a 2x4 and pry that bad boy loose.
Sigh of relieve when hearing the first crack.
Step 8:
Lay the caliper on the floor and pop out the original brake pads
Then compare them to the new brake pads
Step 9:
Remove cap of brake fluid reservoir
Spend a couple minutes fiddling with a screwdriver and wondering how to pry the piston back in.
Realize that God made a......SPANNER/Wrench.
Find an odd enough position for you to pry and push the piston back in without a clamp
(The other side didnt work with this method, but a adjustable pipe wrench squeezing the side and piston worked)
Step 10:
Remove shims from old brake pads and apply them to the new ones.
Then add antiseize (permatex advanced forumula 1600 degrees works great), or antisqueal on the back sides of shims, and any areas that touches metal
MAKE SURE YOU DO NOT TOUCH ANY GREASE/LUBE ON THE BRAKE PADS THAT COME IN CONTACT WITH THE ROTOR
Be very conservative with the use of lube.
Step 11:
Put the new brake pads in the caliper and spray brake cleaner all over the caliper, rotors, and everything else.
Step 12:
Reassemble.
REMEMBER TO PUT THE 12mm BOLT BACK FOR THE BRAKE LINE BEFORE PUTTING THE WHEEL BACK ON
Now would be a VERY good time to put antiseize on every single bolt, and lug nut threads. Antiseize will be your best friend in the future if you ever have to remove anything again.
Just a small dab at the end of the bolt will be enough, it will coat itself while you thread in the bolts
Put the caliper back in position and put the 17mm bolts back in, tighten.
Step 13:
Attach wheel and tighten all lug nuts up, make sure you tighten them up star pattern! (Opposite from each other)
Lower the car off the jack stand, and get inside the car
Test to see if brakes are activating by stepping on the brakes a few times
Step 14:
Bedding your brakes
One of the most important steps after installing your new brake pads
1. On an empty street, away from traffic, speed up to about 30~35mph and make hard slows to 10mph (Do not come to a full stop)
Accelerate quickly back up to 30mph and make hard slows again. Repeat 6~10 times.
2. Accelerate to 45~50mph and make hard slows to 5mph, with slight activation of ABS
Repeat 2~3 times
3. Accelerate to 70mph and make hard slows to 5~10mph without activation of ABS (Do not lightly drag brakes)
4. Drive around for 15~20 mins for brakes to cool down
Step 15:
Step back and enjoy your work well done
Hope you enjoyed this, and helped you
Total time consumed for a newbie: 3.5 hours
Time spend on seized bolts: 2 hours
 01-20-2011
#2
Live for the Twisties
Administrator
Join Date: Jun 2010
Location: Langley, BC
Posts: 8,580
Likes: 0
Received 5 Likes
on
5 Posts
Rep Power: 260 

Re: DIY: Front brake pad install (7th gen) without clamp!
Three notes..
1. Your kicks are rad.
2. WD40 isn't true penetrating lube, try PB Blaster and you'll be amazed at how well it works. Seriously, it makes a world of difference when it comes to battling seized bolts.
3. I'll paypal you $3 to buy a clamp next time you change your brake pads haha
Conclusion..
Great DIY! I like the enginuity with the 2x4.
Last edited by MindBomber; 01-20-2011 at 02:15 AM.
01-20-2011
#3
Re: DIY: Front brake pad install (7th gen) without clamp!
1. Thanks, same thing josh said on FB :P
2. Yeah, I know, but I CBA'd to get any
After 2 hours on the same bolt, it sorta came down to "Fk it, you're coming out no matter what"...then looking for leverage
3. Hopefully, I wont need to replace pads anytime soon with this car...
But then again, 2 years ago, my rear drums were 50%.....
so :P (oddly enough, the same 2 years ago, my fronts were 90%, but there's some unusual wear on my pads)
01-20-2011
#4
Premium Member
Hey! Look At Me!! I'm a Supporting Member!!
iTrader: (14)
Join Date: Aug 2006
Location: Portland, Oregon
Age: 39
Posts: 8,362
Likes: 0
Received 1 Like
on
1 Post
Rep Power: 364 Re: DIY: Front brake pad install (7th gen) without clamp!
Good DIY, move it into the brake DIY's (we gotta section for that right?)
-I always wear gloves when doing brakes and change them at least once or twice. It makes cleanup so much easier. You probably still have gunk under your fingernails and in the creases of your hands huh?
-What about bleeding your brakes?
-Also add a note about making sure not to breath in any of that brake dust because it will give you cancer.
-Brake Kleen is the best for cleaning all those parts up before you apply the anti seize on the shims and stuff.
01-20-2011
#5
Re: DIY: Front brake pad install (7th gen) without clamp!
I started the job at 6:20 pm, and finished at 9:45...
I seriously could not be arsed to bleed it
But I definately will flush it completely today
I wore gloves too, but gave up on it when my bolts were seized
Cleaning my hands with Dawn dish detergeant has removed just about all the dirt and grime.
I seriously could not be arsed to bleed it
But I definately will flush it completely today
I wore gloves too, but gave up on it when my bolts were seized
Cleaning my hands with Dawn dish detergeant has removed just about all the dirt and grime.
01-20-2011
#6
PITA Admin
Administrator
iTrader: (1)
Join Date: Dec 2008
Location: TN
Age: 52
Posts: 14,788
Received 1,443 Likes
on
1,198 Posts
Rep Power: 338 Re: DIY: Front brake pad install (7th gen) without clamp!
Maybe it's easier to grease back the caliper (and the slider pins), but if i am not going to re-grease stuff, i just take the lower bolt out, lift the caliper and secure it with a piece of wire to change the pads.
 01-20-2011
#7
Premium Member
Hey! Look At Me!! I'm a Supporting Member!!
iTrader: (14)
Join Date: Aug 2006
Location: Portland, Oregon
Age: 39
Posts: 8,362
Likes: 0
Received 1 Like
on
1 Post
Rep Power: 364 Re: DIY: Front brake pad install (7th gen) without clamp!
^ Yeah I only take the lower bolt out on the caliper too so half of it stays lined up with no bs


Thread
Thread Starter
Honda Civic Forum
Replies
Last Post
masongap
Mechanical Problems/Vehicle Issues and Fix-it Forum
9
05-26-2015 07:55 PM
rhvic
Mechanical Problems/Vehicle Issues and Fix-it Forum
3
05-22-2015 03:06 PM
ayoitzjulesdx98
Wheels, Tires & Brakes Modifications
2
05-14-2015 08:29 AM

