
I finished shaving the license plate!


Thread Starter
Registered!!
Joined: Jan 2008
Posts: 17
Likes: 0
Rep Power: 0 
I finished shaving the license plate!
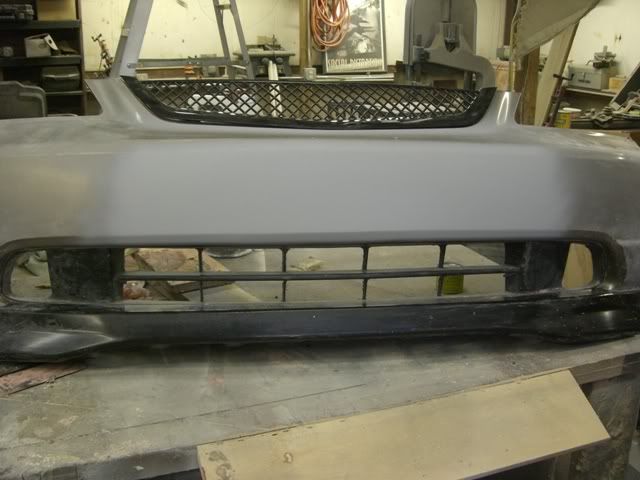
Hello everyone! check it out, I just finished shaving my license plate on my 02 civic bumper...god it took a lot of patience! just need some primer and paint! now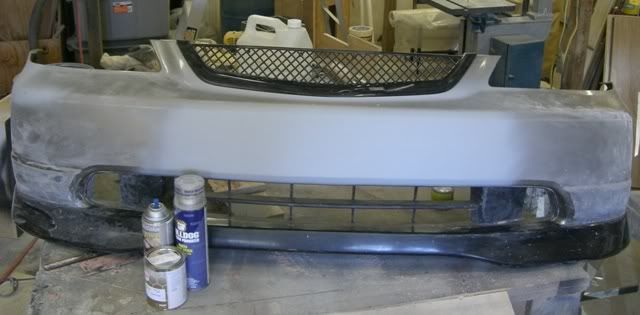

Ill update when i get it on the car!
What does everyone think?
Ill update when i get it on the car!
What does everyone think?


Joined: Aug 2006
Posts: 8,362
Likes: 1
From: Portland, Oregon
Rep Power: 389 

Re: I finished shaving the license plate!
Yeah, I wanna know how EXACTLY you did it as well... I know there is a DIY for one way, but I wanna know how YOU did it- what products did you use.
Post whatever pics you took while doing it as well!
Post whatever pics you took while doing it as well!
Thread Starter
Registered!!
Joined: Jan 2008
Posts: 17
Likes: 0
Rep Power: 0 Re: I finished shaving the license plate!
Thank you!
I wish i had pictures of the early stages i searched my computer but i think they got deleted.
This is how it went........
I first cut out around the the raised part.
I then used a grinder and took down the lip on the piece that was cut out off and the bumper it self.
Then i had to used some creative grinding on the cut out piece to get it to fit flushly in the rectangular hole in the bumper.
Next, with the piece still in place i marked the bottom body line. I then cut down the line using a band saw.
I bought some "plastic welder" witch as like a two part epoxy found at auto part stores.
I put the piece in and make sure its flush and i use the glue on the back of the piece. I then glued strips of abs plastic from an old bumper over the seems for support.
so, now i have the front filled in with a piece of plastic. but the bottom edge is still a skinny, long, rectangular hole....
.....So.....I found a piece of abs plastic with about a 75 degree bend in it long ways (lip from that old bumper i found).
I cut a section of it out that was longer then the opening and fused it too the back with the glue. So the bottom piece isn't flush but close enough for me.
I bought some bondo-glass which is a short hair body filler and coverd the entire rectangle and filled in the bottom angle too.
then using a wood shaver (i think they have these for bondo) i shaved the bondo down to closely match the shaped i needed. Then a second coat and some grinding action with my grinder and this is what i had:
then a coat of regular bondo (which a layed out a few inches past the rectangle) and a good sand with the random orbital with some 80 gritt:
then i added some bondo putty, i think its called. Its for filling pinholes and scratches. a good 220 wet sand. and some primer:
it took a lot of time sanding and grinding and more bondo here and there to get everything perfect but i think it was well worth it.
The bondo on the front isn't very thick so it shouldn't crack but to make sure it doesn't flex to much i also put some bondo-glass around the seems on the back. It seems very strong and should hold up until i run it into something...
Thanks for all your feedback.
Deffinetly a fun project if you have patience and like working with your hands.
Devin
p.s. paint cost me $60 for a pint and a can of adhesion spray. And the lacquer based clear i have isn't compatible so, I'll need to invest in some more clear.
I wish i had pictures of the early stages i searched my computer but i think they got deleted.
This is how it went........
I first cut out around the the raised part.
I then used a grinder and took down the lip on the piece that was cut out off and the bumper it self.
Then i had to used some creative grinding on the cut out piece to get it to fit flushly in the rectangular hole in the bumper.
Next, with the piece still in place i marked the bottom body line. I then cut down the line using a band saw.
I bought some "plastic welder" witch as like a two part epoxy found at auto part stores.
I put the piece in and make sure its flush and i use the glue on the back of the piece. I then glued strips of abs plastic from an old bumper over the seems for support.
so, now i have the front filled in with a piece of plastic. but the bottom edge is still a skinny, long, rectangular hole....
.....So.....I found a piece of abs plastic with about a 75 degree bend in it long ways (lip from that old bumper i found).
I cut a section of it out that was longer then the opening and fused it too the back with the glue. So the bottom piece isn't flush but close enough for me.
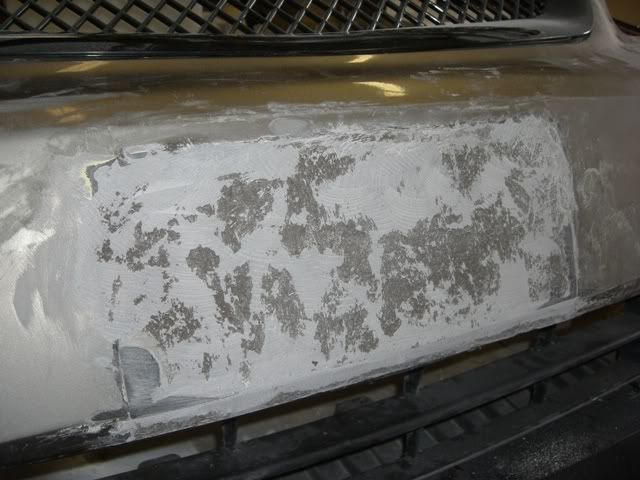
I bought some bondo-glass which is a short hair body filler and coverd the entire rectangle and filled in the bottom angle too.
then using a wood shaver (i think they have these for bondo) i shaved the bondo down to closely match the shaped i needed. Then a second coat and some grinding action with my grinder and this is what i had:
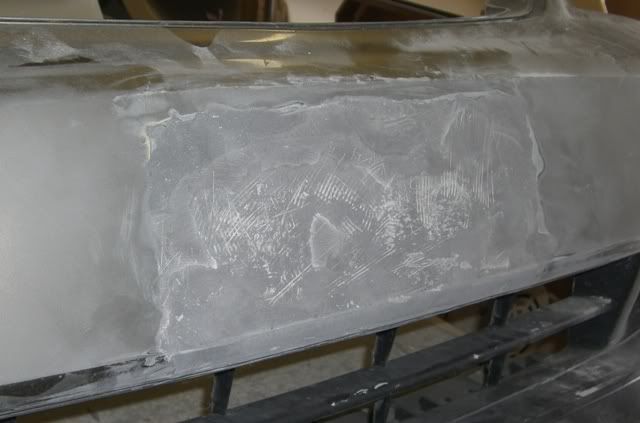
then a coat of regular bondo (which a layed out a few inches past the rectangle) and a good sand with the random orbital with some 80 gritt:
then i added some bondo putty, i think its called. Its for filling pinholes and scratches. a good 220 wet sand. and some primer:
it took a lot of time sanding and grinding and more bondo here and there to get everything perfect but i think it was well worth it.
The bondo on the front isn't very thick so it shouldn't crack but to make sure it doesn't flex to much i also put some bondo-glass around the seems on the back. It seems very strong and should hold up until i run it into something...
Thanks for all your feedback.
Deffinetly a fun project if you have patience and like working with your hands.
Devin
p.s. paint cost me $60 for a pint and a can of adhesion spray. And the lacquer based clear i have isn't compatible so, I'll need to invest in some more clear.


 I love how I don't have to do that on my 04' heh
 Thread Starter
Registered!!
Joined: Jan 2008
Posts: 17
Likes: 0
Rep Power: 0 Re: I finished shaving the license plate!
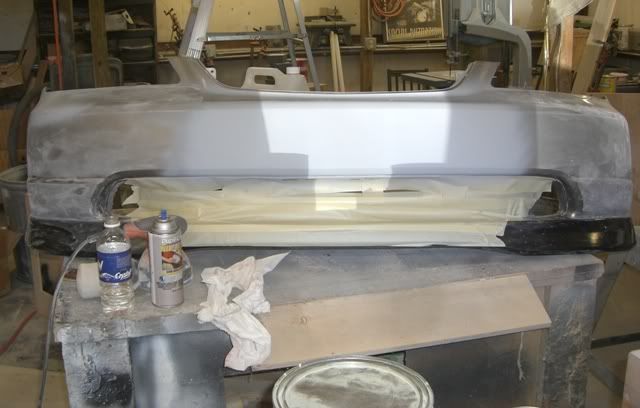
Thanks everyone, i still need to get the clear and finish sanding down the rest of the bumper. But ill update as i go
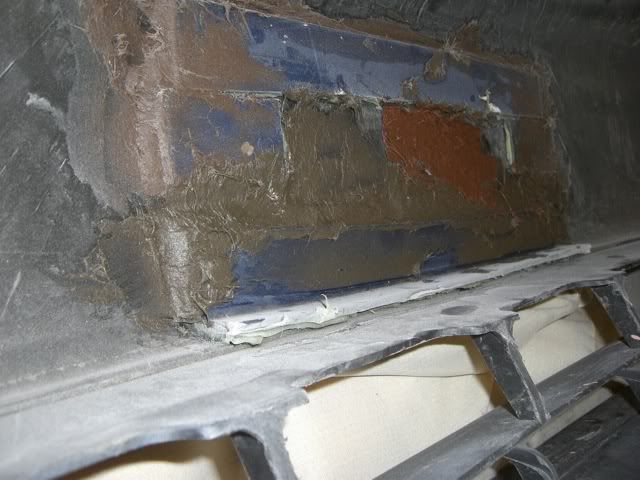
This is what the back looks like you can see the long L shapped piece i used for the bottom angle
The tools: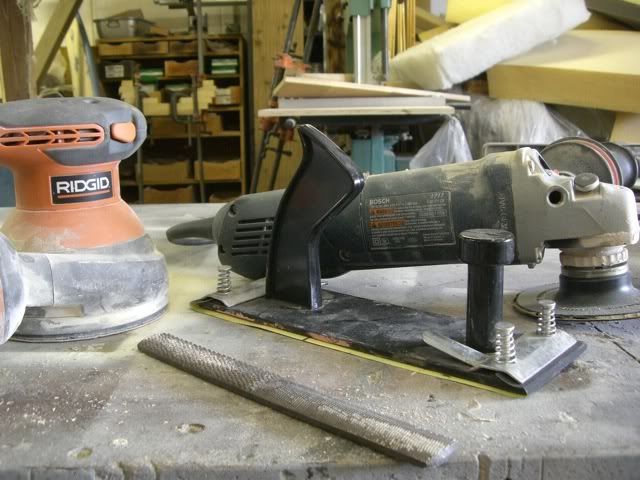
Random orbital, grinder, wood shaver, and sanding block....
Here are some of the products:
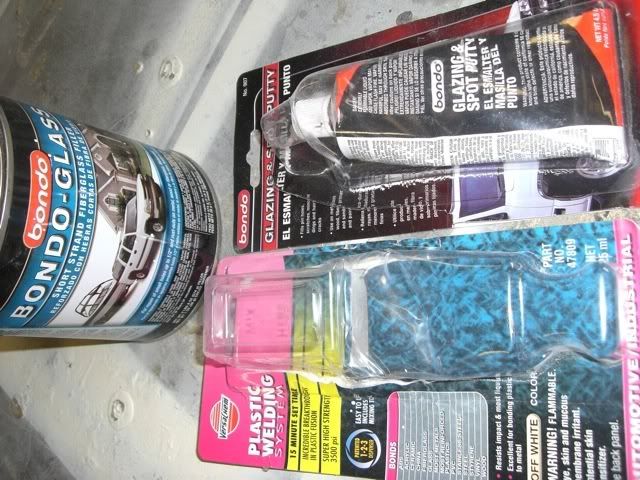
VersaChem's plastic welding system ~ $5
Bondo's Glazing and spot putty ~ $4
Bondo's bondo-glass ~ $14
Bondo ~ $16
This is what the back looks like you can see the long L shapped piece i used for the bottom angle
The tools:
Random orbital, grinder, wood shaver, and sanding block....
Here are some of the products:
VersaChem's plastic welding system ~ $5
Bondo's Glazing and spot putty ~ $4
Bondo's bondo-glass ~ $14
Bondo ~ $16
Official Rattlesnake Hunter
iTrader: (8)
Joined: Jun 2005
Posts: 5,491
Likes: 0
From: Valley Of The Sun...
Rep Power: 314 

A long winded 7th genr
Joined: Jan 2006
Posts: 1,755
Likes: 0
From: Northern California Humboldt
Rep Power: 288 Re: I finished shaving the license plate!
That's nice dude. Great body work. For me, it's like a love hate kinda thing. I love the way it looks when I do a good job, but I hate waiting to get all the work done by myself! Can't wait to see it when it's done.
Thread Starter
Registered!!
Joined: Jan 2008
Posts: 17
Likes: 0
Rep Power: 0 Re: I finished shaving the license plate!
hahahaha nice call
Thanks for the feed back everyone.
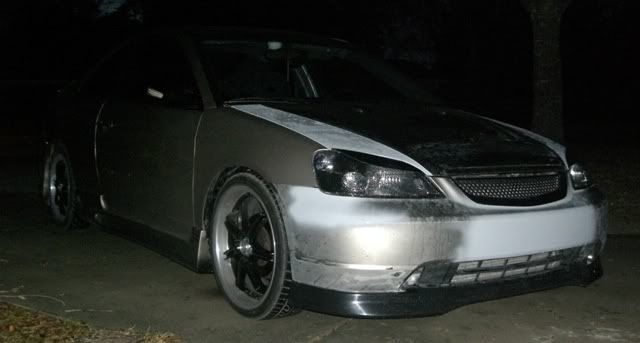
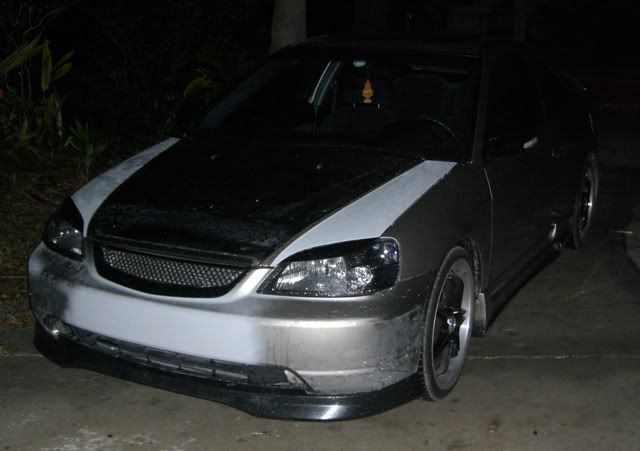
I put it on the car tonight for a dry fit and to test it to make sure it doesn't crack.
Seems to be holding up very well so I'm sure i will not run into any problems until i ram something.
I have run into one problem which i have a question about if anyone knows: The sides of the bumper just before the final bolt there is a ridge like the one under the headlight.... problem is there are no clips on the car to hold on to this. I'm guessing, since i bought the car with a body kit on it that this was removed. is this correct?
Well here is the dryfit pics, no primer yet but soon ill post more as i go...
Thanks for the feed back everyone.
I put it on the car tonight for a dry fit and to test it to make sure it doesn't crack.
Seems to be holding up very well so I'm sure i will not run into any problems until i ram something.
I have run into one problem which i have a question about if anyone knows: The sides of the bumper just before the final bolt there is a ridge like the one under the headlight.... problem is there are no clips on the car to hold on to this. I'm guessing, since i bought the car with a body kit on it that this was removed. is this correct?
Well here is the dryfit pics, no primer yet but soon ill post more as i go...

Thread
Thread Starter
Honda Civic Forum
Replies
Last Post
Touge
Canada East
0
Sep 23, 2015 11:19 PM
Touge
Ottawa
0
Sep 23, 2015 11:14 PM
Touge
Canada East
0
Sep 22, 2015 11:55 PM
Touge
Ottawa
0
Sep 22, 2015 11:52 PM

