
DIY: repair Lower Control Arm broken bushings

Thread Starter
Banished to the Depths of Rice.
iTrader: (3)
Joined: Jun 2005
Posts: 9,196
Likes: 1
From: SoCal 714/909/626
Rep Power: 353 

how do u know its broken?
1. look at it, its cracked. DUH
2. u hear a "*thump* or a weird banging noise from ur suspension.
TOOLS NEEDED:
17mm socket (take off ball joint nut)
19mm socket (take off wheels)
22mm socket (bake of the 2 LCA bolts)
socket wrench (1/2 is best)
jack stands
jack
some plastic cups (to mix the polyurethane)
plastic fork/stick/chopsticks (to mix the polyurethane)
rubber gloves
polyurethane (look at step 3)
optional (but really helps if you have it)
breaker bar (or a cheater bar)
impact gun
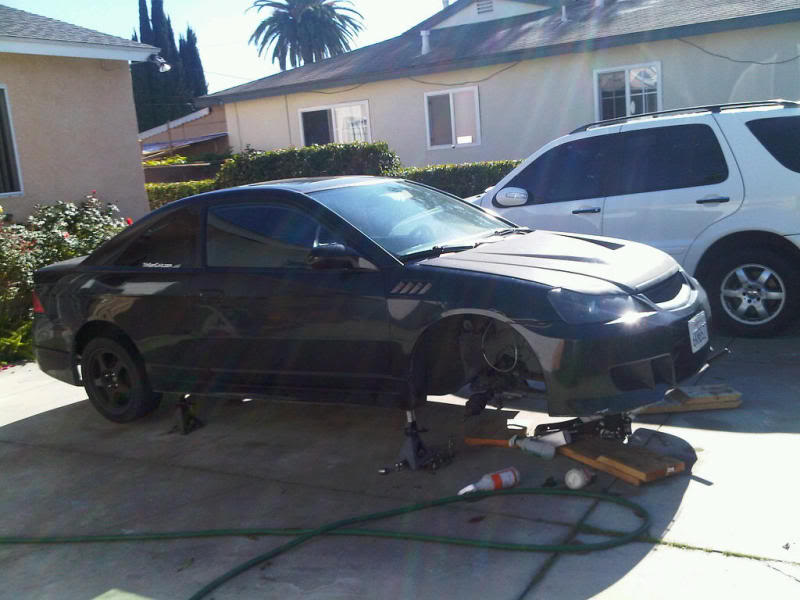
my right (passenger) side broke at 110,000 miles.
you have THREE options:
1. buy new LCA (lower control arms). but they're not cheap. $XXX price range
2. buy energy suspension front bushings set. however, they are a pain in the *** and regular joe-shmo will not be able to install them because you need to first cut and press out the bushings. this requires a press (like a hydraulic press)
http://www.energysuspensionparts.com...prod=16%2E3116
3. (my way) fill your bushings with polyurethane. it's like the same thing as the ES bushings.
step 1. jack your car up and put it on jackstands (I SAID JACKSTANDS PEOPLE)
remember kids, safety first.
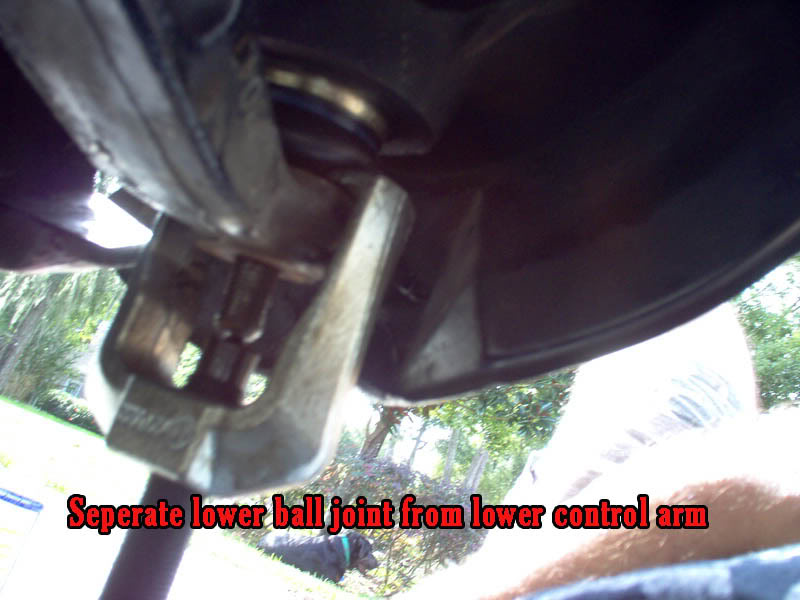
step 2. take off ur LCA:
its held on by 3 bolts: 2 in the chassis and 1 on the balljoint.
remove the two chassis bolt. it's a 22mm (i think. ill check in the morning).
then remove the ball joint bolt. its a 17mm
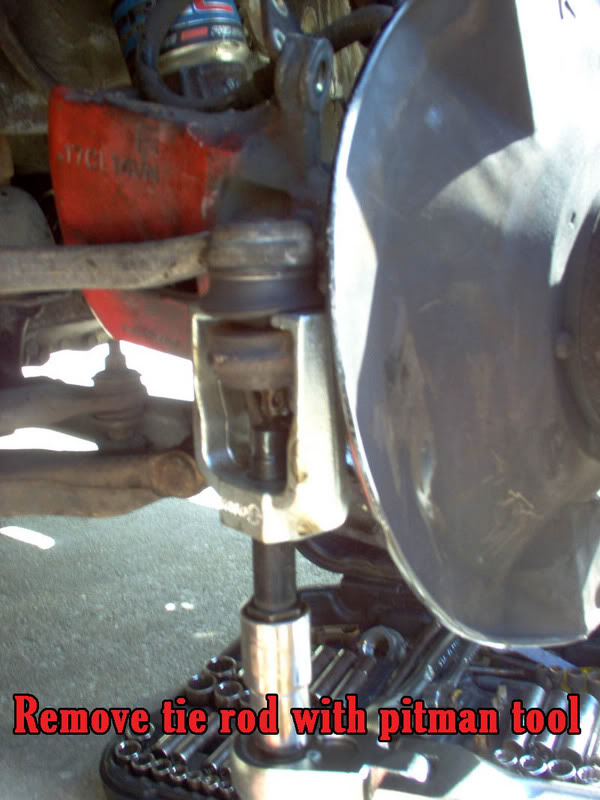
now BREAK the ball joint.
there is a few ways u can do this:
1. go to autozone and RENT (free) a ball joint separator. this is the best and easiest way.
http://www.autozone.com:80/autozone/...uestid=4135097
here is how it looks like in action: (borrowed form hond@tech thread)
or
2. you can also break the ball joint (if ur cant rent the tool...or dont wanna spend the $14 to buy the tool) with a 1/2 socket wrench.
watch the youtube video. notice the wrench in between. then you press down and BAM. the ball joint is out. (you will have to push down pretty far)
http://www.youtube.com/watch?v=ISY8b...layer_embedded
NOTE: DO NOT.....I REPEAT, DO NOT HAMMER THE BALL JOINT BOLT. YOU WILL DESTROY THE THREADS AND WILL HAVE TO REPLACE A WHOLE NEW BALL JOINT!!!
step 3. fixing the LCA bushings by pouring polyurethane
3.1
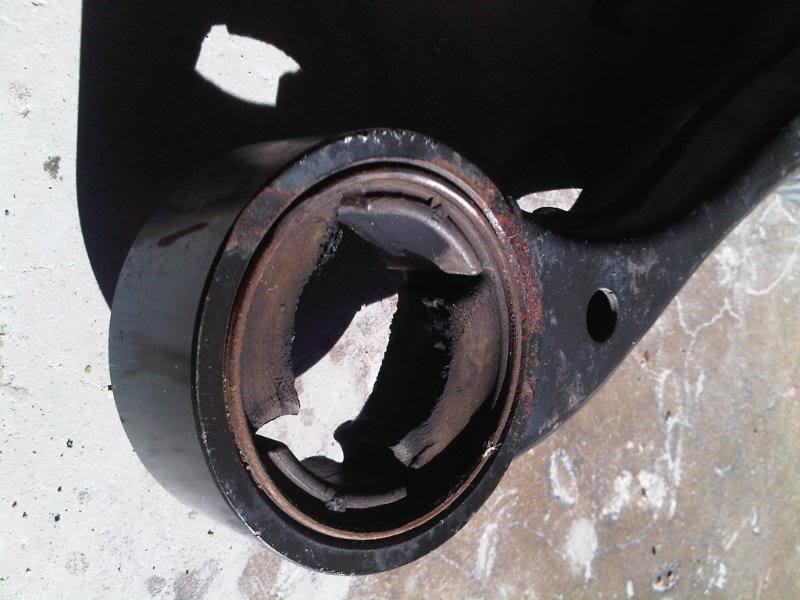
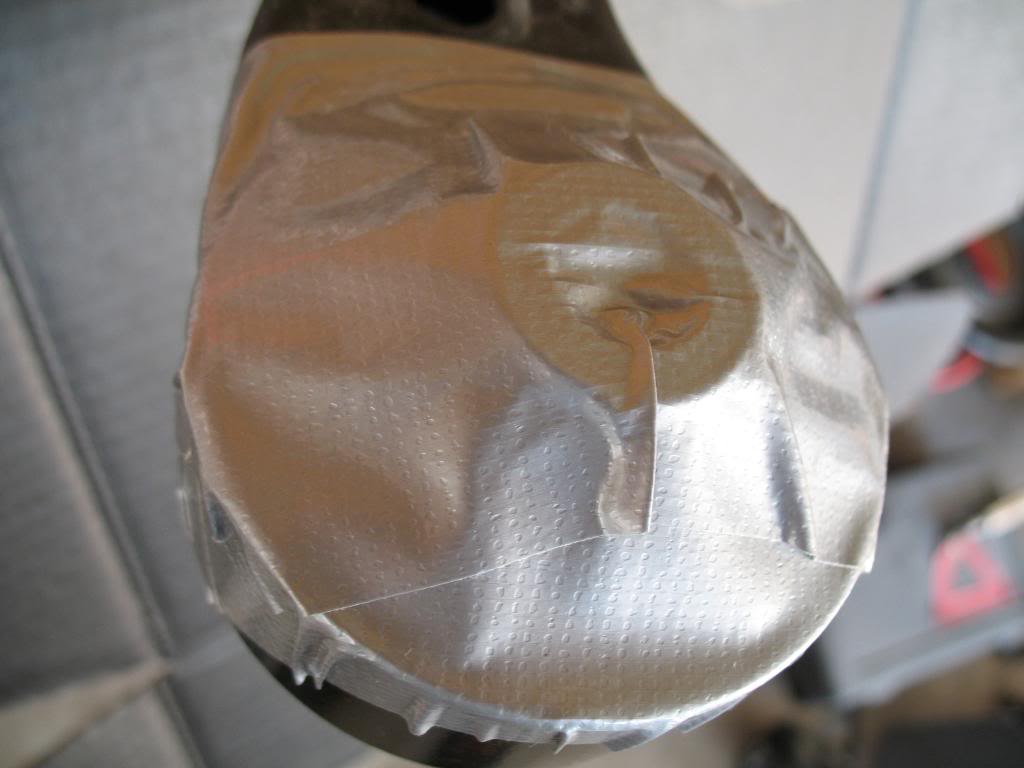
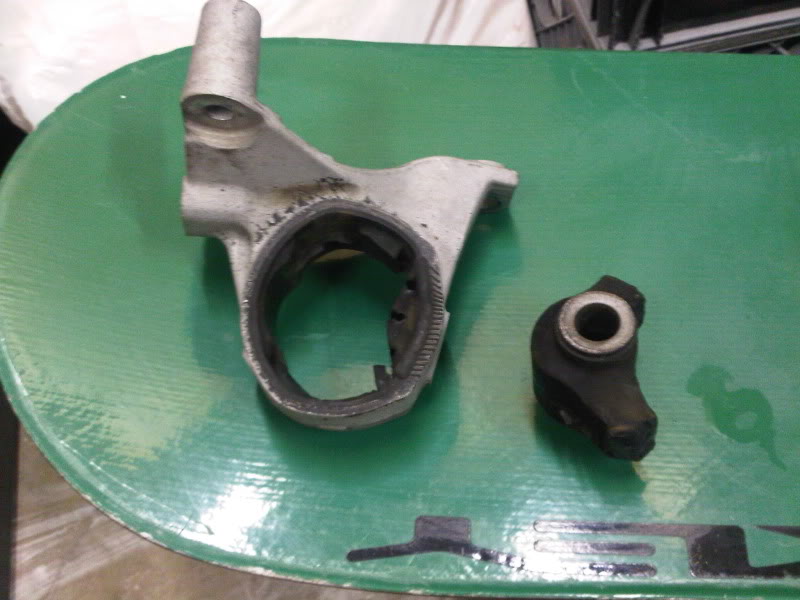
look at ur bushings. as seen here, one of mine is torn. eek
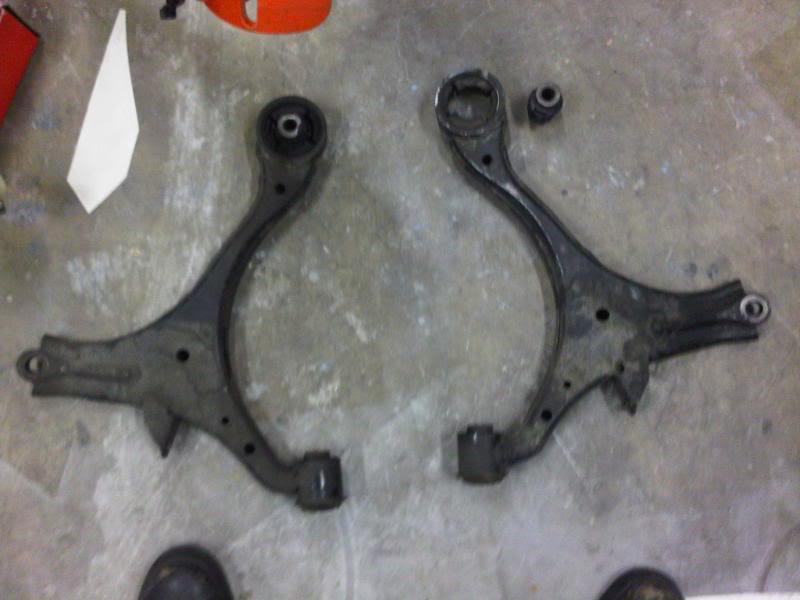
if you notice, this is the top of my front LCA bushing. its broken and you can see that its been banging against the top of my chassis.
3.2
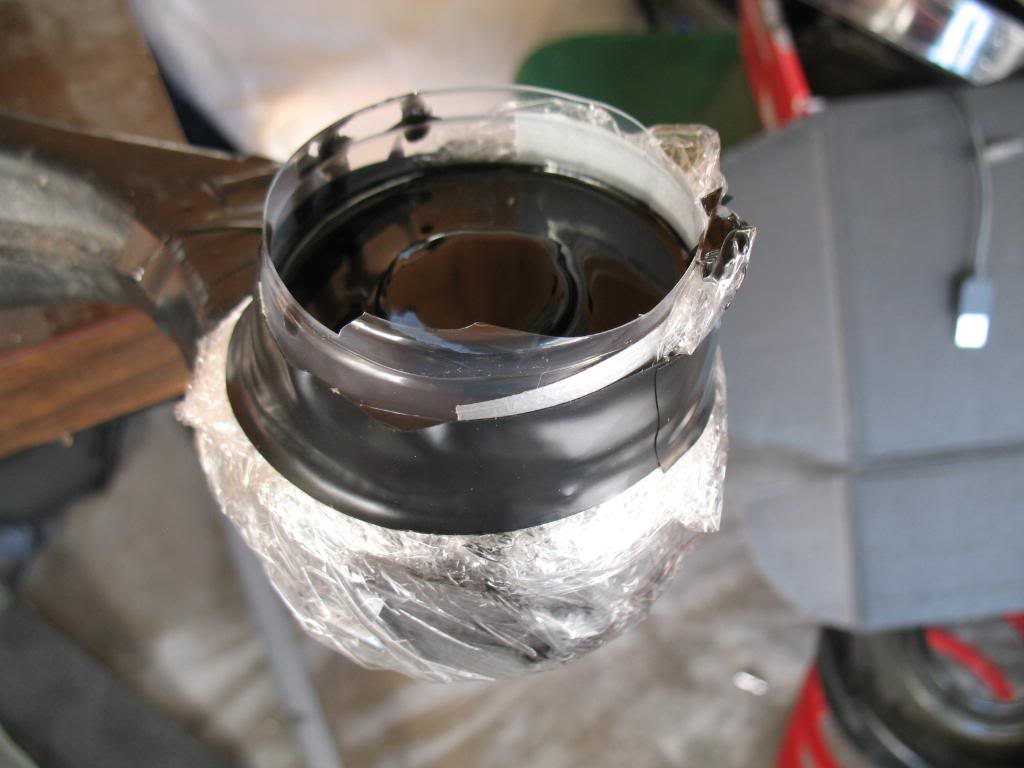
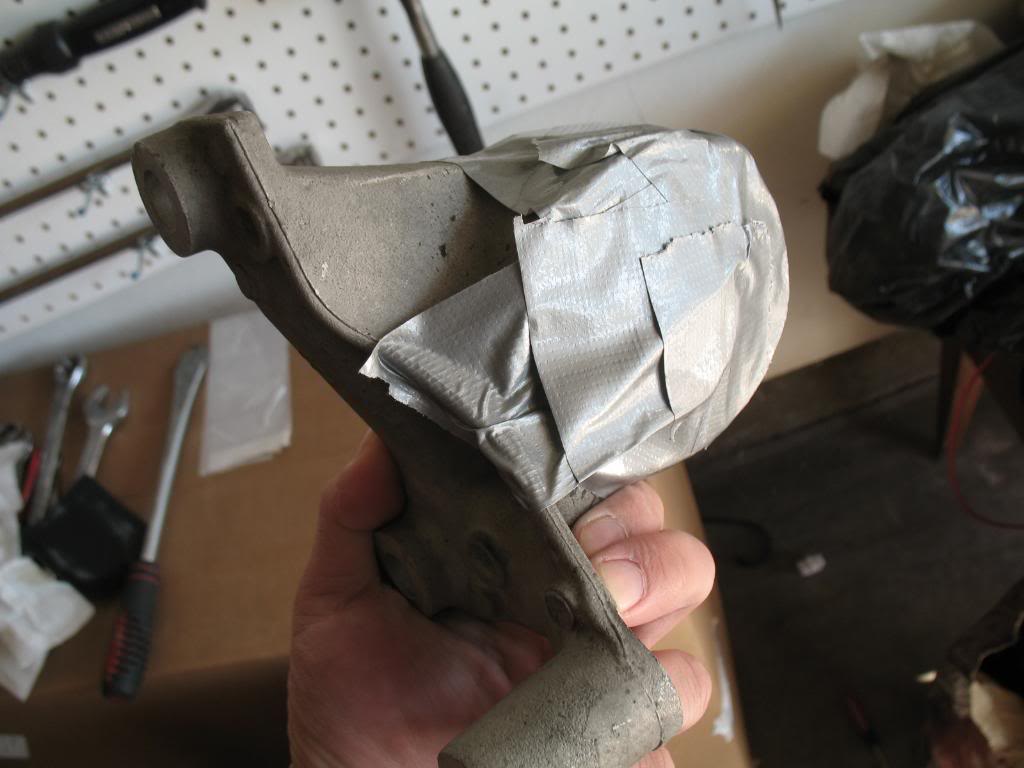
prep the LCA.
tape the bottom of the broken bushing.
make sure the center cylinder is CENTER
i cannot photoshop/use paint if my life depended on it, so i drew it
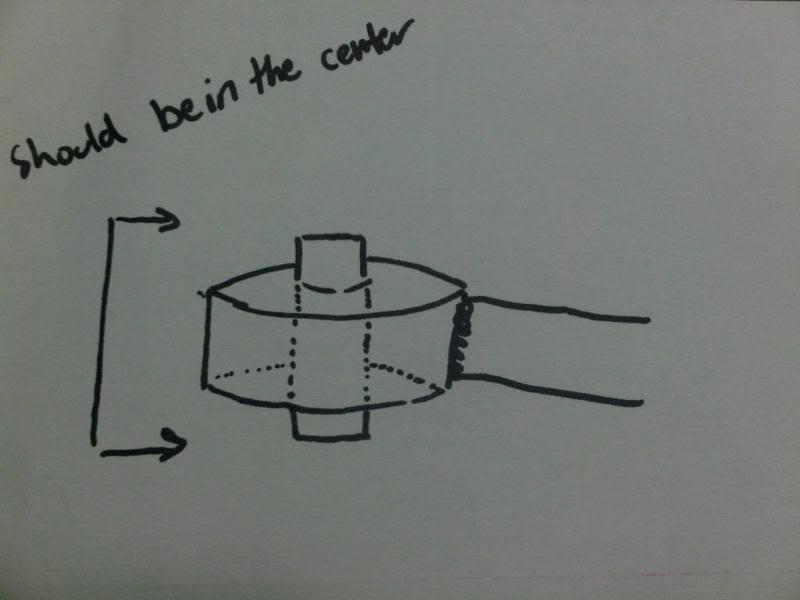
bottom view
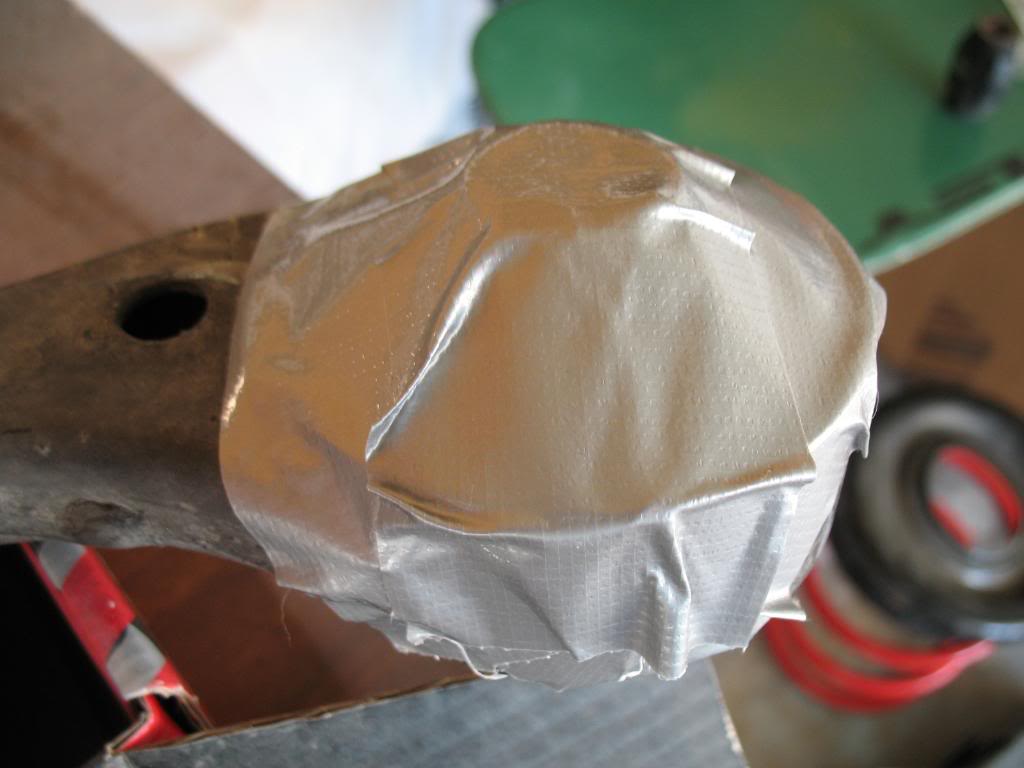
press on the bottom so polyurethane wont fill the cylinder
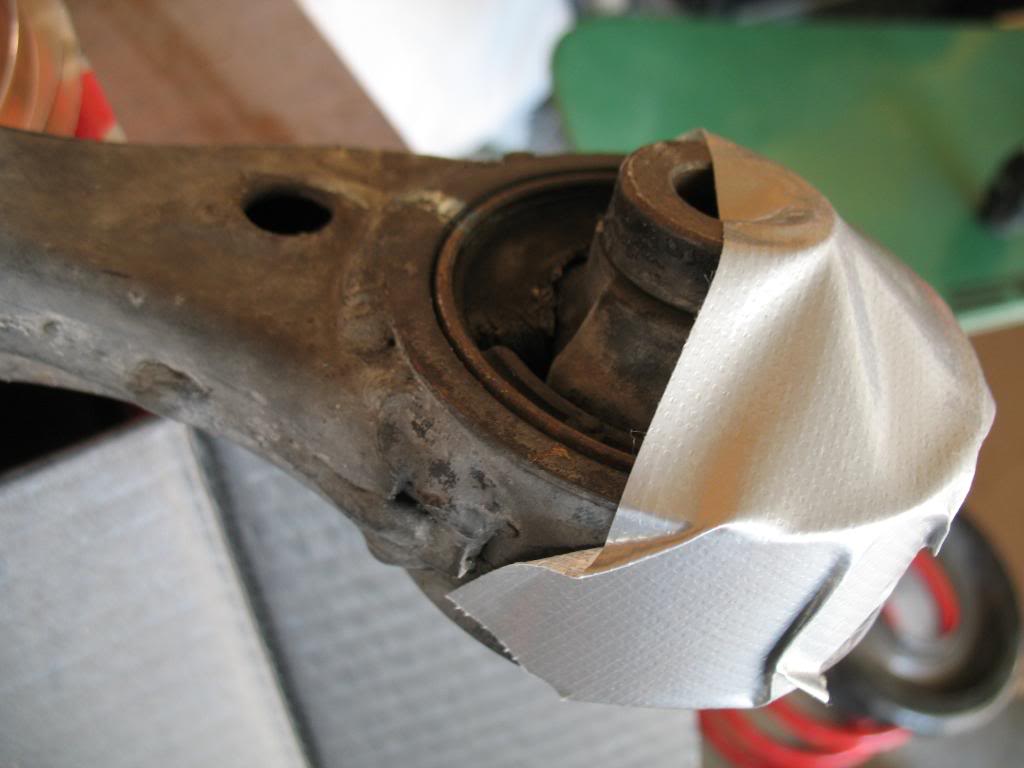
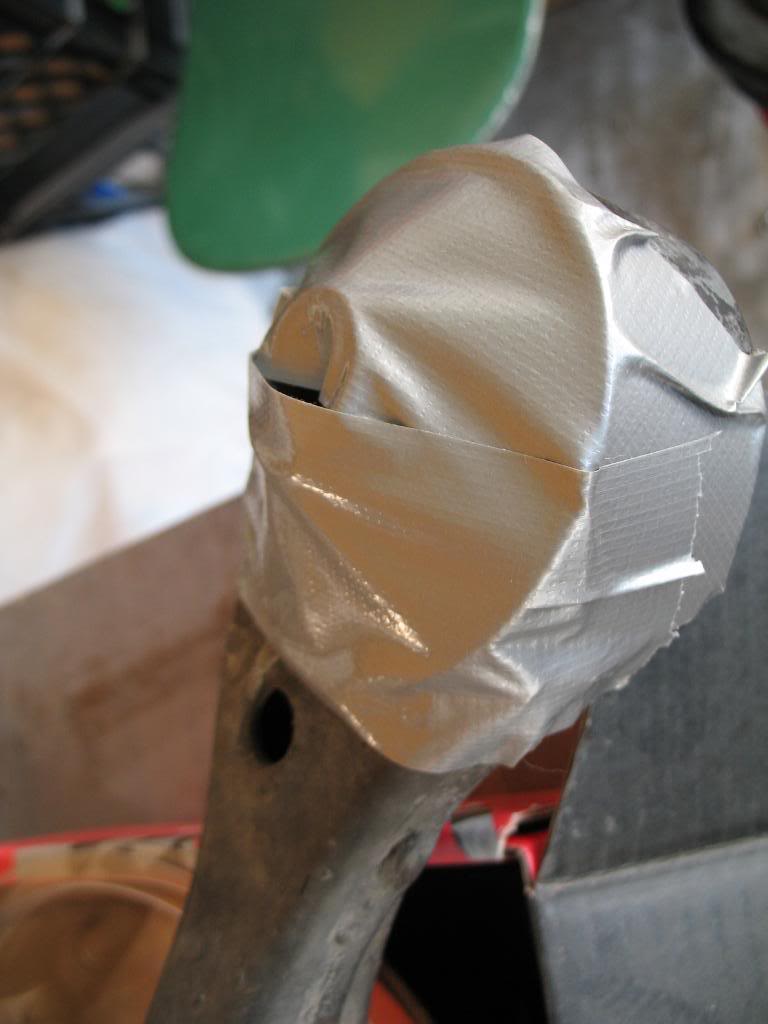
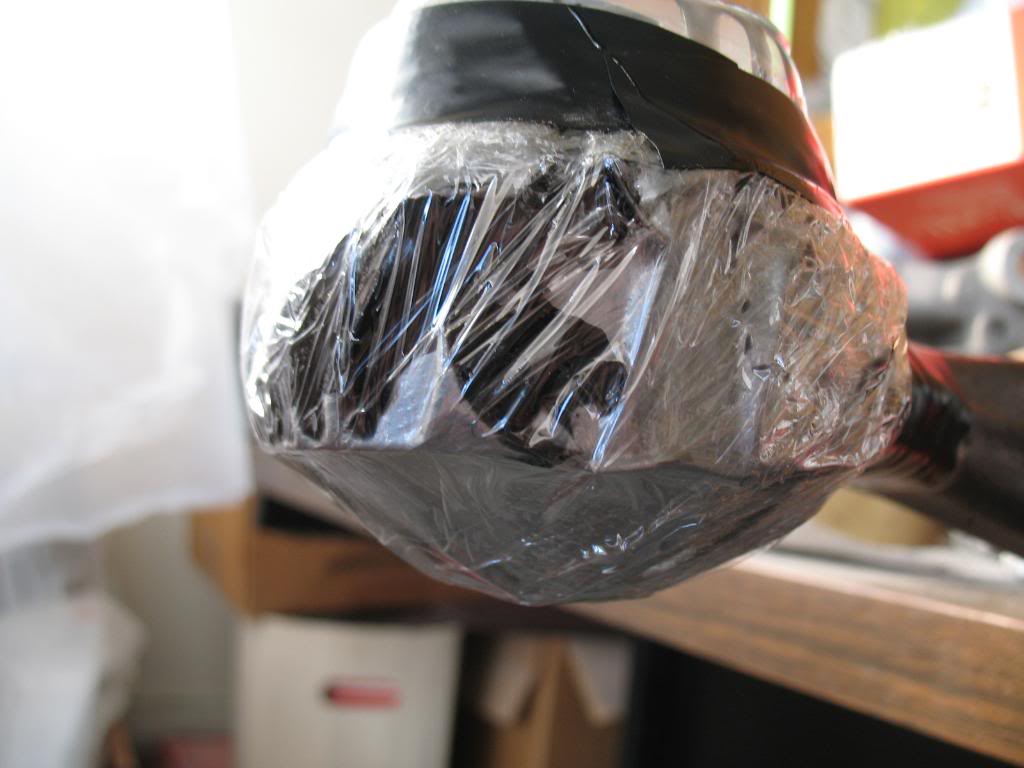
i also cut a piece of the lower part of the cup, and build a little wall around the TOP of the bushing mount area. that way, you can fill the polyurethane almost to the top.
then saran wrap the bottom with some more ductape and more tape. MAKE SURE U TAPE IT WELL SO IT DOESNT LEAK. u will be sorry and make a big mess if it leaks.
top view with the lil wall i built
3.3
prep the polyurethane.
there are a few polyurethane mixes you can use.
devcon flexane is a good one. but its really expensive $50+
i used one i bought on ebay. search "LIQUID CASTING RUBBER Shore 75A" or the seller's name is "aeromarineproducts"
http://cgi.ebay.com/LIQUID-CASTING-R...item4cf34e766c
for those of you who are wondering, SHORE is the hardness/flex level.
1/2 a gallon is enough to fill every motormount and bushing for quite a few cars. unlike the devon flexane, u only get like 16oz (16oz = .125 gal)
so on to the mixing!
wear protection. includes gloves, and eyewear.
it came with instructions as well, so i suggest u read that.
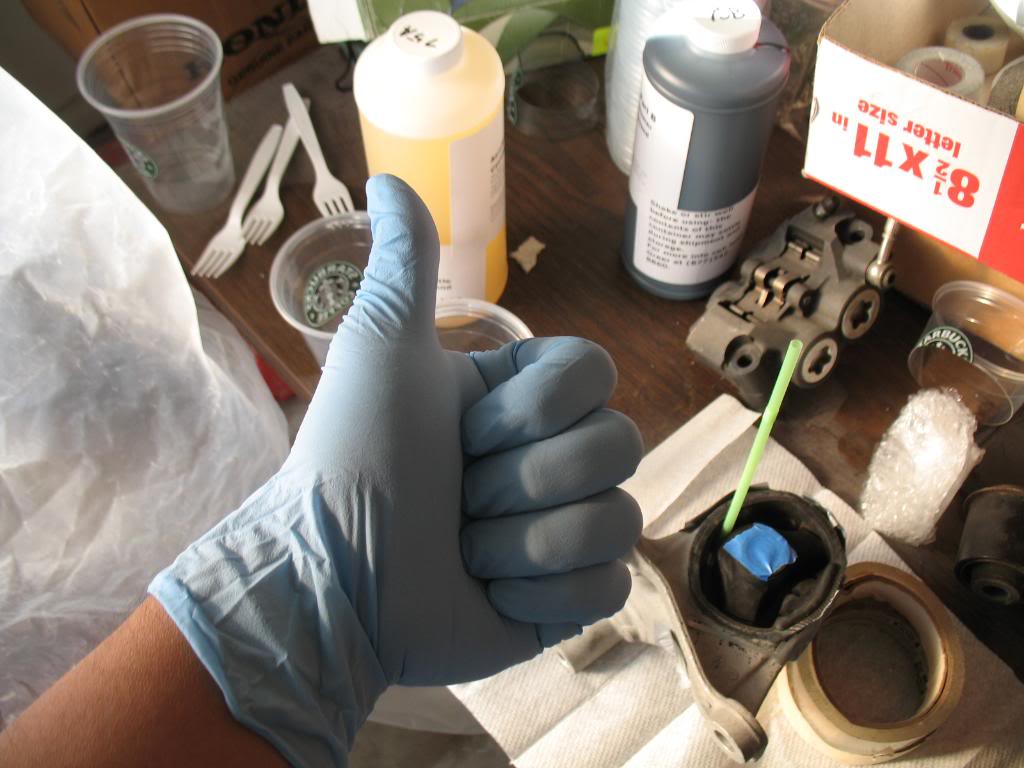
you want to mix it in a plastic container....not paper, wood...etc again read instructions that came with it.
i work at starbucks so i get unlimited cups.
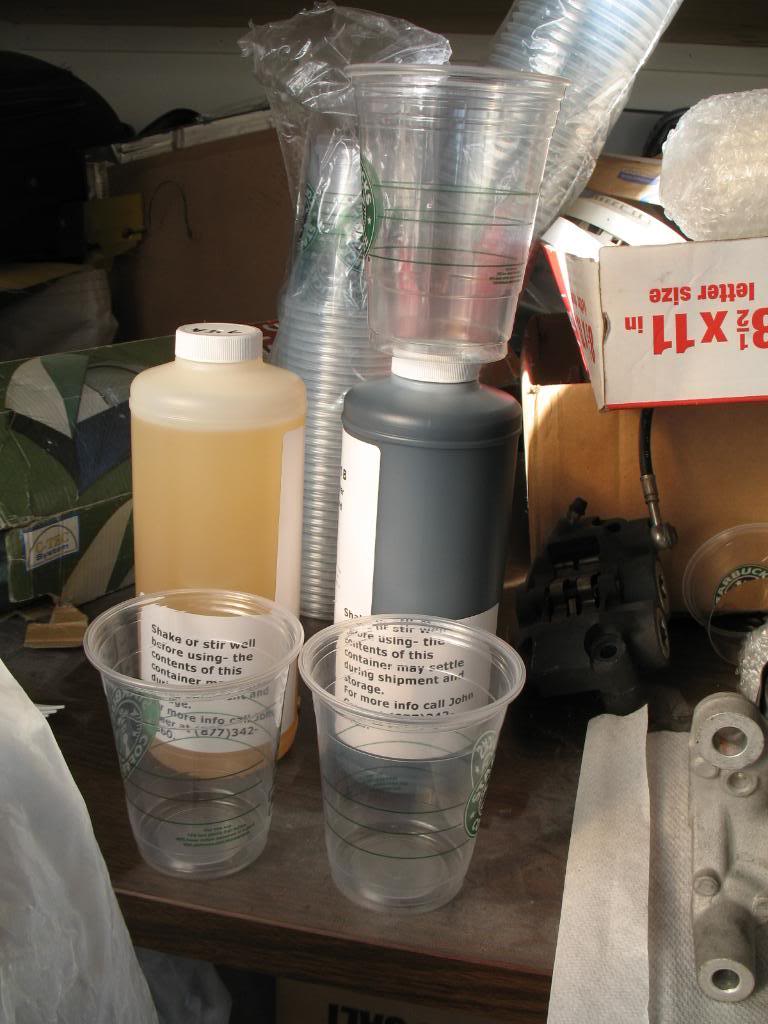
i poured and measure it
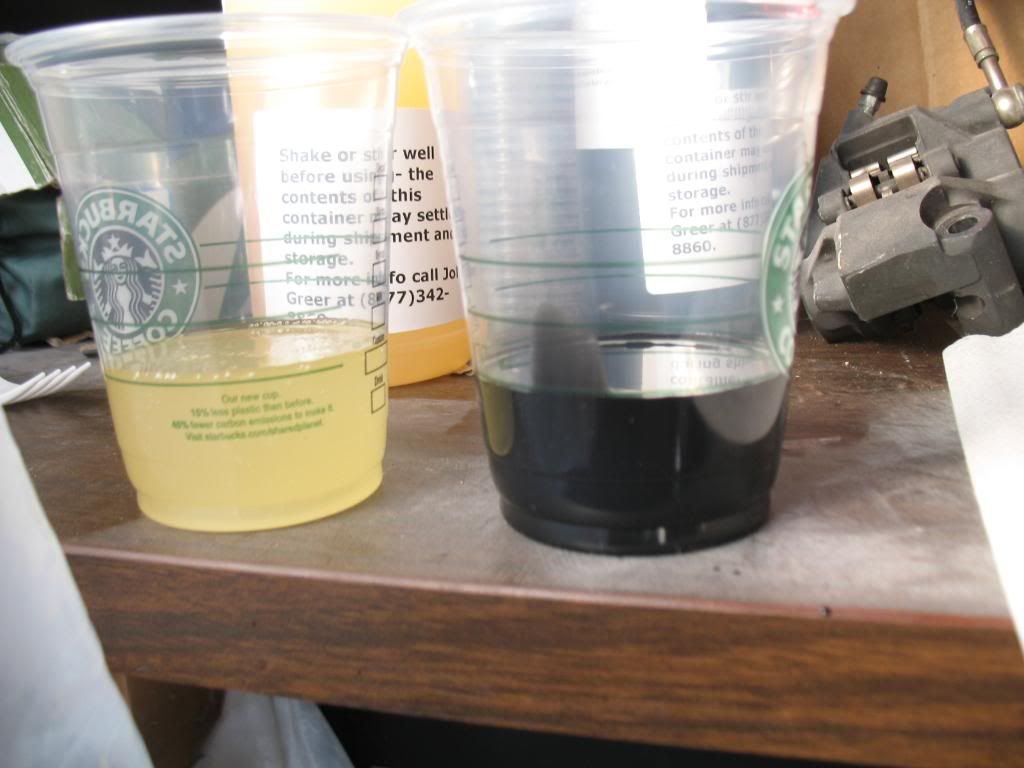
mix it for 1-2 FULL MIN.
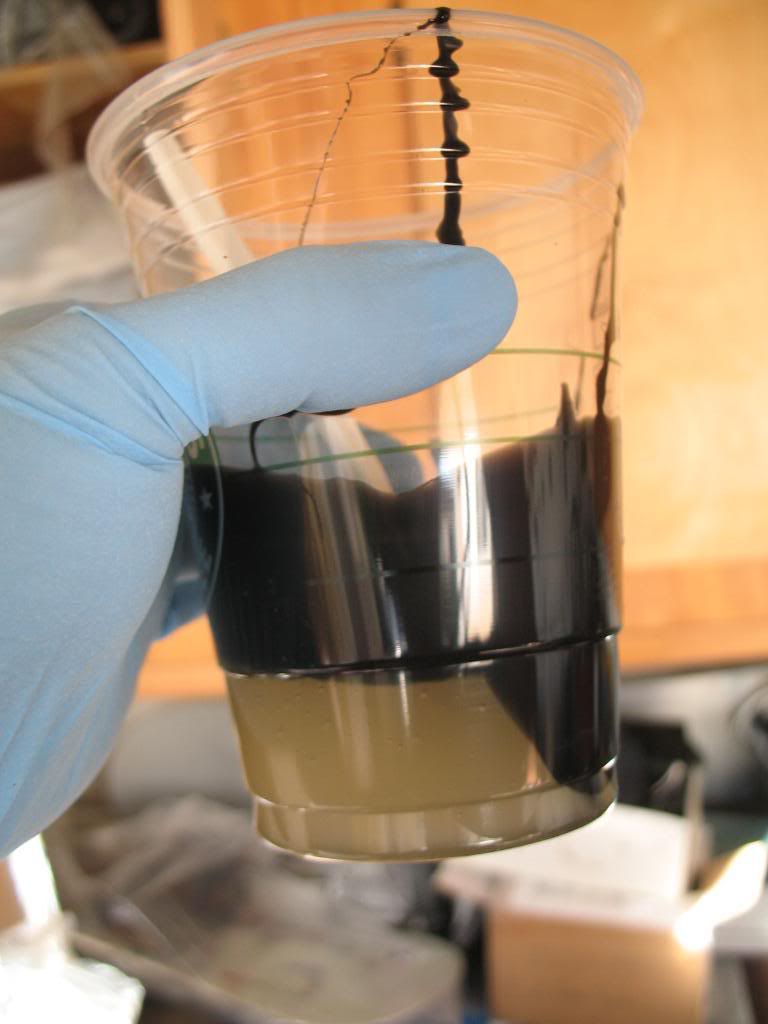
pour it in.
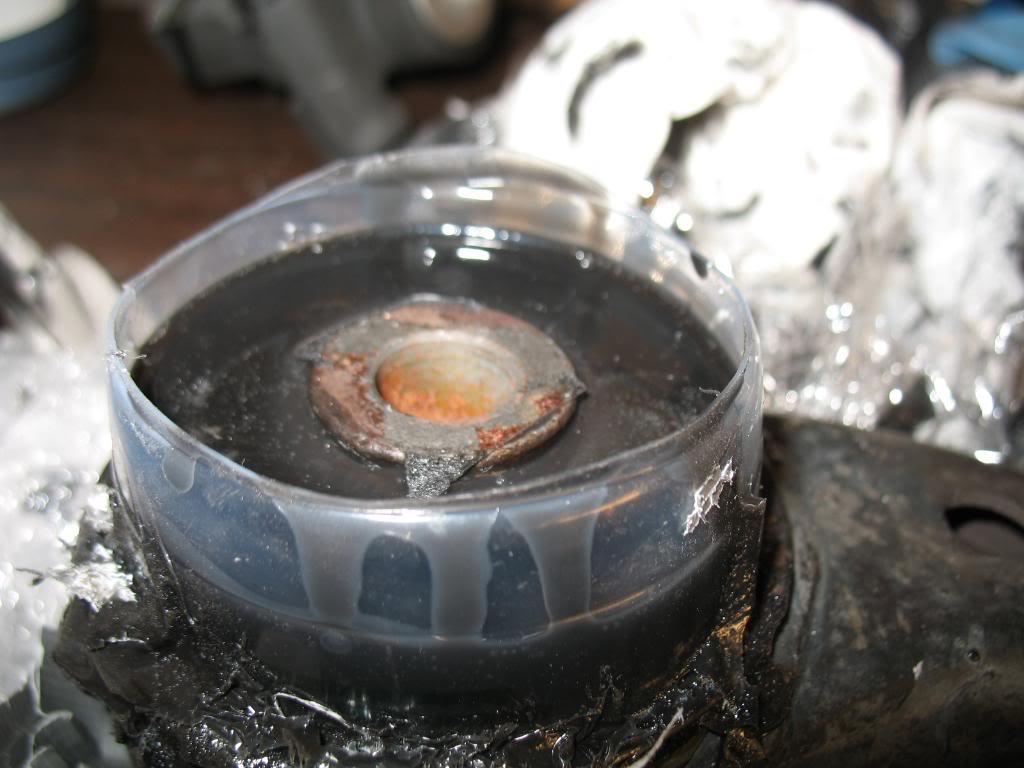
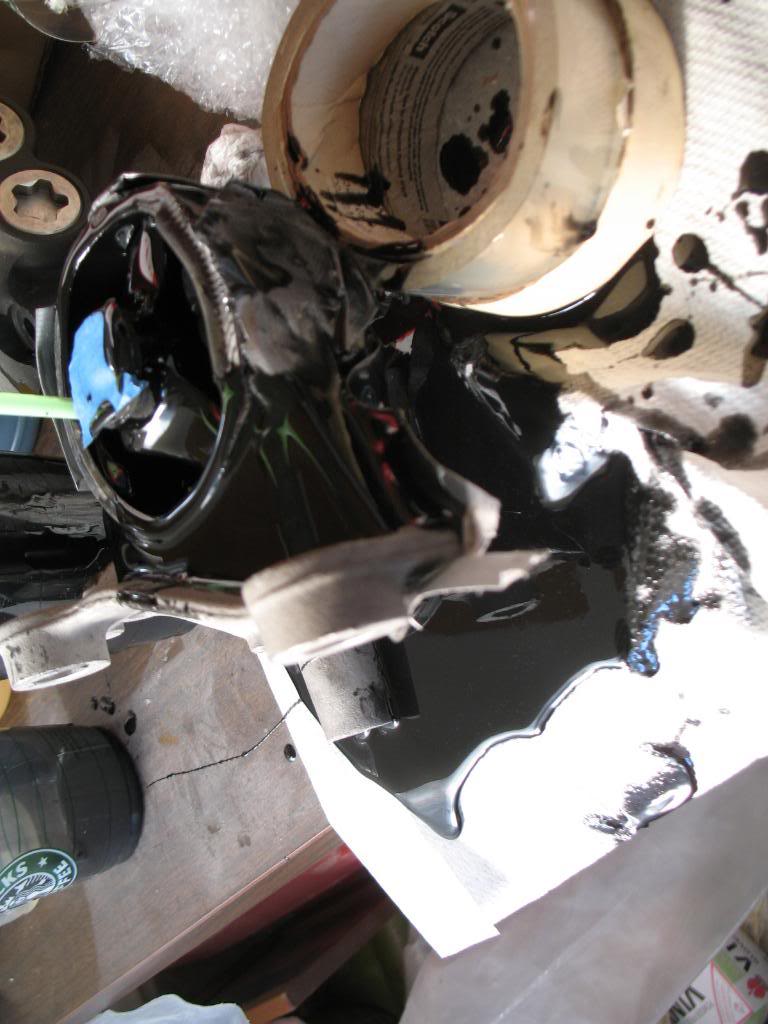
you will notice i put a piece of tape on the top of the metal cylinder thing. thats to prevent the polyurethane to come in and ill the hole. we dont want that.
AHH HA! it leaked a little, but the saran wrap saved it!!!
3.5
manual says it will cure in 5mins, and allow 12 hrs for it to dry before use.
i would highly suggest u let it dry for at least 24hrs.
then take off the tape AND the lil wall made out of a cup. i use a dremel to slit a line in the middle and peeled it off.
if u drive ur car everyday, you will notice that your handling/turning will be much more precise because it will have a LOT less flex from side to side.
reinstall everything in the opposite order and ur done.
go grab a cold one.
1. look at it, its cracked. DUH
2. u hear a "*thump* or a weird banging noise from ur suspension.
TOOLS NEEDED:
17mm socket (take off ball joint nut)
19mm socket (take off wheels)
22mm socket (bake of the 2 LCA bolts)
socket wrench (1/2 is best)
jack stands
jack
some plastic cups (to mix the polyurethane)
plastic fork/stick/chopsticks (to mix the polyurethane)
rubber gloves
polyurethane (look at step 3)
optional (but really helps if you have it)
breaker bar (or a cheater bar)
impact gun
my right (passenger) side broke at 110,000 miles.
you have THREE options:
1. buy new LCA (lower control arms). but they're not cheap. $XXX price range
2. buy energy suspension front bushings set. however, they are a pain in the *** and regular joe-shmo will not be able to install them because you need to first cut and press out the bushings. this requires a press (like a hydraulic press)
http://www.energysuspensionparts.com...prod=16%2E3116
3. (my way) fill your bushings with polyurethane. it's like the same thing as the ES bushings.
step 1. jack your car up and put it on jackstands (I SAID JACKSTANDS PEOPLE)
remember kids, safety first.
step 2. take off ur LCA:
its held on by 3 bolts: 2 in the chassis and 1 on the balljoint.
remove the two chassis bolt. it's a 22mm (i think. ill check in the morning).
then remove the ball joint bolt. its a 17mm
now BREAK the ball joint.
there is a few ways u can do this:
1. go to autozone and RENT (free) a ball joint separator. this is the best and easiest way.
http://www.autozone.com:80/autozone/...uestid=4135097
here is how it looks like in action: (borrowed form hond@tech thread)
or
2. you can also break the ball joint (if ur cant rent the tool...or dont wanna spend the $14 to buy the tool) with a 1/2 socket wrench.
watch the youtube video. notice the wrench in between. then you press down and BAM. the ball joint is out. (you will have to push down pretty far)
http://www.youtube.com/watch?v=ISY8b...layer_embedded
NOTE: DO NOT.....I REPEAT, DO NOT HAMMER THE BALL JOINT BOLT. YOU WILL DESTROY THE THREADS AND WILL HAVE TO REPLACE A WHOLE NEW BALL JOINT!!!
step 3. fixing the LCA bushings by pouring polyurethane
3.1
look at ur bushings. as seen here, one of mine is torn. eek
if you notice, this is the top of my front LCA bushing. its broken and you can see that its been banging against the top of my chassis.
3.2
prep the LCA.
tape the bottom of the broken bushing.
make sure the center cylinder is CENTER
i cannot photoshop/use paint if my life depended on it, so i drew it
bottom view
press on the bottom so polyurethane wont fill the cylinder
i also cut a piece of the lower part of the cup, and build a little wall around the TOP of the bushing mount area. that way, you can fill the polyurethane almost to the top.
then saran wrap the bottom with some more ductape and more tape. MAKE SURE U TAPE IT WELL SO IT DOESNT LEAK. u will be sorry and make a big mess if it leaks.
top view with the lil wall i built
3.3
prep the polyurethane.
there are a few polyurethane mixes you can use.
devcon flexane is a good one. but its really expensive $50+
i used one i bought on ebay. search "LIQUID CASTING RUBBER Shore 75A" or the seller's name is "aeromarineproducts"
http://cgi.ebay.com/LIQUID-CASTING-R...item4cf34e766c
for those of you who are wondering, SHORE is the hardness/flex level.
1/2 a gallon is enough to fill every motormount and bushing for quite a few cars. unlike the devon flexane, u only get like 16oz (16oz = .125 gal)
so on to the mixing!
wear protection. includes gloves, and eyewear.
it came with instructions as well, so i suggest u read that.
you want to mix it in a plastic container....not paper, wood...etc again read instructions that came with it.
i work at starbucks so i get unlimited cups.
i poured and measure it
mix it for 1-2 FULL MIN.
pour it in.
you will notice i put a piece of tape on the top of the metal cylinder thing. thats to prevent the polyurethane to come in and ill the hole. we dont want that.
AHH HA! it leaked a little, but the saran wrap saved it!!!
3.5
manual says it will cure in 5mins, and allow 12 hrs for it to dry before use.
i would highly suggest u let it dry for at least 24hrs.
then take off the tape AND the lil wall made out of a cup. i use a dremel to slit a line in the middle and peeled it off.
if u drive ur car everyday, you will notice that your handling/turning will be much more precise because it will have a LOT less flex from side to side.
reinstall everything in the opposite order and ur done.
go grab a cold one.
Thread Starter
Banished to the Depths of Rice.
iTrader: (3)
Joined: Jun 2005
Posts: 9,196
Likes: 1
From: SoCal 714/909/626
Rep Power: 353 you can also repair motor mounts as well. there is a DIY on it but ill show u anyways since i did it:
our front motor mount only last about 100k before it breaks.
there are 3 bolts holding ur motormount.
you'll need a 17mm and a 12mm(or maybe it was 14mm)
jack ur car up, and put it on jackstands.
now take ur jack and support ur engine BEFORE u take off ur motormount.
this will allow the engine to stay in the same place, so when u take ur MM out, ur engine isnt going to fall or sag.
broken MM FTL
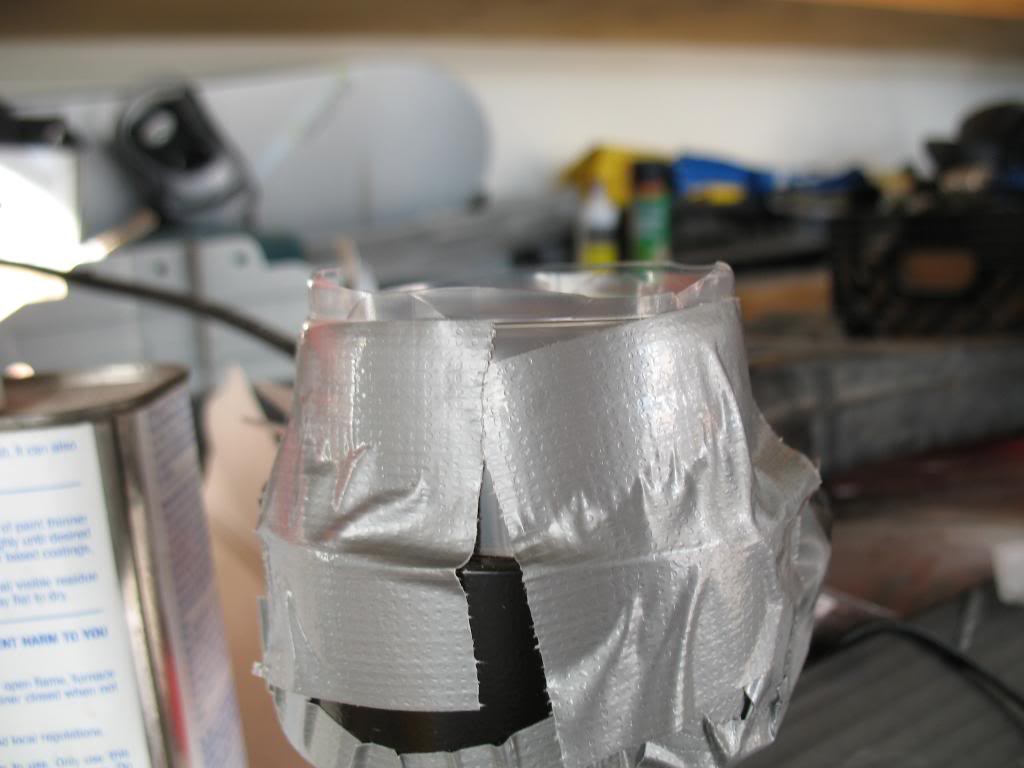
so put the center back in, make sure its centered and tape the bottom
REMEMBER TO TAPE IT WELL and remember to also use SARAN WRAP after the tape.....and some more tape.
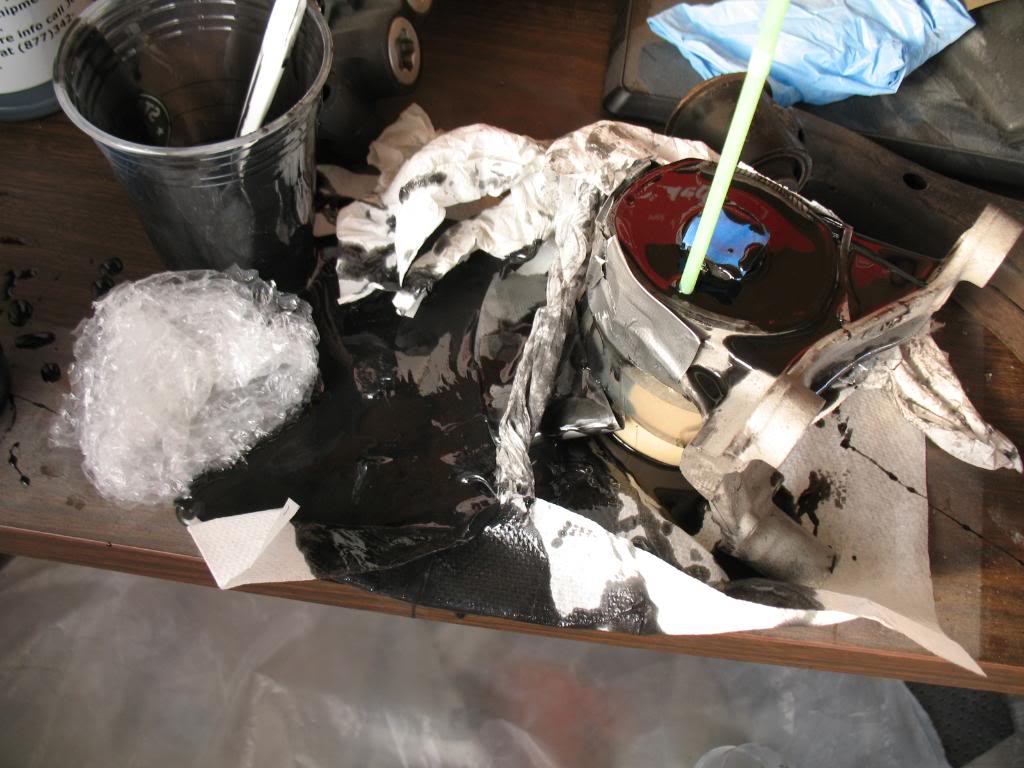
i forgot to put saran wrap + more tape and look what happened:
FAIL FAIL FAIL FAIL FAIL. SH*T EVERYWHERE!!!!
after its done, MAKE SURE U SHAVE OFF THE TOP AND BOTTOM. use a dremel or a drill. drill will take forever tho
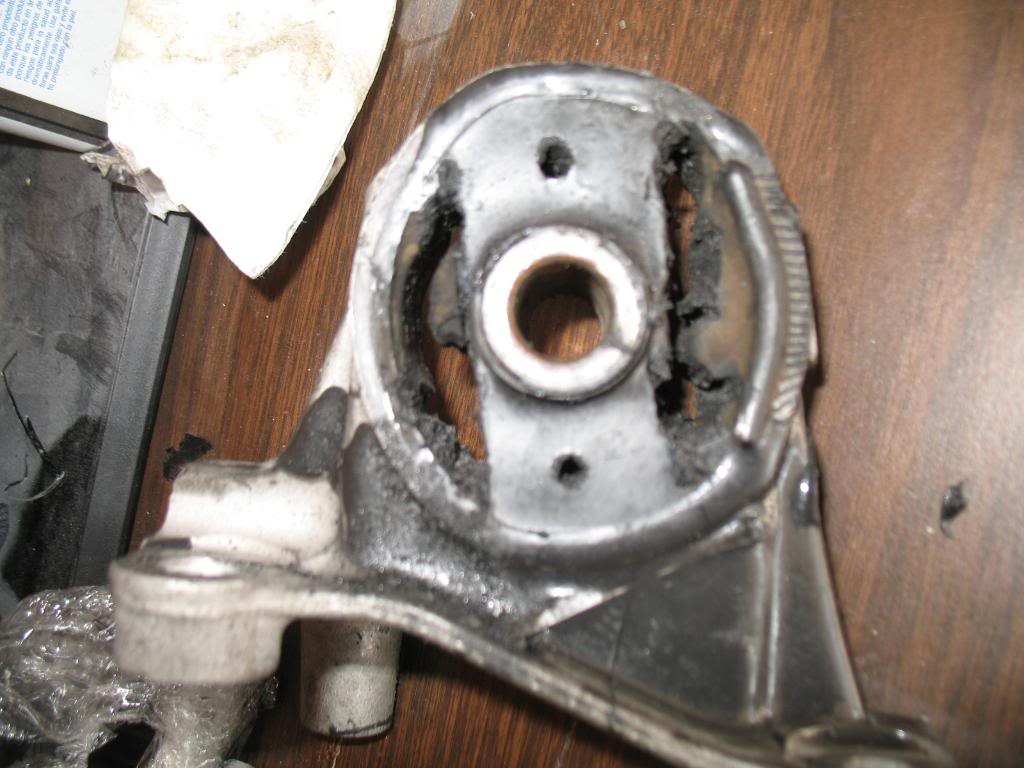
if u leave it completly solid, ur car will vibrate LIKE CRAZY durning idle. and i mean CRAZYYYYYYYY.
if u shave it like what i did, you'll be ok. it'll feel like stock.
our front motor mount only last about 100k before it breaks.
there are 3 bolts holding ur motormount.
you'll need a 17mm and a 12mm(or maybe it was 14mm)
jack ur car up, and put it on jackstands.
now take ur jack and support ur engine BEFORE u take off ur motormount.
this will allow the engine to stay in the same place, so when u take ur MM out, ur engine isnt going to fall or sag.
broken MM FTL
so put the center back in, make sure its centered and tape the bottom
REMEMBER TO TAPE IT WELL and remember to also use SARAN WRAP after the tape.....and some more tape.
i forgot to put saran wrap + more tape and look what happened:
FAIL FAIL FAIL FAIL FAIL. SH*T EVERYWHERE!!!!
after its done, MAKE SURE U SHAVE OFF THE TOP AND BOTTOM. use a dremel or a drill. drill will take forever tho
if u leave it completly solid, ur car will vibrate LIKE CRAZY durning idle. and i mean CRAZYYYYYYYY.
if u shave it like what i did, you'll be ok. it'll feel like stock.
Registered!!
Joined: Jul 2006
Posts: 268
Likes: 0
From: Michigan
Rep Power: 244 Re: DIY: repair Lower Control Arm broken bushings
sl33pyriceboi,
Thanks man, nice DIY. How is your suspension doing so far besides crazy vibration? firm? no *thump*
I realize that mine 04 might need both of them replace soon. That whole big piece probably is called "knuckle".
Great job man.
Thanks man, nice DIY. How is your suspension doing so far besides crazy vibration? firm? no *thump*
I realize that mine 04 might need both of them replace soon. That whole big piece probably is called "knuckle".
Great job man.
Thread Starter
Banished to the Depths of Rice.
iTrader: (3)
Joined: Jun 2005
Posts: 9,196
Likes: 1
From: SoCal 714/909/626
Rep Power: 353 Re: DIY: repair Lower Control Arm broken bushings
a few days later i shaved it up (last pix of post #2) and i have NO more crazy vibration. feels like stock again.
about $30 worth of polyurethane will fix everything.


Thread Starter
Banished to the Depths of Rice.
iTrader: (3)
Joined: Jun 2005
Posts: 9,196
Likes: 1
From: SoCal 714/909/626
Rep Power: 353 Trance Addict
Joined: Dec 2009
Posts: 1,774
Likes: 0
From: Troy, NY
Rep Power: 218 Re: DIY: repair Lower Control Arm broken bushings
LoL. I remember that ball joint separation video. Good write up! The balljoint setup on the EM2s must be different because my car has retaining rings.
Last edited by MelJ; Dec 14, 2010 at 09:53 PM.
Thread Starter
Banished to the Depths of Rice.
iTrader: (3)
Joined: Jun 2005
Posts: 9,196
Likes: 1
From: SoCal 714/909/626
Rep Power: 353 Re: DIY: repair Lower Control Arm broken bushings
my stock ones didnt have retaining rims...however, when i replaced them with duralast ball joints, they had the retaining ring (c-clip)
Trance Addict
Joined: Dec 2009
Posts: 1,774
Likes: 0
From: Troy, NY
Rep Power: 218 Re: DIY: repair Lower Control Arm broken bushings
Know what? I didn't even check. Lol. I had to get my axles replaced, but a number of factors(mainly the 10 degree weather and non-heated garage)came up and I had my mechanic do it. Where was this damn FAQ last week?  . I was afraid of messing something up and got a separator which didn't even effin' work. I had thought the Pitman arm was just for the TRE job.
Edit: Dammit. Upon looking at the TRE layout and lower balljoint layout, the setup is essentially the same.
Edit: Dammit. Upon looking at the TRE layout and lower balljoint layout, the setup is essentially the same.
Last edited by MelJ; Dec 15, 2010 at 05:04 AM.

Registered!!
Joined: Jan 2011
Posts: 16
Likes: 0
Rep Power: 0 
Re: DIY: repair Lower Control Arm broken bushings
energysuspensionparts sells a "DIY Motor Mount" kit.
I haven't bought it, but the page has some useful info.
http://www.energysuspensionparts.com...sp?prod=DIYMMI
I haven't bought it, but the page has some useful info.
http://www.energysuspensionparts.com...sp?prod=DIYMMI
Live for the Twisties
Administrator
Joined: Jun 2010
Posts: 8,580
Likes: 5
From: Langley, BC
Rep Power: 286 Re: DIY: repair Lower Control Arm broken bushings
energysuspensionparts sells a "DIY Motor Mount" kit.
I haven't bought it, but the page has some useful info.
http://www.energysuspensionparts.com...sp?prod=DIYMMI
I haven't bought it, but the page has some useful info.
http://www.energysuspensionparts.com...sp?prod=DIYMMI
Re: DIY: repair Lower Control Arm broken bushings
how sturdy is the polyurethane? i might just fill up my passsenger motormount when my new one goes out again... great write up!

Joined: Sep 2002
Posts: 51,241
Likes: 20
From: NV
Rep Power: 813 Re: DIY: repair Lower Control Arm broken bushings
more sturdy than stock rubber for sure, but there are many grades of poly from very soft to rock hard. the harder you go, the more you feel vibrations thru the chassis.
Joined: Sep 2002
Posts: 51,241
Likes: 20
From: NV
Rep Power: 813 Re: DIY: repair Lower Control Arm broken bushings
im not sure about that, if the oem is torn then i wouldn't recommend this method to just fill around the rubber. i doubt it would stick and could come apart later. the ES mounts press in from the sides around the oem rubber and stay put due to the preformed shape (no adhesive). the diy method will work if you clean up all or most of the oem rubber first and then do poly. but im not sure i agree with cutting parts of the mount when youre done either. that would compromise structure and its not the reason youre doing the mod (if you want stock vibration, get a new stock rubber mount and keep replacing as it breaks).

Live for the Twisties
Administrator
Joined: Jun 2010
Posts: 8,580
Likes: 5
From: Langley, BC
Rep Power: 286 Re: DIY: repair Lower Control Arm broken bushings
I know Acklands Grainger carries it, but I'm not sure if they have U.S. locations 
It comes in two hardness levels, the lower number is basically the same as OEM except solid and the higher level is like a hockey puck.
It comes in two hardness levels, the lower number is basically the same as OEM except solid and the higher level is like a hockey puck.

Re: DIY: repair Lower Control Arm broken bushings
I used the energy suspensions ones. Perfect. I mean Perfect. Although, it might have only been so much better because I was grinding into my arms -___- Big Big tip that might help someone else, Had to pay for the bushing to be replaced because you do need a machine press. And save yourself all the hard work and when placing in the arm back to the car, start with the smaller bushing first, then slide the vertical bushing in to the car haha.

Re: DIY: repair Lower Control Arm broken bushings


Registered!!
Joined: Apr 2013
Posts: 23
Likes: 0
From: Niagara Region
Rep Power: 0 Re: DIY: repair Lower Control Arm broken bushings
Very nice DIY job but I have to wonder is it really worth all that effort. My LCA cost about $60 IIRC so spending hours fiddling with polyurethane seems unnecessary.
Mike
Mike


Registered!!
Joined: Dec 2011
Posts: 28
Likes: 0
Rep Power: 0 Re: DIY: repair Lower Control Arm broken bushings
Thanks for the guide i got some on the way gotta do my a arms and 2 or 3 of my motor mounts, gonna get creative on the upper mount lol.
Also what do yall think of pmc-780 dry urethane? thats what i bought anyways.
its supposed to be industrial and its tear strength was 200 pounds per linear inch (pli) vs around 80 pli for the other Shore 80A mixes i found.
Edit: poured my suspension bushings (theyre were pretty solid after just like 4 hours) front trans mount and passenger upper engine mount, seems pretty solid i think i drilled the sides out of my front trans mount too soon but should be good enough, better than it was anyways. Seems like good urethane to me ill report back when i put it all back together, it says cure time is 48 hours but ill probably leave it longer.
Last edited by awdcivic2; Sep 25, 2013 at 10:14 PM.

Registered!!
Joined: Mar 2013
Posts: 20
Likes: 0
Rep Power: 0 Re: DIY: repair Lower Control Arm broken bushings
Perfect timing for this diy... I was just told by the mechanic, during an oil change, that my front and rear motor mounts are toast. Now to decide... new with poly inserts or rebuild the old ones....

