When you click on links to various merchants on this site and make a purchase, this can result in this site earning a commission. Affiliate programs and affiliations include, but are not limited to, the eBay Partner Network.
***THIS IS A COPY OF THE FIRST DIY SINCE PHOTOBUCKET DELETED MY IMAGES IN THE LAST ONE***
Alright guys here is my DIY on the Y8 manifold swap. Depending on how much time you have will determine how fast this will go for you. Luckily I had a spare motor to fab stuff up on but you don't necessarily have to have that to do this. I spent about a week doing all the stuff to the mani outside the car then the actual swap process took about 3 hours due to some random problems I ran into. The saying "measure twice, cut once" definitely applies here so take your time.
DISCLAIMER: I am not responsible for what YOU do to YOUR car.
What you will need in parts:
-3/8 hose
-3/4 hose
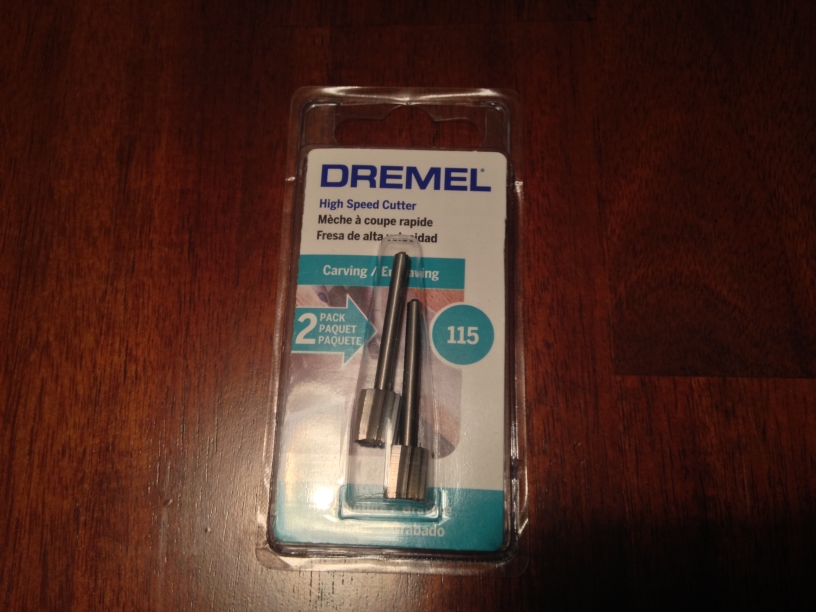
-Metal cutting drill bits
-Dremel with metal cutting wheesl and grinding wheel
-3/8 to 1/2 barbed hose/threaded fitting
-1/4 to 1/8 barbed hose/threaded fitting
-3 D16 intake manifold studs
-Pack of various metric sized O-Rings
-Various hose clamps
-Electrical tape
-D16 Intake (I used a Ebay one)
-Vacuum port caps
-A D16Y8 intake manifold (obviously)
Tools: Various hand tools, drill, cut off wheel, dremel.
Difficulty: If you aren't mechanically inclined 4 out of 5
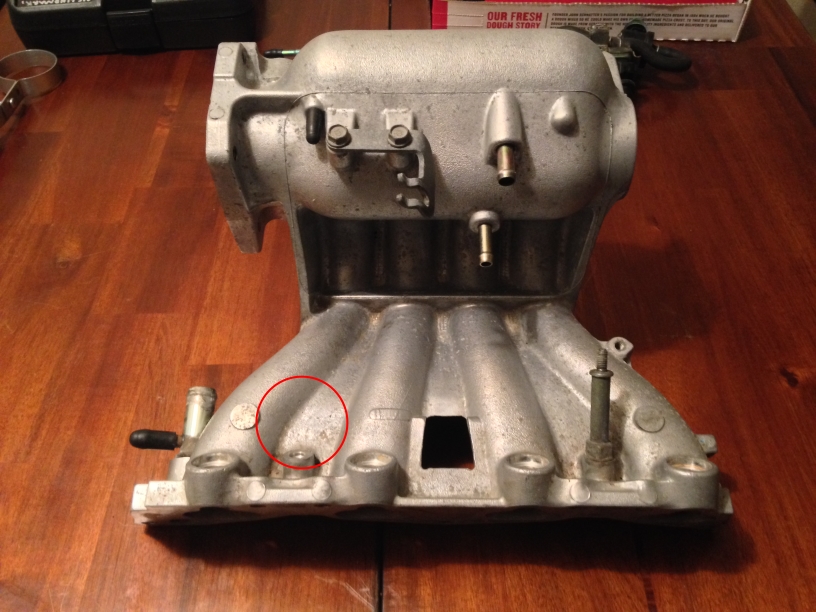
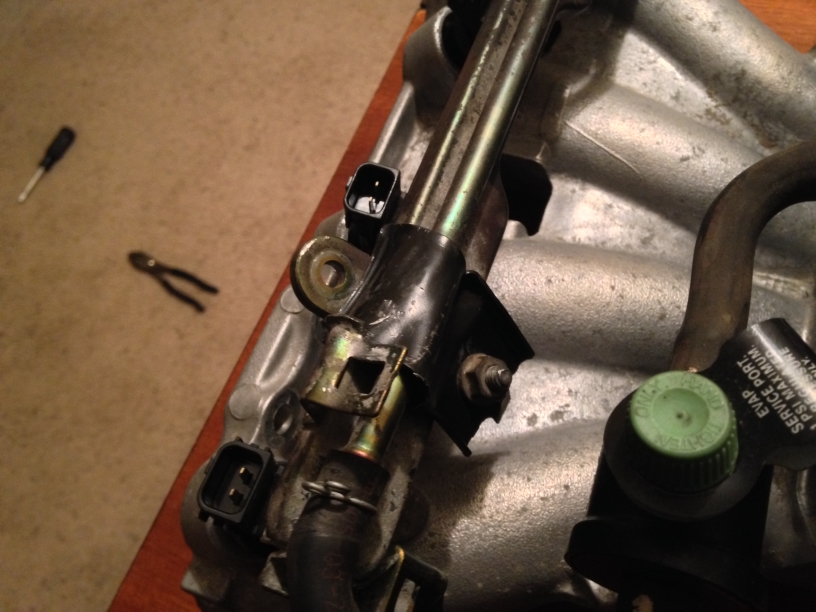
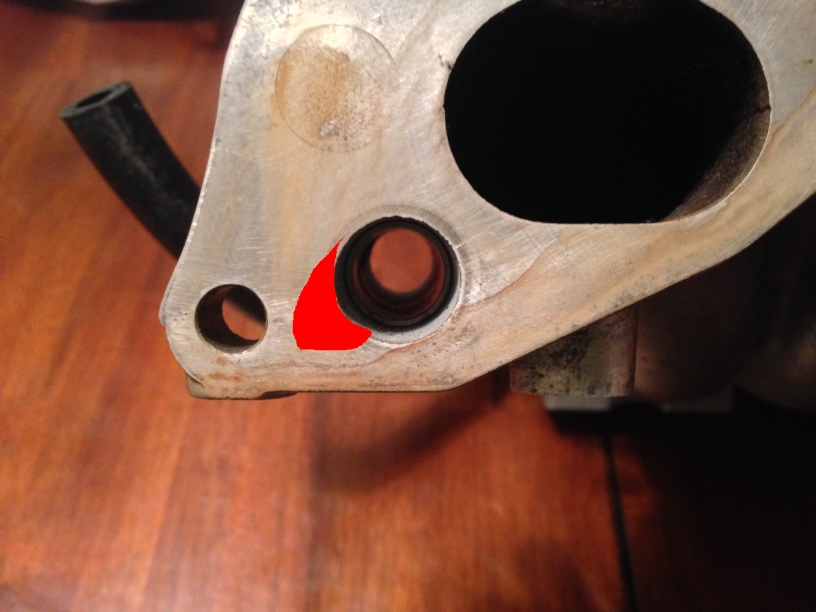
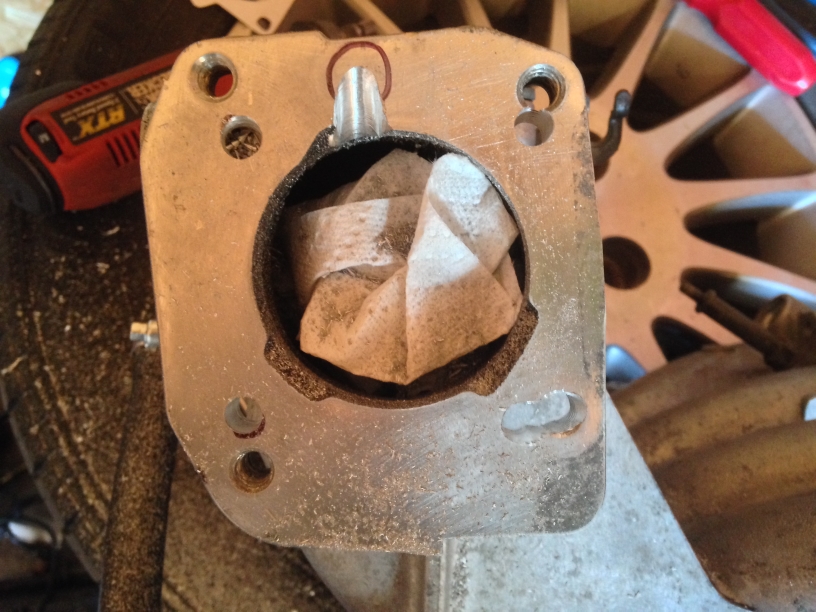
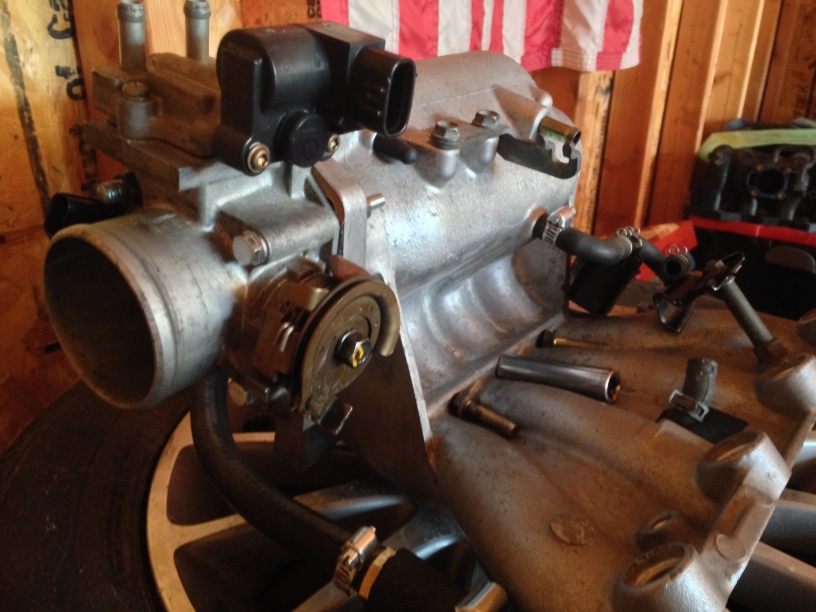
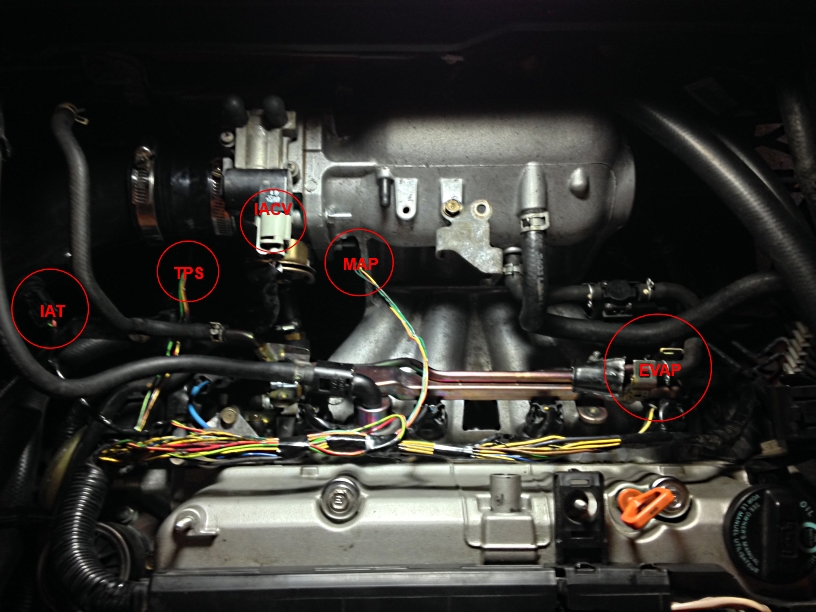
Once you acquire your Y8 manifold, remove everything so it looks like this. The injector rail post that is circled in red you will remove because you can't use it. Also you need to cap off the port next to the throttle cable bracket and the side exit of the Y8 coolant port which you are going to turn into EGR for the D17.
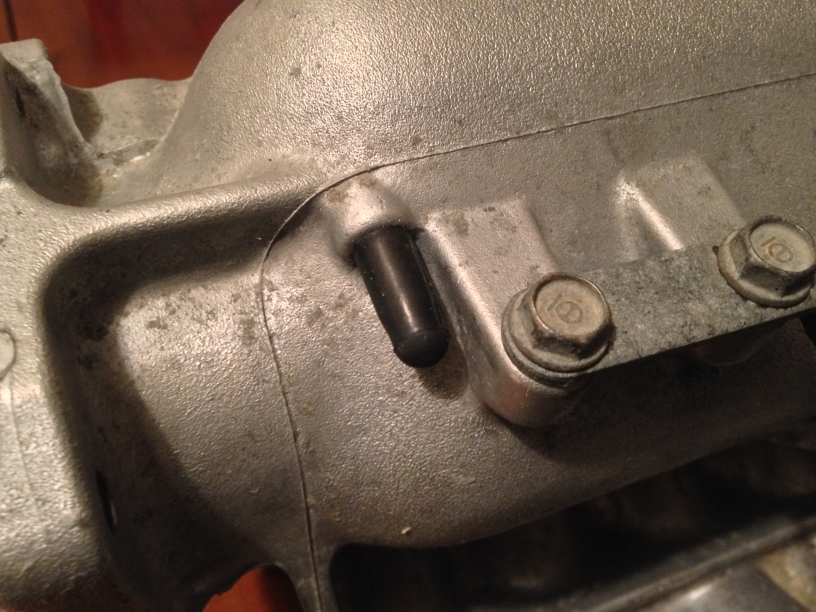
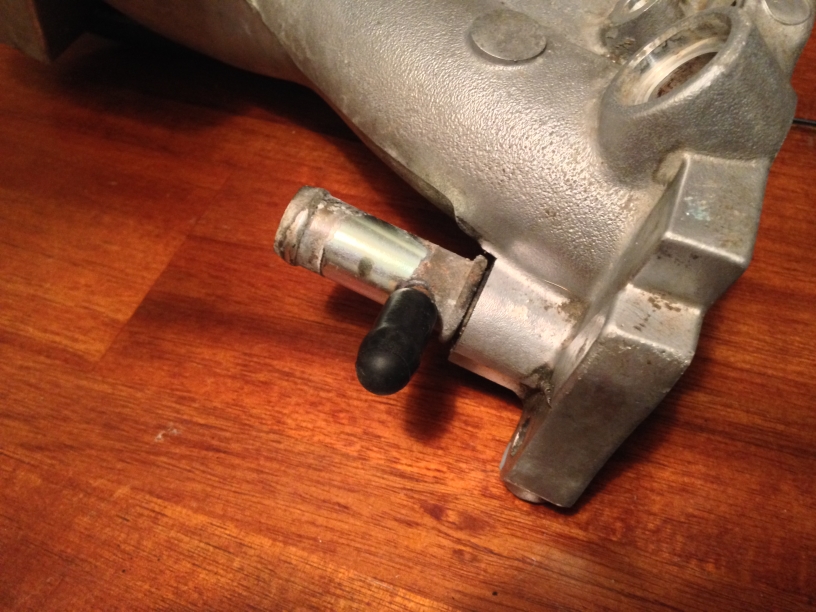
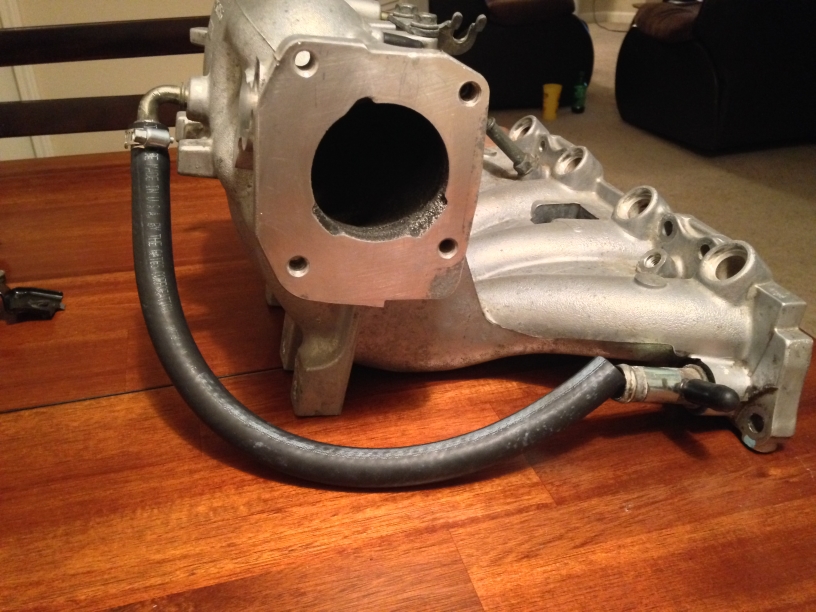
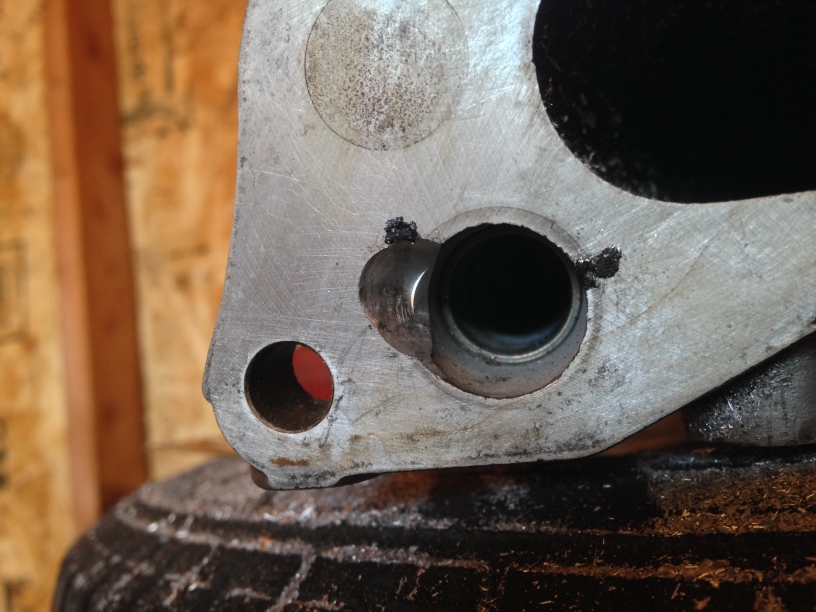
This port located on the back you will need to stick a screwdriver in to rotate it downwards for your EGR routing you are going to make. I angled mine a bit toward the port so it was a little less extreme of an angle the hose to go to. In the second picture you can see how the hose is going to route to each port. On the coolant port side you need about 2.5 inches of 3/4 hose, then you are going to place the threaded side of the 3/8-1/2 barb/threaded adapter into the 3/4 hose side then the 3/8 hose from the barb side to the L port o the back of the manifold. Use hose clamps accordingly.
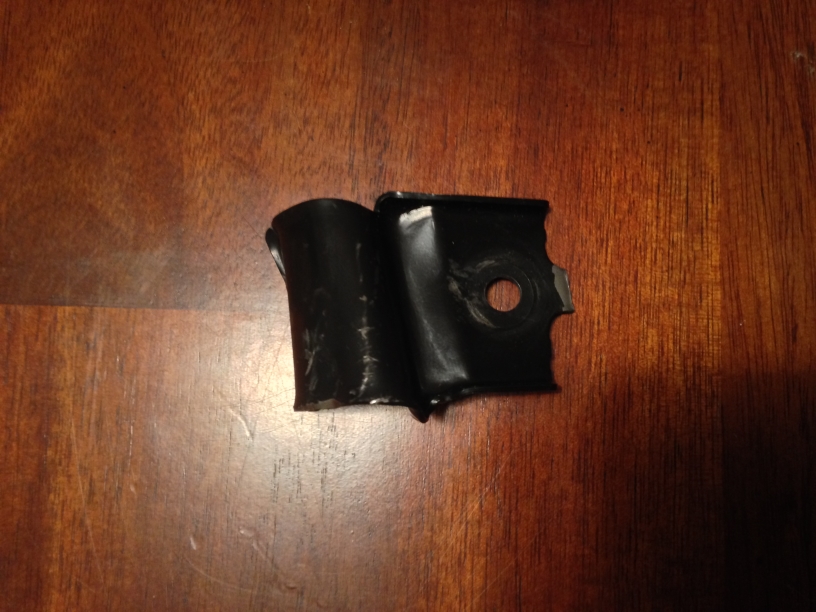
In order to fit the injector rail snuggly you will need to think of a sturdy piece of metal to bend into shape for the existing post you will mount it to. I used a spare throttle cable bracket that holds the line in the engine bay. I bolted the one side down with the rail on and hammered/tapped the bracket into shape to mold to the rail.
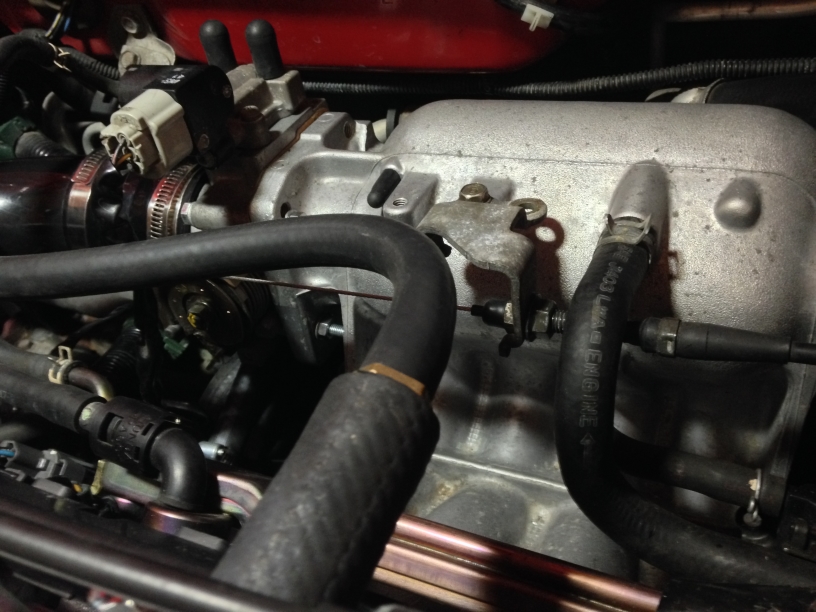
Next this is how you are going to hook up your PCV hose to the manifold. This is where you will need the 1/4-1/8 barb/threaded adapter (double check that those sizes are right when you buy it to fit the PCV hose and a vacuum line). Simply place the existing PCV hose side on the threaded side then the barb side put the vac line to the port on the manifold.
This is where the cutting and drilling will begin.
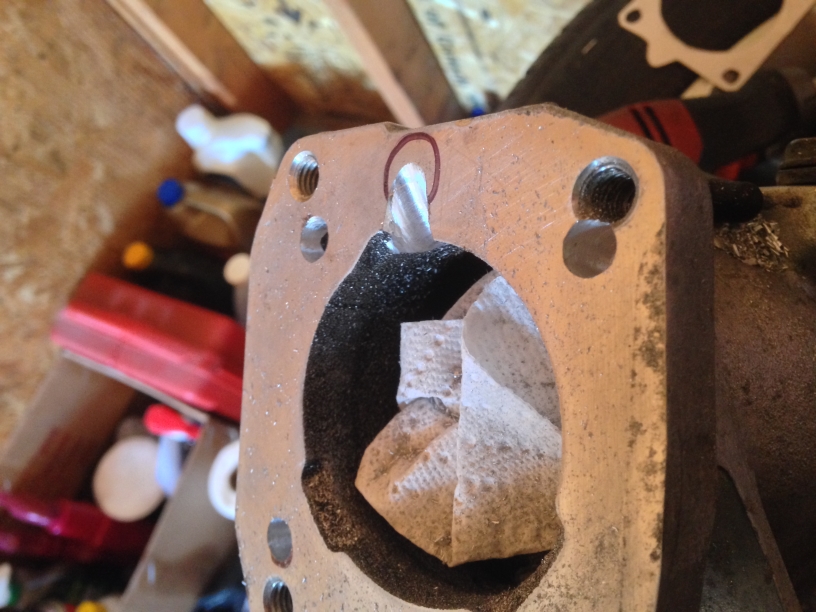
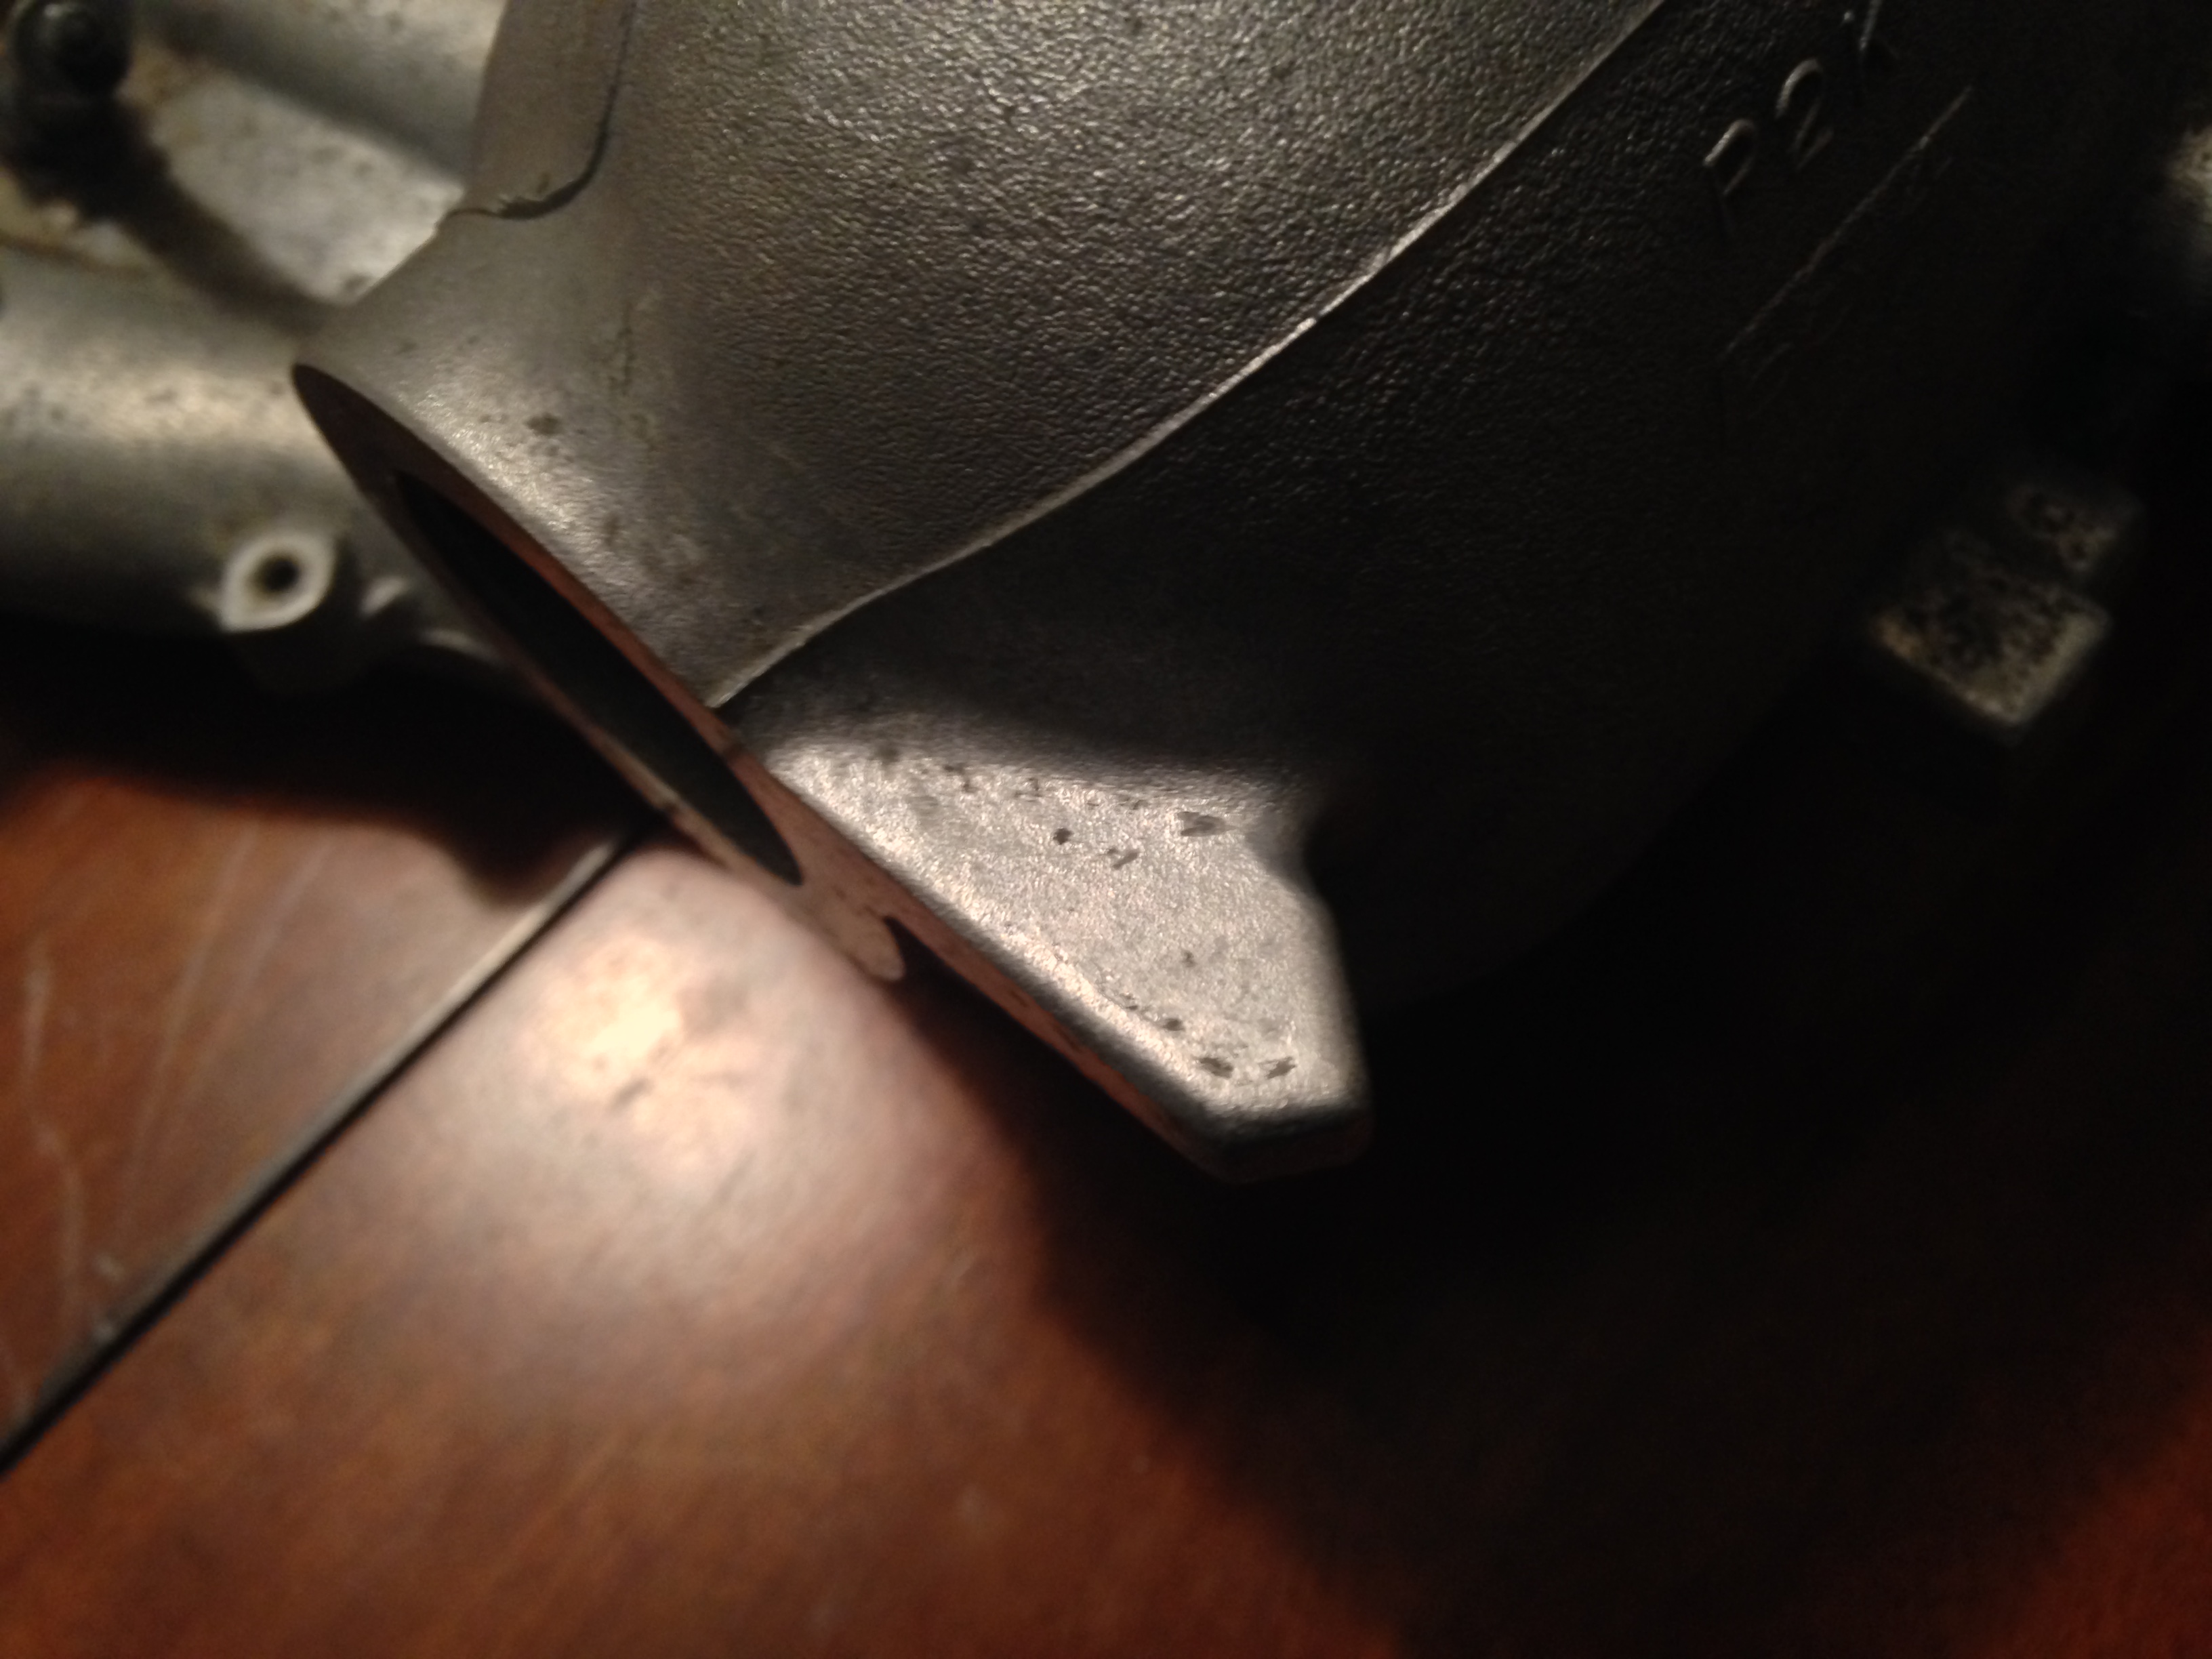
You are going to make the port to use EGR buy using your Dremel with the high speed grinding wheels to make a ramp like the picture with the red mark that way the head's port will line up with the offset of the coolant port on the Y8.
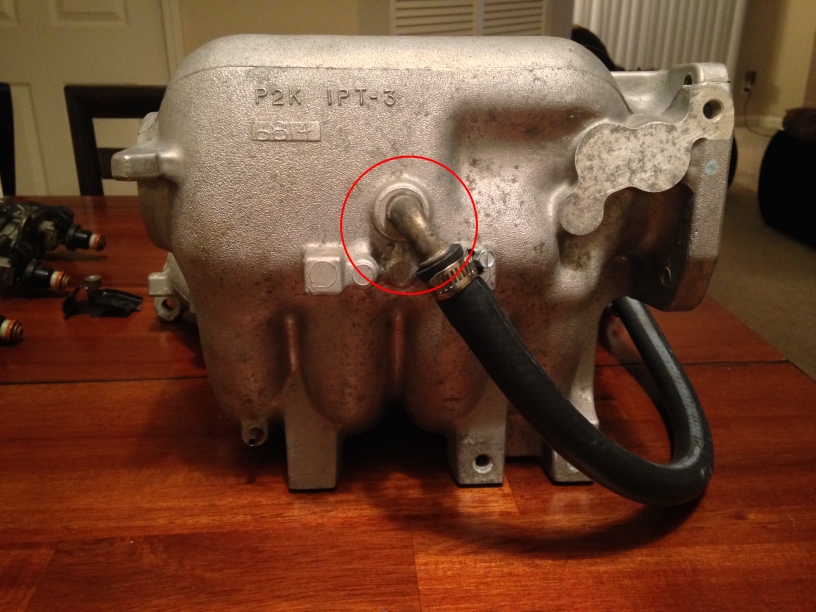
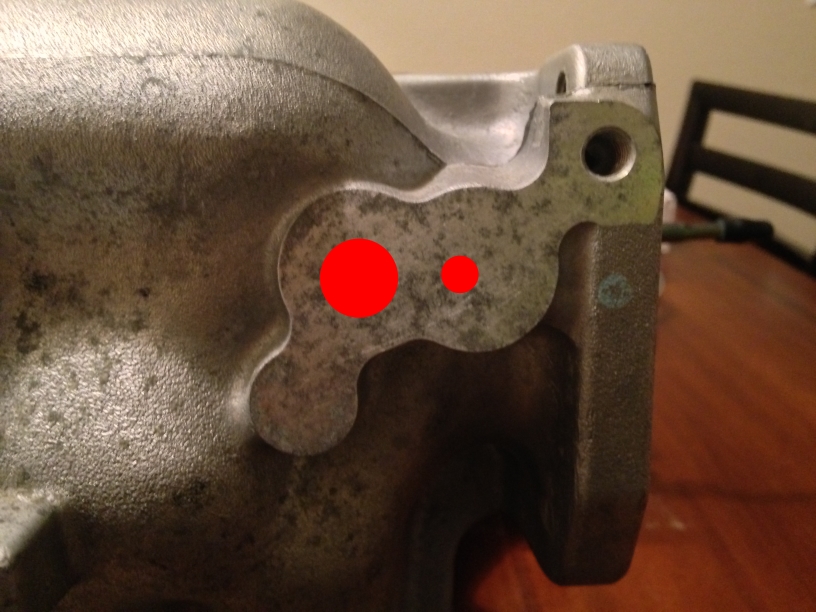
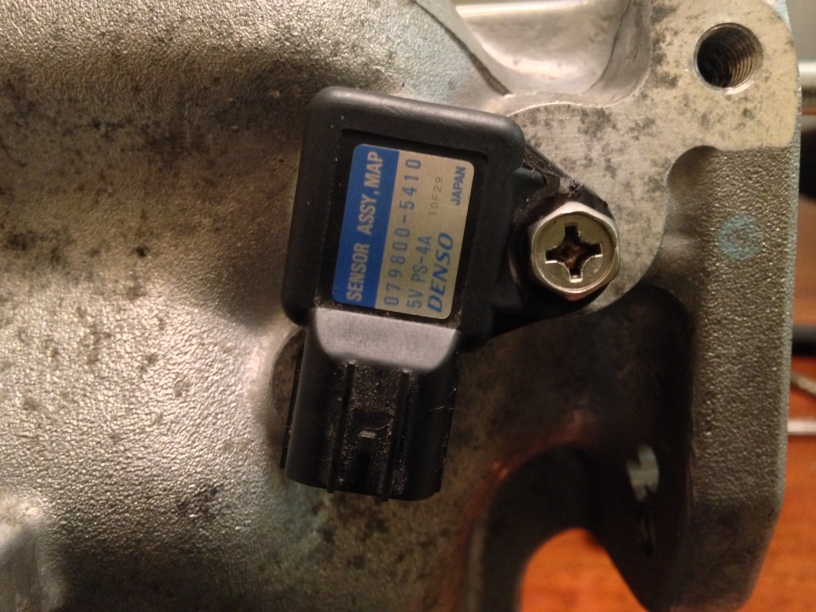
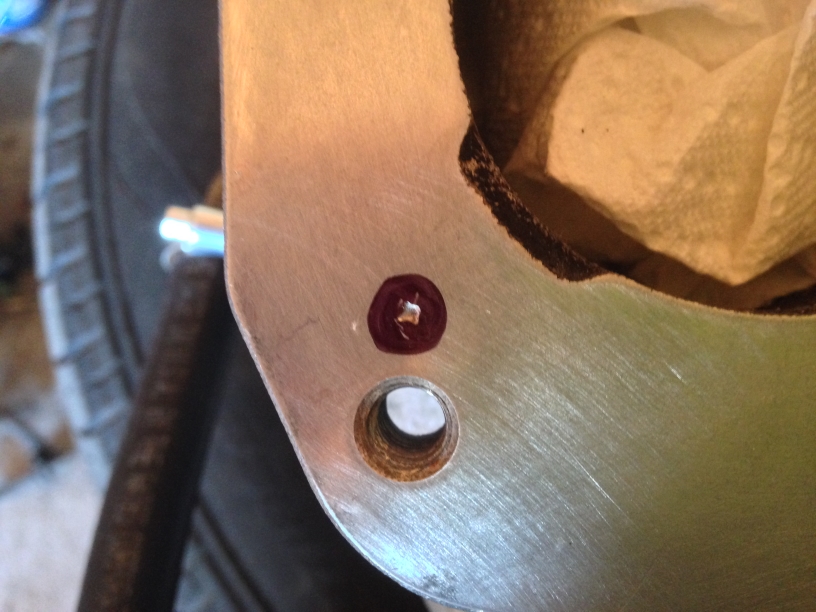
This is where you will place your MAP sensor, I eyeballed this but you want a drill bit the same sized as the nipple on the MAP to drill where the big red dot is, then you are going to drill a smaller hole to use a bolt to tighten it down. You will need to thread this hole for the size of bolt you will be using. My sensor looks a little crooked because I messed up the first hole, so like I said measure twice, cut onece.
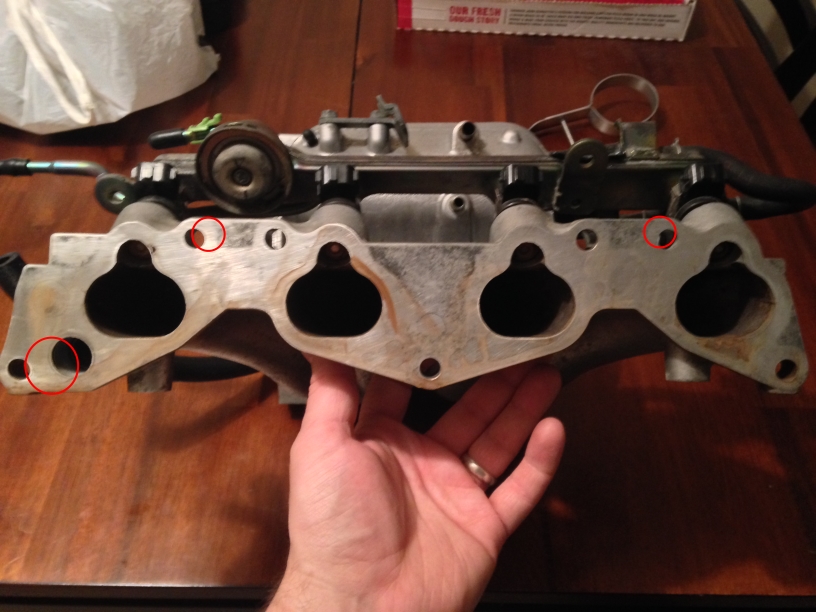
Next if you put your D17 intake mani gasket lined up on the Y8 mani you will see what holes you'll need to expand/widen. Here they are circled in red. The lower 3 holes will line up just fine with the stock stud positions on the D17 head. The EGR is also circled here indicating where you grinded away in the step earlier.
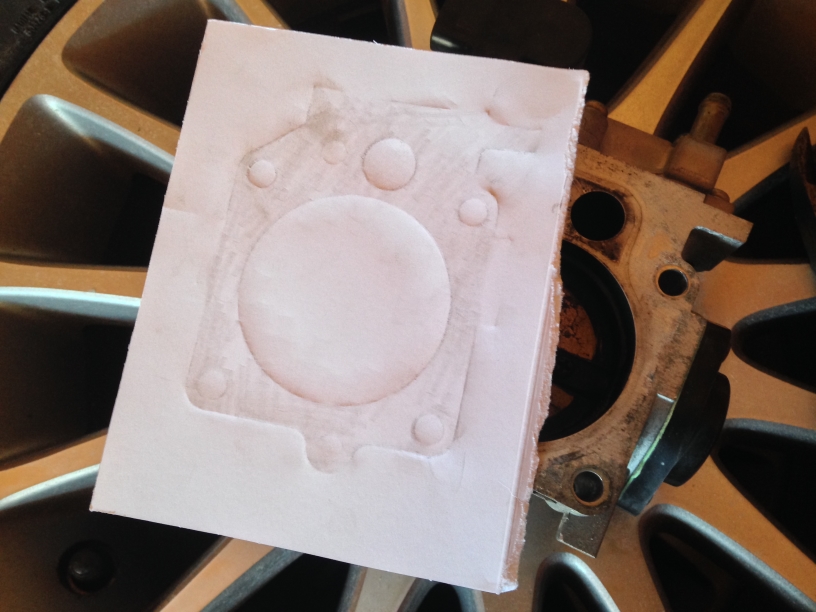
For the throttle body now take a thick card like paper, place it on your D17 throttle body and rub a quarter on it to get a outline of everything to use as a template for drilling on the Y8 manifold.
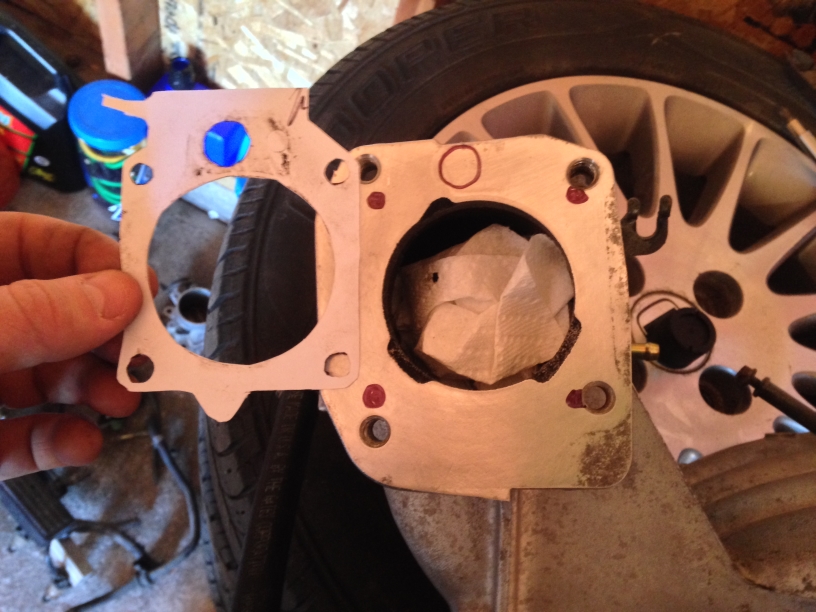
Cut out the holes in the template and line up the throttle body port with the large port on the Y8 mani and then use a Sharpie to mark where the bolt holes and IACV port up top will go.
Next I used the drill bit I was drilling with and a hammer to punch a pilot hole so the drill won't dance all over the surface when you try to drill it.
With your holes drilled grind a ramp at a 45 degree angle going into the throttle body for the IACV port.
Use the stock D16 throttle body gasket, cut holes in it to fit the new bolt hole positions and the IACV and mount your D17 throttle body. I used a stud for the upper left, the rest I bought new bolts that where about 3/4 on an inch longer than the stock D17 bolts. I also used washers and a lock washer for added peace of mind.
Also cut off this thing so it can clear the A/C lines.
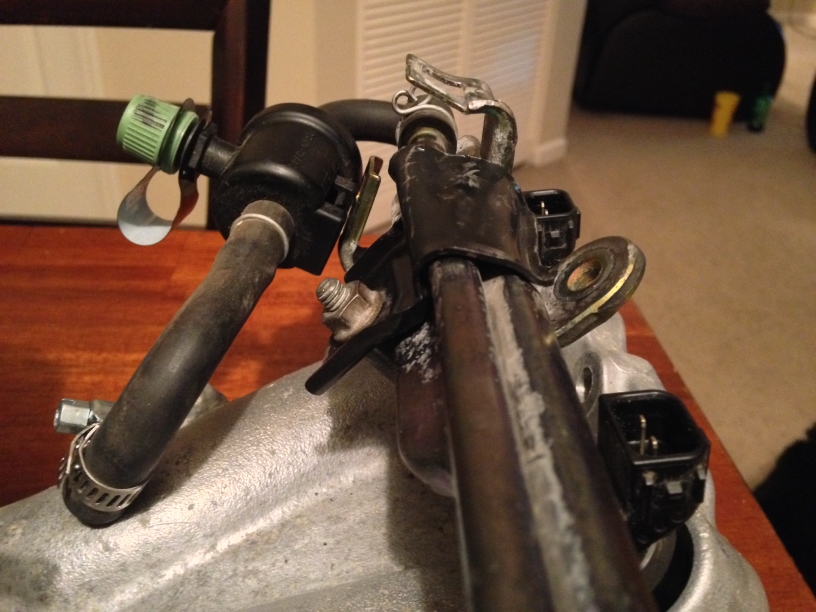
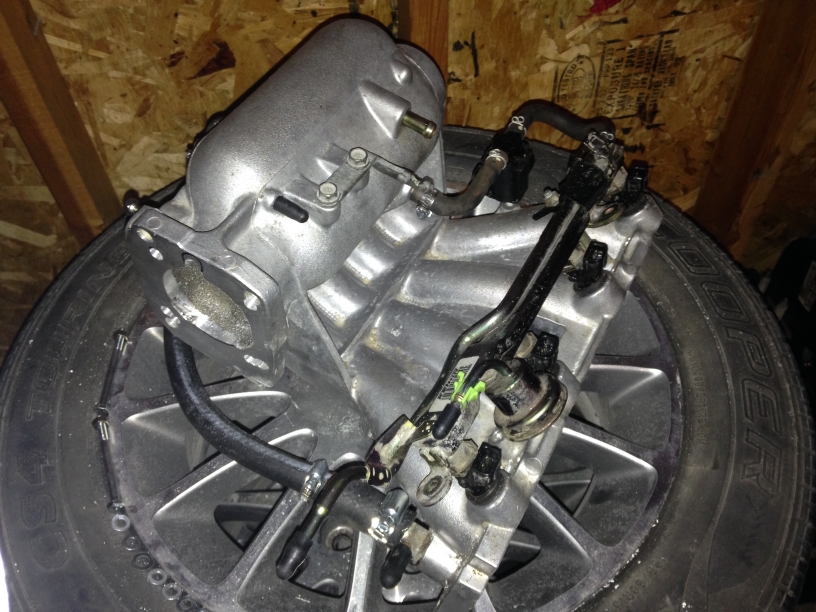
For the injectors to seal (I don't have a pic at the moment but I'll try to get one later) you are going to take the D16 big black gaskets that are in the manifold injector cups and put them on the injectors, then place a o ring that size underneath, then put a o ring the size of the stock orange one above the orange one. I also put a small amount of grease on it to make a good seal. Place the rail on the mani and push down the big D16 gaskets on the injectors down. Then bolt on your bracket, the EVAP sensor will also be mounted like in the picture just be sure the arrow is facing towards the manifold. Now if you need to pass emissions (I don't in NE) you will need to put the EVAP service port on, it's the thing with the green cap. The whole series will go Fuel rail---Hose---Evap Service port---hose---Evap sensor---hose---intake manifold port.
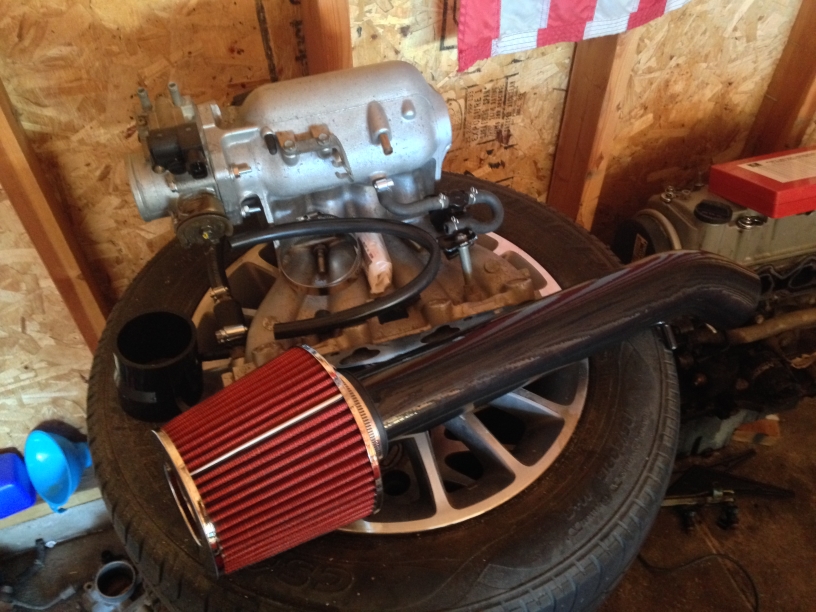
This is the D16 ebay intake I used that you will need to cut down to size.
Install
Remove your stock intake manifold (refer to FSM or Haynes manual)
Remove the 3 D17 studs, these can be a PITA so lightly hit them with a hammer on the tip like you are hammering a nail to break up the seizing, then use vise grips to unscrew them.
Install your 3 D16 studs in the bottom 3 holes for the intake on the cylinder head, you will use bolts for the top 2.
Install the Y8 with the fuel rail off (It will get stuck on the valve cover otherwise) don't forget your intake manifold gasket!
Bolt the 2 top bolts then three bottom nuts then snug starting with the middle nut and move outwards for even pressure.
Hook up fuel lines, place brake booster hose on the largest remaining port above the port for the EVAP sensor.
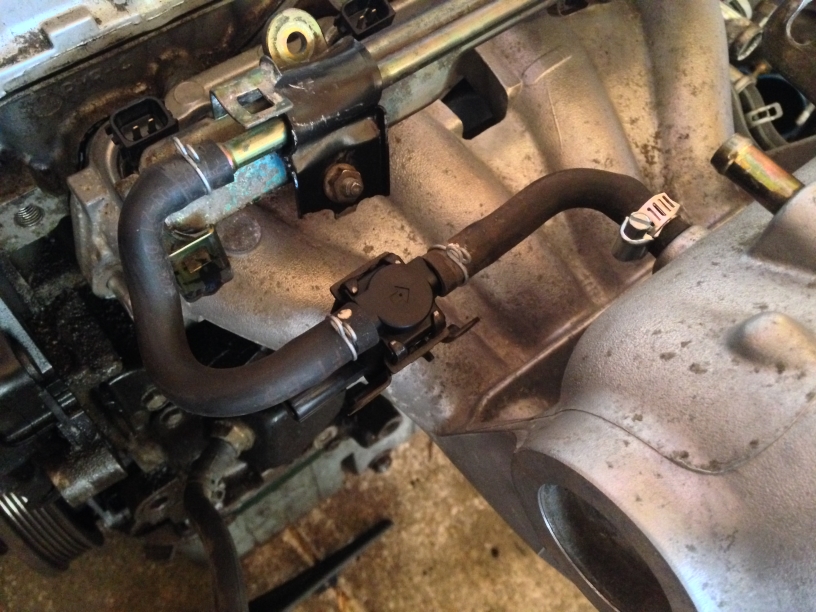
Loop the coolant line from the thermostat housing to the coolant pipe on back since you won't be running it on the IACV anymore.
Next open your wiring harness where the injectors clips are at and just re-route the senor plugs you need so they can plug up on where the sensors are now located, TPS, MAP, IAT, EVAP and you can use the stock wiring locating for the IACV.
Hook up your throttle cable. Bolt on your D17 throttle cable bracket like in the picture.
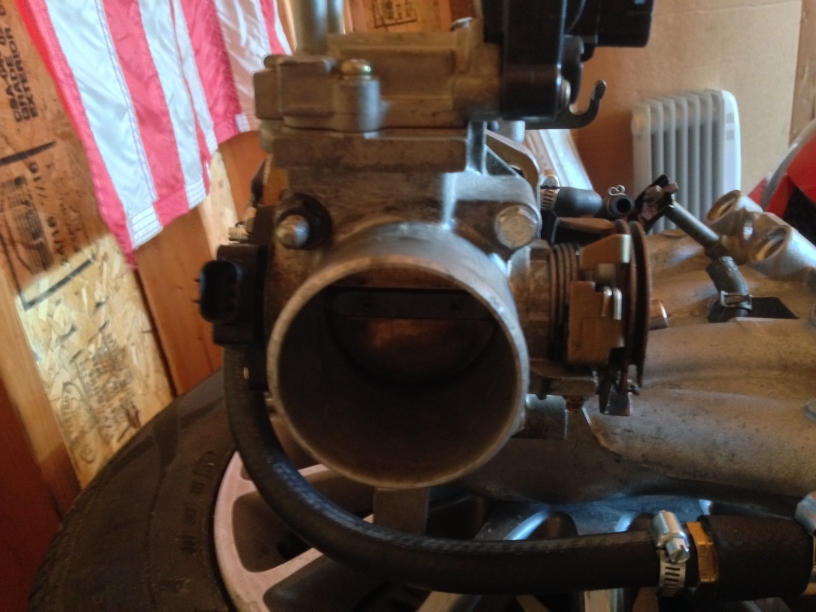
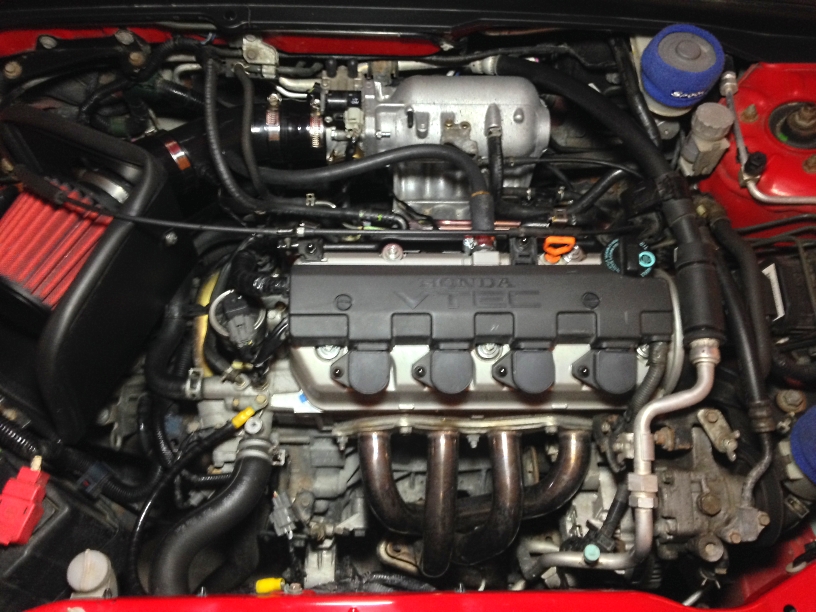
And here it is complete, I also fabbed up a way to fit my K&N heat shield with the ebay intake and AEM dryflow filter.
Verdict - Is the Y8 manifold swap worth the hassle?
Simple answer... Yes.
The car is so much more responsive with the Y8, power feels more direct and immediate. Probably because the air doesn't have a mess of places to go through like the stock intake mani. It will make the intake noise much more deeper, and like my car it compliments the Crower Stage 1 camshaft nicely. If you plan to use nitrous or boost on the D17 this is also a better option due to how well it flows and it also isn't plastic. The Y8 will also remove rev hang that the D17 has with the stock manifold.
I tried this the other day. Swap went fine but, for some reason I am unable to idle my car under 2,000 RPM without it shutting off. I should state that I am running a 2003 Honda Civic EX (SI Canadian) with a JDM D17A engine swap. My guess is that maybe the JDM D17A throttle body doesn't work well with a Canadian D16Y8 intake manifold? Maybe if I swap my JDM D17A throttle body for a Canadian D17A2 throttle body it may fix my problem? Any help would be appreciated. Thanks in advanced.
Yes, this was done. I also forgot to mention that I didn't do it myself. I had my mechanic do it. Also forgot to add a note that he said:
"The idle issue was the MAP sensor was reading 0 when plugged in and the IACV was fully open at base idle and wouldn't change at all."
A little more information that my mechanic said...The idle issue was the MAP sensor was reading 0 when plugged in and the IACV was fully open at base idle and wouldn't change at all. My mechanic also made the modification to the intake to allow for the IACV to work properly. He also measured and placed the MAP sensor in the exact same location as the guide said. It is the hole with the threaded hole beside it on right beside where the throttle body mounts.
It appears that the JDM throttle body works, because that's the throttle body that is currently installed on my intake. There should have been no issue with that throttle body, but for whatever reason he don't get a MAP sensor reading with the Y8 intake. The MAP sensor is not part of the throttle body, but the IACV is. Any ideas anyone?
From the walkthrough on this post..
This is where you will place your MAP sensor, I eyeballed this but you want a drill bit the same sized as the nipple on the MAP to drill where the big red dotis
So if that step was not done well...
The website links took me some weird webpage on Amazon.
My car: 2003 honda civic D17a2 1.7 v-tec manual trans
what do i do???? I am swapping my p.o.s. D17 plastic intake manifold for a Y8 aluminum manifold found on a Honda Civic year:2000 (D16). Ive done all the fab work i just need help with injectors.
Do I use D16 injectors and D16 fuel rail? or do i retro fit my d17 injectors w/ fuel rail? and how do i go about this? I have read many things about using the stock injectors by using Y8 original grommets and 2 o-ring on each side? Would it be better to use d16 injectors?
An idle relearn is probably a good idea though. The car will do this on it's own, just unplug the battery for 15 minutes, plug it back in and touch nothing while it's started for the first time, wait 5 minutes.
***THIS IS A COPY OF THE FIRST DIY SINCE PHOTOBUCKET DELETED MY IMAGES IN THE LAST ONE***
Alright guys here is my DIY on the Y8 manifold swap. Depending on how much time you have will determine how fast this will go for you. Luckily I had a spare motor to fab stuff up on but you don't necessarily have to have that to do this. I spent about a week doing all the stuff to the mani outside the car then the actual swap process took about 3 hours due to some random problems I ran into. The saying "measure twice, cut once" definitely applies here so take your time.
DISCLAIMER: I am not responsible for what YOU do to YOUR car.
What you will need in parts:
-3/8 hose
-3/4 hose
-Metal cutting drill bits
-Dremel with metal cutting wheesl and grinding wheel
-3/8 to 1/2 barbed hose/threaded fitting
-1/4 to 1/8 barbed hose/threaded fitting
-3 D16 intake manifold studs
-Pack of various metric sized O-Rings
-Various hose clamps
-Electrical tape
-D16 Intake (I used a Ebay one)
-Vacuum port caps
-A D16Y8 intake manifold (obviously)
Tools: Various hand tools, drill, cut off wheel, dremel.
Difficulty: If you aren't mechanically inclined 4 out of 5
Once you acquire your Y8 manifold, remove everything so it looks like this. The injector rail post that is circled in red you will remove because you can't use it. Also you need to cap off the port next to the throttle cable bracket and the side exit of the Y8 coolant port which you are going to turn into EGR for the D17.
This port located on the back you will need to stick a screwdriver in to rotate it downwards for your EGR routing you are going to make. I angled mine a bit toward the port so it was a little less extreme of an angle the hose to go to. In the second picture you can see how the hose is going to route to each port. On the coolant port side you need about 2.5 inches of 3/4 hose, then you are going to place the threaded side of the 3/8-1/2 barb/threaded adapter into the 3/4 hose side then the 3/8 hose from the barb side to the L port o the back of the manifold. Use hose clamps accordingly.
In order to fit the injector rail snuggly you will need to think of a sturdy piece of metal to bend into shape for the existing post you will mount it to. I used a spare throttle cable bracket that holds the line in the engine bay. I bolted the one side down with the rail on and hammered/tapped the bracket into shape to mold to the rail.
Next this is how you are going to hook up your PCV hose to the manifold. This is where you will need the 1/4-1/8 barb/threaded adapter (double check that those sizes are right when you buy it to fit the PCV hose and a vacuum line). Simply place the existing PCV hose side on the threaded side then the barb side put the vac line to the port on the manifold.
This is where the cutting and drilling will begin.
You are going to make the port to use EGR buy using your Dremel with the high speed grinding wheels to make a ramp like the picture with the red mark that way the head's port will line up with the offset of the coolant port on the Y8.
This is where you will place your MAP sensor, I eyeballed this but you want a drill bit the same sized as the nipple on the MAP to drill where the big red dot is, then you are going to drill a smaller hole to use a bolt to tighten it down. You will need to thread this hole for the size of bolt you will be using. My sensor looks a little crooked because I messed up the first hole, so like I said measure twice, cut onece.
Next if you put your D17 intake mani gasket lined up on the Y8 mani you will see what holes you'll need to expand/widen. Here they are circled in red. The lower 3 holes will line up just fine with the stock stud positions on the D17 head. The EGR is also circled here indicating where you grinded away in the step earlier.
For the throttle body now take a thick card like paper, place it on your D17 throttle body and rub a quarter on it to get a outline of everything to use as a template for drilling on the Y8 manifold.
Cut out the holes in the template and line up the throttle body port with the large port on the Y8 mani and then use a Sharpie to mark where the bolt holes and IACV port up top will go.
Next I used the drill bit I was drilling with and a hammer to punch a pilot hole so the drill won't dance all over the surface when you try to drill it.
With your holes drilled grind a ramp at a 45 degree angle going into the throttle body for the IACV port.
Use the stock D16 throttle body gasket, cut holes in it to fit the new bolt hole positions and the IACV and mount your D17 throttle body. I used a stud for the upper left, the rest I bought new bolts that where about 3/4 on an inch longer than the stock D17 bolts. I also used washers and a lock washer for added peace of mind.
Also cut off this thing so it can clear the A/C lines.
For the injectors to seal (I don't have a pic at the moment but I'll try to get one later) you are going to take the D16 big black gaskets that are in the manifold injector cups and put them on the injectors, then place a o ring that size underneath, then put a o ring the size of the stock orange one above the orange one. I also put a small amount of grease on it to make a good seal. Place the rail on the mani and push down the big D16 gaskets on the injectors down. Then bolt on your bracket, the EVAP sensor will also be mounted like in the picture just be sure the arrow is facing towards the manifold. Now if you need to pass emissions (I don't in NE) you will need to put the EVAP service port on, it's the thing with the green cap. The whole series will go Fuel rail---Hose---Evap Service port---hose---Evap sensor---hose---intake manifold port.
This is the D16 ebay intake I used that you will need to cut down to size.
Install
Remove your stock intake manifold (refer to FSM or Haynes manual)
Remove the 3 D17 studs, these can be a PITA so lightly hit them with a hammer on the tip like you are hammering a nail to break up the seizing, then use vise grips to unscrew them.
Install your 3 D16 studs in the bottom 3 holes for the intake on the cylinder head, you will use bolts for the top 2.
Install the Y8 with the fuel rail off (It will get stuck on the valve cover otherwise) don't forget your intake manifold gasket!
Bolt the 2 top bolts then three bottom nuts then snug starting with the middle nut and move outwards for even pressure.
Hook up fuel lines, place brake booster hose on the largest remaining port above the port for the EVAP sensor.
Loop the coolant line from the thermostat housing to the coolant pipe on back since you won't be running it on the IACV anymore.
Next open your wiring harness where the injectors clips are at and just re-route the senor plugs you need so they can plug up on where the sensors are now located, TPS, MAP, IAT, EVAP and you can use the stock wiring locating for the IACV.
Hook up your throttle cable. Bolt on your D17 throttle cable bracket like in the picture.
And here it is complete, I also fabbed up a way to fit my K&N heat shield with the ebay intake and AEM dryflow filter.
Verdict - Is the Y8 manifold swap worth the hassle?
Simple answer... Yes.
The car is so much more responsive with the Y8, power feels more direct and immediate. Probably because the air doesn't have a mess of places to go through like the stock intake mani. It will make the intake noise much more deeper, and like my car it compliments the Crower Stage 1 camshaft nicely. If you plan to use nitrous or boost on the D17 this is also a better option due to how well it flows and it also isn't plastic. The Y8 will also remove rev hang that the D17 has with the stock manifold.
Here is a quick video I made reviewing it.
If you have any questions please feel free to comment here and I will get back you.
why was your engine light on and also why did u not hook up the iacv?
Last edited by sdaidoji; Feb 18, 2019 at 02:44 PM.
Reason: if you are going to quote a post full of pictures, remove them from post...
FYI a 70mm throttle body will not fit on this intake without some major mods...
I went with this TB because of having a turbo.
Also, i had to cut the wiring connector to the TB sensor to fit....
Had to Bore out the intake hole Made a Flange and had it Tig welded on 70MM TB now fits.
Regarding Injectors I originally went with my D17 injectors but utilized the d16 injector seals.
Along with D17 injectors i used top hats to fit the d16 fuel rail.
I went with this option so i could monitor/adjust fuel pressure if needed. I also ran a return line back to the tank.
This winter I switched over to 1000cc FID injectors. These came with all the right seals and they fit right in without the use of the top hats.
Please remember i'm running a turbo and i have a Ktuner ECU so i can adjust fuel settings...and i'm on E85.
This winter I switched over to 1000cc FID injectors. These came with all the right seals and they fit right in without the use of the top hats.
Please remember i'm running a turbo and i have a Ktuner ECU so i can adjust fuel settings...and i'm on E85.
what are you making on a setup like this? Numbers wise.
I have a d17a1 and can't find any help on how to do the intake manifold swap all I find it for is the d17a2 I have a d16y8 Mani and head sitting around
Yes, this was done. I also forgot to mention that I didn't do it myself. I had my mechanic do it. Also forgot to add a note that he said:
"The idle issue was the MAP sensor was reading 0 when plugged in and the IACV was fully open at base idle and wouldn't change at all."
According to JDM and several other sources you have to use all your original sensors from your original motor as your ecu will not read the Japan sensors on the JDM motor. Hope this will help you.