
Non-full Coilovers Install on an 8th Generation Civic


Thread Starter
Former Sponsor
Joined: Apr 2018
Posts: 157
Likes: 7
From: US, EU, AU
Rep Power: 0 
Non-full Coilovers Install on an 8th Generation Civic
 Upon their arrival, the coilovers were boxed in a clean, protective fashion. They looked awesome and felt well built. During installation, the 8th generation Civic Si aided me with its ease of access to the front struts. I believe the front coilovers had been preloaded before shipment.
Removal of the strut assembly
Step 1 Jack up the car
On level ground, use a floor-jack to lift the front end of the vehicle safely. Locate the arrow that points to the jacking point that falls before the oil pan.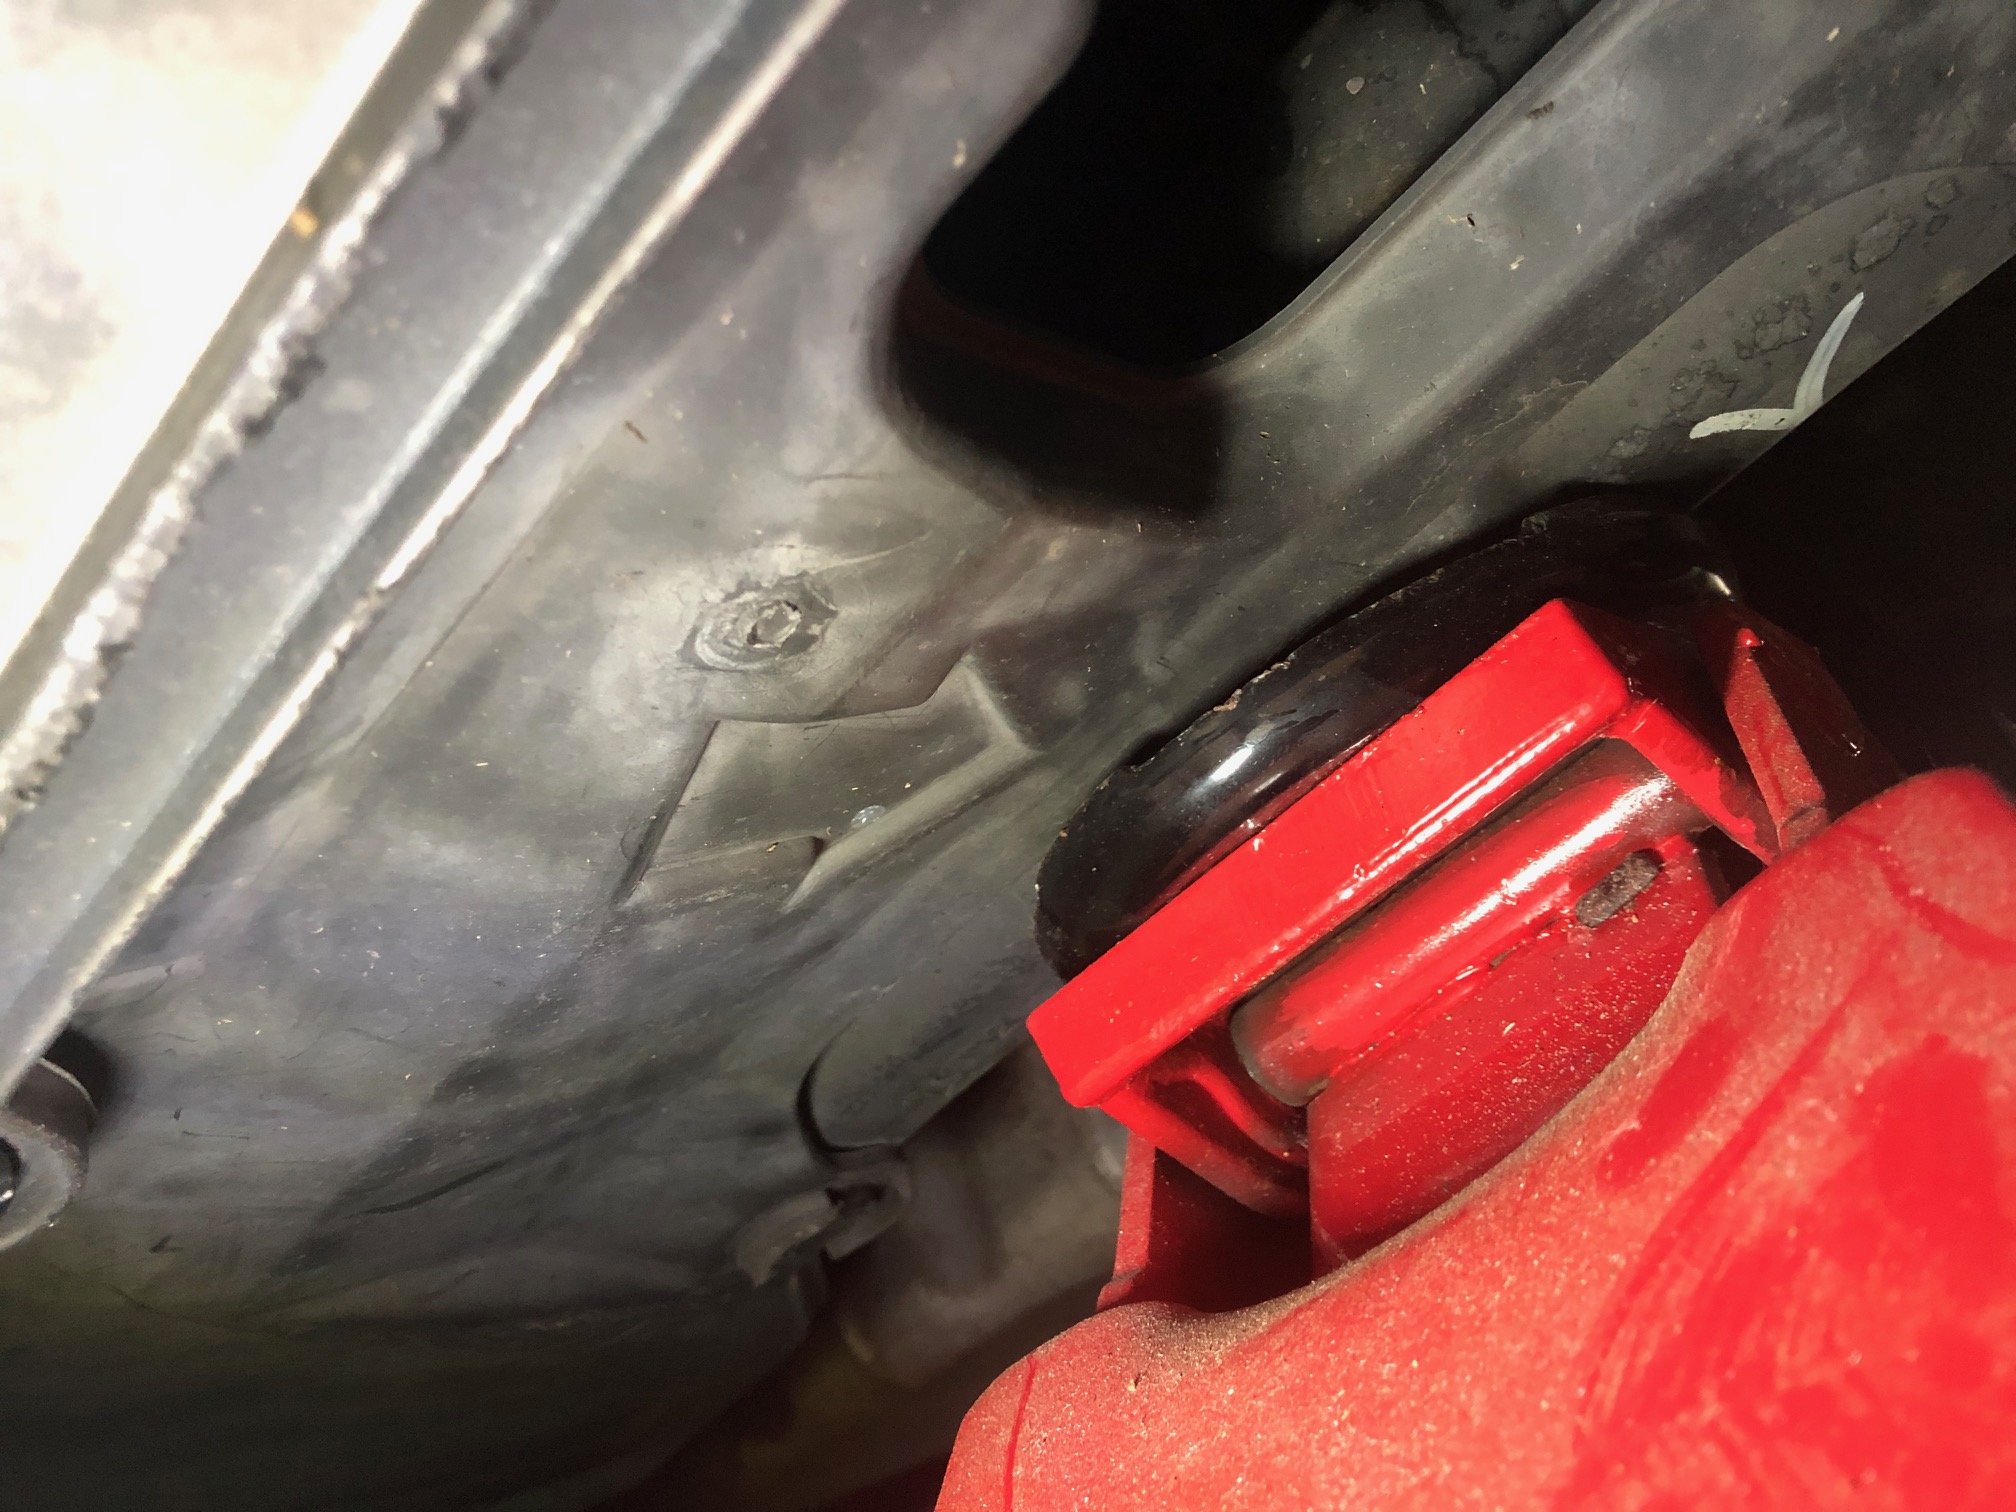 Using a jack stand that can safely support the vehicle�s weight, rest the car on the stand at either its pinch weld or the frame bracing. We also recommend placing the wheel underneath the side of the car for extra safety.
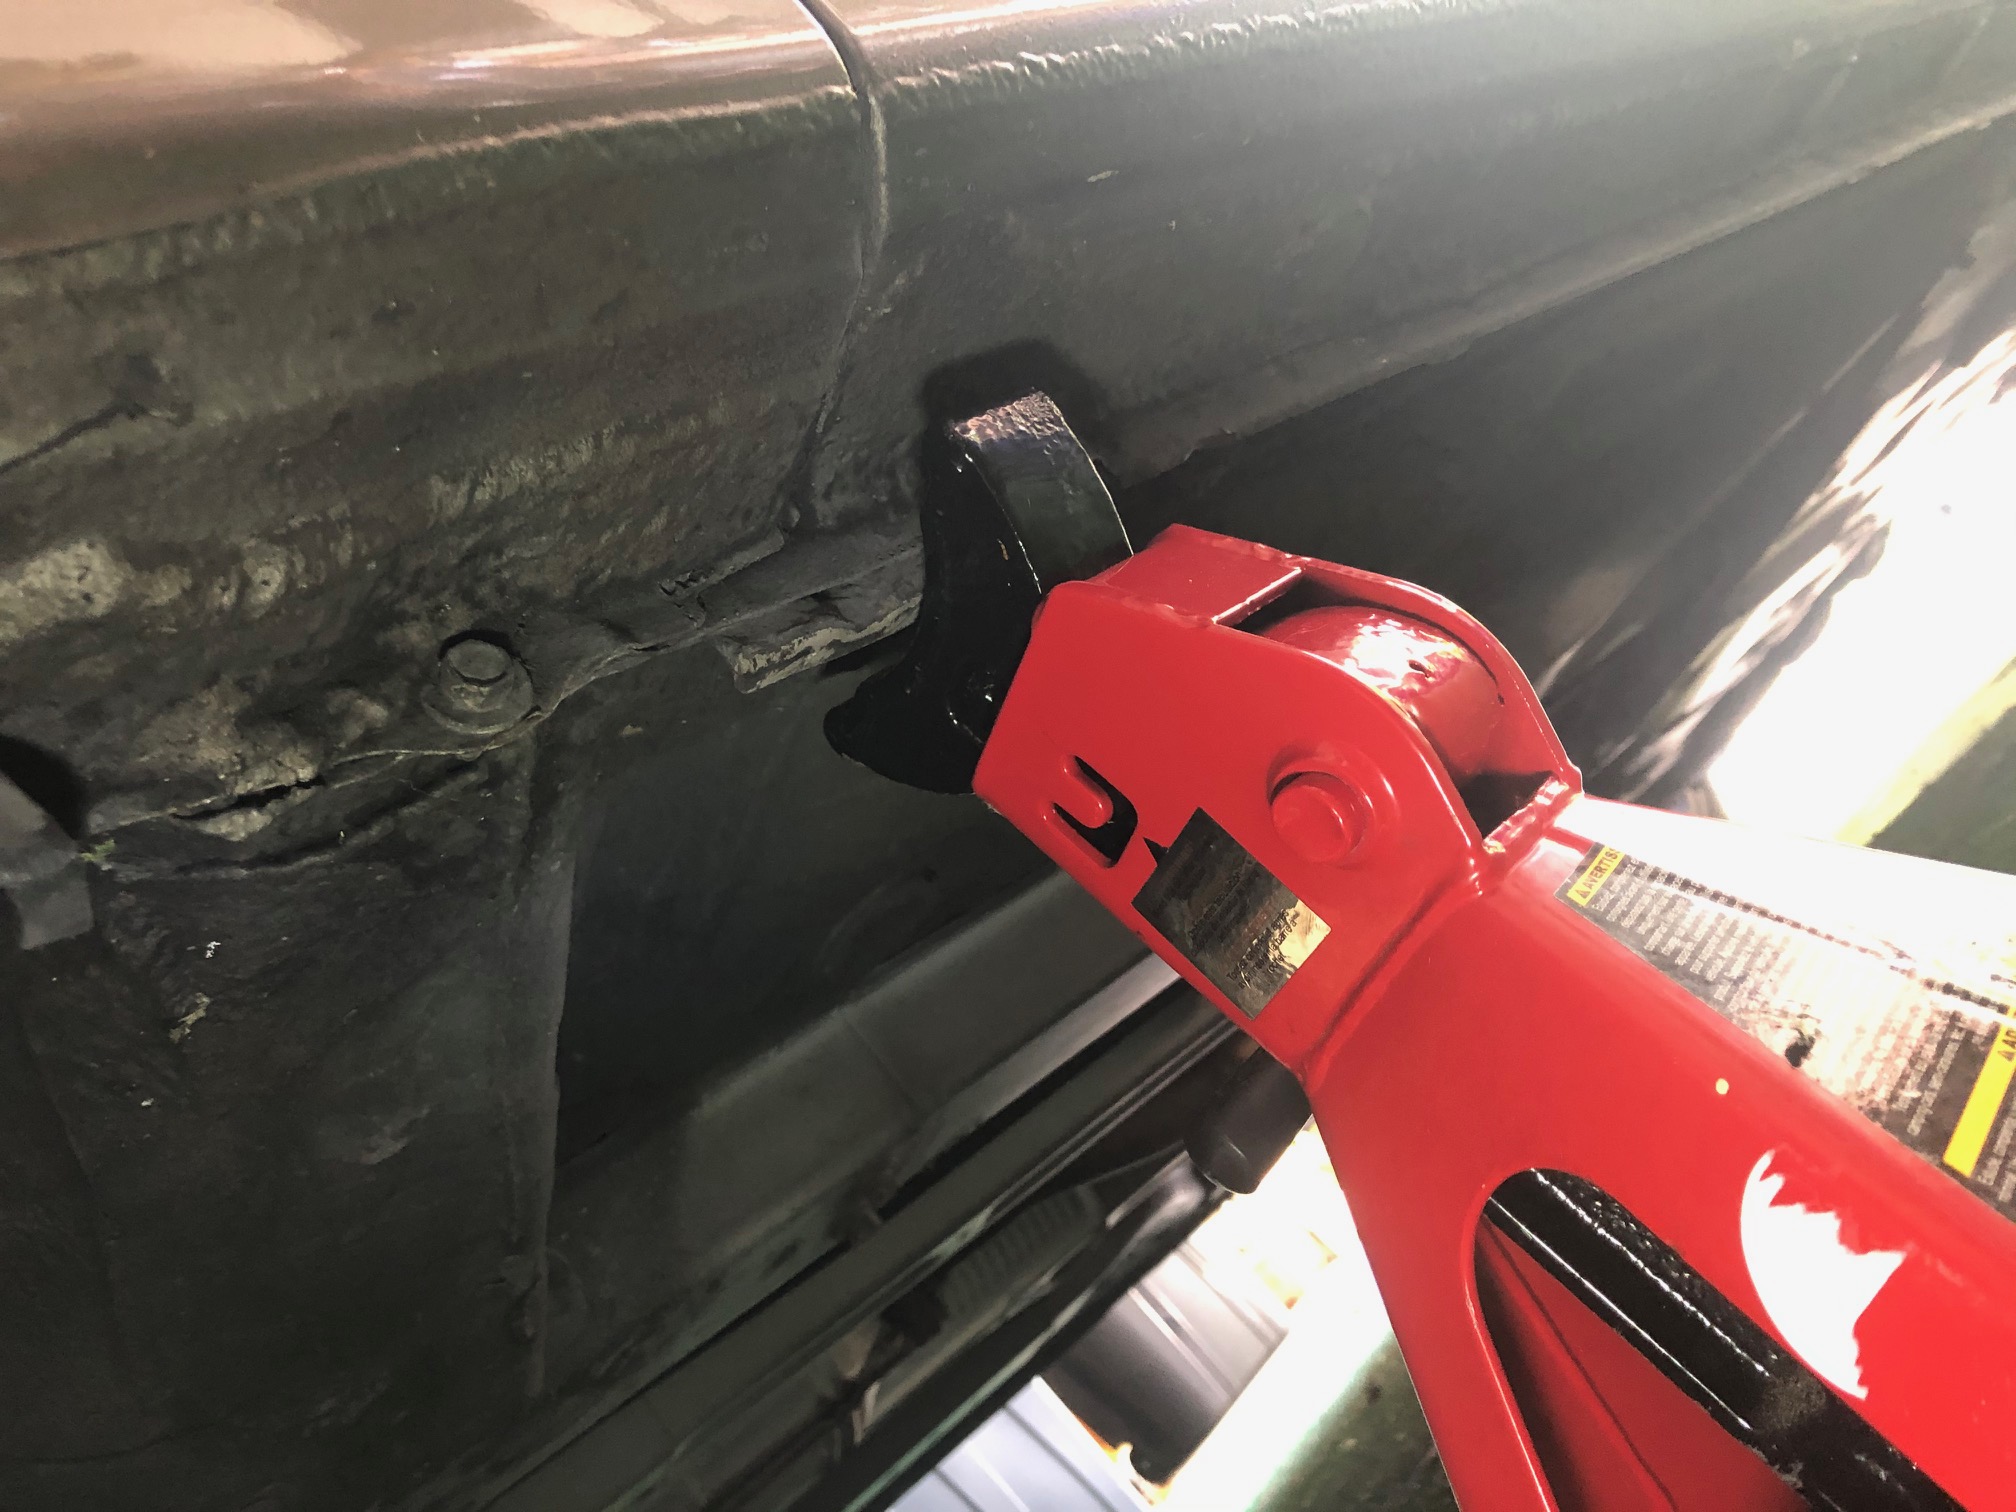
Step 2 Remove the brake line from the Strut bracket
Using a 12mm socket or wrench, remove the bolt that holds the brake line to the lower portion of the strut. Using a pair of needle-nosed pliers, remove the clip that secures the ABS line to the same bracket as the brake line.
Step 3 Remove the Strut Assembly
Using a 17mm socket or wrench, loosen the two(2) bolts that hold the strut assembly to the knuckle. You may need to hold the nut on the other end of the bolt as you remove the bolt. This can be done using a crescent wrench.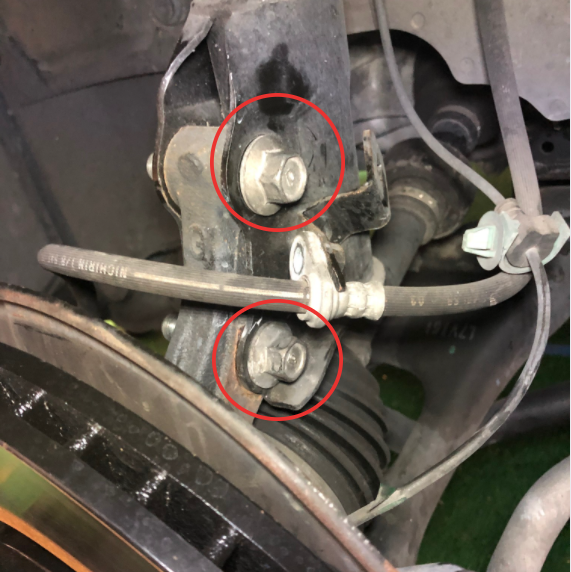 Remove the three(3) nuts securing the strut assembly to its upper mounting location. These nuts can be accessed through a small plastic cutout in the shape of a rectangle. This cutout is easily removable by hand.
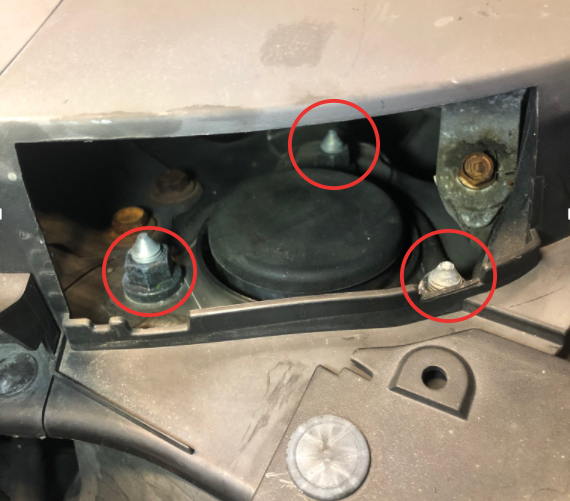
Installation of the front Coilover
Step 4 Prepare the Coilover assembly
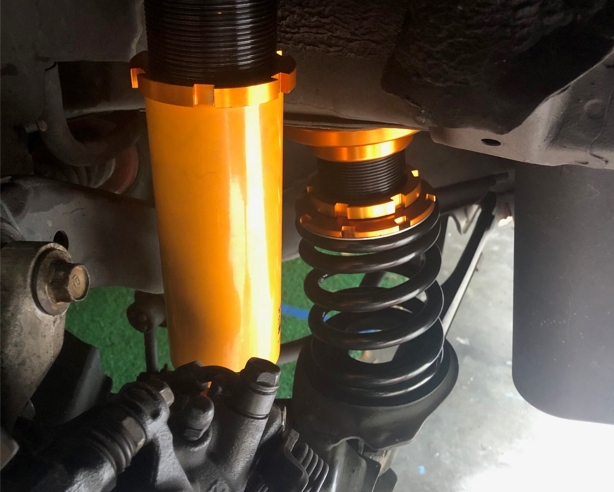
Set the preload, desired ride height/camber, and dampening. If your coilers feature adjustable dampening, the 24-way system is easily controlled using the dial on the top of the assembly.Step 5 Install the new assembly
In reverse, use the same method to install the new assembly. Secure the Coilover to the upper mounting location using the three(3) newly provided nuts. Thread these nuts on by hand, and tighten them down in a pattern that ensures even tightness across all three nuts.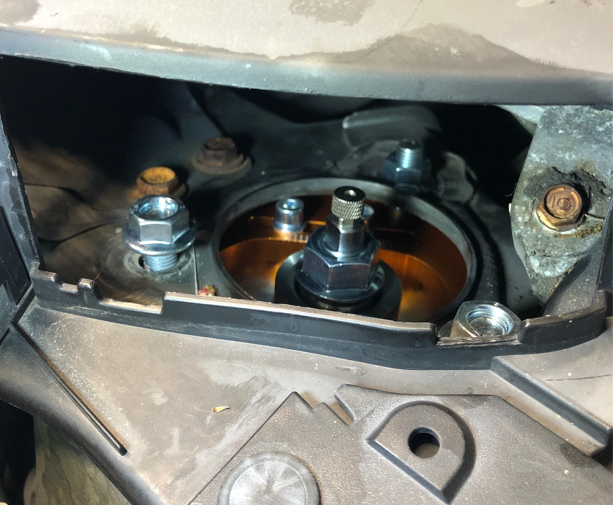 Install the OEM bolts to secure the Coilover assembly to the knuckle.
 Lastly, lift the entire suspension assembly using a floor jack and tighten the nuts and bolts securing the Coilover to the vehicle.
Rear spring and shock removal/Removal of the rear shock and spring
Step 1 Jack up the car
Using the rear cross member as a jacking point, safely jack up the vehicle. Place jack stands underneath the pinch weld that runs alongside the car.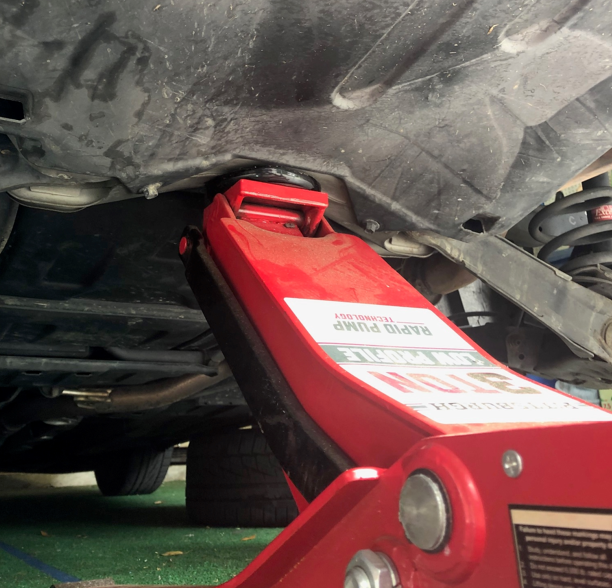
Step 2 Disconnect the lower portion of the shock
Using a 14mm socket or wrench, remove the bolt that holds the shock to the lower control arm.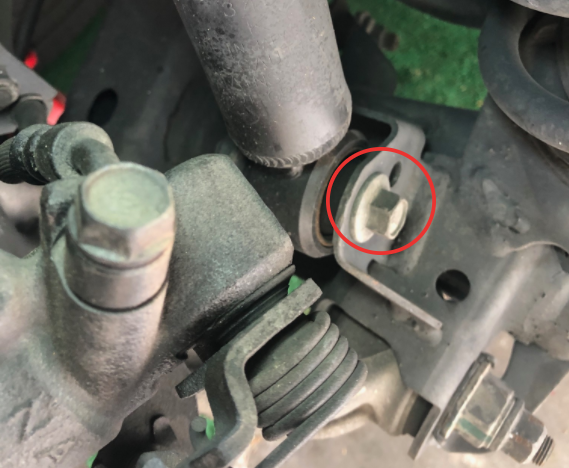
Step 3 Disconnect the upper control arm from the knuckle
Using a 14mm socket or wrench, remove the bolt that holds the lower control arm to the knuckle. After removing the upper control arm bolt, remove the spring by pressing down on the lower control arm and prying it out. This step is much easier with the help of a friend.
Step 4 Disconnect the shock from its upper mount
To gain access to the shock absorber, start by removing the plastic cover on the trunk latch using a small pry tool such as a flathead screwdriver.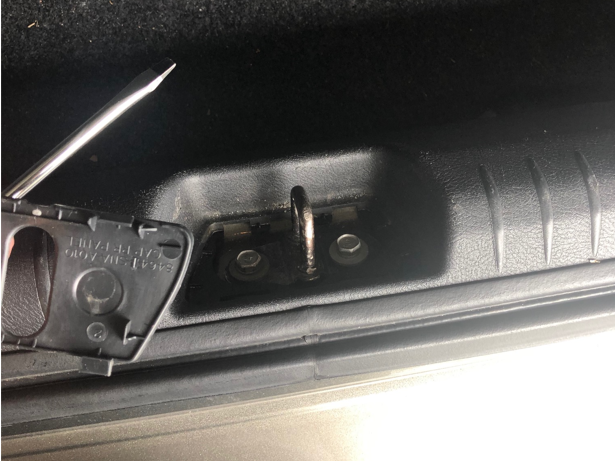 Secondly, remove the plastic fasteners that hold the carpet to the trunk walls using a flat head screwdriver.
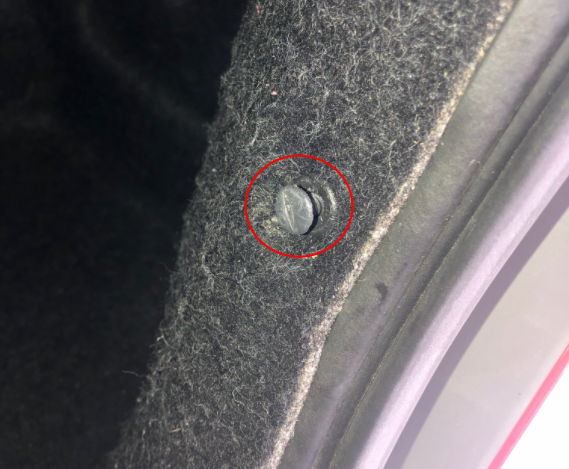 Lastly, remove the 14mm nut that holds the shock to its upper mount. Use an allen key to brace the body of the shock as you loosen the nut.
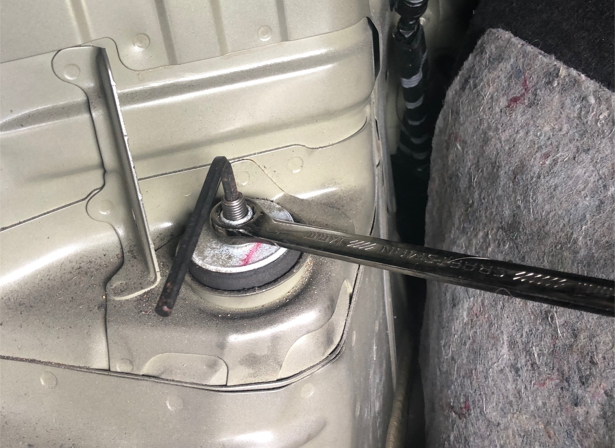
Step 5 Prepare the new shock and spring
Measure, adjust, and tighten both the spring and shock to obtain the desired ride height. Since the dampening **** on the rear shock is exposed after installation, you may wait until the installation is complete to adjust dampening.Step 6 Install the new rear shock to the upper mount
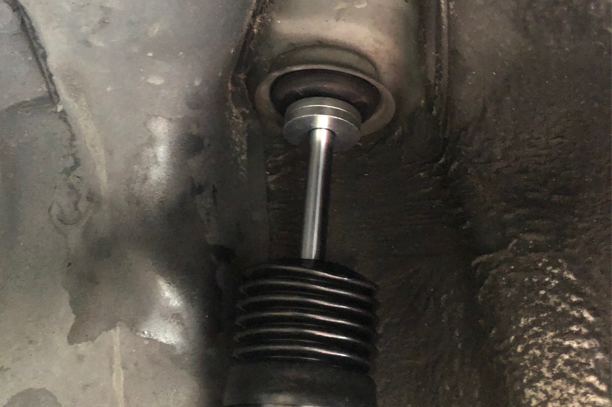
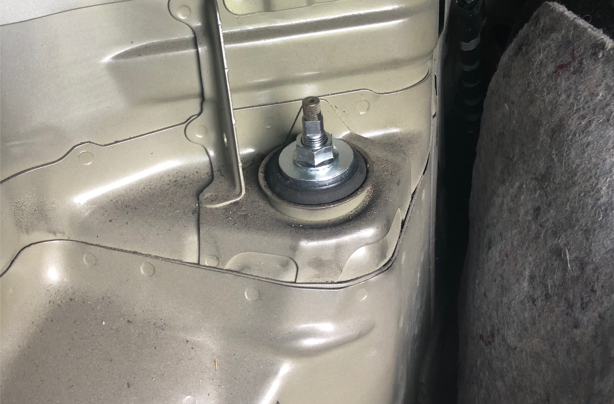
Retaining the OEM bushings, slide the rear shock into the upper mounting location.Using the new washer and nut, secure the shock into its mounting location. Bracing the shock with a small wrench may be needed. Do not attempt to brace the shock by holding the dampening adjustment **** with the supplied allen key. The supplied key is for dampening adjustments only. Do not secure the shock to the lower control arm yet.
Step 7 Install the new spring
Pushing down on the lower control arm creates a window of the room to install the spring safely. After the spring is in the correct position, use a floor jack to lift the suspension. Guide the shock into the place of its mount on the lower control arm and tighten the shock into place.Carefully watch to ensure that the spring stays in its designated perch, with all components intact. Line the upper control arm with its mounting place on the knuckle and secure without tightening much. Lastly, lift the suspension system from the lower control arm until the entire vehicle begins to come off of the jack stand on that side slightly. Then, torque down the bolts accordingly.
Torque Specifications
Front strut to knuckle(2) � 67 lb/ftFront strut to body(3) � 43 lb/ft
Rear upper control arm to knuckle(1) � 80 lb/ft
Rear shock upper(1) � 22 lb/ft
Rear shock to lower control arm(1) � 51 lb/ft
After the install, I was eager to test the new suspension. The coilovers felt strong and confident. I was pleasantly surprised at this, seeing how they go for no more than $400. I was expecting to feel like a shopping cart. Now, of course, it was no Rolls. But that isn�t the goal, and it isn�t a shopping cart. I drove around for a few days, hearing no noises and feeling no abnormalities. I ripped around corners like Ken Miles and cruised around them like my Grandmother. It felt amazing.
My little FA5 handles like a go-kart, and I do not have even the slightest regret with my choice. After my experience with MaXpeedingRods, I recommend the product stated above. These coilovers look great and feel even better, I wouldn�t choose another brand.


Thread
Thread Starter
Honda Civic Forum
Replies
Last Post
Maxpeedingrods
Retail Sales - site vendor annoucements
0
Mar 18, 2022 05:46 AM
Maxpeedingrods
Retail Sales - site vendor annoucements
0
Mar 3, 2022 04:13 AM
Maxpeedingrods
Retail Sales - site vendor annoucements
0
Feb 23, 2022 04:25 AM
Maxpeedingrods
Retail Sales - site vendor annoucements
0
Feb 9, 2022 04:31 AM

