
DIY: DC5 Cluster in EM2


Thread Starter
Registered!!
Joined: Jun 2013
Posts: 17
Likes: 1
Rep Power: 0 
DIY: DC5 Cluster in EM2
Recently purchased a DC5 full interior (Dashboard w/ cluster, door panels, and center console).
The full interior conversion was what I had originally planned to do but seemed like to much work at the time so I just decided to do the cluster swap.
The Materials I used:
Soldering Iron
Wire cutters
Heat Shrink
Electrical Tape
Aluminum Sheeting
JB Weld
Rotary tool
Cluster shroud
Note: Disconnect your battery before doing anything.
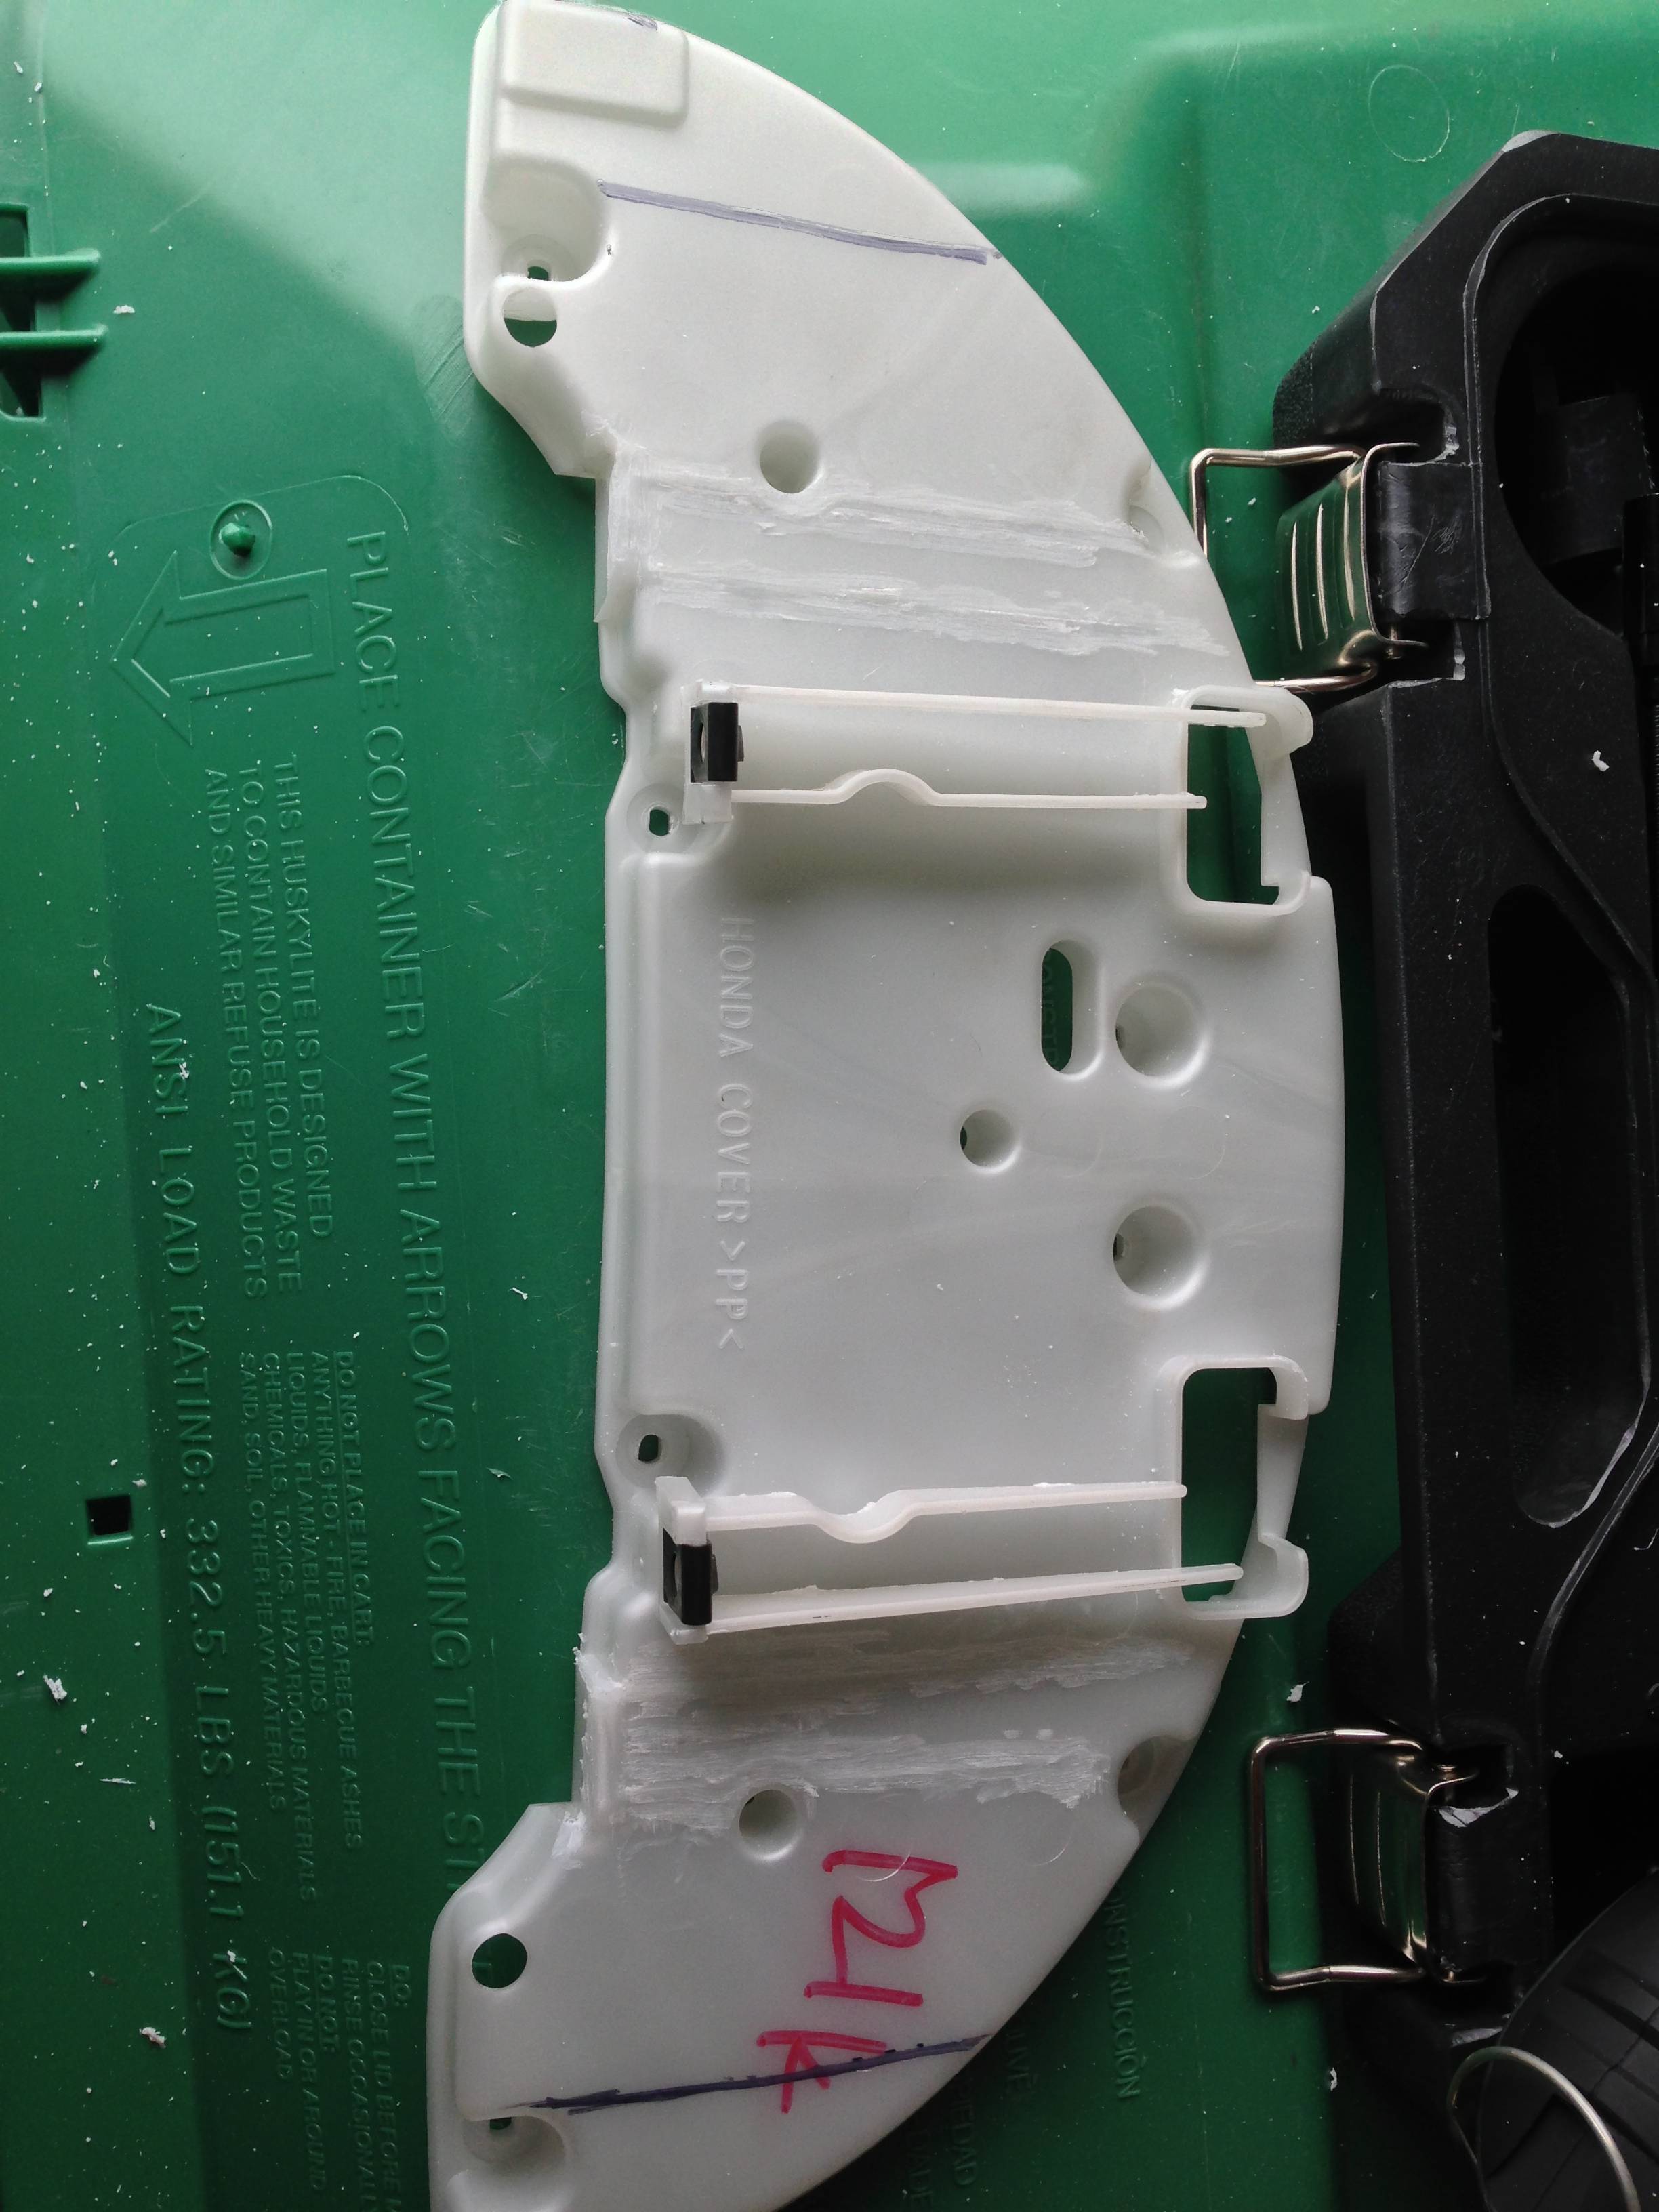
1.
Begin by cutting the back brackets off the DC5 cluster.
Optional
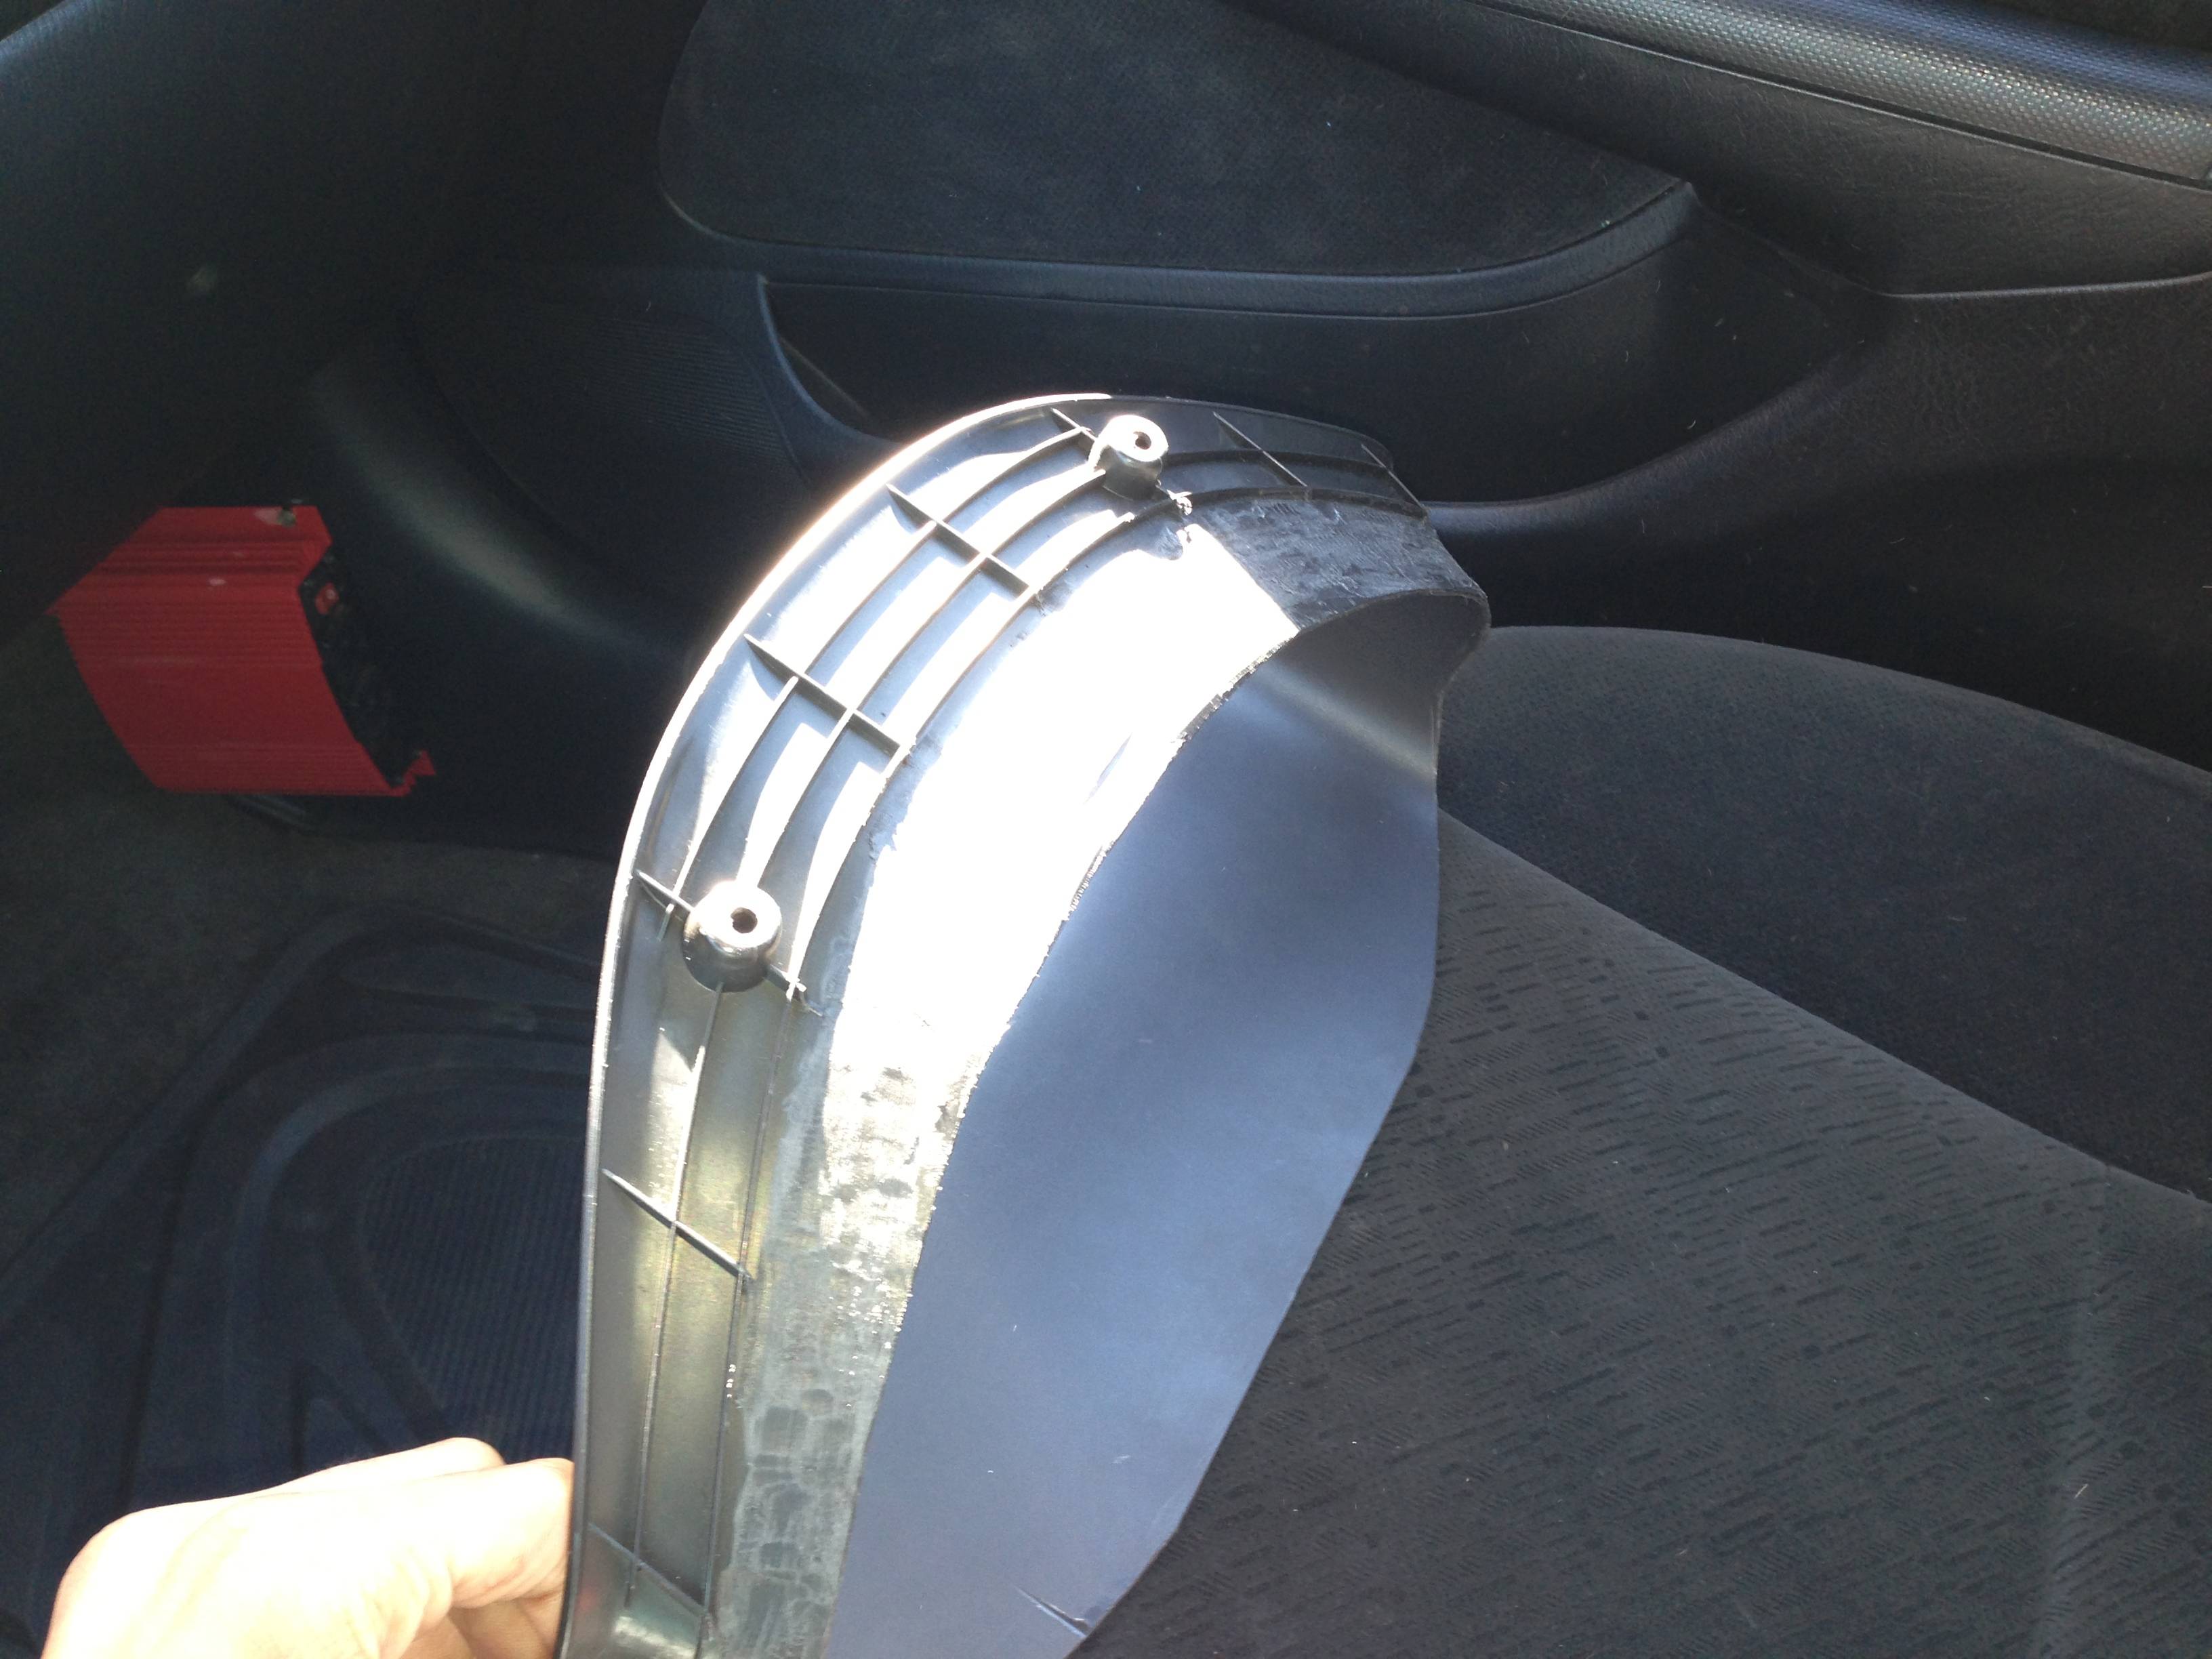
2.
In order to have a more flush and stock feel I trimmed the back to the dimensions of the original cluster.
I believe the bottom is cut at a 45 degree angle and the sides at a 60 degree angle.
Also Optional
3.
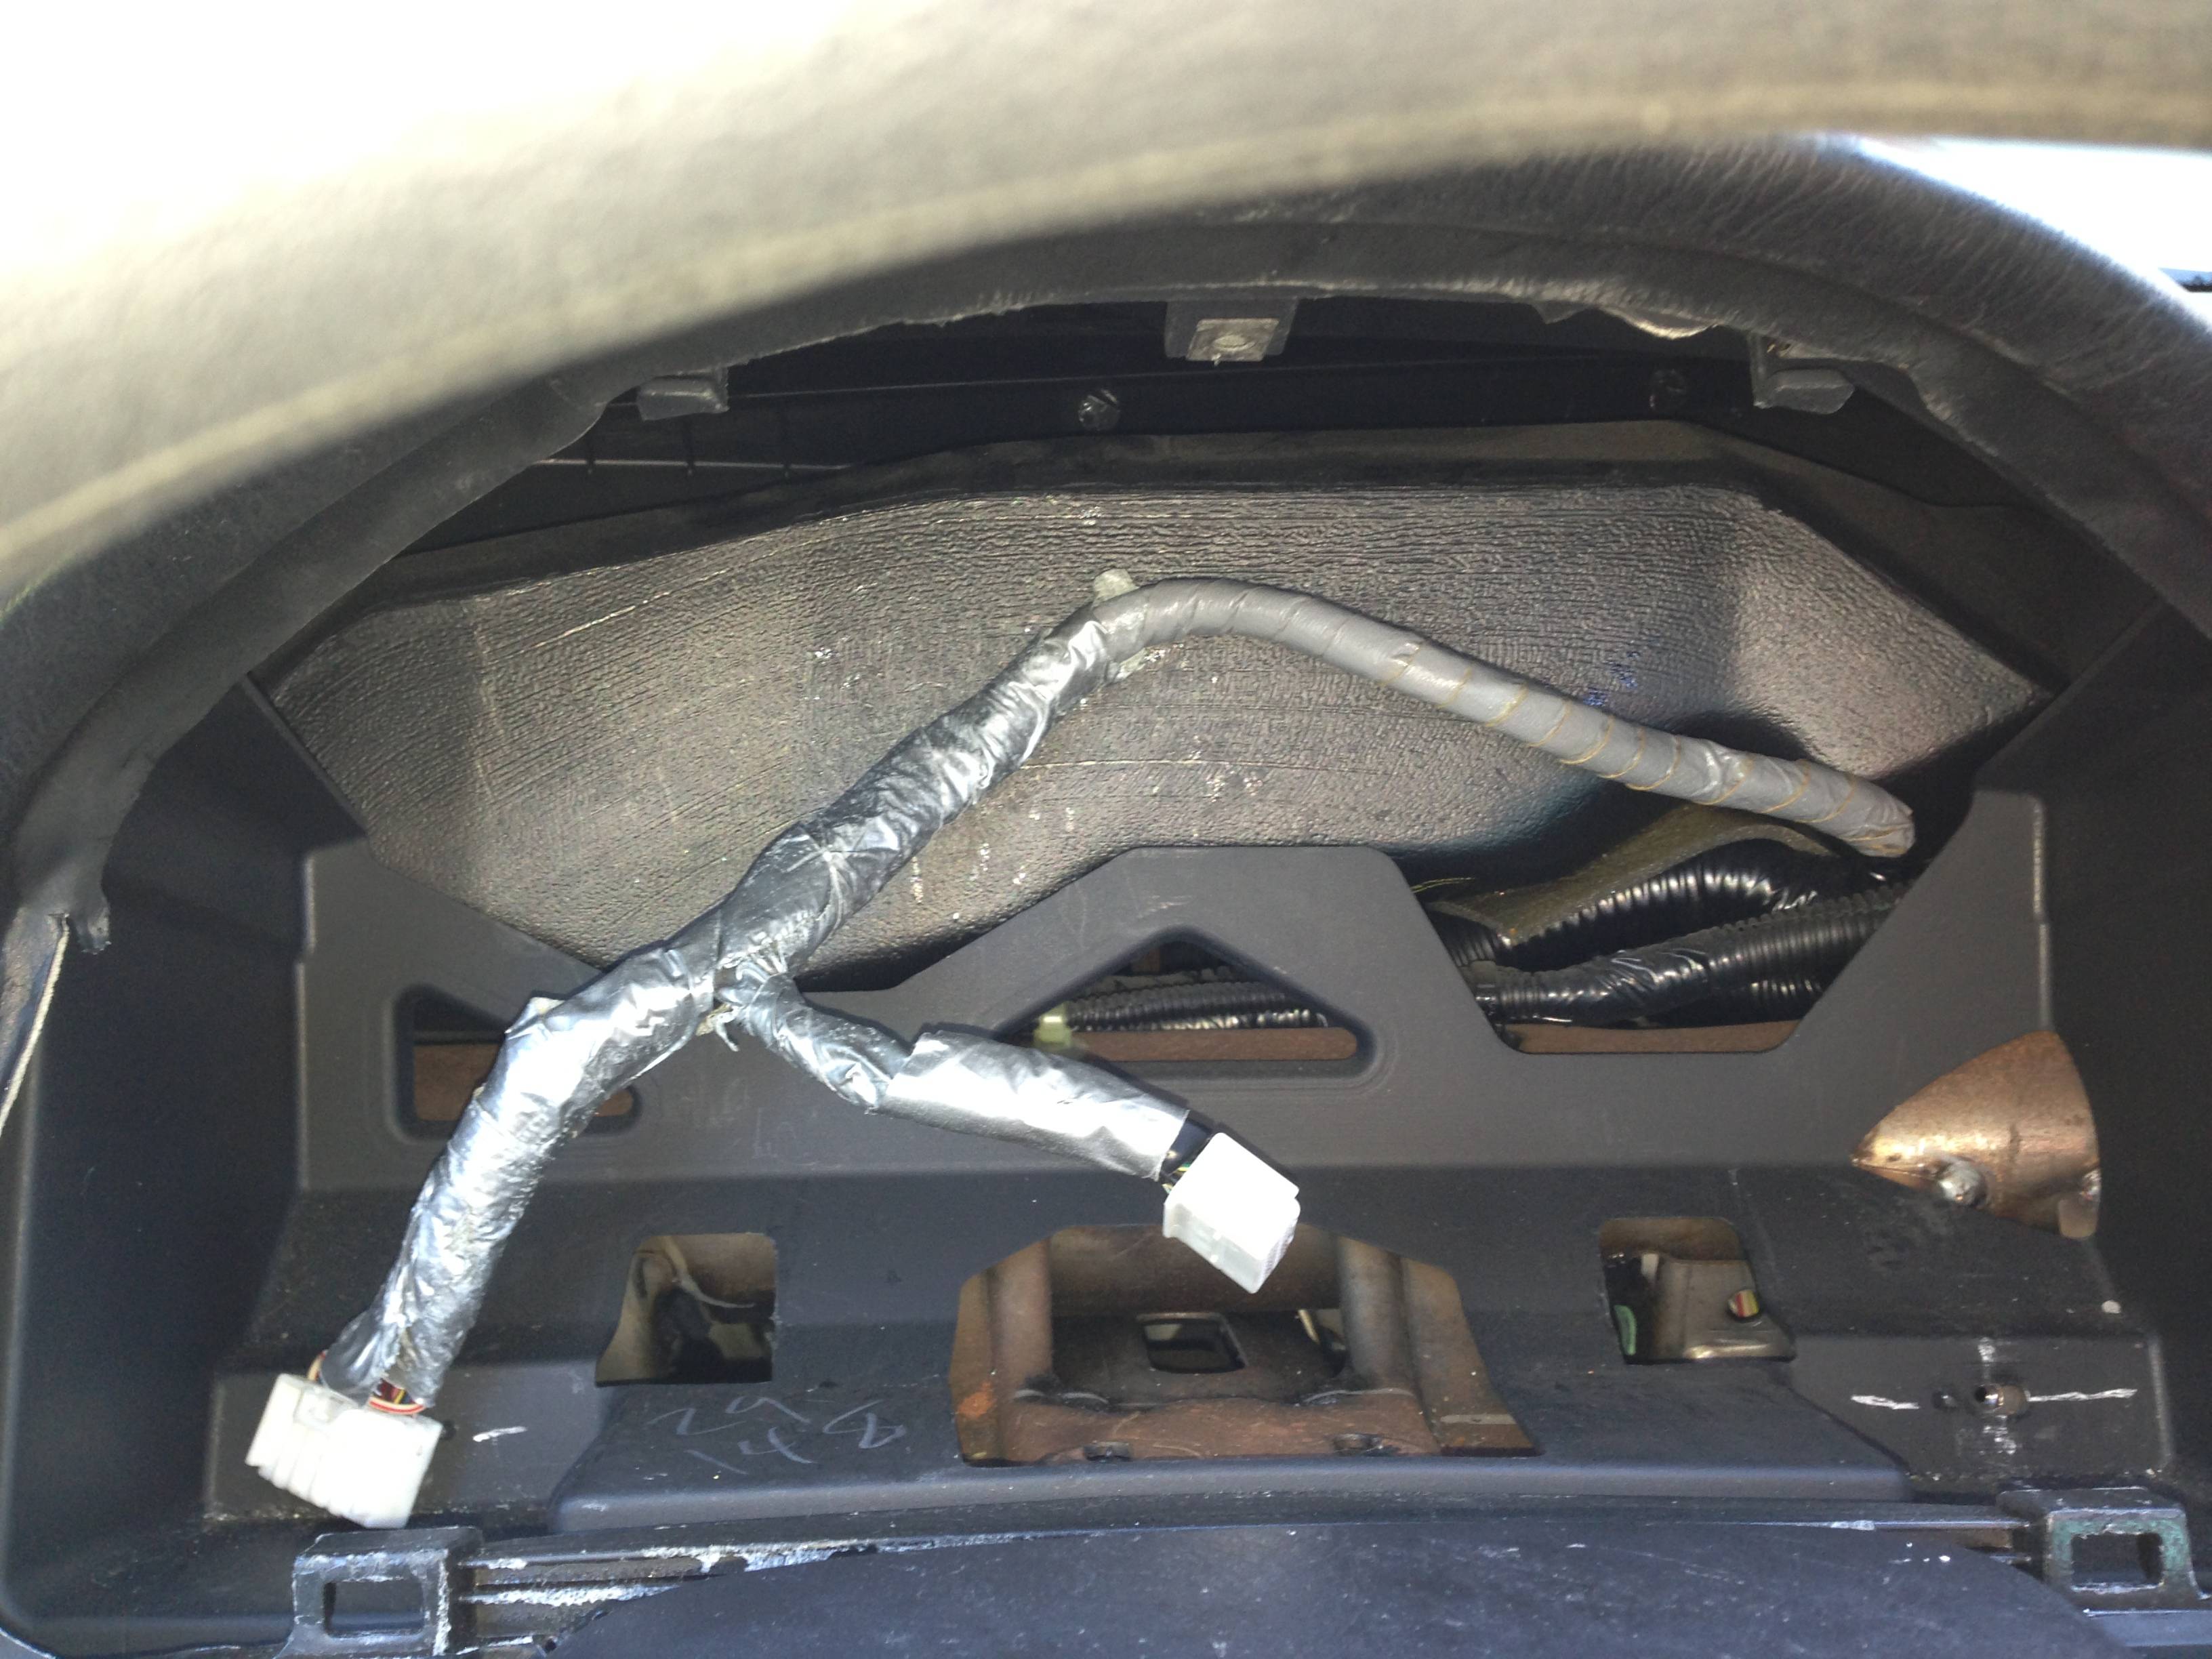
In order to reduce vibration noises and have a more stock placement, I fabricated brackets that would allow the DC5 cluster to use the original mounting points in the dashboard.
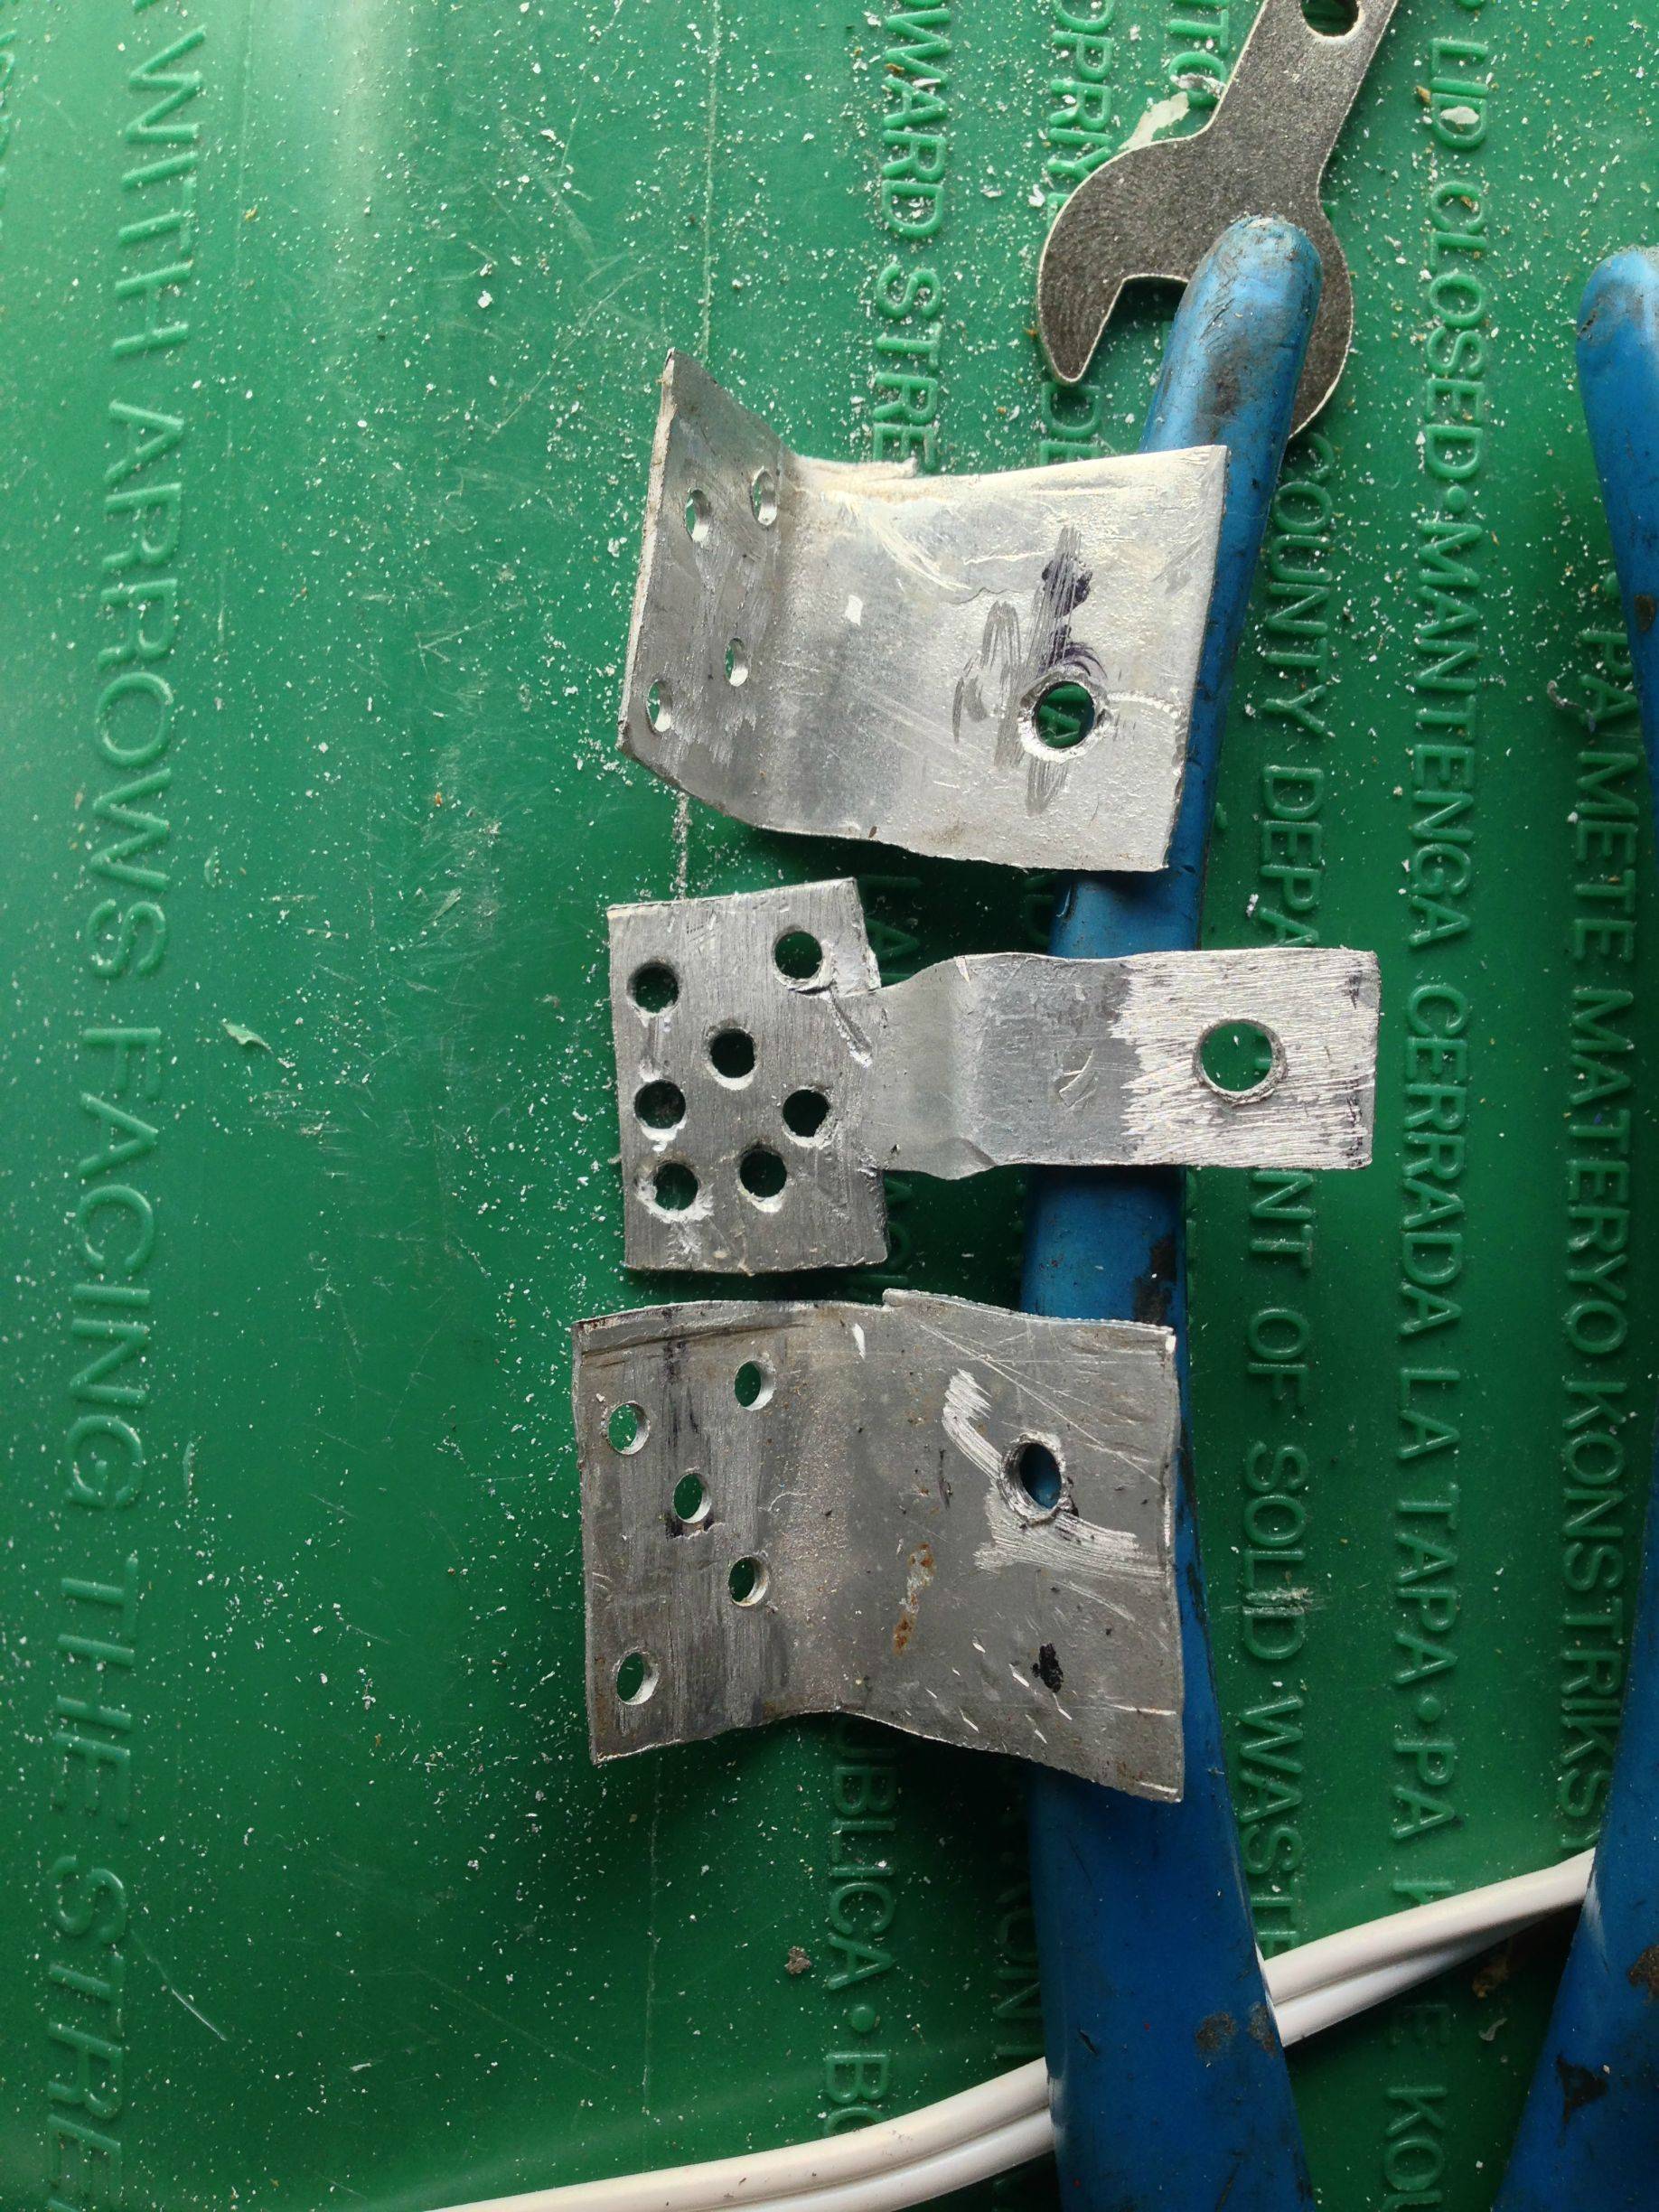
4.
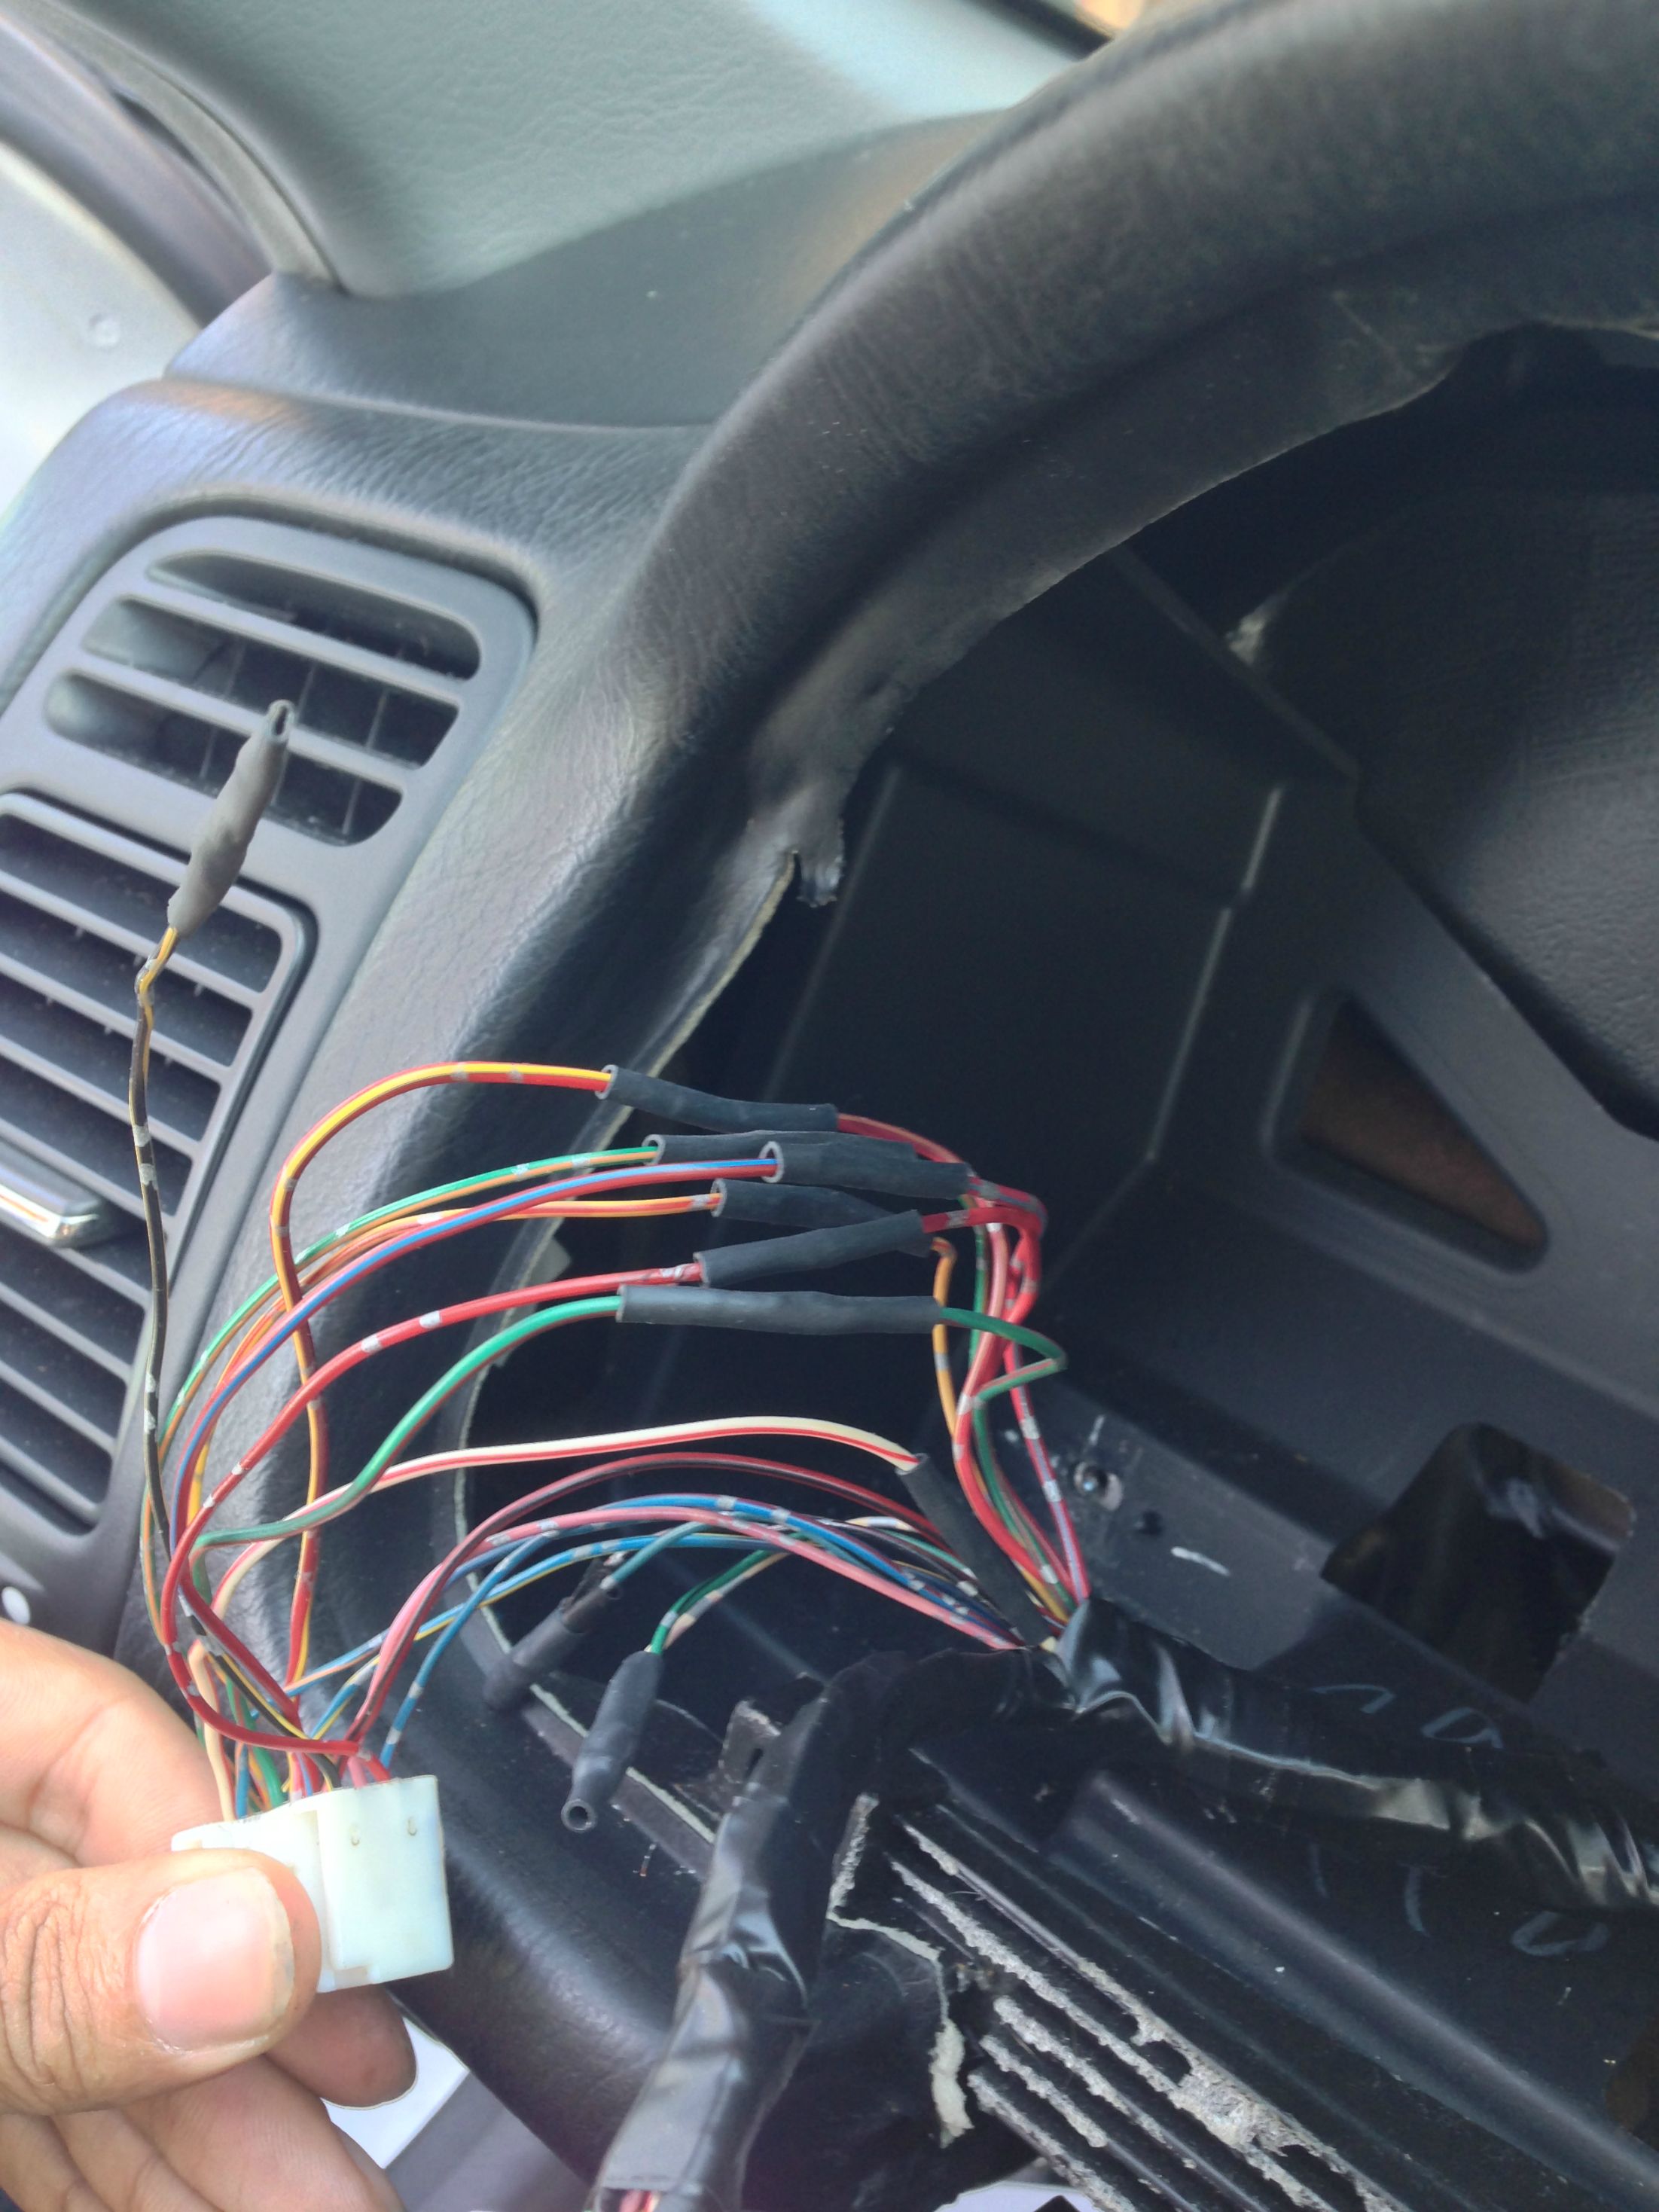
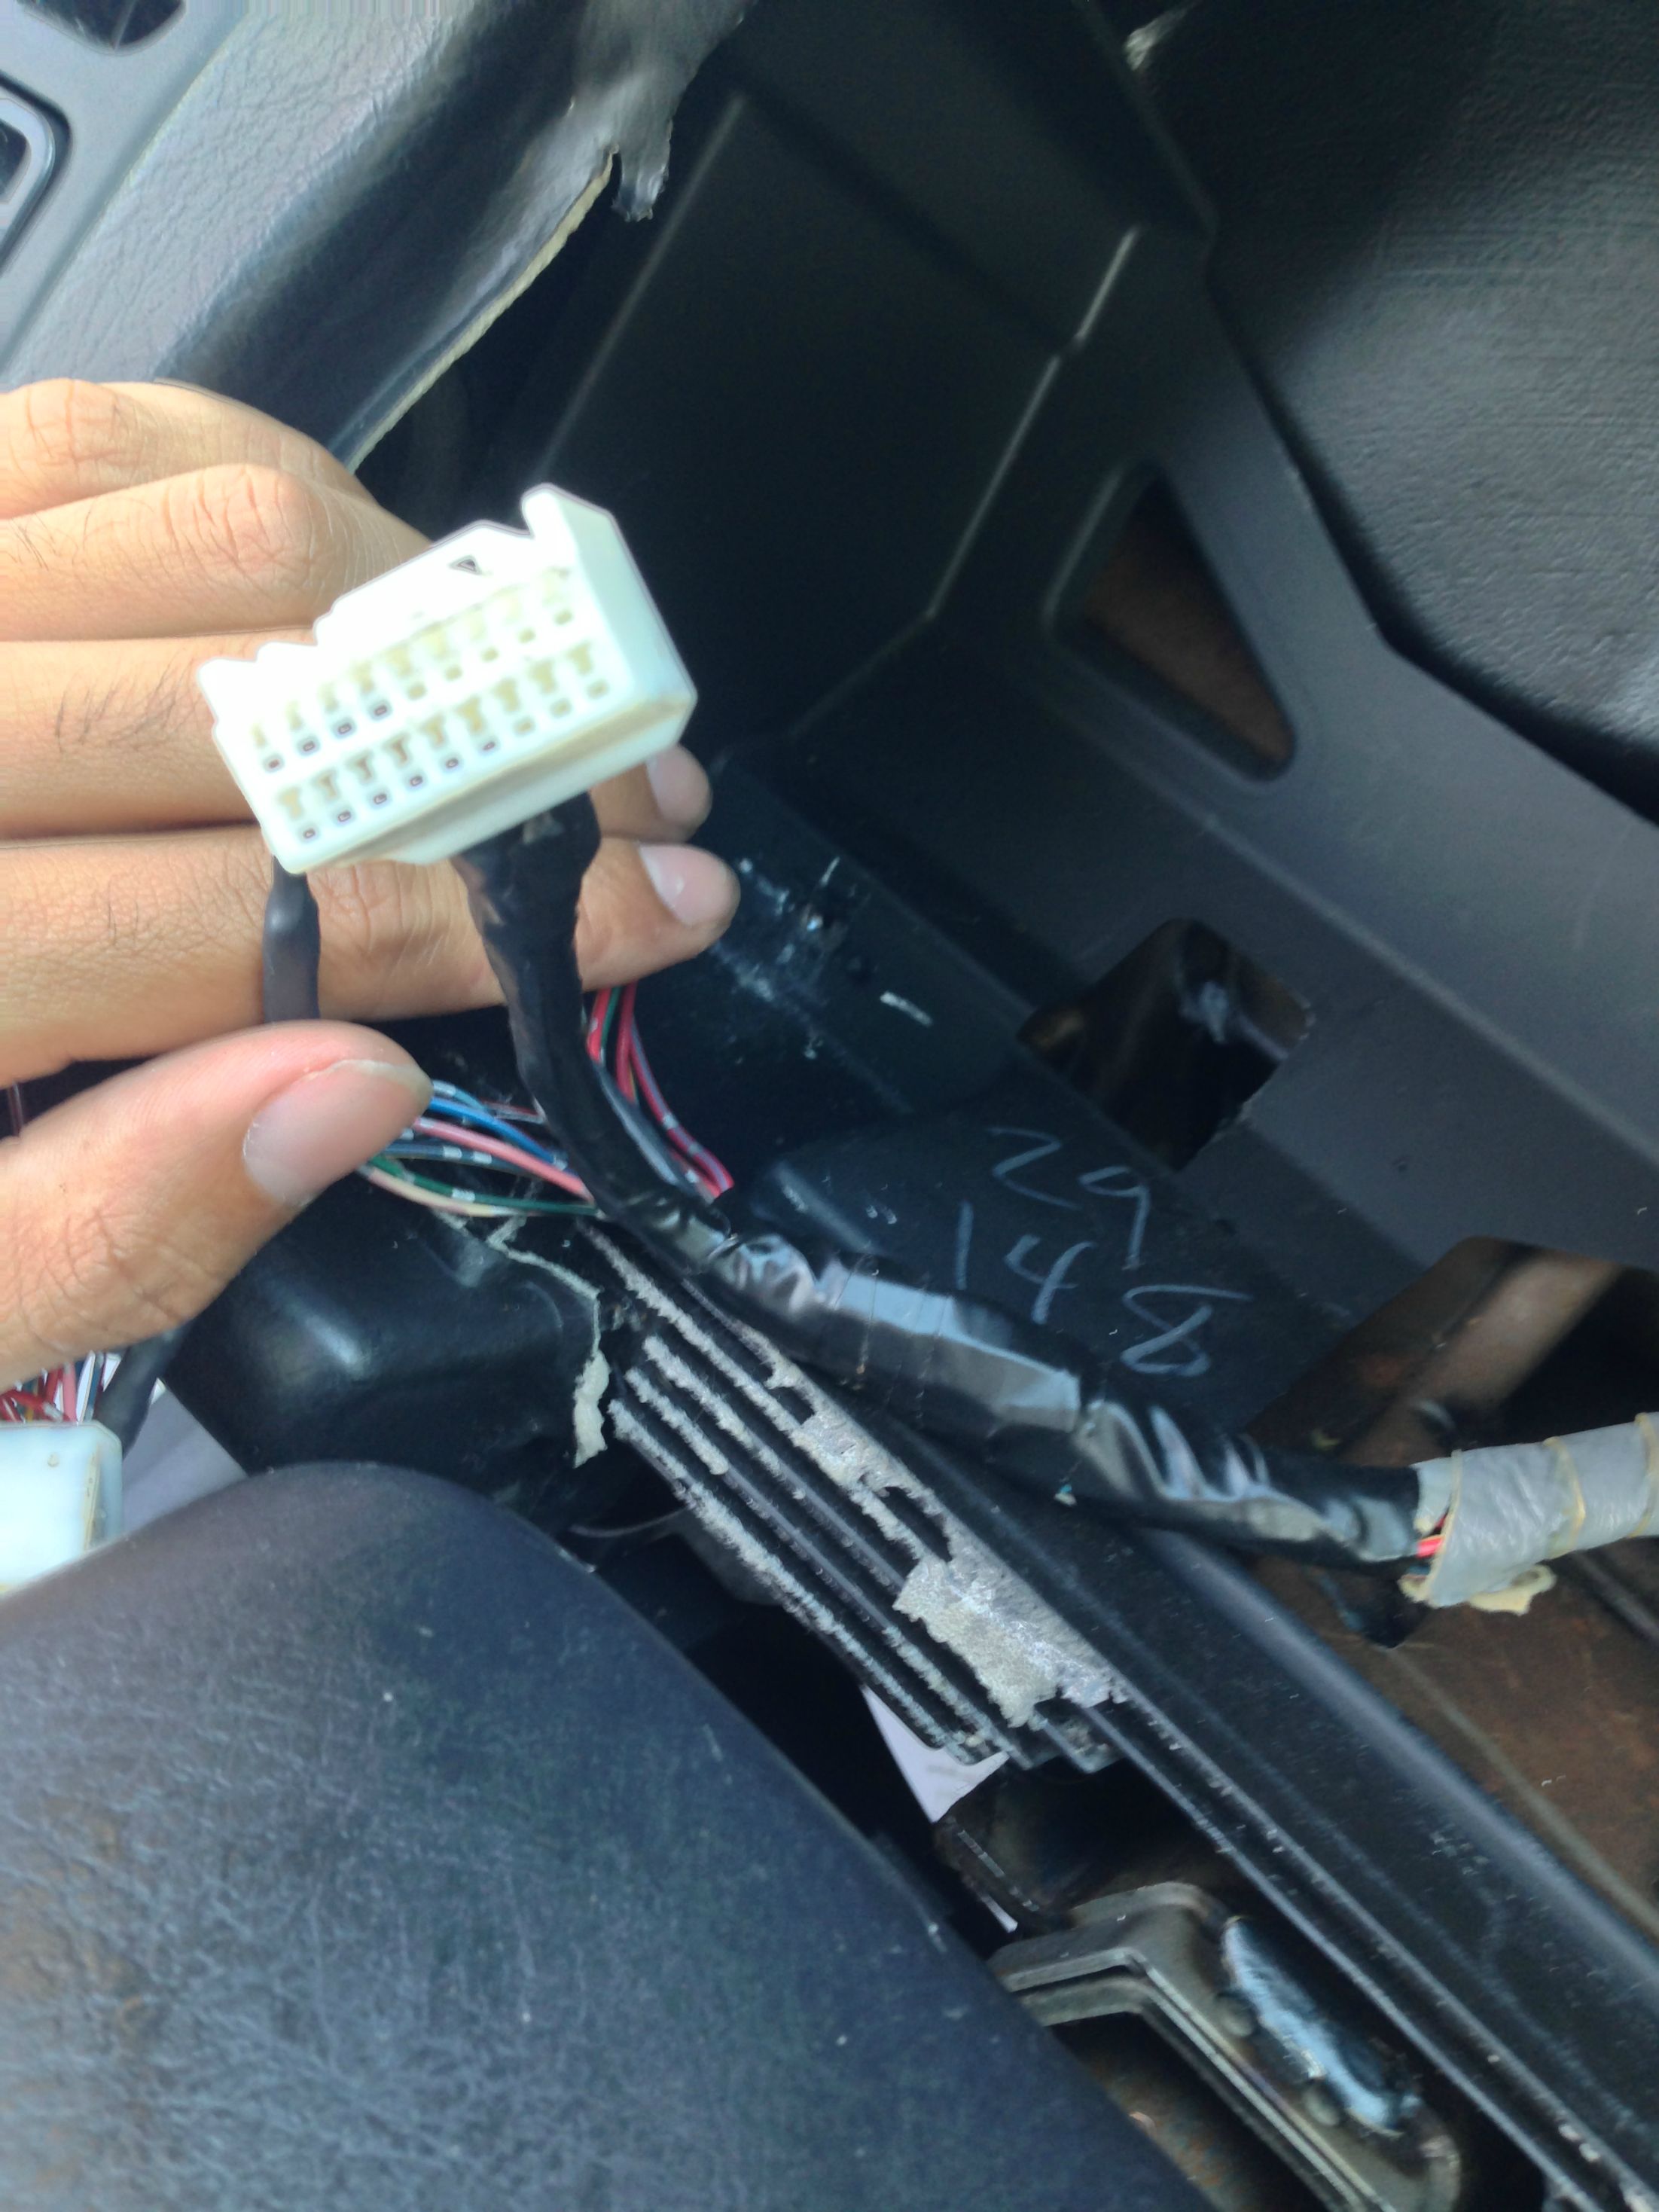
Now what you have to do is cut the plugs off the DC5 wiring harness, and cut the plugs off the EM2 wiring harness.
I do not have a picture of this unfortunately.
(Note: I originally thought I could just remove the pins from the DC5 plug and from the EM2 plug and just re-pin both of them without having to cut the wires.
The only problem with this is that the DC5 pins do not stay inside the EM2 plug.)
5.
Match up the wires by color.
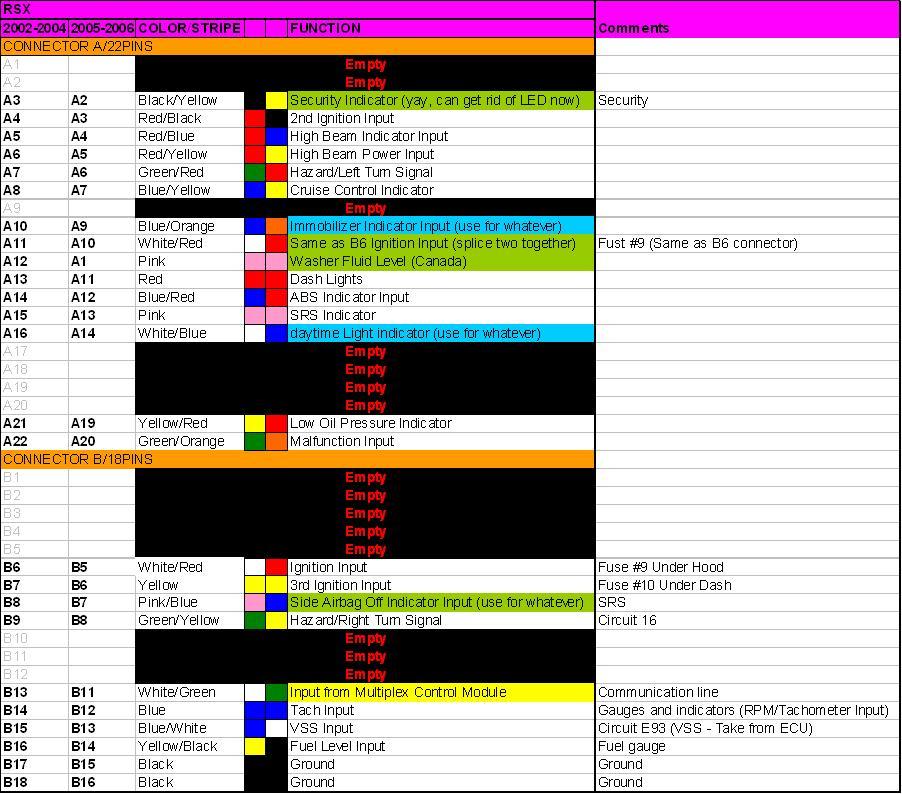
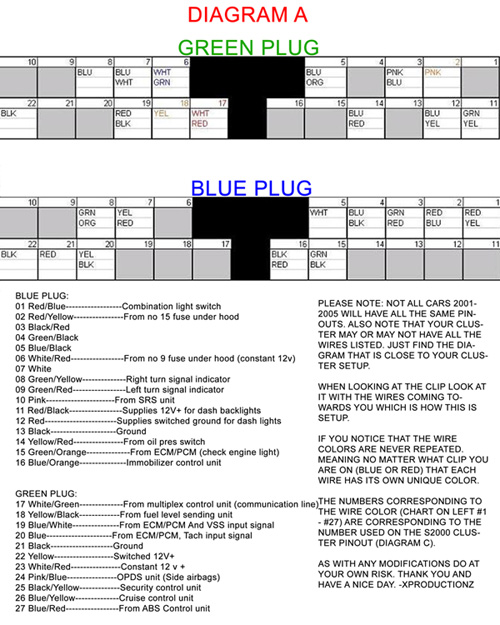
As you will see some of the wires are not used in the DC5 Cluster. Such as washer fluid level and other things.
Optional
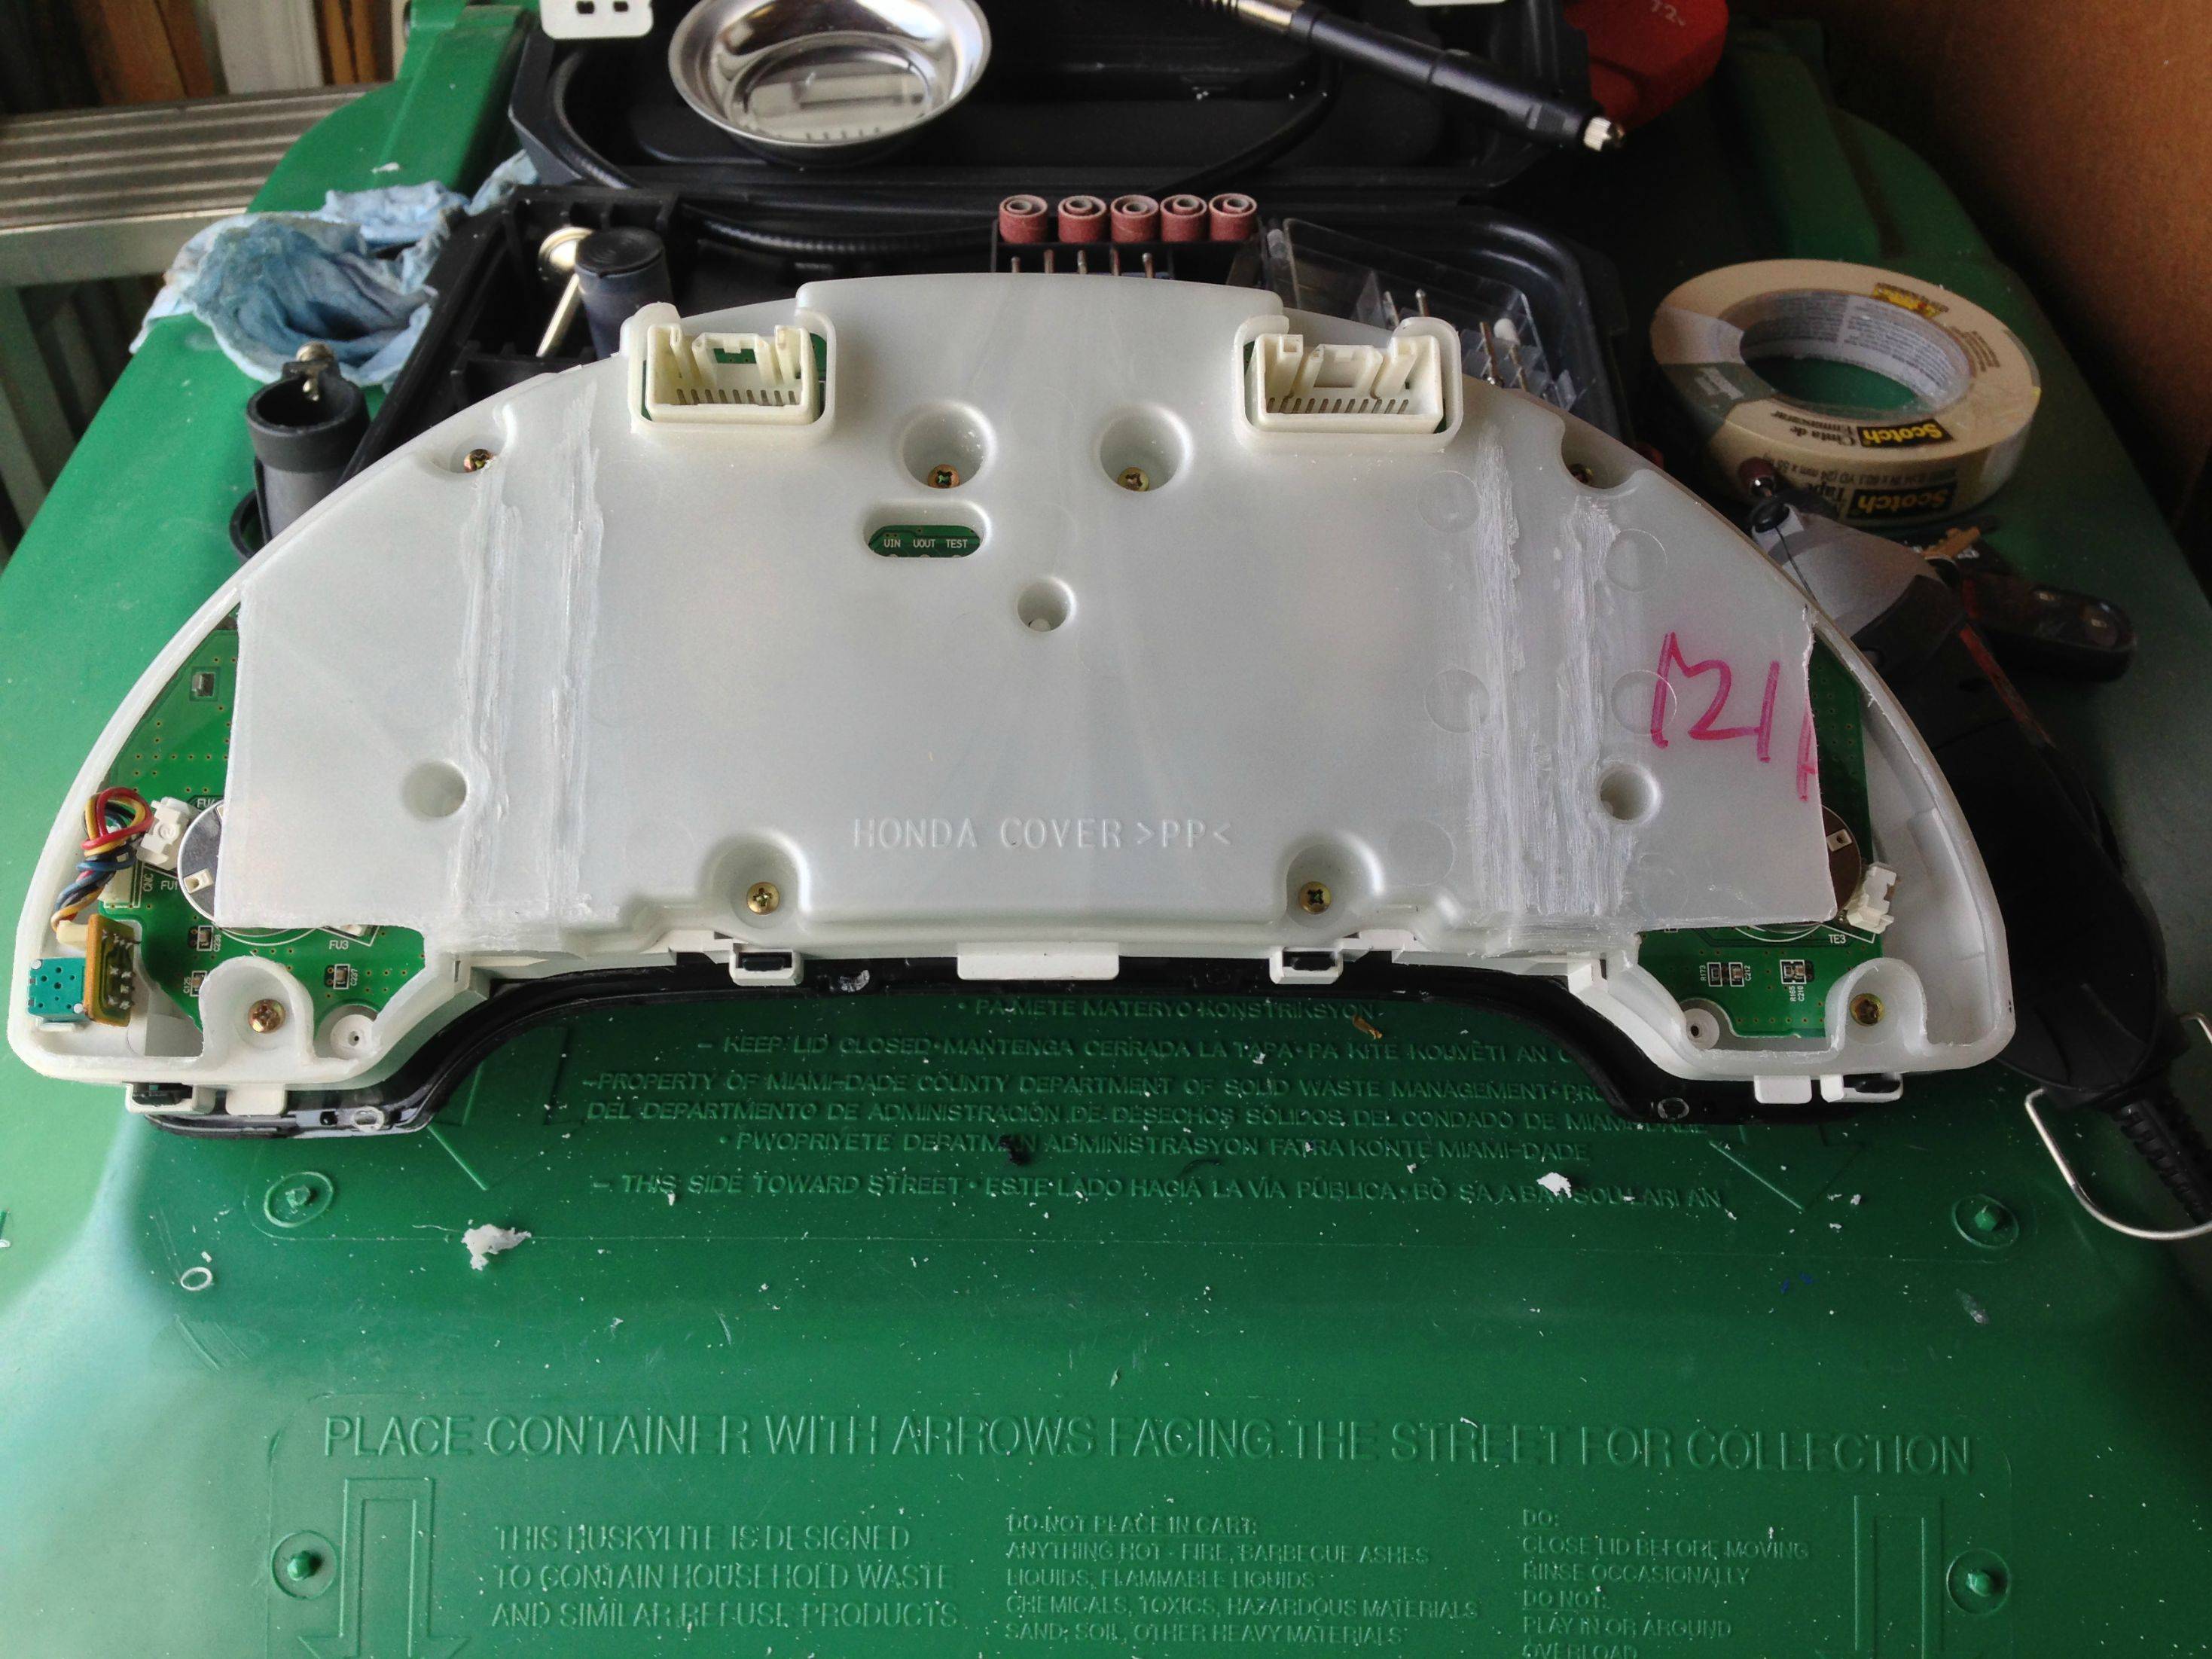
6.
Use JB Weld to glue the brackets to the cluster.
Make sure they are in the right place.
I don't have any magical method to calibrate the position but what I did was use glue from a glue gun to make sure they were in the right position before I used the JB Weld.
The glue gun peels off easily so you can try as many times as you wish.
7.
Once the brackets are in place and everything is soldered up, turn your car on and make sure everything is functioning properly.
8.
If everything is working wrap everything up with electrical tape, and then use duct tape to insulate everything.
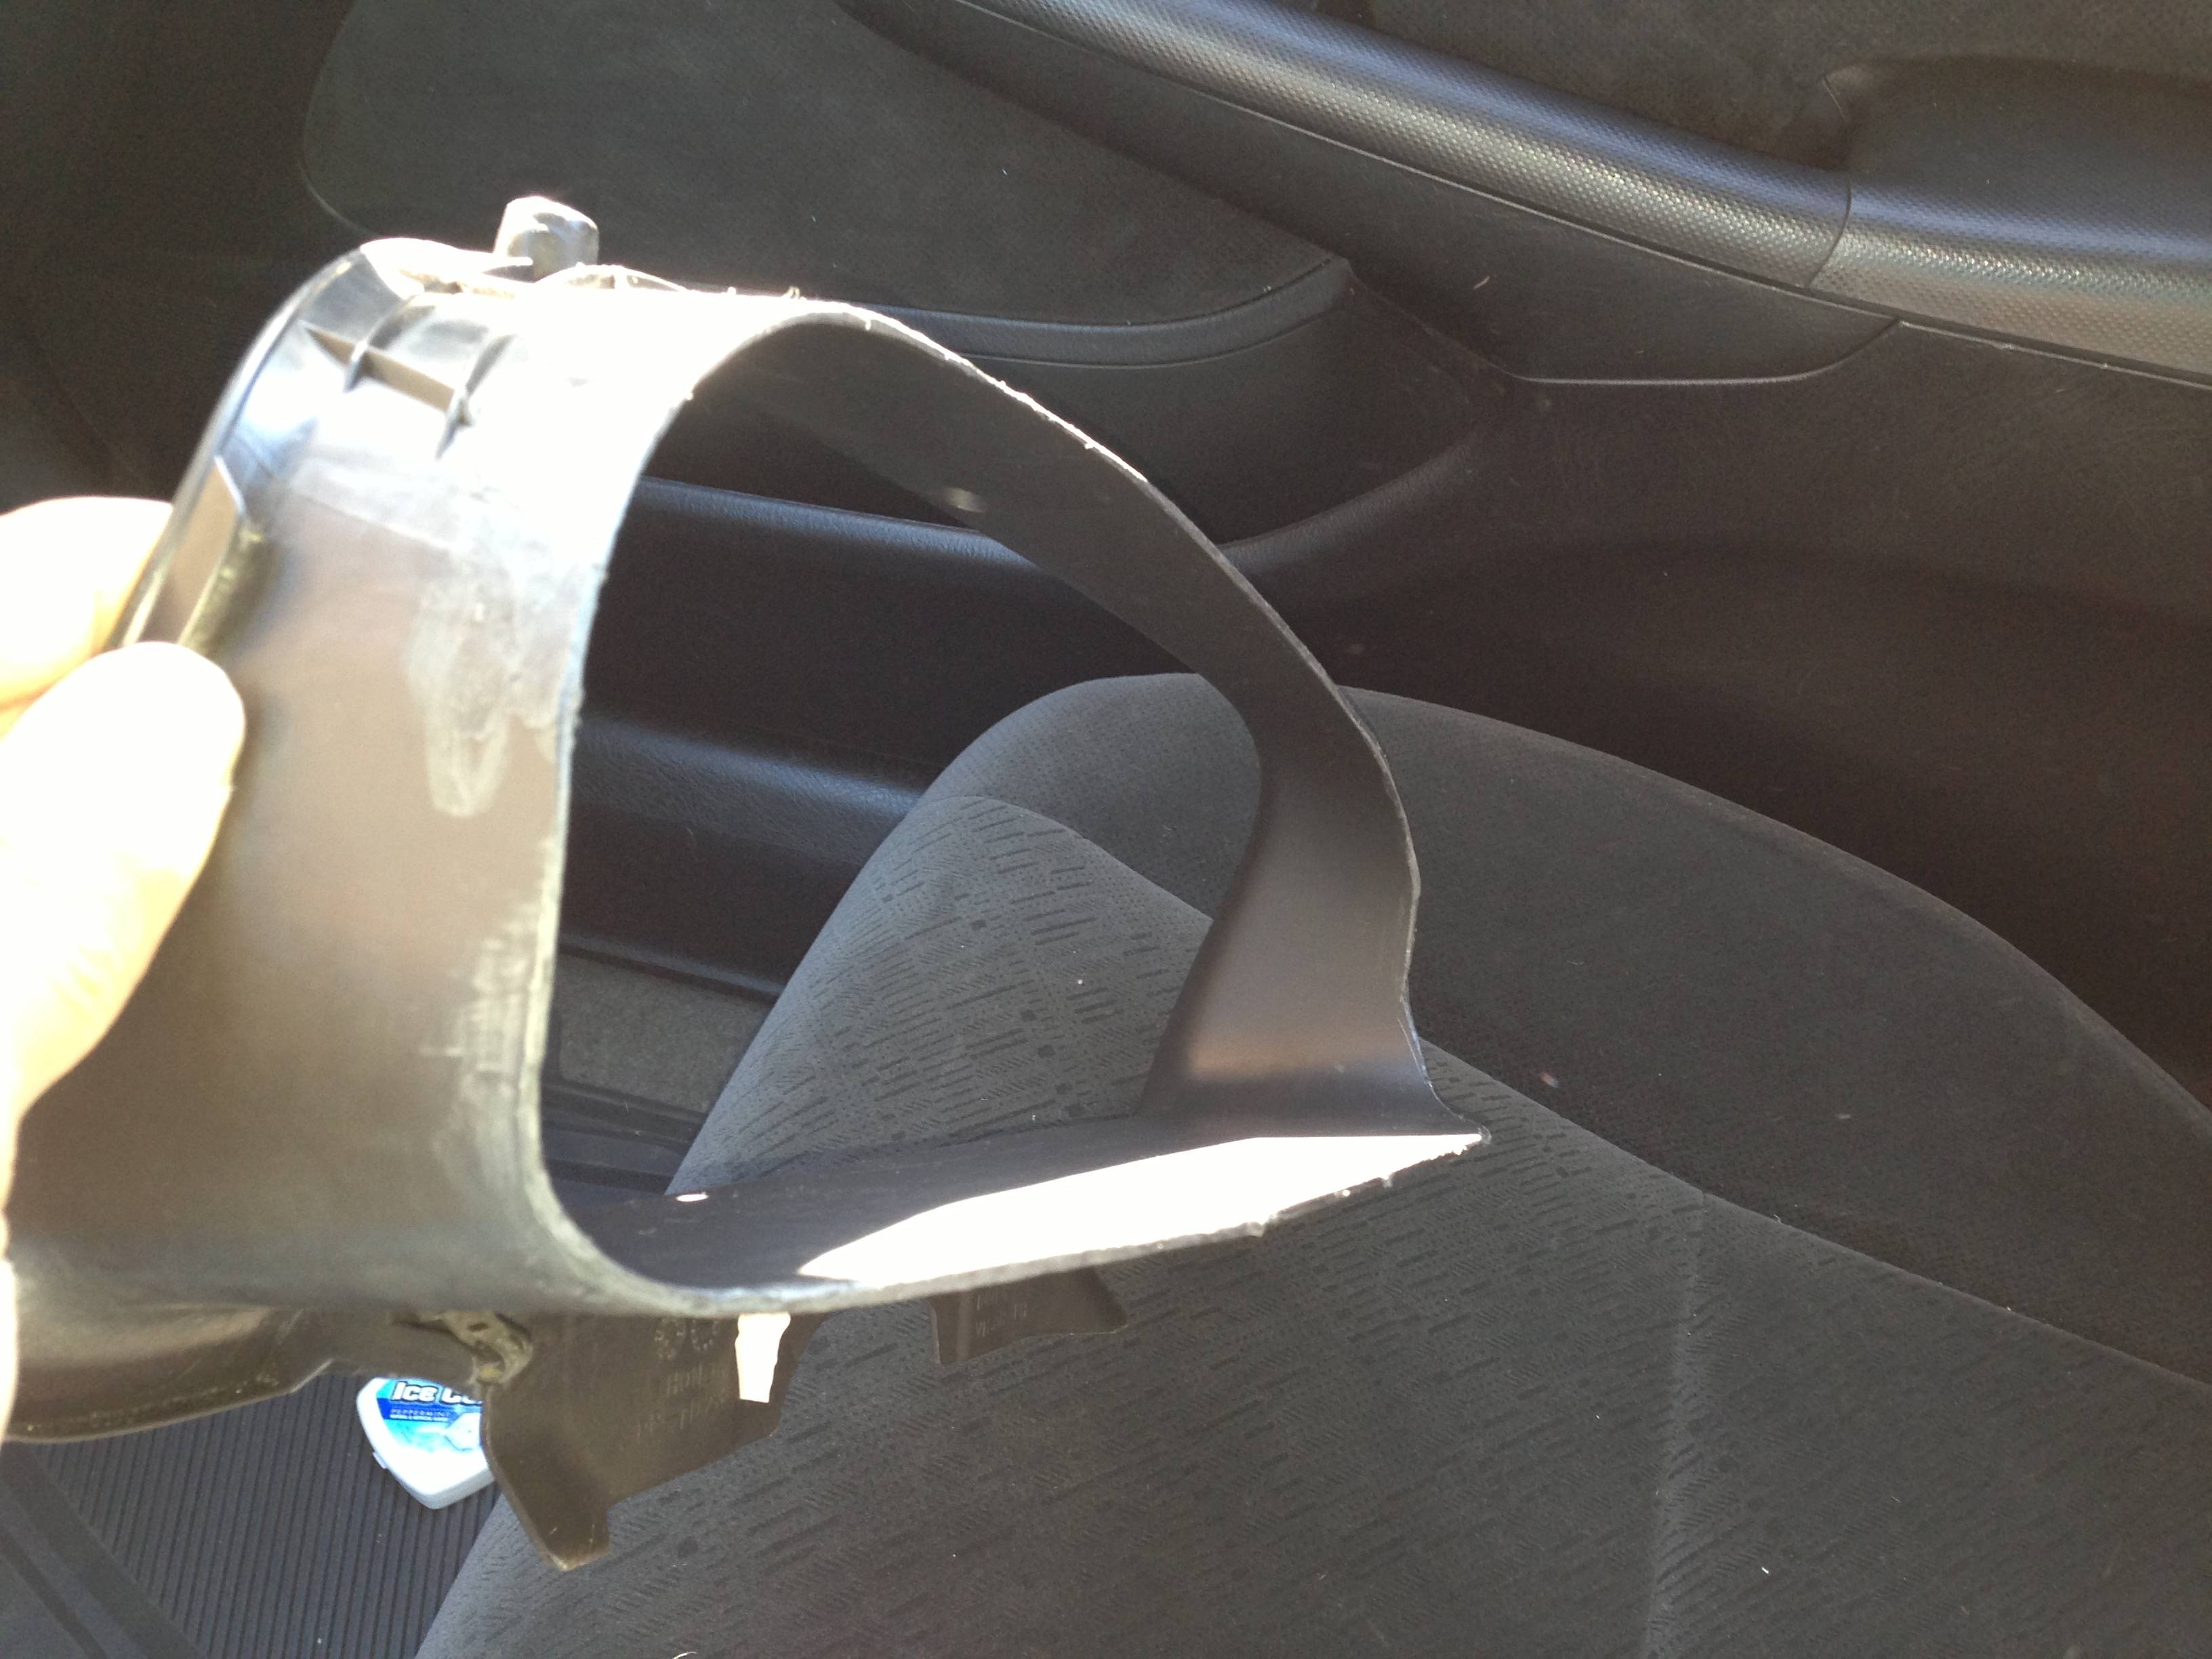
9.
Now for the cluster shroud, what I did was buy another one off eBay so I had my original. Got it for about 15$.
Then use your rotary tool to cut around the shroud to make sure it fits properly in place. This takes time, as you don't want the cut too much. Also you want to cut the bottom clips off the bottom of the shroud. The ones that are supposed to clip into the EM2 cluster.
I will upload a picture of mine soon.
10.
Once the shroud is finished, just put it in place and use the original screws and you should be set!
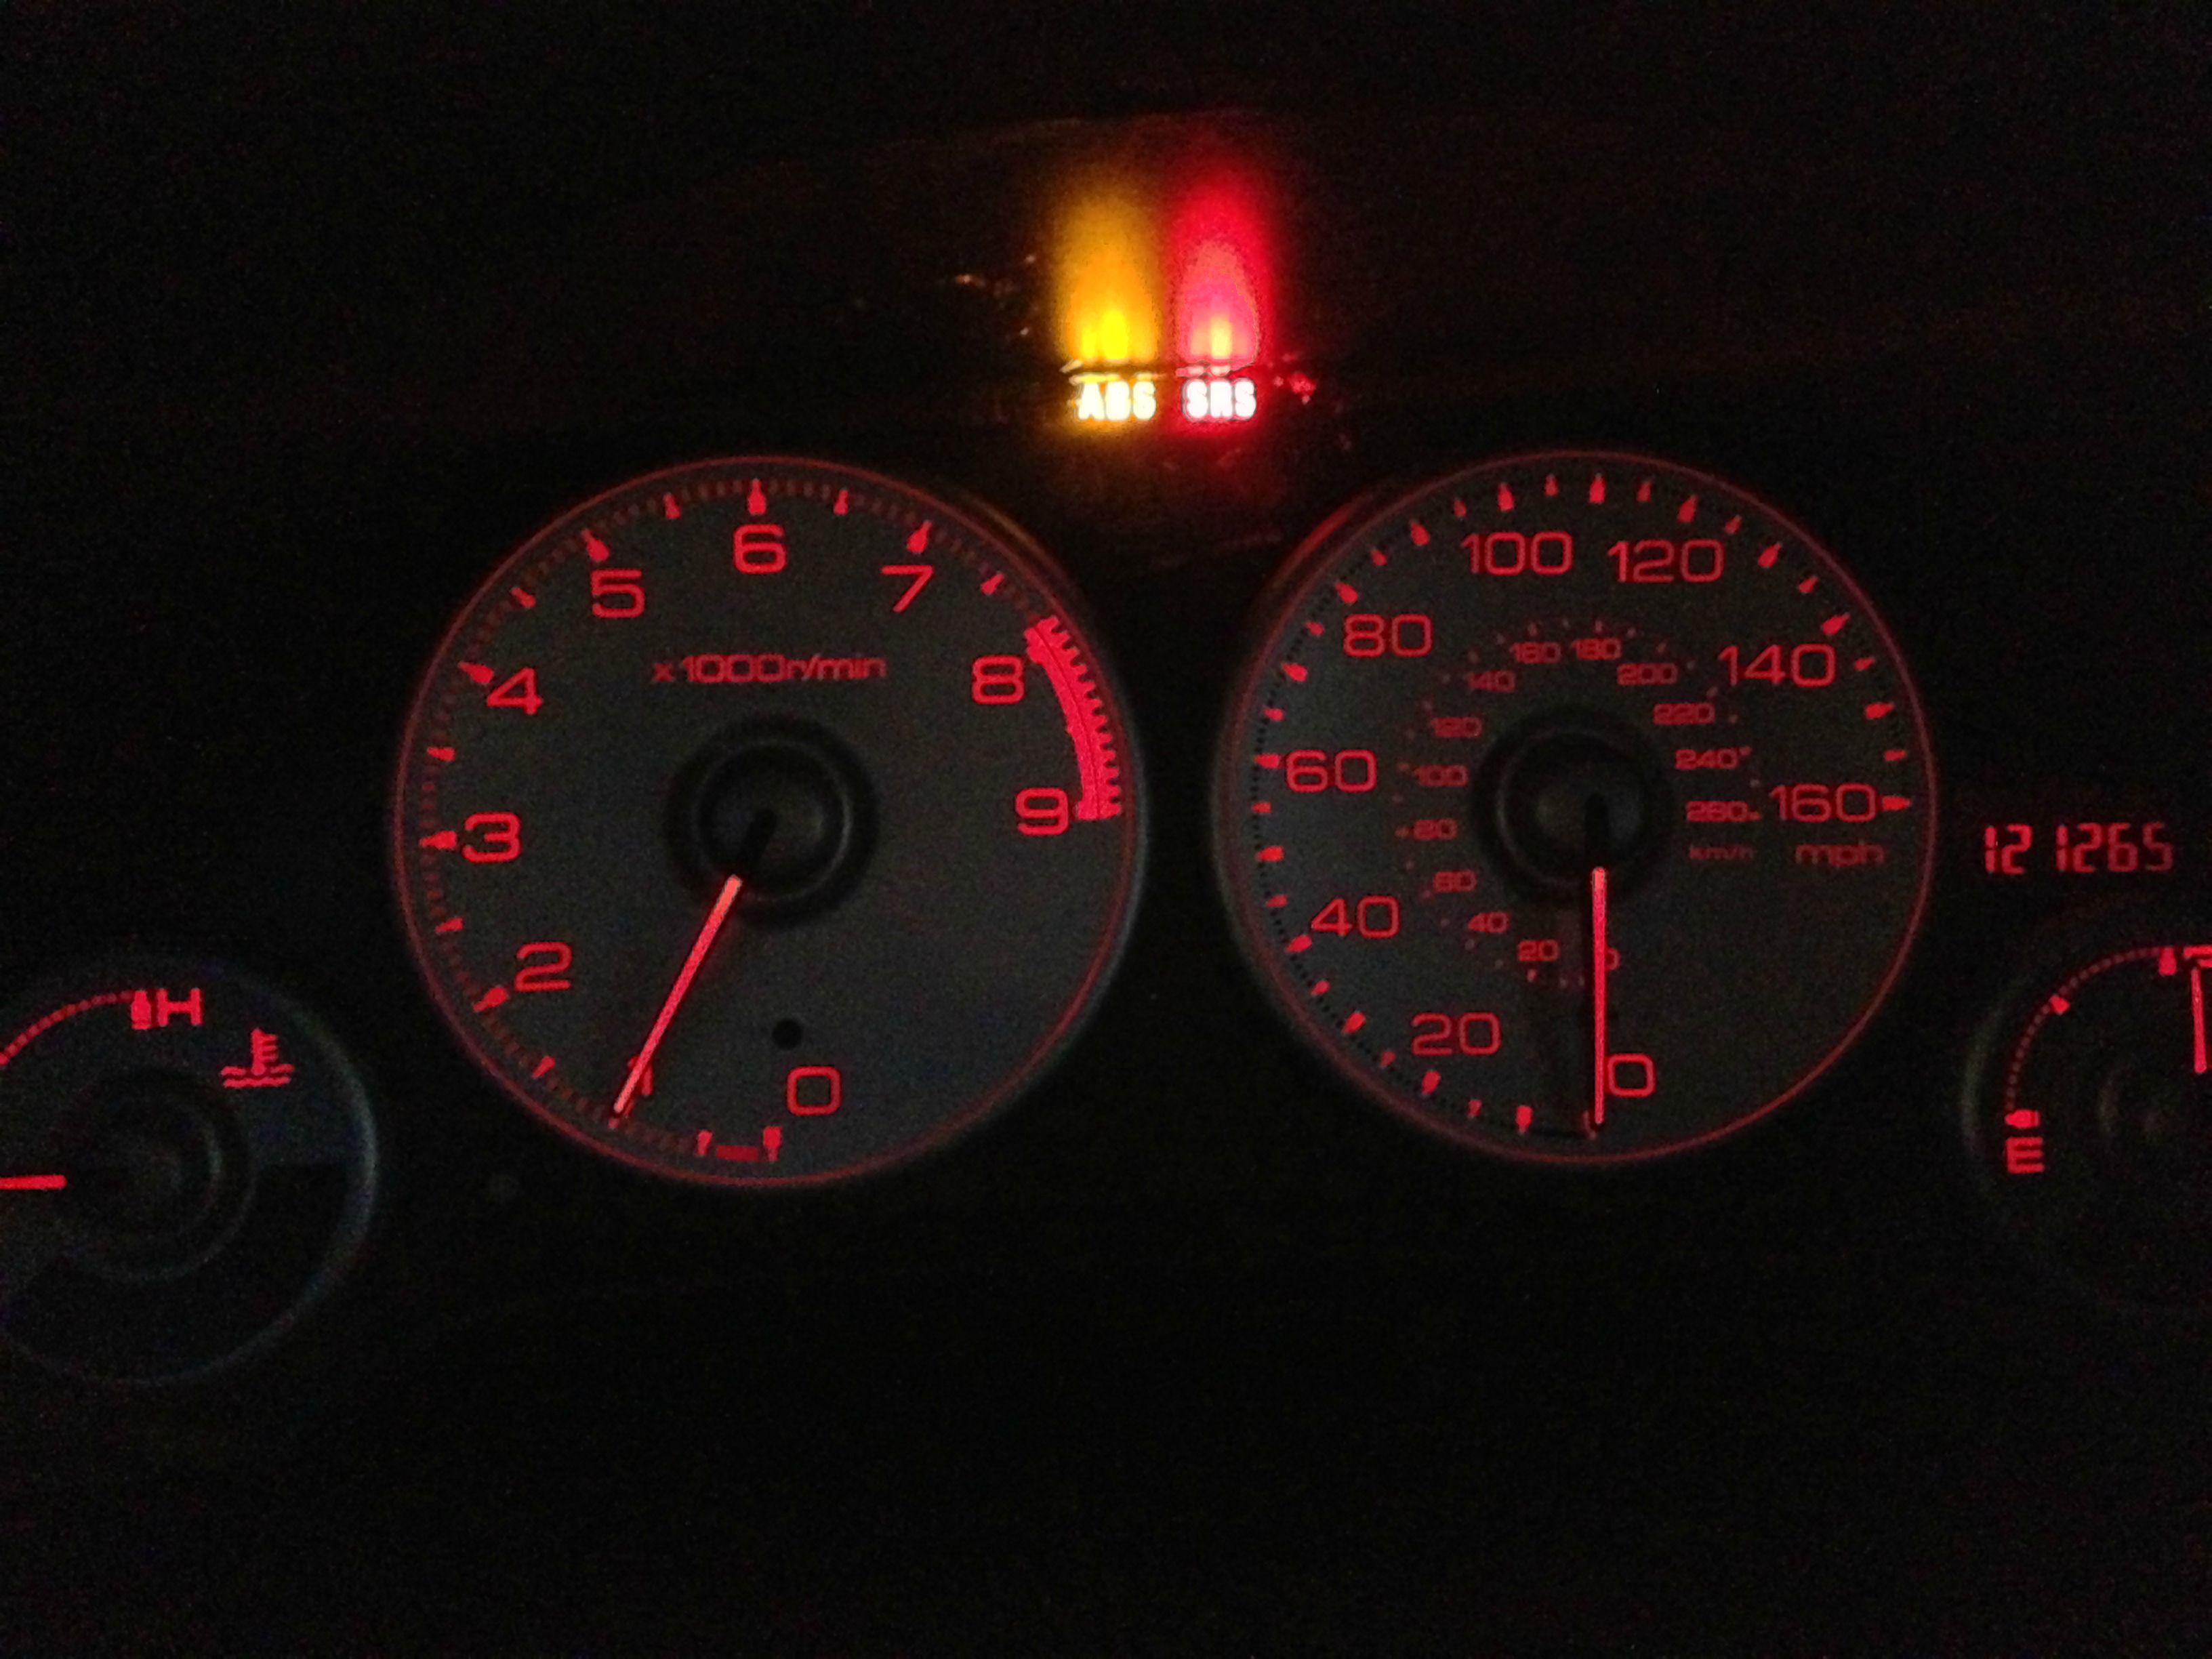
I am not sure how to get rid of the abs light right now, but when I find out I will post here.
I think that is everything. If you have any questions I will try to answer them.
Also I still have a mint condition DC5 dashboard, Door panels, Center Console, and EM2 Cluster with Shroud for sale, if anyone is interested just let me know.
EDIT:
TO GET RID OF THE ABS LIGHT PLACE A 270ohm RESISTOR LEADING TO THE PLUG FROM THE CAR.
The full interior conversion was what I had originally planned to do but seemed like to much work at the time so I just decided to do the cluster swap.
The Materials I used:
Soldering Iron
Wire cutters
Heat Shrink
Electrical Tape
Aluminum Sheeting
JB Weld
Rotary tool
Cluster shroud
Note: Disconnect your battery before doing anything.
1.
Begin by cutting the back brackets off the DC5 cluster.
Optional
2.
In order to have a more flush and stock feel I trimmed the back to the dimensions of the original cluster.
I believe the bottom is cut at a 45 degree angle and the sides at a 60 degree angle.
Also Optional
3.
In order to reduce vibration noises and have a more stock placement, I fabricated brackets that would allow the DC5 cluster to use the original mounting points in the dashboard.
4.
Now what you have to do is cut the plugs off the DC5 wiring harness, and cut the plugs off the EM2 wiring harness.
I do not have a picture of this unfortunately.
(Note: I originally thought I could just remove the pins from the DC5 plug and from the EM2 plug and just re-pin both of them without having to cut the wires.
The only problem with this is that the DC5 pins do not stay inside the EM2 plug.)
5.
Match up the wires by color.
As you will see some of the wires are not used in the DC5 Cluster. Such as washer fluid level and other things.
Optional
6.
Use JB Weld to glue the brackets to the cluster.
Make sure they are in the right place.
I don't have any magical method to calibrate the position but what I did was use glue from a glue gun to make sure they were in the right position before I used the JB Weld.
The glue gun peels off easily so you can try as many times as you wish.
7.
Once the brackets are in place and everything is soldered up, turn your car on and make sure everything is functioning properly.
8.
If everything is working wrap everything up with electrical tape, and then use duct tape to insulate everything.
9.
Now for the cluster shroud, what I did was buy another one off eBay so I had my original. Got it for about 15$.
Then use your rotary tool to cut around the shroud to make sure it fits properly in place. This takes time, as you don't want the cut too much. Also you want to cut the bottom clips off the bottom of the shroud. The ones that are supposed to clip into the EM2 cluster.
I will upload a picture of mine soon.
10.
Once the shroud is finished, just put it in place and use the original screws and you should be set!
I am not sure how to get rid of the abs light right now, but when I find out I will post here.
I think that is everything. If you have any questions I will try to answer them.
Also I still have a mint condition DC5 dashboard, Door panels, Center Console, and EM2 Cluster with Shroud for sale, if anyone is interested just let me know.
EDIT:
TO GET RID OF THE ABS LIGHT PLACE A 270ohm RESISTOR LEADING TO THE PLUG FROM THE CAR.
Last edited by TenToesDown; Jun 26, 2013 at 12:10 AM.
Thread Starter
Registered!!
Joined: Jun 2013
Posts: 17
Likes: 1
Rep Power: 0 Re: DIY: DC5 Cluster in EM2
I have a little bit of carbon fibre left over from my school project, though so I might make a small cover for it.
If I do I will update this guide.
Thank you for the comment!


Registered!!
Joined: May 2020
Posts: 1
Likes: 0
Rep Power: 0 
Re: DIY: DC5 Cluster in EM2
Hola buenas , soy de chile , en estos momentos me encuentro cambiando el interior de m� Civic M2 Al igual que tu , pero yo cambi� el tablero completo ya y me falta conectar el Sin�ptico o tablero del veloc�metro d�nde van las RPM para ser m�s claro , ahora que veo esto me ayuda bastante , pero quer�a saber si tienes los diagramas del panel del aire acondicionado para hacer la misma conversi�n. De ante mano muchas gracias. Y excelente calidad de trabajo.
Super Moderator
Joined: Jun 2012
Posts: 5,073
Likes: 2,096
From: Ohio
Rep Power: 225 
Re: DIY: DC5 Cluster in EM2
Service manual (with circuit diagrams) is available at the link below.
https://www.civicforums.com/forums/1...pdated-10.html
https://www.civicforums.com/forums/1...pdated-10.html

Thread
Thread Starter
Honda Civic Forum
Replies
Last Post
fatih717171
Archive - Wanted Parts (WTB's)
2
Jul 25, 2016 06:22 PM
hondacivic0253
7th Generation Civic 2001 - 2005
7
Sep 29, 2015 08:06 AM
260000milesgoal
I.C.E. (Audio) & Electrical Upgrades
2
Sep 25, 2015 07:41 PM
rayman009
I.C.E. (Audio) & Electrical Upgrades
3
Sep 12, 2015 08:30 PM
Bricoleur
I.C.E. (Audio) & Electrical Upgrades
4
Sep 9, 2015 12:23 PM

