
DIY: REAR EP3 Seats in EM2

Thread Starter
Joined: Apr 2006
Posts: 1,266
Likes: 0
From: Phoenix, AZ
Rep Power: 257 
DIY: REAR EP3 Seats in EM2
I had the unique opportunity to retrofit something that I have yet to see on any EM2 to date....REAR EP3 seats. The process is pretty similar to doing RSX rears but is a little more difficult and definitely more time consuming.
Estimated Time for Completion: 4-7 hours
Difficulty: 7 (10 being hardest)
Tools:
Scissors
Steak Kife(should be serrated)
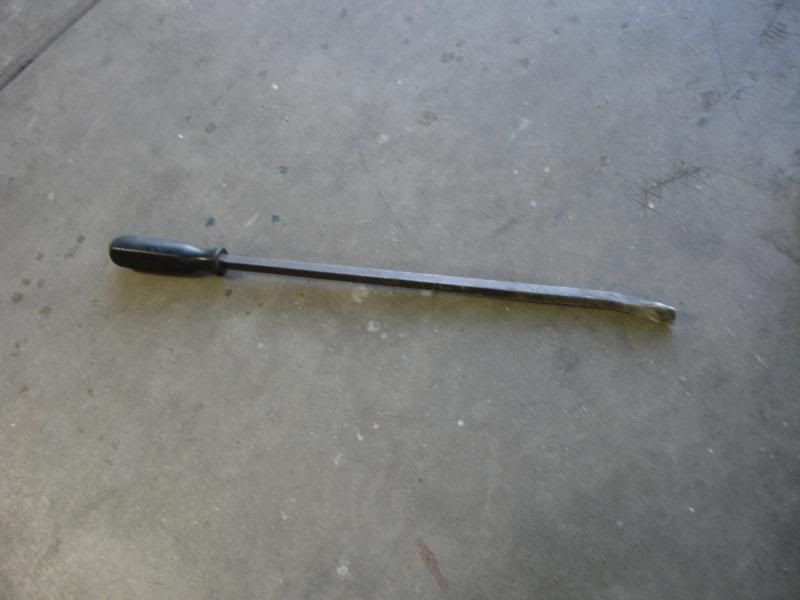
Pry Bar
Needle/Thread(yes you have to do some sewing)
Zip Ties
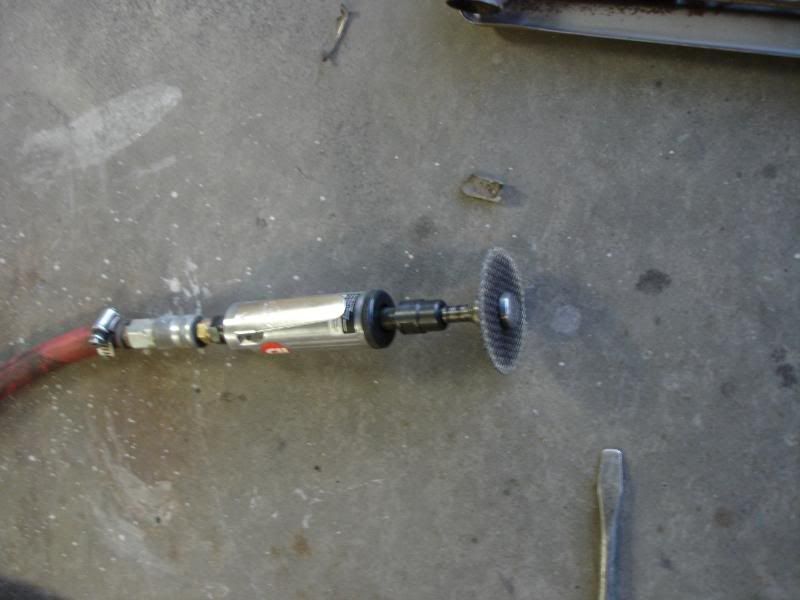
Electric or Pneumatic Cutting Wheel (I went through three 3" wheels...I don't think a dremel will work for these...you will be cutting all day long if you do)
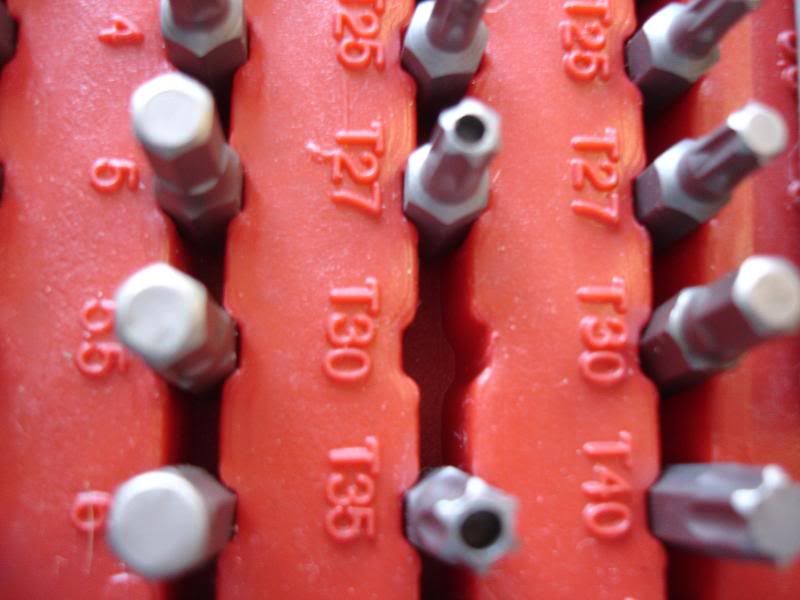
T30 Star Bit
a couple sockets (a 12mm and a 10mm if I remember correctly)
Socket Wrench
A poker(not sure what to call it...will post pics when it comes into play)
Drill/Drill Bits
Procedure:
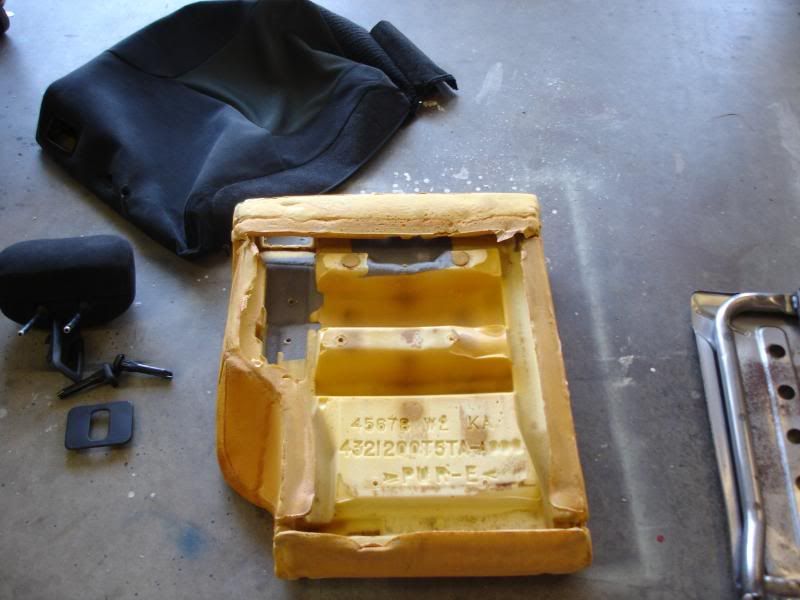
This is the passenger side of the EP3 seats. I forgot to take a pic of the driver side one before I cut it. However what you cut off on both sides is identical.
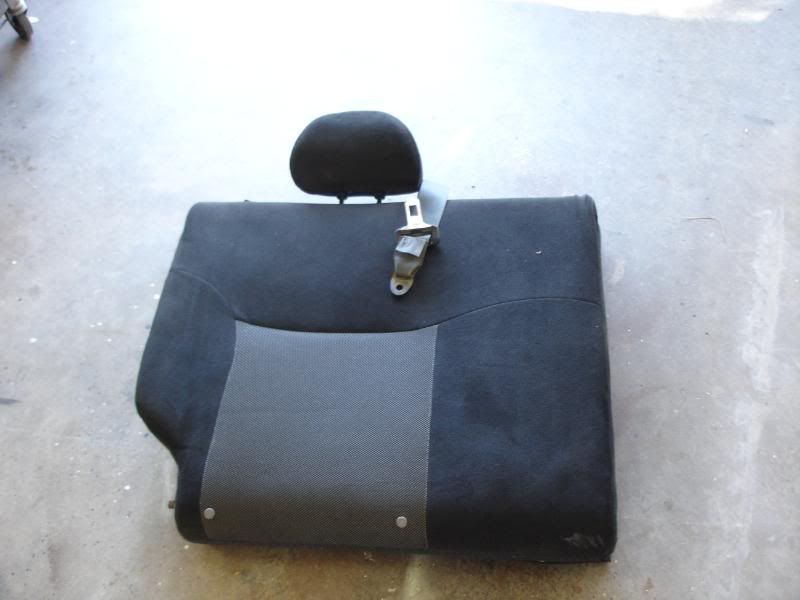
The part that you are cutting off is that section that sticks out from the rest of the seat. In the pic it is on the left side.
Seat Dissassembly:
1. Remove Headrest
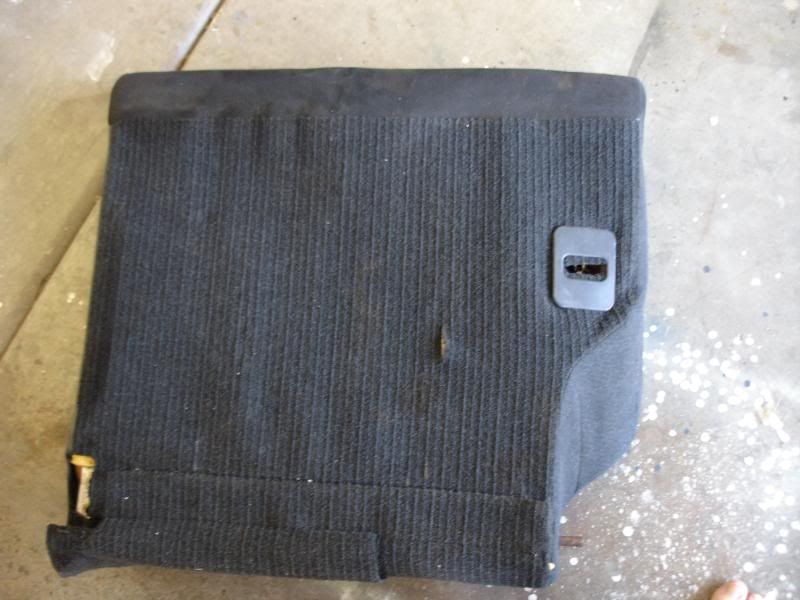
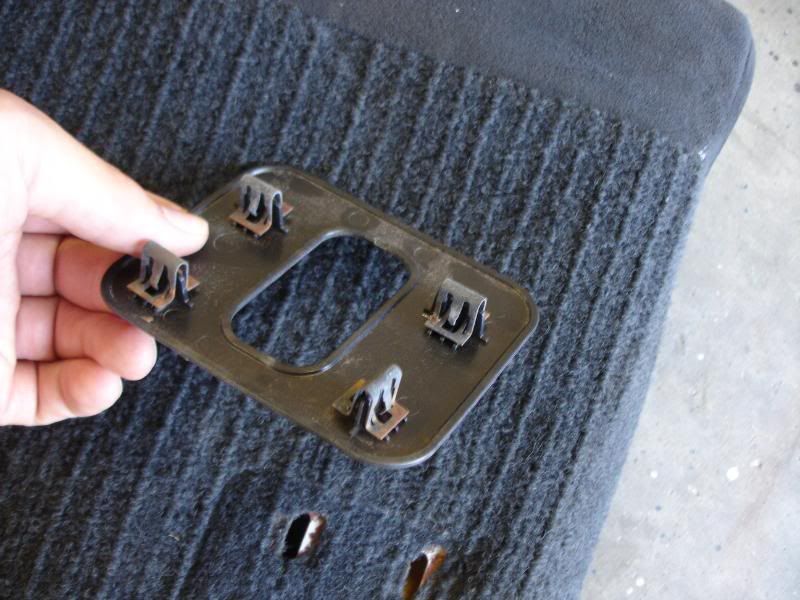
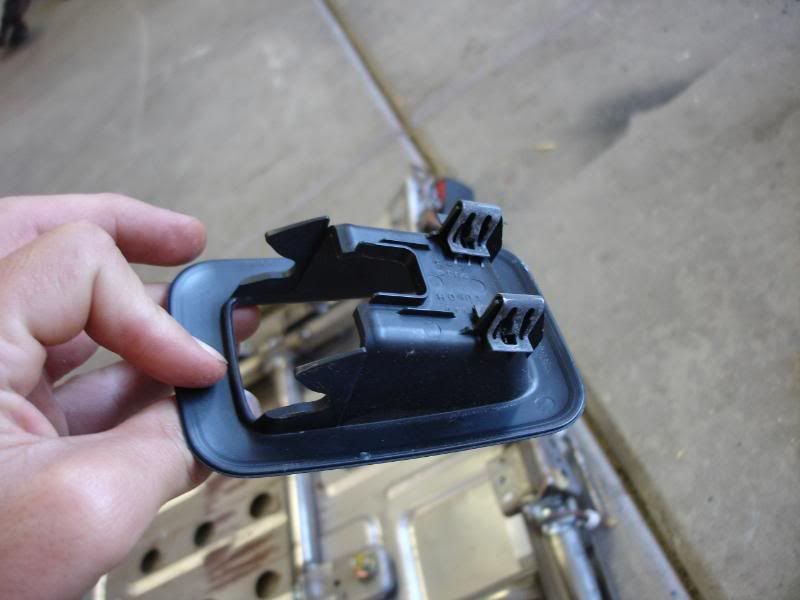
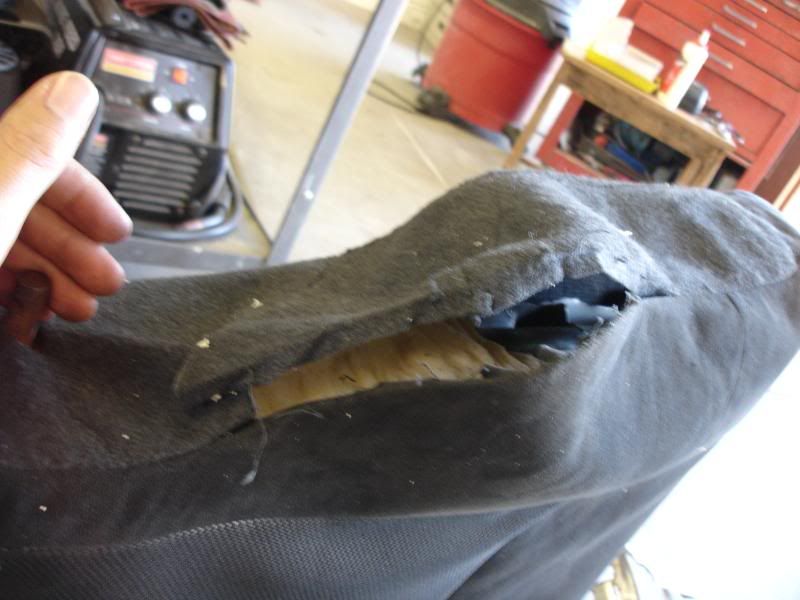
2. Remove the Plastic Cover on back...it just snaps right out. Dont worry about breaking it...you dont re use it (see pics below)
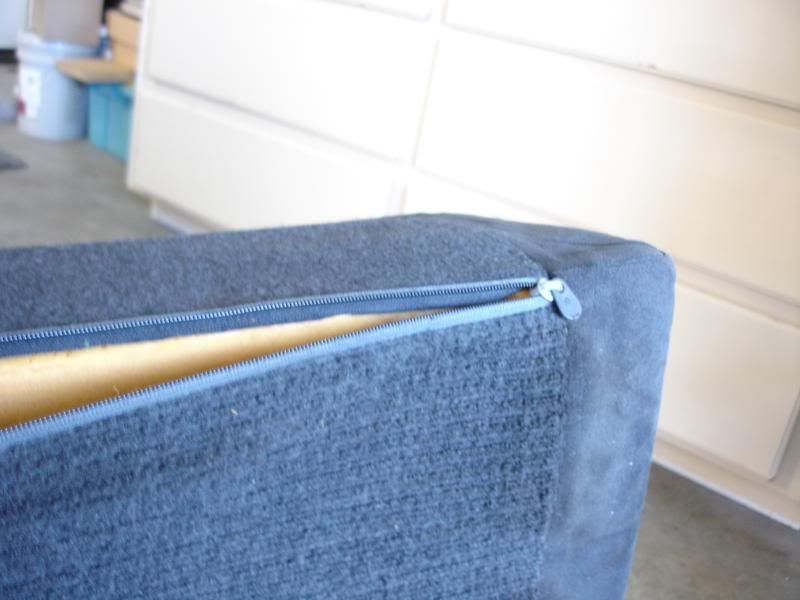
3. Unzip seat cover
4. Unscrew Seatbelt Reinforcement Plate using the T30 Star bit
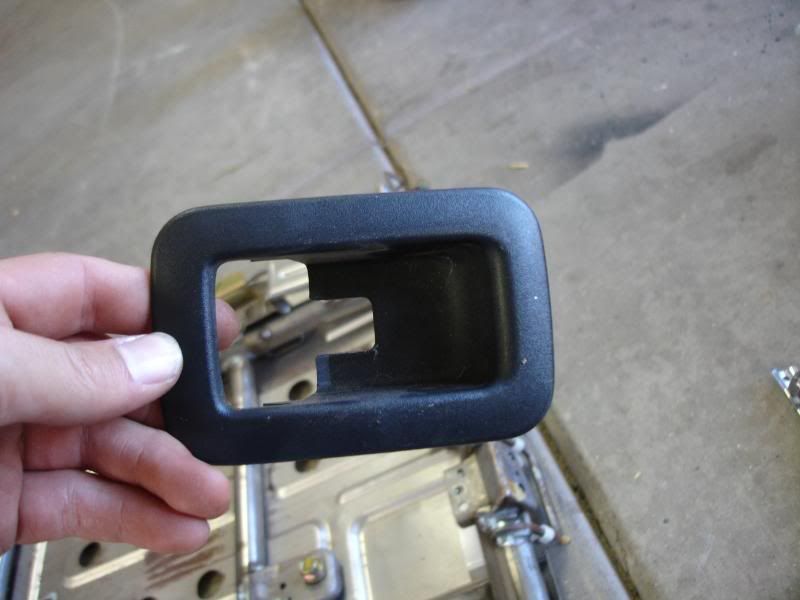
5. Pull off this cover...just pull it off...it will not be reused
6. Unclip the bottom backside of the cover
7. Pull off the seat cover. If you notice the head rest guides are still attached. That is because they unclip from the inside. You need to pull the cover apart from the bottom and then unclip them when you can access them. (see pic)
8. At this point you should have a metal frame with a big piece of foam around it. Pull these apart. They might be lightly glued together. Dont worry about tearing the foam but try to keep it intact.
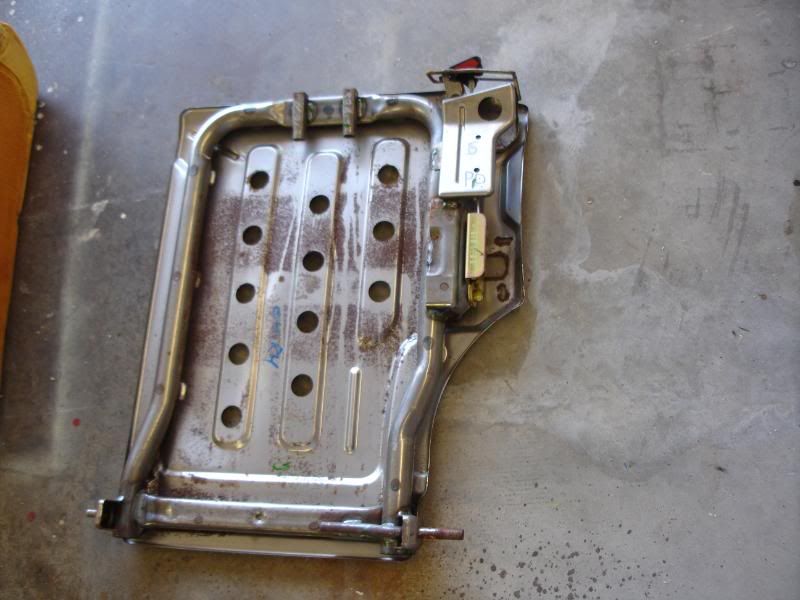
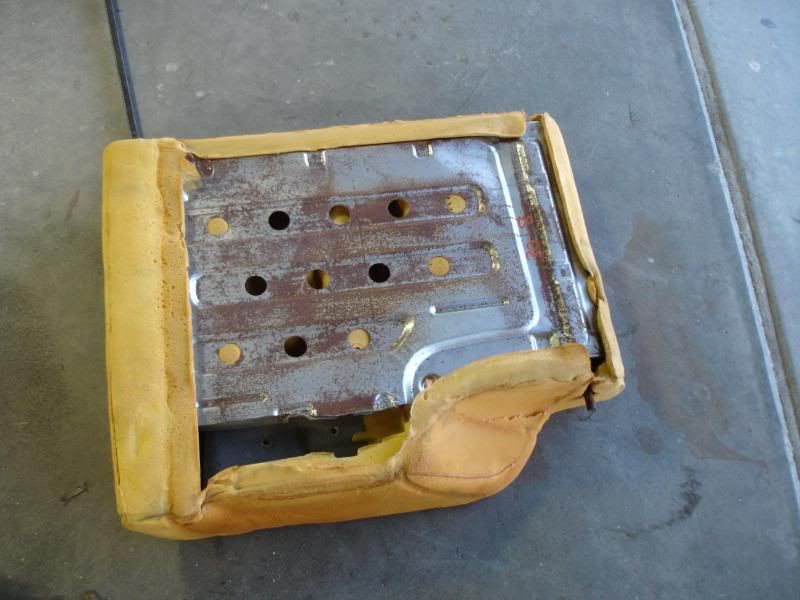
9. Ok grab the frame
10. Remove the seat belt and the White plastic thing(white plastic thing not shown)
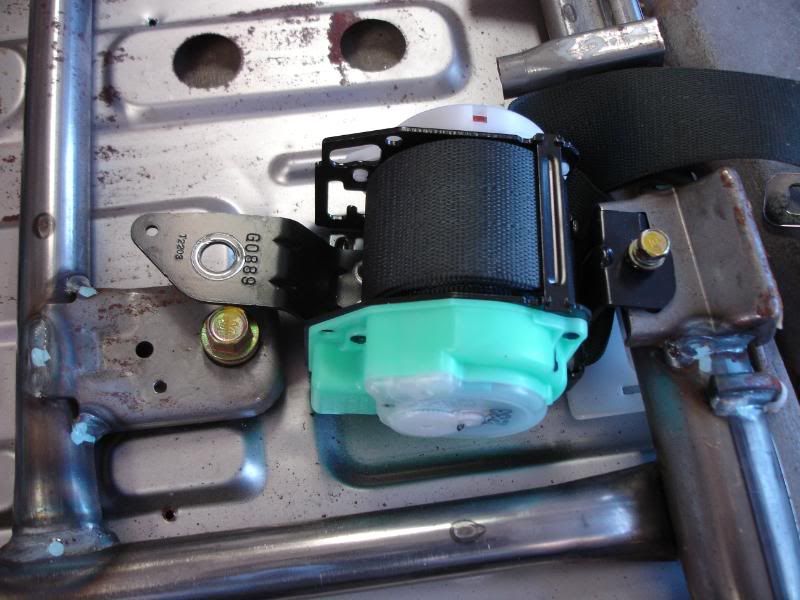
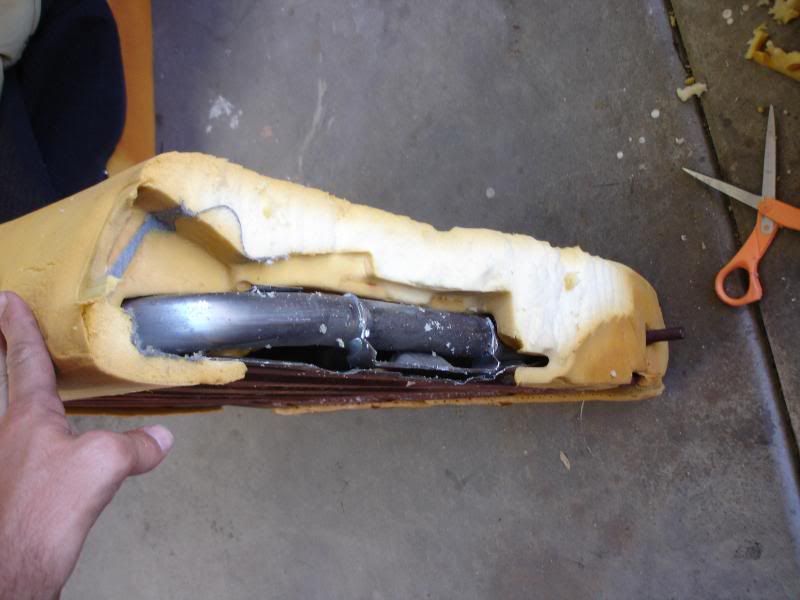
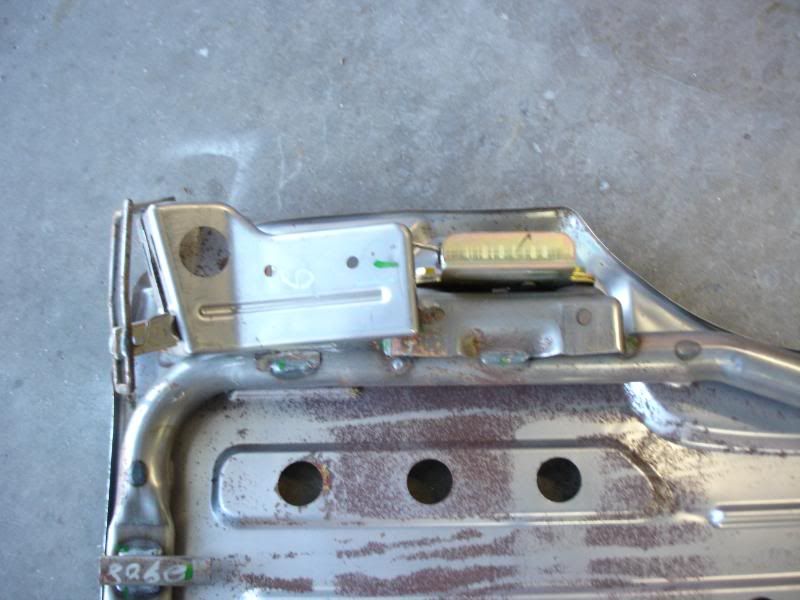
11. Remember that section that was sticking out? Well that section is actually the latching mechanism as you can see on the left side of the frame in the pic above. Cut that bitch off! It is actually a pain in the ***. You need to cut through all the welds and pry the latching mechanism off to break the welds. You also need to cut the sheet metal on the back side. Like I said above. I went through three 3" cutting wheels on my pneumatic cutter. These welds are pretty strong and thick. I do not recommend using a dremel unless you feel like cutting for a long time. Once you start getting about 3/4 way throughthe welds you canuse a pry bar to break them the rest of the way off.


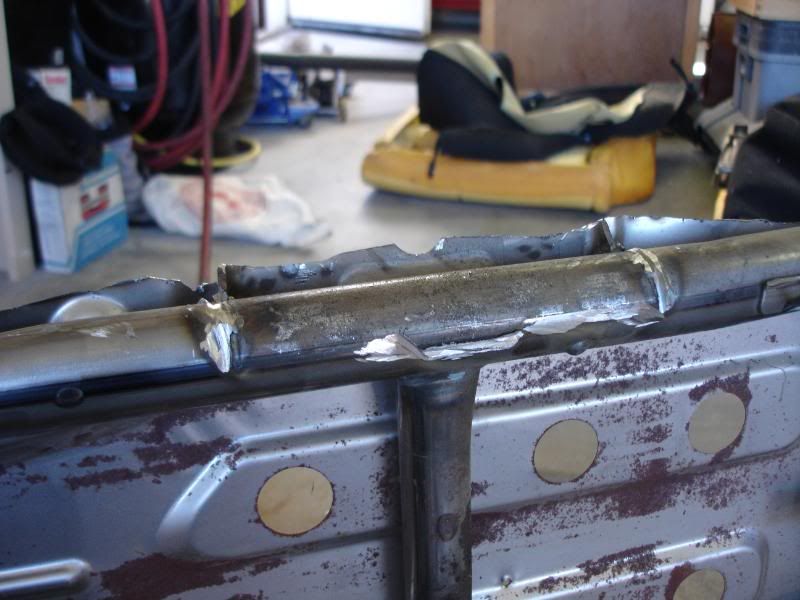
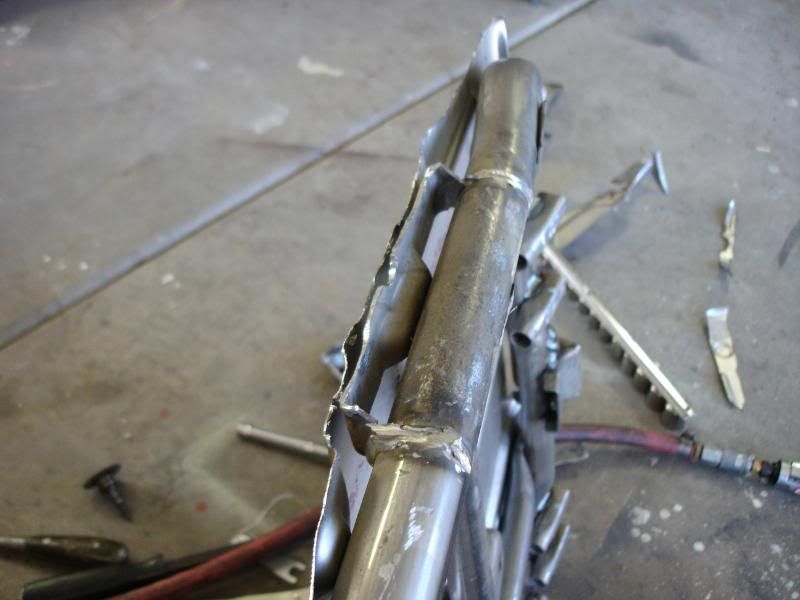

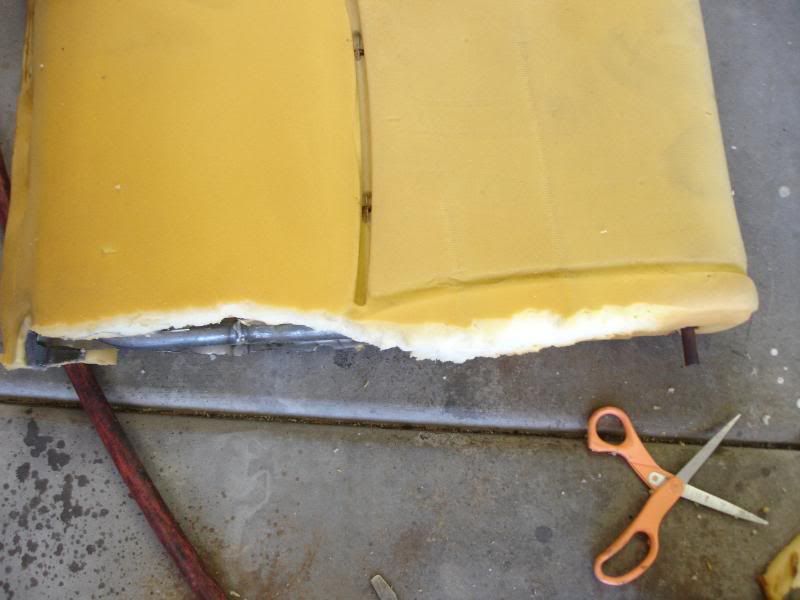
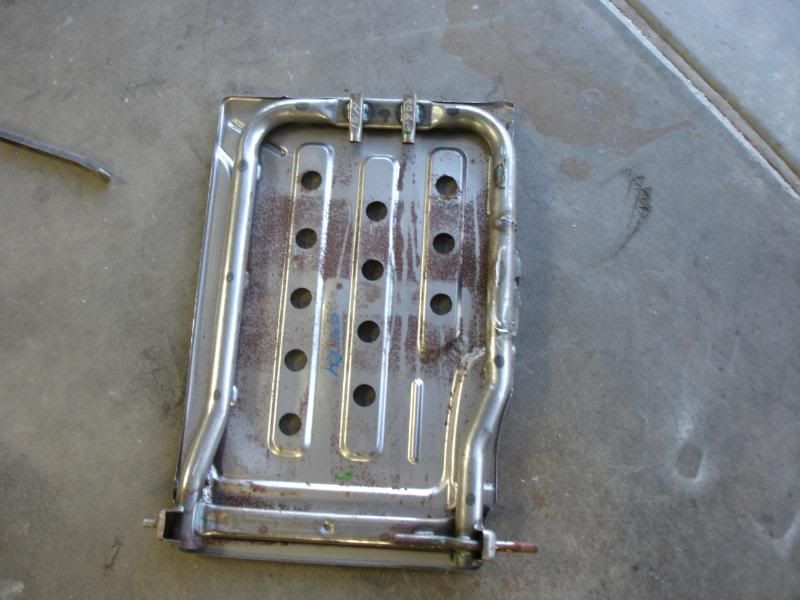
12. Your frame should look like the last pic shown above. If you put the frame back into the foam it should look like the pic shown below.
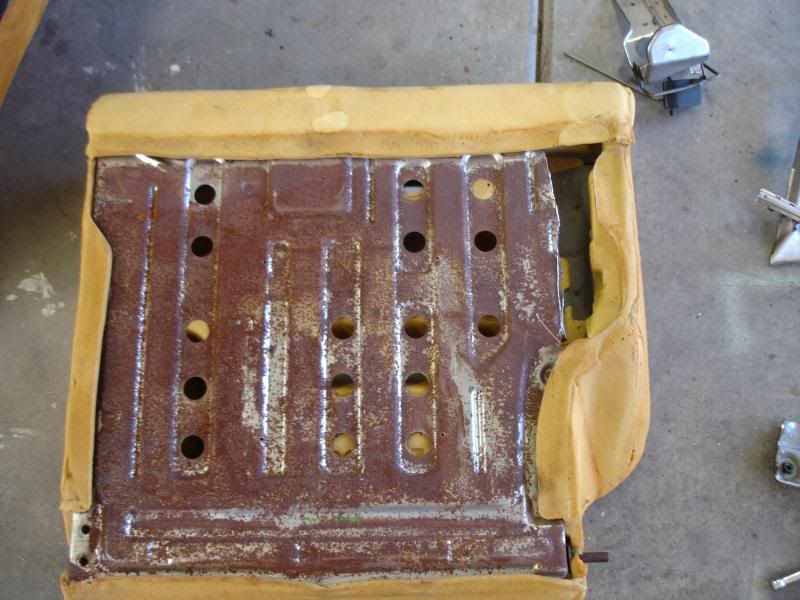
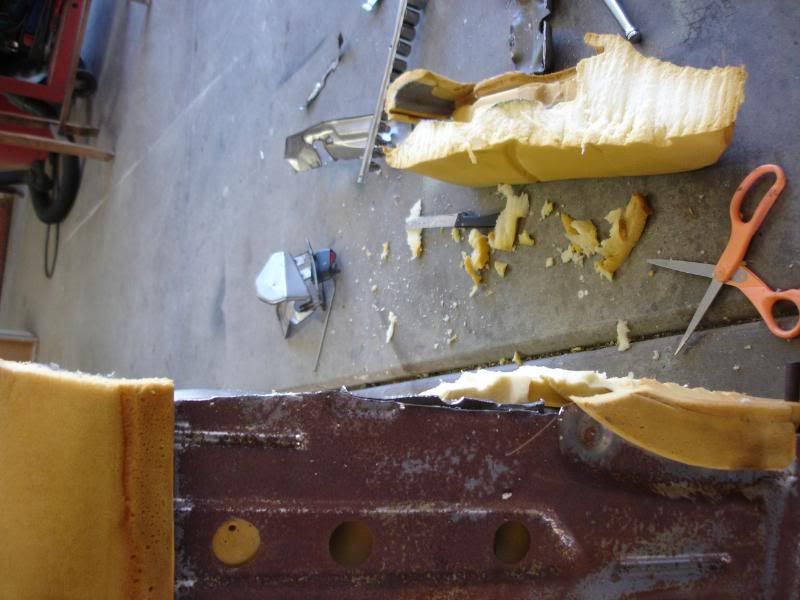
13. Well Clearly this still won't work. So now you need to cut that foam off the side. I used a steak knife to cut the big section off and scissors for the more precise cuts. I was also told that a turkey carver works well for cutting foam. If you notice in the pics that I didnt cut all the way down to the bottom by the peg...disregard this. Cut all the way down. I had to pull the seat back apart and cut some more off. You want the foam to be as even with the frame as possible. the more bumps and edges it has the more bumps you will see when you put the cover back on.
14. Time for reassembly! Put the cover back on the opposite in which how it came off...minus the seat belt and those 2 plastic covers.
15. Now you should notice that you have tons of fabric left over on the side that you cut off. Don't just start cutting off fabric. You need to pay attention to detail for this part. The objective is to pull the cover as tight as possible with out creating wrinkles or folds. This is also the part where you get to bust out your mad sewing skills!
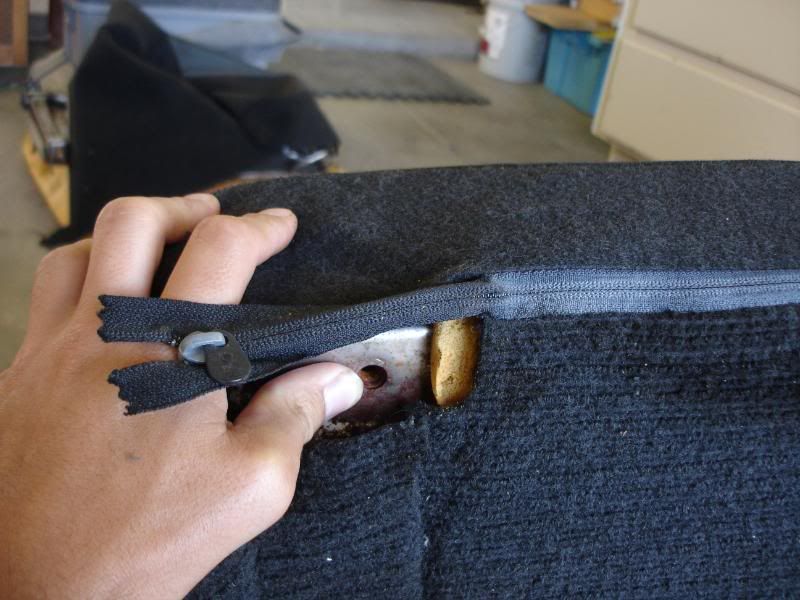
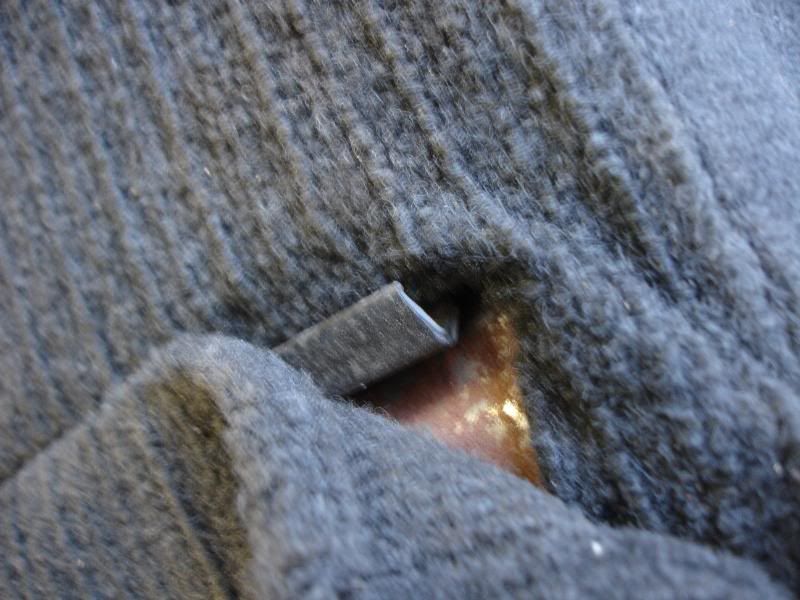
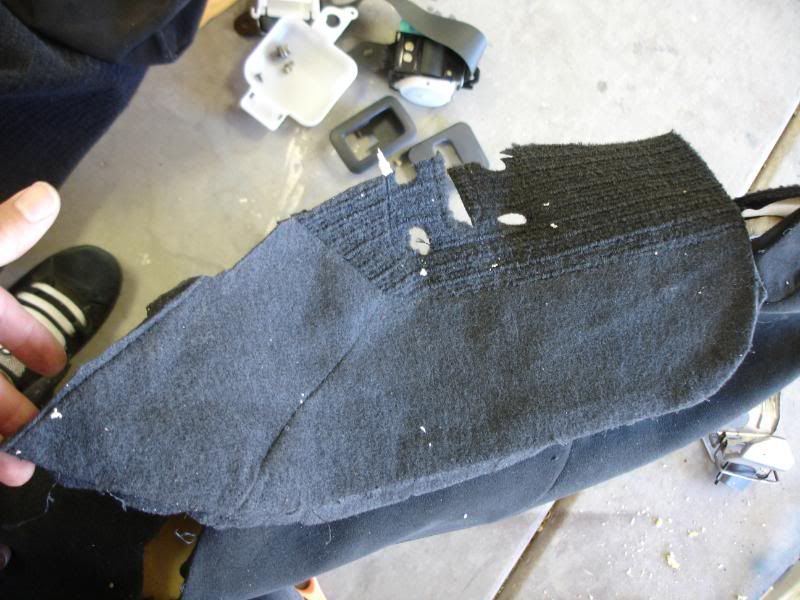
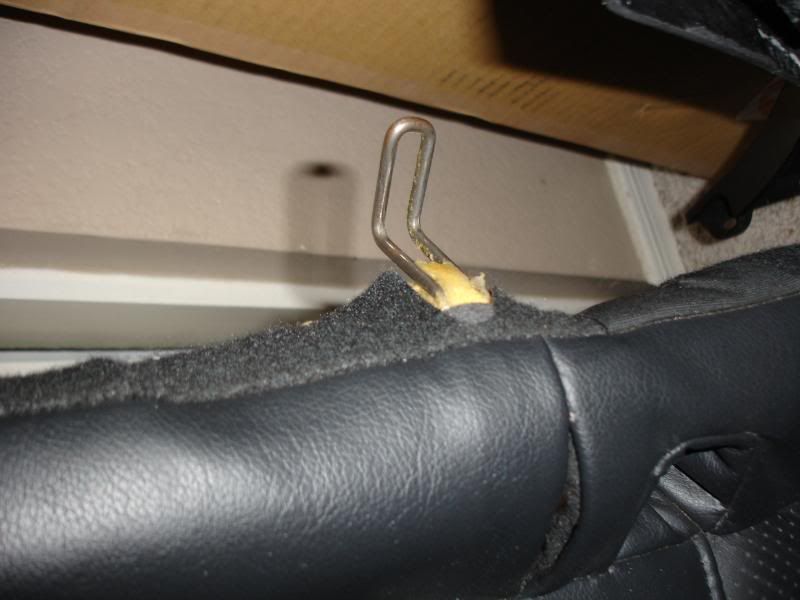
16. Pull apart the suede from that rough scratchy material along the seam as shown below. Be careful to not pull it apart too close to the peg... shown in the second pic below. The pic is actually after it is put back together but it gives you an idea. If i recall correctly i think it was actually a seam as well.
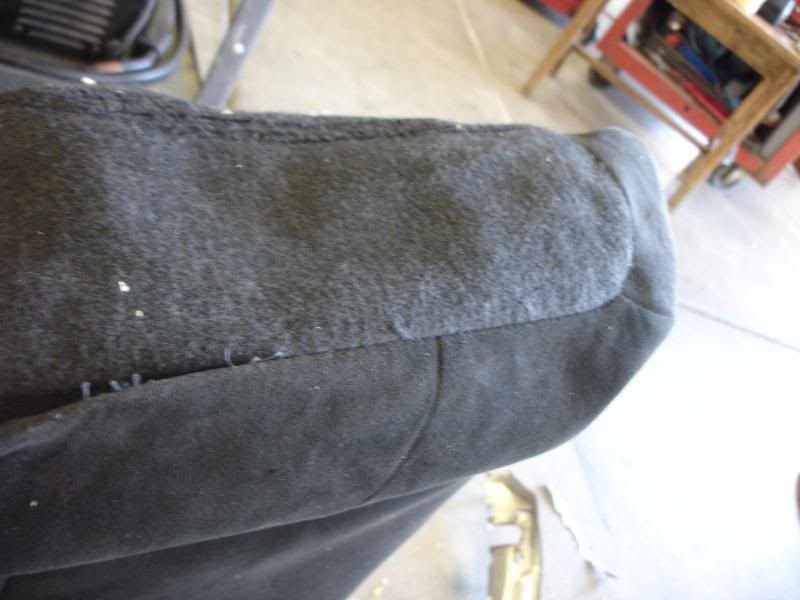
17. Cut that big flap of scratchy material off You want the backing material to be even with the frame. Do not cut into the suede just yet.
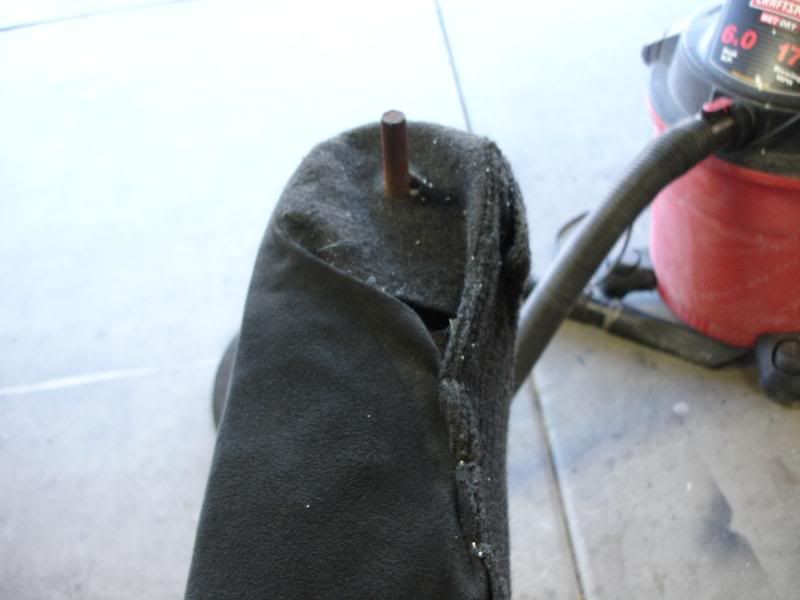
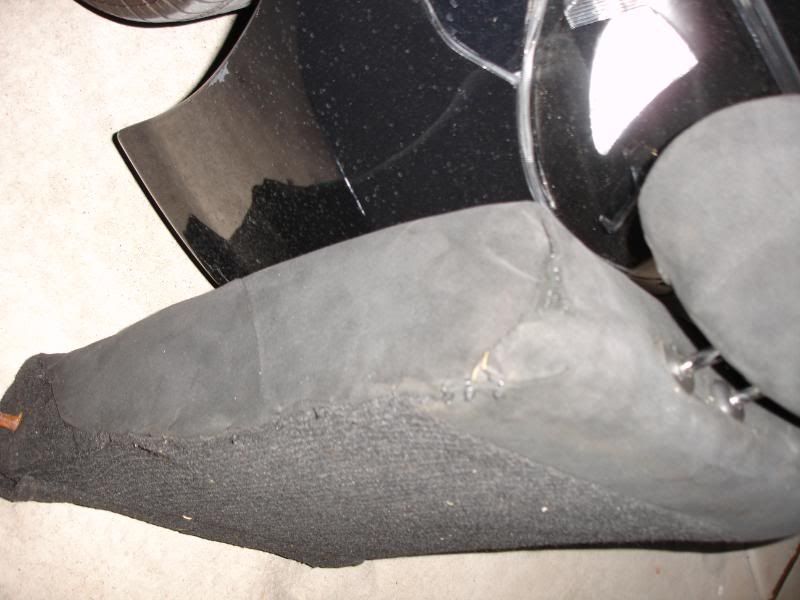
18. If you notice at the top, this is where that plastic cover was before. Now there is a hole with a plastic reinforcer. Cut the threads holding it on and pull the plastic piece off. At this point you are going to have to use your judgment as to where to cut the suede. I did not cut very much off and only cut some off at the very top of the seat by the hole.
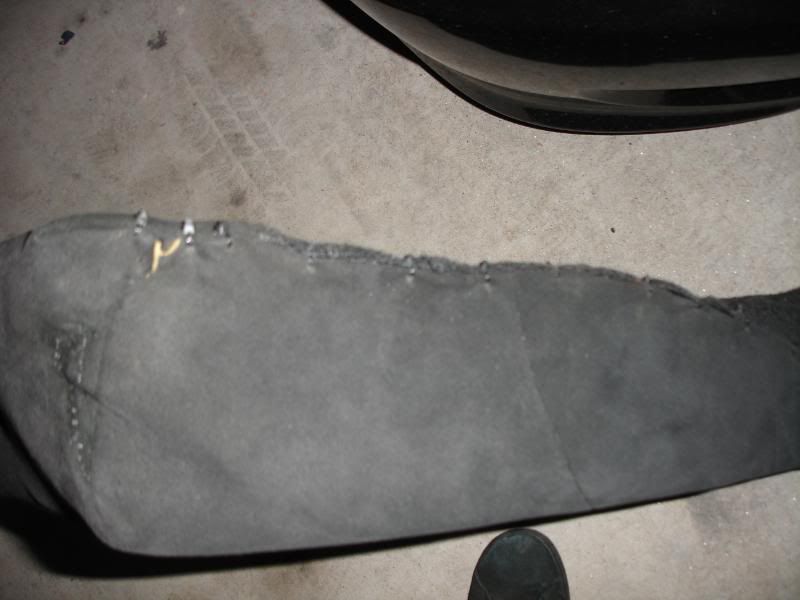
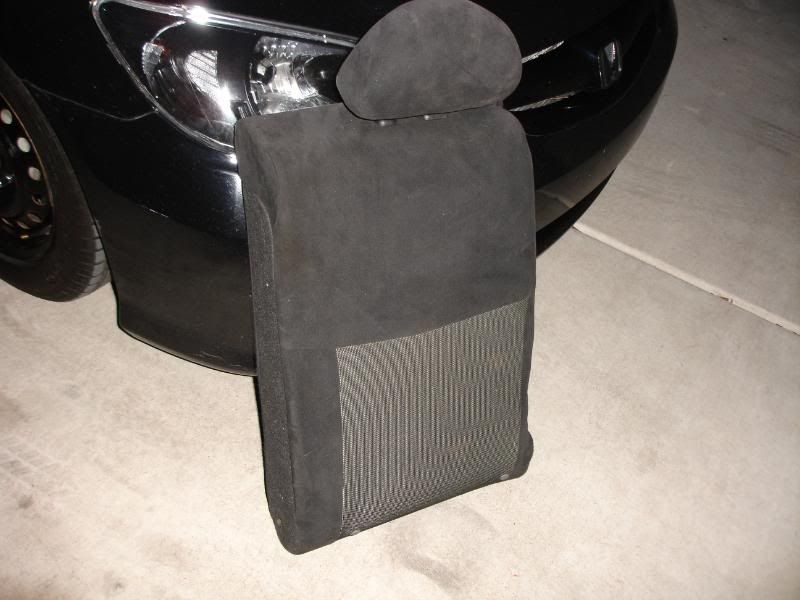
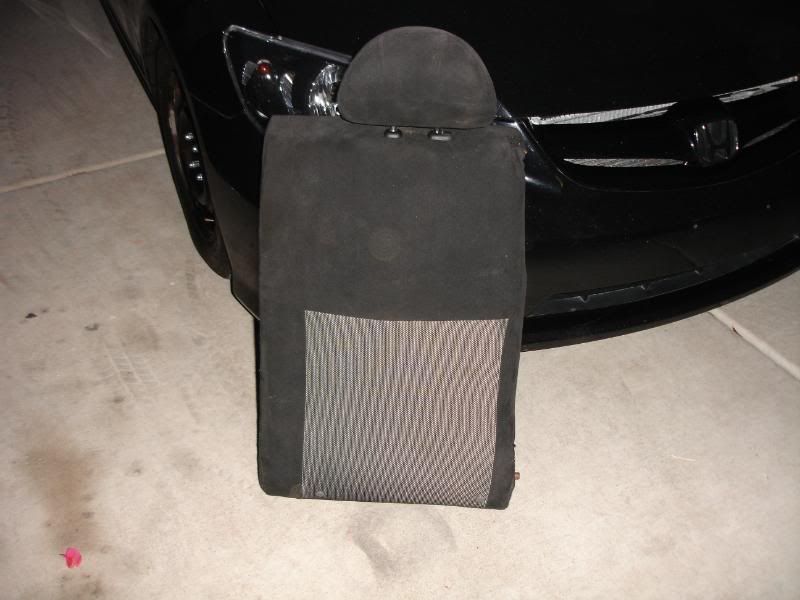
19. It is very difficult to explain how to cut the top part. I can show you the finished product to give you an idea. To hide that hole you have to sew it together. However you decide to fold it and sew you need to do it so that it does not create any wrinkles or folds on the front side of the seat. What ever is on the side it doesnt really matter since it is not visible...use your own best judgement though. Also if you look in the pics below you can see that i used zip ties to attach the suede to the scratchy backing. Again pull it tight but do not create wrinkles.

Here are some views of an entire finished side...they are of the driver side seat but the process is the same for both sides.
Estimated Time for Completion: 4-7 hours
Difficulty: 7 (10 being hardest)
Tools:
Scissors
Steak Kife(should be serrated)
Pry Bar
Needle/Thread(yes you have to do some sewing)
Zip Ties
Electric or Pneumatic Cutting Wheel (I went through three 3" wheels...I don't think a dremel will work for these...you will be cutting all day long if you do)
T30 Star Bit
a couple sockets (a 12mm and a 10mm if I remember correctly)
Socket Wrench
A poker(not sure what to call it...will post pics when it comes into play)
Drill/Drill Bits
Procedure:
This is the passenger side of the EP3 seats. I forgot to take a pic of the driver side one before I cut it. However what you cut off on both sides is identical.
The part that you are cutting off is that section that sticks out from the rest of the seat. In the pic it is on the left side.
Seat Dissassembly:
1. Remove Headrest
2. Remove the Plastic Cover on back...it just snaps right out. Dont worry about breaking it...you dont re use it (see pics below)
3. Unzip seat cover
4. Unscrew Seatbelt Reinforcement Plate using the T30 Star bit
5. Pull off this cover...just pull it off...it will not be reused
6. Unclip the bottom backside of the cover
7. Pull off the seat cover. If you notice the head rest guides are still attached. That is because they unclip from the inside. You need to pull the cover apart from the bottom and then unclip them when you can access them. (see pic)
8. At this point you should have a metal frame with a big piece of foam around it. Pull these apart. They might be lightly glued together. Dont worry about tearing the foam but try to keep it intact.
9. Ok grab the frame
10. Remove the seat belt and the White plastic thing(white plastic thing not shown)
11. Remember that section that was sticking out? Well that section is actually the latching mechanism as you can see on the left side of the frame in the pic above. Cut that bitch off! It is actually a pain in the ***. You need to cut through all the welds and pry the latching mechanism off to break the welds. You also need to cut the sheet metal on the back side. Like I said above. I went through three 3" cutting wheels on my pneumatic cutter. These welds are pretty strong and thick. I do not recommend using a dremel unless you feel like cutting for a long time. Once you start getting about 3/4 way throughthe welds you canuse a pry bar to break them the rest of the way off.
12. Your frame should look like the last pic shown above. If you put the frame back into the foam it should look like the pic shown below.
13. Well Clearly this still won't work. So now you need to cut that foam off the side. I used a steak knife to cut the big section off and scissors for the more precise cuts. I was also told that a turkey carver works well for cutting foam. If you notice in the pics that I didnt cut all the way down to the bottom by the peg...disregard this. Cut all the way down. I had to pull the seat back apart and cut some more off. You want the foam to be as even with the frame as possible. the more bumps and edges it has the more bumps you will see when you put the cover back on.
14. Time for reassembly! Put the cover back on the opposite in which how it came off...minus the seat belt and those 2 plastic covers.
15. Now you should notice that you have tons of fabric left over on the side that you cut off. Don't just start cutting off fabric. You need to pay attention to detail for this part. The objective is to pull the cover as tight as possible with out creating wrinkles or folds. This is also the part where you get to bust out your mad sewing skills!
16. Pull apart the suede from that rough scratchy material along the seam as shown below. Be careful to not pull it apart too close to the peg... shown in the second pic below. The pic is actually after it is put back together but it gives you an idea. If i recall correctly i think it was actually a seam as well.
17. Cut that big flap of scratchy material off You want the backing material to be even with the frame. Do not cut into the suede just yet.
18. If you notice at the top, this is where that plastic cover was before. Now there is a hole with a plastic reinforcer. Cut the threads holding it on and pull the plastic piece off. At this point you are going to have to use your judgment as to where to cut the suede. I did not cut very much off and only cut some off at the very top of the seat by the hole.
19. It is very difficult to explain how to cut the top part. I can show you the finished product to give you an idea. To hide that hole you have to sew it together. However you decide to fold it and sew you need to do it so that it does not create any wrinkles or folds on the front side of the seat. What ever is on the side it doesnt really matter since it is not visible...use your own best judgement though. Also if you look in the pics below you can see that i used zip ties to attach the suede to the scratchy backing. Again pull it tight but do not create wrinkles.
Here are some views of an entire finished side...they are of the driver side seat but the process is the same for both sides.
Last edited by sniperscout; Oct 1, 2008 at 03:35 PM.
Thread Starter
Joined: Apr 2006
Posts: 1,266
Likes: 0
From: Phoenix, AZ
Rep Power: 257 Re: DIY: REAR EP3 Seats in EM2
Doing the Other (driverside) Seat:
It is exactly the same! minus the seat belt
I will post the pics I have but I will not type out the steps since I already did above.

ALMOST DONE!
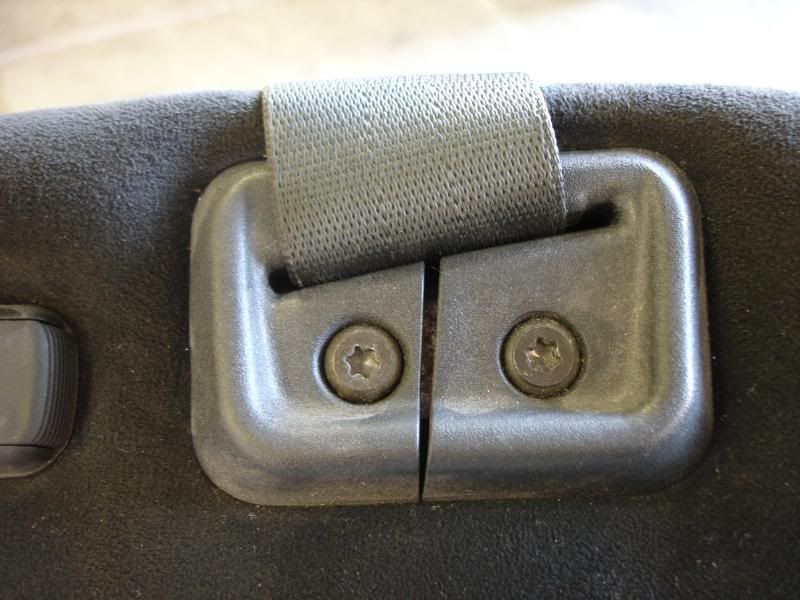
20. Remove your seats...If you dont know how it is really really simple. Fold down your seats...unscrew the two bolts at the bottom in the middle under the little flap that is velcroed down. They are right next to the driver side seat. I can show you with an rsx seat...its in the same spot.
[IMG] [/IMG]
For the seat cushion....there is a 10mm bolt at the back near the center. if you cant find it, pull the cushion and figure out where it is being held on. I can show you with an rsx seat...its in the same spot. The bolt goes through that metal loop thing.
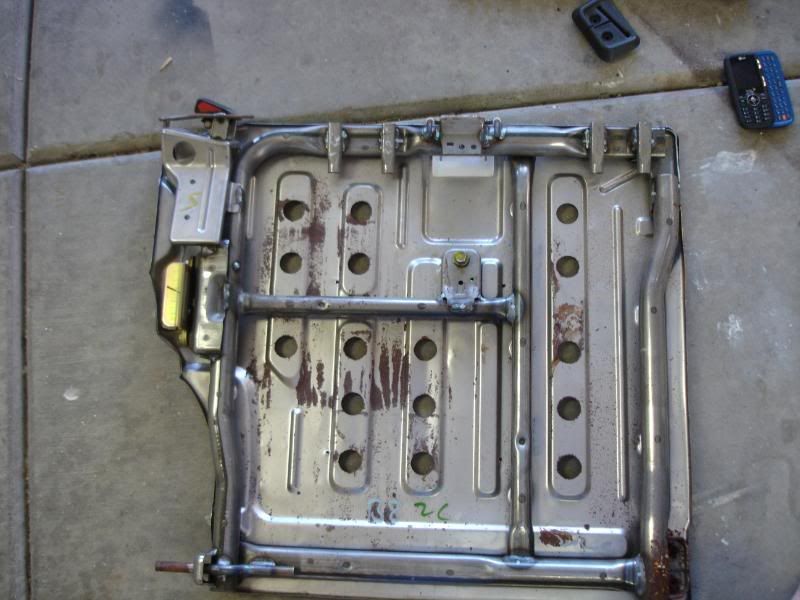
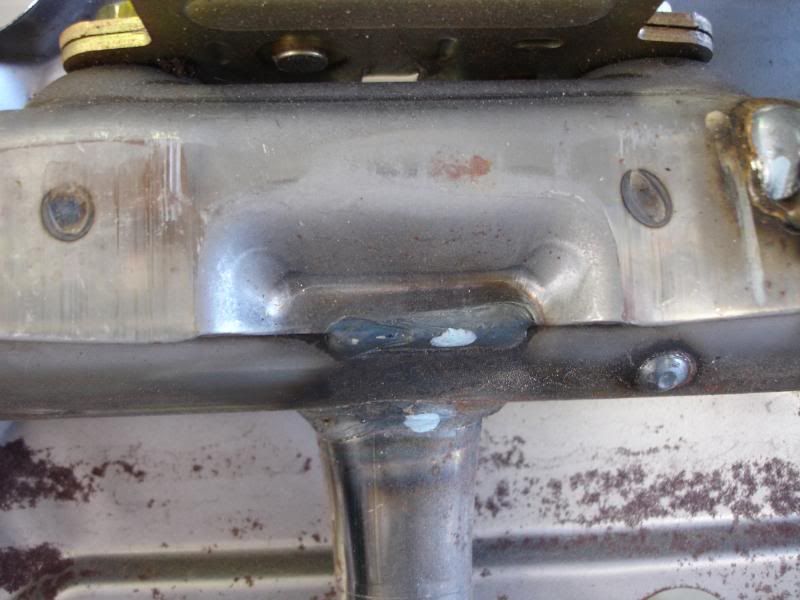
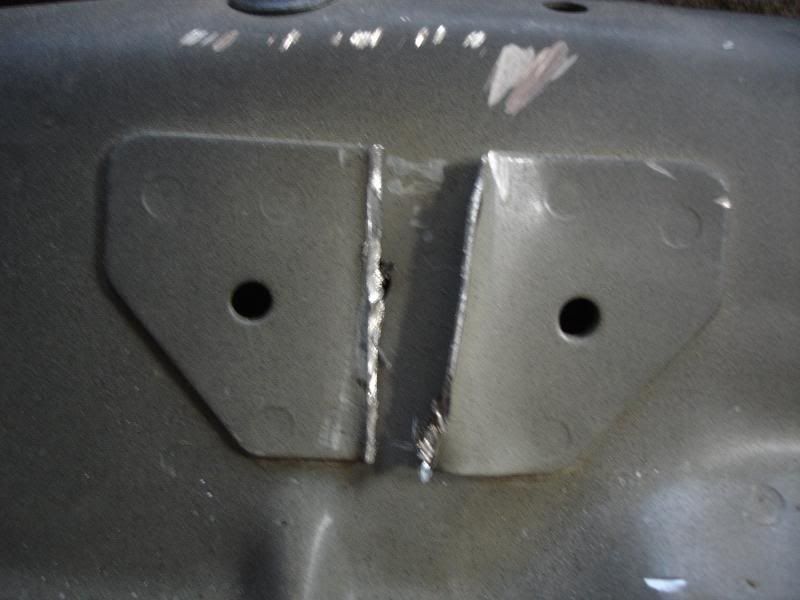
21. You need to drill out the welds on the bracket that your two seats pivot on. I Cut mine...but if i were to re-do it i would drill out the welds. The base of the bracket looks like the pic below. If you notice on each side of the base there are 3 circles...2 on top and 1 on bottom...those are the welds. You need to use a drill bit bigger than those circles. You also may need to use a screw driver to pry it a little once you drill through them.
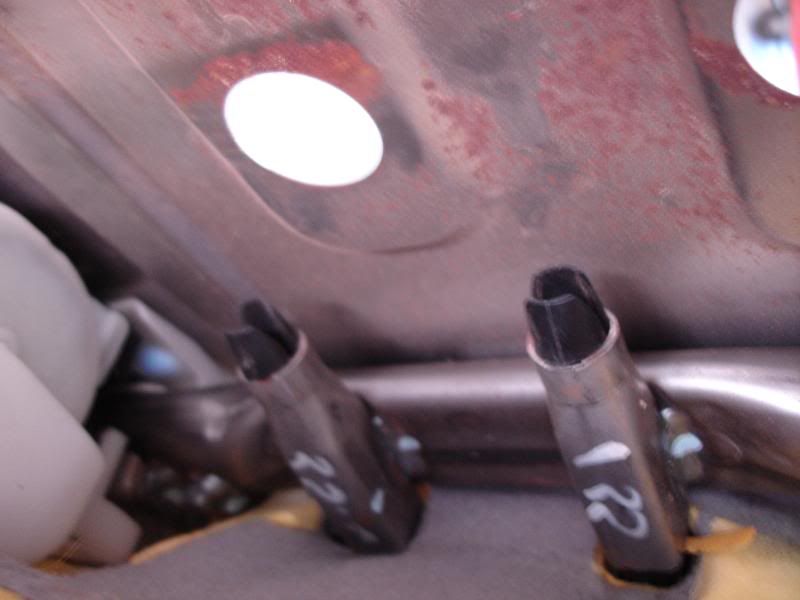
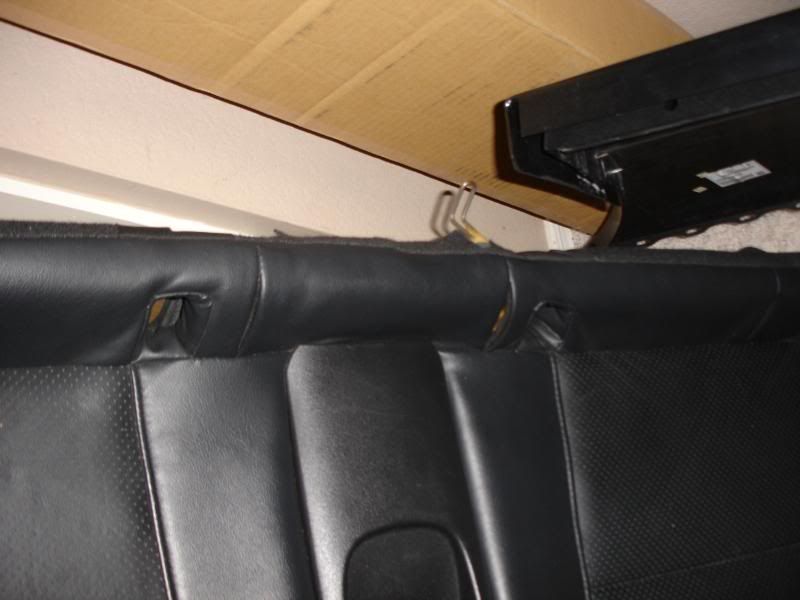
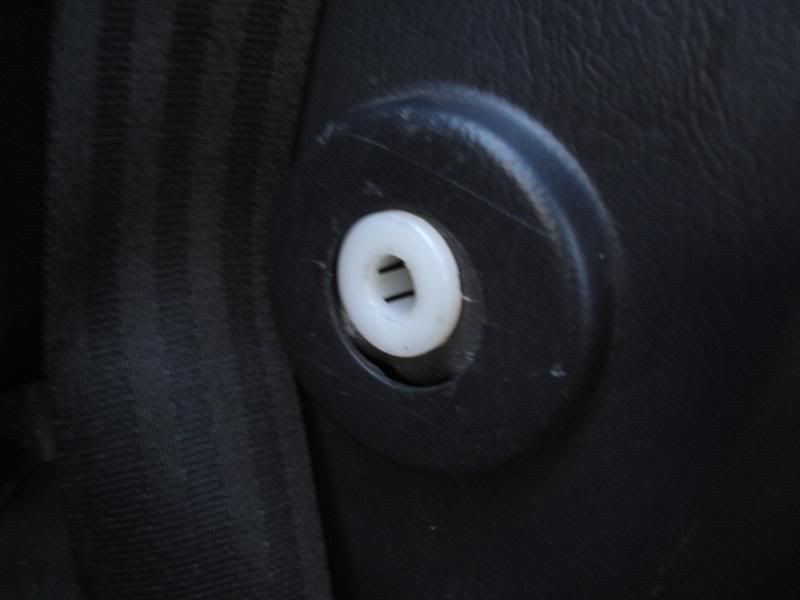
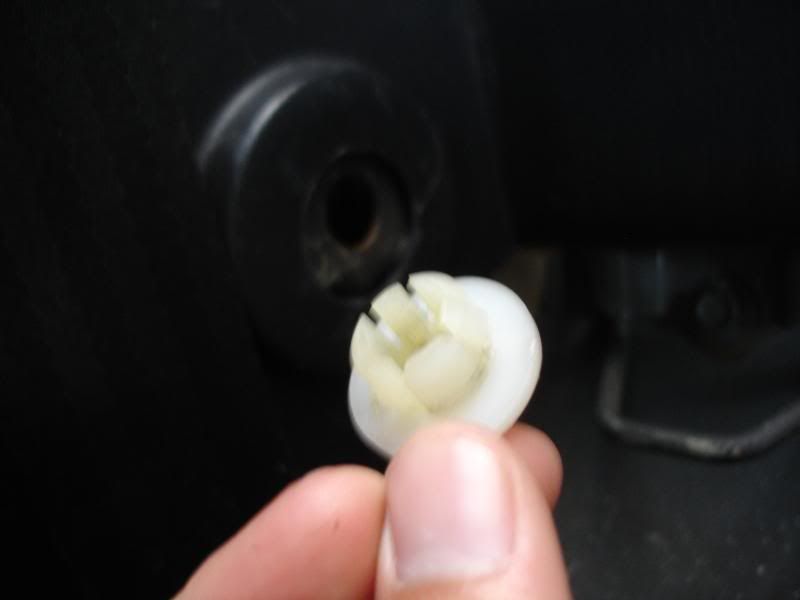
22. On each side of the back seat area there is a small circular white clip...pull it out with a screw driver or needle nose pliars.

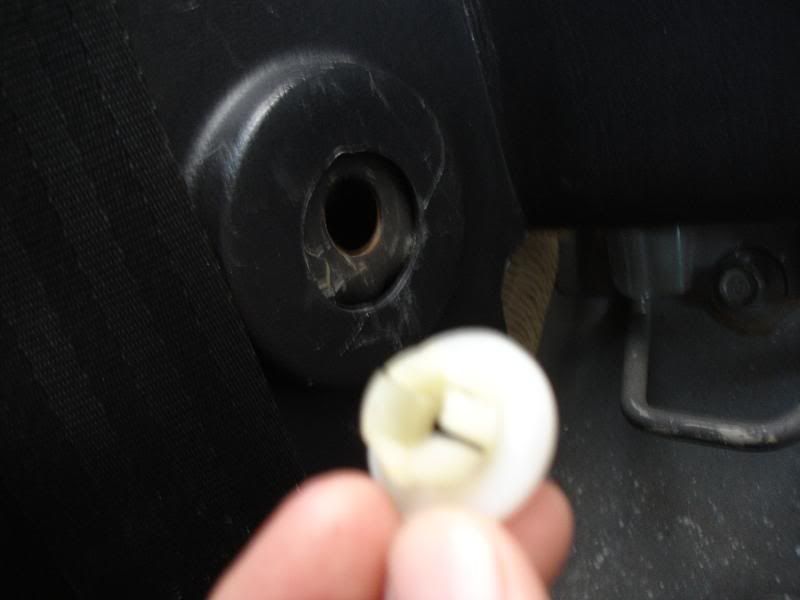
23. Install EP3 seats! Put the left and right pegs into the holes andput the bottom cushion on opposite to how you pulled yours off.
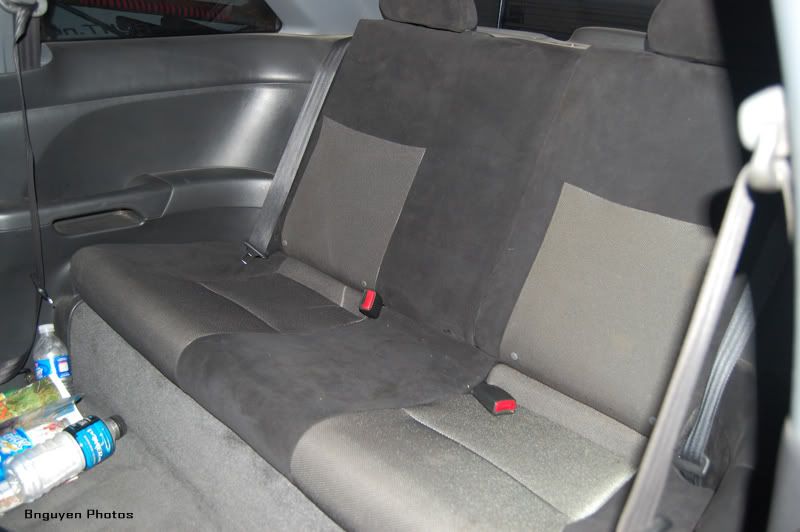
FINISHED PRODUCT!
If you start this and come up with any questions...ask me! Hope this helps!
It is exactly the same! minus the seat belt
I will post the pics I have but I will not type out the steps since I already did above.
ALMOST DONE!
20. Remove your seats...If you dont know how it is really really simple. Fold down your seats...unscrew the two bolts at the bottom in the middle under the little flap that is velcroed down. They are right next to the driver side seat. I can show you with an rsx seat...its in the same spot.
[IMG]
[/IMG]For the seat cushion....there is a 10mm bolt at the back near the center. if you cant find it, pull the cushion and figure out where it is being held on. I can show you with an rsx seat...its in the same spot. The bolt goes through that metal loop thing.
21. You need to drill out the welds on the bracket that your two seats pivot on. I Cut mine...but if i were to re-do it i would drill out the welds. The base of the bracket looks like the pic below. If you notice on each side of the base there are 3 circles...2 on top and 1 on bottom...those are the welds. You need to use a drill bit bigger than those circles. You also may need to use a screw driver to pry it a little once you drill through them.
22. On each side of the back seat area there is a small circular white clip...pull it out with a screw driver or needle nose pliars.
23. Install EP3 seats! Put the left and right pegs into the holes andput the bottom cushion on opposite to how you pulled yours off.
FINISHED PRODUCT!
If you start this and come up with any questions...ask me! Hope this helps!
Last edited by sniperscout; Oct 1, 2008 at 03:35 PM.


Thread Starter
Joined: Apr 2006
Posts: 1,266
Likes: 0
From: Phoenix, AZ
Rep Power: 257 Re: DIY: REAR EP3 Seats in EM2
cause when you swap in fronts the rears dont match...especially if you have an 01-03...they have that crazy pattern

Joined: Aug 2006
Posts: 8,362
Likes: 1
From: Portland, Oregon
Rep Power: 388 
Re: DIY: REAR EP3 Seats in EM2
Thats pretty dope, they look good in your car with the black interior. I think your the first to have an si interior into an em2. Any pics with the fronts as well?
Re: DIY: REAR EP3 Seats in EM2
dammm...i give you props for doing all that for rear seats. I would of just got my stock seat reupholstered. I do give you a lot of credit though... so much work
Thread Starter
Joined: Apr 2006
Posts: 1,266
Likes: 0
From: Phoenix, AZ
Rep Power: 257 Re: DIY: REAR EP3 Seats in EM2
um they arent in my car...i did it for a friend...im getting recaros in the front tomorrow and doing a rear seat delete in the next week or so
these seats were test fitted in my car first though so i concur with me being the first with ep3 seats in the rear
these seats were test fitted in my car first though so i concur with me being the first with ep3 seats in the rear

Registered!!
iTrader: (6)
Joined: Feb 2005
Posts: 1,470
Likes: 0
From: Ft. Bragg/Fayetteville, nc
Rep Power: 273 Re: DIY: REAR EP3 Seats in EM2
nice job!!! they look like they fit better than the rsx swap...true? but it looks like it took alot of work for that. like some people said i would of just got the rears reupholstered. good job on the whole thing tho!! i sure hope your friend paid you or something, cuz i kno i wouldn't have done it...lol.
Thread Starter
Joined: Apr 2006
Posts: 1,266
Likes: 0
From: Phoenix, AZ
Rep Power: 257 

Joined: Jun 2002
Posts: 3,242
Likes: 0
From: so cal djmota=oscar
Rep Power: 323 Re: DIY: REAR EP3 Seats in EM2
cool diy they almost look like they belong there unlike the rsx rear seats. thats pimp darkmaul i want to get mine recovered to match my base rsx seats up front.


Thread
Thread Starter
Honda Civic Forum
Replies
Last Post
juror
Suspension DIY
6
Jul 30, 2019 03:28 AM

