
DIY 04/05 tail light conversion (with factory parts)


DIY 04/05 tail light conversion (with factory parts)
Hey guys this is my first DIY and I know there is already one on the tail light conversion but I wanted to do one with factory parts. This is to convert 01-03 Coupe tails to 04-05 I borrowed a few pictures from Gearbox hope that is ok so here goes. I printed out the price of the parts from Majestic Honda and took it to my local dealer and they matched their prices, or just order from Majestic. Anyway hope this helps some people out, I had a hard time figuring out which parts to order especially the pigtails (I got the wrong ones the first time).
Parts needed:
1. 04/05 tails
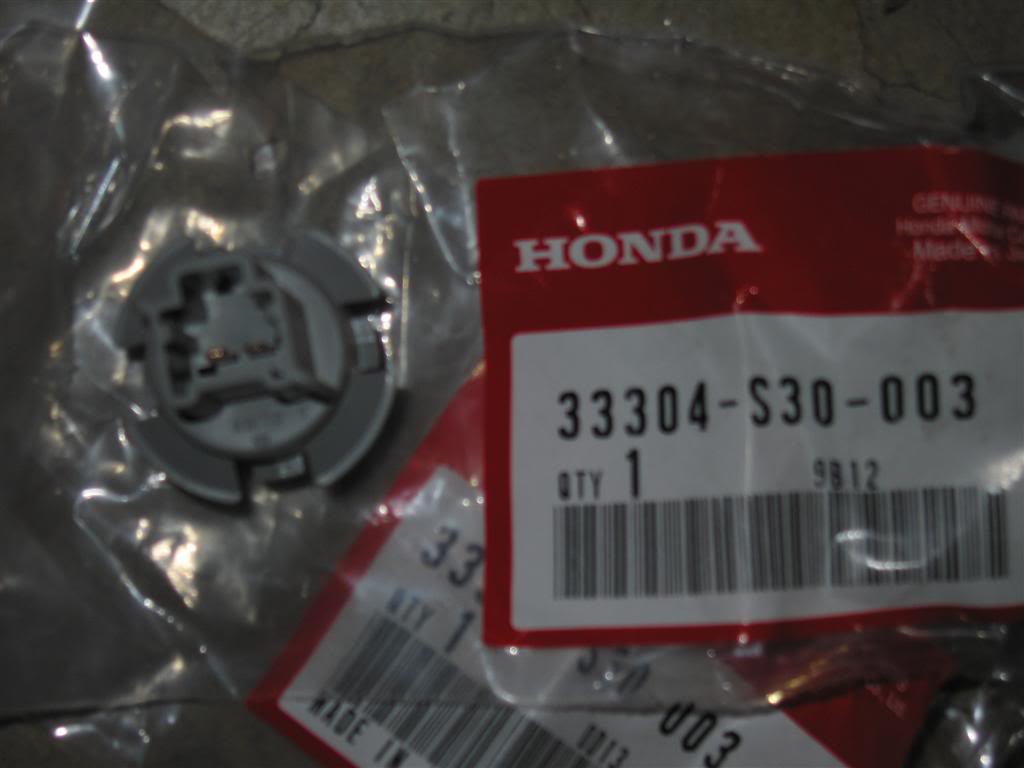
2. Two factory turn signal sockets part # 33304-S30-003 $6.50 each
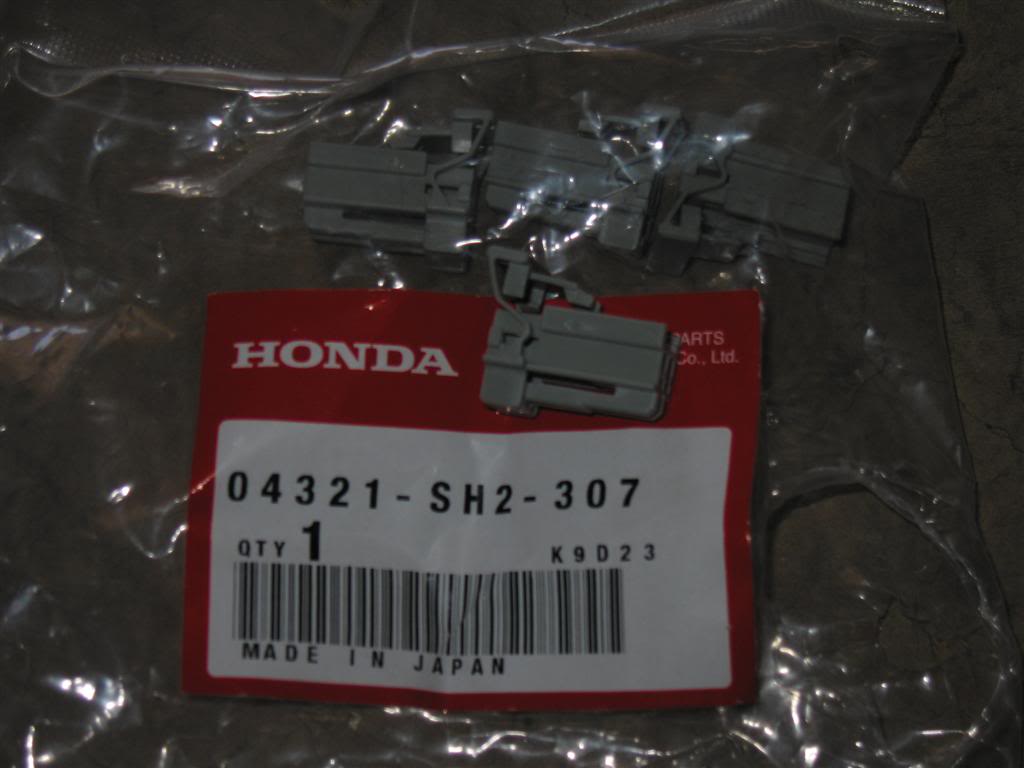
3. One pack of connectors (they come in packs of 5 so only order 1 pack) part # 04321-SH2-307 $4 per pack again only one pack needed
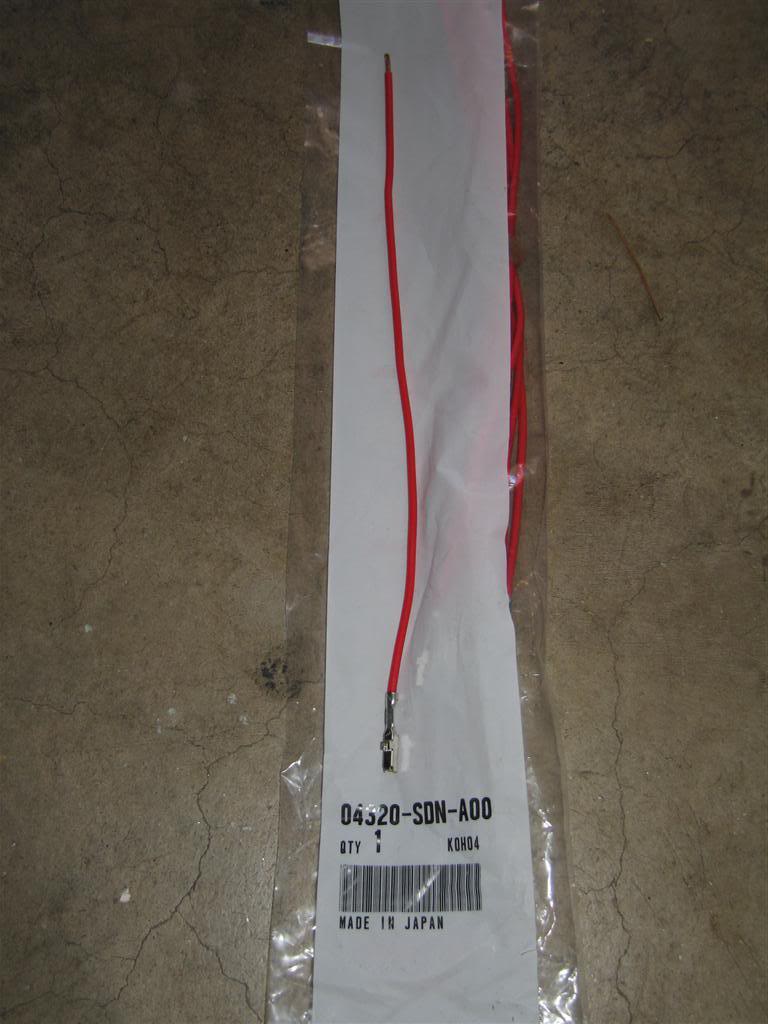
4. One pack of Pigtails (they come in packs of 10 you will only need 4 of them) part # 04320-SDN-A00 $8.00
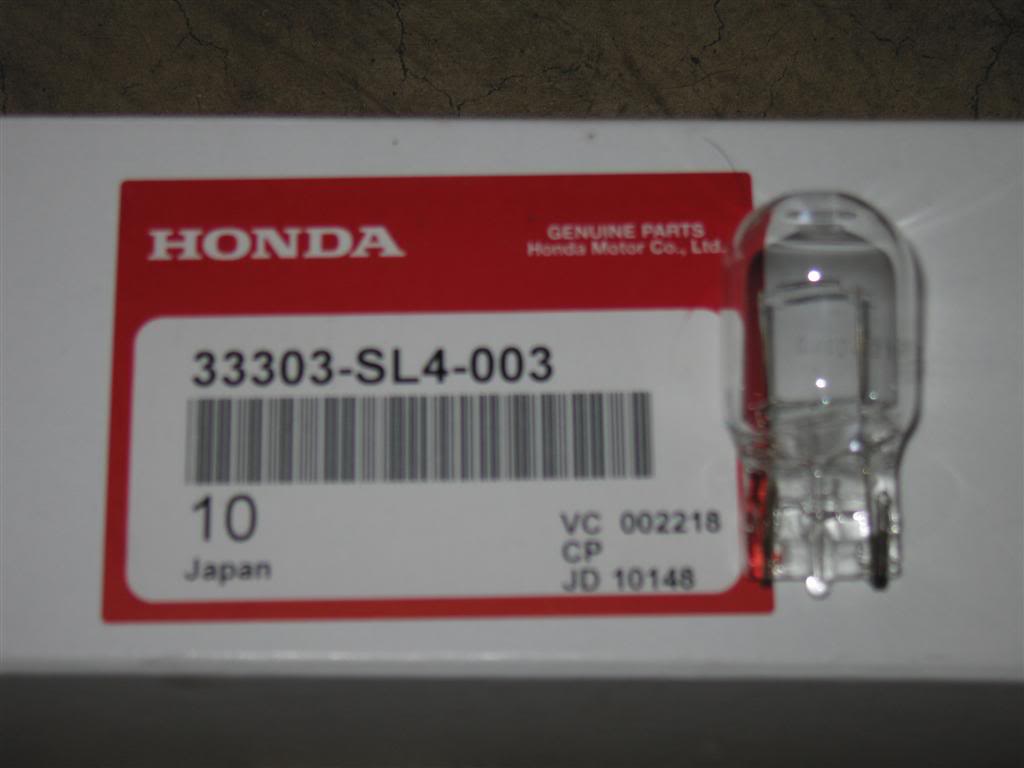
5. Two new signal bulbs Part # 33303-SL4-003
Steps
1. Pull the plastic screws holding the trunk carpet and peal it back so that you can get to the backside of the tail lights.
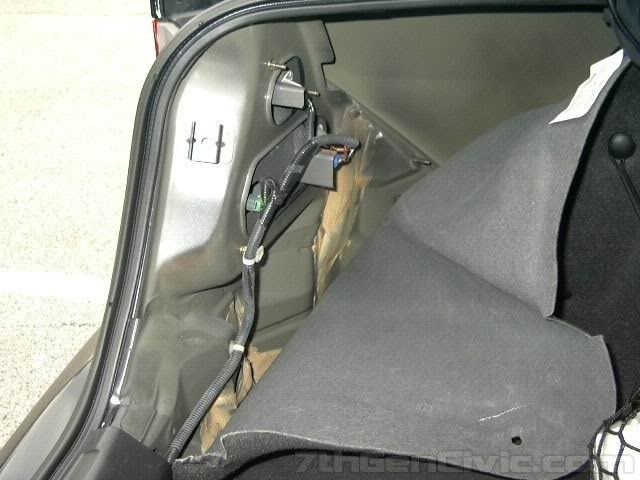
2. Remove all four sockets from the tail light housing.
3. Remove the four nuts holding your old tail lights in and gently pull the lights out, watch the plastic tabs do not break them.
4. Now bolt in your new tail lights, you may have to trim the foam piece if you are reusing it like I did just take your time and only cut it where you need to it's pretty obvious when you look at it.
5. Only three Socket/bulbs are used in the new tails, the one all the way to the right wont be used it's the side marker, remove the socket/bulb from the connector and zip-tie old connector to the harness, I put the old socket/bulb back in the old tails for safe keeping.
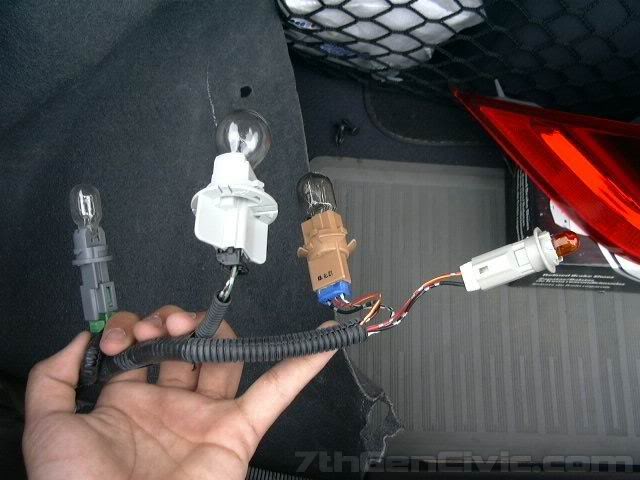
6. Plug in the reverse light & the brake lights into their respective sockets. In the picture the top socket brown with blue connector is the brake/running lights, and the reverse lights are the dark gray socket with the green connector, it's the bottom right in the picture. The new turn socket Light gray socket & Connector (completed in this picture) is bottom left, and the connector hanging is the old side signal connector (not used in the new tails).
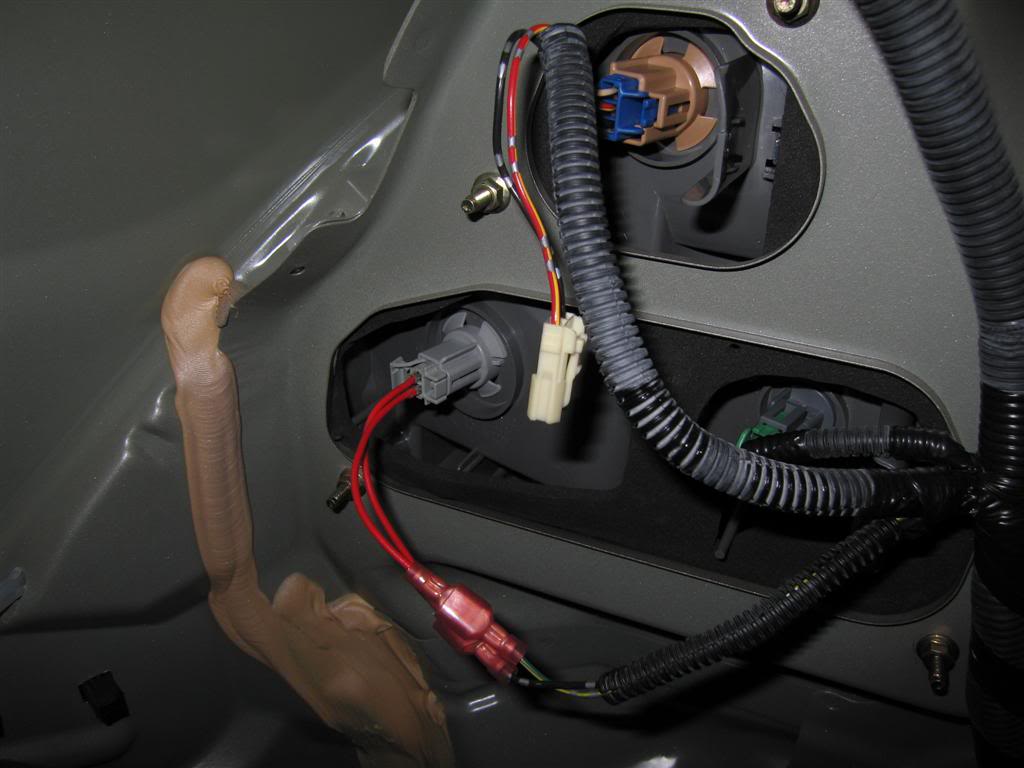
7. Now unplug the black connector from the large signal socket and clip it off about an inch from the connector so you can reuse it if you ever want to put your stock tails back in.
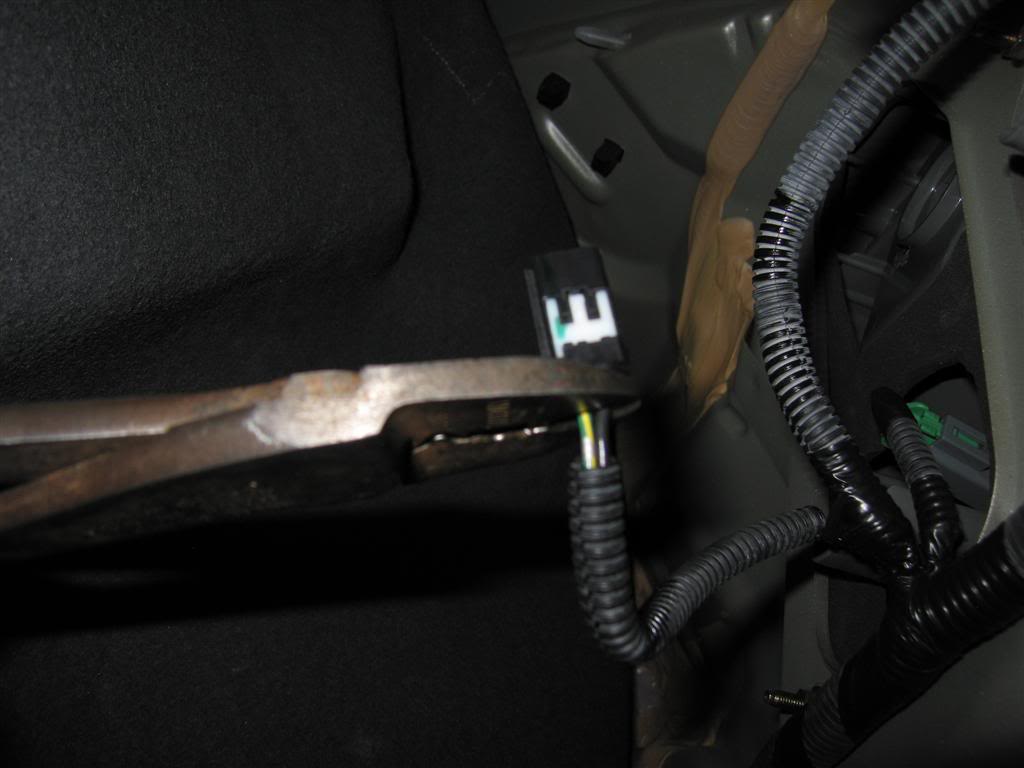
8. Ok it's time to put your new connectors together. Take the new connector and install the new pigtails into them (two each).
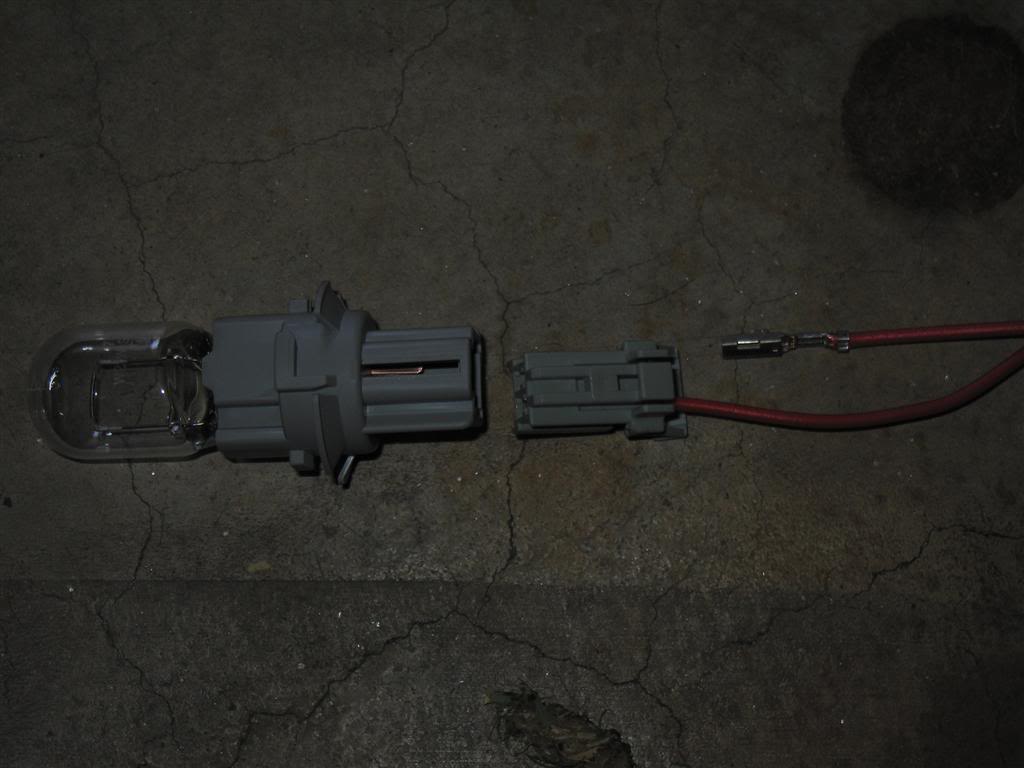
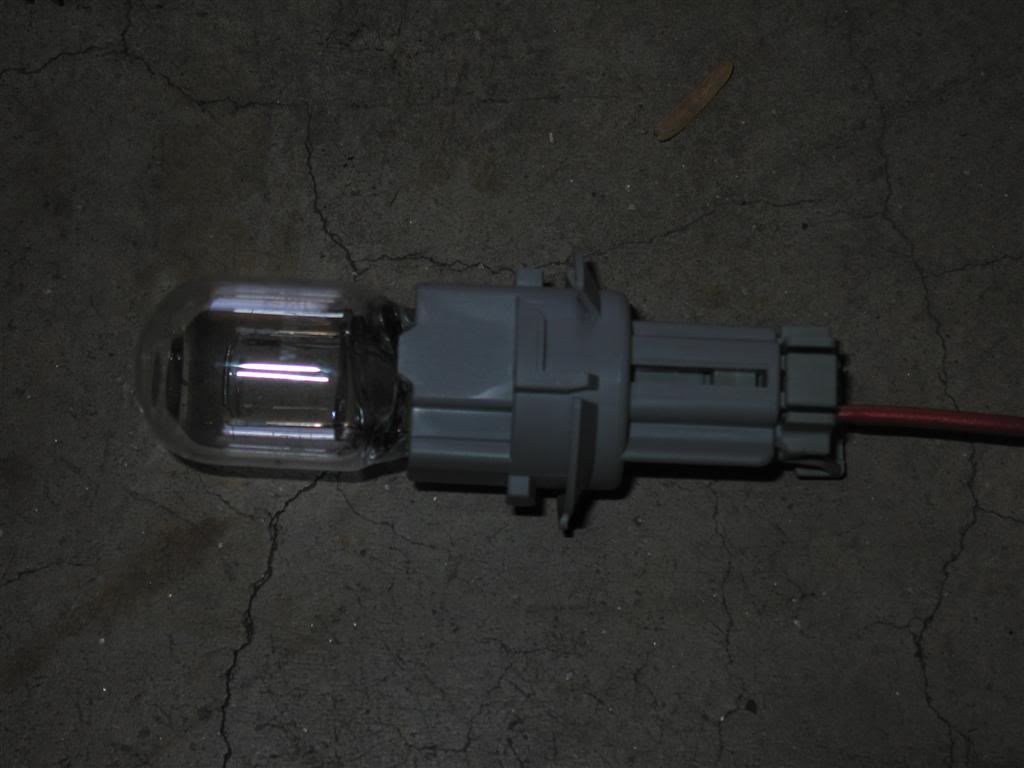
Now simply push the connector into the new socket and install the bulb
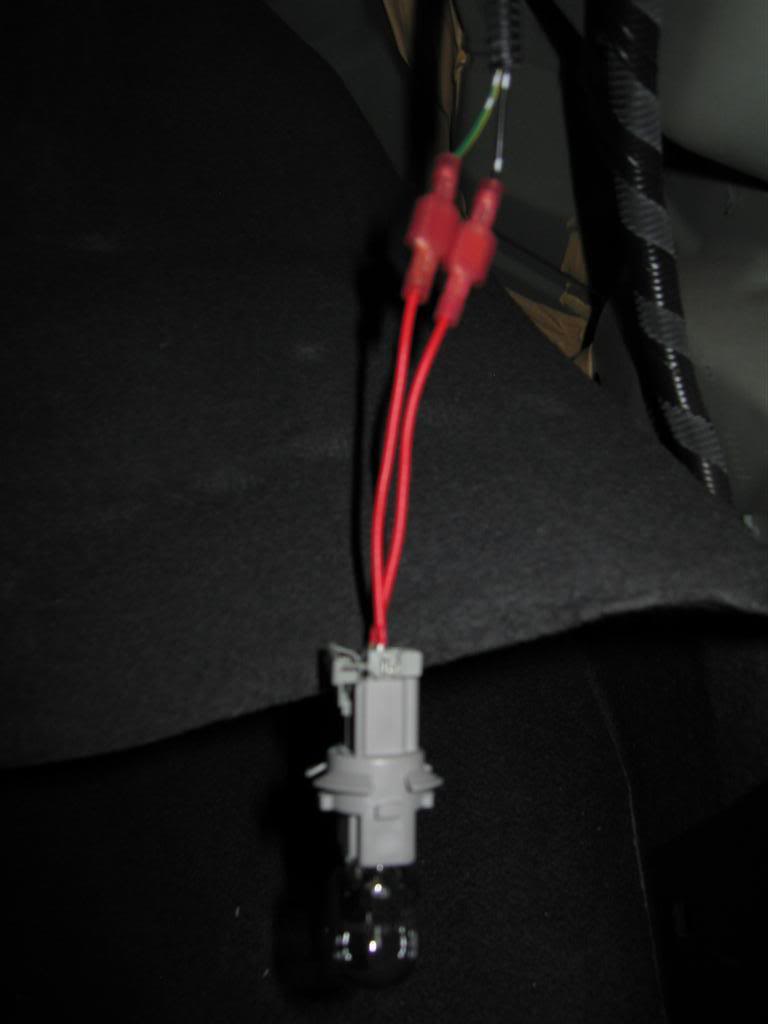
9. Use wire connectors or solder the wires to the harness. I chose to use connectors so that I could easily put my stock tails back in down the road either way will work.
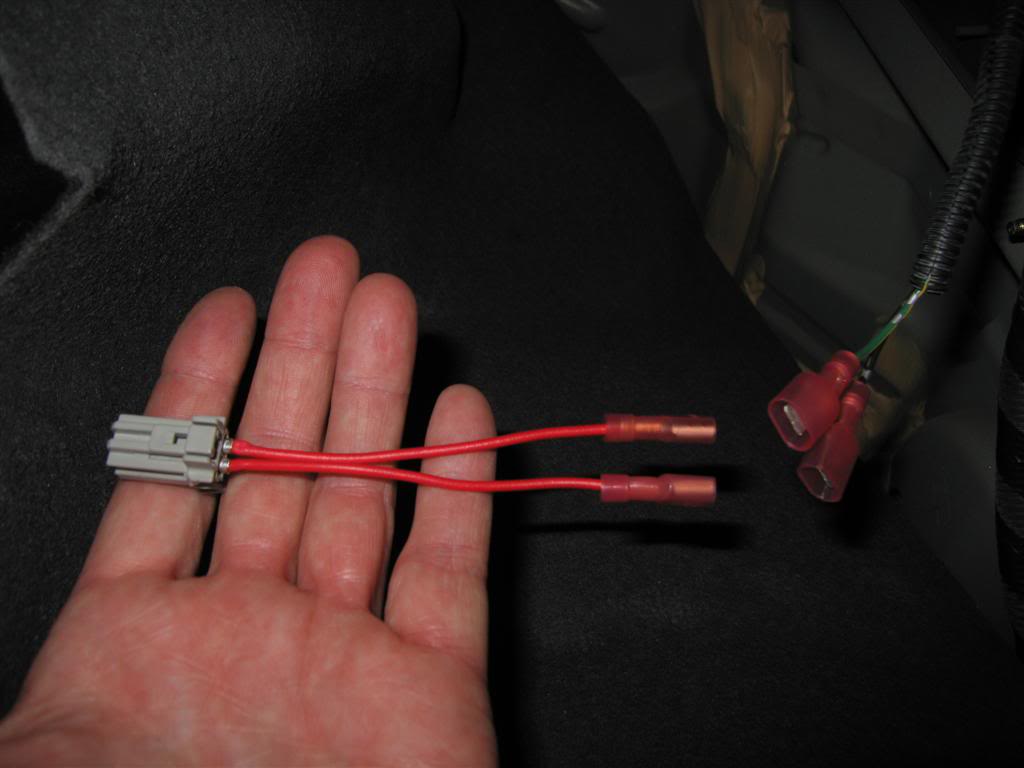
This is what your final connection will look like.
10. almost done just plug your signal socket into the tail light, button everything back up and your done.
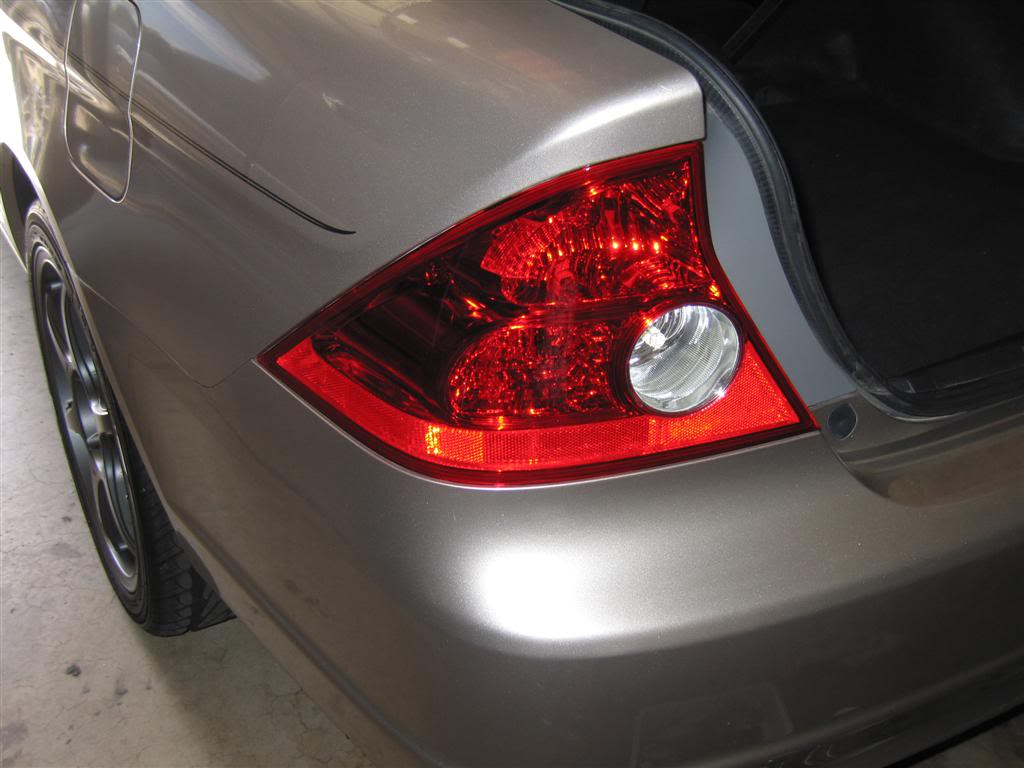
Here is the finished product looks much better IMO.
Parts needed:
1. 04/05 tails
2. Two factory turn signal sockets part # 33304-S30-003 $6.50 each
3. One pack of connectors (they come in packs of 5 so only order 1 pack) part # 04321-SH2-307 $4 per pack again only one pack needed
4. One pack of Pigtails (they come in packs of 10 you will only need 4 of them) part # 04320-SDN-A00 $8.00
5. Two new signal bulbs Part # 33303-SL4-003
Steps
1. Pull the plastic screws holding the trunk carpet and peal it back so that you can get to the backside of the tail lights.
2. Remove all four sockets from the tail light housing.
3. Remove the four nuts holding your old tail lights in and gently pull the lights out, watch the plastic tabs do not break them.
4. Now bolt in your new tail lights, you may have to trim the foam piece if you are reusing it like I did just take your time and only cut it where you need to it's pretty obvious when you look at it.
5. Only three Socket/bulbs are used in the new tails, the one all the way to the right wont be used it's the side marker, remove the socket/bulb from the connector and zip-tie old connector to the harness, I put the old socket/bulb back in the old tails for safe keeping.
6. Plug in the reverse light & the brake lights into their respective sockets. In the picture the top socket brown with blue connector is the brake/running lights, and the reverse lights are the dark gray socket with the green connector, it's the bottom right in the picture. The new turn socket Light gray socket & Connector (completed in this picture) is bottom left, and the connector hanging is the old side signal connector (not used in the new tails).
7. Now unplug the black connector from the large signal socket and clip it off about an inch from the connector so you can reuse it if you ever want to put your stock tails back in.
8. Ok it's time to put your new connectors together. Take the new connector and install the new pigtails into them (two each).
Now simply push the connector into the new socket and install the bulb
9. Use wire connectors or solder the wires to the harness. I chose to use connectors so that I could easily put my stock tails back in down the road either way will work.
This is what your final connection will look like.
10. almost done just plug your signal socket into the tail light, button everything back up and your done.
Here is the finished product looks much better IMO.
Last edited by sam68; Sep 28, 2010 at 06:35 PM.


Thread
Thread Starter
Honda Civic Forum
Replies
Last Post
shaejb15
Electrical, Wiring, and In Car Entertainment
2
Apr 12, 2015 11:38 AM

