
My HID retrofit thread (finished!)


Thread Starter
Joined: Sep 2002
Posts: 51,241
Likes: 20
From: NV
Rep Power: 813 

My HID retrofit thread (finished!)
Okay guys as I work on this project, I wanted to share what and how I'm doing this to hopefully help others. I will post as I get done with certain stages. I decided on Sonar Halo projectors for this project. They are well constructed and look the best imo. The new generation has an amber reflector and crystal clear halo lens with etched background. Now one important point to make is that the turn signals included are 1156 single filament 27w bulbs. the stock bulb and holder will not fit. This means you will only have turn signal and no parking light. However, there is a small hole in the reflector for a 194 mini bulb (I won't be using this).
THE PLAN:
The front 1156 bulb will be amber and used for DRL and turn signal only.
I have my sidemarkers wired as turn signal only, no park or DRL.
For parking lights, I plan on refitting the halo with white leds and also adding amber leds behind the orange reflector. When the projector headlight turns on, the halo will turn off to conserve led life and also since it will not be visible anyway.
Far lights will be on a completely separate wire harness connected to a switch inside the car. I will be using osram +50 silverstar clear bulbs.
Projector retrofit will be a complete setup of valeo projector/ballast and bulb from a new 2005 Audi A4. The ballast will be wired to an H4 plug that will mate with a factory upgrade harness from www.suvlights.com
Fog lights are already retrofitted with bmw style projectors and painted (on the inside) with yellow glass paint.
I need to find some sort of bright led light for the license plate. Might need to work something custom.
The part I am not very happy with is the turn signal reflector. It is just painted a dull silver color. I am experimenting with painting it using krylon glitter spray.
I am not cutting any corner here as I want everything to be perfect. This will be going on for some time, as many parts will not even arrive for a few weeks.
PROGRESS:
So far, I have taken the lights apart by using an oven at 200F to warm the goo. the inserts are held in by a single star screw and come right out. The actual halo ring is also held on by two star screws. Here's a pic of the insert with halo removed.

At the bottom the led assembly can be easily pried off. it is a small board with 2 3mm white leds attached with resistor. It looked good, but I just did not want to trust their wiring job. and i wanted bigger leds I replaced the setup with 2 5mm white leds with 50,000mcd brightness.

As you can see, the two leds can be soldered together in series and then connected to wiring. they fit right in! Later when i put it all together i will put a drop of epoxy to seal the middle hole and fix them in place. I soldered all connections. a power wire and ground wire was attached, with resistors on the power lead. it is VERY important to use the proper resistance. I set mine up to handle 15V to be on the safe side. All test pics will be using 12V lantern battery so they will not be as bright as when the car is running. Use this to figure out the resistance needed. You need to know how many leds you connect in series, what their forward voltage is (my white was 3.2v), current (mine was 20mA), and total voltage (alternator ~14.4V). Now there is a lil trick. you can only have as many leds as when their forward voltage is around ~14.4V. Say that you connect 5 white leds together (5 x 3.2 = 16V). That means they will handle 16v when hooked together and you wont even need a resistor!
http://ourworld.compuserve.com/homep...Bowden/led.htm
Here are the leds fitted into the back of the ring. there is only room for 2 leds.

Now i tested them to make sure everything was working.


My next task will be to fit amber leds behind the reflector as parking lights to go along with the halo. I plan to use 8 leds arranged in a straight line from top to bottom. There is limited room, so we'll see what happens. The reflector pops out easily, and then you can drill holes from the front. Just go slow and don't slip

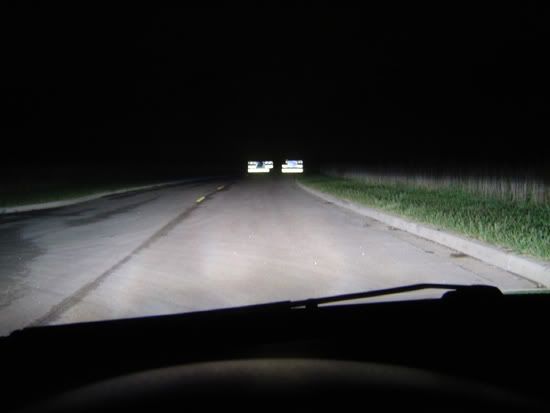
I just got all the hid hardware. Gonna work on putting plugs on the ballast and trying to fit the projectors. I might even have some night shot testing the bulbs. the amber leds wont be here for a while so i have time. might try the glitter spray too. Pics coming tonight...
Here are switches for the hi beam and red floor neons (inside pocket), and DRL (outside).

I need to find which wires on the stock harness match the ones on the upgrade harness. otherwise my wiring will look something like this for lo beam

Change of plans. I've decided to use 7443 stock bulb instead to make things simple. details later. i unscrewed and removed both stock projectors. then got some #5 hex nuts to fit the threads. put one nut on each side, then a washer.

Now the audi projectors i used had two mount holes, but they were too big. you must drill them bigger so they fit over the two mounts.

You want to try and get them as far back as possible so they are in the same general area as the previous projector (otherwise the cover wont go on later). now tighten the nuts finger tight. you want them a tad loose so you can adjust them later. now the problem is the projector is barely big enough to fit. you want the projector to sit straight and level, not pointing up or down. even with the two nuts installed, the projector will still move freely up and down a bit. this will be fixed later. to line up the projector, i held them vertical and put a level meter across the hi beam housing. then a made sure the projector top was also at the same level.

now you need to tie the projector from the back on top and bottom with metal 22 gauge cable. this is all i could think of but it works. again when you're done doing the tie job, make sure the projectors are both level with the hi beam reflector.

for the turn signals, i got some amber glass bulbs from ebay which wont fade. the problem is the socket is loose in the projector. so i had to silicone it in place. dont worry, you can remove it later to change the bulb. now i also put a plastic piece in the parking light hole and sealed that up too since i wont be using it.


now you are almost done! put the halo back on and put the headlight together. bake it and make sure it seals. now before you put it together, take the back plastic cover and inspect. there should be three small holes where on the back there is a rubber drain pipe looking thing. rip all those off and plug them with silicone or epoxy. otherwise your headlights wont be sealed!
once the light is together, get the rubber seals and cut them so that you can fit the pigtail in. dont cut too much, just enough to stretch it and put the plug into the bulb.

now you can take it to your car. i wired the halo + to the parking light red wire and then the - to the headlight switch 12v power (pass side red wire, driver side red/yel). this is so that they work only when parking lights are on and turn off once the headlights come on. Again, the stock halo leds are setup to only be used with 12.5v as it says on the light housing. this wont work when you start the car and goto 14.4v this is why you need to redo the leds. anyway, once the halo is hooked up, i did the ballasts. for this i purchased a universal wire harness from www.suvlights.com that comes with 40amp relay and fused power (required for hid because stock wires will melt). now the harness has red wire (connect to battery) and black (connect to ground). then there is a thin white wire, this is the turn-on and should be connected to the red wire on the pass side headlight socket. this wire gets 12v whenever the lo AND hi beam is on. this means the lo beam will not turn off when the hi beam is switched on. now there are two wires left on the harness. a thick white wire on the pass side, connect this to the ballast power. on the other side (longer wire) will be a thick blue wire, connect this to the other ballast. now you need to connect each ballast ground. i just ran wires to the support here.

put the lights back and loosely tighten the screws. the aim was pretty close, so that to get them level i just adjusted the headlight positions and tightened. i think they may be too high, but i need to recheck that. if the aim is off, you need to tear it apart and start all over with the wire part. no way am i doing that so hopefully they are level enough.
and take pics of the new lights. looks pimp. i also installed some protective film from www.headlightarmor.com (better than lamin-x). i got one side perfect but the other side got messed up. its not too noticable from far away.


THE PLAN:
The front 1156 bulb will be amber and used for DRL and turn signal only.
I have my sidemarkers wired as turn signal only, no park or DRL.
For parking lights, I plan on refitting the halo with white leds and also adding amber leds behind the orange reflector. When the projector headlight turns on, the halo will turn off to conserve led life and also since it will not be visible anyway.
Far lights will be on a completely separate wire harness connected to a switch inside the car. I will be using osram +50 silverstar clear bulbs.
Projector retrofit will be a complete setup of valeo projector/ballast and bulb from a new 2005 Audi A4. The ballast will be wired to an H4 plug that will mate with a factory upgrade harness from www.suvlights.com
Fog lights are already retrofitted with bmw style projectors and painted (on the inside) with yellow glass paint.
I need to find some sort of bright led light for the license plate. Might need to work something custom.
The part I am not very happy with is the turn signal reflector. It is just painted a dull silver color. I am experimenting with painting it using krylon glitter spray.
I am not cutting any corner here as I want everything to be perfect. This will be going on for some time, as many parts will not even arrive for a few weeks.
PROGRESS:
So far, I have taken the lights apart by using an oven at 200F to warm the goo. the inserts are held in by a single star screw and come right out. The actual halo ring is also held on by two star screws. Here's a pic of the insert with halo removed.
At the bottom the led assembly can be easily pried off. it is a small board with 2 3mm white leds attached with resistor. It looked good, but I just did not want to trust their wiring job. and i wanted bigger leds
I replaced the setup with 2 5mm white leds with 50,000mcd brightness. As you can see, the two leds can be soldered together in series and then connected to wiring. they fit right in! Later when i put it all together i will put a drop of epoxy to seal the middle hole and fix them in place. I soldered all connections. a power wire and ground wire was attached, with resistors on the power lead. it is VERY important to use the proper resistance. I set mine up to handle 15V to be on the safe side. All test pics will be using 12V lantern battery so they will not be as bright as when the car is running. Use this to figure out the resistance needed. You need to know how many leds you connect in series, what their forward voltage is (my white was 3.2v), current (mine was 20mA), and total voltage (alternator ~14.4V). Now there is a lil trick. you can only have as many leds as when their forward voltage is around ~14.4V. Say that you connect 5 white leds together (5 x 3.2 = 16V). That means they will handle 16v when hooked together and you wont even need a resistor!
http://ourworld.compuserve.com/homep...Bowden/led.htm
Here are the leds fitted into the back of the ring. there is only room for 2 leds.
Now i tested them to make sure everything was working.
My next task will be to fit amber leds behind the reflector as parking lights to go along with the halo. I plan to use 8 leds arranged in a straight line from top to bottom. There is limited room, so we'll see what happens. The reflector pops out easily, and then you can drill holes from the front. Just go slow and don't slip
I just got all the hid hardware. Gonna work on putting plugs on the ballast and trying to fit the projectors. I might even have some night shot testing the bulbs. the amber leds wont be here for a while so i have time. might try the glitter spray too. Pics coming tonight...
Here are switches for the hi beam and red floor neons (inside pocket), and DRL (outside).
I need to find which wires on the stock harness match the ones on the upgrade harness. otherwise my wiring will look something like this for lo beam
Change of plans. I've decided to use 7443 stock bulb instead to make things simple. details later. i unscrewed and removed both stock projectors. then got some #5 hex nuts to fit the threads. put one nut on each side, then a washer.
Now the audi projectors i used had two mount holes, but they were too big. you must drill them bigger so they fit over the two mounts.
You want to try and get them as far back as possible so they are in the same general area as the previous projector (otherwise the cover wont go on later). now tighten the nuts finger tight. you want them a tad loose so you can adjust them later. now the problem is the projector is barely big enough to fit. you want the projector to sit straight and level, not pointing up or down. even with the two nuts installed, the projector will still move freely up and down a bit. this will be fixed later. to line up the projector, i held them vertical and put a level meter across the hi beam housing. then a made sure the projector top was also at the same level.
now you need to tie the projector from the back on top and bottom with metal 22 gauge cable. this is all i could think of but it works. again when you're done doing the tie job, make sure the projectors are both level with the hi beam reflector.
for the turn signals, i got some amber glass bulbs from ebay which wont fade. the problem is the socket is loose in the projector. so i had to silicone it in place. dont worry, you can remove it later to change the bulb. now i also put a plastic piece in the parking light hole and sealed that up too since i wont be using it.
now you are almost done! put the halo back on and put the headlight together. bake it and make sure it seals. now before you put it together, take the back plastic cover and inspect. there should be three small holes where on the back there is a rubber drain pipe looking thing. rip all those off and plug them with silicone or epoxy. otherwise your headlights wont be sealed!
once the light is together, get the rubber seals and cut them so that you can fit the pigtail in. dont cut too much, just enough to stretch it and put the plug into the bulb.
now you can take it to your car. i wired the halo + to the parking light red wire and then the - to the headlight switch 12v power (pass side red wire, driver side red/yel). this is so that they work only when parking lights are on and turn off once the headlights come on. Again, the stock halo leds are setup to only be used with 12.5v as it says on the light housing. this wont work when you start the car and goto 14.4v this is why you need to redo the leds. anyway, once the halo is hooked up, i did the ballasts. for this i purchased a universal wire harness from www.suvlights.com that comes with 40amp relay and fused power (required for hid because stock wires will melt). now the harness has red wire (connect to battery) and black (connect to ground). then there is a thin white wire, this is the turn-on and should be connected to the red wire on the pass side headlight socket. this wire gets 12v whenever the lo AND hi beam is on. this means the lo beam will not turn off when the hi beam is switched on. now there are two wires left on the harness. a thick white wire on the pass side, connect this to the ballast power. on the other side (longer wire) will be a thick blue wire, connect this to the other ballast. now you need to connect each ballast ground. i just ran wires to the support here.
put the lights back and loosely tighten the screws. the aim was pretty close, so that to get them level i just adjusted the headlight positions and tightened. i think they may be too high, but i need to recheck that. if the aim is off, you need to tear it apart and start all over with the wire part. no way am i doing that so hopefully they are level enough.
and take pics of the new lights. looks pimp. i also installed some protective film from www.headlightarmor.com (better than lamin-x). i got one side perfect but the other side got messed up. its not too noticable from far away.
Last edited by gearbox; Aug 5, 2006 at 07:27 PM.
Registered!!
iTrader: (1)
Joined: Nov 2005
Posts: 252
Likes: 0
From: Miramar, Florida
Rep Power: 253 nice progress gear! i was actually looking into those particular projector headlights. but obviously everyones reviews say output is wack. hope this comes out succeful, so i can follow you lol GL!!

Thread Starter
Joined: Sep 2002
Posts: 51,241
Likes: 20
From: NV
Rep Power: 813 ya the only problem is they shake going over bumps. its like a flicker almost, like my old H4 kit did also. but meh overall it worked out. the beam is confusing me. it looks pretty straight, but to get both sides even in terms of kneeling in front and going down, one side needs to be higher or it looks bad, even tho on the wall it doesnt look right.
yea my current retrofit that i bought off AlpJLfan(no longer here) shakes a lil over big bumps or very jittery bumps but it doesnt affect anything b.c it goes by so quick. im gonna eventually do another retro b.c this one sux big time. might go with something better than valeo.
Thread Starter
Joined: Sep 2002
Posts: 51,241
Likes: 20
From: NV
Rep Power: 813 ya i made all the mistakes i guess. its kinda shoddy with the wire ties, but it felt solid to me. and i have the fresnel shape lens with all the grooves. i know the clear lens is supposed to be brighter/sharper but its just preference i like fresnel better. valeo is like a base model, then the better ones are like s2k and TL projector, maybe tsx too but i dont like those.


Thread Starter
Joined: Sep 2002
Posts: 51,241
Likes: 20
From: NV
Rep Power: 813 they are the updated sonar projector from ebay, $120. has a better halo and amber reflector. the projector/ballast/bulb hardware was $435, plus misc costs around $50 for wire harness, bulbs, and other crap.

Thread Starter
Joined: Sep 2002
Posts: 51,241
Likes: 20
From: NV
Rep Power: 813 no i couldnt wait 2 weeks for leds to come in. i just used the amber 7443 bulb i had from ebay and since the connector was loose, i put silicone all around it. makes it hard to change later but not that bad.
 i thought you were never gonna mess with your headlights again

Thread Starter
Joined: Sep 2002
Posts: 51,241
Likes: 20
From: NV
Rep Power: 813 hmm i tried the epoxy in the light to hold the projector still, but it didnt work. it still shakes over bumps. then i found that its the actual headlight assembly. even tho the bolts are tight, when i tap it from the top it shivers. its not held on very tight for some reason? im just leaving it the way it is. i mean it doesnt do it all the time only over bad bumps. if i drove back home where the good road is, it would never move.


Last edited by gearbox; Aug 10, 2006 at 11:19 PM. Reason: Automerged Doublepost
man those light up the road helluva lot better than my crapy valeos.
with the shivering i wouldnt worry bout it as long as it doesnt screw with yer lighting. mine does it only over huge bumps or continuous bumps but even then it doesnt throw things out of wack.
with the shivering i wouldnt worry bout it as long as it doesnt screw with yer lighting. mine does it only over huge bumps or continuous bumps but even then it doesnt throw things out of wack.
Last edited by crazyasian; Aug 11, 2006 at 12:32 AM.
Thread Starter
Joined: Sep 2002
Posts: 51,241
Likes: 20
From: NV
Rep Power: 813 okay i have to say i took those pics on white concrete roads thats why its tons bright. lol. its not normally that bright but im surprised how even the output is compared to the tyc where you clearly see the usual W projector beams like two flashlights. these look like stock reflector.
Thread Starter
Joined: Sep 2002
Posts: 51,241
Likes: 20
From: NV
Rep Power: 813 ya they are raybrig 2x hyper bulb (blue coated). around 3800k, so they're whiter but not that rice white. i got some white leds but they looked way too blue so using the bulbs which are good.
Thread Starter
Joined: Sep 2002
Posts: 51,241
Likes: 20
From: NV
Rep Power: 813 thanks. just got done wiring hi beam on its own harness. the lo beam stays on even if the combo switch gets pushed to the hi beam position. for the hi beam, i have a dedicated switch that works even when car is off. and yes the pocket can close over the switches. the other one next to hi beam is for floor neons. outside in the cup is the DRL switch and led.


Bone Stock!
Joined: Oct 2003
Posts: 1,879
Likes: 0
From: Rowland Heights, CA
Rep Power: 0
Originally Posted by gearbox
ya they are raybrig 2x hyper bulb (blue coated). around 3800k, so they're whiter but not that rice white. i got some white leds but they looked way too blue so using the bulbs which are good.
Thread Starter
Joined: Sep 2002
Posts: 51,241
Likes: 20
From: NV
Rep Power: 813 see thats what i didnt want. i wanted pure white to match the hids, but the leds i got were too blue looking (rice). they're the white superstars from autolumination. maybe i have a silver car or my license plate has blue in it, but idk why they were blue. it didnt look good so i went with raybrig coated bulb. it is not as white as i would like, but its alot better than stock and good enough. but to answer your question no is wont look like lexus cause they use some type of led.

