Daily Driver EM2 EX SE Build Ver. 2.0
 07-25-2017
#1
Registered!!
Thread Starter

Daily Driver EM2 EX SE Build Ver. 2.0
PREFACE: I had to recreate this thread since Photobucket wanted to be some clowns and block all my pics, so now this has been remade to include the new picture links, this first post follows the car from purchase in August 2014 until June 2015 where I took a break from the car. Enjoy!
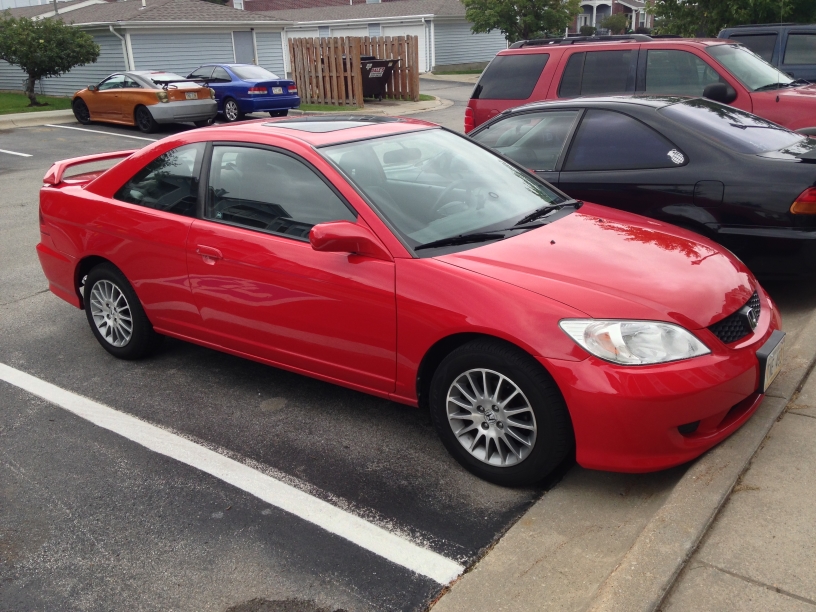
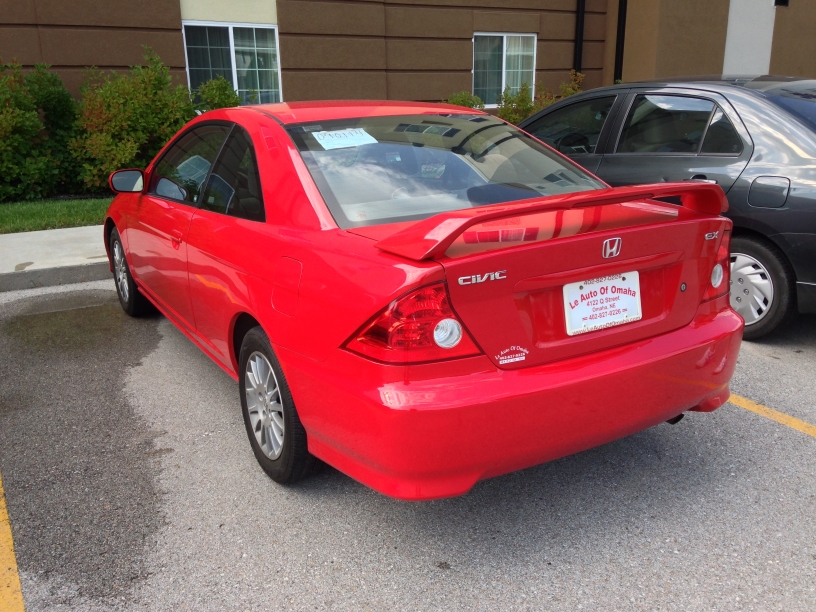
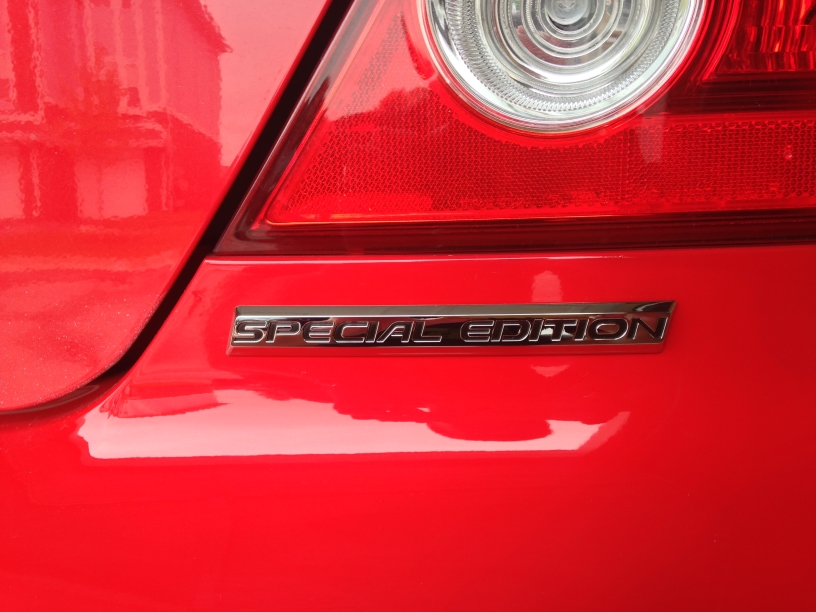
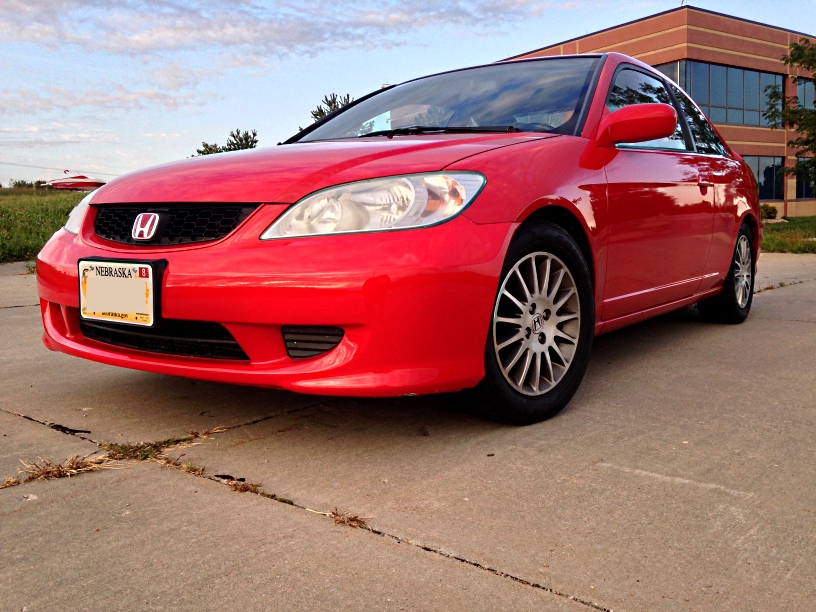
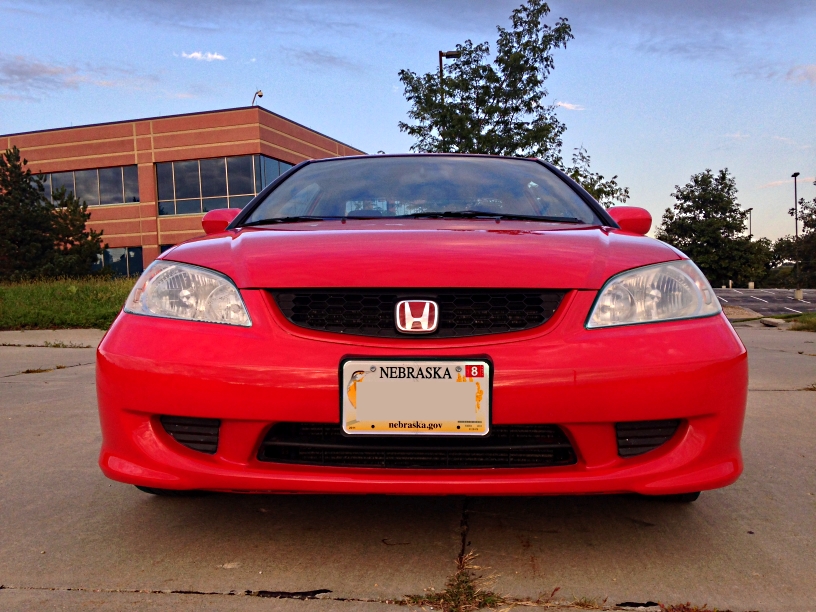
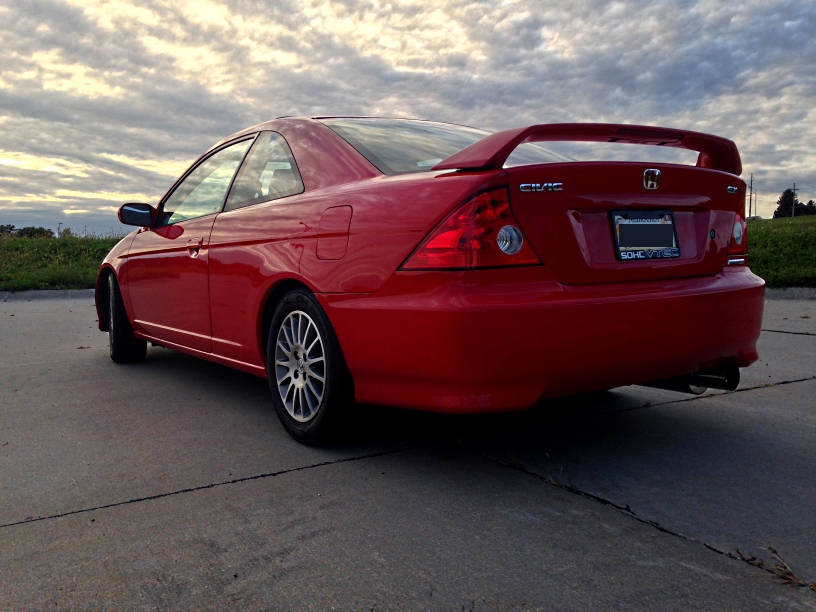
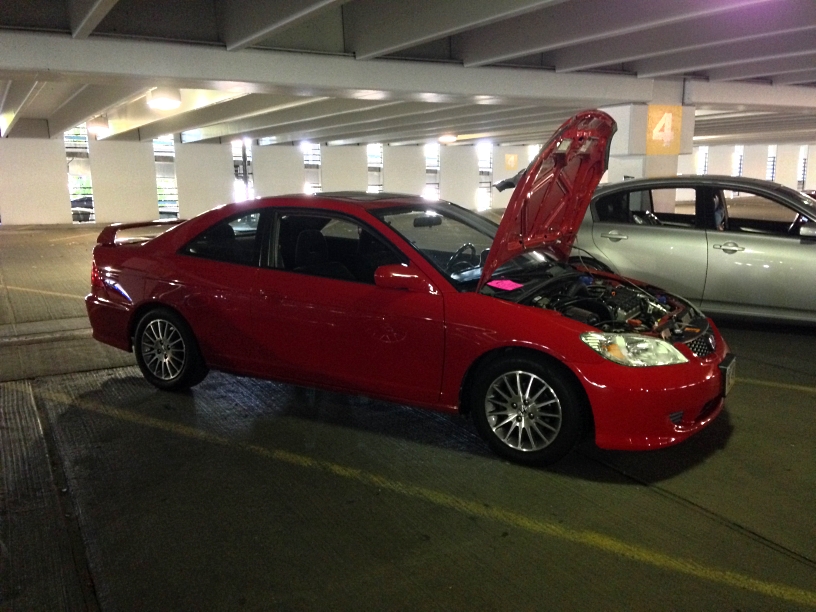
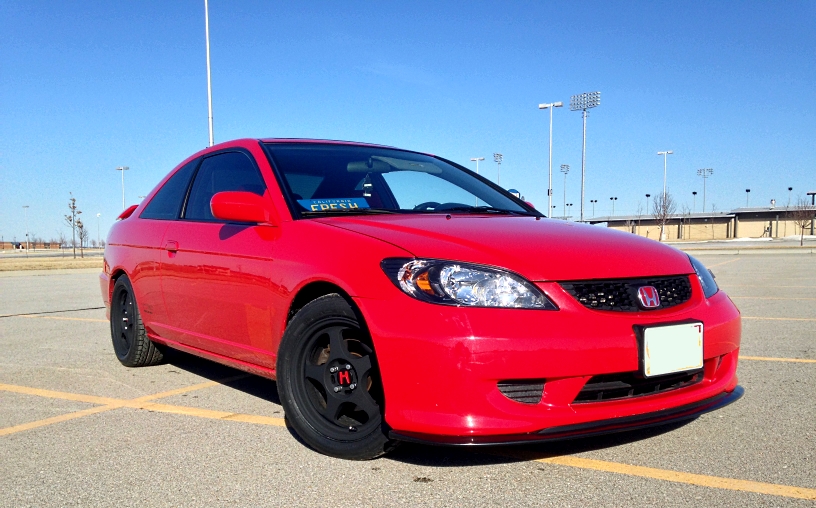
Alright where to begin. Well before I left Japan I was looking to see what kind of daily driver I wanted while I was waiting for my Integra Type R which is now in pieces in a shipping container, eventually to become a track car build, see the history of that here--->http://forums.nwp4life.com/zerothread?id=46199. My first thought was a 8th Gen SI but with the price and the unstable quality of the transmissions I looked into a EP3. The mini van style was hard to grasp but I did like it and thought it wasn't too bad, I was also looking at 8th Gen EX's but price and availability was still a factor. I knew I wanted something Rallye red, black interior, all stock, daily drivable, not highly coveted by thieves, and had some sort of a "sporty" styling which led me to purchasing my 2005 Civic EX Special Edition. It fit the entire bill and was the top of the line trim so I instantly jumped on it. $6600 later and it was mine.
Day after I bought it and a good washing.
As I am sure most claim in the import world, I wanted to do something different. I already new the 7th Gen was the redheaded step child of Honda and very few liked them. Even more so the coupes and sedans, but I was most inspired by the fact I couldn't find much about these. Granted yes there were handfuls of forums and those out there who have built these but it still isn't common at all to see modified. I attended the Ice Cream Cruise in Omaha, NE this month and, to my knowledge, there wasn't one at all in the entire 6,000 attendants except me.
So here is the plan, as you can tell from my last build thread titled Daily Driver with some Oomph, now that that build is going into a dedicated track project down the road this is now the Daily Driver with some Oomph 2.0. The goal is to eventually finish with a unique EM2 daily that has decent power and no detail has been overlooked, it can get groceries, retain decent mpg, be fun, and look good doing it. And the big plan is to eventually run a 60-65 shot of nitrous. I like this better because it can be power on demand, retain mpg off the bottle, less costly than a turbo, virtually maintenance free, and easily removable. I know I could get a turbo, or a k swap, or countless other things but that's not the point. So sit back relax and here we go.
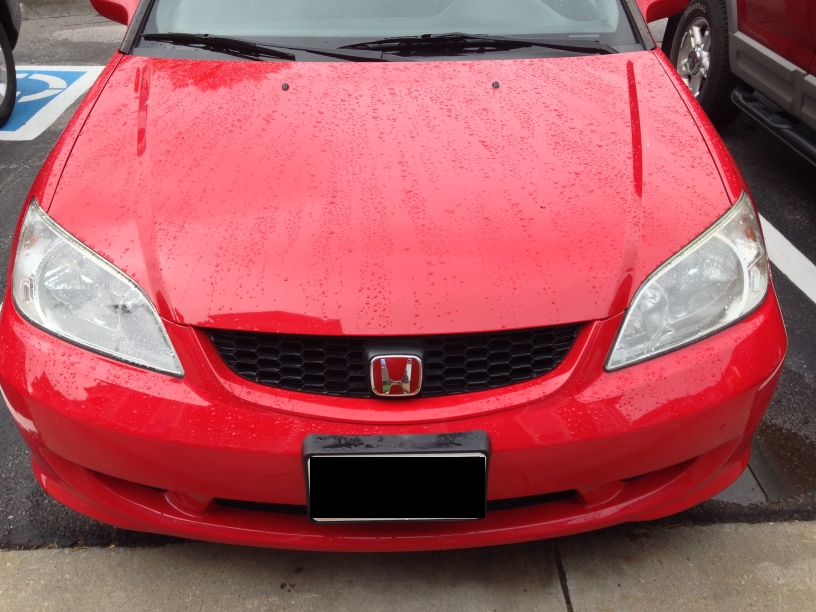
First things done, red H front emblem along with Tein S Techs, StopTech Centric rotors, and Hawk Performance ceramic pads.
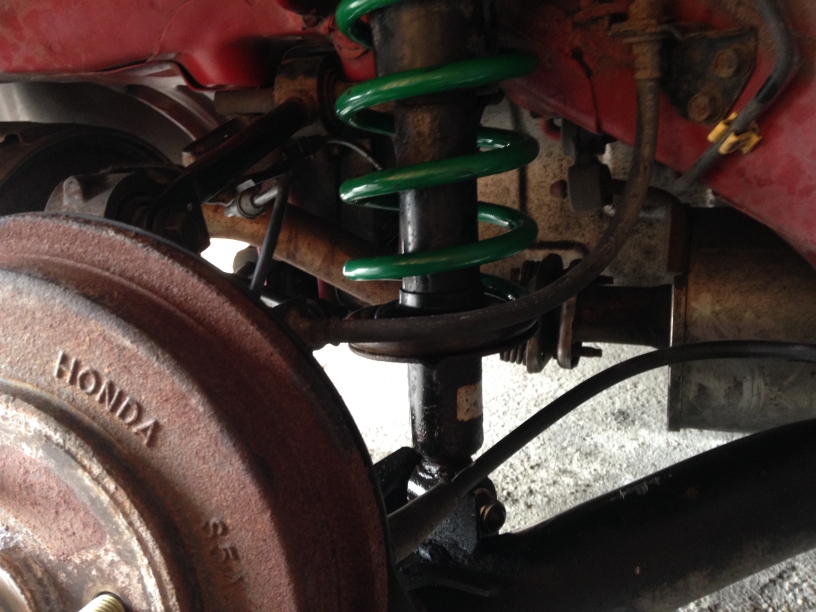
Then all sh*t hit the fan, bank 1 O2 sensor went out, cylinder 1 misfire, massive over heating etc. and on the last shock I was removing for the Tein springs, the head of the bolt snapped off so I drove around like that to pick up some donor parts from a junkyard along with some tools, specifically a angle grinder and went to town.
Success!
Eventually did a block test twice which cam back negative, changed the thermostat and it hasn't overheated once, so if you own a 7th gen, don't be like all the other pessimistic 7th gen owners who scream headgasket at the first mentioning of a overheat condition and check the small stuff first. Also the misfire was from fuel injector cleaner. Misfired the whole tank with it and about 1/4 through a fresh full tank it stopped and never came back. So moral of the story don't use FI cleaner.
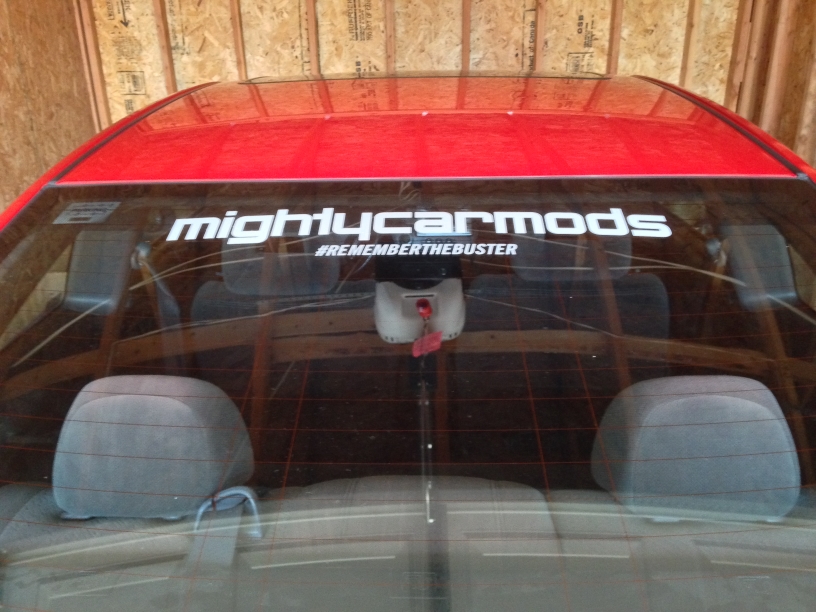
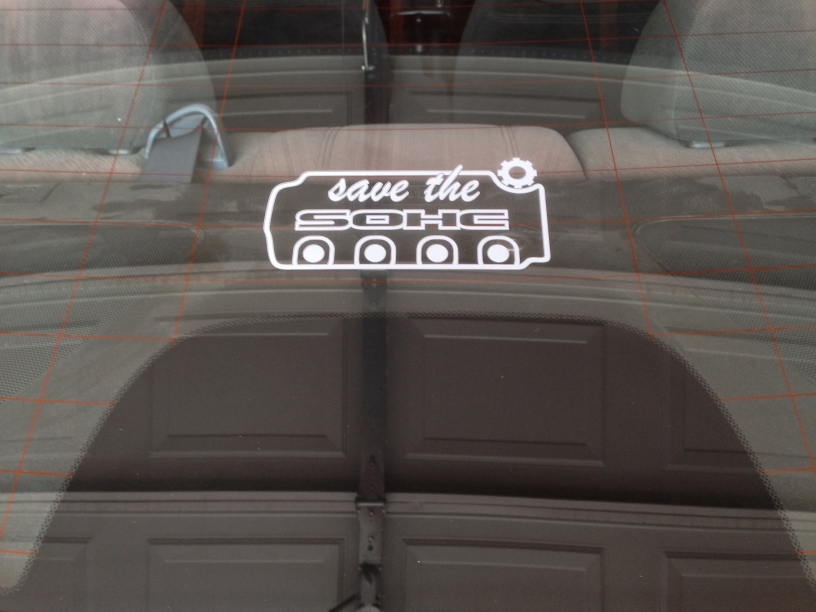
Added some decals to the rear windshield of 2 of my biggest automotive inspirations. Mighty Car Mods, and Paul Walker, the actor and movie that started it all for me when I was 11. Say what you will but I guarantee half of us wouldn't be here doing this stuff if it wasn't for this movie.
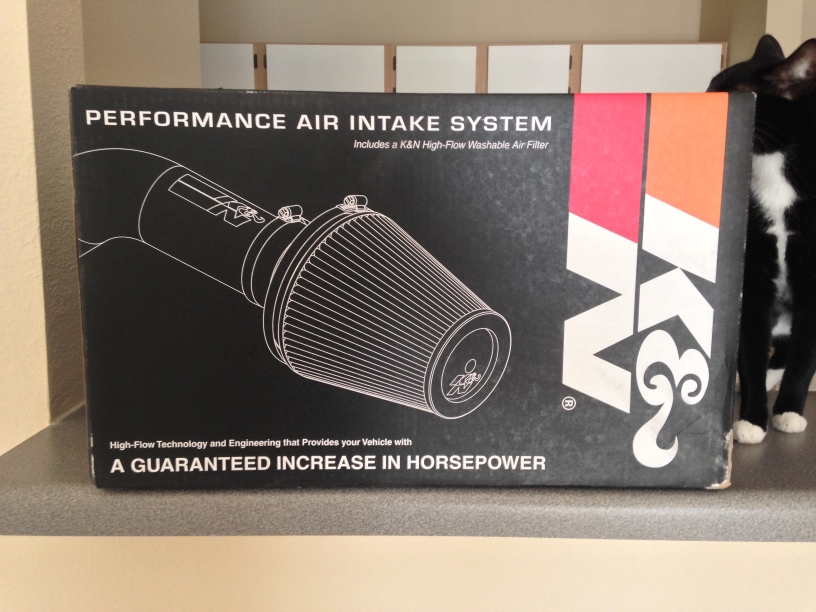
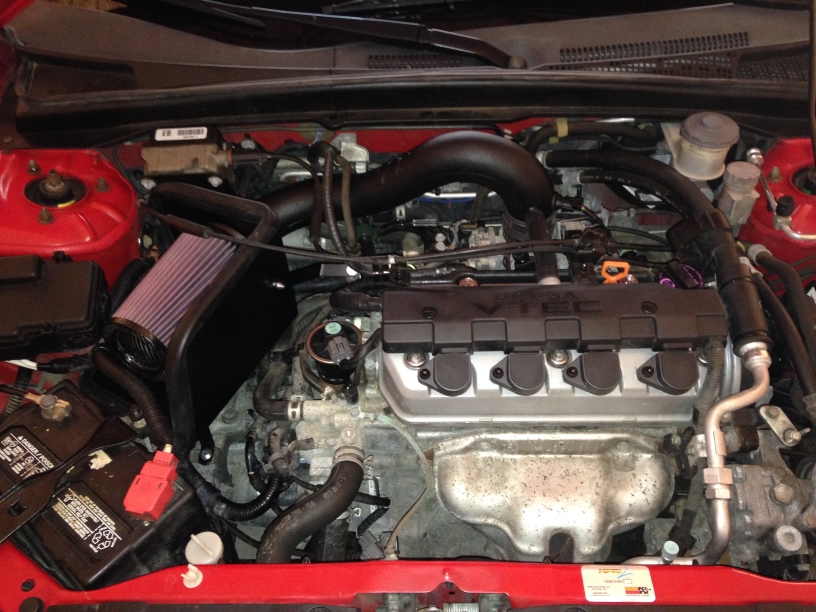
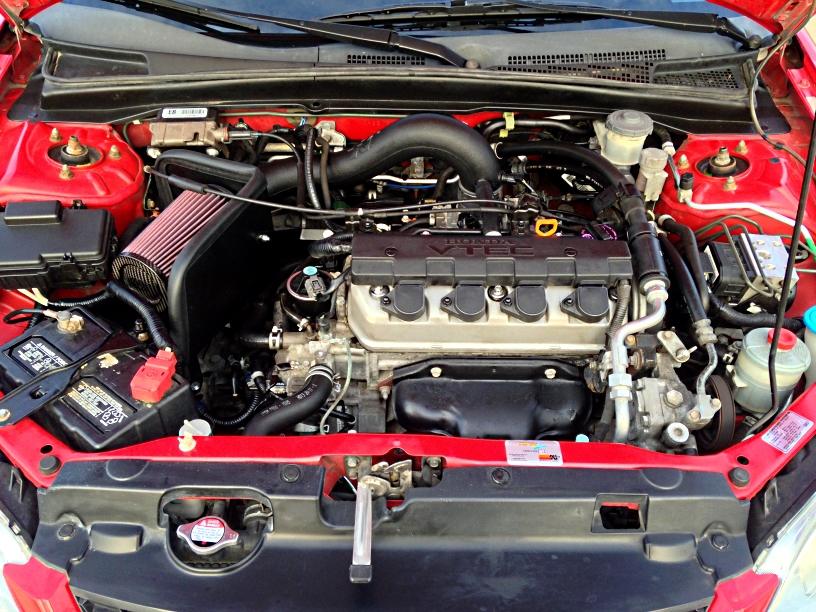
Picked up a K&N short ram kit. I've always used their filters and never had problems but have never gotten a whole intake kit. So never better than now to get one, installed with ease and is a nice piece to look at in the engine bay. I'm not one for super chromed out intakes.
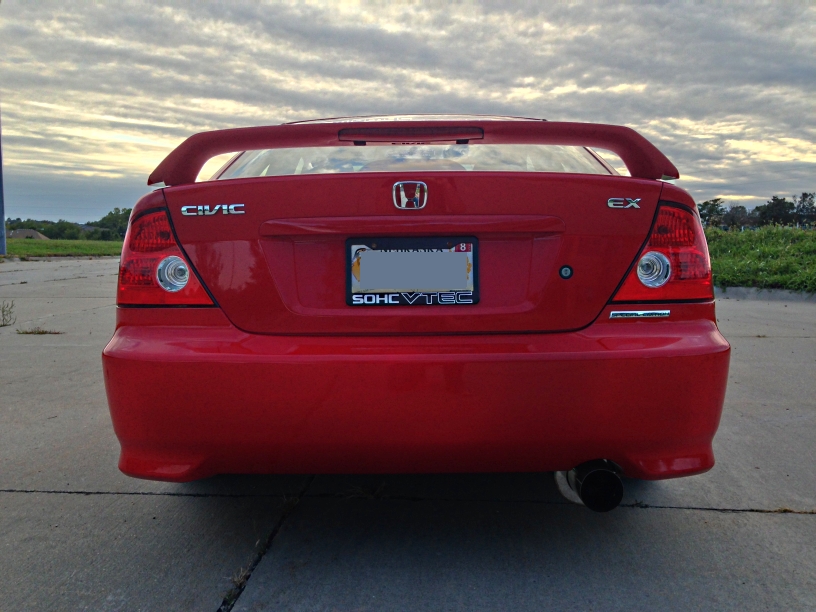
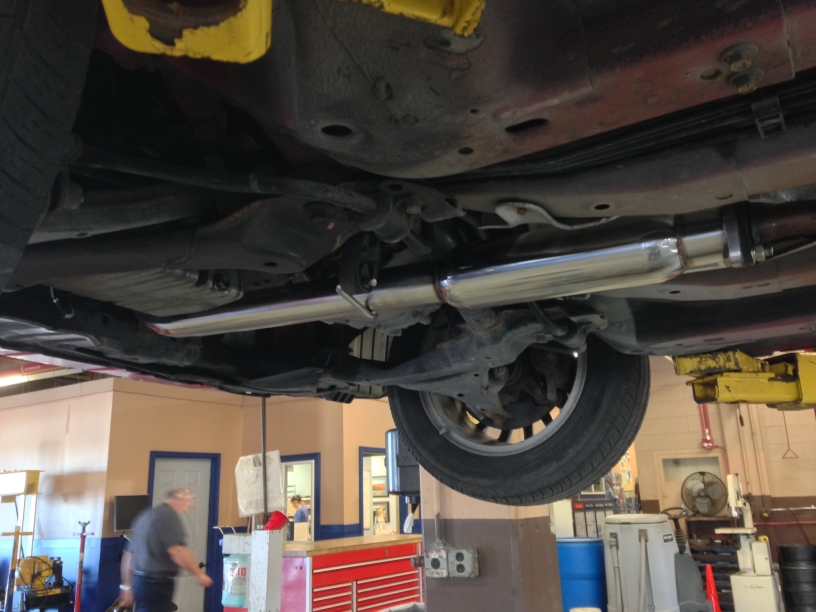
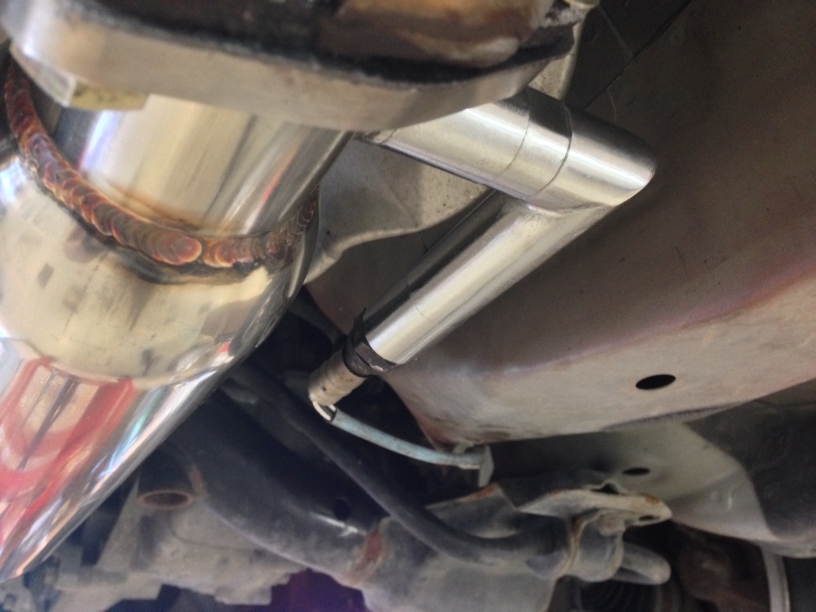
The most recent install/purchase a Ebay axle back muffler... I know I know hear me out, lol. For a whopping $70 I got this shipped to my front door, I wanted to see how it would sound as just a axle back and then I plan on getting a catless header and wanted to see how loud that is with a stock midpipe and a axle back. Reason being the downpipe from the header on the D17 is bottlenecked down to 1.70" and this being a DD but with a little extra on the side I'm gonna test out a catless header, stock mid pipe, axle back setup and see how that does in the loudness department.
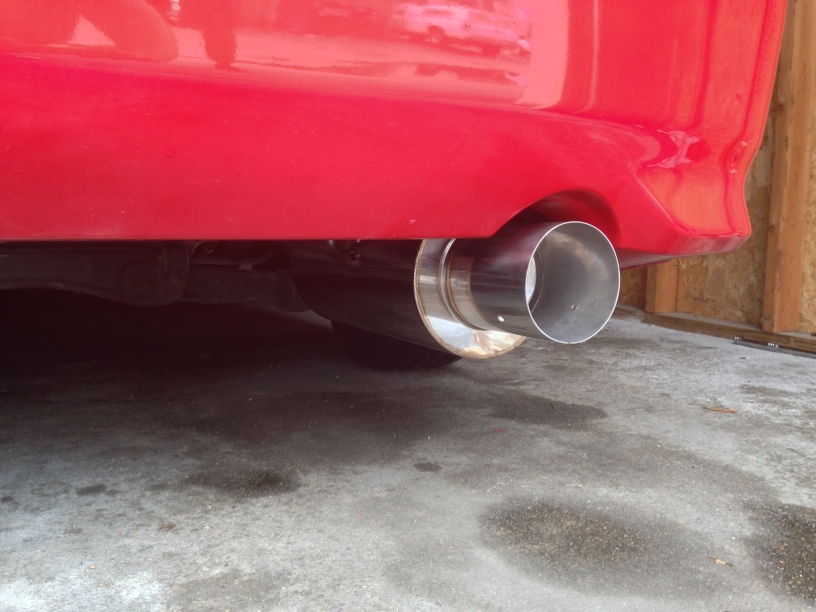
Hell for $70, good mellow rumble, perfect fitment, and fast shipping. I'd say it's worth it.
That's it for big changes for a little while until my ITR parts I won't be using get here and I can sell them, small here and there/repair/appearance projects will be coming up.
Just some small things done today. The last sticker I will put on my car.
The red overlay from Corsport, which took a month to get here
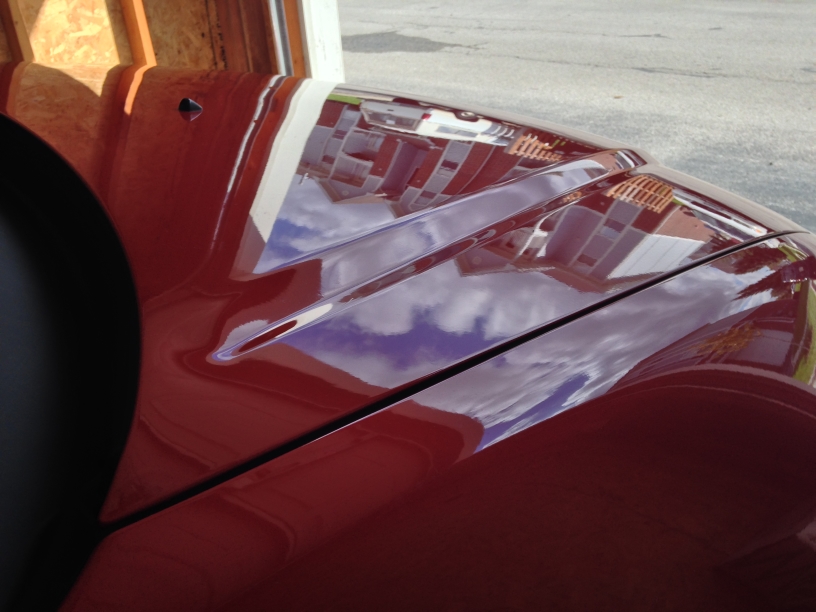
And a little order from Majestic Honda, the previous owner was in a minor fender bender I'm assuming this knocked off and never put back on when repainted (you can see the awesome primer over spray on the corner of the trunk ) also I like to keep things OEM fresh
Other than that my ITR parts to sell should be here anyday, then I'll be picking up a Crower Stage 1, KYB GR-2 struts, new strut bearings, header, and if I have enough left over buy a chunk of my Nitrous Express kit I'm looking at. Would buy wheels but meh, winter is around the corner here so I'll wait.
Another small update. Upon checking my tracking for some parts I ordered Friday night I just realized my parts had been delivered and sitting in my mailbox for the last six hours
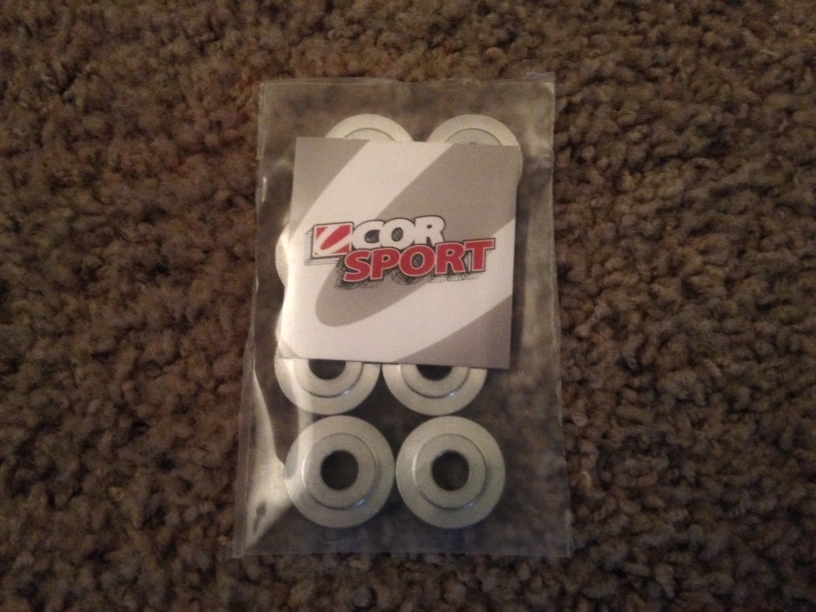
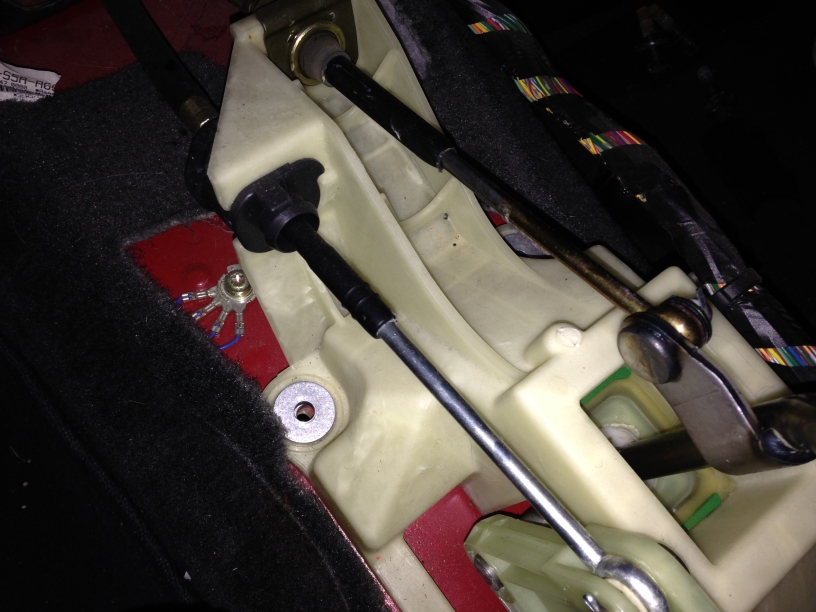
Corsport Base Shifter Bushings
My rear red H emblem
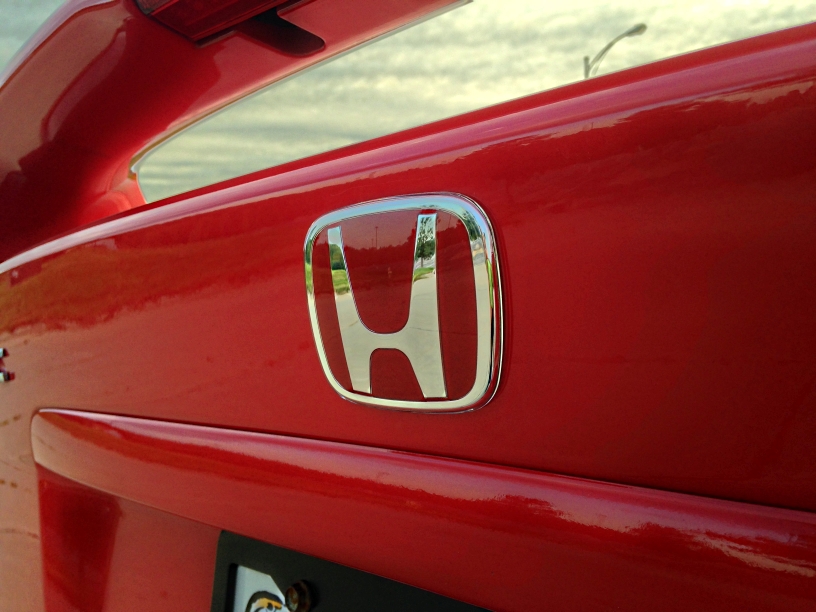
I am not entirely sure if these are real, they are sold by Gadgets Center on Amazon. I was not about to pay $120 for "JDM" emblems that could get stolen. Total for front and back from them is like $58. Has a legit looking package and the build quality is extremely nice but anybody with a printer can print that Honda package sticker if they wanted to.
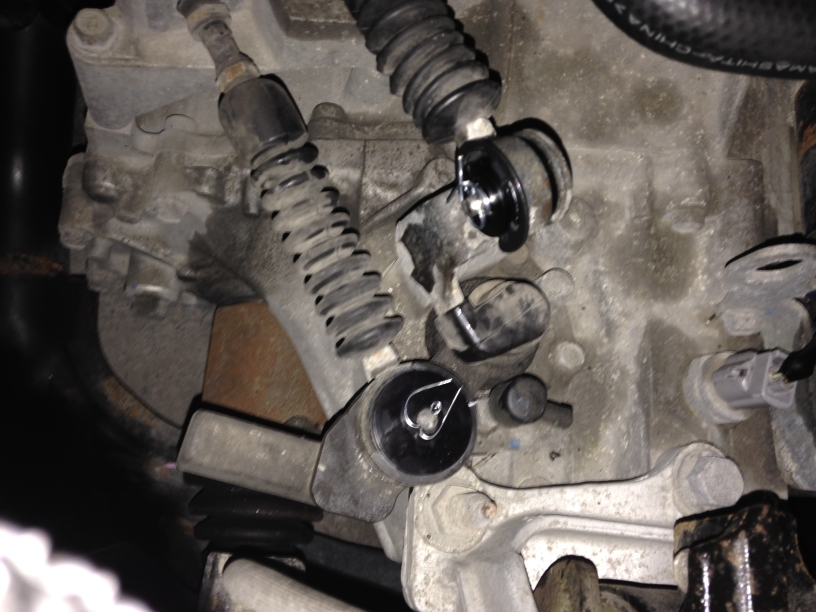
I'll admit when I bought the Corsport Base Bushings I thought I had bought something completely different. I was under the impression these bushings replaced the linkage bushings for some reason to the acutal shifter (I think I got this idea from my 240sx I had 6 years ago, I just may be nuts ) When I realized Corsport didn't send the instructions they said they include I looked up a DIY for them and found out where they really go. After which I thought there was no way this could improve shifter feel and assumed I just wasted $28. Well I installed them and after a test drive I couldn't have been more wrong, these things are great! I was really surprised to notice a difference, feels alot more rigid and direct. I highly recommend this to anyone who is looking for improved shifter feel but doesn't want a short shifter like me since this is my DD and not a race car
  Soon I'll also be buying the "under hood" shifter bushings to replace the ones that attach the cables to the trans.
I also got a Meguiar's Clay Bar kit, which came out really nice, I also used their cleaner wax and here is the result.
Finally got around to changing the oil today since I bought the car, I know I know, too much time and money doing modifications
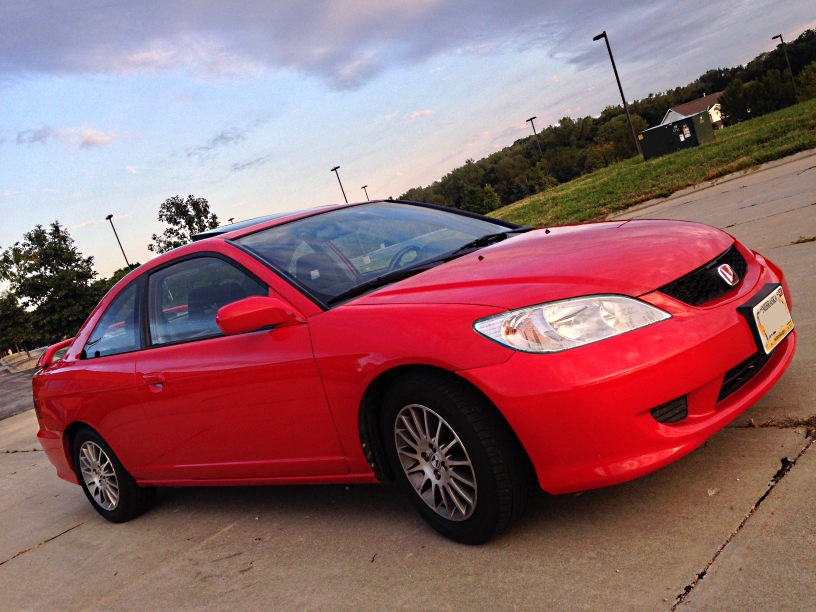
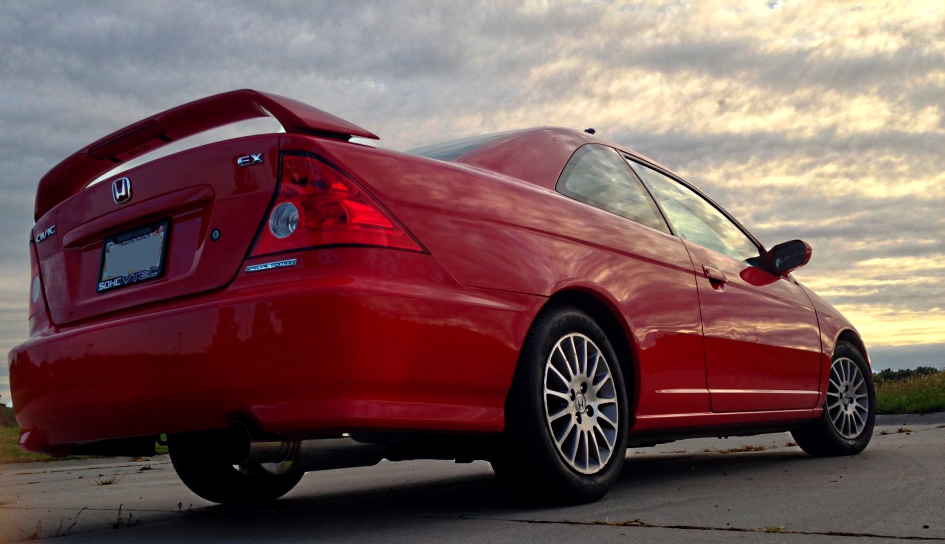
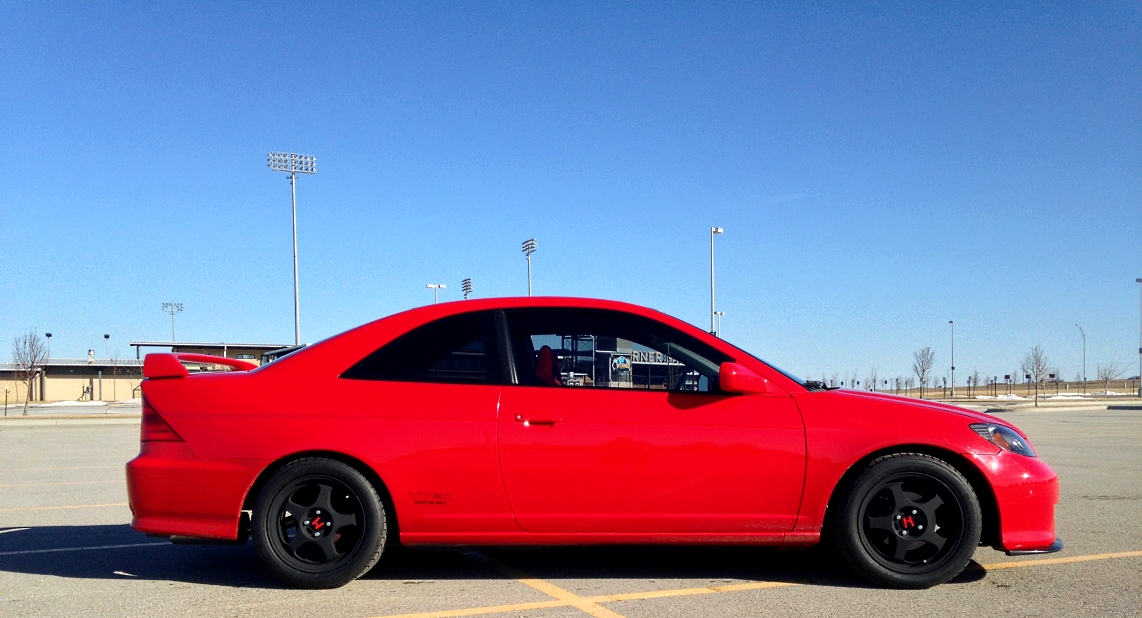
I also went out and shot some photos after since I don't have any legit posed shots, crappy day for photography but
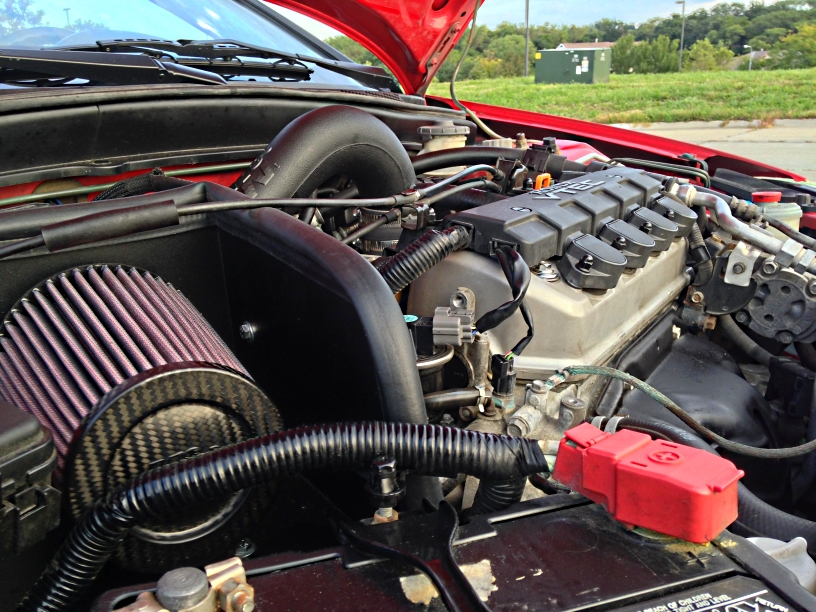
Also painted my heat shield with VHT ceramic paint, looks waaay better IMO and cleaned up a little here and there. I used Black Magic Tire Foam on the looms and hoses sparingly and it came out great.
Alright guys a couple updates.
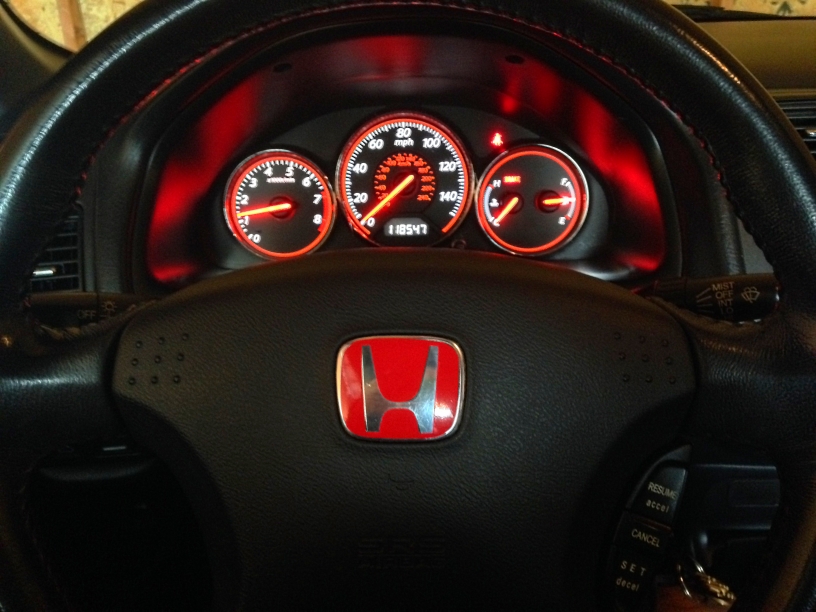
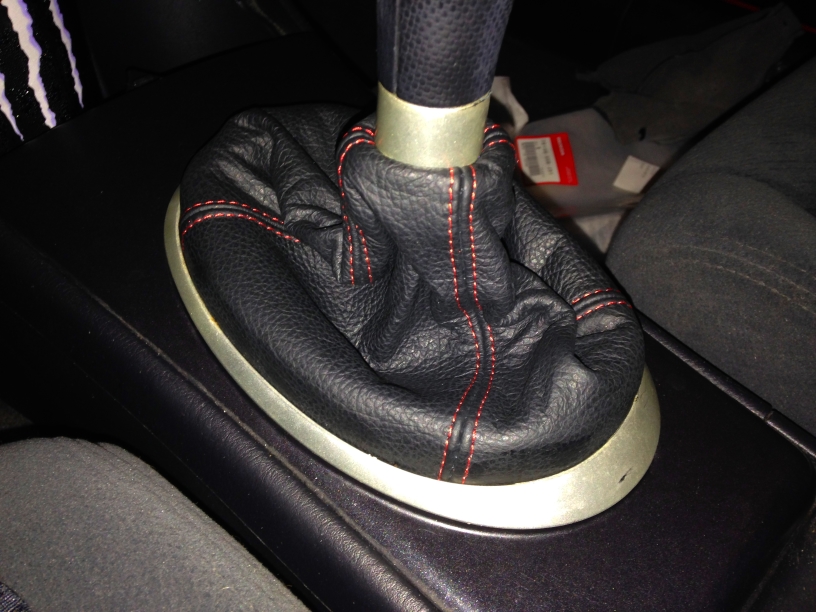
I got my custom shift boot from Redlinegoods.com, these guys are awesome! Great customer service, fast shipping, and flawless craftsmanship. The boot I ordered was real leather and "JDM" red stitch with a X pattern. Had it made and shipped out from Europe to my front door in a week!
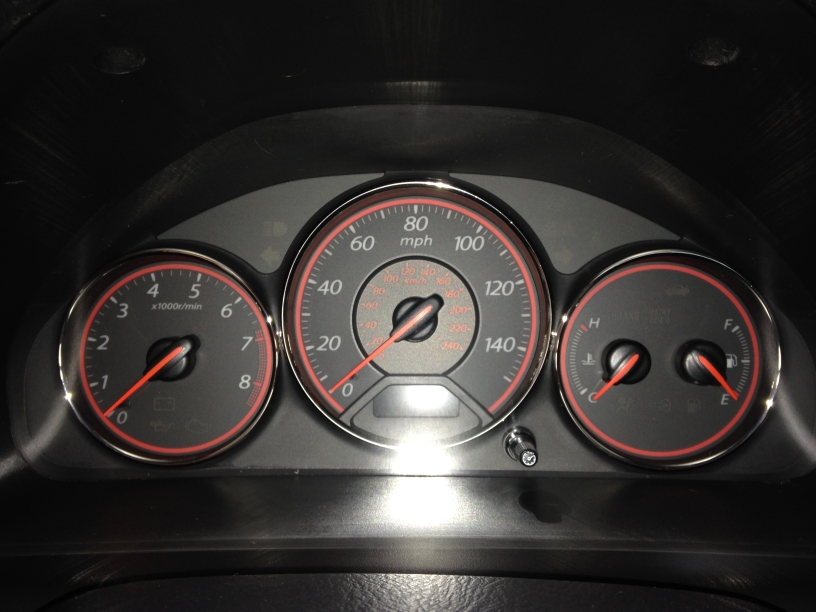
Also ordered a new gauge lens since mine was cracked, when I took the old one off it literally tore like paper . Courtesy of Majestic Honda, great company.
Old
New
Some more exciting news, I ordered a OBX catless downpipe and 4-1 header, I had one on my 240sx and it was great. Also ordered Ingalls new rear camber kit and Corsport linkage bushings.
Installed the Corsport aluminum shift linkage bushings today. Along with my base bushings this has made shift feel excellent.
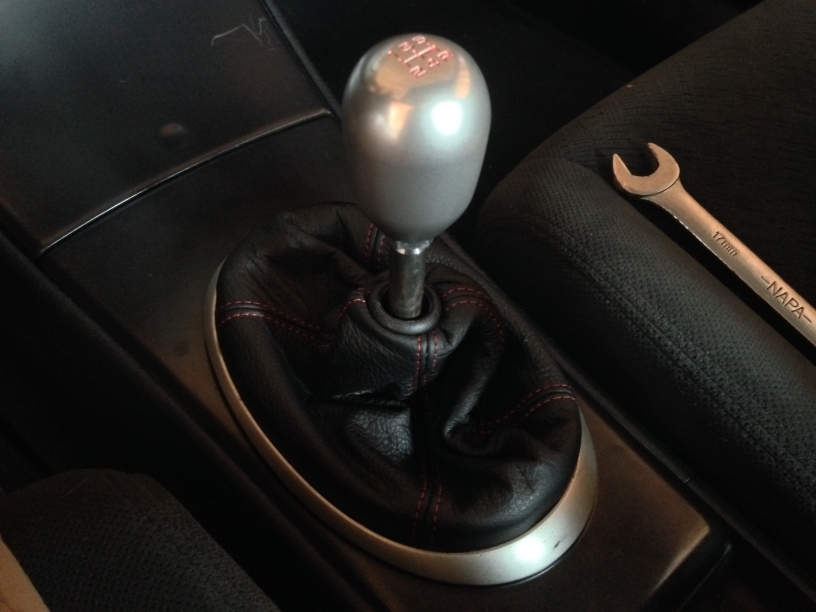
Alright so now that my ITR parts came, I took the stuff I was going to use for this car and put it on, my Spoon socks, Type R shift ****, WedsSport grounding kit (its the black cables with yellow ends), and I also took the collar off my ITR boot to put it on the new Redline Goods one.
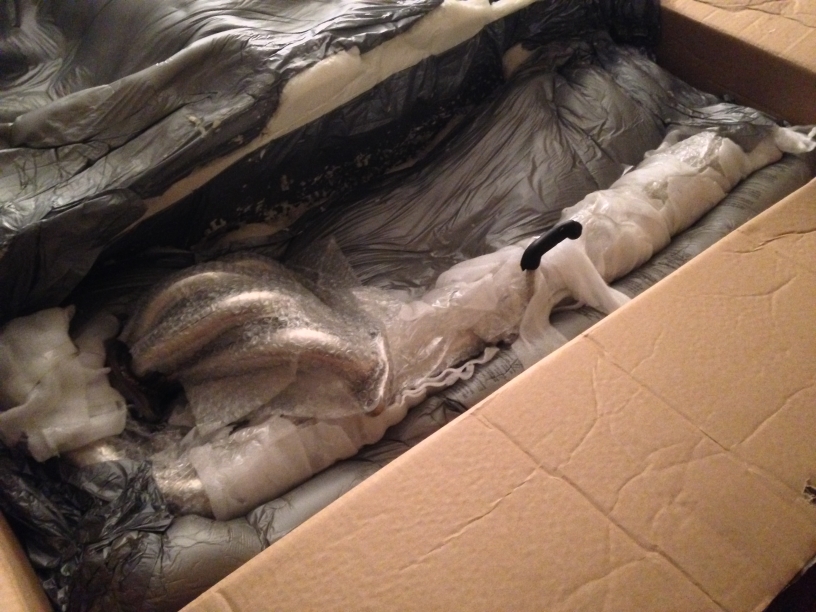
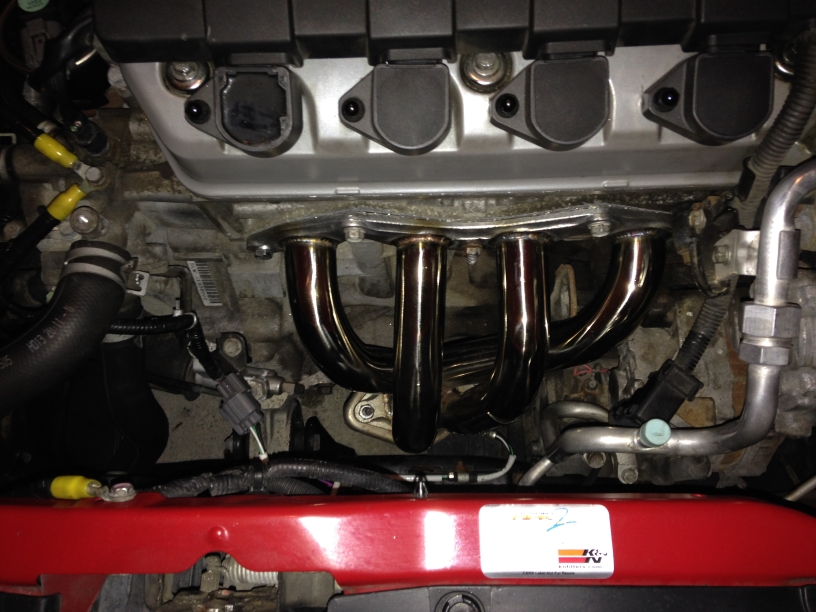
Also got my OBX header in, fit perfectly, haven't put the down pipe on yet. Waiting to take it to my shop on base so I can get it on a lift to get better leverage on the cat bolts. Came in a interesting packing, it was like foam injected into a plastic bag, lol, it was well packed though.

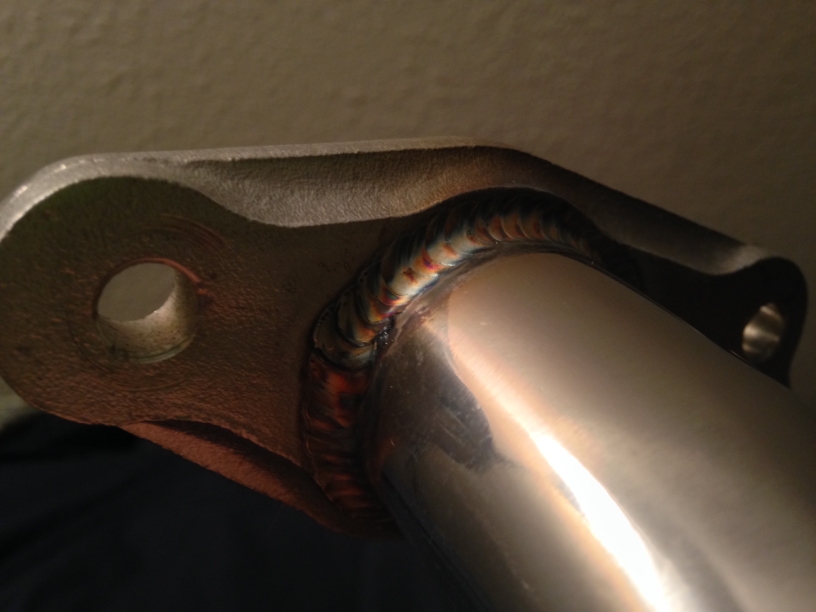
So I was able to put on the OBX down pipe today. I was extremely surprised how well the install went considering my luck with this car so far. On a side note I highly recommend anyone who works on their cars alot to buy Irwin's bolt extractor set, they are like case hardened steel sockets with blade like grips inside in a spiral that makes the most stubborn bolt look like a p***y I've used it so many times in a jam in the past year it has become one of the best tools I have every owned. Anyways, as far as what I did for the install I purchased a O2 defouler from Amazon for like $16 which fit our cars with this header like a glove, I couldn't have asked for a better fitment for the bank 2 o2 sensor, it retained the stock location and wire stay entirely. Fitment was great, welds look just as good as the header all in all good buy. This has been the second header I have owned from them and their products are nothing short of fantastic. As far as gains I did see a noticeable improvement I believe in the top end, it feels more free reving, probably since losing that double walled 1.70'' pipe. And yes I know I won't see the biggest improvement until I also get rid of the stock midpipe but the sound just got super deep with not a hint of rasp which I was pleasantly surprised of, and I also believe that smaller midpipe will keep up the necessary back pressure since it is more free flowing. So performance and still daily drivable without making you want to blow your brains out due to noise. Well this should encompass my final engine mods until the Crower stage 1 and the NX kit. So for the mean time I'm trying to find some Rota Slips to trade my Integra Type R parts for, and will be doing some small interior and exterior stuff.
Here is also my car sitting pretty at the Turbos for Tatas charity car show for breast cancer awareness, I was in the 01 and newer asian mild class, I didn't place, got beat out by a g35, brz, and wrx but next year hopefully.
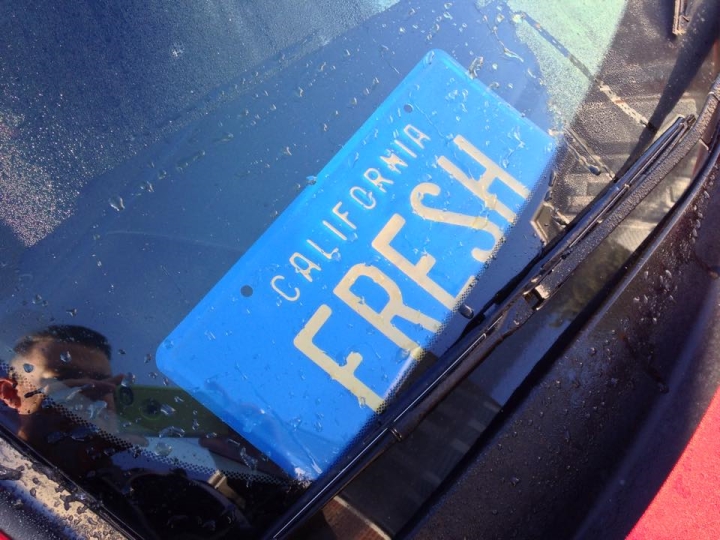
Just some small updates, added a vanity plate to the front windshield. I have wanted this for a while now and finally got it
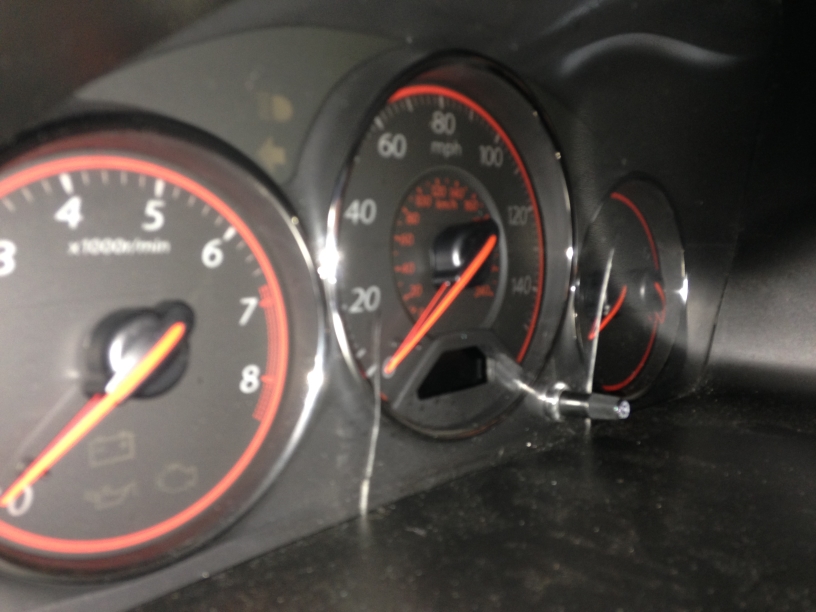
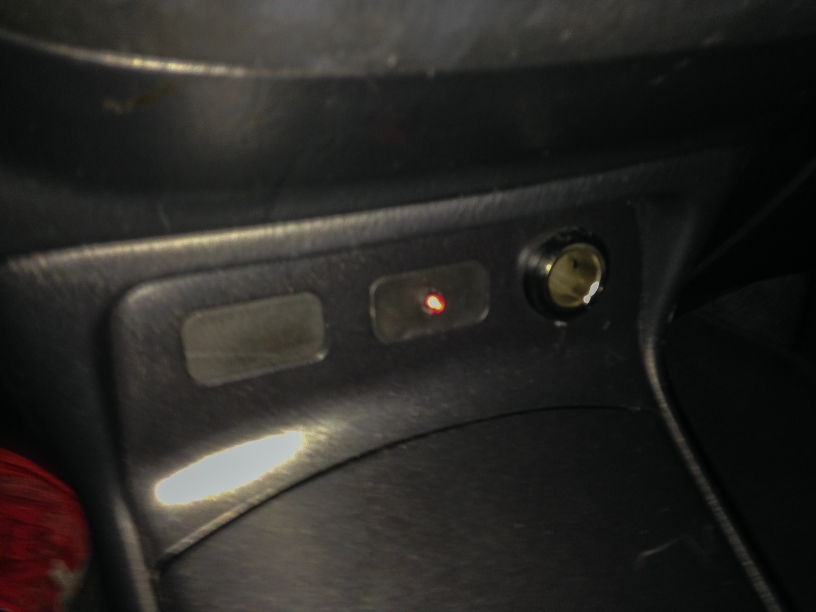
Also wired up a VTEC light to monitor for economy, about half throttle and up at 2800 RPMs is when it engages for anyone who is wondering since there is so much speculation out there.
On a side note I am having significant engine problems again. For the first two months of owning the car I hadn't changed the oil since the dealer had but I always checked the level to make sure it was all good since it was a new car for me which the oil level was always the same. I changed it 2 weeks ago and when I checked my oil today it was 2 quarts low... I know its not burning it because since I don't have a cat nothing is impeded all you ever see is the occasional puff from idle when you take off because of the richness. I have no oil spots in my garage, and no visible leaks I can see, when I installed my header and downpipe I didn't notice the filter leaking nor is it leaking onto the header which you would see smoke from. So all in all I have no freakin clue what is going on. At this point I'm thinkin of getting another D17 from H Motors Online for 750 and just do a seal and gasket rebuild because I can't write this car off yet, I still owe $6200
So after some diagnosing I changed out to a new PCV valve so hopefully that was what was causing the oil burning issue. The old one was pretty crappy looking. Also I sold some of my Type R parts so I'm trying to decide on either a stage 1 Crower or wheels, what would you guys do first? I've got winter coming up in NE soon so I was thinking cam.
OBX downpipe update:
I took it off... lol. I couldn't stand the smell and the little puffs of smoke from stoplight acceleration, it made daily driving a annoyance and like someone mentioned earlier the O2 defouler lasted only a week until it threw a CEL. It just made me feel like one of those nasty teen ricer hondas that smell bad and smoke so until I can get a high flow cat for the dp I'm leaving it off. Just not worth it. On the other hand I swear the stock dp gives better low end since it adds some back pressure. It feels peppier in stop and go than it did with the catless dp, I'm sure the catless one would also be better with a tune.
Alright so the PCV wasn't the issue, after some research I think the oil control rings are sticking, when I changed the oil I used Mobil 1 Full Syn 5w-20 so that may have cleaned things up too much so I changed it today to 5w-30 Valvoline Max Life with a new filter so we'll see how that goes.
I finally put on my Ingalls rear Smart Arms, now just to get an alignment.
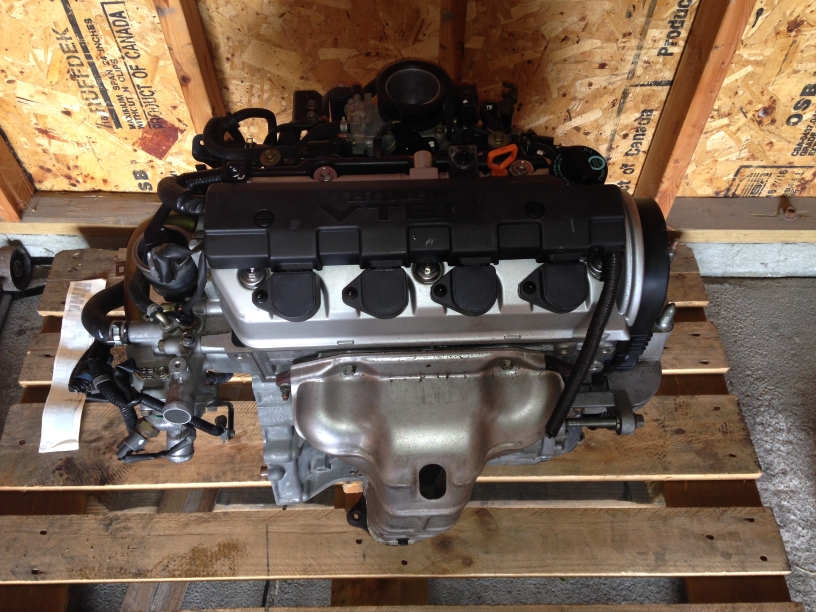
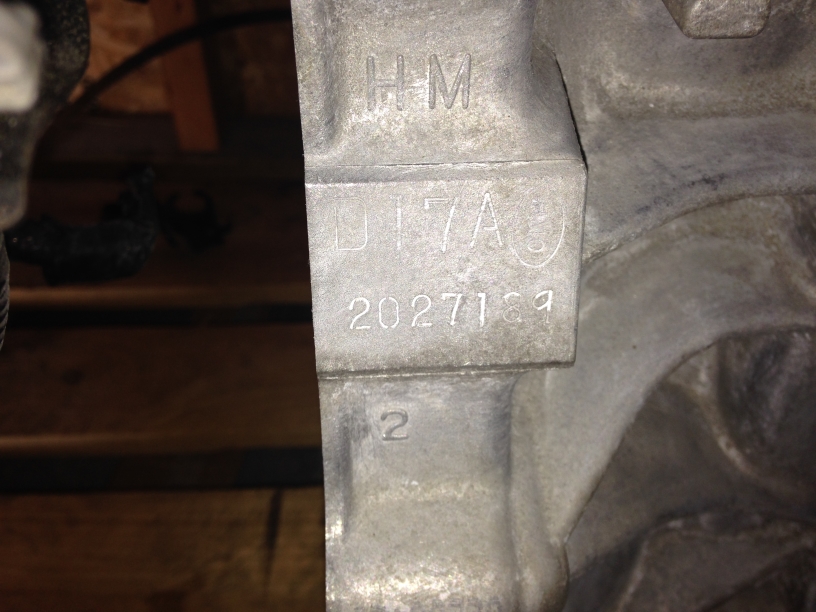
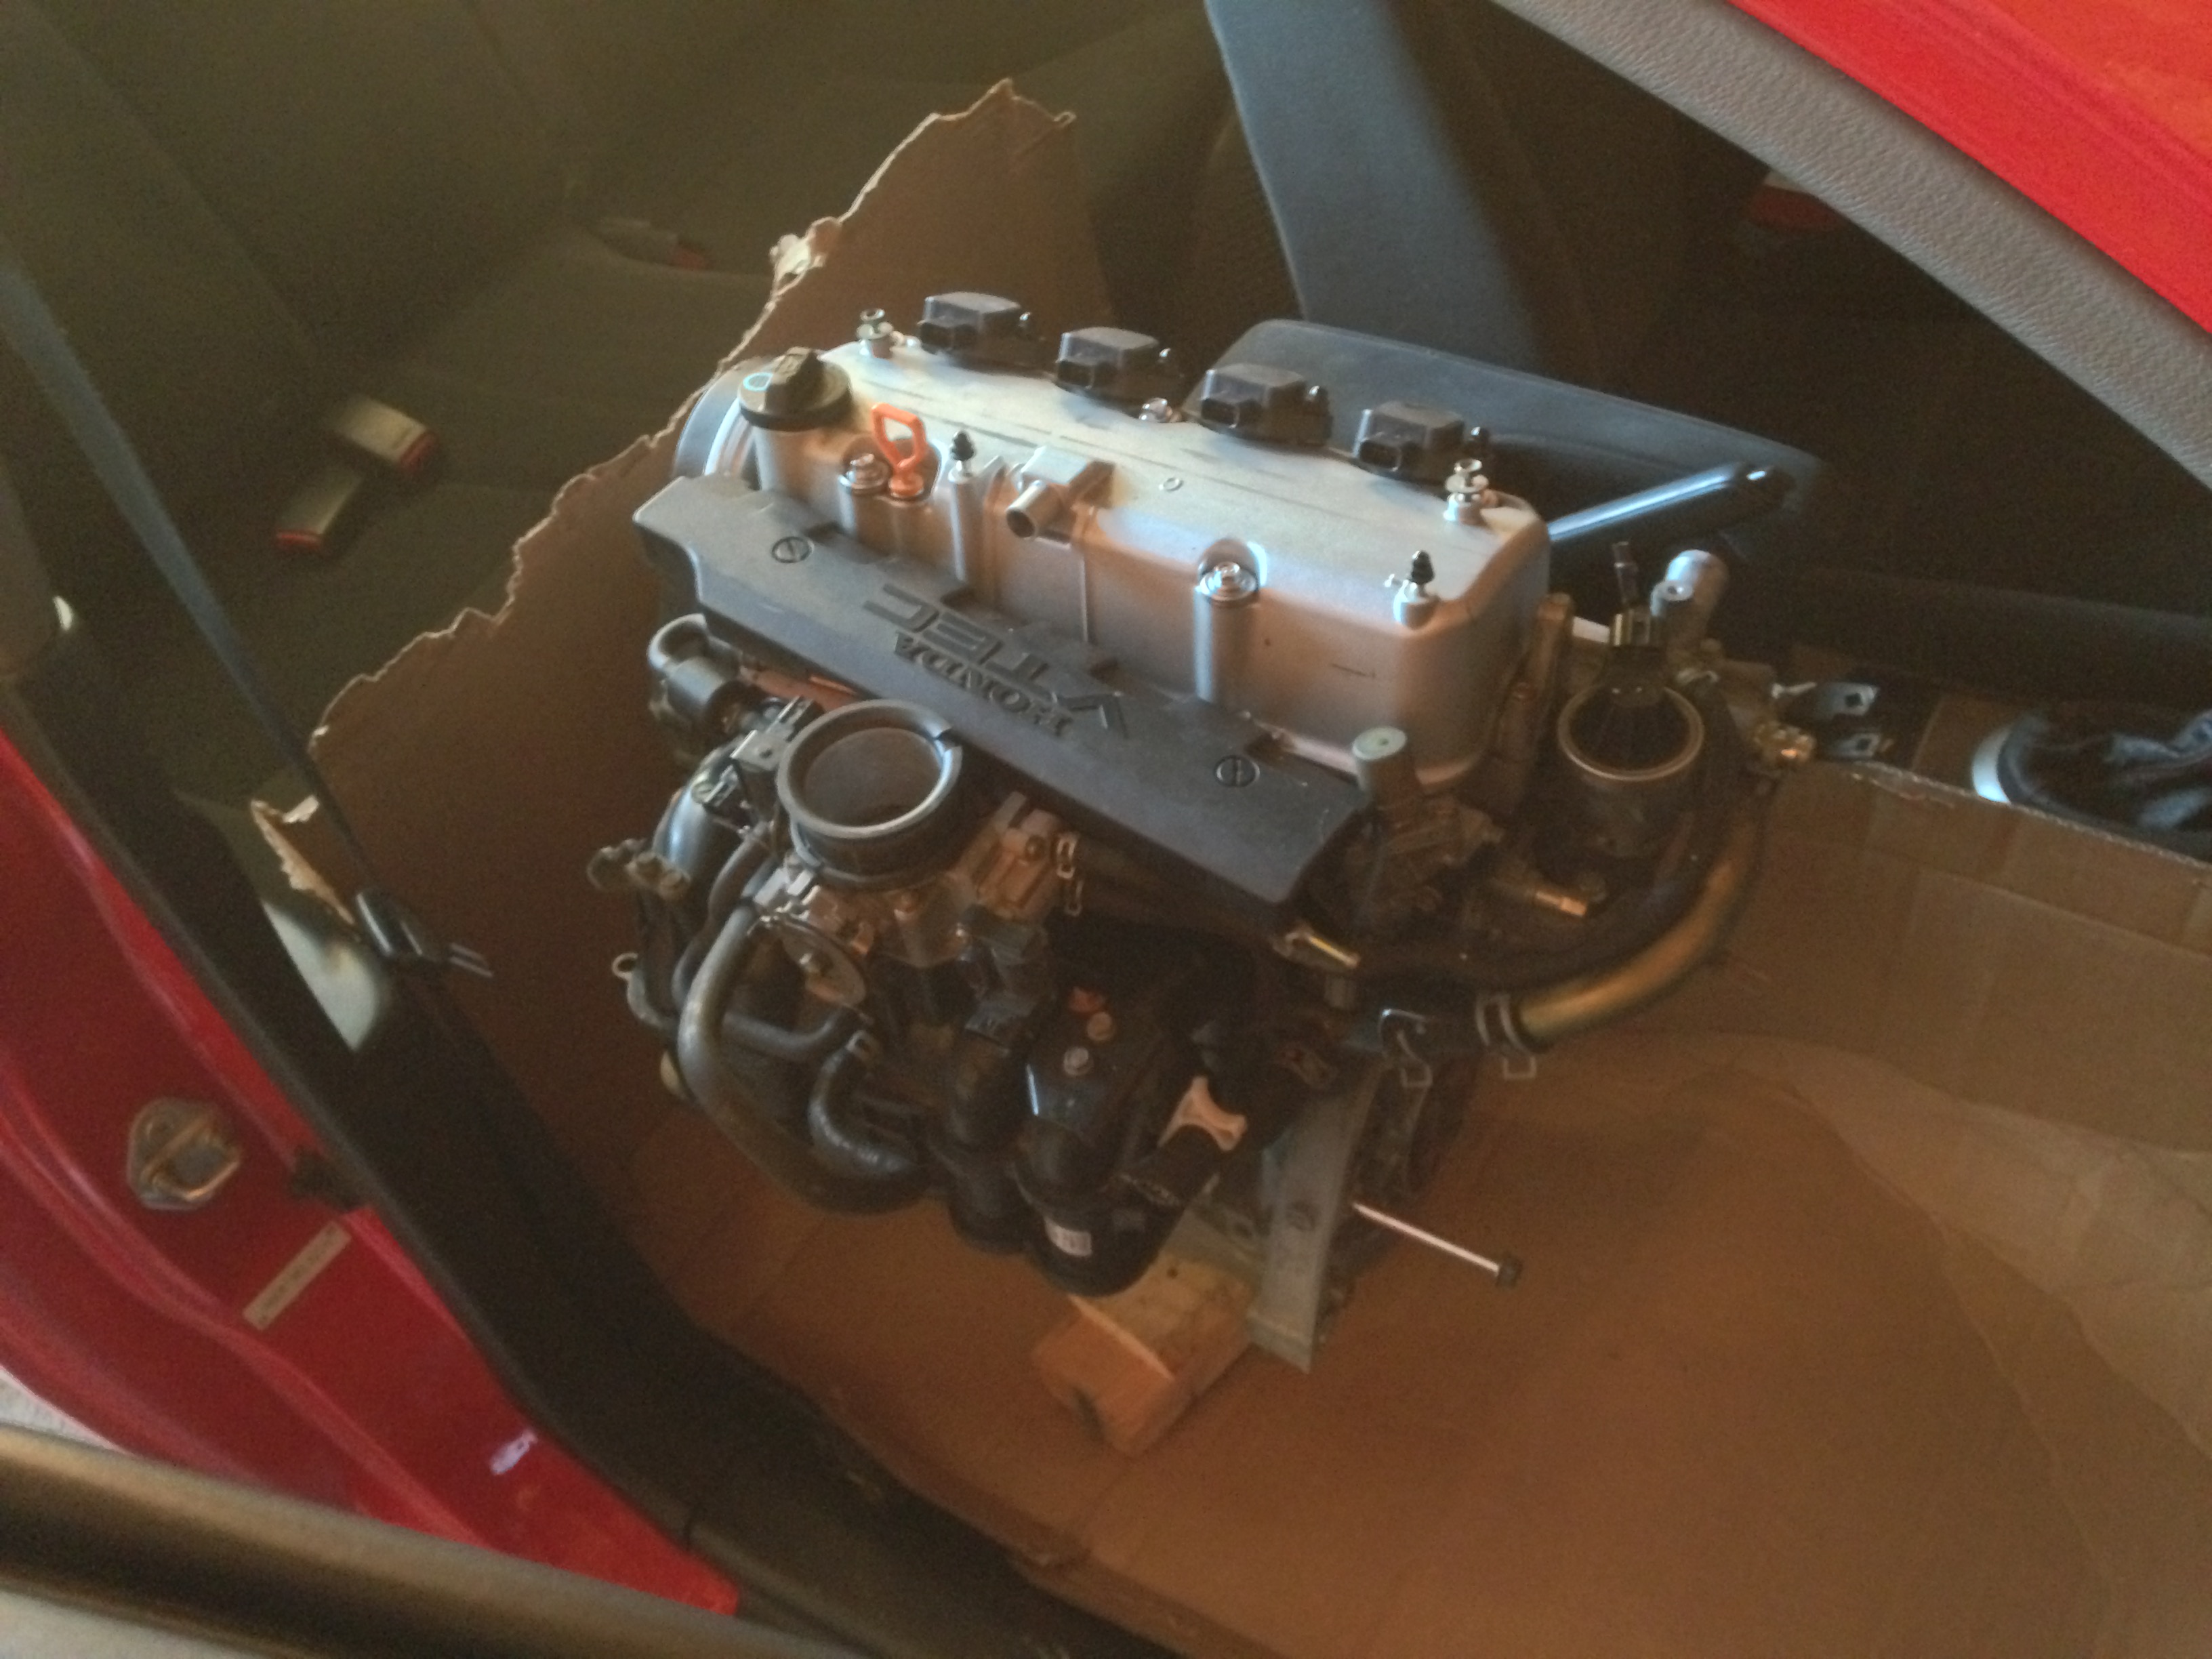
So with my never ending oil consumption problem and possible leaking headgasket. I bought a new D17A from HMotors Online. Great company to deal with, all sensors came intact, it was super clean, and estimated between 35-45K miles. Over the next few months I will be replacing this new motors headgasket with a OEM one, a Gates timing belt component kit, ARP head studs, Competition Clutch Stage 1, and minor odds and ends like thermostat etc. Also picked up a Crower Stage 1 camshaft seeing as there isn't a better time than now to put one in .
So it has been a while since I updated, between the holidays and lack of motivation with the car's problems I'm finally getting back into fixing it up.
Some minor things are I removed all the rear windshield stickers as they weren't appealing to me anymore and added a minor cosmetic piece to the sides.

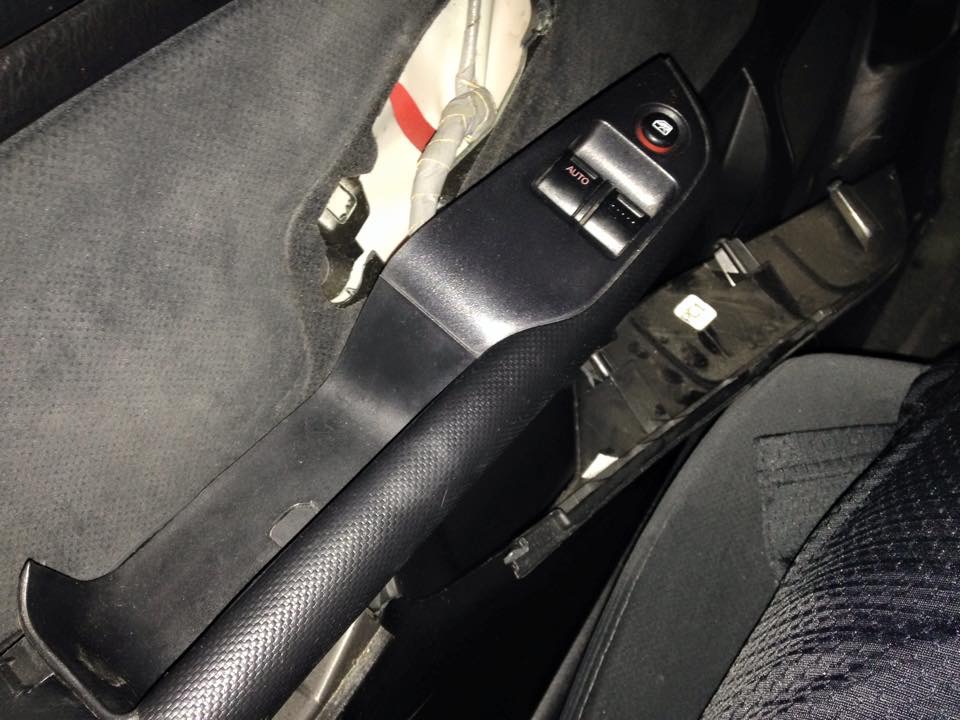
More problems arose, it was about -2 degrees one morning and as I went to shut my door the whole panel exploded and cracked. So I just did a temp fix for now until I can find a junkyard replacement.
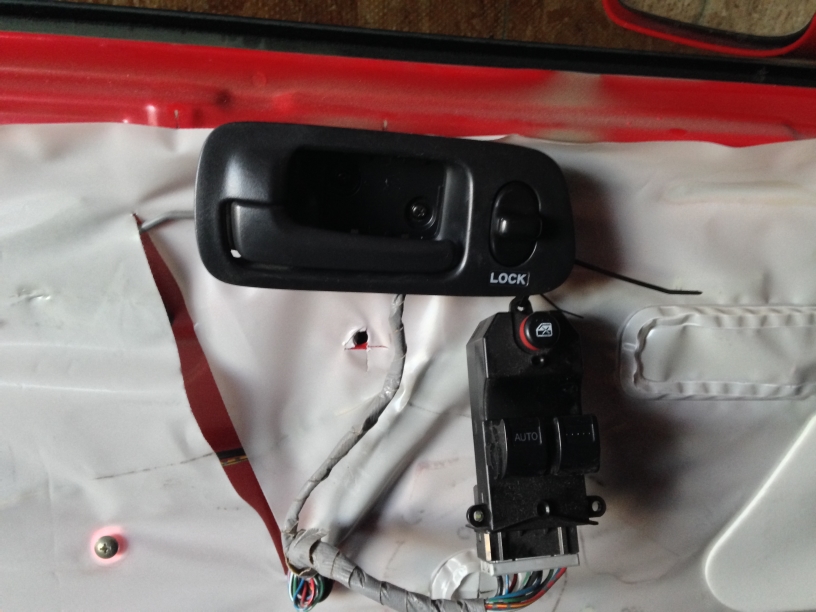
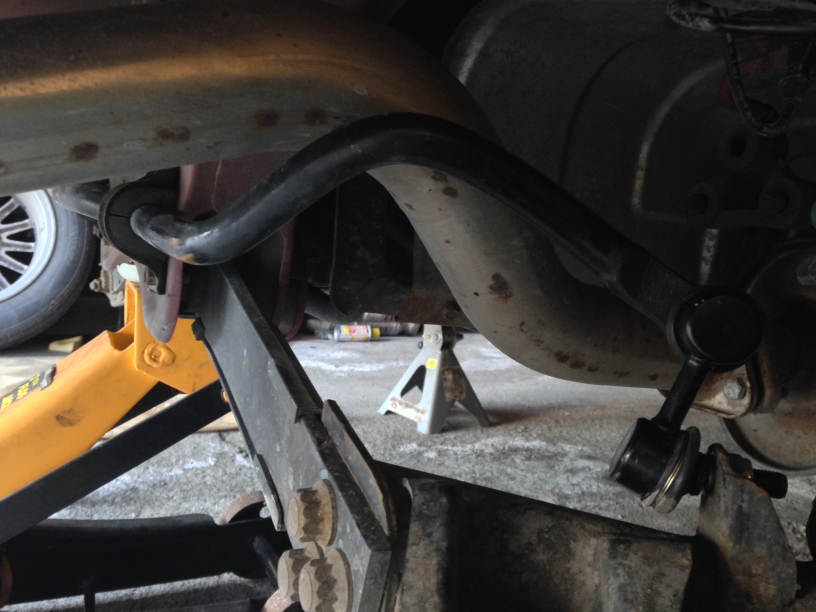
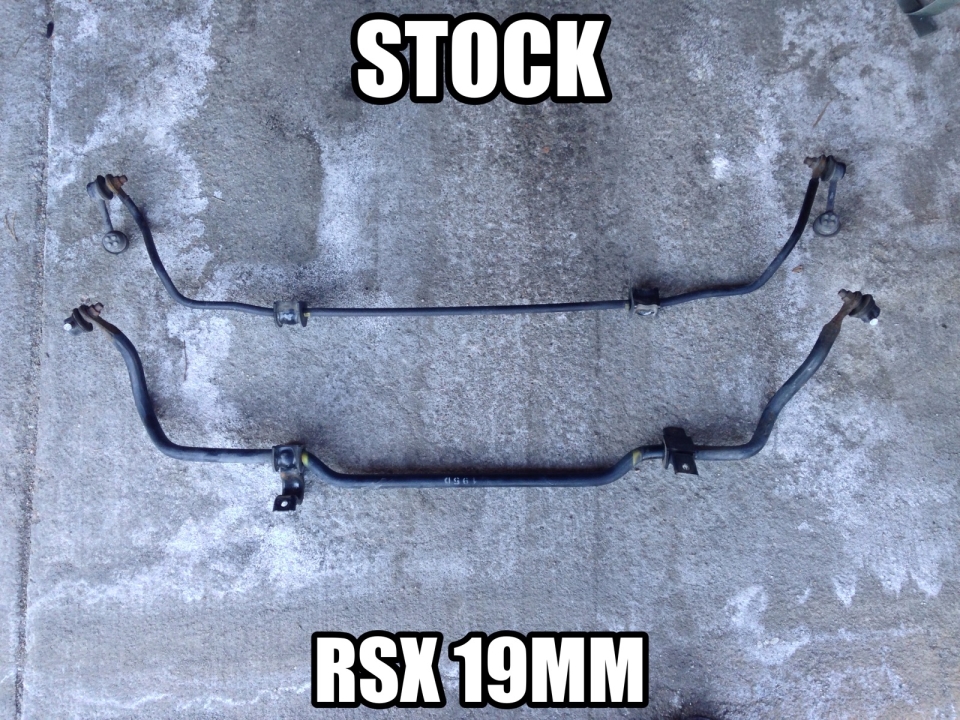
I went to my local junkyard to source a door panel and didn't find one but I did manage to score a 19mm base RSX rear sway bar. Have to say probably one of the best mods I have done, the car feels so much more planted in corners. I just need to get some header wrap to put on the exhaust because sometimes it taps against the larger sway bar and becomes annoying.
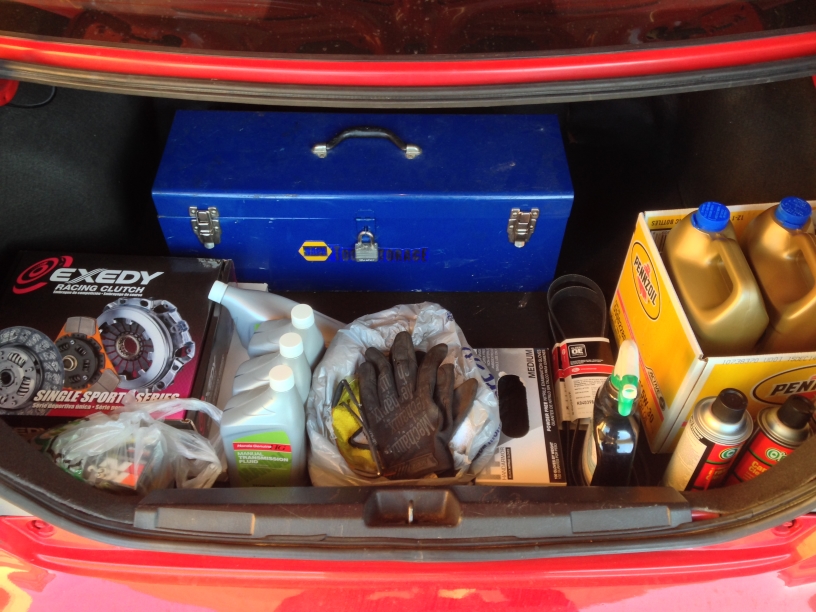
Other than that I should be getting started on installing the Gates timing belt kit, new water pump, Crower stage 1 soon, and will be installing the new engine hopefully in Feb/March weather permitting. Until then here is a action shot lol.
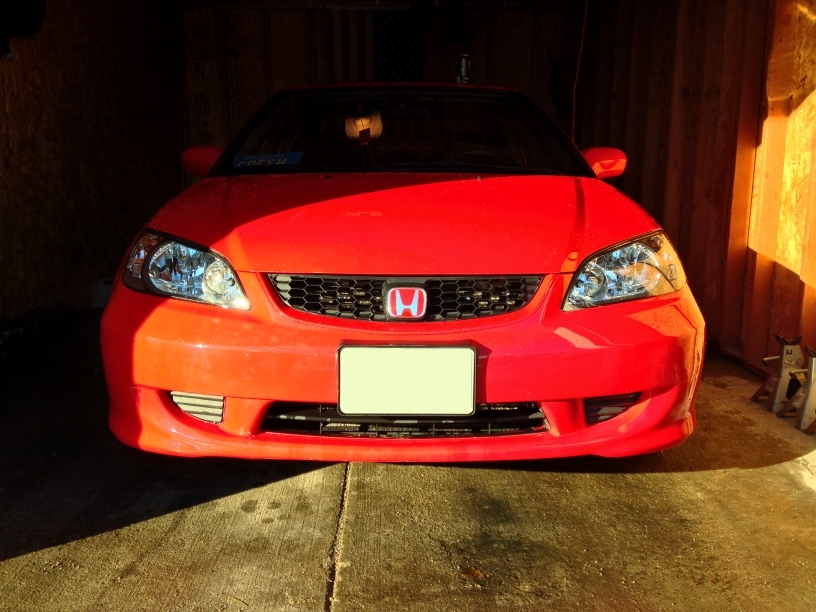
Some small updates, threw on some black housing headlights I picked up off of Amazon.
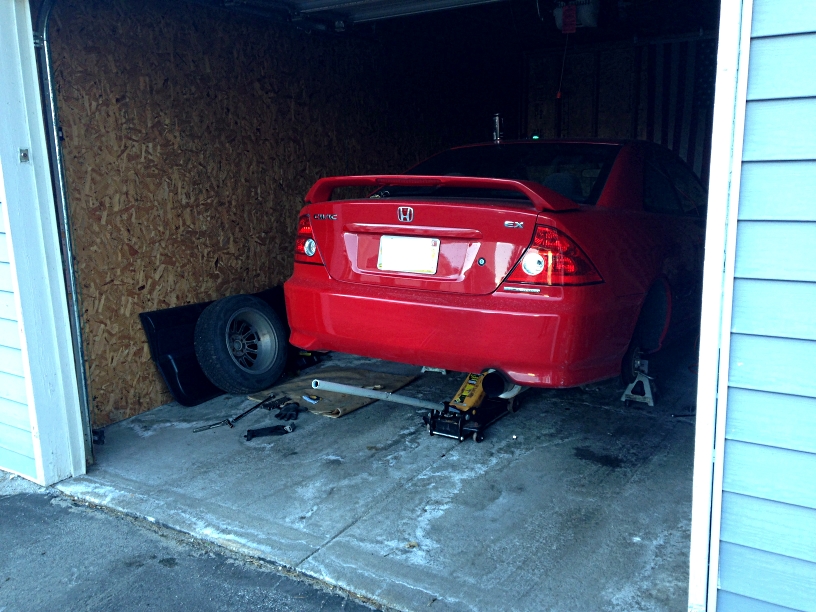
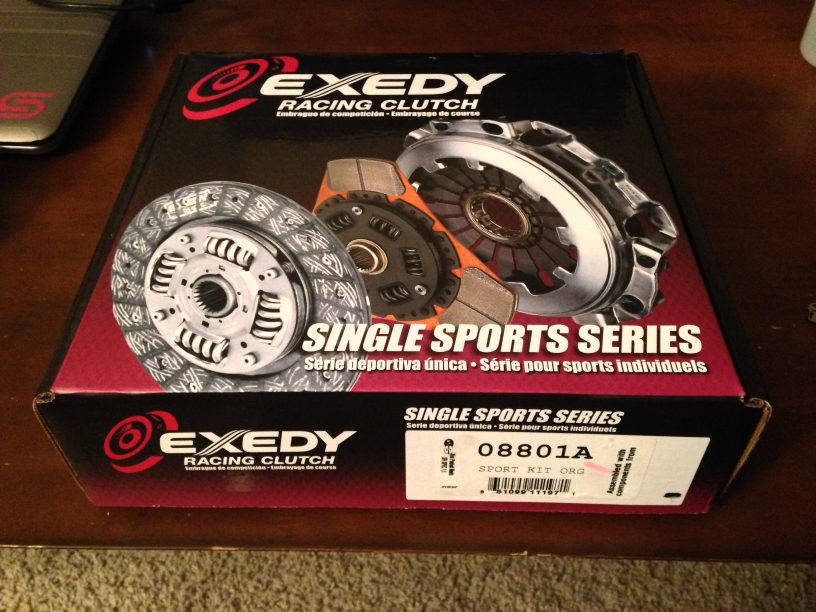
Also got my Exedy Stage 1 organic plate clutch in the mail for the new engine.
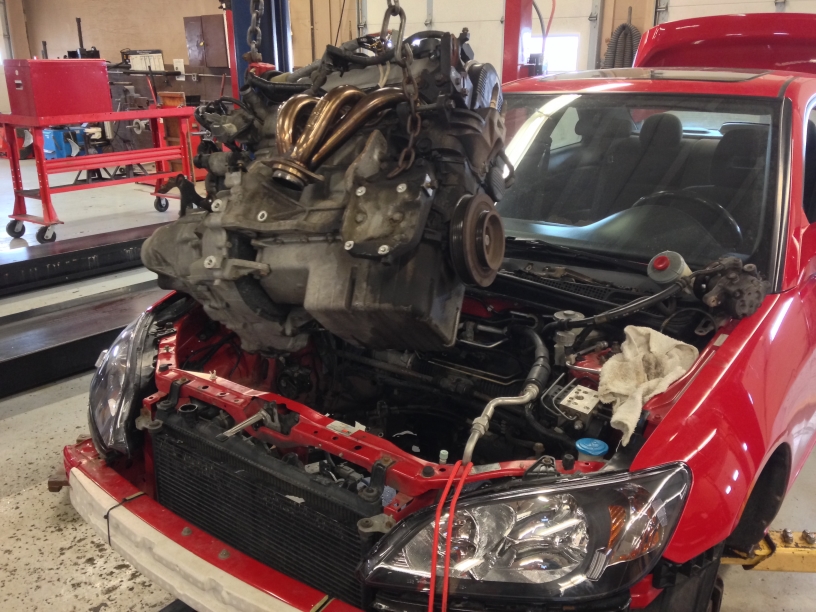
Alright so the biggest hurdle was accomplished this weekend. A total of 13 hours I finally got my JDM D17A swapped in. It went fairly easy with a few snafus here and there, particularly the ball joints (I ended up having to buy 3 new ones lol, don't ask) and the shop I work out of not having the necessary tools and such set up. All in all I feel 13 hours was pretty quick. Along the way I installed my Crower Stage 1 camshaft, Exedy Stage 1 organic clutch, Exedy oem replacement flywheel, and some others things I changed before hand was the timing belt set, water pump, thermostat, VC gasket, and NGK Iridium IX spark plugs. So here are some tips if you are swapping a D17A2 for a D17A.
- JDM motors don't use a oil pressure switch in conjunction with the VTEC solenoid so all you have to do is unscrew it from your A2 and screw it on the A where there is a bolt plugging the hole.
- Pulling the engine from the top was really easy contrary to popular belief, follow the Honda FSM and in addition this is what I did, remove the metal battery tray mounted to the chassis, unbolt the AC compressor and use a bungee cord to pull it towards the front and driver's side of the car, as you raise the engine remove the front mount completely to clear the radiator, then raise a little more and remove the trans mount mounting bracket completely, angle the engine with a leveler to lower the trans side and raise the crank pulley side and it'll come right out. You'll need two people, one to operate the lift while the other moves crap out of the way.
- I don't know if it was bad or what but I had to swap the JDM throttle body for my USDM one, the JDM one caused a surging idle, I'm not sure if that is incompatibility or a bad sensor either or if you have the same problem put your USDM TB on.
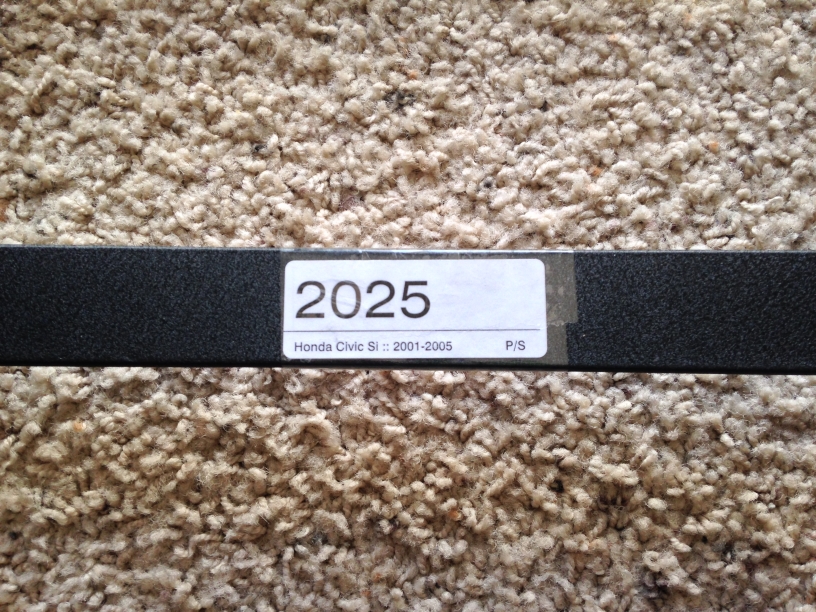
So that is all for now, currently breaking in the cam and the clutch, once that is done I'll soon put up a vid of the cam so you guys can see. I also picked up some 16x7 Drag DR-23 with 205/55 BFGoodrich gForce Sport Comp-2 tires that will be going on in spring. Also ordered Recaro custom seat brackets to mount my DC2 Recaros in my EM2 from Wedge Brackets.
Heading to the shop.
Two D17s in one EM2
Out with the old...
In with the new.
New Type A lip from Ebay.

Soon to come Spring 2015
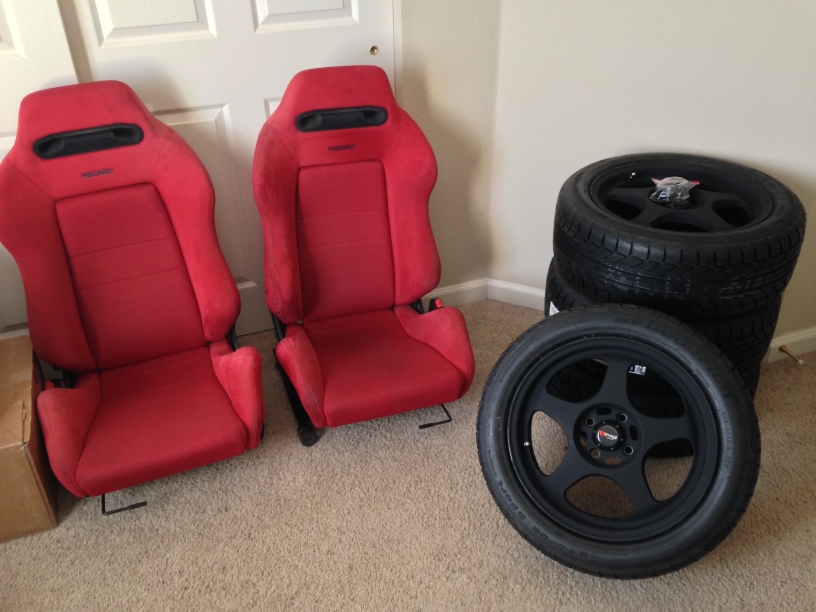
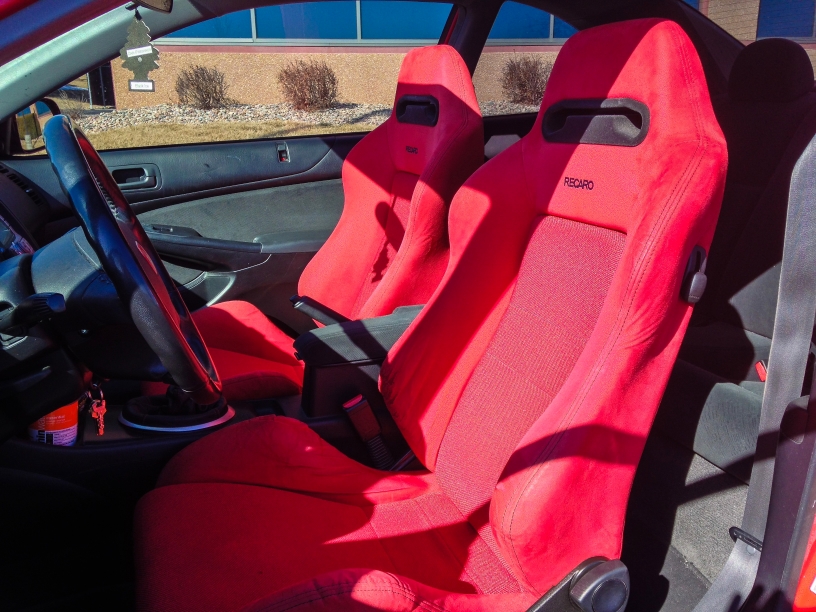
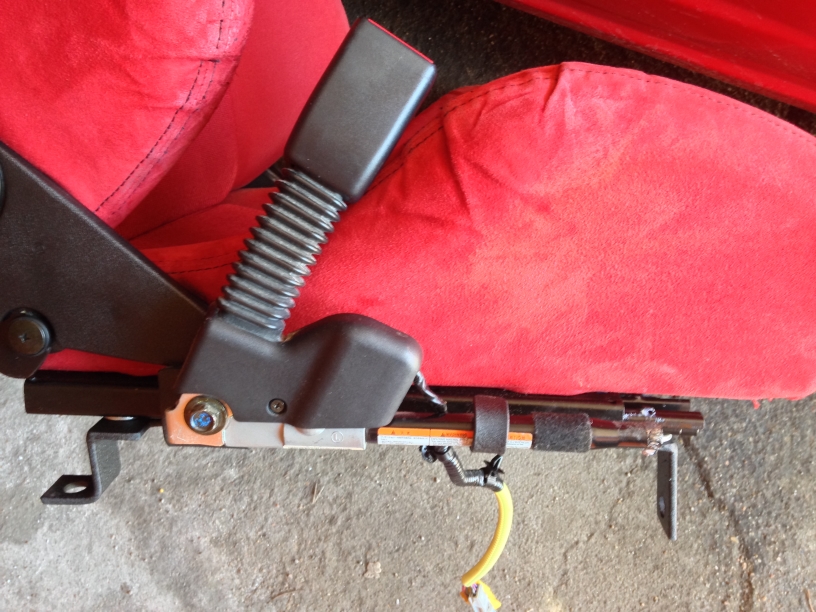
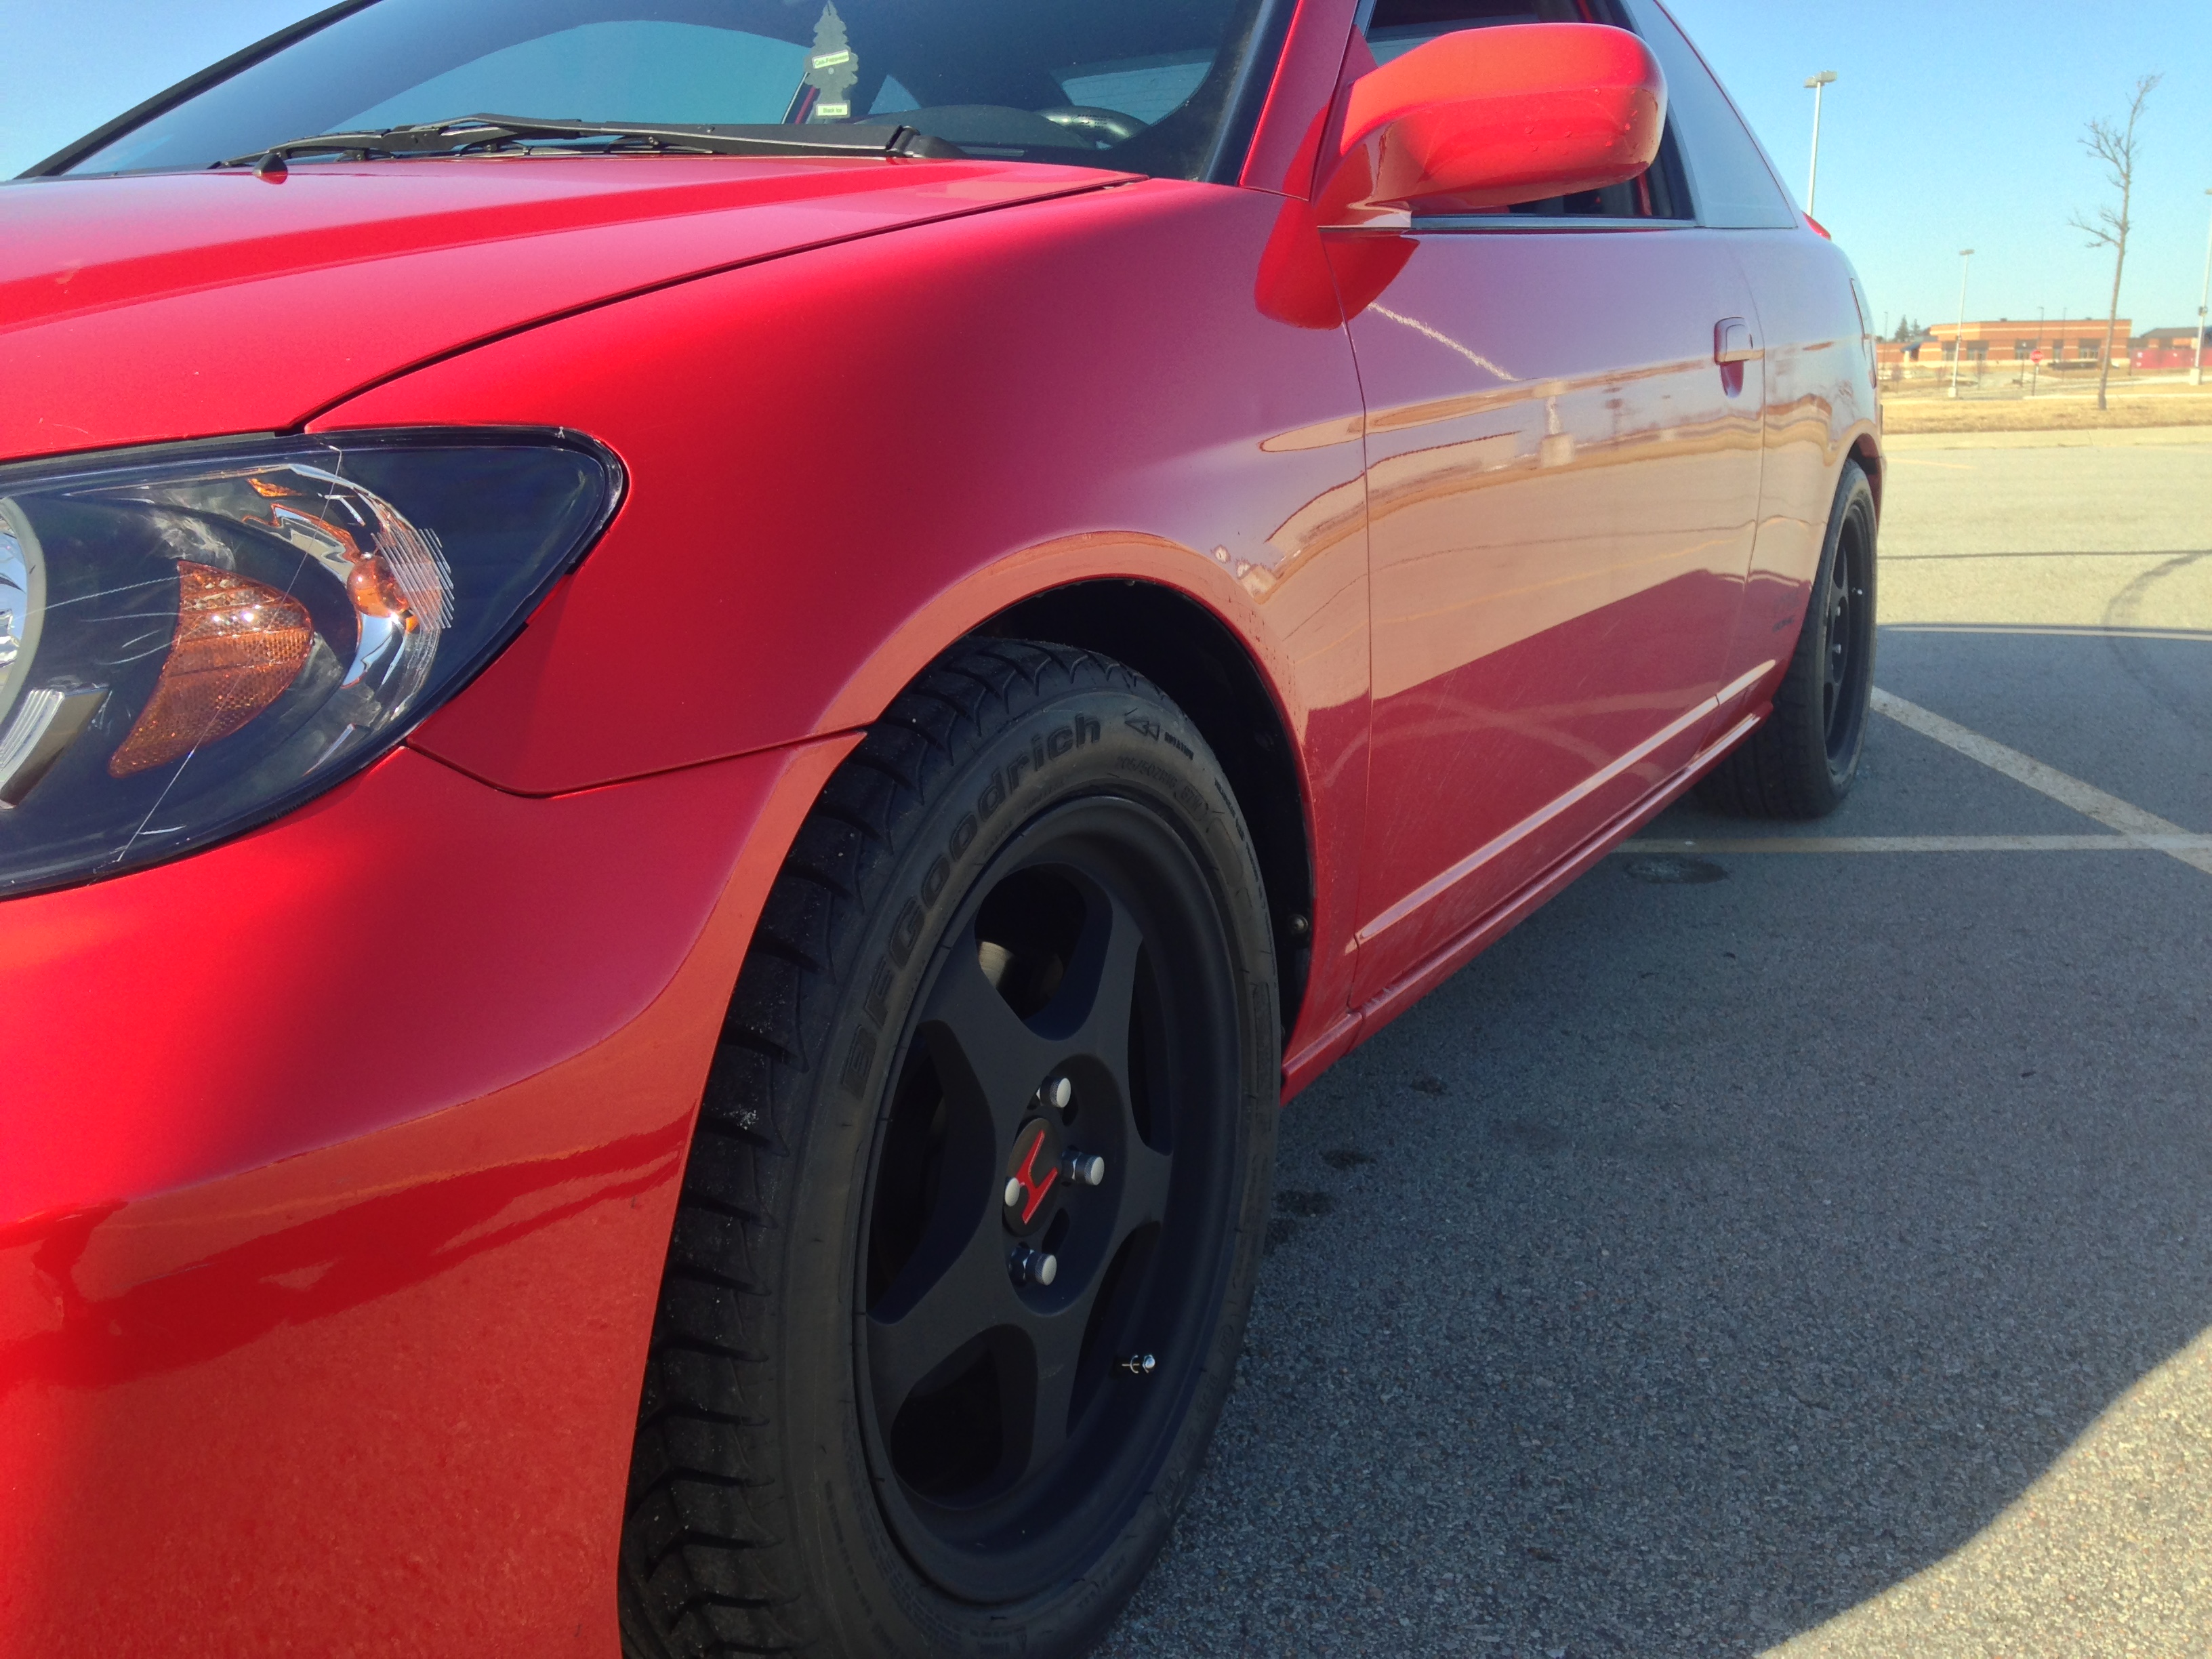
Got around to installing the wheels, and custom made red H center caps. Also got my Wedge Engineering brackets in to put my DC2 Recaros in. Great company, took about a month but fit perfect, even had a mount for the stock seat belt buckle with tensioner, so no need to do the SRS resistor trick.
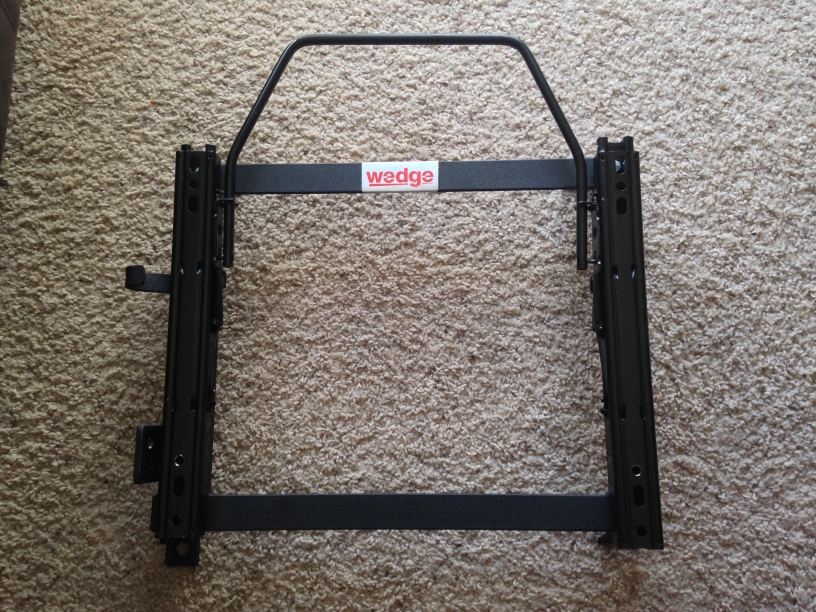
Lol, for some reason Wedge references the EM2/ES1/ES2 as the Canadian SI even though they are a American company.

Installed my Y8 manifold last week. Swap went pretty smooth. It nicely compliments the Crower cam and all the other bolt ons, power is very linear feeling and more immediate/direct. This is more than likely the last of the engine modifications. All other time and money will be spent on suspension and on my brake setup as I plan to start road course racing this spring/summer. Also will be looking at the possibility of saving up for a K20, more than likely I will be ditching the nitrous idea just because of reliability and the fact I'm still paying off the car and the old motor obviously wasn't reliable so I don't want to blow this one up.
Custom fabbed up a Ebay D16 intake, I have a AEM filter coming in the mail to get rid of the junky Ebay filter.
The wiring in this photo looks like a mess, I was running out of daylight and motivation after 3 hours of working on it so I started rushing to get everything in place. Since then I've ditched the loom, went back to the plastic stock loom for the injector area wiring and shortened the length of the wires to the sensors for a much better appearance and also just electrical taped them up, flipped my fuel feed line and will need to buy longer hose to run the other under the intake. I'll get more pics of the cleaned up bay soon, probably this weekend as I'll be prepping the car for the first car show of our season.
I redid the wiring and cleaned it up more for the Y8 manifold, figured out how to fab up the piping so I could use my K&N heat shield, got the AEM dryflow filter and also flipped my throttle bracket so better parallel the throttle cable.
The next section of my project is my Spoon Sports engine bay theme along with some Spoon interior pieces. I plan on the following:
Spoon Reservior Covers
Spoon Radiator Cap
Spoon Oil Cap
Spoon DC5 Strut Bar
Spoon Duracon Shift ****
Spoon Steering Wheel
Spoon Rear View Mirror
OBX Blue Rad Hoses (Spoon doesn't make any for D series)
SickSpeed Carbon Fiber Spark Plug cover
Powder Coat valve cover Spoon Yellow
Along witht the "Spoon" theme I would like to keep the car NA and run Kpro with a stage 1 port and polished head since I have my spare motors head still.
Some future purchases I'm throwing around are:
Kpro
AEM fuel rail
Takata 4 pt harnesses
Tein Street Advance coilovers
SS brake lines
Hawk HP plus pads
Yonaka or Megan OE-RS Catback
So stay tuned!
I finally got around to doing my Spoon theme engine bay with everything I listed in the previous post. I also found a way to use the Y8 manifold injector rail with the help of some K-Tuned injector hats and making a custom AN fuel line. Also installed a Corsport SS clutch line.

Alright where to begin. Well before I left Japan I was looking to see what kind of daily driver I wanted while I was waiting for my Integra Type R which is now in pieces in a shipping container, eventually to become a track car build, see the history of that here--->http://forums.nwp4life.com/zerothread?id=46199. My first thought was a 8th Gen SI but with the price and the unstable quality of the transmissions I looked into a EP3. The mini van style was hard to grasp but I did like it and thought it wasn't too bad, I was also looking at 8th Gen EX's but price and availability was still a factor. I knew I wanted something Rallye red, black interior, all stock, daily drivable, not highly coveted by thieves, and had some sort of a "sporty" styling which led me to purchasing my 2005 Civic EX Special Edition. It fit the entire bill and was the top of the line trim so I instantly jumped on it. $6600 later and it was mine.
Day after I bought it and a good washing.
As I am sure most claim in the import world, I wanted to do something different. I already new the 7th Gen was the redheaded step child of Honda and very few liked them. Even more so the coupes and sedans, but I was most inspired by the fact I couldn't find much about these. Granted yes there were handfuls of forums and those out there who have built these but it still isn't common at all to see modified. I attended the Ice Cream Cruise in Omaha, NE this month and, to my knowledge, there wasn't one at all in the entire 6,000 attendants except me.
So here is the plan, as you can tell from my last build thread titled Daily Driver with some Oomph, now that that build is going into a dedicated track project down the road this is now the Daily Driver with some Oomph 2.0. The goal is to eventually finish with a unique EM2 daily that has decent power and no detail has been overlooked, it can get groceries, retain decent mpg, be fun, and look good doing it. And the big plan is to eventually run a 60-65 shot of nitrous. I like this better because it can be power on demand, retain mpg off the bottle, less costly than a turbo, virtually maintenance free, and easily removable. I know I could get a turbo, or a k swap, or countless other things but that's not the point. So sit back relax and here we go.
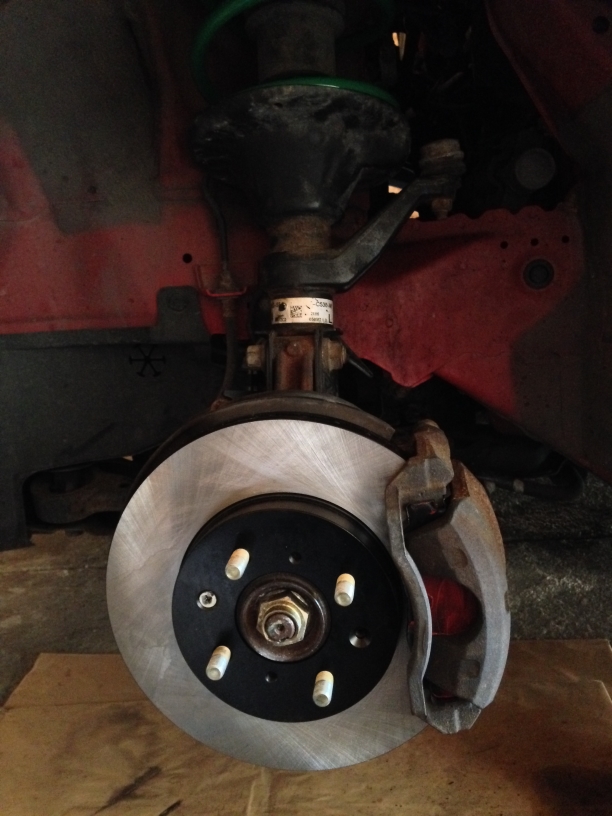
First things done, red H front emblem along with Tein S Techs, StopTech Centric rotors, and Hawk Performance ceramic pads.
Then all sh*t hit the fan, bank 1 O2 sensor went out, cylinder 1 misfire, massive over heating etc. and on the last shock I was removing for the Tein springs, the head of the bolt snapped off so I drove around like that to pick up some donor parts from a junkyard along with some tools, specifically a angle grinder and went to town.
Success!
Eventually did a block test twice which cam back negative, changed the thermostat and it hasn't overheated once, so if you own a 7th gen, don't be like all the other pessimistic 7th gen owners who scream headgasket at the first mentioning of a overheat condition and check the small stuff first. Also the misfire was from fuel injector cleaner. Misfired the whole tank with it and about 1/4 through a fresh full tank it stopped and never came back. So moral of the story don't use FI cleaner.
Added some decals to the rear windshield of 2 of my biggest automotive inspirations. Mighty Car Mods, and Paul Walker, the actor and movie that started it all for me when I was 11. Say what you will but I guarantee half of us wouldn't be here doing this stuff if it wasn't for this movie.
Picked up a K&N short ram kit. I've always used their filters and never had problems but have never gotten a whole intake kit. So never better than now to get one, installed with ease and is a nice piece to look at in the engine bay. I'm not one for super chromed out intakes.
The most recent install/purchase a Ebay axle back muffler... I know I know hear me out, lol. For a whopping $70 I got this shipped to my front door, I wanted to see how it would sound as just a axle back and then I plan on getting a catless header and wanted to see how loud that is with a stock midpipe and a axle back. Reason being the downpipe from the header on the D17 is bottlenecked down to 1.70" and this being a DD but with a little extra on the side I'm gonna test out a catless header, stock mid pipe, axle back setup and see how that does in the loudness department.
Hell for $70, good mellow rumble, perfect fitment, and fast shipping. I'd say it's worth it.
That's it for big changes for a little while until my ITR parts I won't be using get here and I can sell them, small here and there/repair/appearance projects will be coming up.
Just some small things done today. The last sticker I will put on my car.
The red overlay from Corsport, which took a month to get here
And a little order from Majestic Honda, the previous owner was in a minor fender bender I'm assuming this knocked off and never put back on when repainted (you can see the awesome primer over spray on the corner of the trunk
) also I like to keep things OEM fresh Other than that my ITR parts to sell should be here anyday, then I'll be picking up a Crower Stage 1, KYB GR-2 struts, new strut bearings, header, and if I have enough left over buy a chunk of my Nitrous Express kit I'm looking at. Would buy wheels but meh, winter is around the corner here so I'll wait.
Another small update. Upon checking my tracking for some parts I ordered Friday night I just realized my parts had been delivered and sitting in my mailbox for the last six hours
Corsport Base Shifter Bushings
My rear red H emblem
I am not entirely sure if these are real, they are sold by Gadgets Center on Amazon. I was not about to pay $120 for "JDM" emblems that could get stolen. Total for front and back from them is like $58. Has a legit looking package and the build quality is extremely nice but anybody with a printer can print that Honda package sticker if they wanted to.
I'll admit when I bought the Corsport Base Bushings I thought I had bought something completely different. I was under the impression these bushings replaced the linkage bushings for some reason to the acutal shifter (I think I got this idea from my 240sx I had 6 years ago, I just may be nuts
I also got a Meguiar's Clay Bar kit, which came out really nice, I also used their cleaner wax and here is the result.
Finally got around to changing the oil today since I bought the car, I know I know, too much time and money doing modifications
I also went out and shot some photos after since I don't have any legit posed shots, crappy day for photography but
Also painted my heat shield with VHT ceramic paint, looks waaay better IMO and cleaned up a little here and there. I used Black Magic Tire Foam on the looms and hoses sparingly and it came out great.
Alright guys a couple updates.
I got my custom shift boot from Redlinegoods.com, these guys are awesome! Great customer service, fast shipping, and flawless craftsmanship. The boot I ordered was real leather and "JDM" red stitch with a X pattern. Had it made and shipped out from Europe to my front door in a week!
Also ordered a new gauge lens since mine was cracked, when I took the old one off it literally tore like paper
. Courtesy of Majestic Honda, great company.Old
New
Some more exciting news, I ordered a OBX catless downpipe and 4-1 header, I had one on my 240sx and it was great. Also ordered Ingalls new rear camber kit and Corsport linkage bushings.
Installed the Corsport aluminum shift linkage bushings today. Along with my base bushings this has made shift feel excellent.
Alright so now that my ITR parts came, I took the stuff I was going to use for this car and put it on, my Spoon socks, Type R shift ****, WedsSport grounding kit (its the black cables with yellow ends), and I also took the collar off my ITR boot to put it on the new Redline Goods one.
Also got my OBX header in, fit perfectly, haven't put the down pipe on yet. Waiting to take it to my shop on base so I can get it on a lift to get better leverage on the cat bolts. Came in a interesting packing, it was like foam injected into a plastic bag, lol, it was well packed though.
So I was able to put on the OBX down pipe today. I was extremely surprised how well the install went considering my luck with this car so far. On a side note I highly recommend anyone who works on their cars alot to buy Irwin's bolt extractor set, they are like case hardened steel sockets with blade like grips inside in a spiral that makes the most stubborn bolt look like a p***y I've used it so many times in a jam in the past year it has become one of the best tools I have every owned. Anyways, as far as what I did for the install I purchased a O2 defouler from Amazon for like $16 which fit our cars with this header like a glove, I couldn't have asked for a better fitment for the bank 2 o2 sensor, it retained the stock location and wire stay entirely. Fitment was great, welds look just as good as the header all in all good buy. This has been the second header I have owned from them and their products are nothing short of fantastic. As far as gains I did see a noticeable improvement I believe in the top end, it feels more free reving, probably since losing that double walled 1.70'' pipe. And yes I know I won't see the biggest improvement until I also get rid of the stock midpipe but the sound just got super deep with not a hint of rasp which I was pleasantly surprised of, and I also believe that smaller midpipe will keep up the necessary back pressure since it is more free flowing. So performance and still daily drivable without making you want to blow your brains out due to noise. Well this should encompass my final engine mods until the Crower stage 1 and the NX kit. So for the mean time I'm trying to find some Rota Slips to trade my Integra Type R parts for, and will be doing some small interior and exterior stuff.
Here is also my car sitting pretty at the Turbos for Tatas charity car show for breast cancer awareness, I was in the 01 and newer asian mild class, I didn't place, got beat out by a g35, brz, and wrx but next year hopefully.
Just some small updates, added a vanity plate to the front windshield. I have wanted this for a while now and finally got it
Also wired up a VTEC light to monitor for economy, about half throttle and up at 2800 RPMs is when it engages for anyone who is wondering since there is so much speculation out there.
On a side note I am having significant engine problems again. For the first two months of owning the car I hadn't changed the oil since the dealer had but I always checked the level to make sure it was all good since it was a new car for me which the oil level was always the same. I changed it 2 weeks ago and when I checked my oil today it was 2 quarts low... I know its not burning it because since I don't have a cat nothing is impeded all you ever see is the occasional puff from idle when you take off because of the richness. I have no oil spots in my garage, and no visible leaks I can see, when I installed my header and downpipe I didn't notice the filter leaking nor is it leaking onto the header which you would see smoke from. So all in all I have no freakin clue what is going on. At this point I'm thinkin of getting another D17 from H Motors Online for 750 and just do a seal and gasket rebuild because I can't write this car off yet, I still owe $6200
So after some diagnosing I changed out to a new PCV valve so hopefully that was what was causing the oil burning issue. The old one was pretty crappy looking. Also I sold some of my Type R parts so I'm trying to decide on either a stage 1 Crower or wheels, what would you guys do first? I've got winter coming up in NE soon so I was thinking cam.
OBX downpipe update:
I took it off... lol. I couldn't stand the smell and the little puffs of smoke from stoplight acceleration, it made daily driving a annoyance and like someone mentioned earlier the O2 defouler lasted only a week until it threw a CEL. It just made me feel like one of those nasty teen ricer hondas that smell bad and smoke so until I can get a high flow cat for the dp I'm leaving it off. Just not worth it. On the other hand I swear the stock dp gives better low end since it adds some back pressure. It feels peppier in stop and go than it did with the catless dp, I'm sure the catless one would also be better with a tune.
Alright so the PCV wasn't the issue, after some research I think the oil control rings are sticking, when I changed the oil I used Mobil 1 Full Syn 5w-20 so that may have cleaned things up too much so I changed it today to 5w-30 Valvoline Max Life with a new filter so we'll see how that goes.
I finally put on my Ingalls rear Smart Arms, now just to get an alignment.
So with my never ending oil consumption problem and possible leaking headgasket. I bought a new D17A from HMotors Online. Great company to deal with, all sensors came intact, it was super clean, and estimated between 35-45K miles. Over the next few months I will be replacing this new motors headgasket with a OEM one, a Gates timing belt component kit, ARP head studs, Competition Clutch Stage 1, and minor odds and ends like thermostat etc. Also picked up a Crower Stage 1 camshaft seeing as there isn't a better time than now to put one in .
So it has been a while since I updated, between the holidays and lack of motivation with the car's problems I'm finally getting back into fixing it up.
Some minor things are I removed all the rear windshield stickers as they weren't appealing to me anymore and added a minor cosmetic piece to the sides.
More problems arose, it was about -2 degrees one morning and as I went to shut my door the whole panel exploded and cracked
. So I just did a temp fix for now until I can find a junkyard replacement.I went to my local junkyard to source a door panel and didn't find one but I did manage to score a 19mm base RSX rear sway bar. Have to say probably one of the best mods I have done, the car feels so much more planted in corners. I just need to get some header wrap to put on the exhaust because sometimes it taps against the larger sway bar and becomes annoying.
Other than that I should be getting started on installing the Gates timing belt kit, new water pump, Crower stage 1 soon, and will be installing the new engine hopefully in Feb/March weather permitting. Until then here is a action shot lol.
Some small updates, threw on some black housing headlights I picked up off of Amazon.
Also got my Exedy Stage 1 organic plate clutch in the mail for the new engine.
Alright so the biggest hurdle was accomplished this weekend. A total of 13 hours I finally got my JDM D17A swapped in. It went fairly easy with a few snafus here and there, particularly the ball joints (I ended up having to buy 3 new ones lol, don't ask) and the shop I work out of not having the necessary tools and such set up. All in all I feel 13 hours was pretty quick. Along the way I installed my Crower Stage 1 camshaft, Exedy Stage 1 organic clutch, Exedy oem replacement flywheel, and some others things I changed before hand was the timing belt set, water pump, thermostat, VC gasket, and NGK Iridium IX spark plugs. So here are some tips if you are swapping a D17A2 for a D17A.
- JDM motors don't use a oil pressure switch in conjunction with the VTEC solenoid so all you have to do is unscrew it from your A2 and screw it on the A where there is a bolt plugging the hole.
- Pulling the engine from the top was really easy contrary to popular belief, follow the Honda FSM and in addition this is what I did, remove the metal battery tray mounted to the chassis, unbolt the AC compressor and use a bungee cord to pull it towards the front and driver's side of the car, as you raise the engine remove the front mount completely to clear the radiator, then raise a little more and remove the trans mount mounting bracket completely, angle the engine with a leveler to lower the trans side and raise the crank pulley side and it'll come right out. You'll need two people, one to operate the lift while the other moves crap out of the way.
- I don't know if it was bad or what but I had to swap the JDM throttle body for my USDM one, the JDM one caused a surging idle, I'm not sure if that is incompatibility or a bad sensor either or if you have the same problem put your USDM TB on.
So that is all for now, currently breaking in the cam and the clutch, once that is done I'll soon put up a vid of the cam so you guys can see. I also picked up some 16x7 Drag DR-23 with 205/55 BFGoodrich gForce Sport Comp-2 tires that will be going on in spring. Also ordered Recaro custom seat brackets to mount my DC2 Recaros in my EM2 from Wedge Brackets.
Heading to the shop.
Two D17s in one EM2
Out with the old...
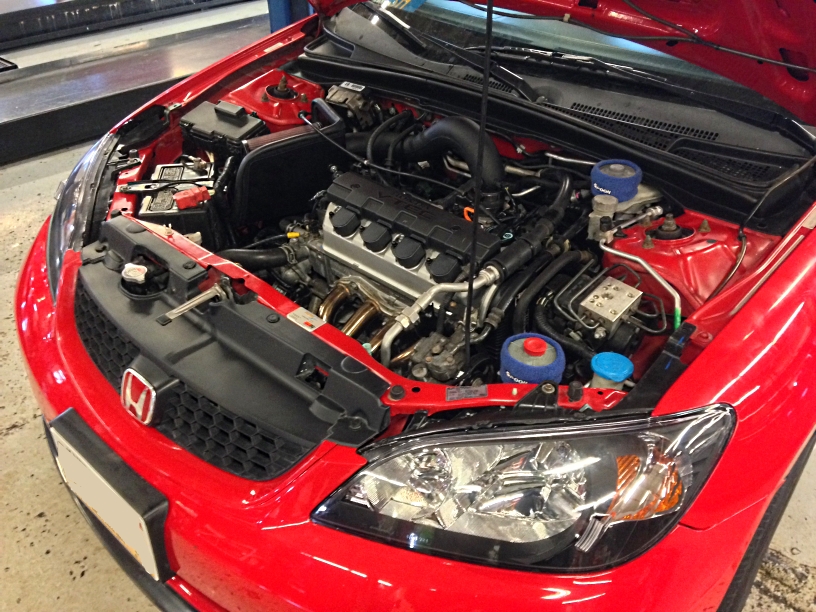
In with the new.
New Type A lip from Ebay.
Soon to come Spring 2015
Got around to installing the wheels, and custom made red H center caps. Also got my Wedge Engineering brackets in to put my DC2 Recaros in. Great company, took about a month but fit perfect, even had a mount for the stock seat belt buckle with tensioner, so no need to do the SRS resistor trick.
Lol, for some reason Wedge references the EM2/ES1/ES2 as the Canadian SI even though they are a American company.
Installed my Y8 manifold last week. Swap went pretty smooth. It nicely compliments the Crower cam and all the other bolt ons, power is very linear feeling and more immediate/direct. This is more than likely the last of the engine modifications. All other time and money will be spent on suspension and on my brake setup as I plan to start road course racing this spring/summer. Also will be looking at the possibility of saving up for a K20, more than likely I will be ditching the nitrous idea just because of reliability and the fact I'm still paying off the car and the old motor obviously wasn't reliable so I don't want to blow this one up.
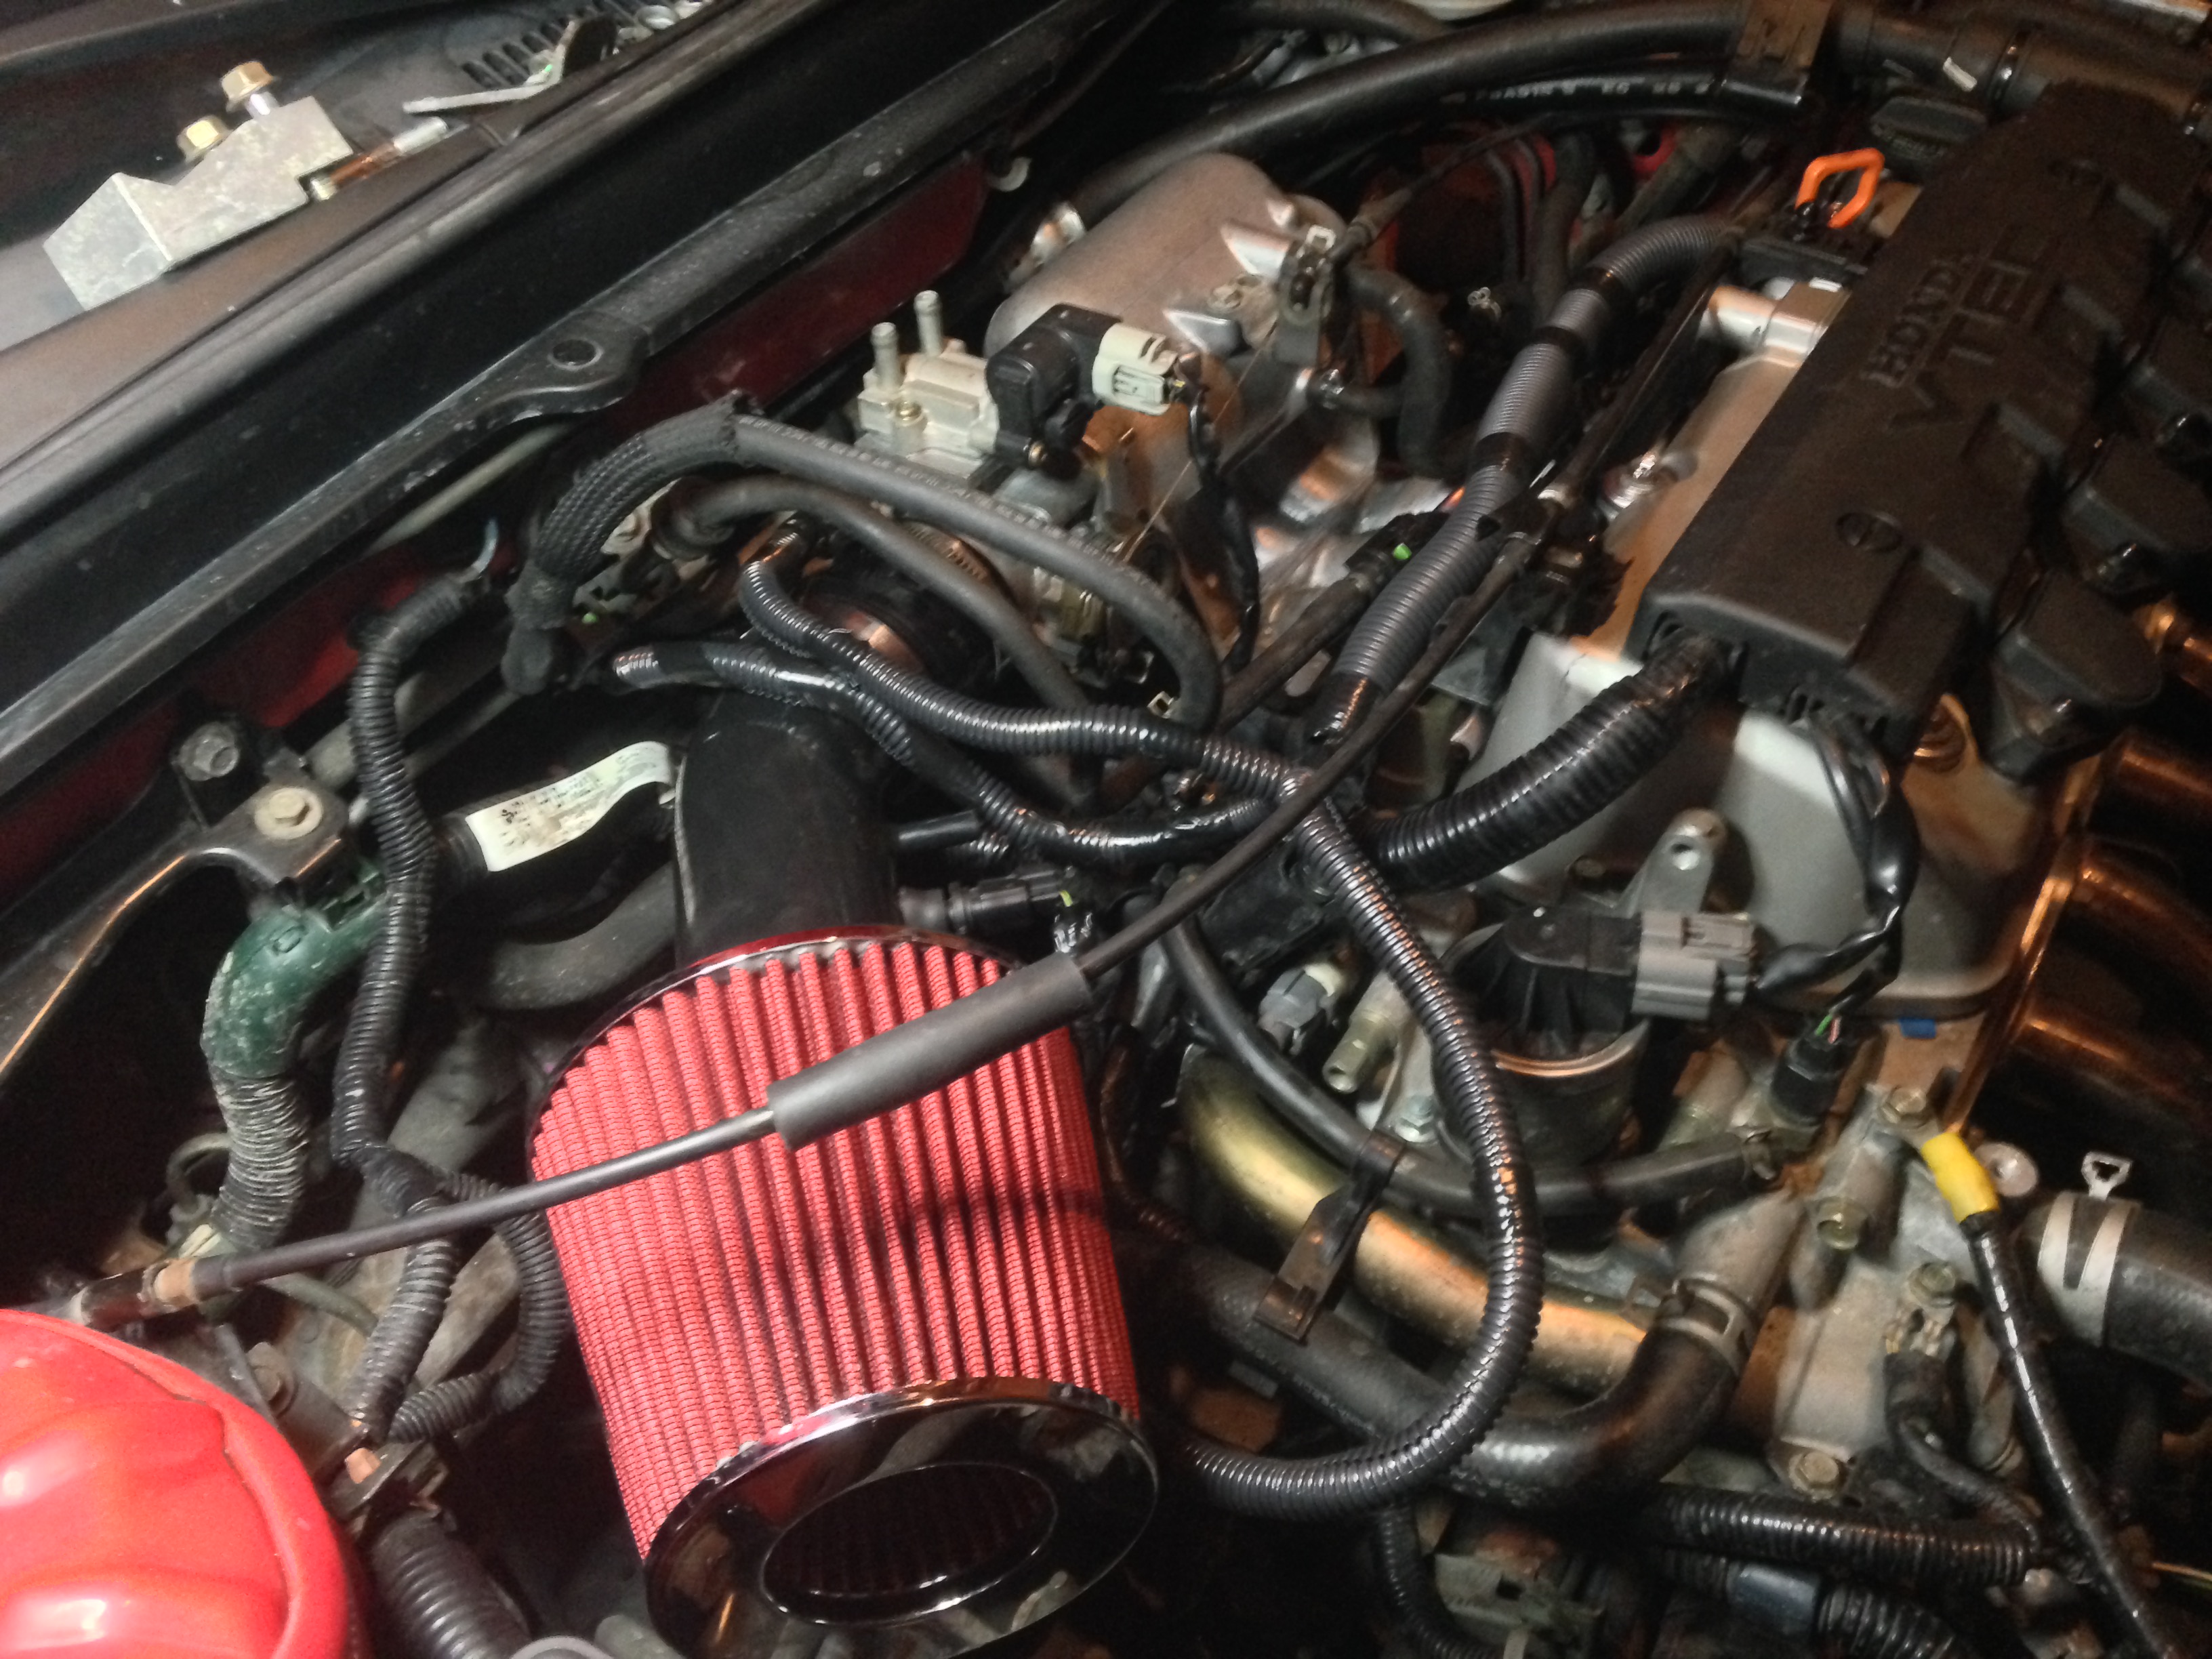
Custom fabbed up a Ebay D16 intake, I have a AEM filter coming in the mail to get rid of the junky Ebay filter.
The wiring in this photo looks like a mess, I was running out of daylight and motivation after 3 hours of working on it so I started rushing to get everything in place. Since then I've ditched the loom, went back to the plastic stock loom for the injector area wiring and shortened the length of the wires to the sensors for a much better appearance and also just electrical taped them up, flipped my fuel feed line and will need to buy longer hose to run the other under the intake. I'll get more pics of the cleaned up bay soon, probably this weekend as I'll be prepping the car for the first car show of our season.
I redid the wiring and cleaned it up more for the Y8 manifold, figured out how to fab up the piping so I could use my K&N heat shield, got the AEM dryflow filter and also flipped my throttle bracket so better parallel the throttle cable.
The next section of my project is my Spoon Sports engine bay theme along with some Spoon interior pieces. I plan on the following:
Spoon Reservior Covers
Spoon Radiator Cap
Spoon Oil Cap
Spoon DC5 Strut Bar
Spoon Duracon Shift ****
Spoon Steering Wheel
Spoon Rear View Mirror
OBX Blue Rad Hoses (Spoon doesn't make any for D series)
SickSpeed Carbon Fiber Spark Plug cover
Powder Coat valve cover Spoon Yellow
Along witht the "Spoon" theme I would like to keep the car NA and run Kpro with a stage 1 port and polished head since I have my spare motors head still.
Some future purchases I'm throwing around are:
Kpro
AEM fuel rail
Takata 4 pt harnesses
Tein Street Advance coilovers
SS brake lines
Hawk HP plus pads
Yonaka or Megan OE-RS Catback
So stay tuned!
I finally got around to doing my Spoon theme engine bay with everything I listed in the previous post. I also found a way to use the Y8 manifold injector rail with the help of some K-Tuned injector hats and making a custom AN fuel line. Also installed a Corsport SS clutch line.
Last edited by KillerCam251; 07-25-2017 at 10:08 PM.
 07-25-2017
#2
Registered!!
Thread Starter
Re: Daily Driver EM2 EX SE Build Ver. 2.0
PREFACE: This is where I picked up since the Photobucket debacle circa June 2017
Oh man, so it has been a while since I was one here. I still have been working on the car but between changing jobs and moving to Montana life has been hectic the past year. But starting with some good news I paid the car off! So now I can blow it up or do whatever but seriously now I may actually get to the nitrous part of my build that I always wanted to do. Since last time, here are the things that have been changed, modded, and added to the build. As of right now I'm kind of in a refresh/audio/entertainment section of the project. Well without further ado...
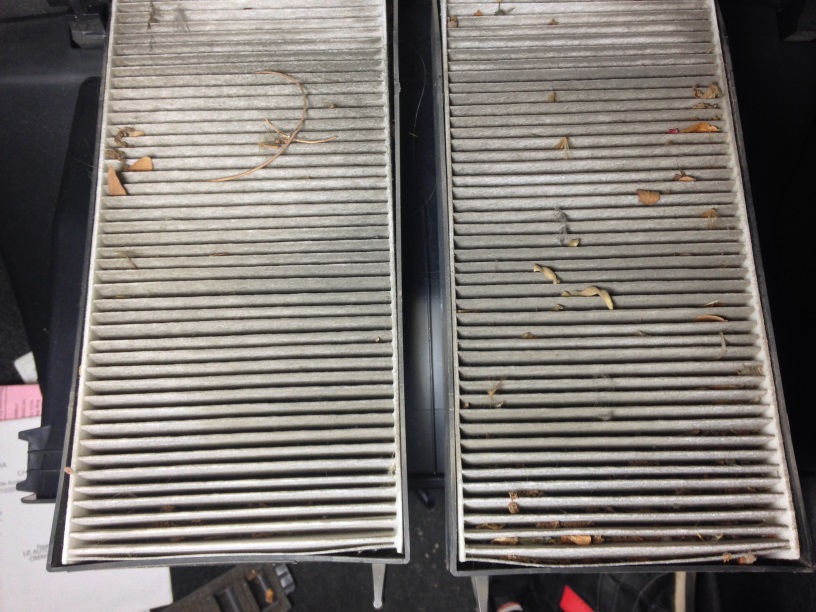
The first thing was getting rid of the nasty old cabin air filters, who knows the last time this was done. Highly recommend it if you haven't, it is very cheap too. About $10 on Amazon.
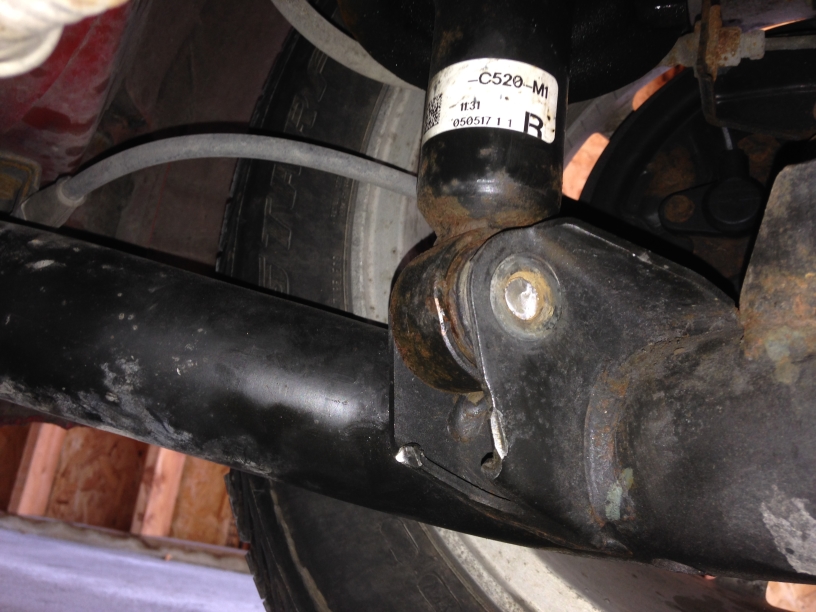
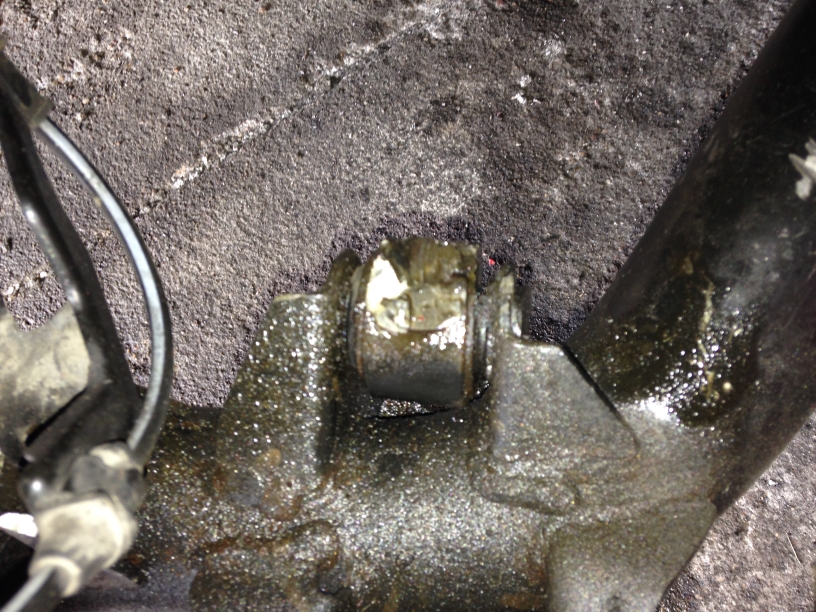
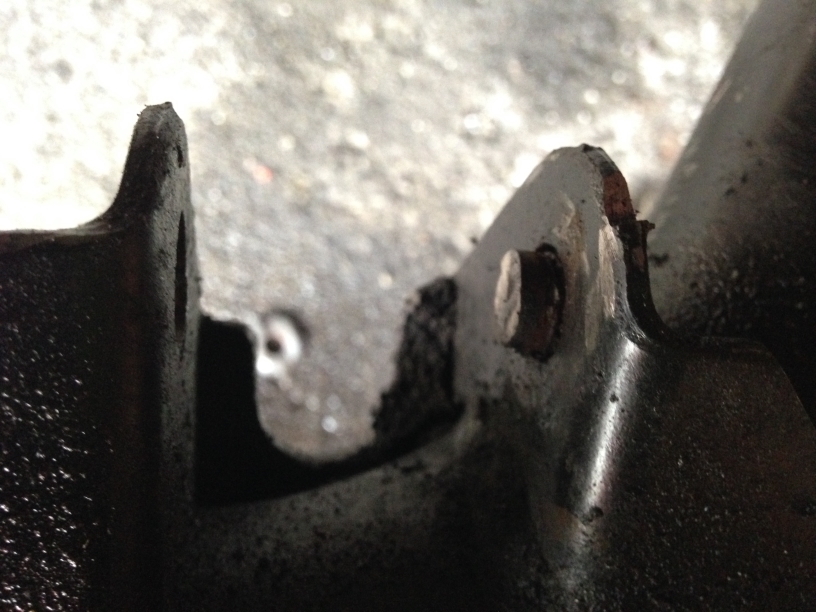
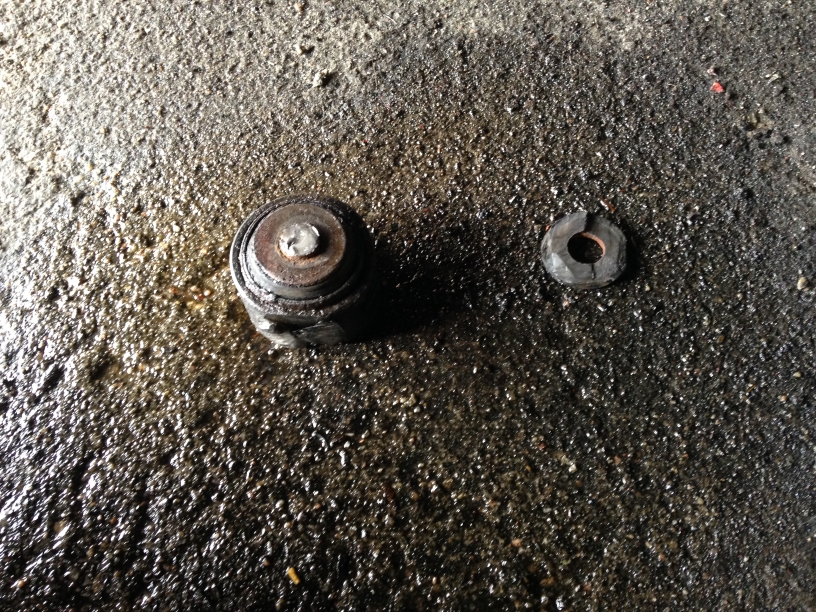
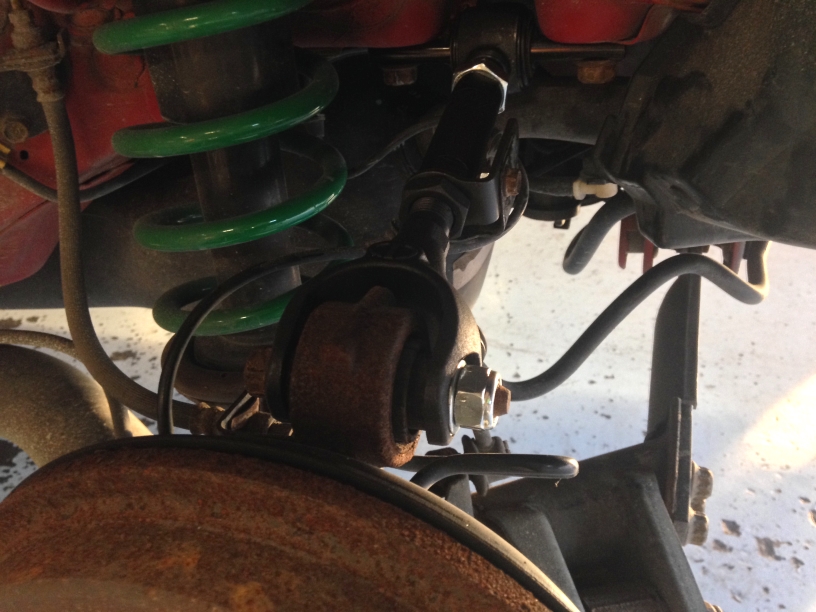
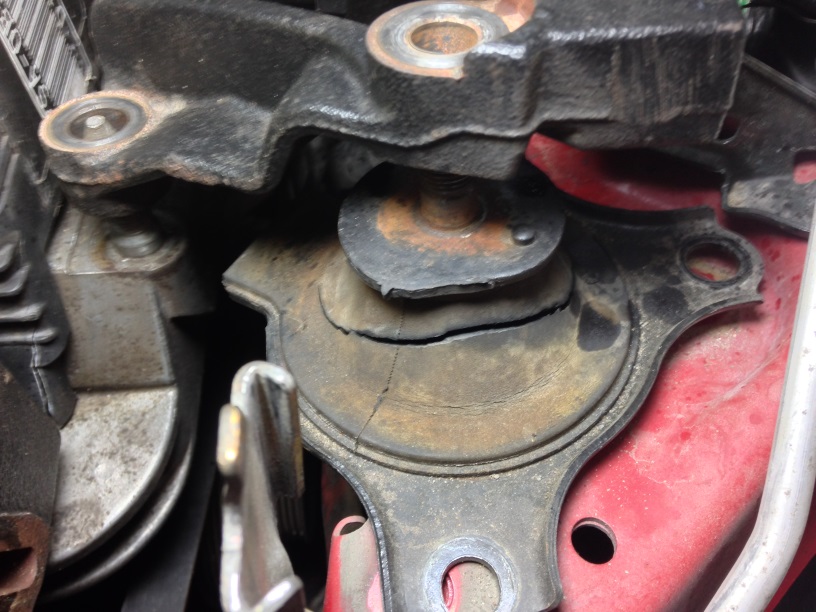
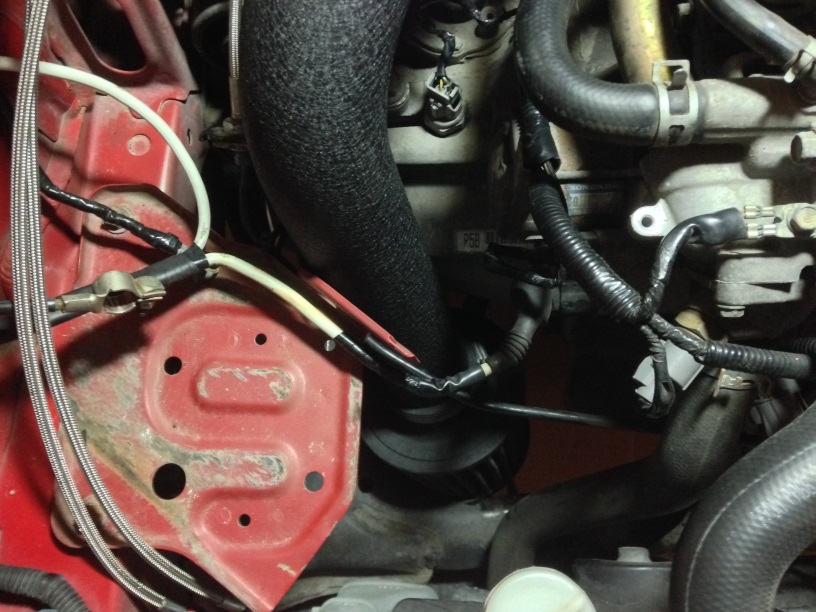
Next I went under the hood because I was having a bad oil leak after winter, turned out to be a bad cam seal, so replaced that with a new tensioner and timing belt and while in the process discovered this bad engine mount.
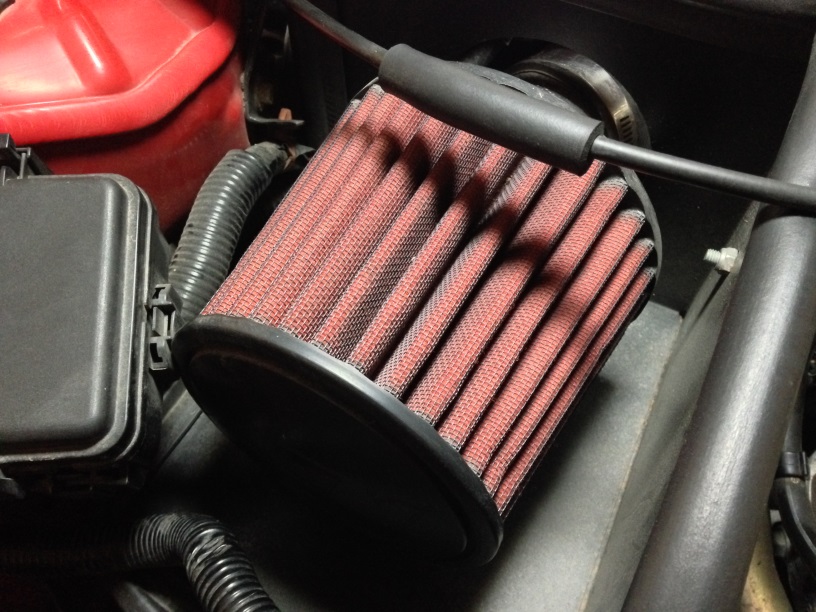
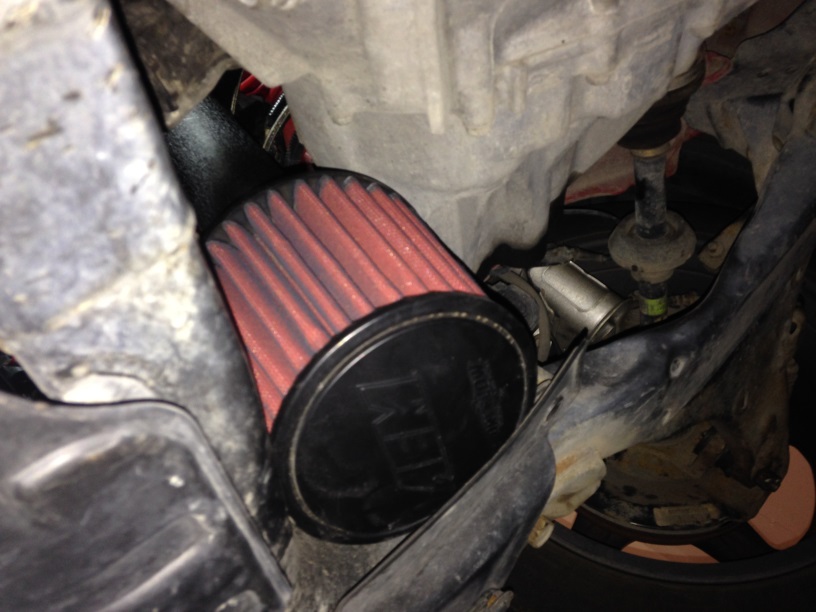
It was time to refresh the AEM Dryflow after like 4 road trips, so I got a bottle of the AEM Dryflow cleaner and went to town.
Before:
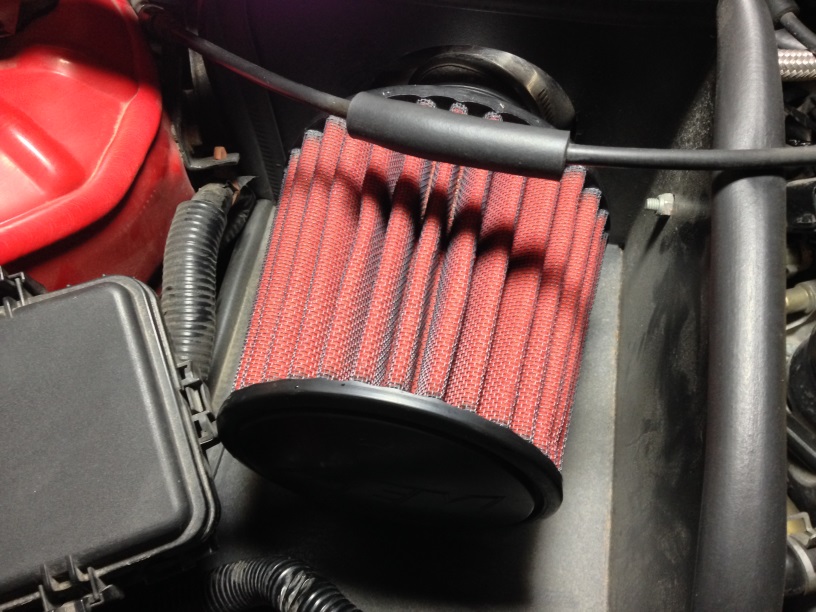
After:
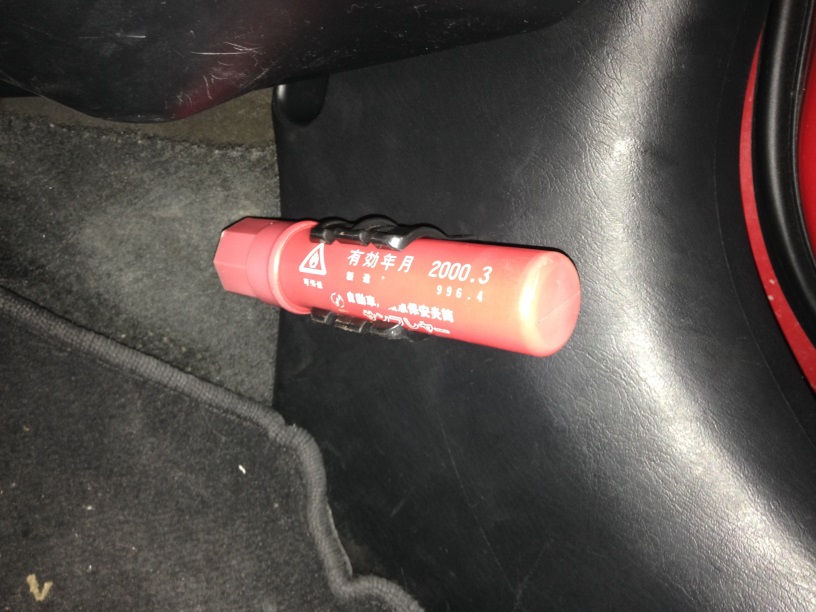
After moving to Montana and going through my parts bins I found my old road flare from my Integra Type R in Japan, so I thought why not? I slapped it in for some more mad jdm yo points.
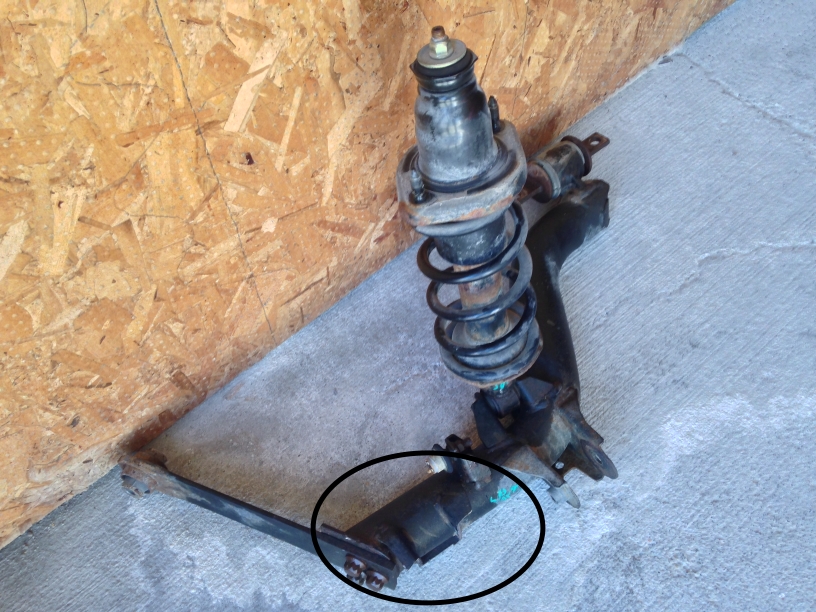
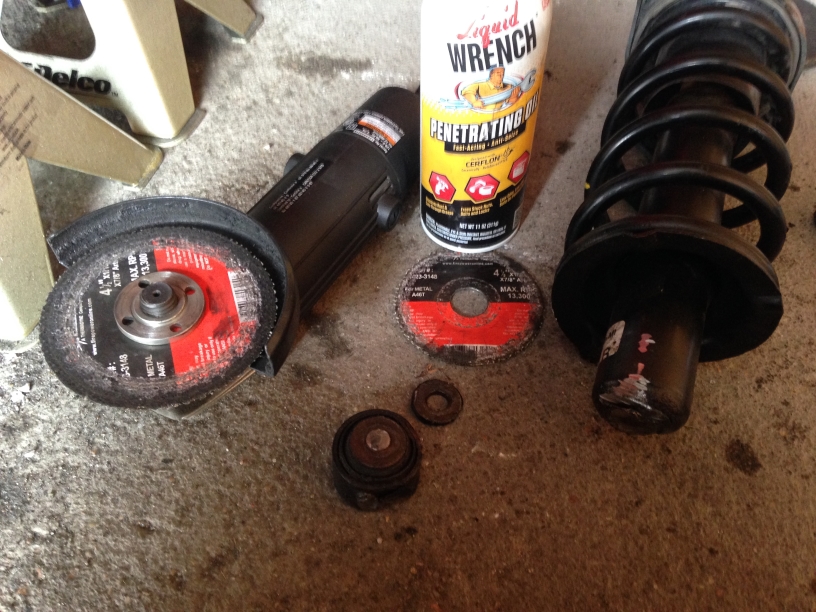
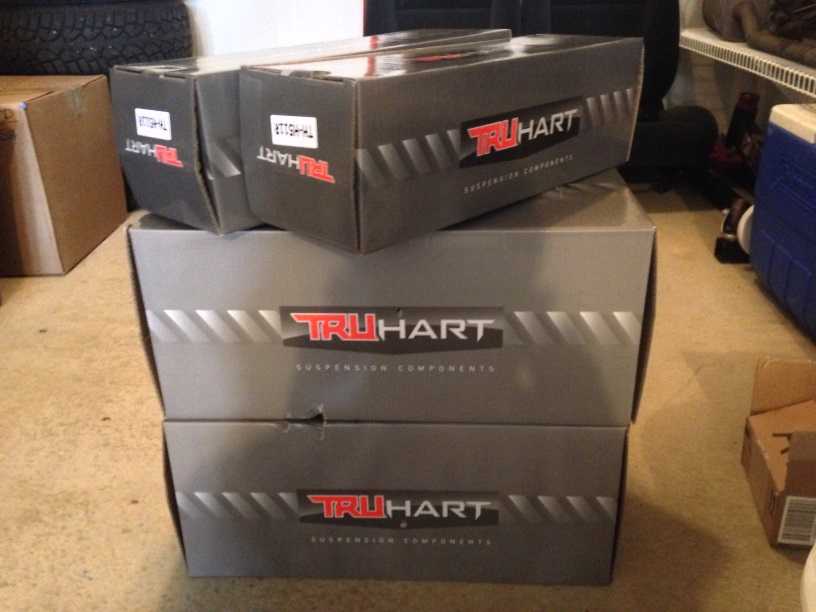
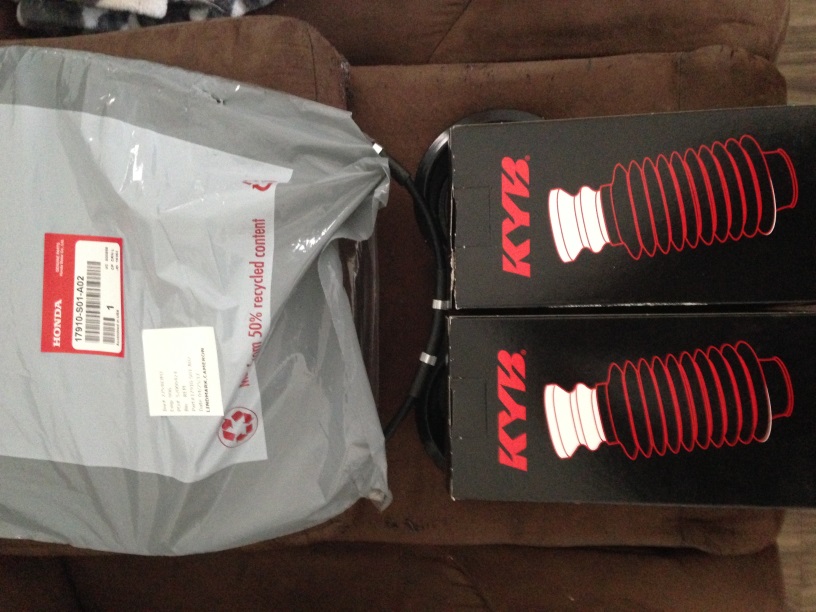
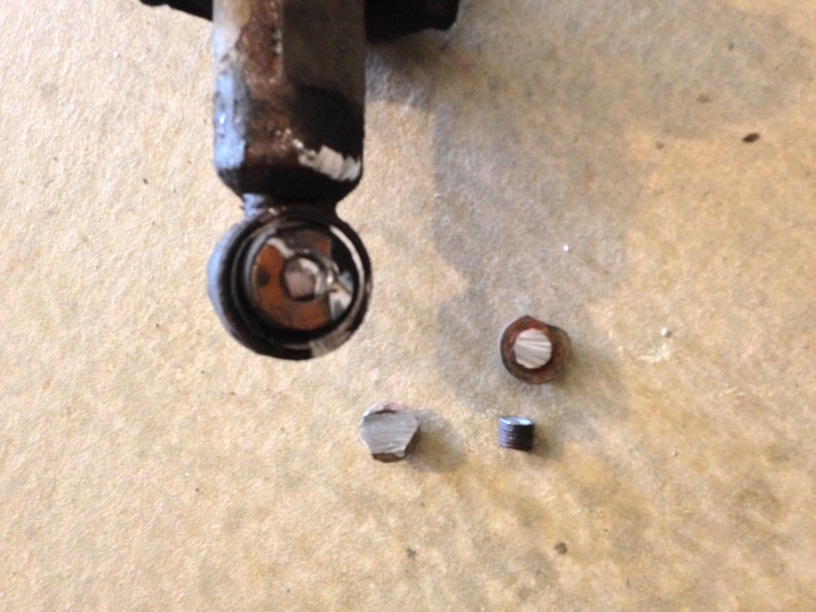
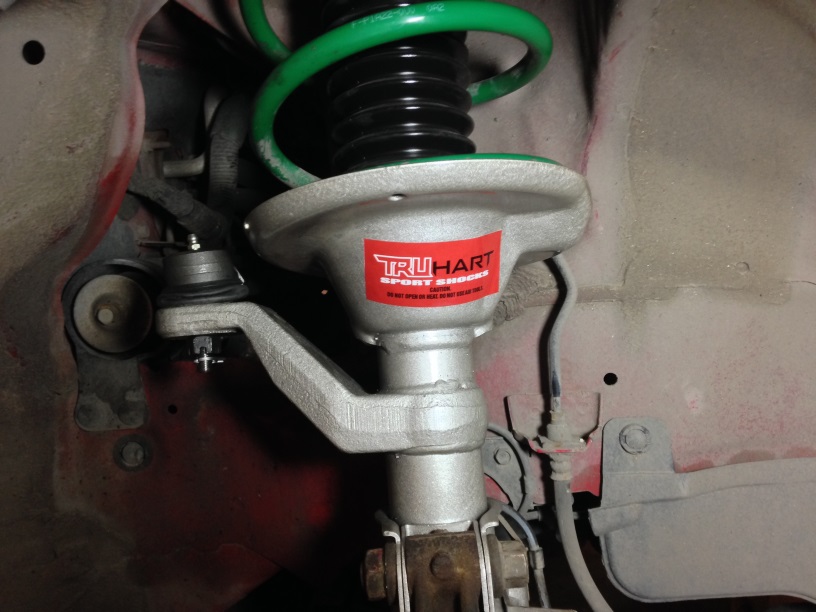
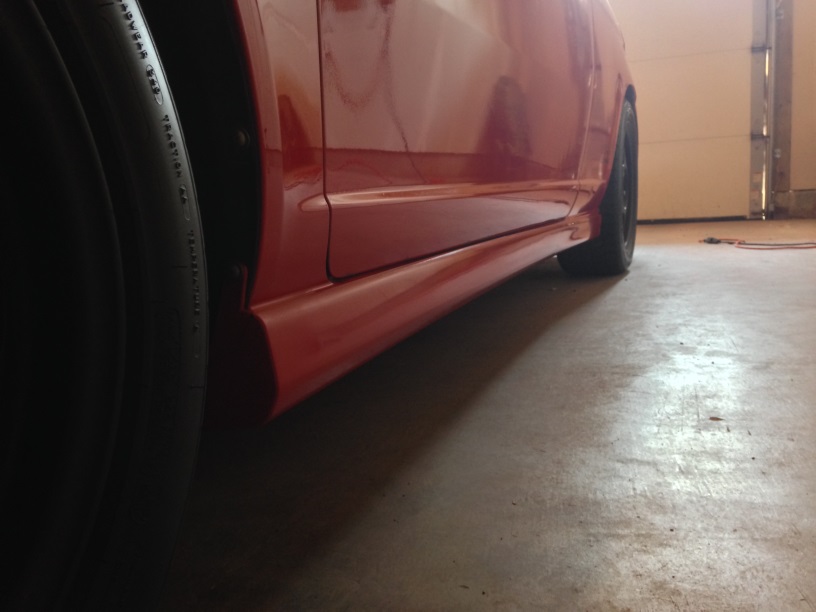
Moving on to the next big update is the suspension, after much deliberation and chatting with some friends about them, I decided to go with TruHart Sport Shocks, they are valved shorter to work better with lowering springs with at least a 1" drop or lower. During the install I had to CUT THE REAR STRUT OUT AGAIN!!! If you haven't been following my thread check out page one to see that debacle from 3 years ago. Anyways while I was in there I changed the strut mounts, bump stops/boots, and bearings for brand new ones. Install went well and they feel great! Have had them on for about a month as of now and no issues, much better than with all 4 corners blown. 250 bucks well spent.
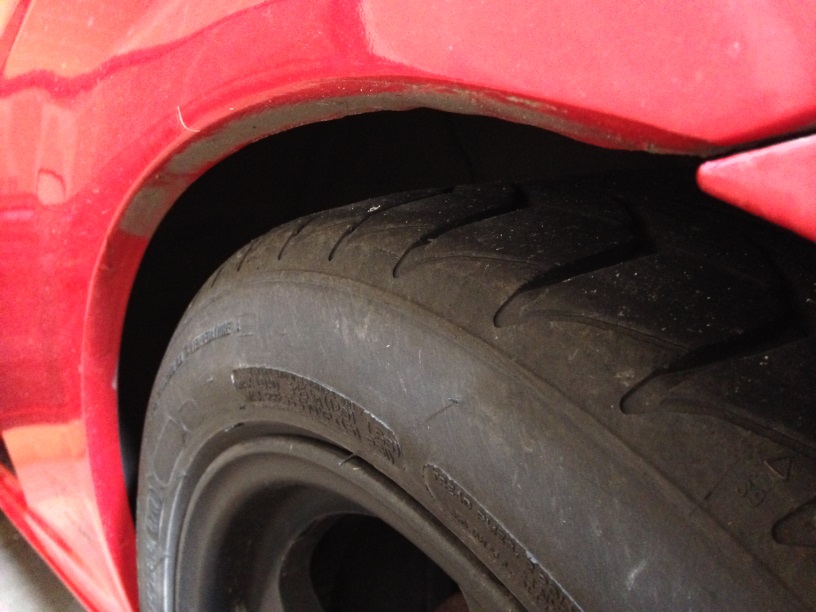
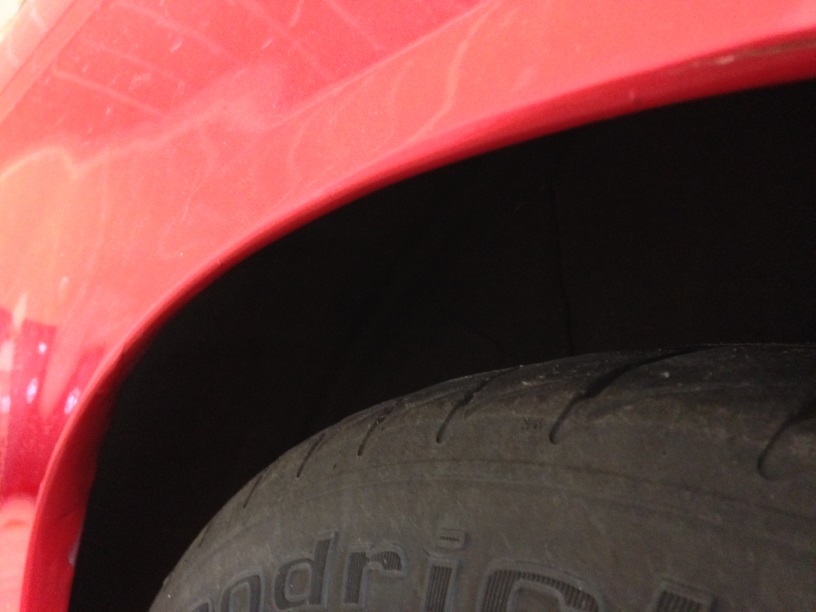
Next was rolling my rear fenders since on the drive up here to Montana, having stuff loaded in the trunk was weighing it down and was causing the fenders to dig into the tires on bumps so I took a rubber mallet and a heat gun to it and the results were great.
Before:
After:
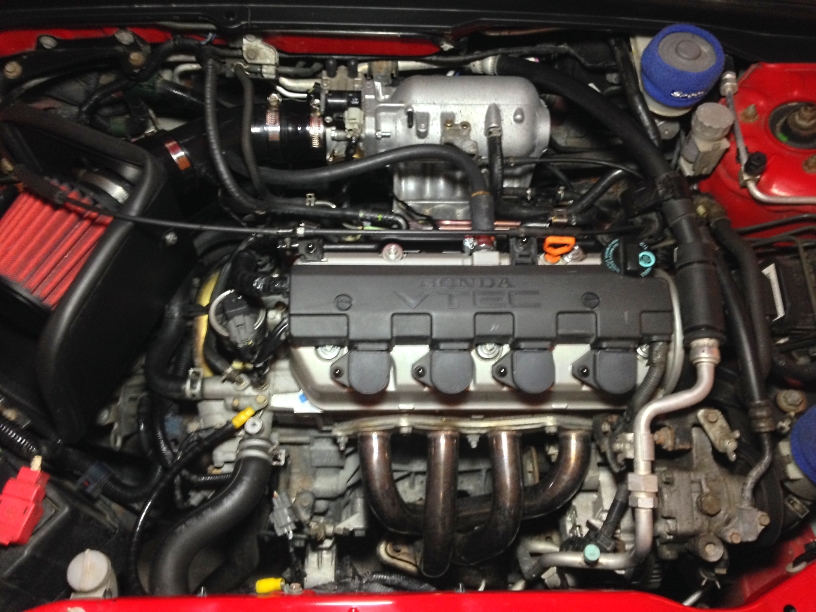
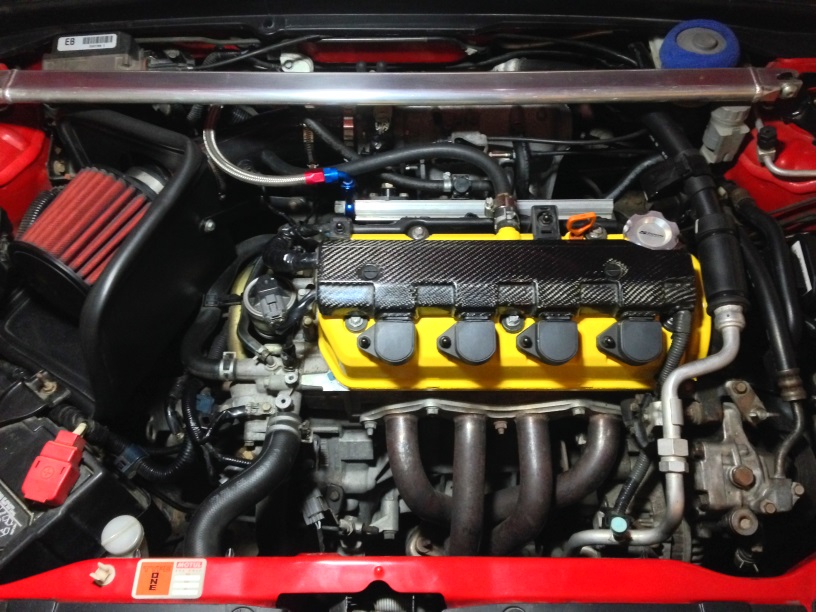
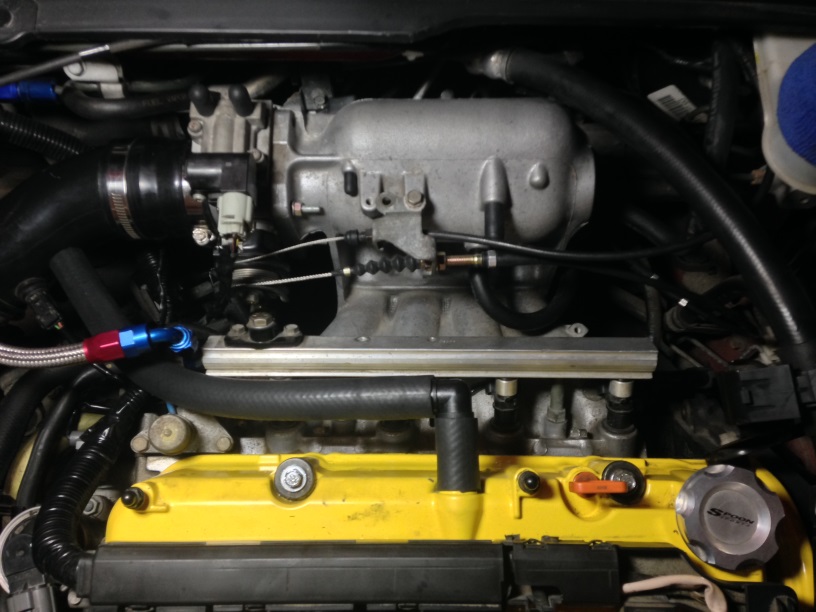
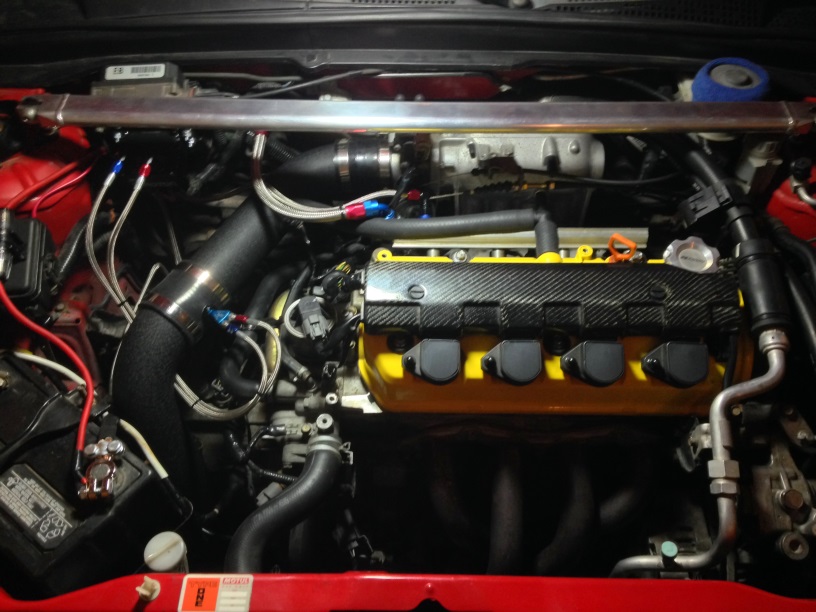
Here is what the engine bay looks like today, not much different. I did add a 96-00 Civic throttle cable to clean up the bay from the huge looping stock one. I also removed the OBX radiator hoses because no matter how tight the hose clamps were they leaked, so I put the stock ones back on.
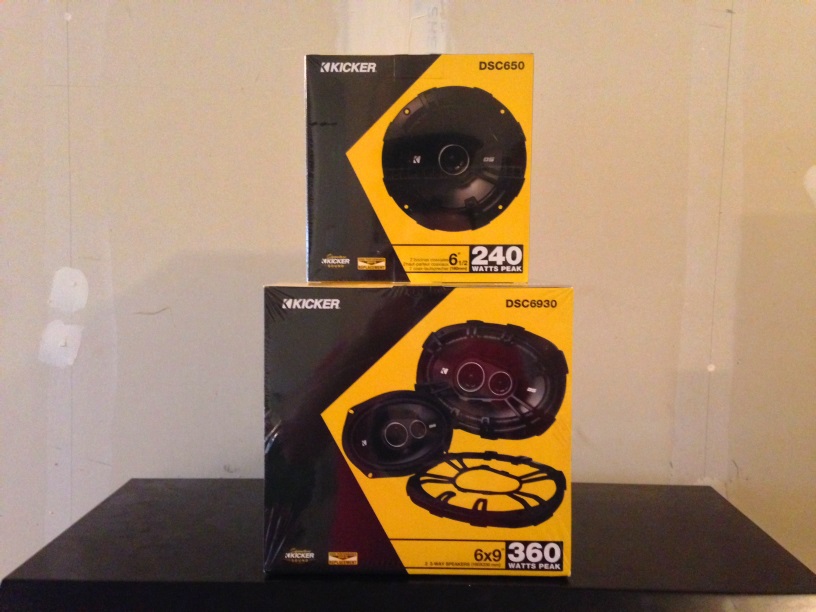
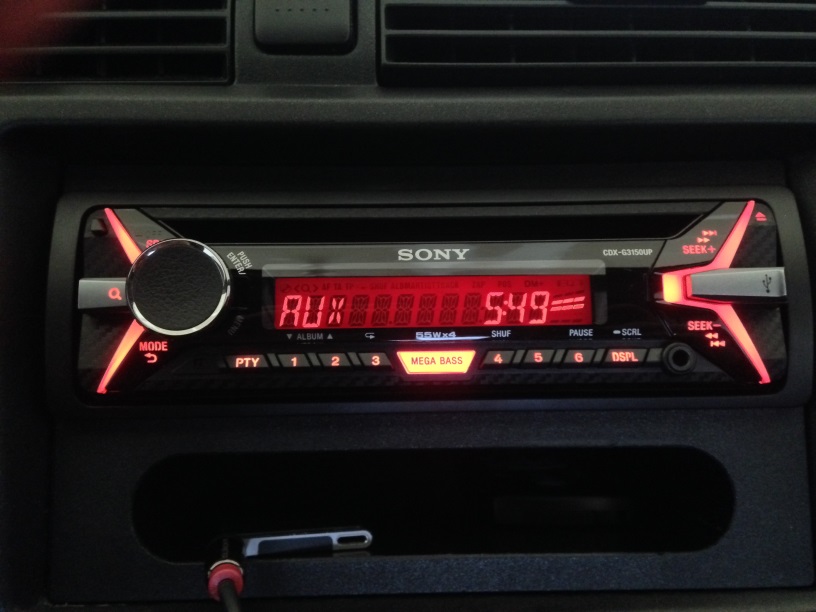
And here we are today. The current project, which is a audio overhaul. So far I have installed Kicker DS 6.5" door speakers, Kicker DS 6x9's in the deck, a Sony CDX-3150UP headunit, and now I am planning to run a 10" Rockford Fosgate Prime in a Sealed box in the trunk to round everything out.
So whats next? Well nitrous is still on the list, I think I finally decided on the NX Proton kit with a 55 shot, I need to get a AEM fuel rail to have a better way to tap into the fuel system. Before that though I am planning on getting a new lip (previous one shattered from a raccoon), new rear bumper since it is cracked, a new spoiler, and some side skirts because the rocker panels are getting so nasty to look at. So stay tuned!
Oh man, so it has been a while since I was one here. I still have been working on the car but between changing jobs and moving to Montana life has been hectic the past year. But starting with some good news I paid the car off! So now I can blow it up or do whatever
but seriously now I may actually get to the nitrous part of my build that I always wanted to do. Since last time, here are the things that have been changed, modded, and added to the build. As of right now I'm kind of in a refresh/audio/entertainment section of the project. Well without further ado...The first thing was getting rid of the nasty old cabin air filters, who knows the last time this was done. Highly recommend it if you haven't, it is very cheap too. About $10 on Amazon.
Next I went under the hood because I was having a bad oil leak after winter, turned out to be a bad cam seal, so replaced that with a new tensioner and timing belt and while in the process discovered this bad engine mount.
It was time to refresh the AEM Dryflow after like 4 road trips, so I got a bottle of the AEM Dryflow cleaner and went to town.
Before:
After:
After moving to Montana and going through my parts bins I found my old road flare from my Integra Type R in Japan, so I thought why not? I slapped it in for some more mad jdm yo points.
Moving on to the next big update is the suspension, after much deliberation and chatting with some friends about them, I decided to go with TruHart Sport Shocks, they are valved shorter to work better with lowering springs with at least a 1" drop or lower. During the install I had to CUT THE REAR STRUT OUT AGAIN!!!
If you haven't been following my thread check out page one to see that debacle from 3 years ago. Anyways while I was in there I changed the strut mounts, bump stops/boots, and bearings for brand new ones. Install went well and they feel great! Have had them on for about a month as of now and no issues, much better than with all 4 corners blown. 250 bucks well spent.Next was rolling my rear fenders since on the drive up here to Montana, having stuff loaded in the trunk was weighing it down and was causing the fenders to dig into the tires on bumps so I took a rubber mallet and a heat gun to it and the results were great.
Before:
After:
Here is what the engine bay looks like today, not much different. I did add a 96-00 Civic throttle cable to clean up the bay from the huge looping stock one. I also removed the OBX radiator hoses because no matter how tight the hose clamps were they leaked, so I put the stock ones back on.
And here we are today. The current project, which is a audio overhaul. So far I have installed Kicker DS 6.5" door speakers, Kicker DS 6x9's in the deck, a Sony CDX-3150UP headunit, and now I am planning to run a 10" Rockford Fosgate Prime in a Sealed box in the trunk to round everything out.
So whats next? Well nitrous is still on the list, I think I finally decided on the NX Proton kit with a 55 shot, I need to get a AEM fuel rail to have a better way to tap into the fuel system. Before that though I am planning on getting a new lip (previous one shattered from a raccoon), new rear bumper since it is cracked, a new spoiler, and some side skirts because the rocker panels are getting so nasty to look at. So stay tuned!
07-25-2017
#3
Registered!!
Thread Starter
Re: Daily Driver EM2 EX SE Build Ver. 2.0
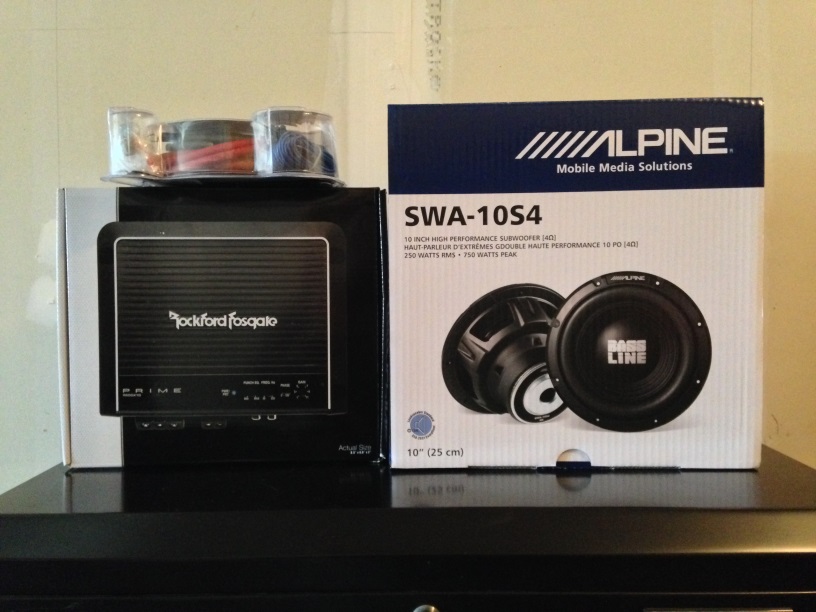
Got my audio project done. Went a budgetish route with an Alpine SWA-10S4 Bassline subwoofer, Rockford Fosgate Prime 500w x 1 amp, and a Scosche sealed box along with a Rockford 8AWG wiring kit. Hits pretty good, by no means is this to win SPL competitions but it gets the job done, I mostly listen to death metal anyways so this serves its purpose just fine. I will eventually upgrade to a Rockford P3D2 500w RMS subwoofer in the future. I was planning to do sound deadening and what not but not really a point after the install, I don't have any crazy vibrations or anything so I might do it later.
The goods:
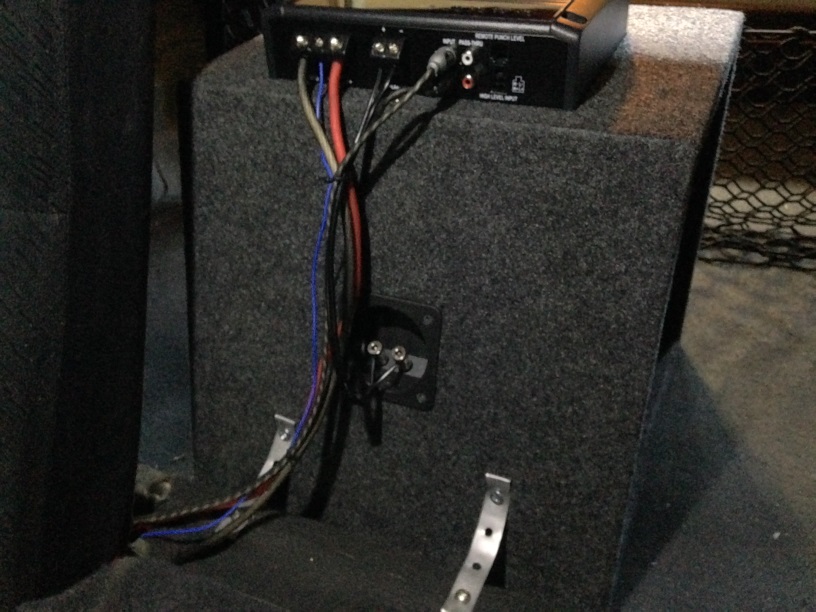
Box mounting and amp installation:
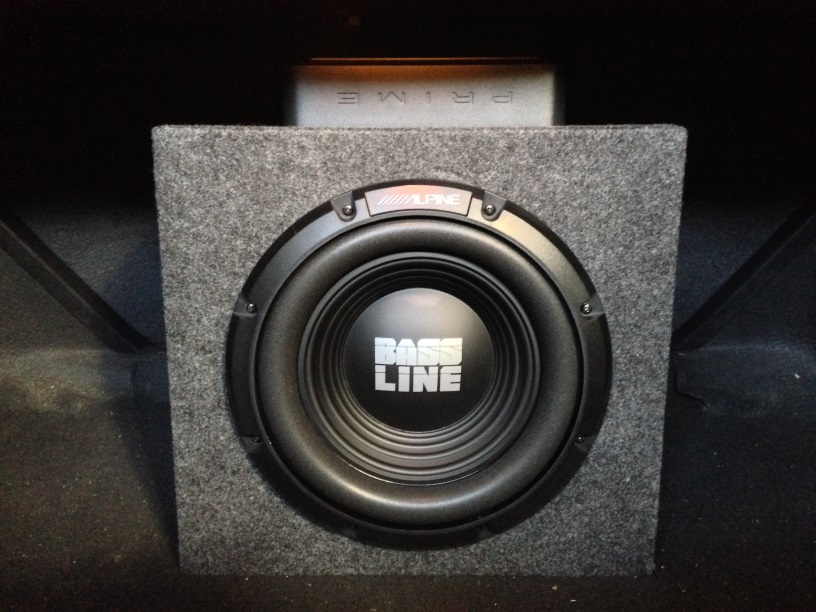
How it all looks:
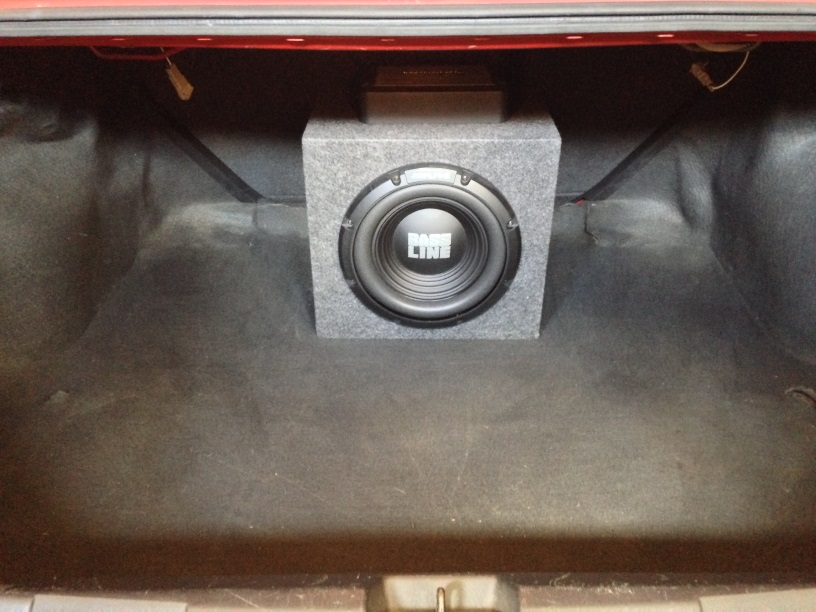
Still have plenty of trunk space which was a goal:
Next phase is now body work because it has been horribly neglected for the past couple years. I ordered some ebay side skirts which will be painted the OEM rallye red, will be getting a new rear bumper, and a new front lip painted gloss black. Then an entire paint correction, polish, wax. I eventually want a new front bumper and repaint the hood due to rock chips but we will see. I'll keep you posted!
The goods:
Box mounting and amp installation:
How it all looks:
Still have plenty of trunk space
which was a goal:Next phase is now body work because it has been horribly neglected for the past couple years. I ordered some ebay side skirts which will be painted the OEM rallye red, will be getting a new rear bumper, and a new front lip painted gloss black. Then an entire paint correction, polish, wax. I eventually want a new front bumper and repaint the hood due to rock chips but we will see. I'll keep you posted!
 08-20-2017
#5
Registered!!
Thread Starter
Re: Daily Driver EM2 EX SE Build Ver. 2.0
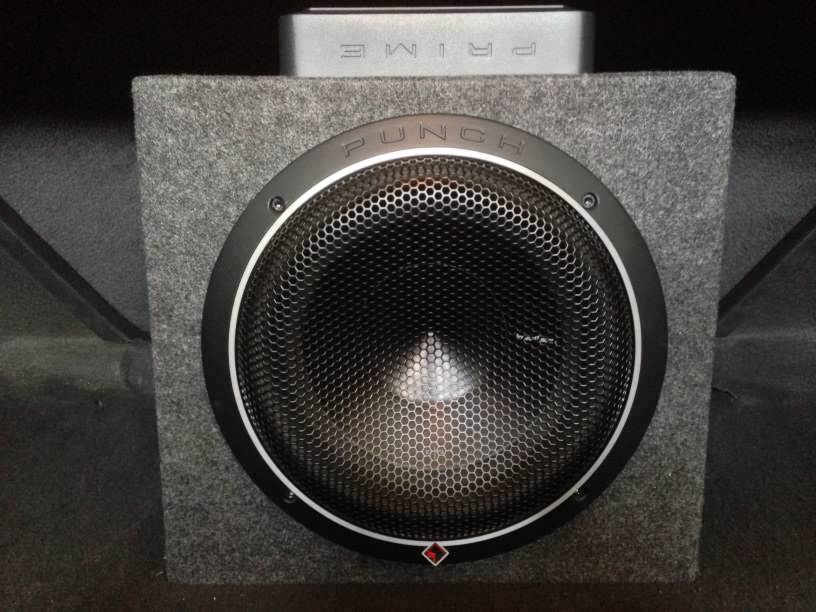
Ah man, so it's been a while again but here we go So the Alpine decided to rip the spider off the basket so I called Crutchfield to swap it out and upgrade towards what I should have gotten from the get go, a Rockford Fosgate P3D2. This sub sounds waaay better and hits harder.
The carnage:
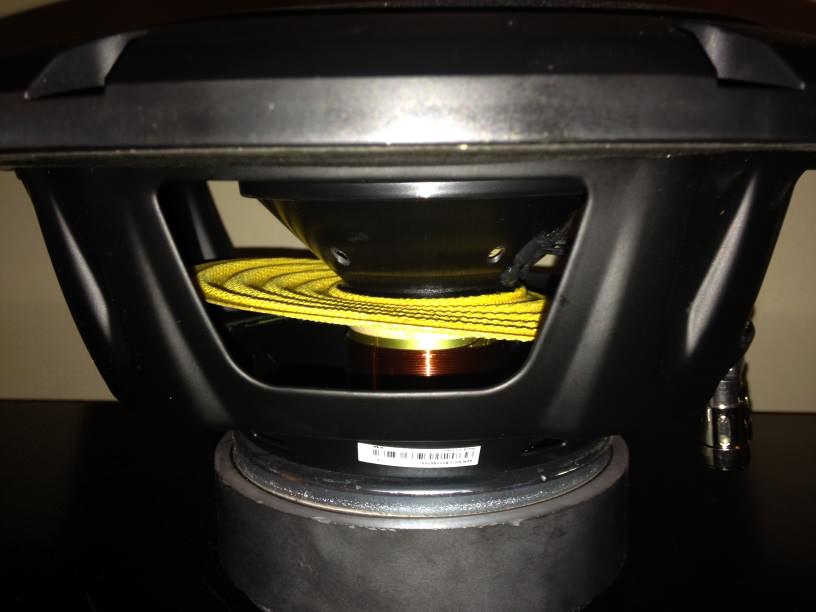
The new:
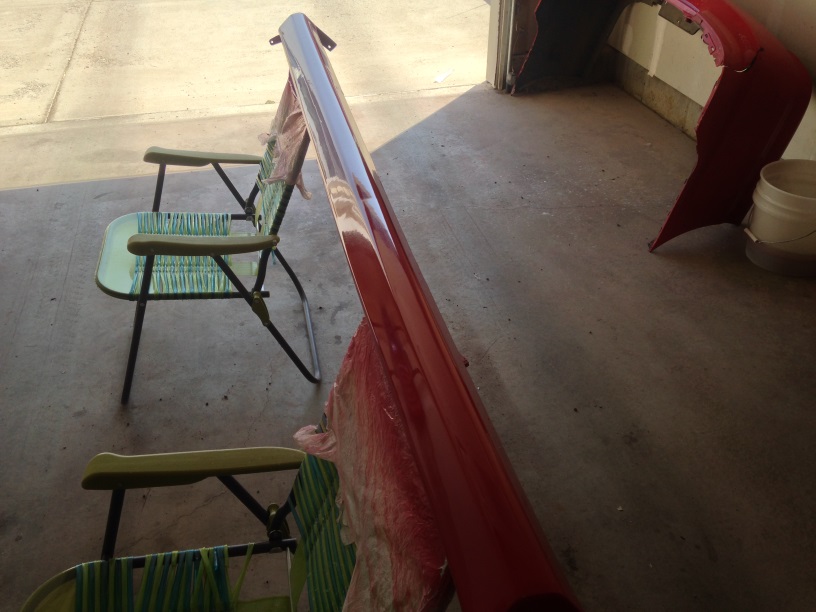
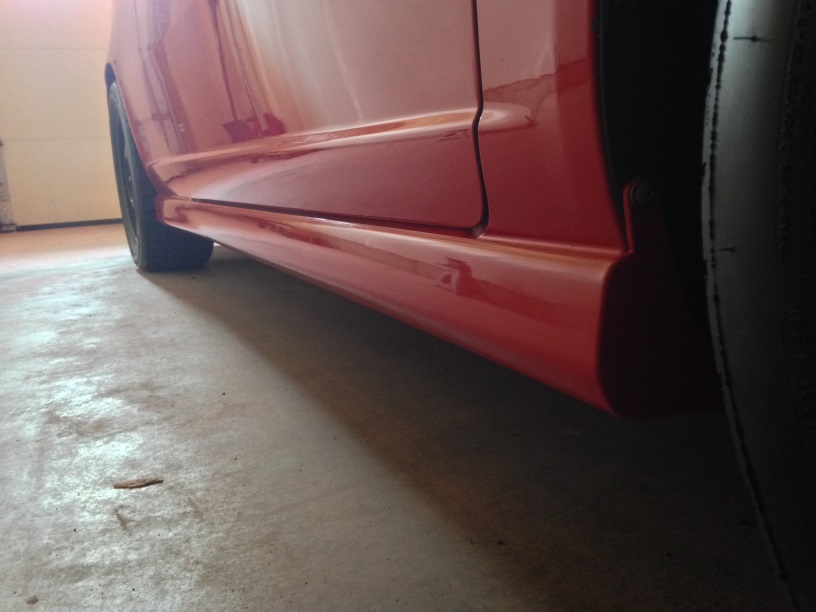
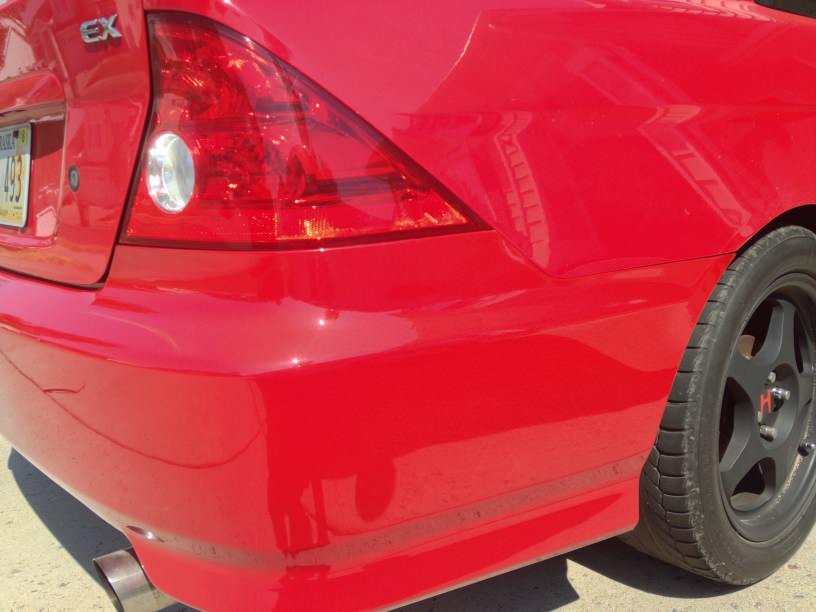
After that debacle it was time to finally tackle some sideskirts. I bought the Type "A" skirts on Ebay and painted them with paint matched from paintscratch.com and hit it with some wetsanding, afterwards some Meguiar's compound and polish got them shined up real good. I still need to buy a buffer so this was all done by hand, I'll repolish them once I do get one though.
I also installed my new rear bumper paint matched from MBI Auto on Ebay as well.
I recently have got the bug to do a wire tuck, so I ordered a ton of braided loom, heat shrink, and some more wire to tackle that in the coming weeks. For now I cleaned up all the hoses and injector wiring on the Y8, it came out pretty good.
Before:

After:
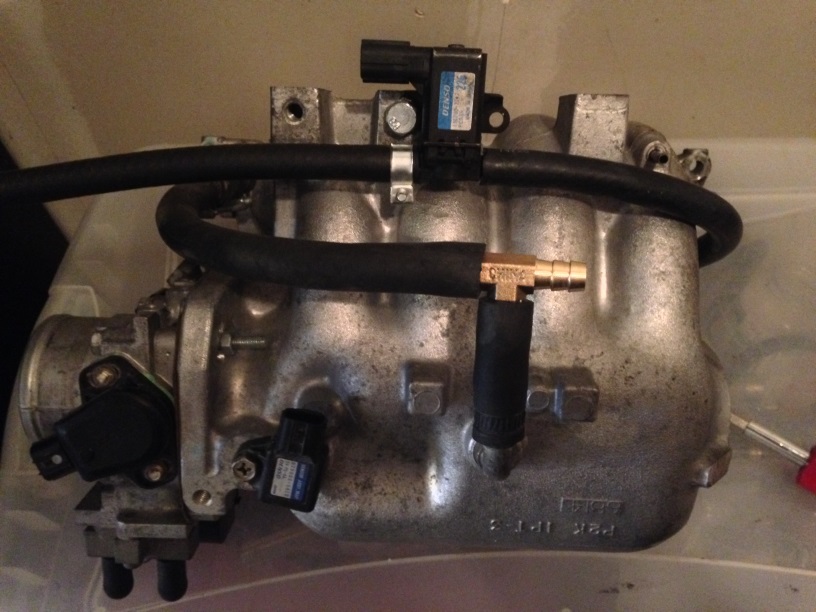
Some of the new routing behind the mani:
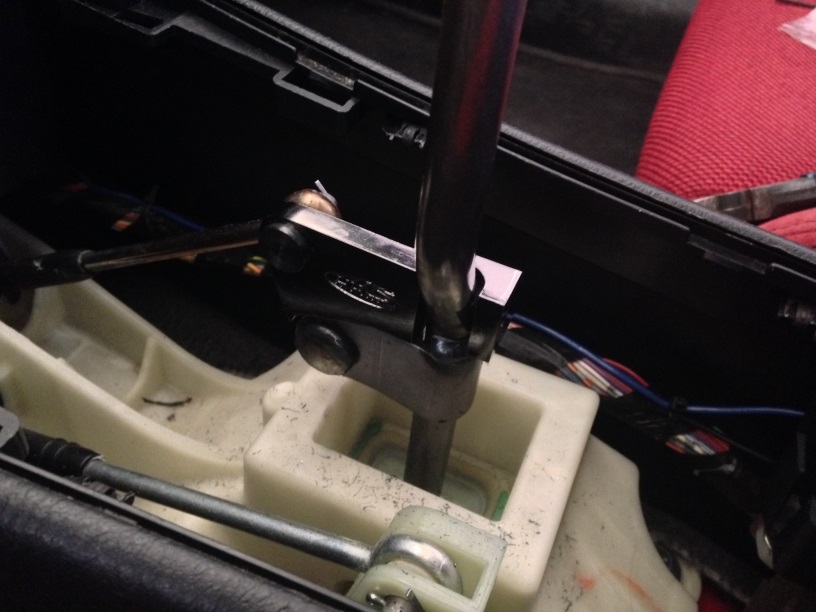
Another random find on Ebay was this AC Autotechnic short shifter adapter, I thought for $20 how can you go wrong? Got it in the mail and slapped in on and it works great, very impressed with how cheap this is, definitely reduced the throw about 50%
So there I was one night, perusing Ebay like usual and I spotted it, a NX Proton kit brand new in an opened box for $375, what a deal! I thought long and hard about it and after all said and done here is the result
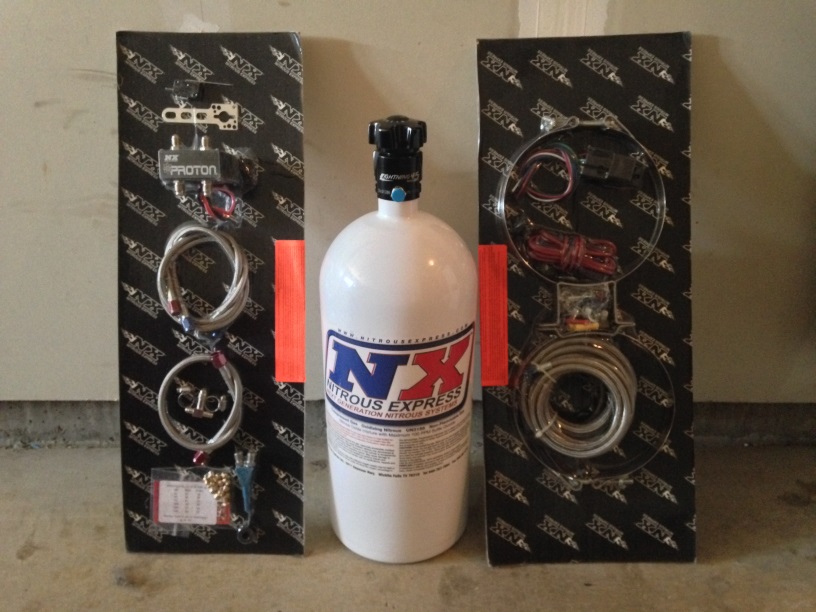
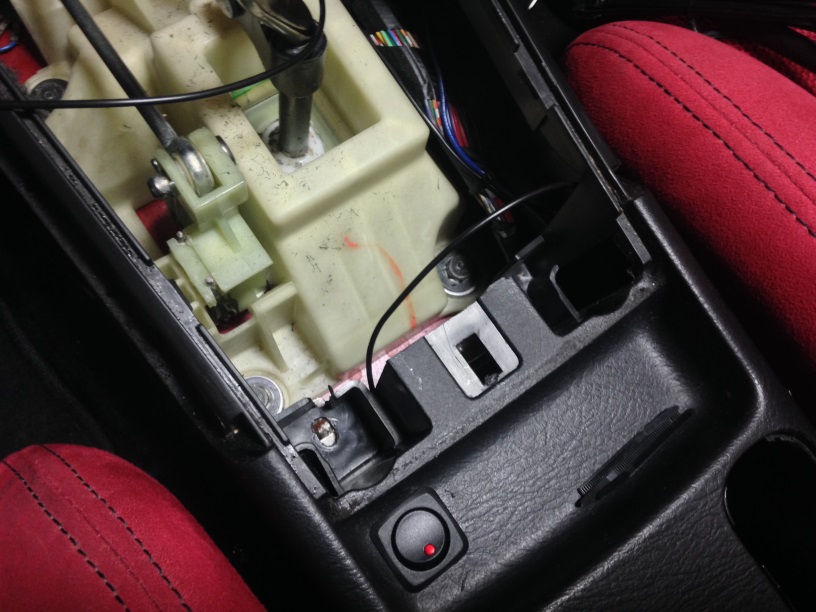
I picked it up! So what I said in the opening of my thread almost 3 years ago has happend. The next huge leap in this build. Took my time to install everything to make sure it was just right. I've seen so many kits just slapped on with things like the bottle seat belted in the back seat, nitrous button on the shifter electrical taped on, it just looked so half assed and cheap so I wanted to make it as nice as possible inside, and in the bay.
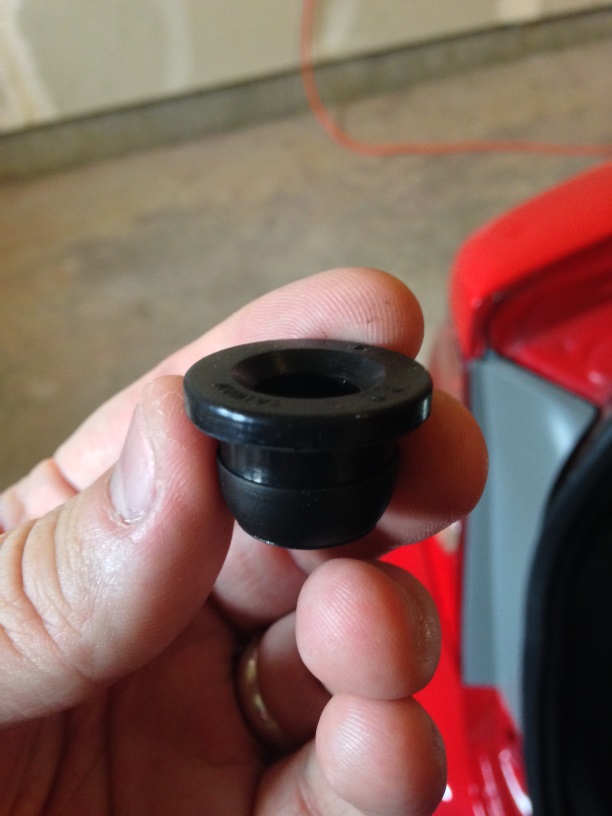
So I started with the bottle, I obviously knew I wanted to place it in the trunk so I went to town with my drill and got the mounting holes placed. I cut slots and holes in the wood so the trunk floor was still functional as well as with the carpet. I ran the nitrous line down out of the trunk and underneath the car up into the bay. The metal back here was thick so I had issues finding a grommet thick enough for the feed line, eventually I figured a GM PCV grommet from O'Reilly's would work.
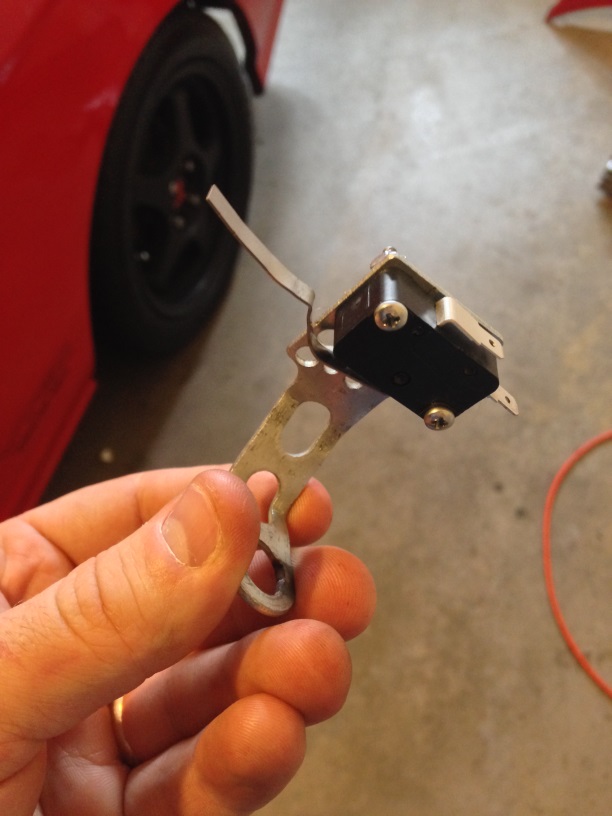
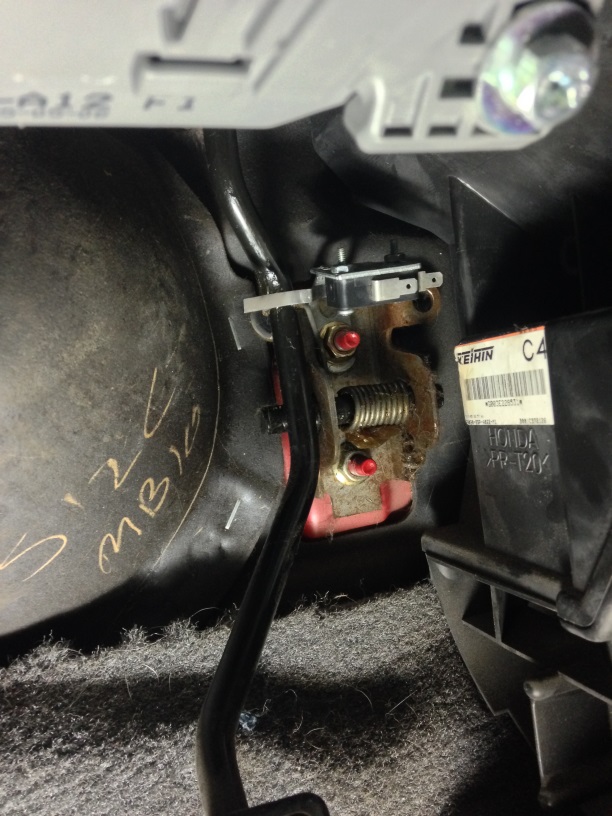
After that it was time for the switches. I put the arming switch in the coin pocket on the center console and then I spent days deciding what to do for the microswitch, I must have bent a thousand different configurations in order to put it on the throttle body and I just didn't like how it looked nor worked. It would catch and just kept bothering me. I was perusing a NOS RSX kit manual and noticed it had a specific bracket for the WOT switch that was placed on the pedal assembly. So that's what I did was bend it just like it looked and put it in. Very sturdy and out of the way, also your foot HAS to be to the floor for it to make contact and click, so that is a little insurance.
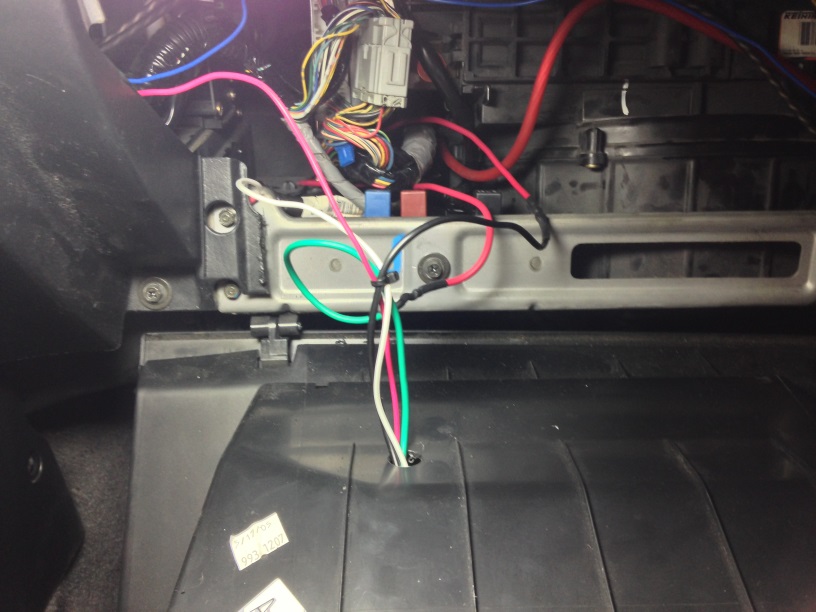
Next was wiring for the relay, I decided to put it in the glove box after reading on some muscle car forums and seeing they did this, that way if it blows its easy to replace. I had a ongoing issue of the relay not sending power to the solenoids, after tons of testing come to find out NX or whomever makes the relays crimped the pin for 30 right on the insulation so it had no connection I routed the wire through the hole that my amp wire is going.
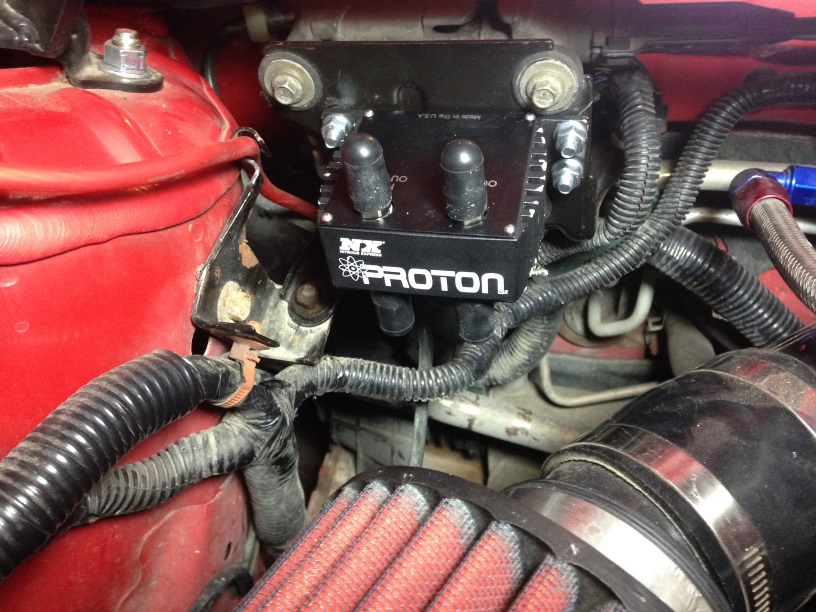
So then came the decision of where to put the solenoids (I swear, half of a nitrous kit is where to put things, not how to put it in) I wanted to put it where my cruise control was but wanted to keep my CC so I just drilled some holes and put it on the bracket.
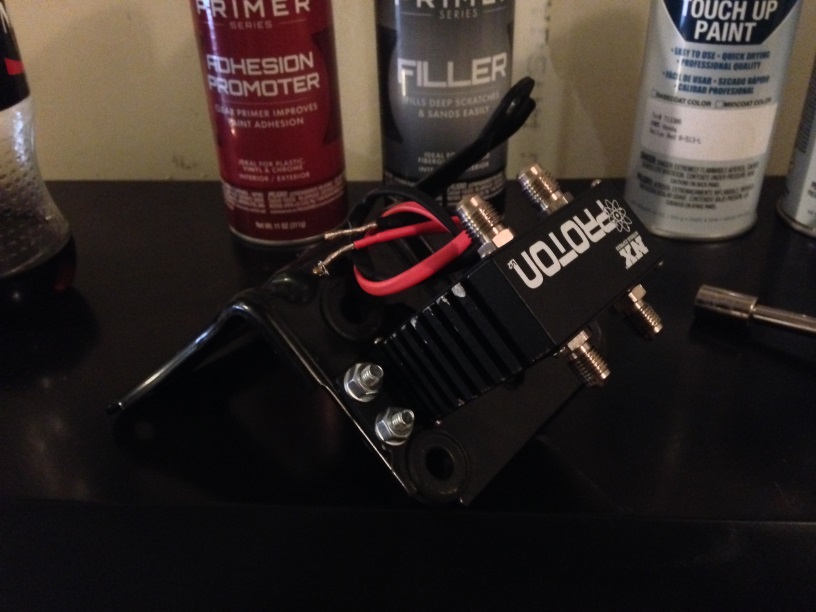
The way the lines are on the solenoids, they would point straight up so I had to get these ridiculously expensive Vibrant 4AN swivel fittings, one for each nozzle line and one for the fuel.

After all this I installed a new fuel rail adapter from VMS and put the fuel line swivel on it and routed all the lines. I also bought a new intake, this one being a 94-97 Accord intake that I modified in order for it to be like a CAI. I initially was trying to relocate the battery to the fender but the bracket I bought was too big, so I messed around with the charge harness, got wires outta the way, removed the trans bracket, zip tied the clutch line bracket to the battery tray, and redid my grounds and here is the result, came out better than I expected. Finally will have some nice cool intake air, and yes eventually I'll get a Hydro Shield as a safety precaution.
I think it came out well. Next is redoing the entire harness to tuck it and make it look cleaner, I'm not 100% of the nozzle in the coupler, I only did it that way as that's how the guy in Honda Tuning did it for a 01 EM2 but it's just not super secure. I'll probably drill it to the intake pipe.
So now that nitrous is officially going to happen this has opened a huge door for stuff to do:
Nitrous pressure gauge
AEM wideband
High flow cat in the OBX down pipe and weld in a O2 bung
Bottle heater
And that is just the necessities, I bought a clear timing cover, am contemplating ABS/PS removal, remote bottle opener, NHRA blowdown tube, etc etc. The list just goes on. So stay tuned, more is coming for sure!
So the Alpine decided to rip the spider off the basket so I called Crutchfield to swap it out and upgrade towards what I should have gotten from the get go, a Rockford Fosgate P3D2. This sub sounds waaay better and hits harder.The carnage:
The new:
After that debacle it was time to finally tackle some sideskirts. I bought the Type "A" skirts on Ebay and painted them with paint matched from paintscratch.com and hit it with some wetsanding, afterwards some Meguiar's compound and polish got them shined up real good. I still need to buy a buffer so this was all done by hand, I'll repolish them once I do get one though.
I also installed my new rear bumper paint matched from MBI Auto on Ebay as well.
I recently have got the bug to do a wire tuck, so I ordered a ton of braided loom, heat shrink, and some more wire to tackle that in the coming weeks. For now I cleaned up all the hoses and injector wiring on the Y8, it came out pretty good.
Before:
After:
Some of the new routing behind the mani:
Another random find on Ebay was this AC Autotechnic short shifter adapter, I thought for $20 how can you go wrong? Got it in the mail and slapped in on and it works great, very impressed with how cheap this is, definitely reduced the throw about 50%
So there I was one night, perusing Ebay like usual and I spotted it, a NX Proton kit brand new in an opened box for $375, what a deal! I thought long and hard about it and after all said and done here is the result
I picked it up! So what I said in the opening of my thread almost 3 years ago has happend. The next huge leap in this build. Took my time to install everything to make sure it was just right. I've seen so many kits just slapped on with things like the bottle seat belted in the back seat, nitrous button on the shifter electrical taped on, it just looked so half assed and cheap so I wanted to make it as nice as possible inside, and in the bay.
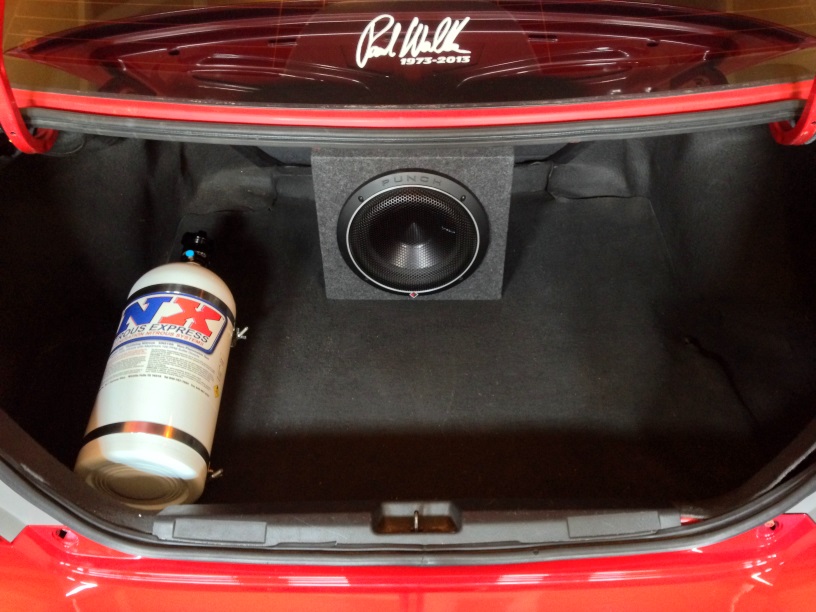
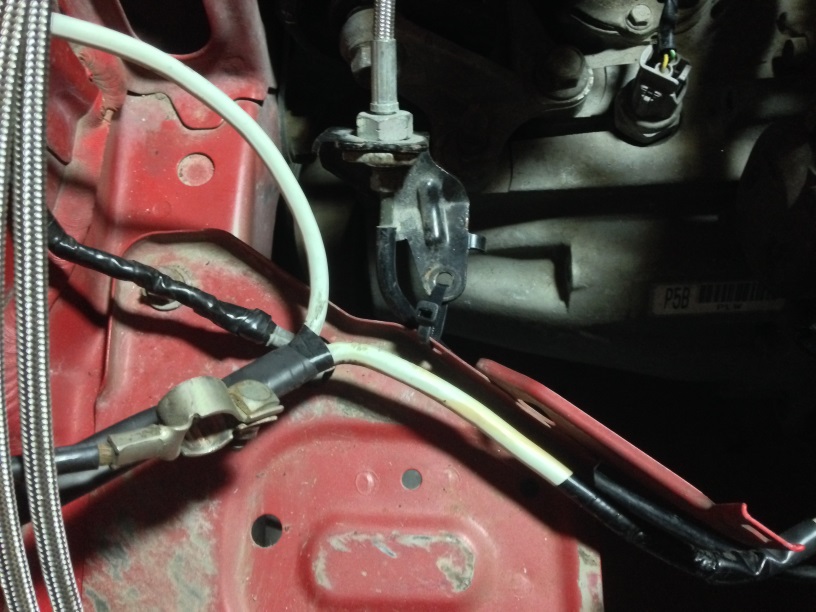
So I started with the bottle, I obviously knew I wanted to place it in the trunk so I went to town with my drill and got the mounting holes placed. I cut slots and holes in the wood so the trunk floor was still functional as well as with the carpet. I ran the nitrous line down out of the trunk and underneath the car up into the bay. The metal back here was thick so I had issues finding a grommet thick enough for the feed line, eventually I figured a GM PCV grommet from O'Reilly's would work.
After that it was time for the switches. I put the arming switch in the coin pocket on the center console and then I spent days deciding what to do for the microswitch, I must have bent a thousand different configurations in order to put it on the throttle body and I just didn't like how it looked nor worked. It would catch and just kept bothering me. I was perusing a NOS RSX kit manual and noticed it had a specific bracket for the WOT switch that was placed on the pedal assembly. So that's what I did was bend it just like it looked and put it in. Very sturdy and out of the way, also your foot HAS to be to the floor for it to make contact and click, so that is a little insurance.
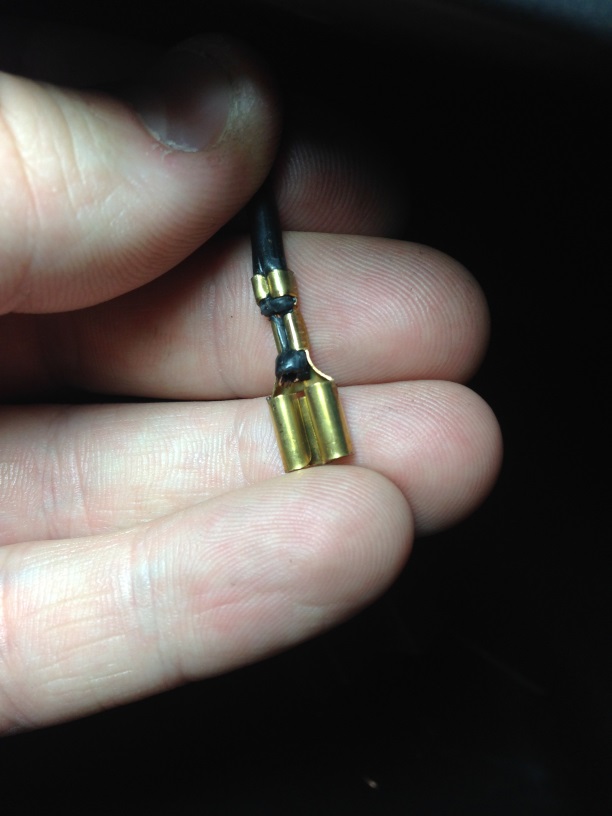
Next was wiring for the relay, I decided to put it in the glove box after reading on some muscle car forums and seeing they did this, that way if it blows its easy to replace. I had a ongoing issue of the relay not sending power to the solenoids, after tons of testing come to find out NX or whomever makes the relays crimped the pin for 30 right on the insulation so it had no connection
I routed the wire through the hole that my amp wire is going.So then came the decision of where to put the solenoids (I swear, half of a nitrous kit is where to put things, not how to put it in) I wanted to put it where my cruise control was but wanted to keep my CC so I just drilled some holes and put it on the bracket.
The way the lines are on the solenoids, they would point straight up so I had to get these ridiculously expensive Vibrant 4AN swivel fittings, one for each nozzle line and one for the fuel.
After all this I installed a new fuel rail adapter from VMS and put the fuel line swivel on it and routed all the lines. I also bought a new intake, this one being a 94-97 Accord intake that I modified in order for it to be like a CAI. I initially was trying to relocate the battery to the fender but the bracket I bought was too big, so I messed around with the charge harness, got wires outta the way, removed the trans bracket, zip tied the clutch line bracket to the battery tray, and redid my grounds and here is the result, came out better than I expected. Finally will have some nice cool intake air, and yes eventually I'll get a Hydro Shield as a safety precaution.
I think it came out well. Next is redoing the entire harness to tuck it and make it look cleaner, I'm not 100% of the nozzle in the coupler, I only did it that way as that's how the guy in Honda Tuning did it for a 01 EM2 but it's just not super secure. I'll probably drill it to the intake pipe.
So now that nitrous is officially going to happen this has opened a huge door for stuff to do:
Nitrous pressure gauge
AEM wideband
High flow cat in the OBX down pipe and weld in a O2 bung
Bottle heater
And that is just the necessities, I bought a clear timing cover, am contemplating ABS/PS removal, remote bottle opener, NHRA blowdown tube, etc etc. The list just goes on. So stay tuned, more is coming for sure!
The following users liked this post:
ES2Spec (02-01-2022)

