DIY - 05 Coupe Spoiler Shave/Trunk Repair
 08-07-2009
#1
Registered!!
Thread Starter

Join Date: Apr 2009
Posts: 54
Likes: 0
Received 0 Likes
on
0 Posts
Rep Power: 183 
DIY - 05 Coupe Spoiler Shave/Trunk Repair
Alright guys, just a little project I knocked out last night over a few beers and figured someone might find it useful someday. The situation was such; I removed an aluminum wing which was installed improperly. As a result of that, not only were there holes in the trunk, but also some very minimal structural damage and dents surrounding those holes. Now that you're up to speed, lets get started.
**Safety Disclaimer**
Power tools can be very dangerous if handeled improperly; please take all necessary precations, don't remove your safety guards, and always wear hearing and eye protection!
**My Disclaimer**
I'm just gonna throw this out here now, in an attempt to stop people from trying to prove how smart they are and knock my work.
#1 - Yes, fiberglass and metal does expand/contract at different rates
#2 - The 'proper' way to do this repair would involve welding the trunk, preferably TIG. There are many reasons why I chose not to take this route, mainly because I dont own or have access to a TIG .
#3 - With the above being stated, you can still acheive professional, long lasting results with my method.
**Materials**
1. Small can of 'Kitty Hair' - I use Bondo brand.
2. Small can of Bondo brand body filler and a tube of glazing/spot putty.
3. Spreaders, some scrap cardboard to mix on, and a putty knife.
4. Sandpaper - 60,120,220,400/500
5. Angle grinder w/ a 60 grit disk (not required, but soo much faster..)
6. High build primer
7. An ice cold six pack
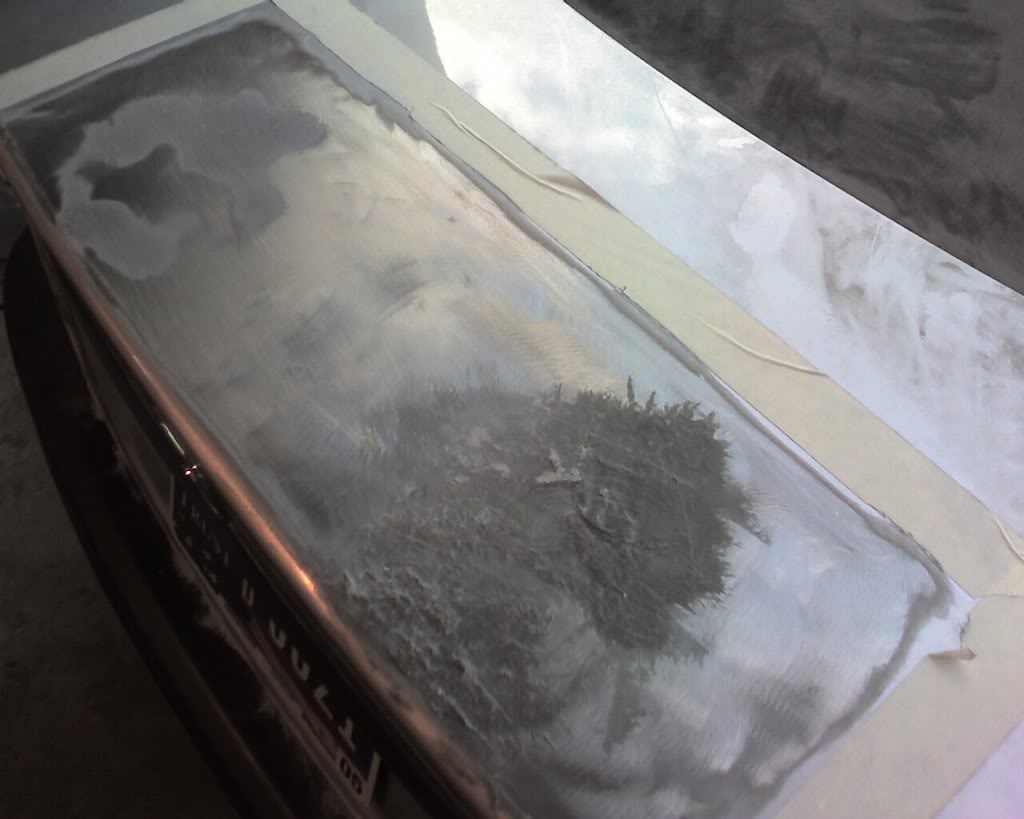
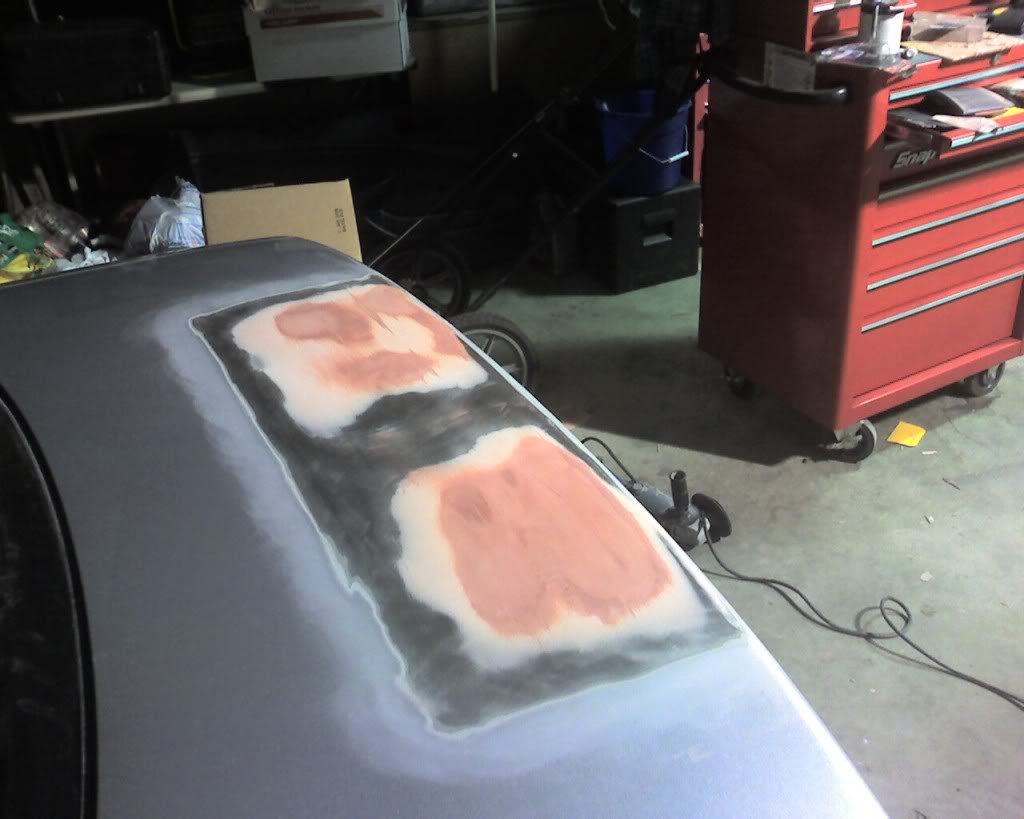
Now that we've got our gear, we're going to take down a section of the trunk to bare metal. Keep in mind, the holes were for a #10 bolt, and the damage around the holes minimal. You do NOT simply want to grind down this small area and decide to 'pack it' with Bondo. You will fail. Here is a shot of my trunk, after grinding. (The tape was just a visual guide for me)

I have circled the obvious holes and the arrows are pointing out the indentations the damn spoiler put in my trunk.
You may think this area is way too big for those itty bitty holes. Rest assured however, this is what you want. This my friends, is how you feather out your repair and make blend with the car. You must be sure that you're all the way to bare metal - all paint and primer must be gone, otherwise it can cause adhesion problems.
Next step: Kitty Hair! Mix up the recommended 3 inch diameter circle, knead your hardener and put a single strip straight across the center. This stuff sets quickly, so take care not to mix too hot! With your spreader, slap a pile of this on the hole and drag outwards - smoothly. Keep in mind, you can be a bit messy here, but if you keep it clean your arms will thank you later. Once this hardens the repair is essentially complete, now all we have to do is clean it up and blend 'er in. Starting with a 60 grit paper, begin sanding this down, feathering you're edges nice and smooth.
Driver's side is sanded, passenger side obviously not. Notice the blurring effect around the edges on the left - this means it is feathered properly.
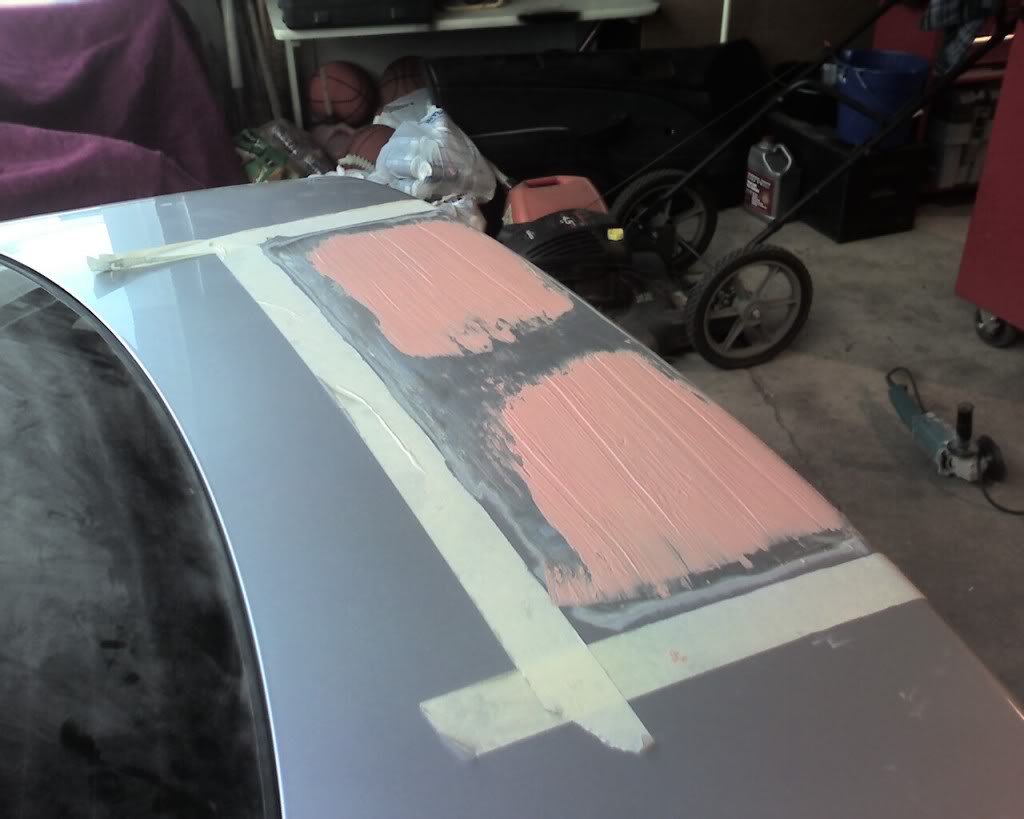
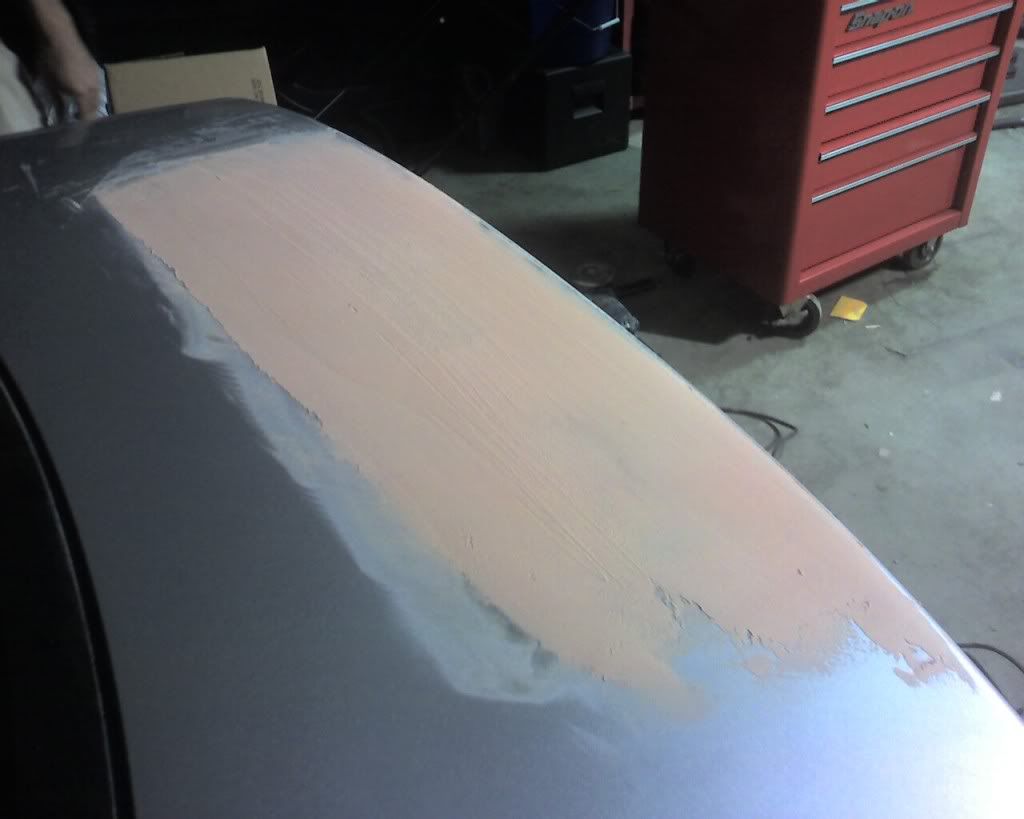
Once you've got this done, it's time to mix up your body filler - again, a 3 inch circle with a single strip of hardener. Mix to uniform color - should be nice and pink. If it's a little off-whiteish you didn't mix it hot enough. Here is why we ground down such a large area. We need to blend our repair 'into the trunk' with this filler. So, with a spreader start laying down strips of filler that almost cover this entire area. The bigger we go here, the easier it is to blend. Try to get nice smooth layers, avoiding valleys or mountains left by the edge of your spreader. You will get marks, don't try to get it glass smooth at this point.
Same as the kitty hair, start sandin' with your 60 grit. You're essentially roughing it in right now, but you should be feeling with your hands and getting it as smooth as possible. The goal - running your hand from one side of the trunk to the other feeling nothing but a change in texture. If you're feeling waves or mountains, you're going to want to sand in the opposing direction to knock these down. When the 'mountains' feel more like 'mole hills', it's time to sand diagonally and cut across at an angle. The reason for this is our trunks are not flat - they are curved in two different directions. This diagonal motion helps blend these lines together.
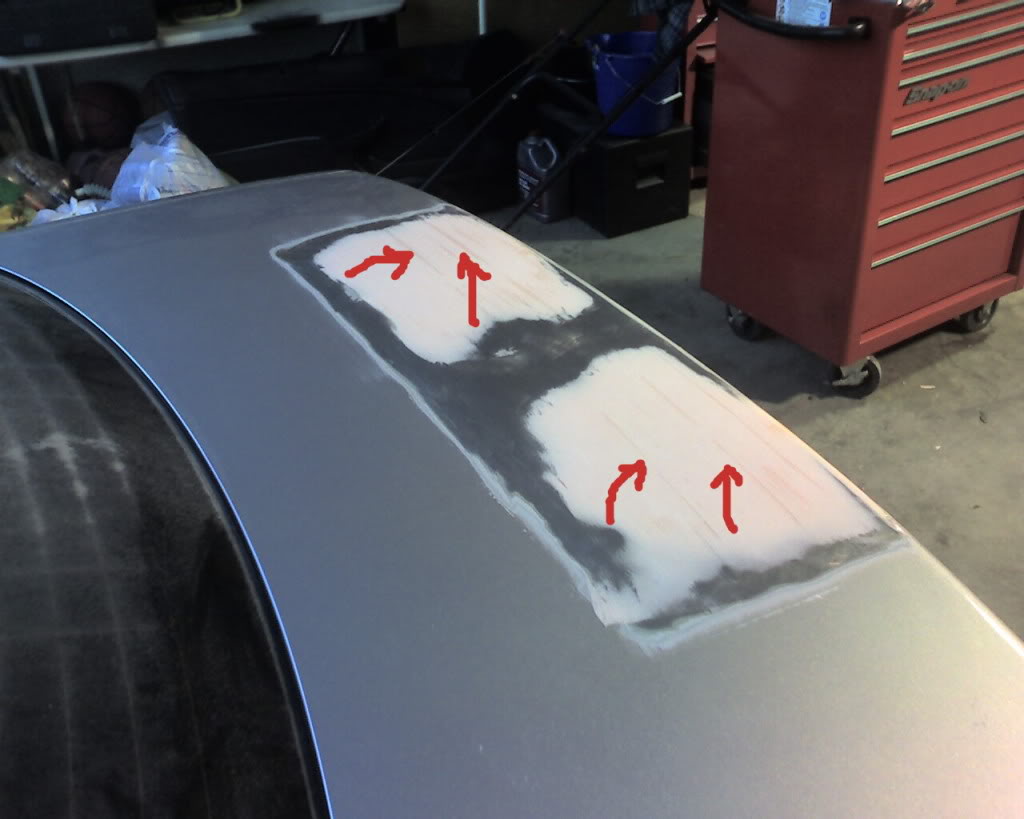
Now, here we are roughed in. I have pointed out low spots, or 'valleys' with the arrows. You want to be careful and not get too aggressive with the sanding. Chances are, if you sand until all of these are gone you're going to be way too low and again - fail. How do we fix these? Grab your tube of glazing putty, and simply squeeze it out like toothpaste straight down the line. Feather this with a spreader (think spreading icing on a cake..) and let it dry.
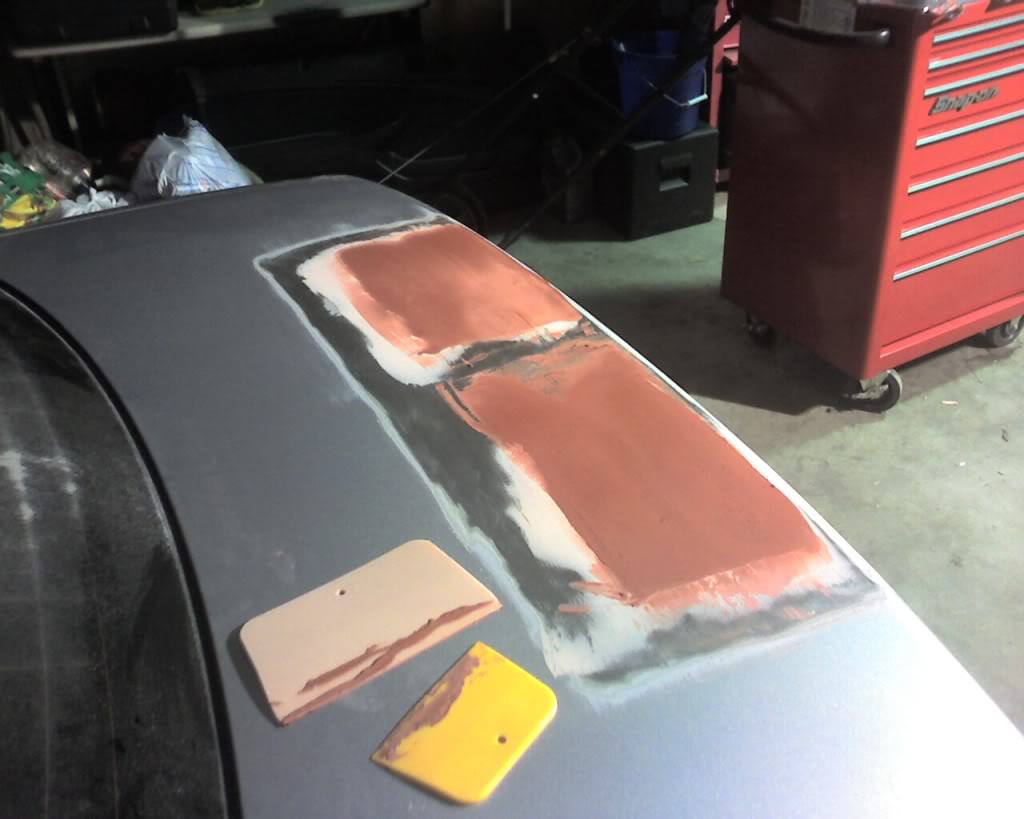
Here is it before I sanded it down, and after:
At this point you could stop, completely finish sand and shoot with primer.. But if you want professional results and a prestine trunk - read on.
The final step here, which makes all the difference in the world is your glaze or skim coat. We're going to lay down one more layer on bondo before completely blending and finish sanding. Keep in mind, the layer of bondo we lay now needs to be paper thin. You should not end up with a quart of bondo on your trunk when we're done.. The purpose of this coat is again, to feather our repair into the lines of the trunk and essentially make it invisible.
Example:
If your house is drywalled, you may think your walls are perfectly flat - after all, they appear that way. In all reality, there is tape and several layers of mud at every seam and joint. The joint and tape disappear because of the layers of mud feathering it into the wall.
Mix up your final layer, spread it t-h-i-n and let that cure about 5 minutes before you start finish sanding. Use the same techniques as above, side to side, then cutting at diagonals to blend it in. Once everything feels nice and smooth, edges are nice and blurry, move up a grit. You work from 60, 120, 220, and finish off with a 400 or 500 grit paper. Depending on the primer, you may choose to leave it at 60 before finish sanding the finer grits. The rougher the surface, the better the primer 'bites'.
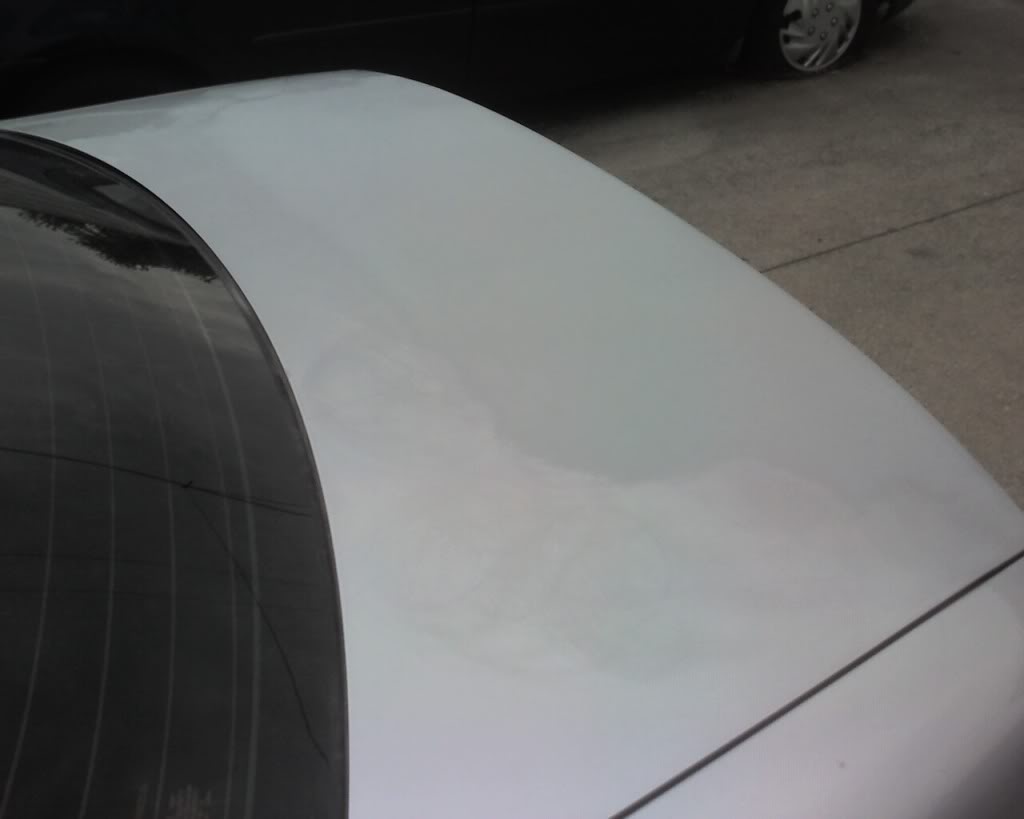
Sadly enough, I was under time contraints and the influence of , so I forgot to snap a pic after I had this completely finish sanded. Best advice I can give you here: Look away from the car and let your hands 'see' the surface of the trunk. They'll tell you when it's done.
Here is the 'finished' product. This is merely roughed in, more work is needed before ready for paint.
Well, there you go guys. Hopefully you learned a little something, or maybe even got a little confidence boost. It's not so tough, it's just sheet metal and bondo.
**Safety Disclaimer**
Power tools can be very dangerous if handeled improperly; please take all necessary precations, don't remove your safety guards, and always wear hearing and eye protection!
**My Disclaimer**
I'm just gonna throw this out here now, in an attempt to stop people from trying to prove how smart they are and knock my work.
#1 - Yes, fiberglass and metal does expand/contract at different rates
#2 - The 'proper' way to do this repair would involve welding the trunk, preferably TIG. There are many reasons why I chose not to take this route, mainly because I dont own or have access to a TIG .
#3 - With the above being stated, you can still acheive professional, long lasting results with my method.
**Materials**
1. Small can of 'Kitty Hair' - I use Bondo brand.
2. Small can of Bondo brand body filler and a tube of glazing/spot putty.
3. Spreaders, some scrap cardboard to mix on, and a putty knife.
4. Sandpaper - 60,120,220,400/500
5. Angle grinder w/ a 60 grit disk (not required, but soo much faster..)
6. High build primer
7. An ice cold six pack
Now that we've got our gear, we're going to take down a section of the trunk to bare metal. Keep in mind, the holes were for a #10 bolt, and the damage around the holes minimal. You do NOT simply want to grind down this small area and decide to 'pack it' with Bondo. You will fail. Here is a shot of my trunk, after grinding. (The tape was just a visual guide for me)
I have circled the obvious holes and the arrows are pointing out the indentations the damn spoiler put in my trunk.
You may think this area is way too big for those itty bitty holes. Rest assured however, this is what you want. This my friends, is how you feather out your repair and make blend with the car. You must be sure that you're all the way to bare metal - all paint and primer must be gone, otherwise it can cause adhesion problems.
Next step: Kitty Hair! Mix up the recommended 3 inch diameter circle, knead your hardener and put a single strip straight across the center. This stuff sets quickly, so take care not to mix too hot! With your spreader, slap a pile of this on the hole and drag outwards - smoothly. Keep in mind, you can be a bit messy here, but if you keep it clean your arms will thank you later.
Once this hardens the repair is essentially complete, now all we have to do is clean it up and blend 'er in. Starting with a 60 grit paper, begin sanding this down, feathering you're edges nice and smooth. Driver's side is sanded, passenger side obviously not. Notice the blurring effect around the edges on the left - this means it is feathered properly.
Once you've got this done, it's time to mix up your body filler - again, a 3 inch circle with a single strip of hardener. Mix to uniform color - should be nice and pink. If it's a little off-whiteish you didn't mix it hot enough. Here is why we ground down such a large area. We need to blend our repair 'into the trunk' with this filler. So, with a spreader start laying down strips of filler that almost cover this entire area. The bigger we go here, the easier it is to blend. Try to get nice smooth layers, avoiding valleys or mountains left by the edge of your spreader. You will get marks, don't try to get it glass smooth at this point.
Same as the kitty hair, start sandin' with your 60 grit. You're essentially roughing it in right now, but you should be feeling with your hands and getting it as smooth as possible. The goal - running your hand from one side of the trunk to the other feeling nothing but a change in texture. If you're feeling waves or mountains, you're going to want to sand in the opposing direction to knock these down. When the 'mountains' feel more like 'mole hills', it's time to sand diagonally and cut across at an angle. The reason for this is our trunks are not flat - they are curved in two different directions. This diagonal motion helps blend these lines together.
Now, here we are roughed in. I have pointed out low spots, or 'valleys' with the arrows. You want to be careful and not get too aggressive with the sanding. Chances are, if you sand until all of these are gone you're going to be way too low and again - fail. How do we fix these? Grab your tube of glazing putty, and simply squeeze it out like toothpaste straight down the line. Feather this with a spreader (think spreading icing on a cake..) and let it dry.
Here is it before I sanded it down, and after:
At this point you could stop, completely finish sand and shoot with primer.. But if you want professional results and a prestine trunk - read on.
The final step here, which makes all the difference in the world is your glaze or skim coat. We're going to lay down one more layer on bondo before completely blending and finish sanding. Keep in mind, the layer of bondo we lay now needs to be paper thin. You should not end up with a quart of bondo on your trunk when we're done.. The purpose of this coat is again, to feather our repair into the lines of the trunk and essentially make it invisible.
Example:
If your house is drywalled, you may think your walls are perfectly flat - after all, they appear that way. In all reality, there is tape and several layers of mud at every seam and joint. The joint and tape disappear because of the layers of mud feathering it into the wall.
Mix up your final layer, spread it t-h-i-n and let that cure about 5 minutes before you start finish sanding. Use the same techniques as above, side to side, then cutting at diagonals to blend it in. Once everything feels nice and smooth, edges are nice and blurry, move up a grit. You work from 60, 120, 220, and finish off with a 400 or 500 grit paper. Depending on the primer, you may choose to leave it at 60 before finish sanding the finer grits. The rougher the surface, the better the primer 'bites'.
Sadly enough, I was under time contraints and the influence of
, so I forgot to snap a pic after I had this completely finish sanded. Best advice I can give you here: Look away from the car and let your hands 'see' the surface of the trunk. They'll tell you when it's done. Here is the 'finished' product. This is merely roughed in, more work is needed before ready for paint.
Well, there you go guys. Hopefully you learned a little something, or maybe even got a little confidence boost. It's not so tough, it's just sheet metal and bondo.
Last edited by V84Lunch; 08-07-2009 at 06:28 PM.

 08-10-2009
#3
Registered!!
Thread Starter
Join Date: Apr 2009
Posts: 54
Likes: 0
Received 0 Likes
on
0 Posts
Rep Power: 183 Re: DIY - 05 Coupe Spoiler Shave/Trunk Repair
I am an idiot when it comes to body work, what else needs to be done before its painted?
To answer your question, the number one problem (which you can't see in the pics above) are minor imperfections in the bondo. Primer (especially black) will reveal any and all imperfections in what's beneath it. A lot of guys will lay a coat of primer as a 'guide coat' while they are finish sanding. I've used this trick many times, and definitely recommend it.
Essentially all that needs done is finish sanding. The area you're working with has to be glass smooth when you're finished, as the primer will bring out the worst in your handywork. And always remember, if it shows in the primer coat - it will show in the paint. High build primers will fill very minor flaws, but you've got to work it smooth.
08-10-2009
#5
Registered!!
Thread Starter
Join Date: Apr 2009
Posts: 54
Likes: 0
Received 0 Likes
on
0 Posts
Rep Power: 183 Re: DIY - 05 Coupe Spoiler Shave/Trunk Repair
Let's see some pics of it painted!
In the meantime though, (and out of pure curiousity) I actually purchased some matte black vinyl wrap from sticker city. I wrapped the trunk yesterday, and I must say - that **** is simply amazing.. I have never worked with a more forgiving and conforming material. I also refinished my Honda logo and that strip that hides the license plate lights in Gunmetal to match the rims.
Last edited by V84Lunch; 08-10-2009 at 01:16 AM. Reason: Fat-fingered some words
08-10-2009
#6
Registered!!
Thread Starter
Join Date: Apr 2009
Posts: 54
Likes: 0
Received 0 Likes
on
0 Posts
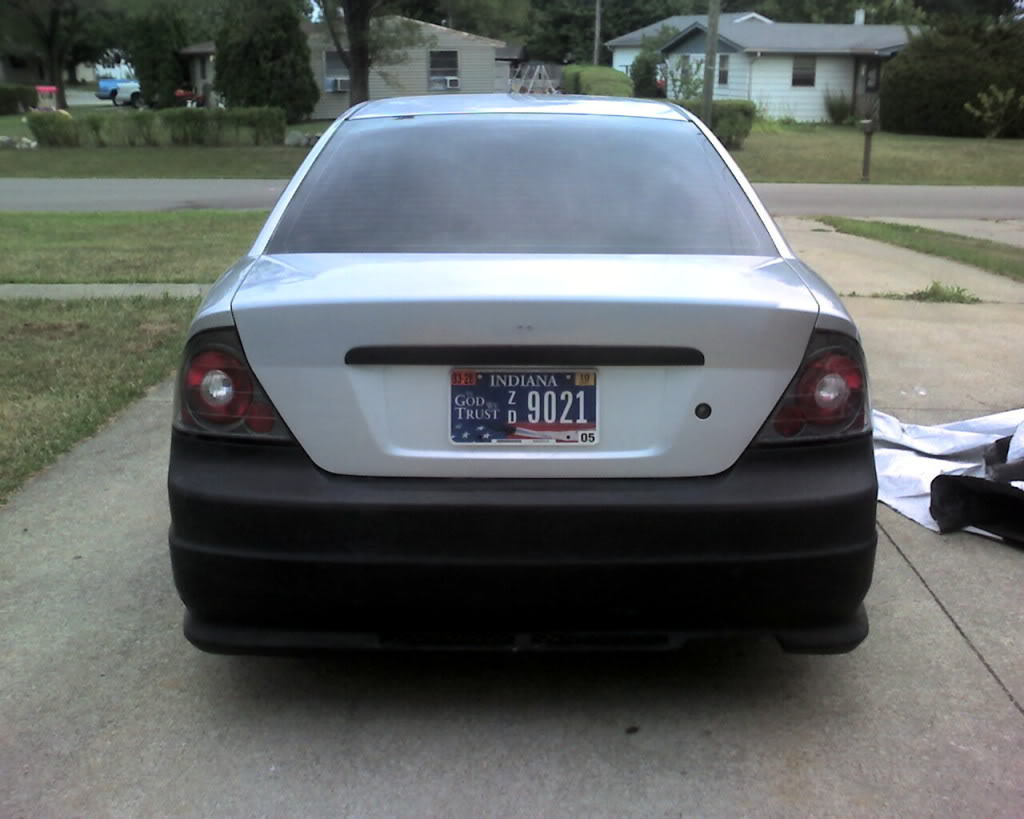
Rep Power: 183 ** Finished Pic Update **
Here we go guys, some finished shots of the trunk. Again, this is wrapped in a matte black 3M vinyl from Sticker City. Decided to leave my Civic emblem off, think it looks cleaner but definitely had to represent with the H 
Tried to get close to the same angles as before so you guys could compare..
Wide Shot:
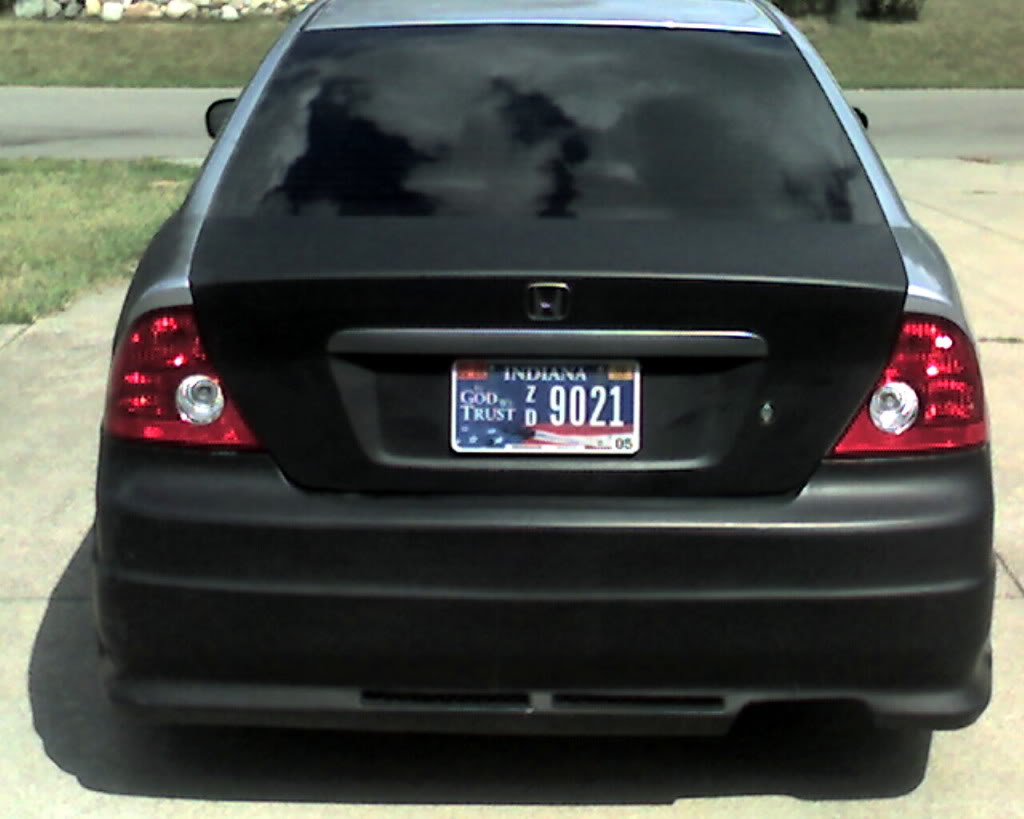
A little closer:
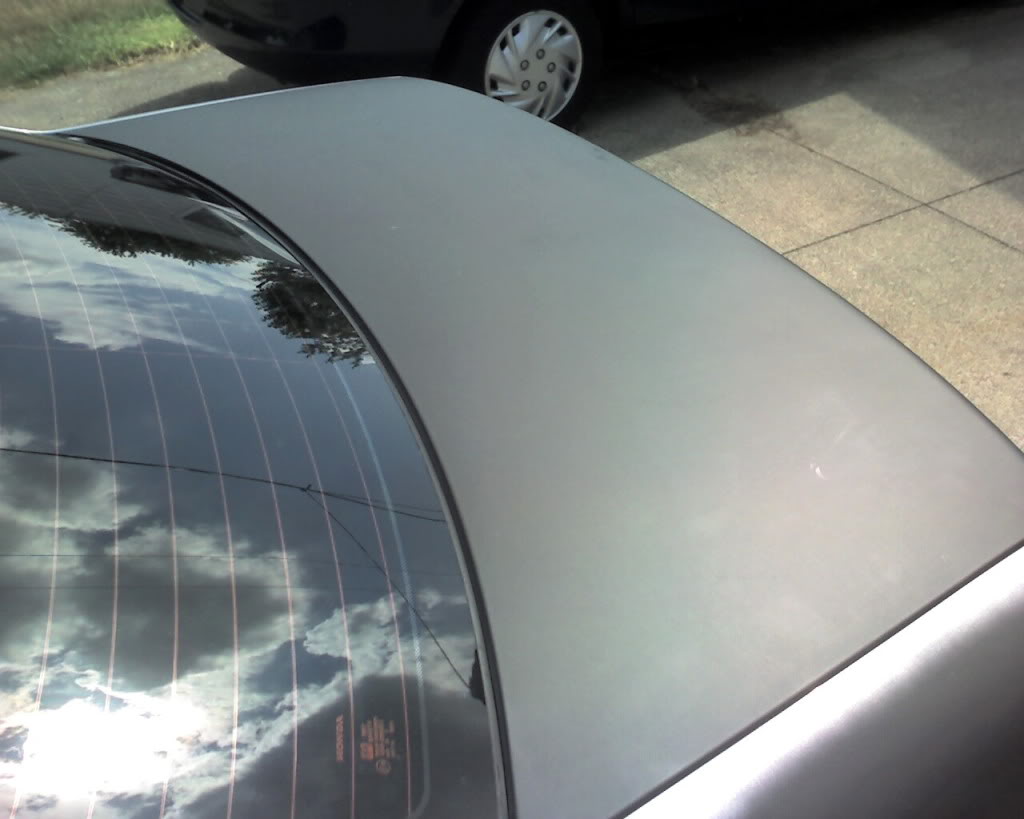
And finally the emblem/strip refinish:

For more pics of the car check out my fuel door thread (My New Project). There you can see the beginnings of the widebody
Tried to get close to the same angles as before so you guys could compare..
Wide Shot:
A little closer:
And finally the emblem/strip refinish:
For more pics of the car check out my fuel door thread (My New Project). There you can see the beginnings of the widebody
08-11-2009
#8
Registered!!
iTrader: (4)
Join Date: Apr 2007
Posts: 523
Likes: 0
Received 0 Likes
on
0 Posts
Rep Power: 213 Re: DIY - 05 Coupe Spoiler Shave/Trunk Repair
Have some more rep.. that is a great diy. I'm planning on doing my own paint job before too terribly long and I have not been able to find a simple step by step for paint and body work. I've got an eye for painting, but it's been incredibly difficult to find a simple guide for what steps to do in what order.
08-11-2009
#9
Registered!!
Thread Starter
Join Date: Apr 2009
Posts: 54
Likes: 0
Received 0 Likes
on
0 Posts
Rep Power: 183 Re: DIY - 05 Coupe Spoiler Shave/Trunk Repair
Awesome guys, thanks for the positive feedback and the rep! Keep 'em comin!
Baron - if you have any questions or anything shoot 'em my way, I'd be more than happy to help you out any way I can. I'm going to be painting quite a few interior pieces here shortly, if you think an in depth write up would be helpful for you I'll put one together step by step w/ plenty of pics.
Baron - if you have any questions or anything shoot 'em my way, I'd be more than happy to help you out any way I can. I'm going to be painting quite a few interior pieces here shortly, if you think an in depth write up would be helpful for you I'll put one together step by step w/ plenty of pics.

Thread
Thread Starter
Honda Civic Forum
Replies
Last Post
VBullon
1st - 5th Generation Civic 1973 - 1995
7
06-22-2015 06:31 PM


