DIY Fuel Door Fix Coupe!
 04-04-2008
#1
Registered!!
Thread Starter
Join Date: Aug 2007
Location: East Coast
Age: 35
Posts: 242
Likes: 0
Received 0 Likes
on
0 Posts
Rep Power: 205 
( I apologize for the dim lighting in advance )
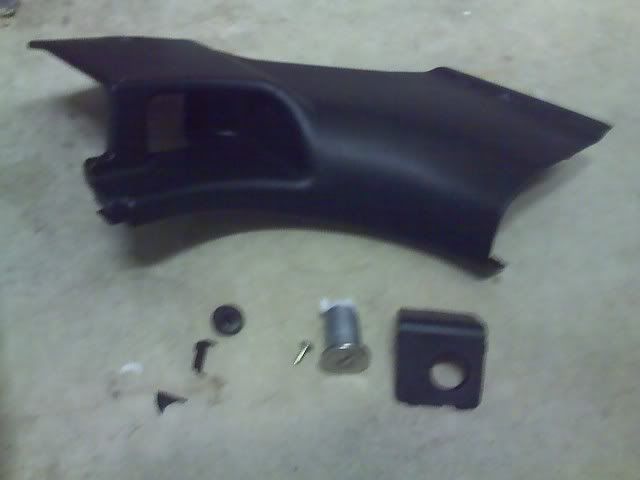
THIS DIY IS USING "www.fueldoorfix.com" 's Canadian piece to fix the door
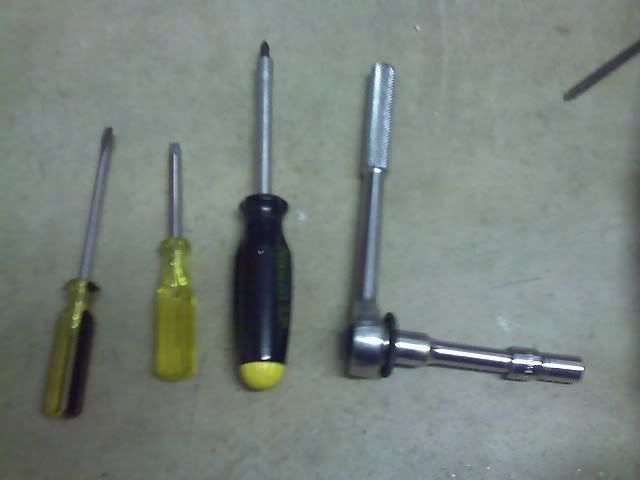
Tools needed:
1. 10 mm ratchet
2. 14 mm ratchet
3. Phillips head screw driver
4. 2 flat head screw drivers
5. 2 aspirin
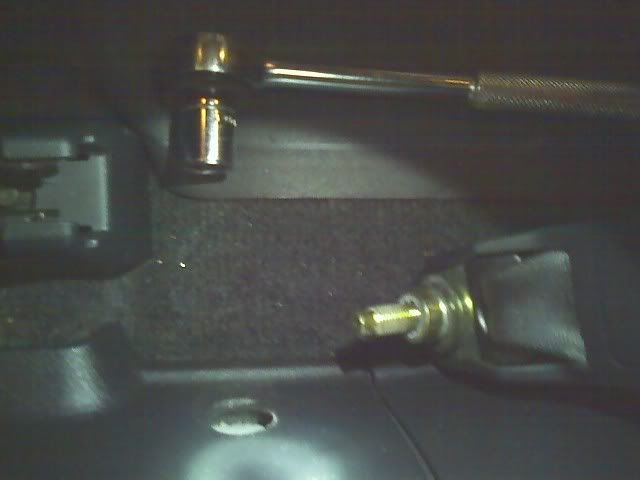
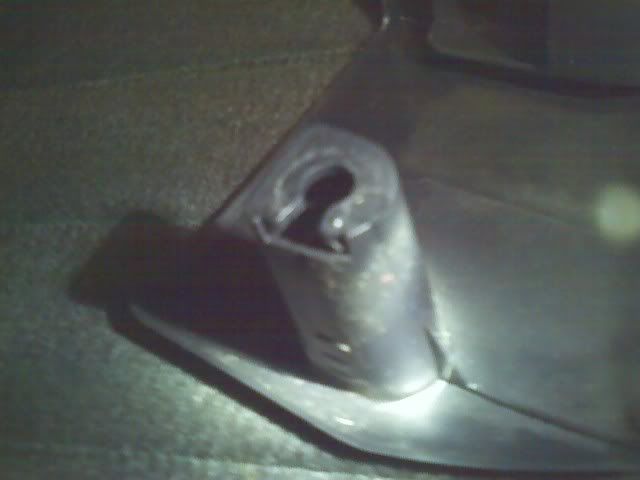
pry off the lock cover carefully, (i cracked mine), use 2 flatheads, insert one into obvious hole on top and the other right next to it. pry up and towards the inside of car until it pops off

use phillips head to unscrew screw next to lock
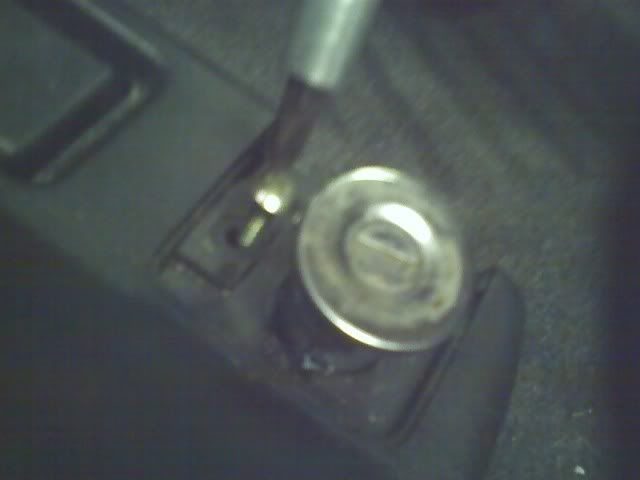
use flat head to pry cylindrical, silver lock out
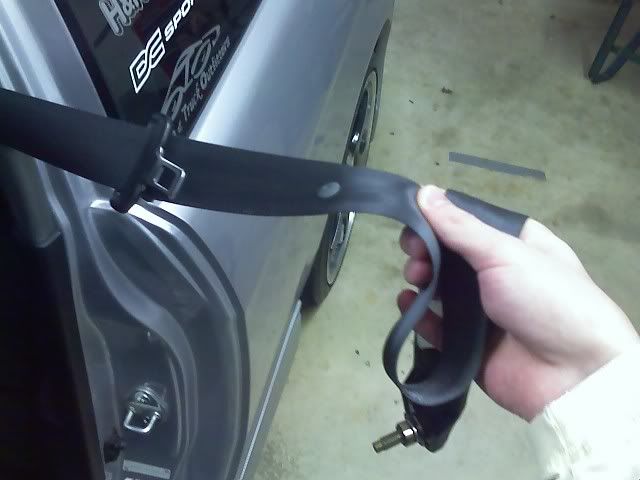
lets remove the seatbelt now, it's heavy and can be useful for weight reduction, OR TRIM REMOVAL.
first pry off plastic center cap on bottom of driver side seatbelt harness. Be careful it's plastic and can snap.
next use a 14mm ratchet and remove bottom of seatbelt
removed, now you'll be able to remove both pieces of trim for easy access to fuel door lever
next your going to remove the trim surrounding your hood release. theres 2 plastic clips to release. The white circle clips, 1 top 1 bottom in pic below

pull trim from top first, out and towards the rear of the car. then pull bottom of trim piece the same way. You have to do this to avoid breaking the clip because of the slot the white clip slips into on the trim shown below:
top:
bottom:
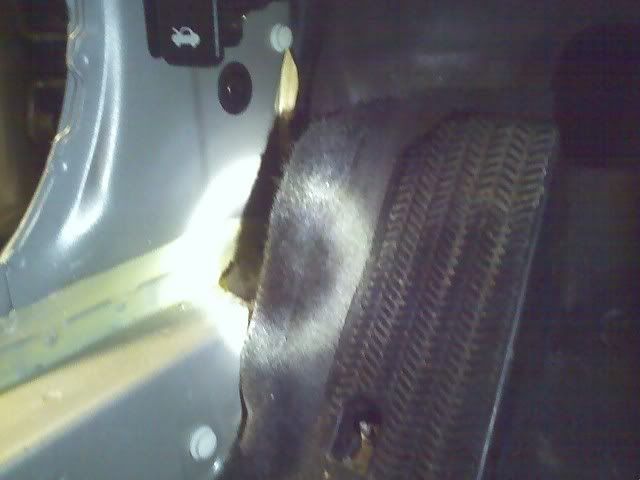
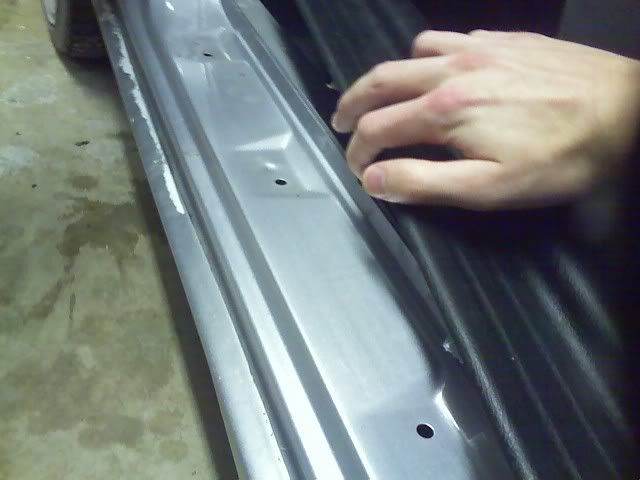
the next piece of trim you remove is the running board, i guess you could call it. This is why you detached the seatbelt. CAREFULLY slide your fingers under the outer edge and begin to pop out clips:
as you can see below, there's 4 clips to pop out on top*, then theres like 4 more on the back inner trim wall. These are the clips you have to slide a certain way or they'l break, (which mine did). Try and pry off and slide toward the *rear*(*i think ==>to check it, the slide holes on the back trim wall should be in the opposite direction as the white clips on top(4)*), pushing a little towards the inside of your car.
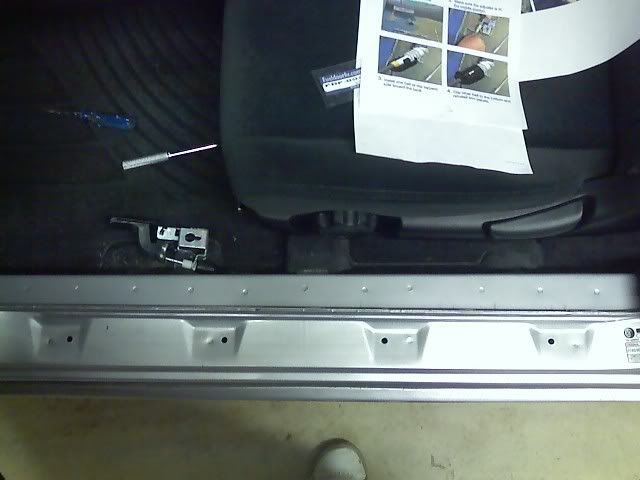
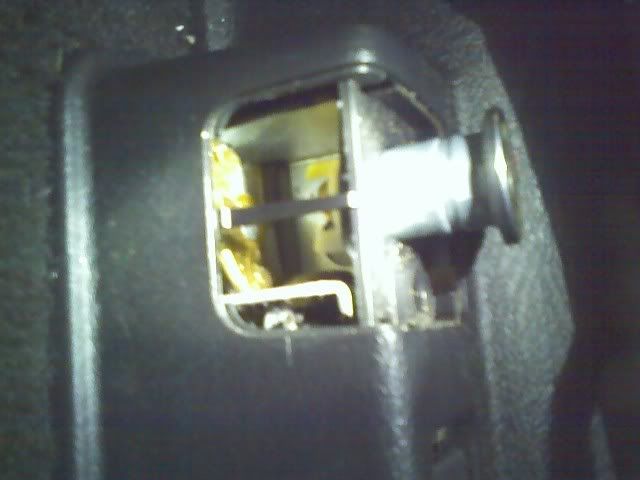
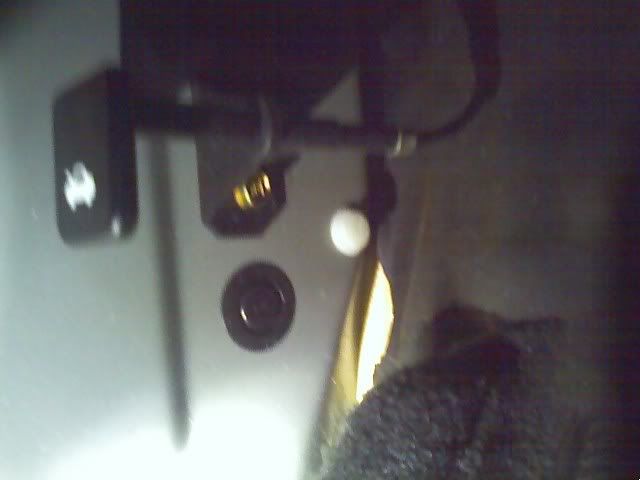
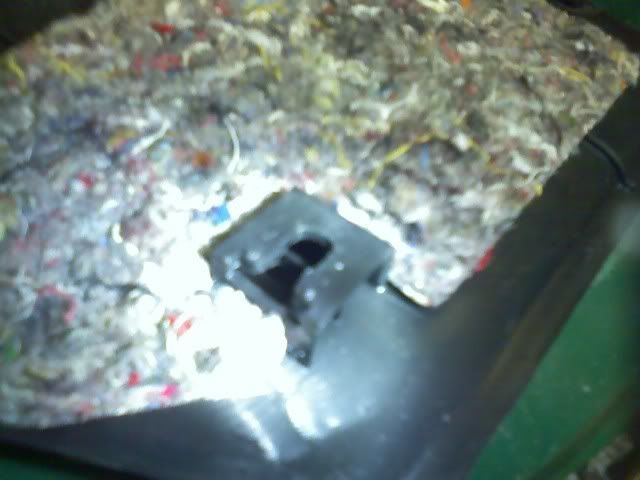
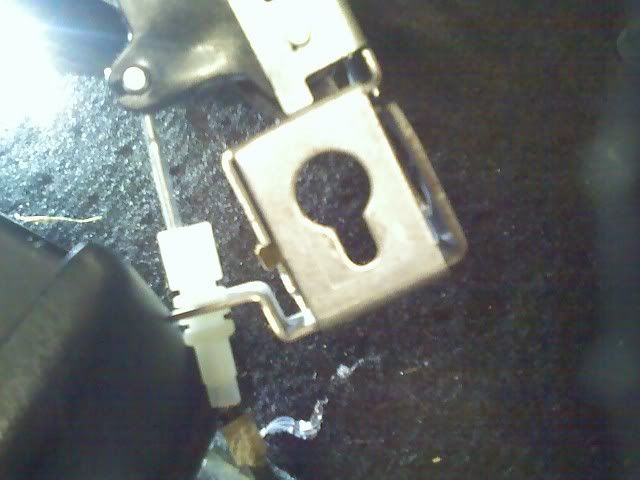
with that removed you should see the lever setup. It's attached to the inner edge with a 10 mm bolt you need to undo (top left in pic), heres a pic of the inside of the setup:

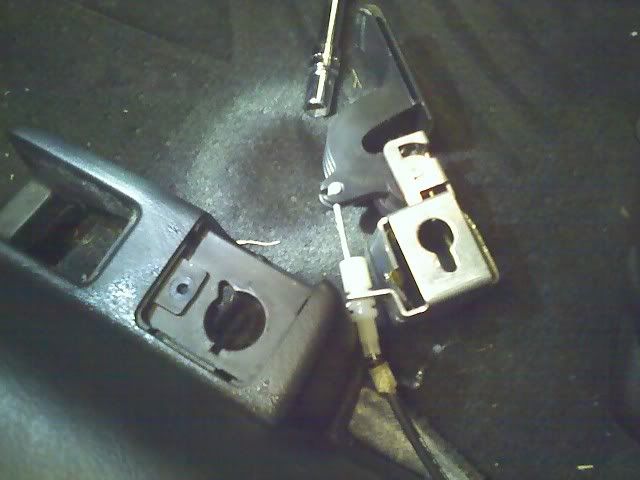
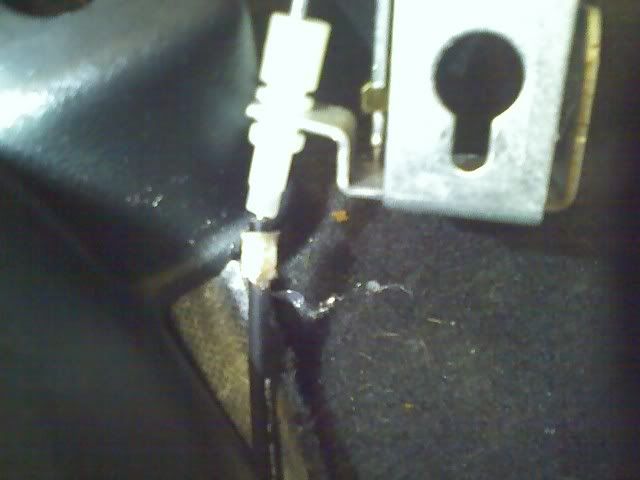
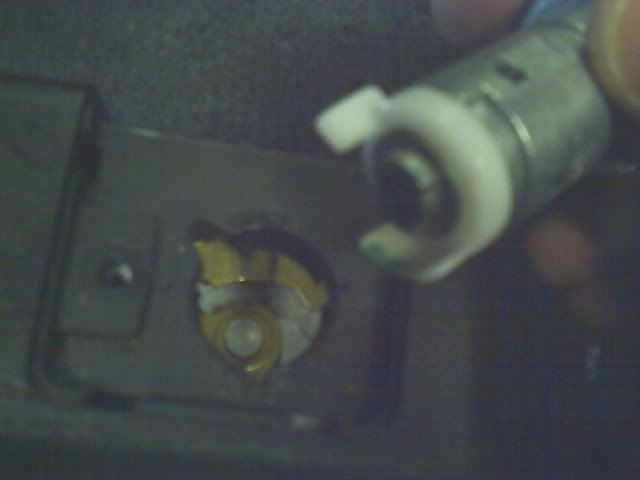
attach your Canadian black snap-on piece to the 1st white circle and around the wire, snap on other half and test it before putting everything back together. Once it works put back on all the trim and go show off your working fuel door!
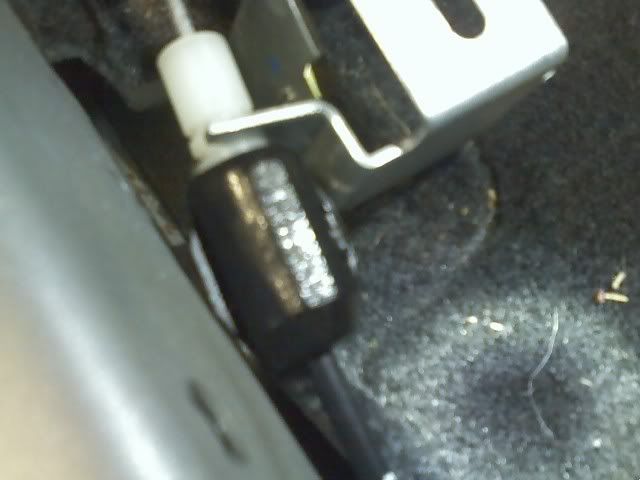
NOTE: when re-installing the 10 mm bolt, be careful where exactly you position it because it will affect if the lever rubs against the housing when lifted.

THIS DIY IS USING "www.fueldoorfix.com" 's Canadian piece to fix the door
Tools needed:
1. 10 mm ratchet
2. 14 mm ratchet
3. Phillips head screw driver
4. 2 flat head screw drivers
5. 2 aspirin
pry off the lock cover carefully, (i cracked mine), use 2 flatheads, insert one into obvious hole on top and the other right next to it. pry up and towards the inside of car until it pops off
use phillips head to unscrew screw next to lock
use flat head to pry cylindrical, silver lock out
lets remove the seatbelt now, it's heavy and can be useful for weight reduction, OR TRIM REMOVAL.
first pry off plastic center cap on bottom of driver side seatbelt harness. Be careful it's plastic and can snap.
next use a 14mm ratchet and remove bottom of seatbelt
removed, now you'll be able to remove both pieces of trim for easy access to fuel door lever
next your going to remove the trim surrounding your hood release. theres 2 plastic clips to release. The white circle clips, 1 top 1 bottom in pic below
pull trim from top first, out and towards the rear of the car. then pull bottom of trim piece the same way. You have to do this to avoid breaking the clip because of the slot the white clip slips into on the trim shown below:
top:
bottom:
the next piece of trim you remove is the running board, i guess you could call it. This is why you detached the seatbelt. CAREFULLY slide your fingers under the outer edge and begin to pop out clips:
as you can see below, there's 4 clips to pop out on top*, then theres like 4 more on the back inner trim wall. These are the clips you have to slide a certain way or they'l break, (which mine did). Try and pry off and slide toward the *rear*(*i think ==>to check it, the slide holes on the back trim wall should be in the opposite direction as the white clips on top(4)*), pushing a little towards the inside of your car.
with that removed you should see the lever setup. It's attached to the inner edge with a 10 mm bolt you need to undo (top left in pic), heres a pic of the inside of the setup:
attach your Canadian black snap-on piece to the 1st white circle and around the wire, snap on other half and test it before putting everything back together. Once it works put back on all the trim and go show off your working fuel door!
NOTE: when re-installing the 10 mm bolt, be careful where exactly you position it because it will affect if the lever rubs against the housing when lifted.
Last edited by dryft; 04-06-2009 at 11:39 AM.

 08-11-2008
#5
Registered!!
Join Date: Jul 2007
Location: Dartmouth, Nova Scotia
Posts: 22
Likes: 0
Received 0 Likes
on
0 Posts
Rep Power: 0 
Re: DIY Fuel Door Fix Coupe!
Did This, Worked As Stated, My Only Addition Would Be That Those Who Live In The Salt Belt Check The Cable End Where It Goes Into The Release Handle As It Expands, It Corrodes, So Causes Sticking Between The Handle And The Cable End. Clean As Necessary To Bring Back Proper Fit.
04-13-2009
#6
Registered!!
iTrader: (1)
Join Date: Jun 2002
Location: Treasure Island, FL
Age: 41
Posts: 535
Likes: 0
Received 0 Likes
on
0 Posts
Rep Power: 272 Re: DIY Fuel Door Fix Coupe!
Completed this project yesterday! Followed DIY and was so simple! Thank you so much dryft for the awesome write up. On a side note....the FUELDOORFIX product is kick ***.....what an awesome fix!
09-24-2009
#8
Registered!!

Join Date: Aug 2009
Posts: 2
Likes: 0
Received 0 Likes
on
0 Posts
Rep Power: 0 Re: DIY Fuel Door Fix Coupe!
I actually fixed that plastic piece myself with thread and super glue - you take about a foot of heavy thread, and glue an end down.
Then, wrap the thread tightly around the part, kind of like you are putting thread on a spindle, tight and close. After each layer of thread, saturate with super glue.
Thread + superglue roughly equates to concrete. Very handy for small plastic parts that dont need to do much.
Worked fine for a couple months, until the actual cable itself busted off due to the stress of the angle it is at when held in place. Turns out, that plastic piece of crap was the strongest piece of that assembly once I got through with it, so all the stress went to the cable and it finally busted off. Check your cable for signs of cracking or fatigue. You might be closer to a full replacement of the part than you think.
07-06-2010
#12
Registered!!

Join Date: Jul 2010
Location: Nova Scotia, Canada
Posts: 3
Likes: 0
Received 0 Likes
on
0 Posts
Rep Power: 0 Re: DIY Fuel Door Fix Coupe!
thanks, Ive got the same problem. maybe this video will go along nicely with your DIY
http://www.youtube.com/watch?v=5-ovIXM6pX4
http://www.youtube.com/watch?v=5-ovIXM6pX4
Last edited by randylavers; 07-06-2010 at 09:42 AM. Reason: forgot link
07-06-2010
#13
Registered!!
Join Date: Jul 2010
Location: Nova Scotia, Canada
Posts: 3
Likes: 0
Received 0 Likes
on
0 Posts
Rep Power: 0 Re: DIY Fuel Door Fix Coupe!
im going to try some type of home made job, maybe some wire or something, I'll get it too work. Don't feel like ordering a new cable OR that fix kit. $90CAD for the cable from Honda


Thread
Thread Starter
Honda Civic Forum
Replies
Last Post
werdnahall
I.C.E. (Audio) & Electrical Upgrades
11
05-17-2015 11:37 AM
MamaBear2015
Electrical, Wiring, and In Car Entertainment
1
05-03-2015 02:17 PM
BabyLX
General Honda Civic Forum Archive.
2
11-08-2001 09:25 AM

