DIY: Aftermarket Shift Knob Installation
 01-10-2012
#1
Busy Speeding!!
Thread Starter
Join Date: Nov 2010
Location: Wisconsin
Age: 29
Posts: 581
Likes: 0
Received 1 Like
on
1 Post
Rep Power: 169 
DIY: Aftermarket Shift **** Installation
So, I think the stock **** is not gonna cut it if you wanna give your car that vintage ricer look lol. This works for certain *****, mostly the cheap ones you find at your local auto parts store. These cheap guys come with removeable plastic inserts that you thread onto your shifter. The plastic threads didnt last a week in my car, and the **** started to wobble around all over the place. I did this conversion on about 1/5/12 and have not had a problem yet.
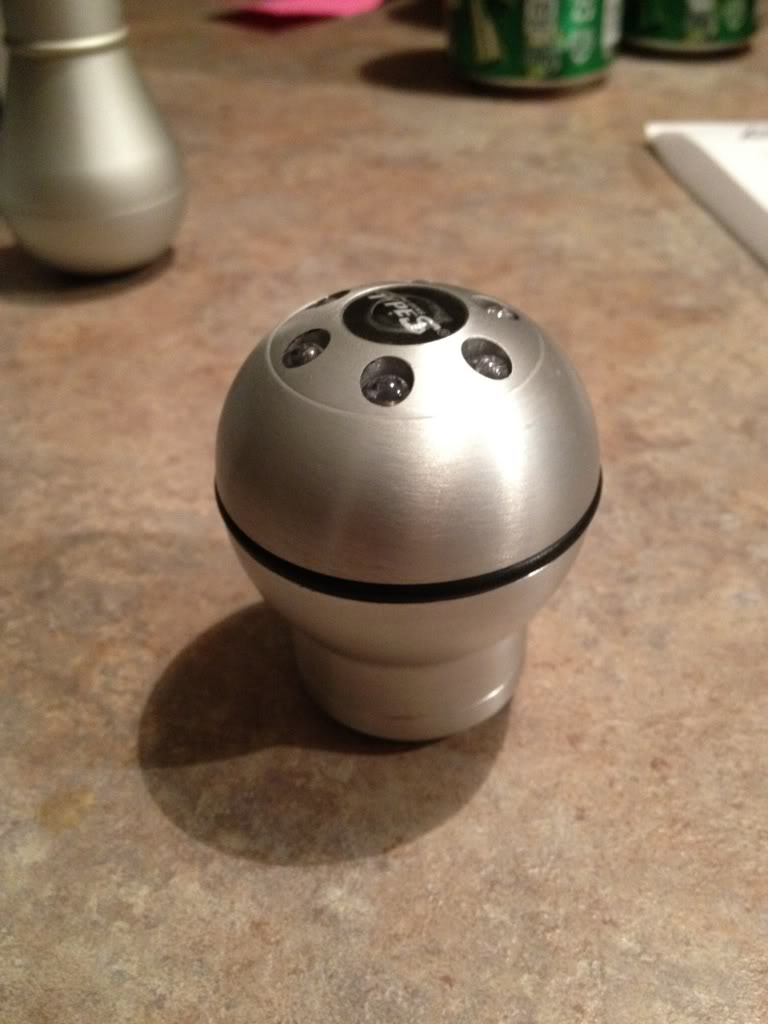
To start it off, heres my new shift ****. Pretty standard.
Turn it over and screw off the top

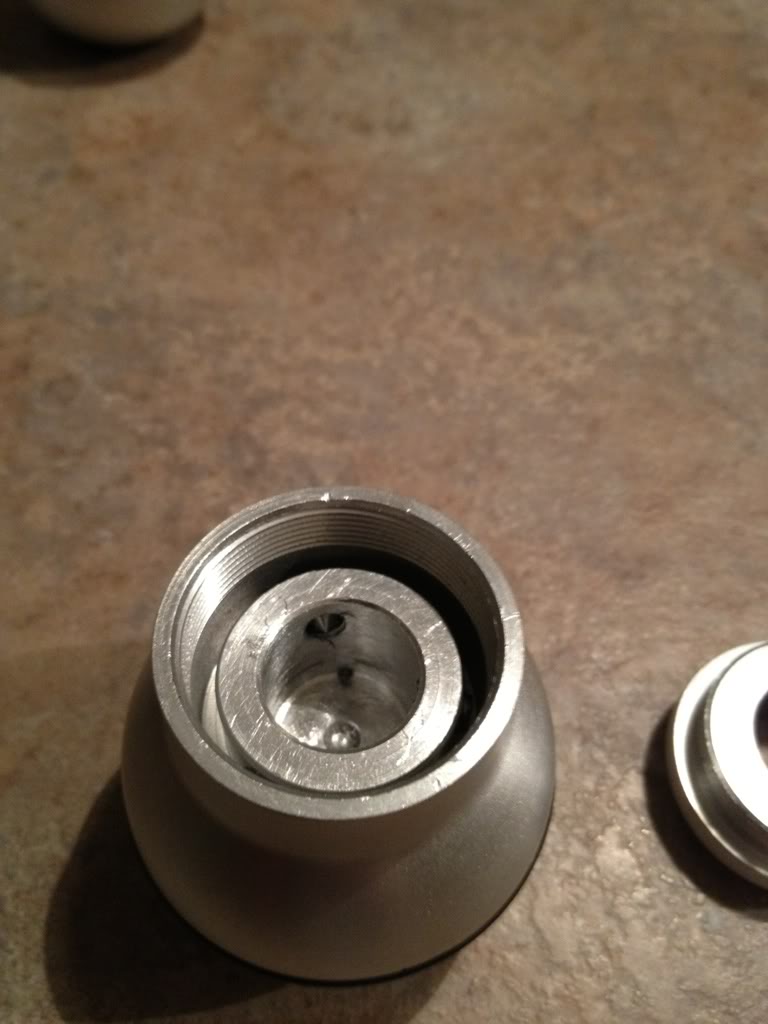
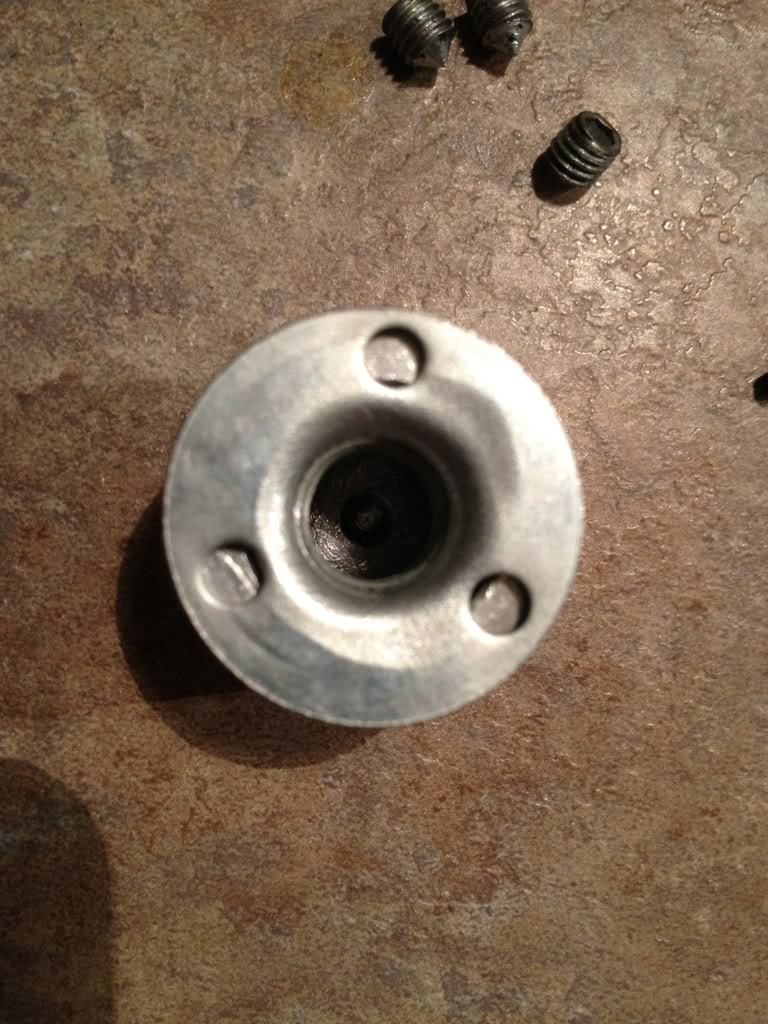
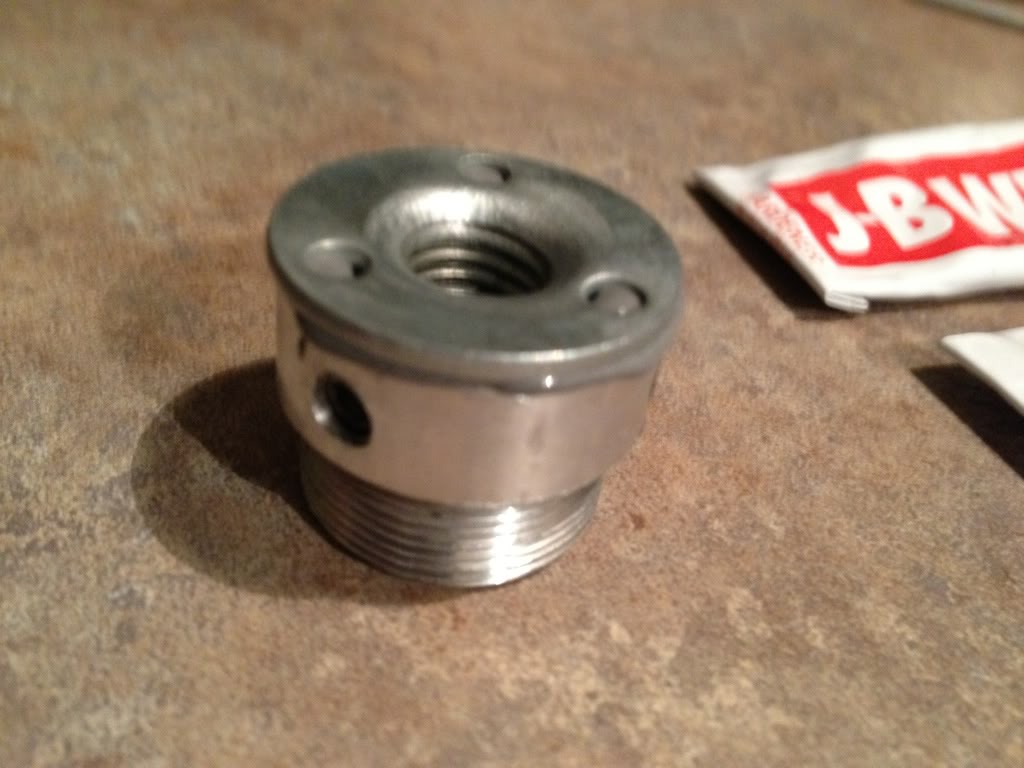
Take that inside part (lets call it the thread house) and screw it off. I had to use a small needle nose. worked fine.

Now that thread house needs some modification. Start by removing those hex keys with your trusty allen wrench.
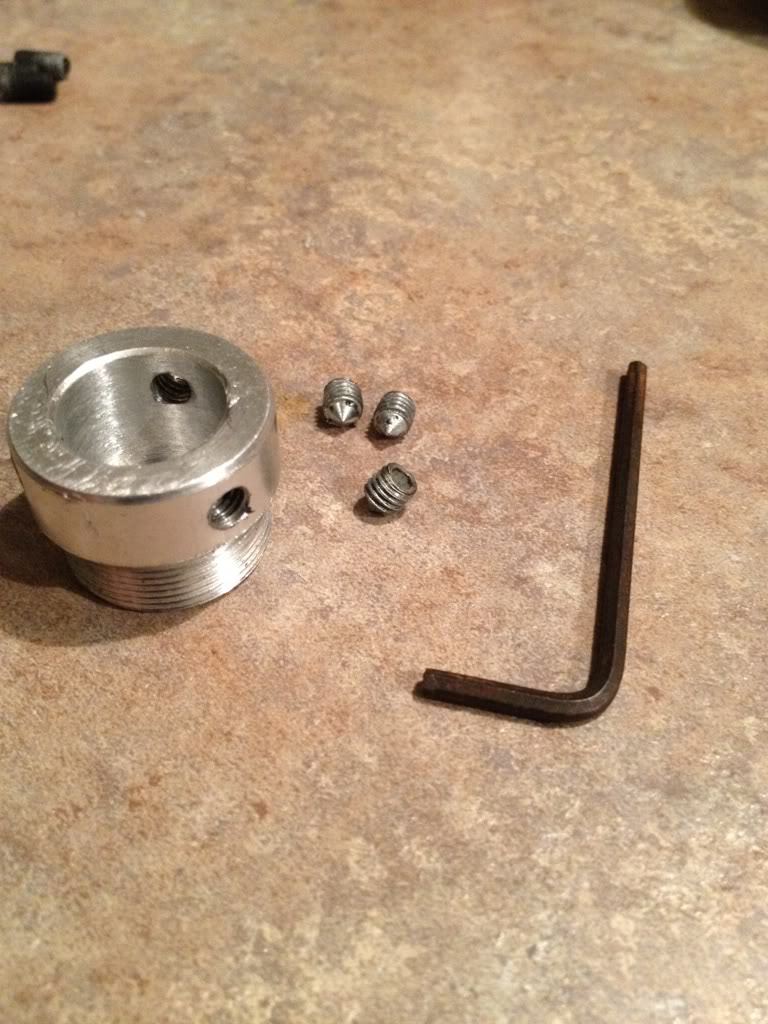
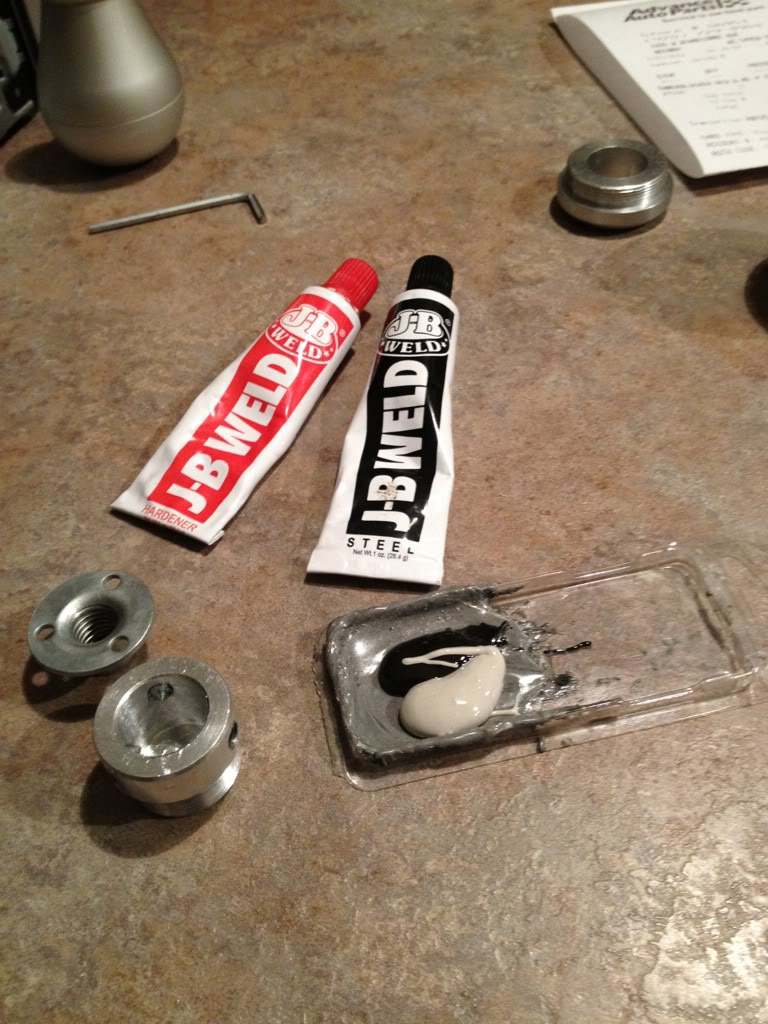
I bought one of these from my local hardware store. No idea what its called, but its a M8-1.50 thread. The deeper it is, the more grip it will have during a shift and in general. This is the deepest the hardware store had.
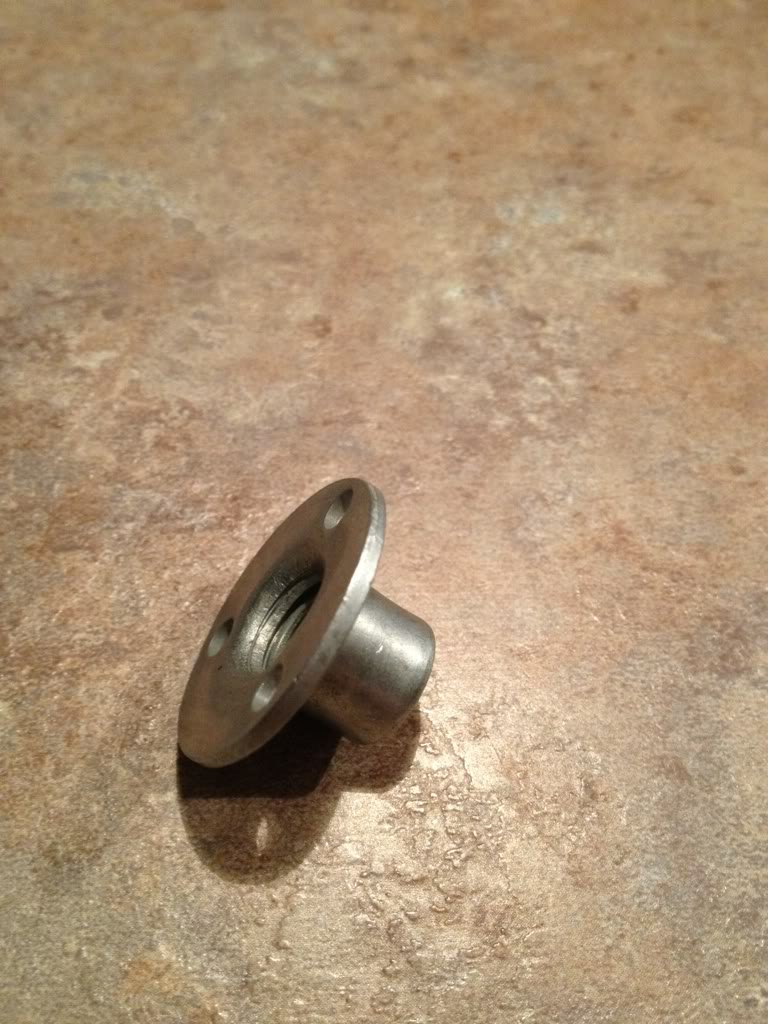
Center that piece inside your thread house and tighten your hex keys back on. BUT leave it a little loose, and pull out the piece and set it aside.
This is my favorite stuff ever. If you dont have any, buy some.
Mix up your JB Weld 1:1 ratio with whatever you have around. In my case, a toothpick :P
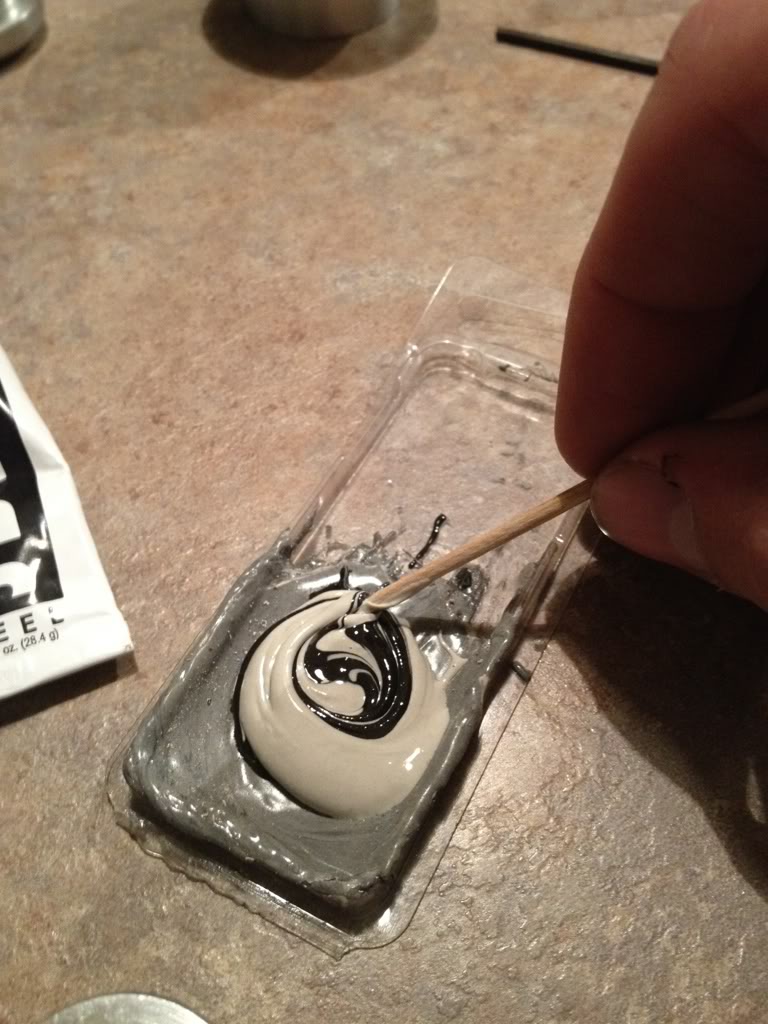
After youre done mixing it should look something like this
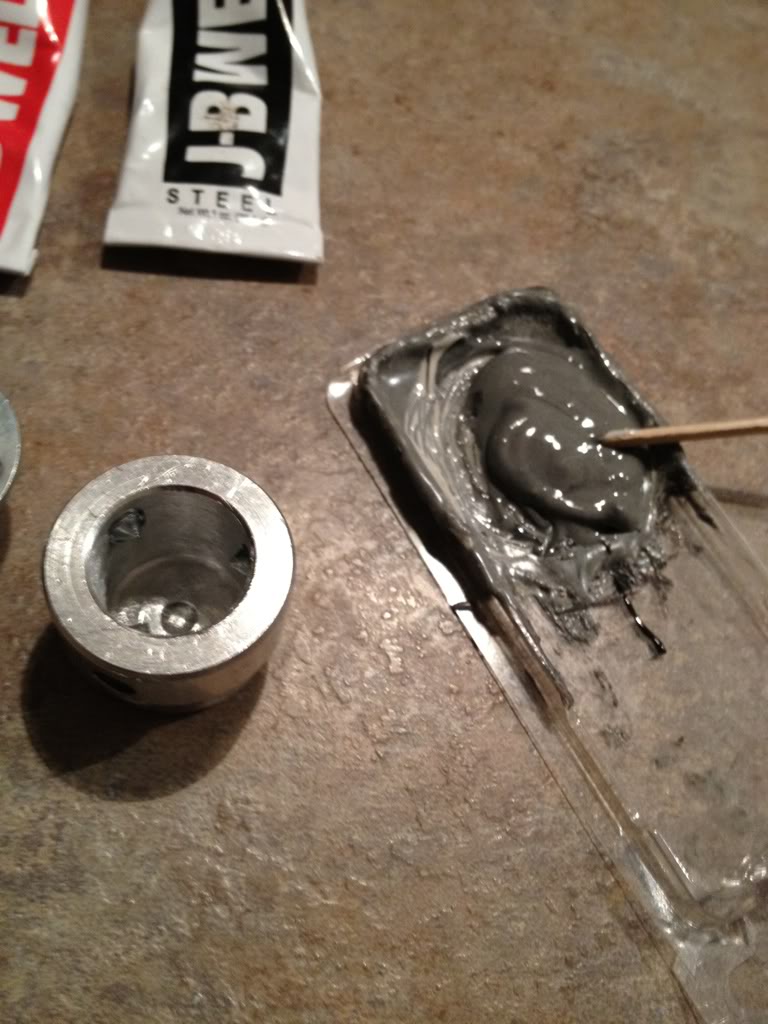
Apply the JB Weld mix on top of the thread house and use a liberal amount
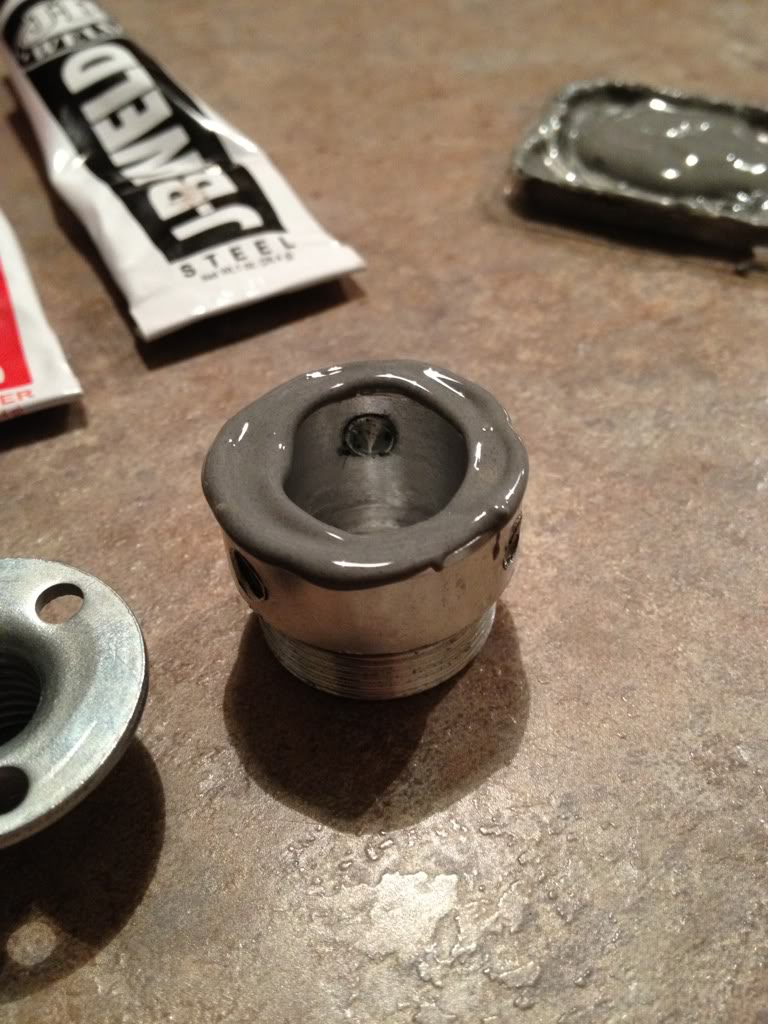
Now take the piece and push it on there. You want the JB Weld to push through those holes and have a good grip. (You could even take some coarse sandpaper and roughen up the contact points for superior grip. I would recommend that. You could even cut notches into the side with a dremel, you want this thing to last as long as possible) JB Weld is great because it doesnt harden to the strength of concrete, it allows some bending and flexibility, which you want so it doesnt just snap.
After your JB Weld dries, (4-6 hours to set up and 24 hours until object should be put back in use) then screw in the modified thread house
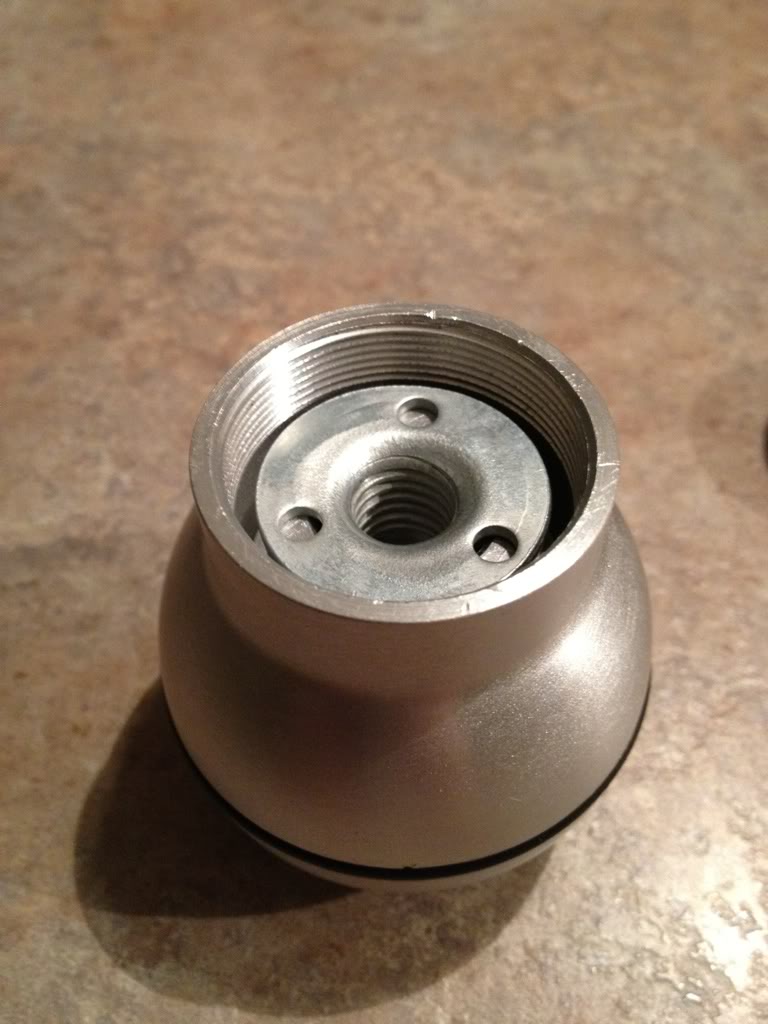
This is what your final product should look like
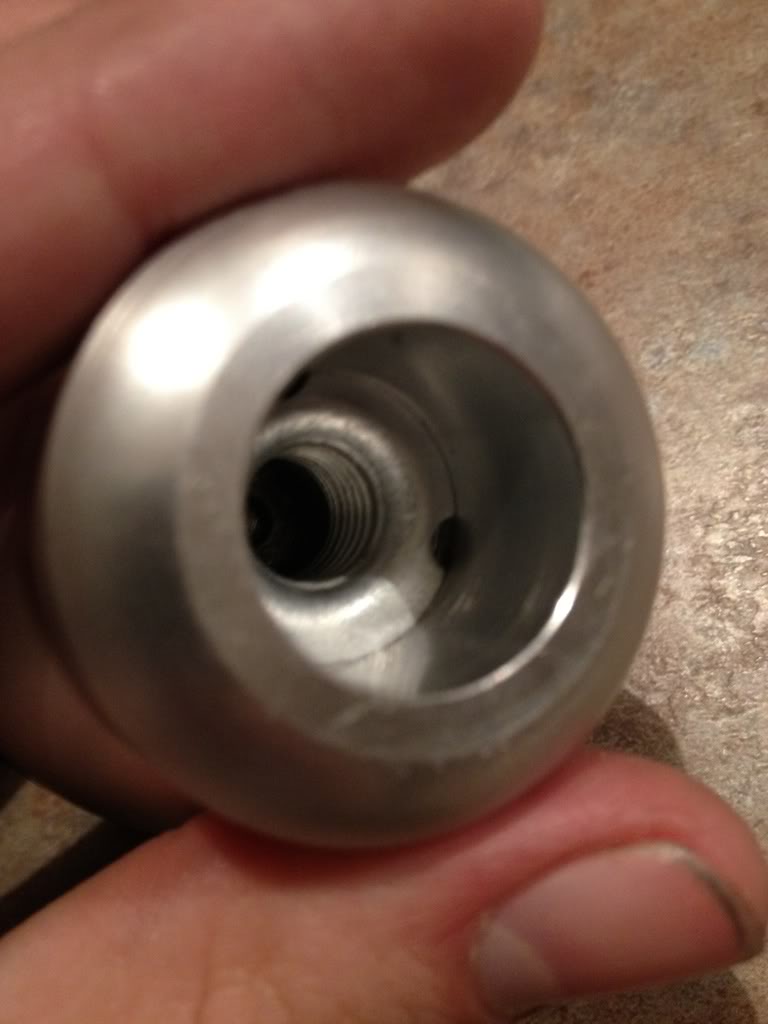
As I said before, I have yet to have a problem with this setup, and i throw my shifts pretty hard. This is my first diy so any comments are appreciated! Thanks!
My next DIY will be a fiberglass shift plate, stay tuned!!
To start it off, heres my new shift ****. Pretty standard.
Turn it over and screw off the top
Take that inside part (lets call it the thread house) and screw it off. I had to use a small needle nose. worked fine.
Now that thread house needs some modification. Start by removing those hex keys with your trusty allen wrench.
I bought one of these from my local hardware store. No idea what its called, but its a M8-1.50 thread. The deeper it is, the more grip it will have during a shift and in general. This is the deepest the hardware store had.
Center that piece inside your thread house and tighten your hex keys back on. BUT leave it a little loose, and pull out the piece and set it aside.
This is my favorite stuff ever. If you dont have any, buy some.
Mix up your JB Weld 1:1 ratio with whatever you have around. In my case, a toothpick :P
After youre done mixing it should look something like this
Apply the JB Weld mix on top of the thread house and use a liberal amount
Now take the piece and push it on there. You want the JB Weld to push through those holes and have a good grip. (You could even take some coarse sandpaper and roughen up the contact points for superior grip. I would recommend that. You could even cut notches into the side with a dremel, you want this thing to last as long as possible) JB Weld is great because it doesnt harden to the strength of concrete, it allows some bending and flexibility, which you want so it doesnt just snap.
After your JB Weld dries, (4-6 hours to set up and 24 hours until object should be put back in use) then screw in the modified thread house
This is what your final product should look like
As I said before, I have yet to have a problem with this setup, and i throw my shifts pretty hard. This is my first diy so any comments are appreciated! Thanks!
My next DIY will be a fiberglass shift plate, stay tuned!!
Last edited by SlimRisk; 01-12-2012 at 08:08 AM.


 01-12-2012
#4
PITA Admin
Administrator
iTrader: (1)
Join Date: Dec 2008
Location: TN
Age: 52
Posts: 14,779
Received 1,440 Likes
on
1,196 Posts
Rep Power: 338 
Re: DIY: Aftermarket Shift **** Installation
props!
that's a guy that does not ask, he simply goes and do it! bravo!
that's a guy that does not ask, he simply goes and do it! bravo!

Thread
Thread Starter
Honda Civic Forum
Replies
Last Post
Supramk3
6th Generation Civic 1996 - 2000
1
06-11-2015 11:13 AM
What_It_Do
6th Generation Civic 1996 - 2000
3
05-10-2015 05:31 PM
toastyghosty
General Honda Civic Forum Archive.
32
12-26-2001 02:03 AM
NukeSilo
General Honda Civic Forum Archive.
1
11-20-2001 10:02 PM

