2011 R18 Turbo Build
 06-08-2011
#1
Registered!!
Thread Starter
2011 R18 Turbo Build
I guess I can start off by saying this is a hell of a job so far. I did a DIY for the removal of the front bumper for 8th gen civics, and will continue from there to here...
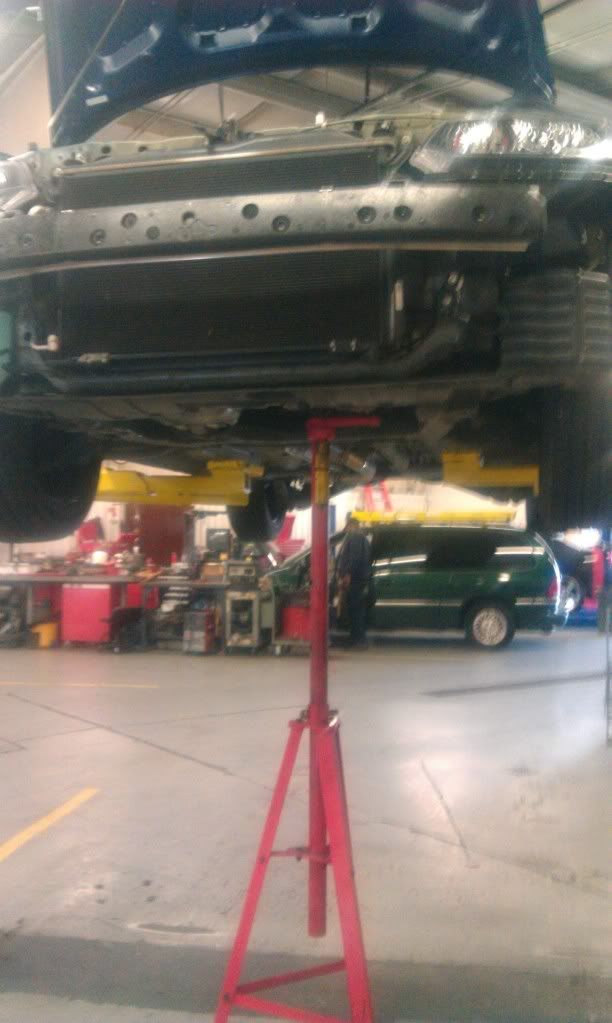
Currently the car is on a lift at the shop with the lower mount disconnected, turbo is installed, which had to be clocked 2 degrees aft. Currently struggling with removing the oil pan. If you have tips, i'm all ears because 4 hours of messing with just the pan has me drinking right now and waiting on pizza to be delivered.
Now the fun stuff... PICTURES!!!
 06-09-2011
#5
Registered!!
Thread Starter
Re: 2011 R18 Turbo Build
Day two completed.... Accomplished... Removal and Re installation of the oil pan, reconnection of torque thing, drilled a hole in the side of my oil pan, welded a bung from the inside... tricky... installed the ac mount, torqued pan, torque thing, ac mount. Needless to say a total lack of a long day.
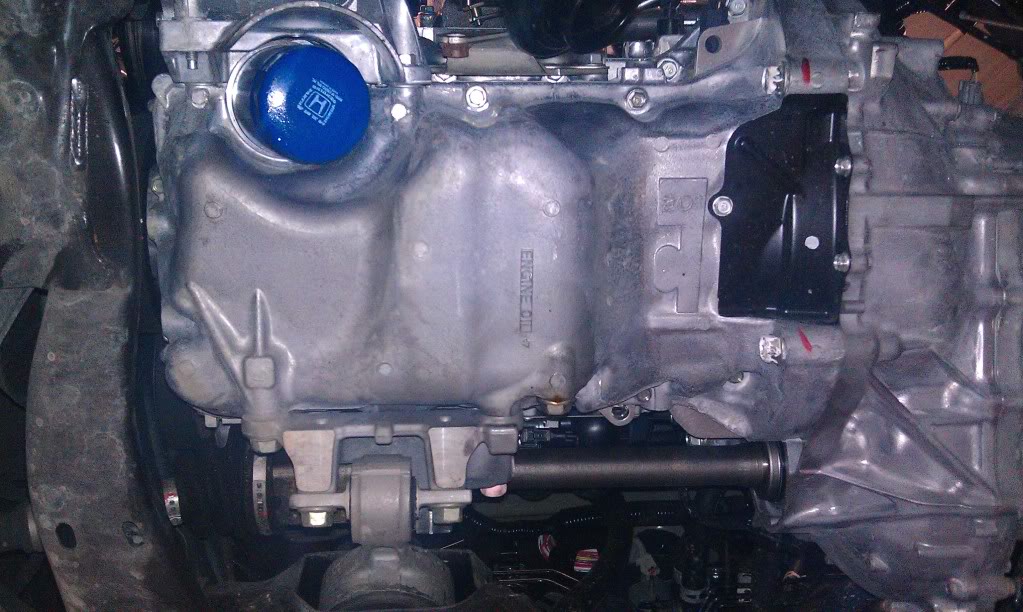
I got hung up on the oil pan, panicked... had a smoke... lowered the car and used a long pry bar, and rubber mallet to beat the crud out of the oil pan from the front at the 12 o'clock position on the oil pan.... it came off after 20 min of beating. And on to pictures.
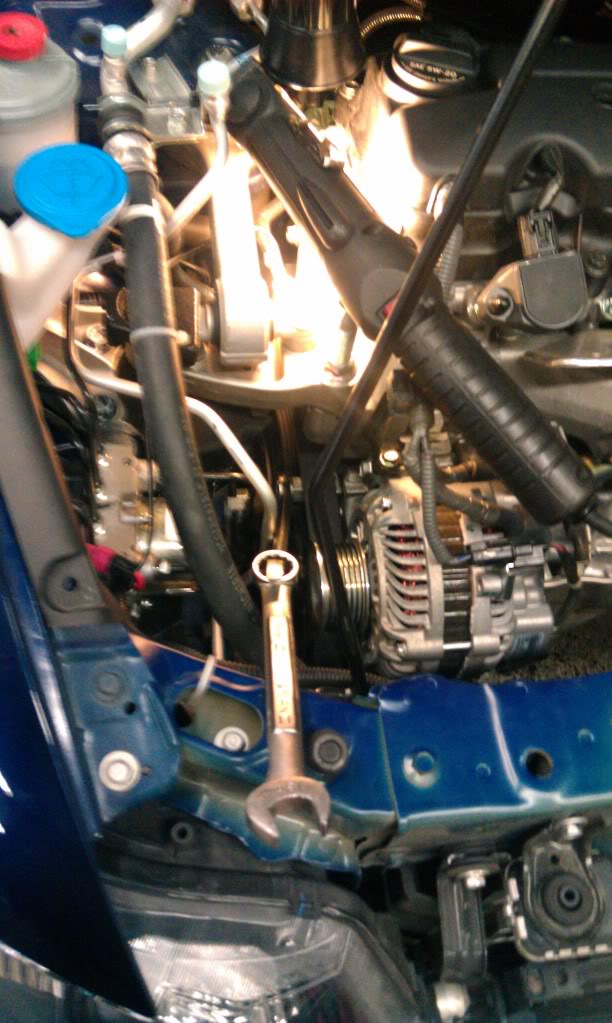
Looking up into the motor with pan removed:
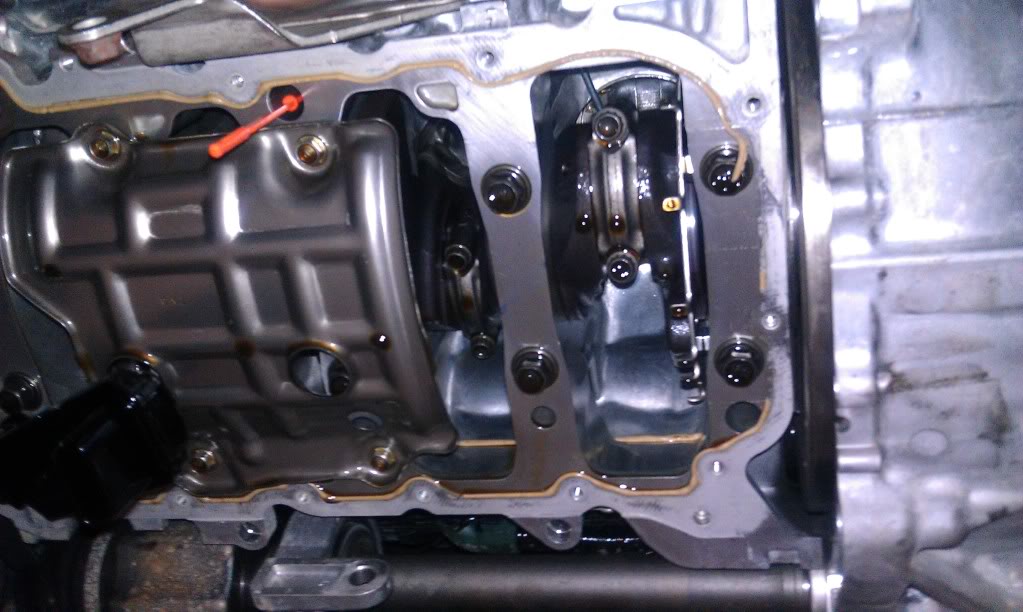
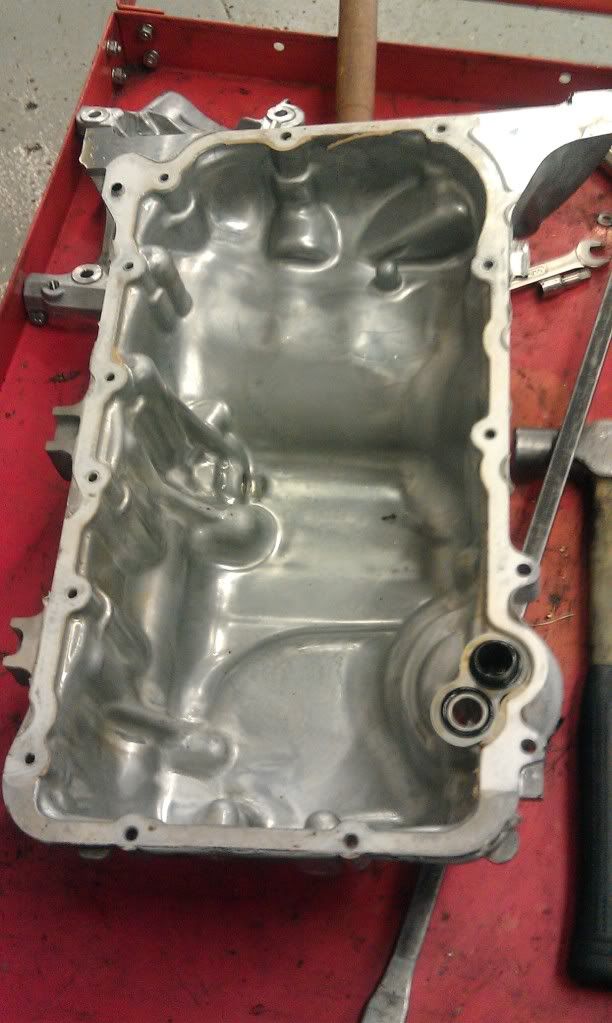
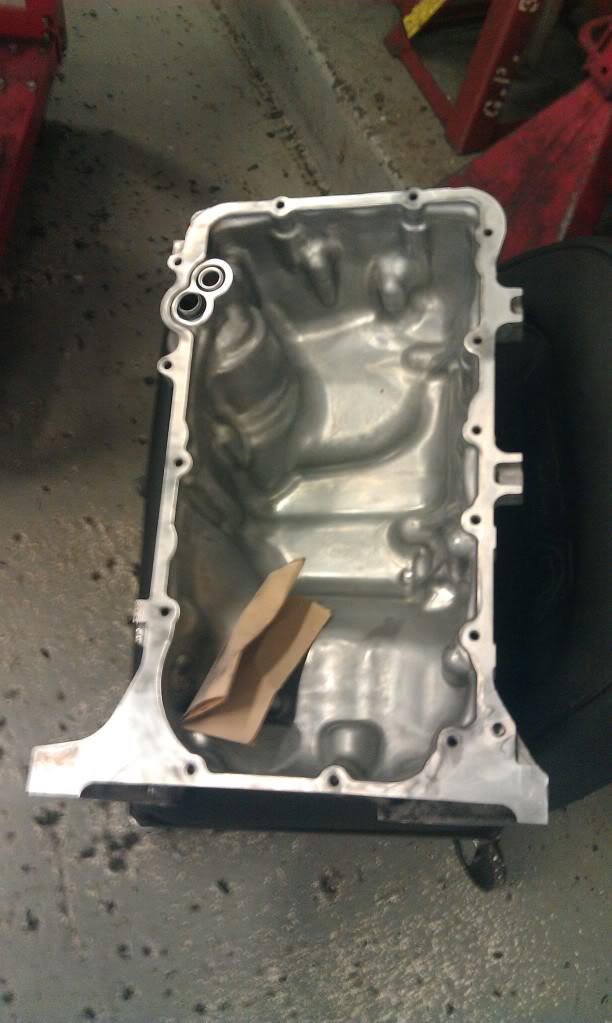
The darn oil pan (unclean)
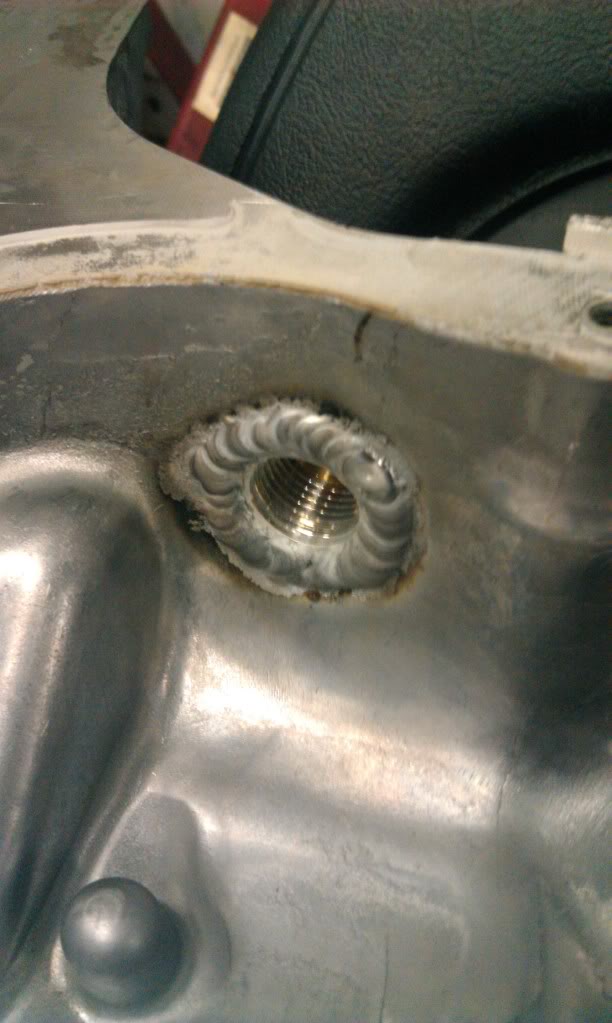
My weld job inside the oil pan, took my time, clean surface, good tig temp, and this is what you get when you want to do it right with a clear mind.
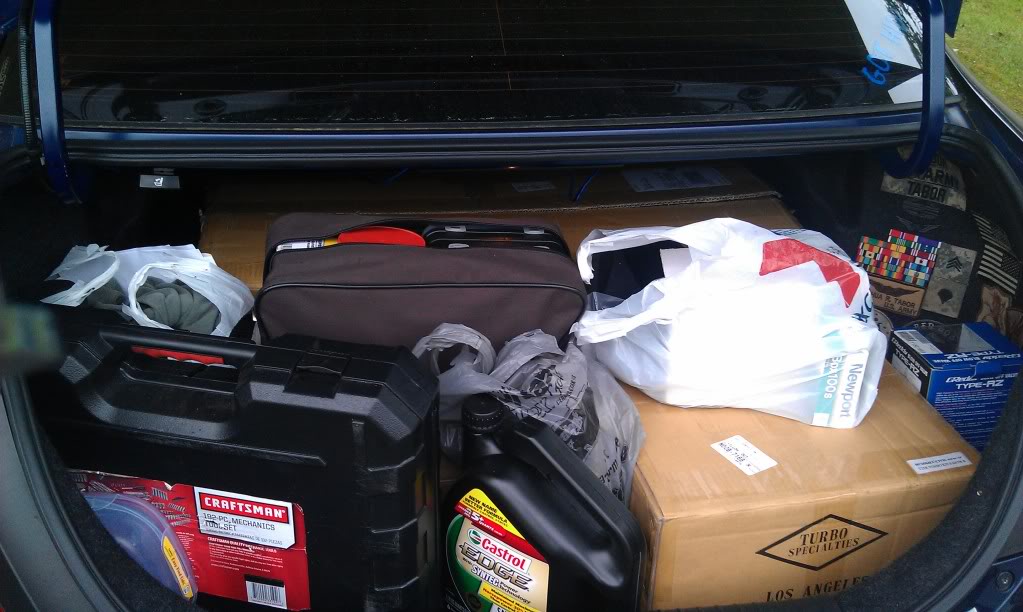
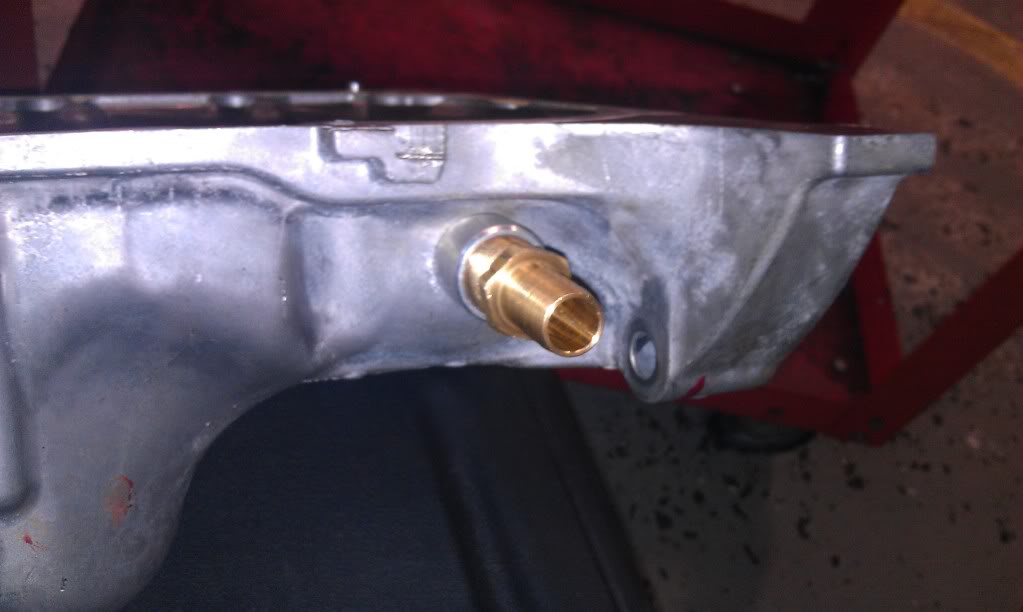
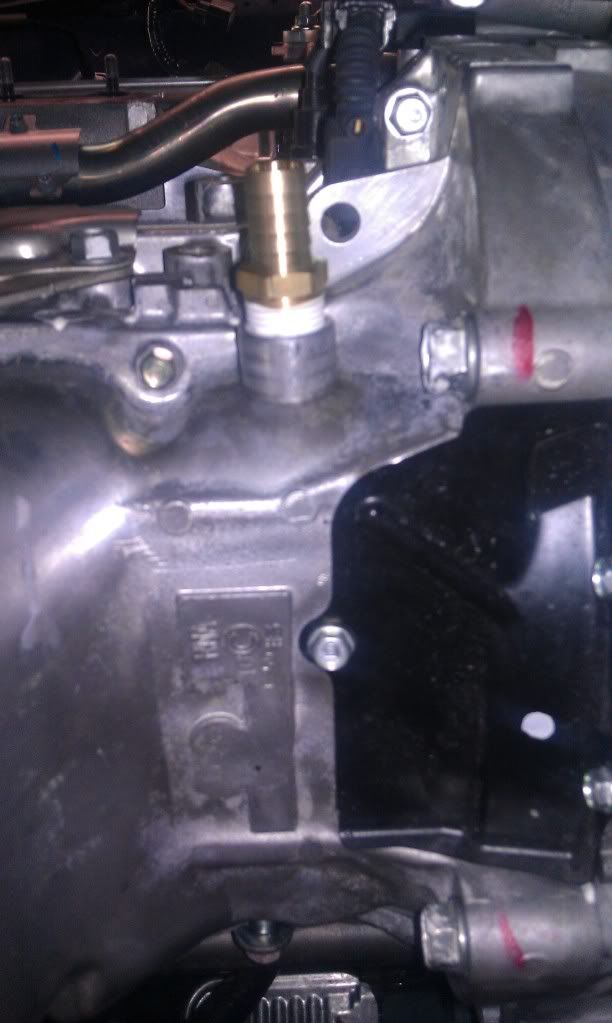
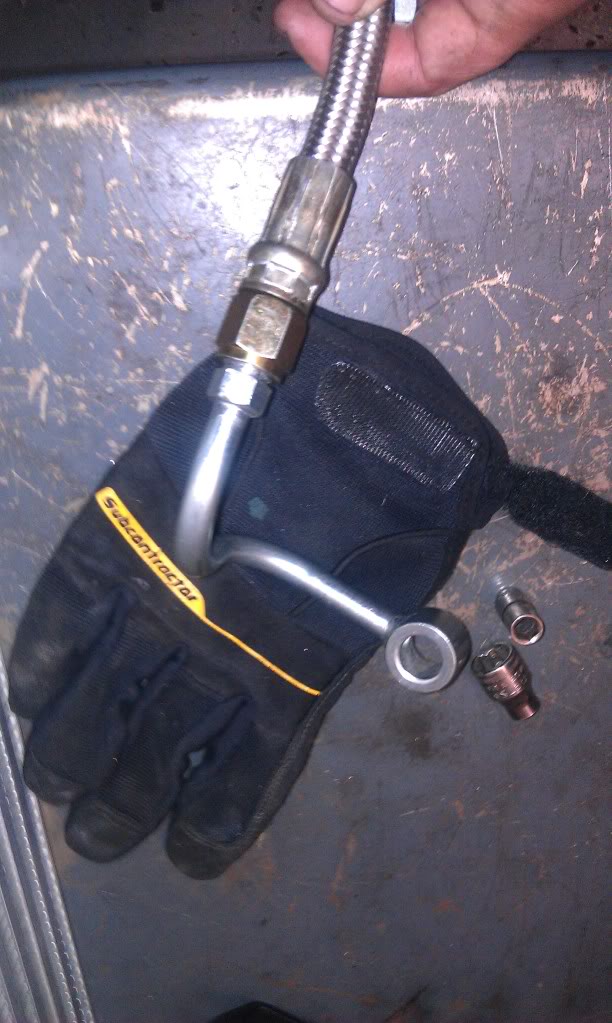
The fitting I decided was better than what TSi gave me, a 7/8.
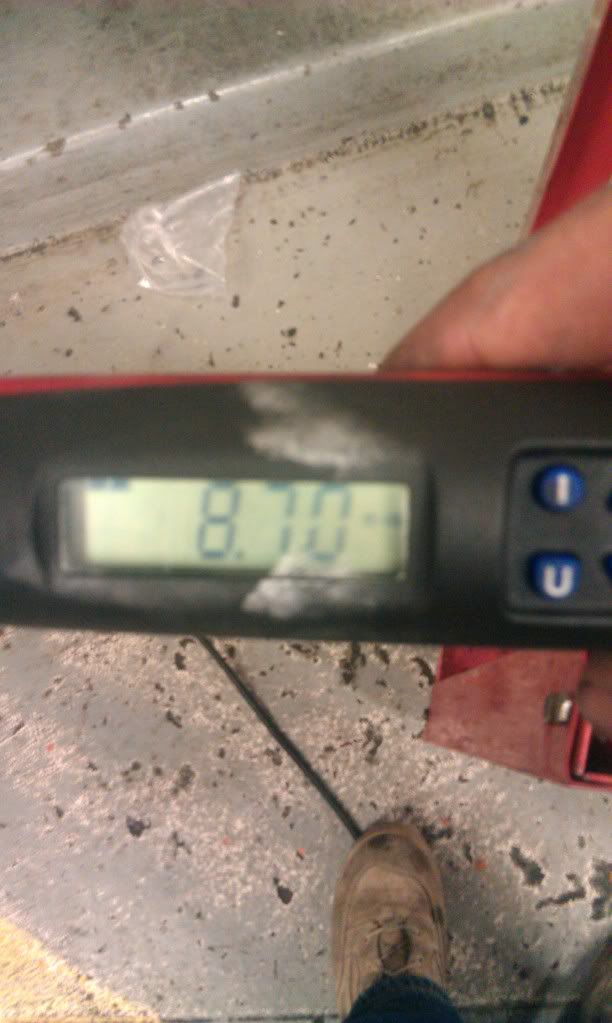
The torque wrench I used for the oil pan bolts. Don't hate!
As clean as I could get the oil pan.
The pan installed, fitting installed, all torqued, and sealed with HONDA BOND 4, 3 drip spots, and that stuff burns on the face....
Looking forward to tomorrow... I'll be able to get started at 1000 instead of 1400 tomorrow.
I got hung up on the oil pan, panicked... had a smoke... lowered the car and used a long pry bar, and rubber mallet to beat the crud out of the oil pan from the front at the 12 o'clock position on the oil pan.... it came off after 20 min of beating. And on to pictures.
Looking up into the motor with pan removed:
The darn oil pan (unclean)
My weld job inside the oil pan, took my time, clean surface, good tig temp, and this is what you get when you want to do it right with a clear mind.
The fitting I decided was better than what TSi gave me, a 7/8.
The torque wrench I used for the oil pan bolts. Don't hate!
As clean as I could get the oil pan.
The pan installed, fitting installed, all torqued, and sealed with HONDA BOND 4, 3 drip spots, and that stuff burns on the face....
Looking forward to tomorrow... I'll be able to get started at 1000 instead of 1400 tomorrow.
06-12-2011
#6
Registered!!
Thread Starter
Re: 2011 R18 Turbo Build
Day 3 was a really late start, and didn't take many pictures.
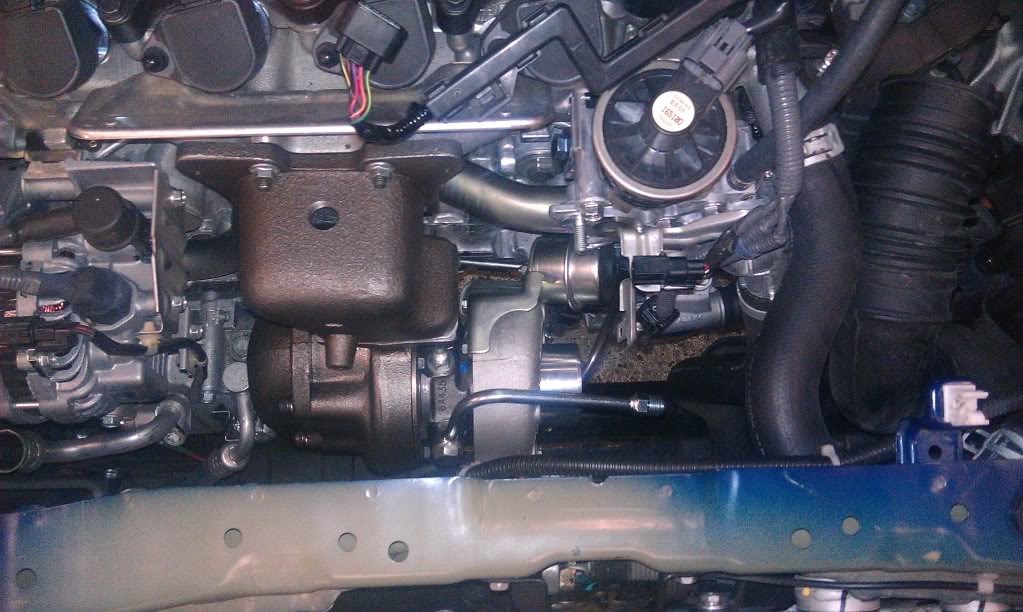
Installed the turbo as a partial assembly (Turbo on housing, Downpipe with wideband installed) The thing I would of connected prior to installing the assembly would of been the steel braided coolent line behind the turbo... It proved to be a complete headache and took some time.
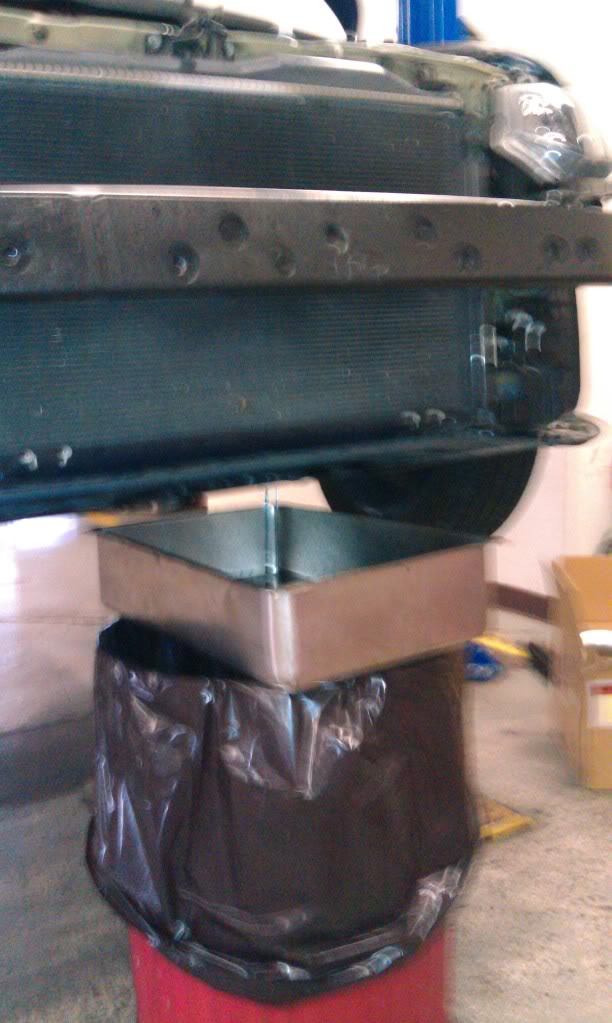
Draining the coolant
Reattached the serpentine belt, a few attempts alone, but got it.
Torqued Turbo assembly, but should of attached the line for coolant before putting it in.

Ended up removing the coolant attachment from the turbo while it was installed, after several failed attempts to install it while on the turbo.
The two connections for the coolant lines, clamped and installed.

That was all for day 3.... going to add day 4 later. Tired.
Installed the turbo as a partial assembly (Turbo on housing, Downpipe with wideband installed) The thing I would of connected prior to installing the assembly would of been the steel braided coolent line behind the turbo... It proved to be a complete headache and took some time.
Draining the coolant
Reattached the serpentine belt, a few attempts alone, but got it.
Torqued Turbo assembly, but should of attached the line for coolant before putting it in.
Ended up removing the coolant attachment from the turbo while it was installed, after several failed attempts to install it while on the turbo.
The two connections for the coolant lines, clamped and installed.
That was all for day 3.... going to add day 4 later. Tired.
06-12-2011
#7
Live for the Twisties
Administrator
Join Date: Jun 2010
Location: Langley, BC
Posts: 8,580
Likes: 0
Received 5 Likes
on
5 Posts
Rep Power: 260 

Re: 2011 R18 Turbo Build
Finally, you got that damn oil pan off. I guess it was just a matter of brute force, I was thinking about that again today and still couldn't figure out why it stuck on there.
Nice torque wrench, is that one of the snap on ones that beeps?
Nice torque wrench, is that one of the snap on ones that beeps?
06-12-2011
#8
Registered!!
Thread Starter
Re: 2011 R18 Turbo Build
Yes, It has an audible beep when approaching torque then vibration once torque is achieved. It is built by Snap on.
I went to a car show today and entered the car for engine bay. This was my first car show that I entered something and actually came in first! There were only 10 of us in the engine bay competition. I finished this project last night at 1040pm, it runs pretty good, but haven't gotten on it yet.... going to wait for the tune. I'll be posting final day 4 here shortly but this is a picture of the engine bay I won with today....
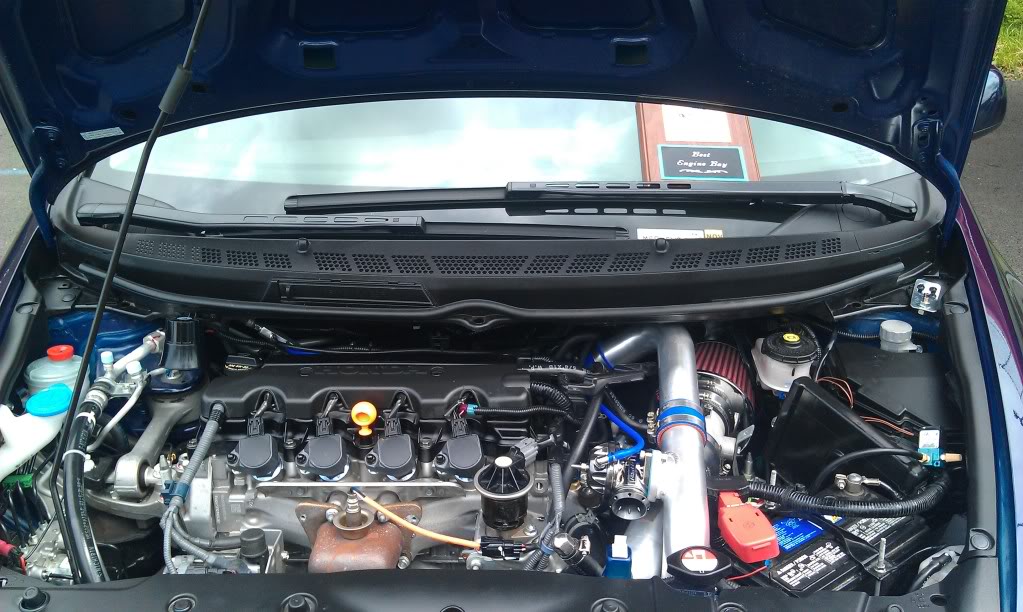
I went to a car show today and entered the car for engine bay. This was my first car show that I entered something and actually came in first! There were only 10 of us in the engine bay competition. I finished this project last night at 1040pm, it runs pretty good, but haven't gotten on it yet.... going to wait for the tune. I'll be posting final day 4 here shortly but this is a picture of the engine bay I won with today....
06-12-2011
#9
Live for the Twisties
Administrator
Join Date: Jun 2010
Location: Langley, BC
Posts: 8,580
Likes: 0
Received 5 Likes
on
5 Posts
Rep Power: 260 Re: 2011 R18 Turbo Build
Congrats on the win! Nice to have a little pay off like that after a few tough days.
What are you thinking of doing next now that the turbo install is almost done?
.
What are you thinking of doing next now that the turbo install is almost done?
.
06-12-2011
#10
Registered!!
Thread Starter
Re: 2011 R18 Turbo Build
And Final Day, Day 4:
Went in strong by removing the plastics, removing the coils, plugs, disconnected fuel rail, and removed injectors.
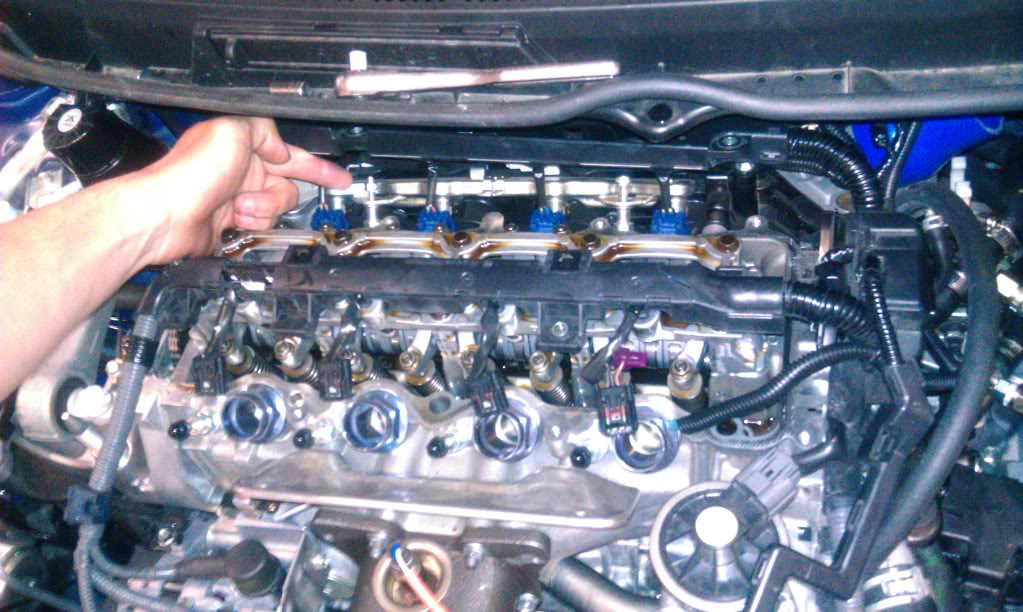
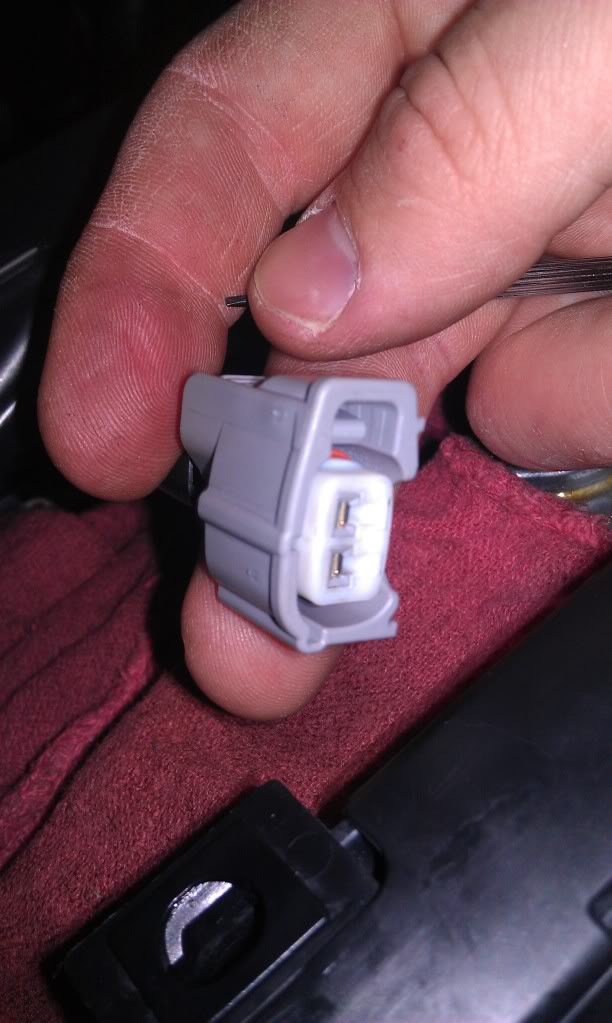
Then Depinned the factory injectors as follows:
Removed blue adapter piece with a jewl set flat head
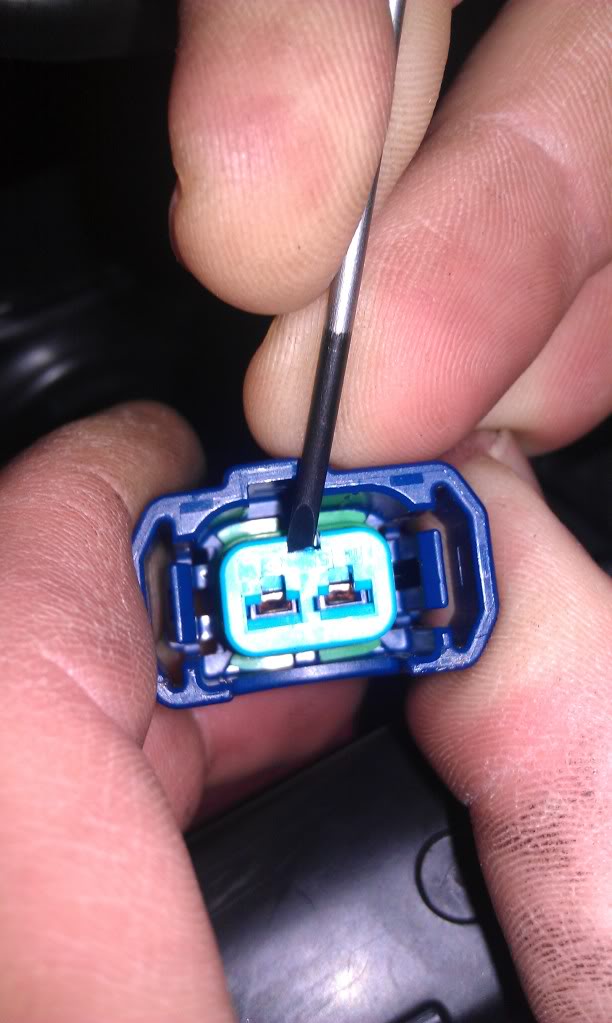
Pushed down on small plastic clips inside injector clip housing
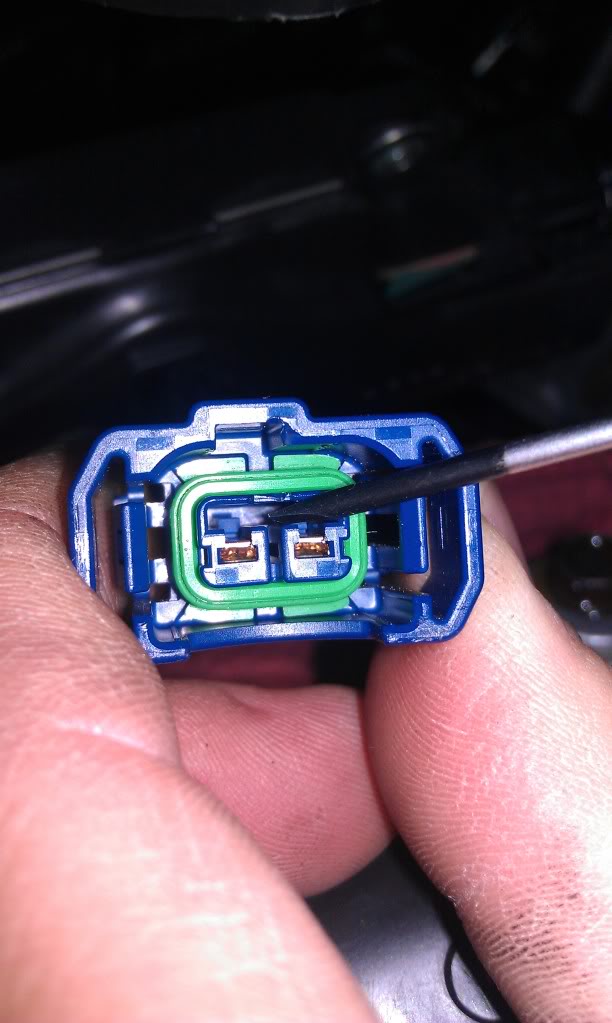
And Removed both pins by gently pulling on the wire from the top of clip.
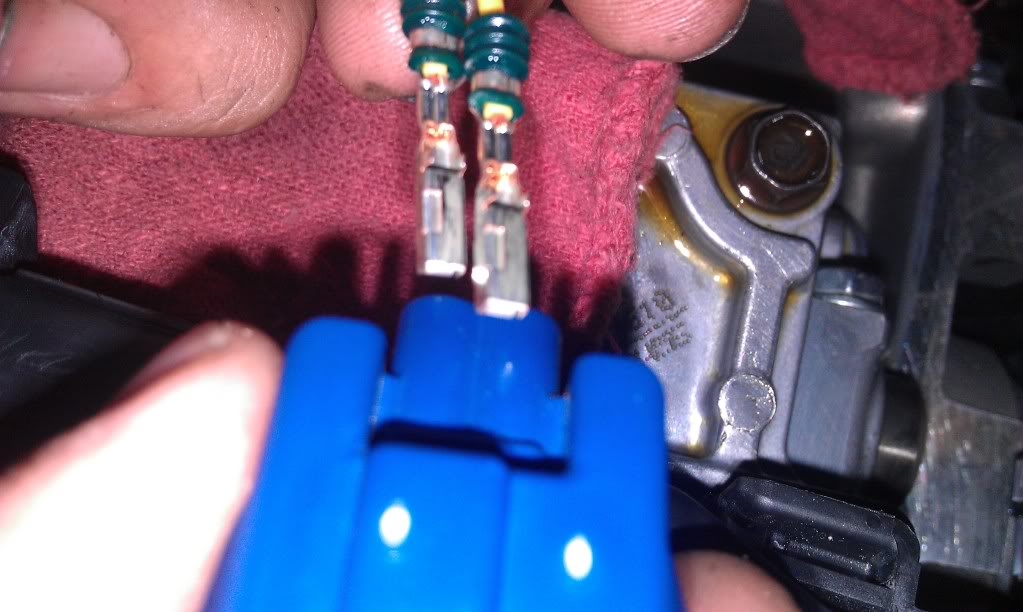
Then it got tricky, the 410 injectors that come in the R18 TSi Extreme kit are numbered 1 and 2. I used port 1 as the positive, and two as the negative (Marked by a black stripe on all negative wires). After alot of messing around with possible ways to connect them via trial and error, this is what the pins and clip have to look like in order for you to get the full connection onto the injector.
Push the wires in at the same time, and will hear and feel the small click of the pin being properly seated in the clip.
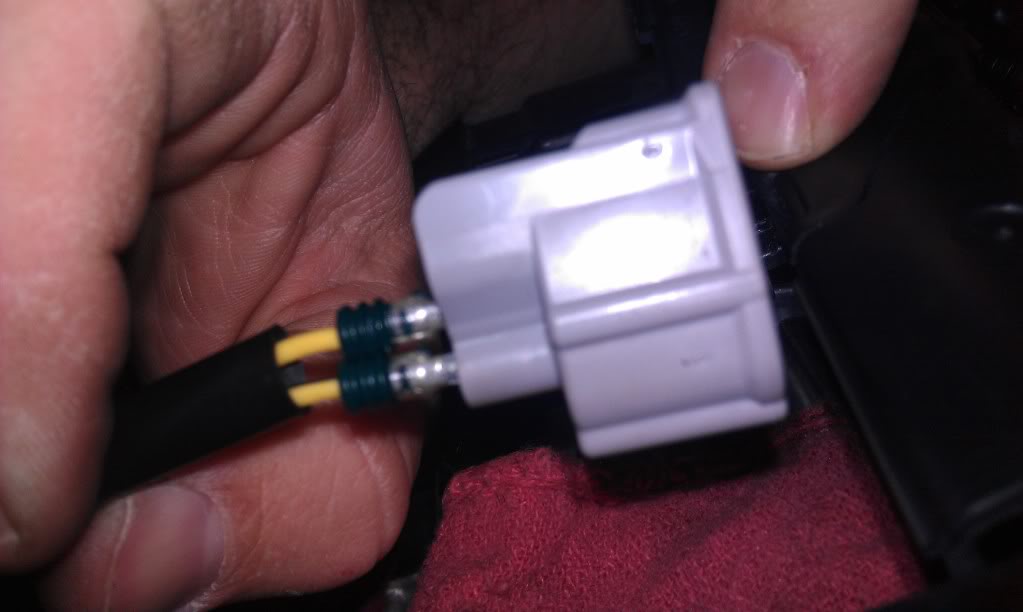
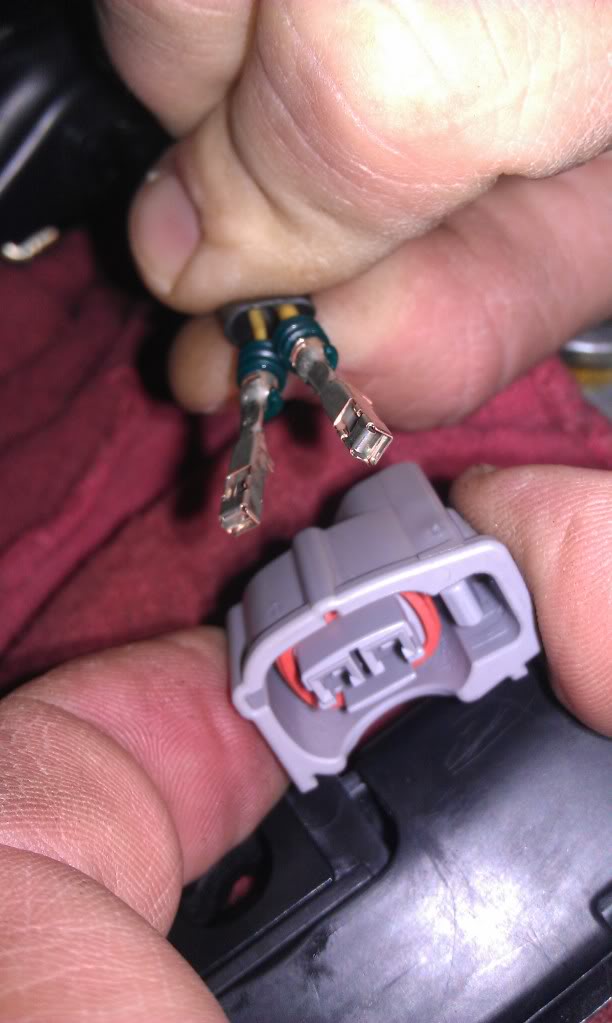
Then push the white cap into the injector clip.... and push them in all the WAY, or they will not connect to the injector.
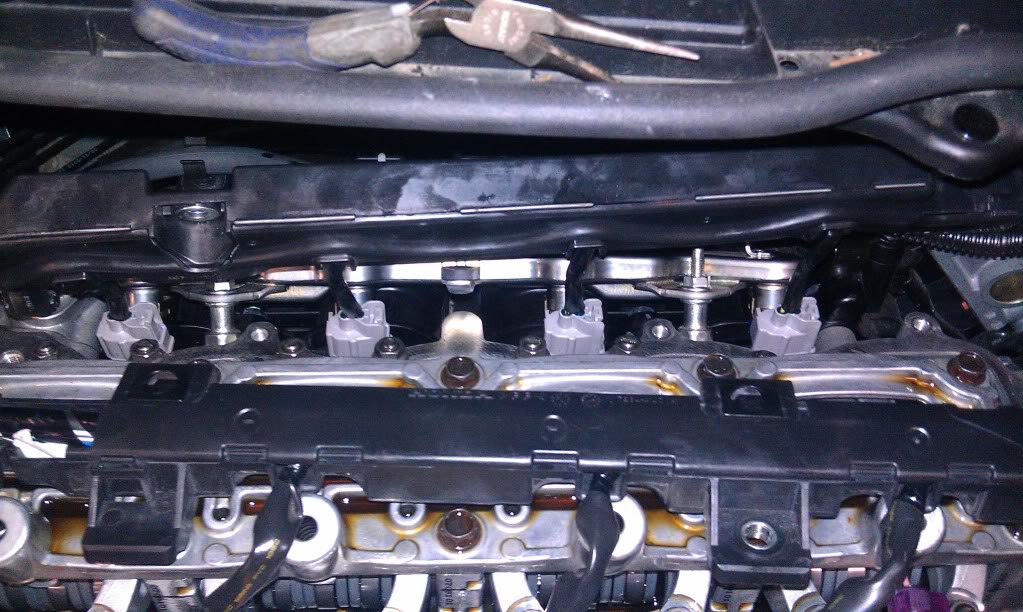
Now repeat 3 more times, and this is what it will look like correctly done.
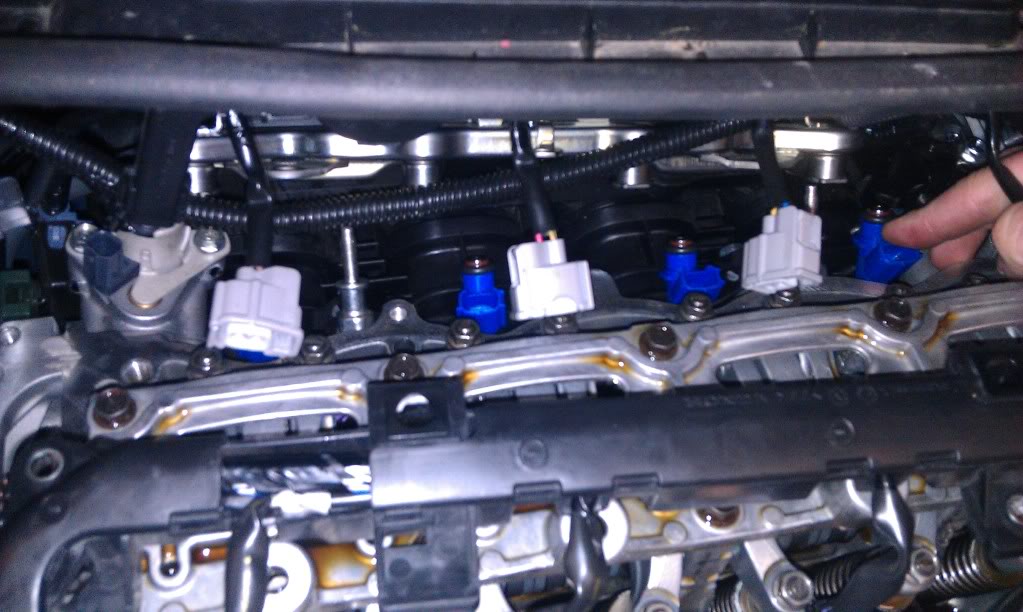
After all the wiring its time to fight the fuel rail on the right side, and the metal locking clips for the injectors... I have no pointers for that part. Its a pain in the rear end but have a magnet handy. I installed the injectors, then the fuel rail (without bolting down yet) then the metal clips, and finally tightened the fuel rail after all said was done.
Then install the valve cover gasket, valve cover, replace spark plugs with (your choice) Denso Iridium 1 Step colder, install coils, and finally fuel rail plastic, and wiring plastics.
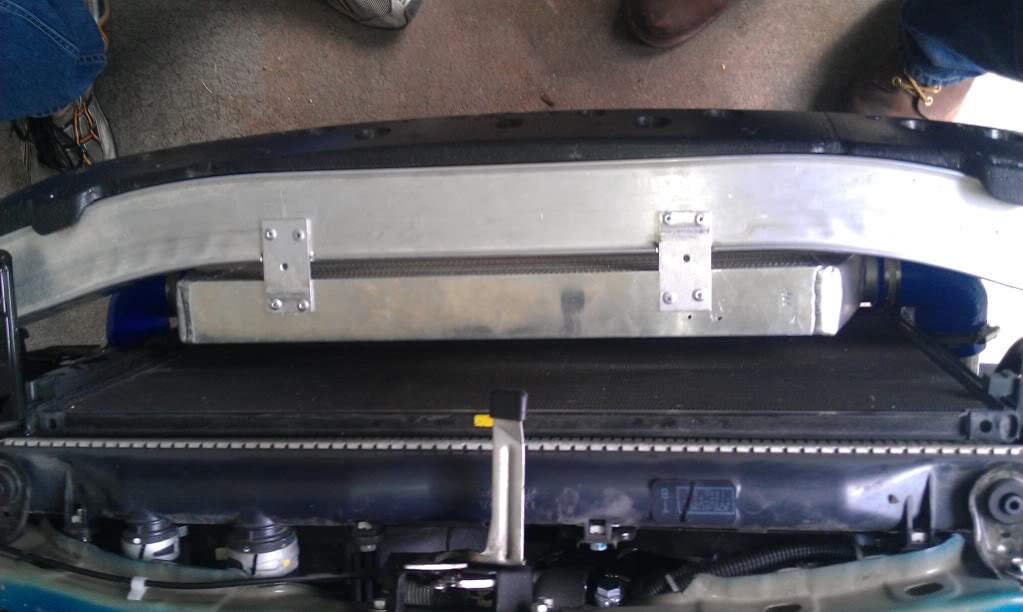
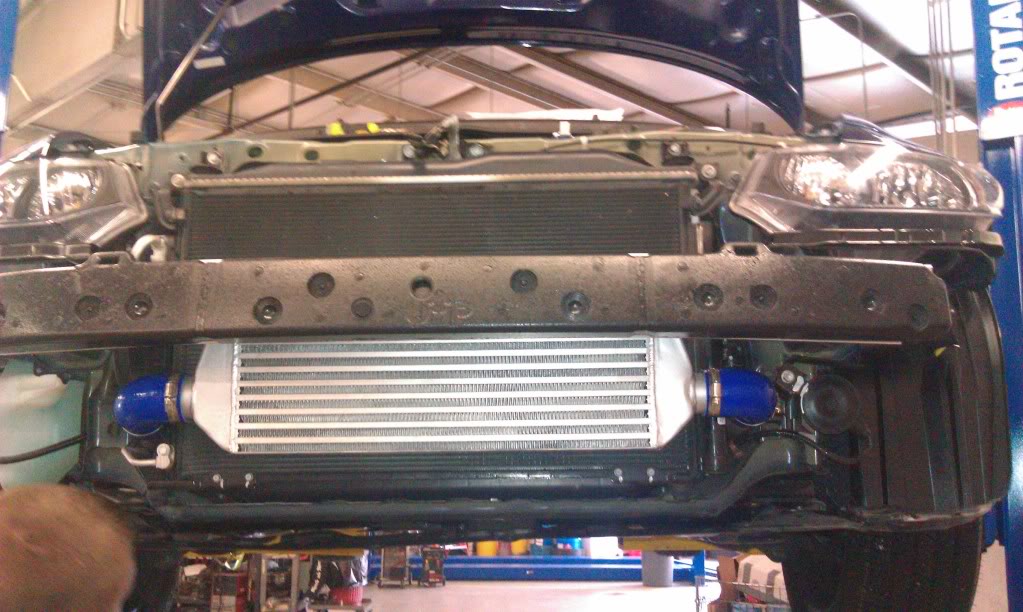
After that was done I took the angled brackets they included in the kit and make them flat. Measured the width of the bracket, marked the top of the bumper, and used an angle grinder to take out two chunks for my intercooler. Next I made sure the intercooler was not touching anything and drilled a hole in the bumper, then popped a rivit, and moved on to the next hole. I did that process 8 times because if you mark then drill everything, then pop rivits it will not line up. take your time, make it right, be professional. This is what my end product looked like.
Next I added oil and coolant, connected the battery, flashed my ecu with hondata, and the TSI 410 base map. Then I turned the key on and off 4 times to prime the injectors, and fired the car right up. It high idled then calmed right down. No CEL. I let it run for 2 minuets, then shut it off. Checked oil level, tightened one coolant line, and added a tad more coolant to the system. Started the car right back up and let it run for 10 minuets. Cooked all the preservatives off the turbo (smoked for a little bit) and went of the first ride around the corner and back. Adjusted one vibrating charge pipe, checked fluids, temps, and called it a day. Drove it home with a smile.
I'll be getting my tuning done tomorrow and will be recording the dyno runs. Expect a link to youtube by Wednesday after editing. If anyone has any questions, I know first hand what your problems are going to be, and can answer virtually any question about this installation. They put this install at a level 3, but i would rank it as a 4 on a chart of 5. I am also a helicopter mechanic for the US Army, past 10 years, so I do have mechanical knowledge. I wouldn't suggest anyone without access to a shop to try and install this at home. It was nice having a lift, and closed area. This project took me 4 days, and half a night of wiring of UEGO and TrueBoost gauges. I will not romp on my turbo until its tuned by a professional.
Went in strong by removing the plastics, removing the coils, plugs, disconnected fuel rail, and removed injectors.
Then Depinned the factory injectors as follows:
Removed blue adapter piece with a jewl set flat head
Pushed down on small plastic clips inside injector clip housing
And Removed both pins by gently pulling on the wire from the top of clip.
Then it got tricky, the 410 injectors that come in the R18 TSi Extreme kit are numbered 1 and 2. I used port 1 as the positive, and two as the negative (Marked by a black stripe on all negative wires). After alot of messing around with possible ways to connect them via trial and error, this is what the pins and clip have to look like in order for you to get the full connection onto the injector.
Push the wires in at the same time, and will hear and feel the small click of the pin being properly seated in the clip.
Then push the white cap into the injector clip.... and push them in all the WAY, or they will not connect to the injector.
Now repeat 3 more times, and this is what it will look like correctly done.
After all the wiring its time to fight the fuel rail on the right side, and the metal locking clips for the injectors... I have no pointers for that part. Its a pain in the rear end but have a magnet handy. I installed the injectors, then the fuel rail (without bolting down yet) then the metal clips, and finally tightened the fuel rail after all said was done.
Then install the valve cover gasket, valve cover, replace spark plugs with (your choice) Denso Iridium 1 Step colder, install coils, and finally fuel rail plastic, and wiring plastics.
After that was done I took the angled brackets they included in the kit and make them flat. Measured the width of the bracket, marked the top of the bumper, and used an angle grinder to take out two chunks for my intercooler. Next I made sure the intercooler was not touching anything and drilled a hole in the bumper, then popped a rivit, and moved on to the next hole. I did that process 8 times because if you mark then drill everything, then pop rivits it will not line up. take your time, make it right, be professional. This is what my end product looked like.
Next I added oil and coolant, connected the battery, flashed my ecu with hondata, and the TSI 410 base map. Then I turned the key on and off 4 times to prime the injectors, and fired the car right up. It high idled then calmed right down. No CEL. I let it run for 2 minuets, then shut it off. Checked oil level, tightened one coolant line, and added a tad more coolant to the system. Started the car right back up and let it run for 10 minuets. Cooked all the preservatives off the turbo (smoked for a little bit) and went of the first ride around the corner and back. Adjusted one vibrating charge pipe, checked fluids, temps, and called it a day. Drove it home with a smile.
I'll be getting my tuning done tomorrow and will be recording the dyno runs. Expect a link to youtube by Wednesday after editing. If anyone has any questions, I know first hand what your problems are going to be, and can answer virtually any question about this installation. They put this install at a level 3, but i would rank it as a 4 on a chart of 5. I am also a helicopter mechanic for the US Army, past 10 years, so I do have mechanical knowledge. I wouldn't suggest anyone without access to a shop to try and install this at home. It was nice having a lift, and closed area. This project took me 4 days, and half a night of wiring of UEGO and TrueBoost gauges. I will not romp on my turbo until its tuned by a professional.
06-12-2011
#11
Registered!!
Thread Starter
Re: 2011 R18 Turbo Build
I am going to get the car tuned, and start looking for a intake manifold. That will be the last of it for a little while... until the clutch go's out. But when the clutch go's, I believe i will be looking at internals and body weight management next. The goal is to keep the car stock looking from the outside.
06-13-2011
#12
That Dude with the Questions
Join Date: Jan 2011
Location: Ottawa, Ontario
Posts: 1,296
Likes: 0
Received 0 Likes
on
0 Posts
Rep Power: 174 Re: 2011 R18 Turbo Build
Amazing job man, looking good.  You really know what you're doing, and it really shows through your posts. Can't wait for those dyno numbers
You really know what you're doing, and it really shows through your posts. Can't wait for those dyno numbers
06-13-2011
#13
Registered!!
Thread Starter
Re: 2011 R18 Turbo Build
Thanks man. Running dyno right now. 174whp on mustang dyno running 4lbs and tuning cam via hondata right now. I will put up final numbers tonight.
06-15-2011
#15
That Dude with the Questions
Join Date: Jan 2011
Location: Ottawa, Ontario
Posts: 1,296
Likes: 0
Received 0 Likes
on
0 Posts
Rep Power: 174
06-21-2011
#16
Registered!!
Thread Starter
Re: 2011 R18 Turbo Build
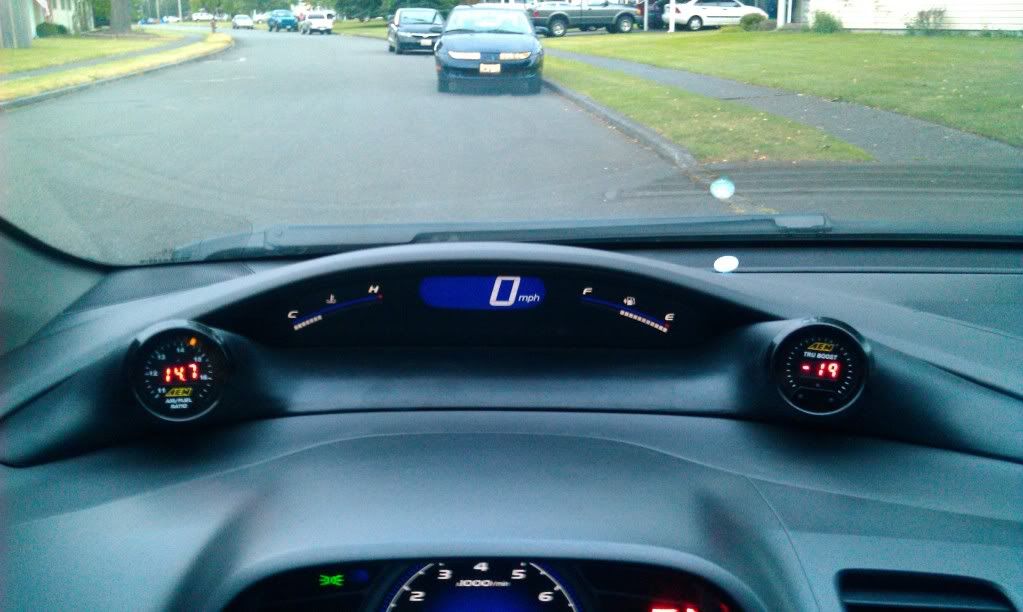
The lbs I'm referring to are boosted air intake manifold pressure added. 8.3 is where I am still at, and going to hit the dyno once again on friday. I will break the 200 mark on a mustang dyno. Ive had this set up for a week and a day with the tune, and still tuning. Its more of a pain than i thought. Freaking computers.
Here is a pic of my gauge pod that finally came in last night.
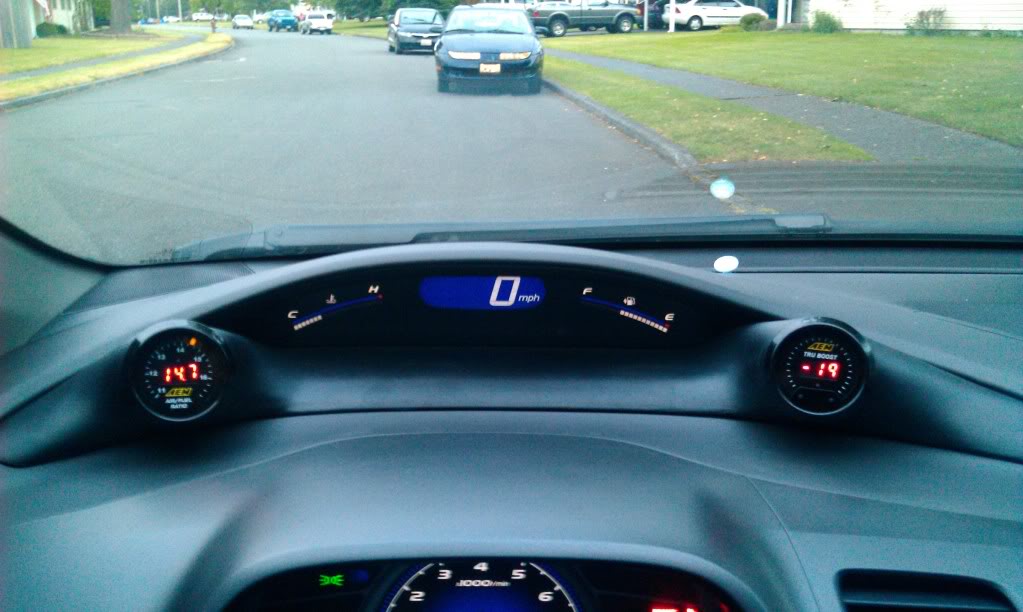
Here is a pic of my gauge pod that finally came in last night.
06-21-2011
#17
That Dude with the Questions
Join Date: Jan 2011
Location: Ottawa, Ontario
Posts: 1,296
Likes: 0
Received 0 Likes
on
0 Posts
Rep Power: 174 Re: 2011 R18 Turbo Build
The lbs I'm referring to are boosted air intake manifold pressure added. 8.3 is where I am still at, and going to hit the dyno once again on friday. I will break the 200 mark on a mustang dyno. Ive had this set up for a week and a day with the tune, and still tuning. Its more of a pain than i thought. Freaking computers.
Here is a pic of my gauge pod that finally came in last night.
Here is a pic of my gauge pod that finally came in last night.
OOOH Ok, I finally get how torque is measured :P AND NICE GUAGES

Thread
Thread Starter
Honda Civic Forum
Replies
Last Post
Dave Brabant
6th Generation Civic 1996 - 2000
20
10-06-2015 12:44 AM


