DIY: Removing Brake Dust Shields
 09-06-2008
#1
Registered!!
Thread Starter

Join Date: Mar 2008
Location: Boone, NC
Age: 41
Posts: 158
Likes: 0
Received 0 Likes
on
0 Posts
Rep Power: 0 
DIY: Removing Brake Dust Shields
Removing the brake dust shields will allow much more air to hit the brakes, and will therefore keep them much cooler on track days and hard canyon runs. However it will increase the amount of brake dust on your suspension and wheels (duh). So if your wheels are worth as much as the rest of your car then maybe this isn�t for you. But if you want the best performance from your car then this is required. This is what I did. I take no responsibility for what you do to your car. If you **** your brakes up, drop the car on yourself, cut off your finger, or anything else: I�m not responsible for ****!
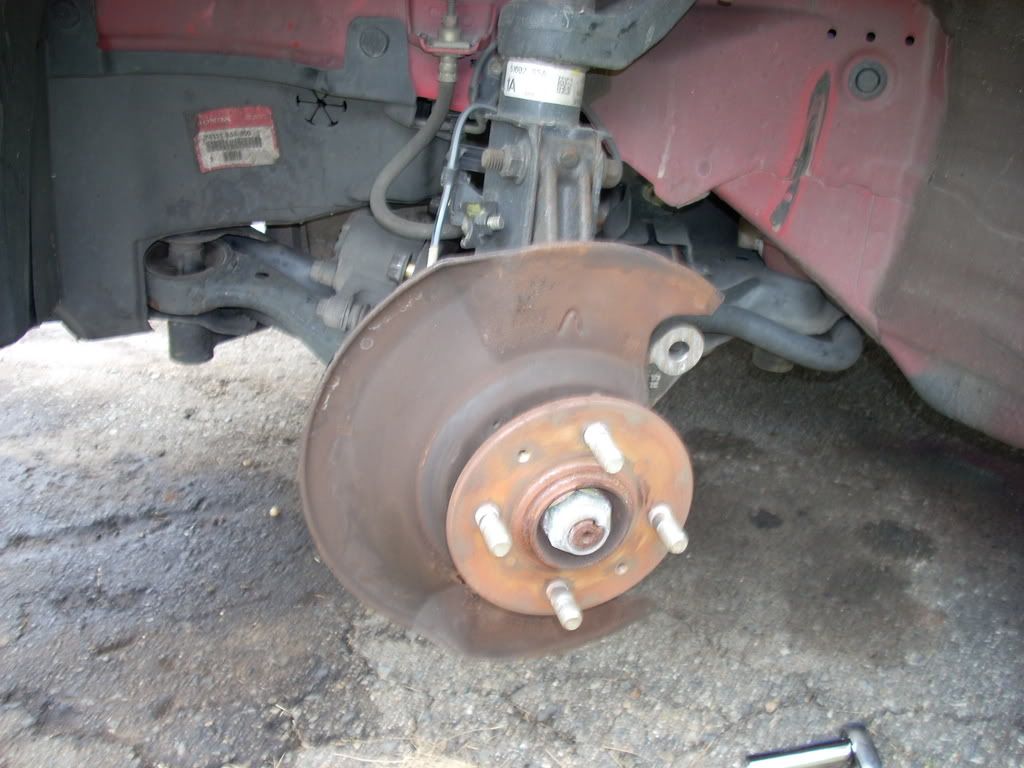
Loosen the lug nuts, chuck the rear wheels, jack up the front of the car and secure it on jack stands. I recommend lifting both front tires. You�ll have to do the other side anyway, and this way you can turn the wheels in either direction to make it easier to get to different parts. Remove the wheels.
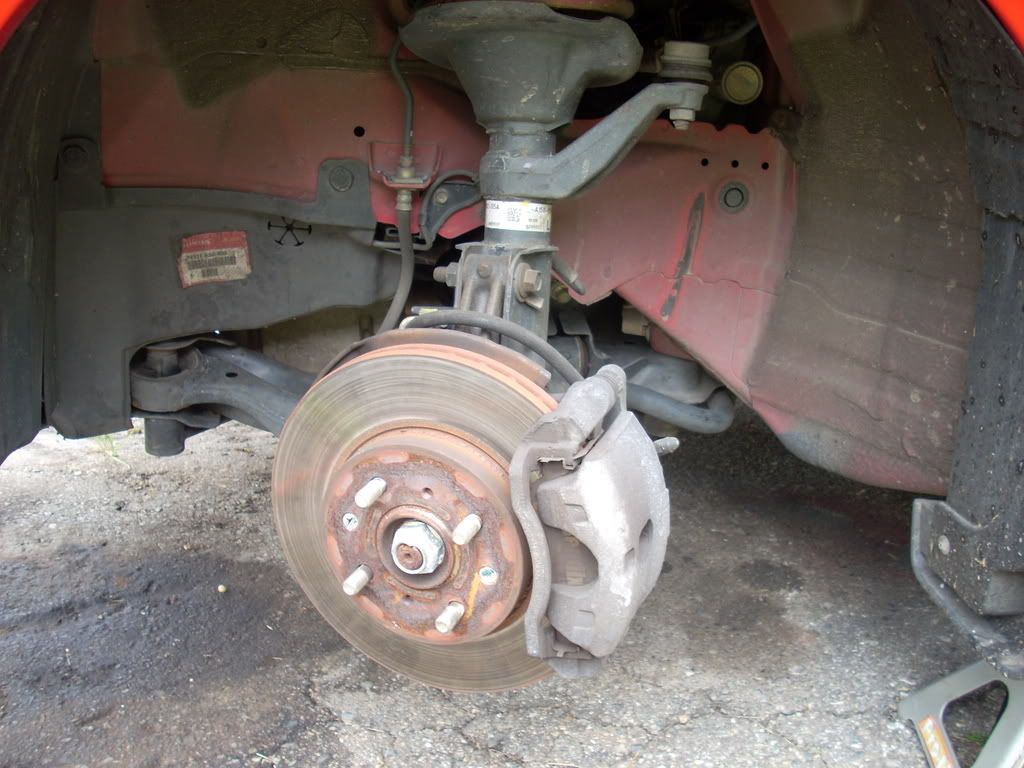
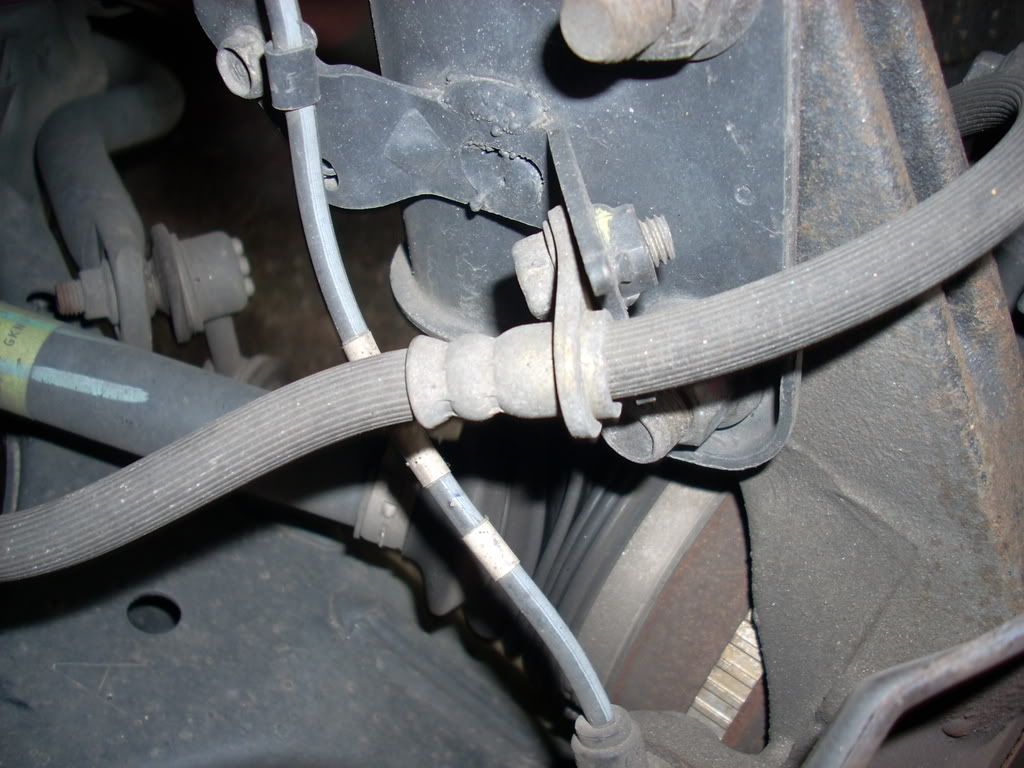
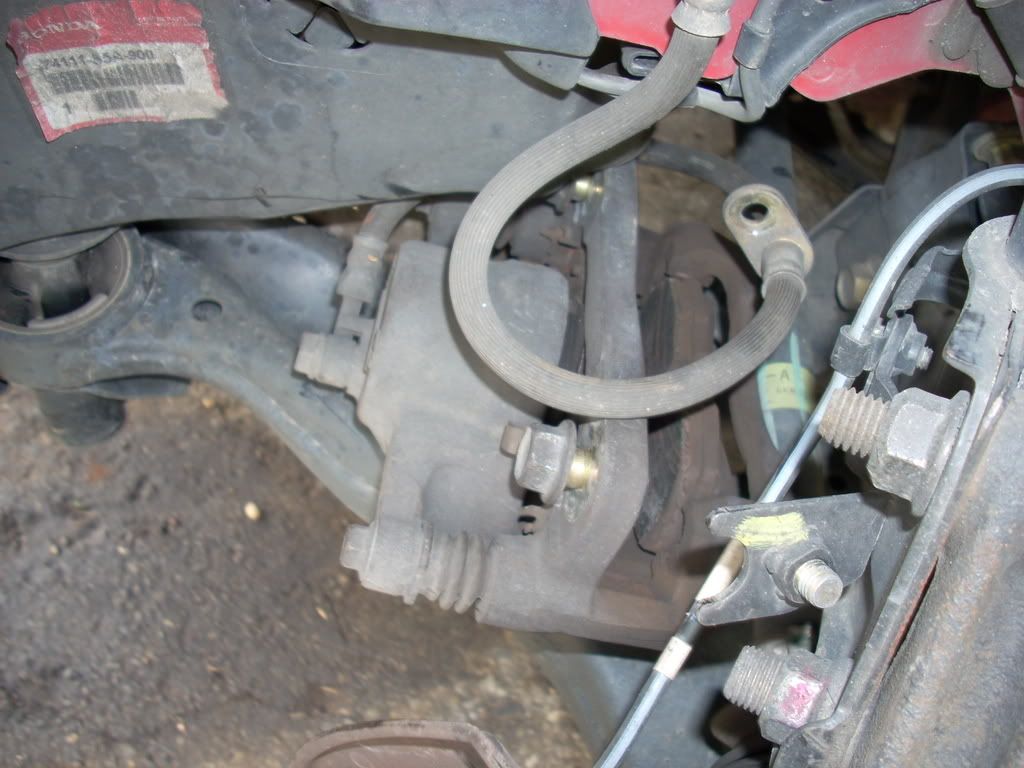
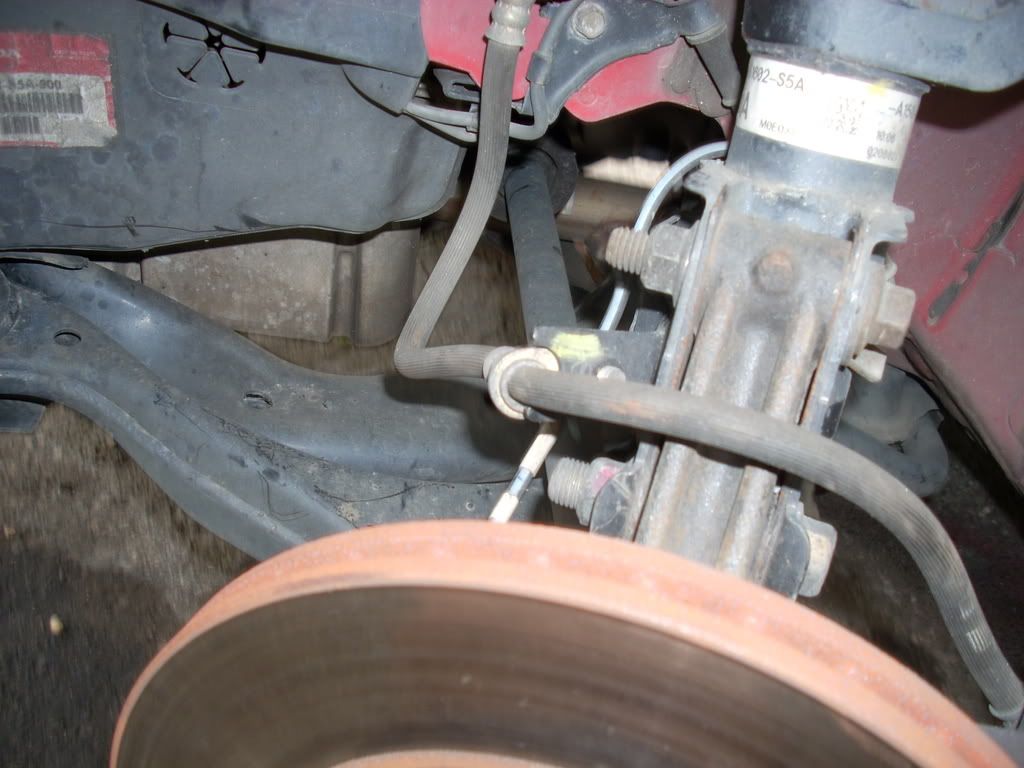
Disconnect the brake line bracket. It is a 12mm bolt.
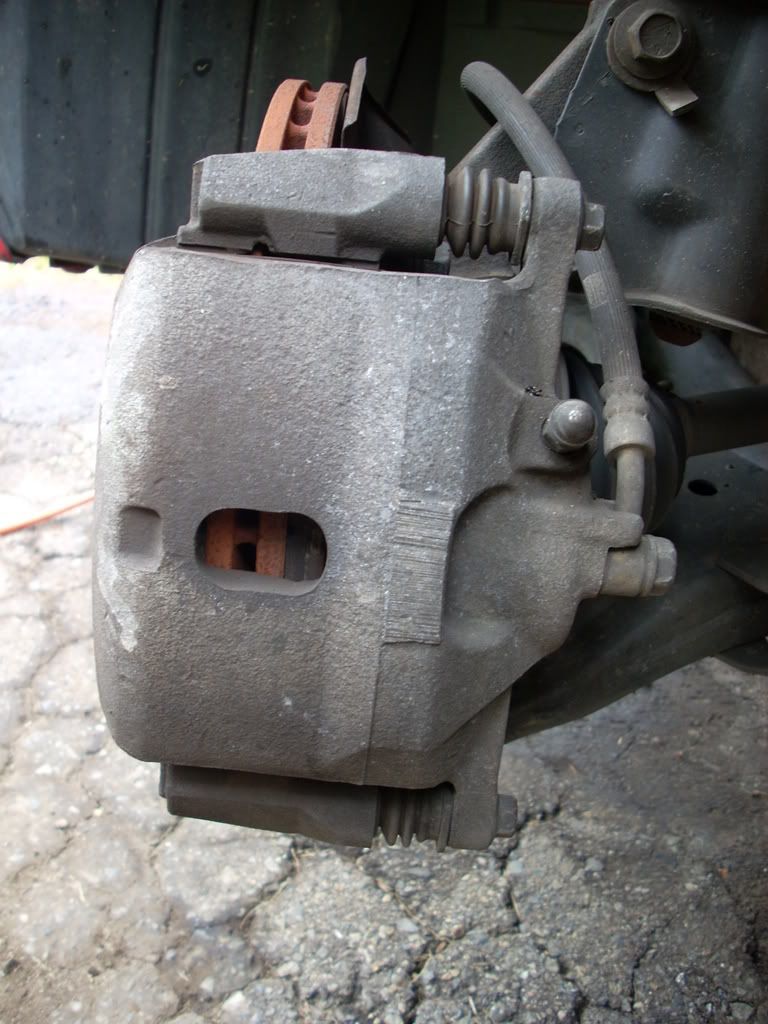
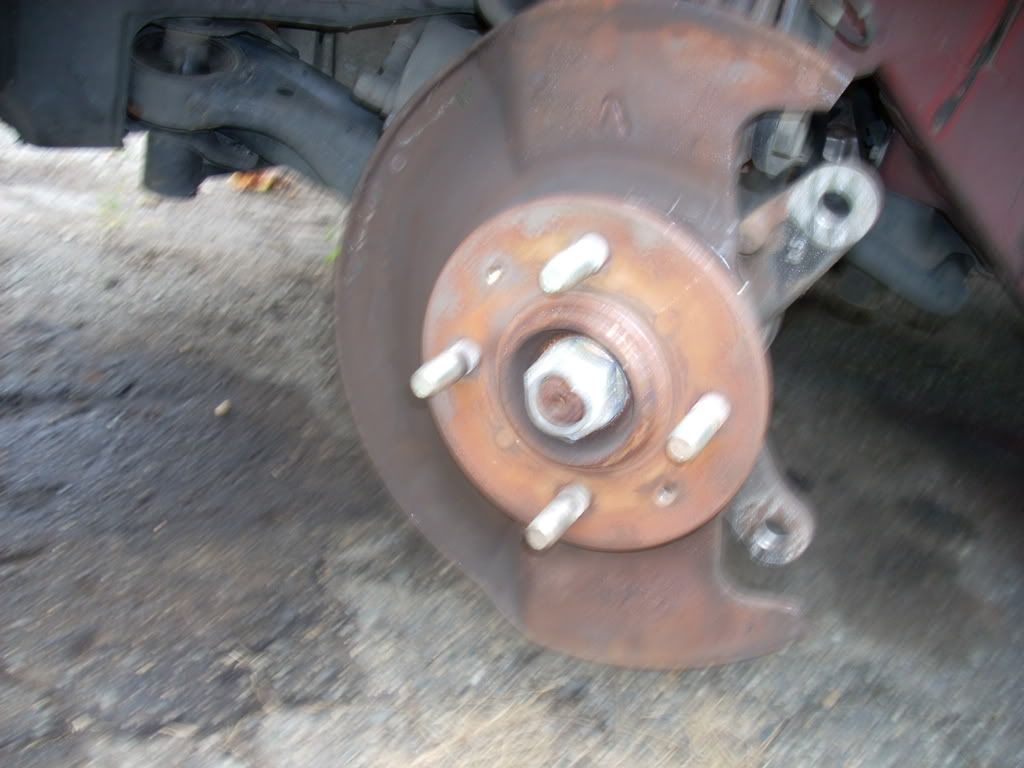
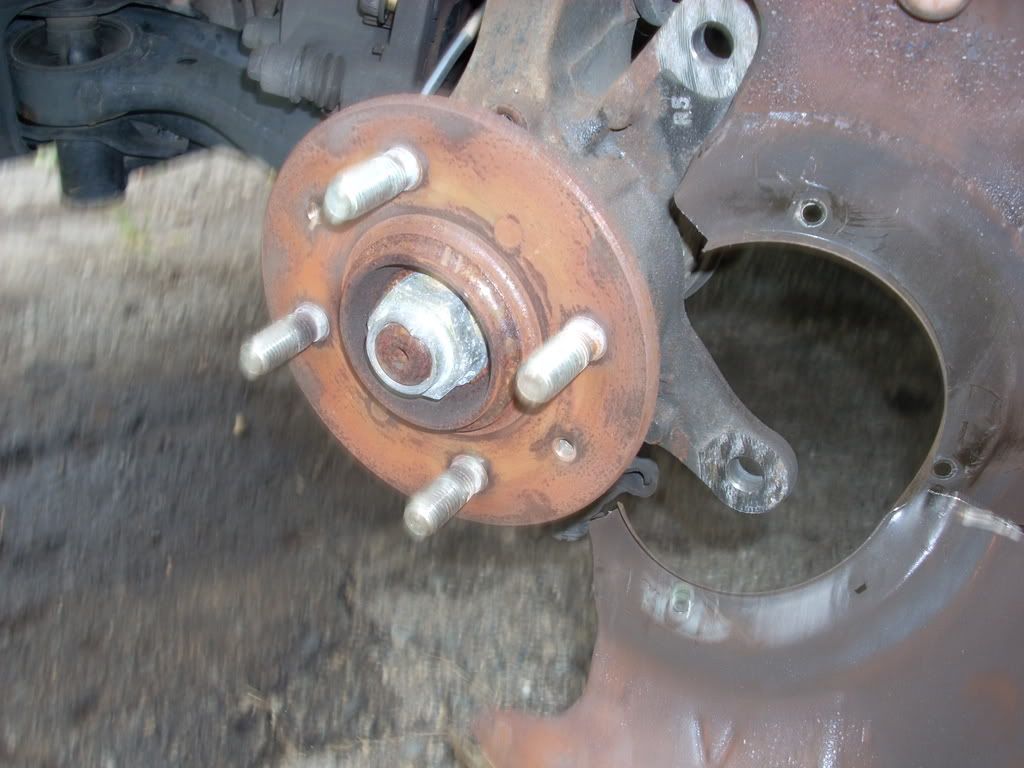
Remove the brake caliper. There are 2 bolts that hold it on from the back. They are both 17mm. Note: NOT the bolts at the top and bottom visible in the 1st pic. These are used to change the brake pads. Instead, the 2 bolts just behind them, shown in the other pictures.
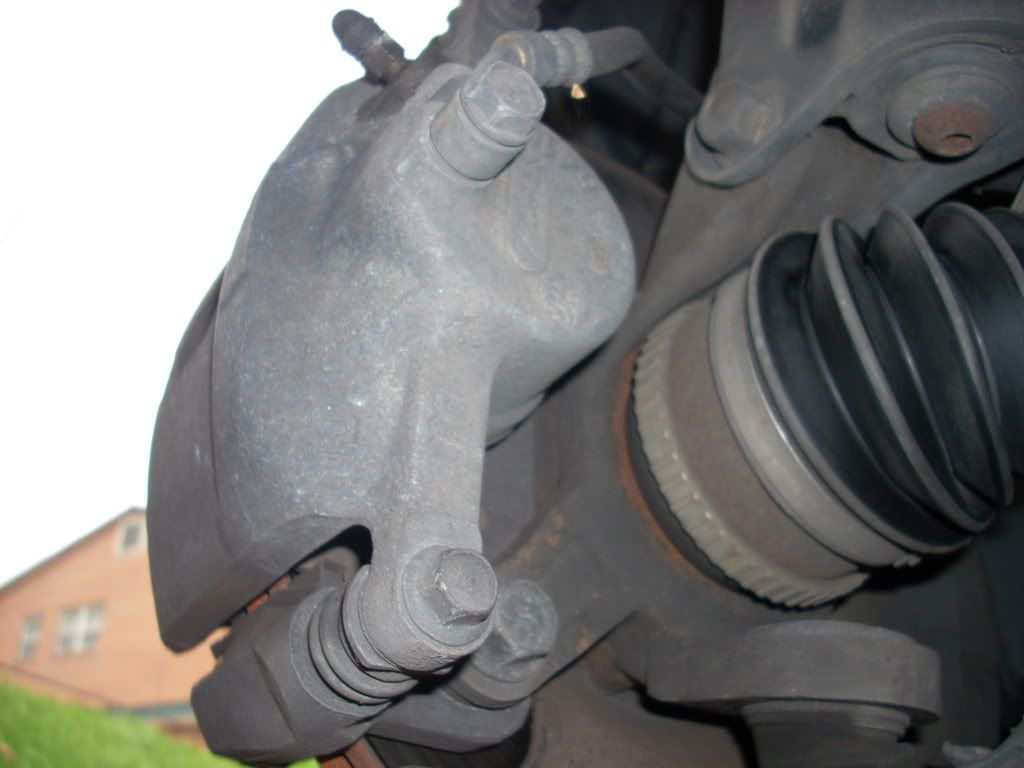

Here is a pic of the breaker bar on the top bolt.

Off
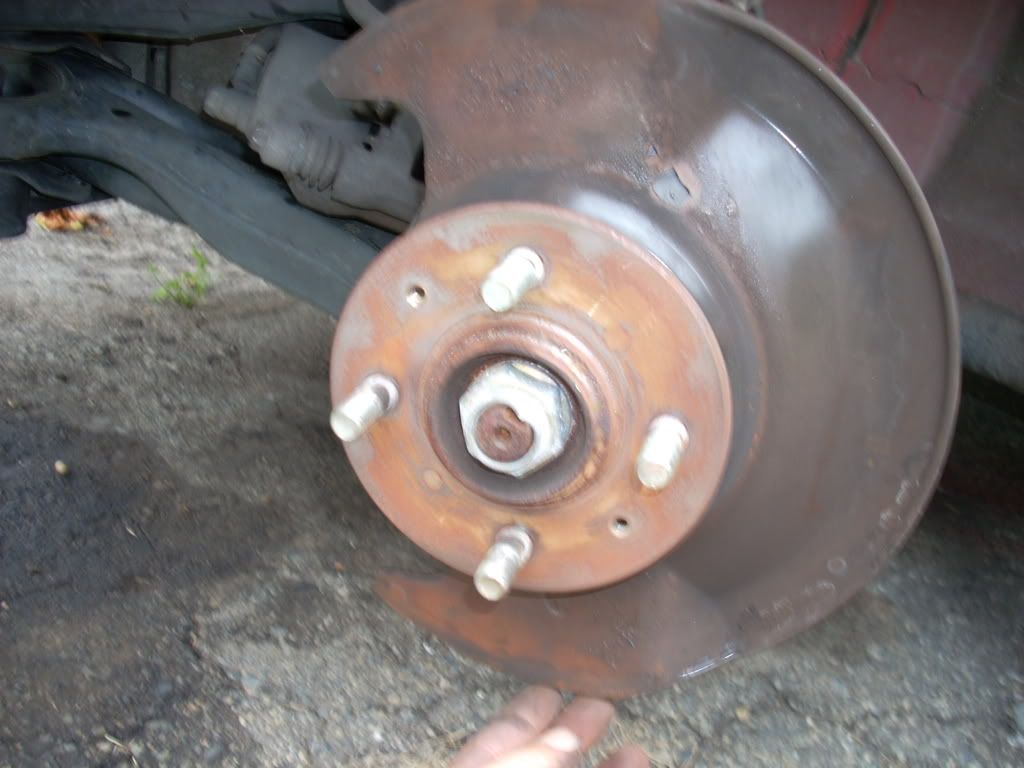
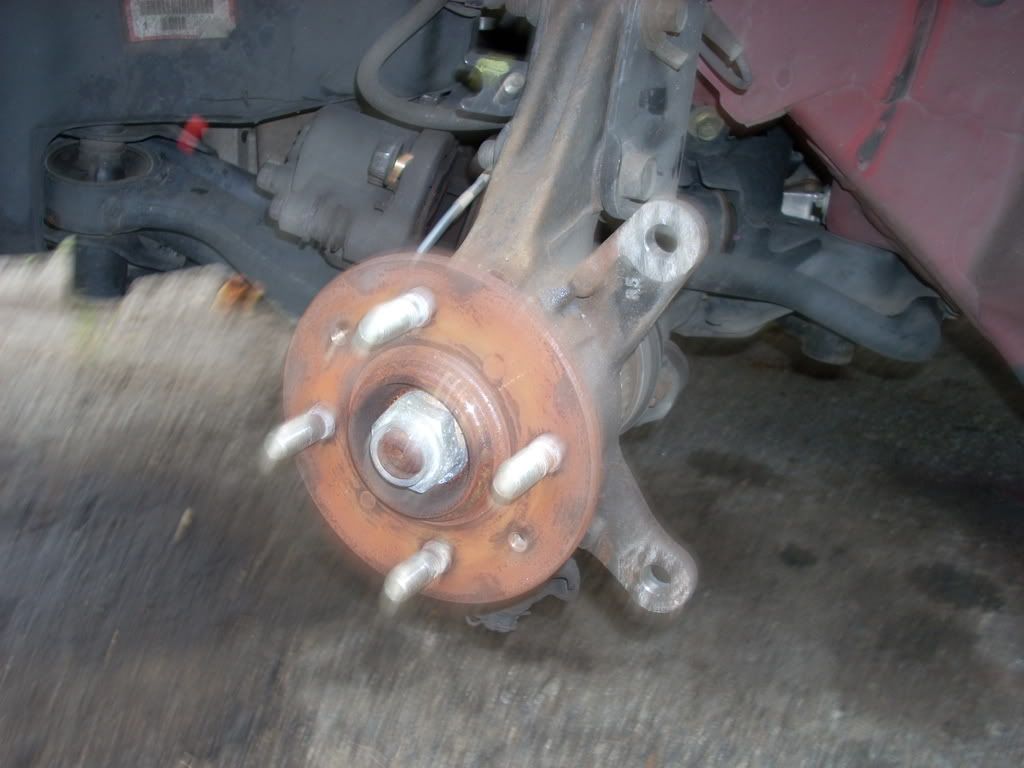
Instead of hanging the brake caliper I like to just set it on part of the suspension. Do not put pressure, kinks, or twists into the brake line.
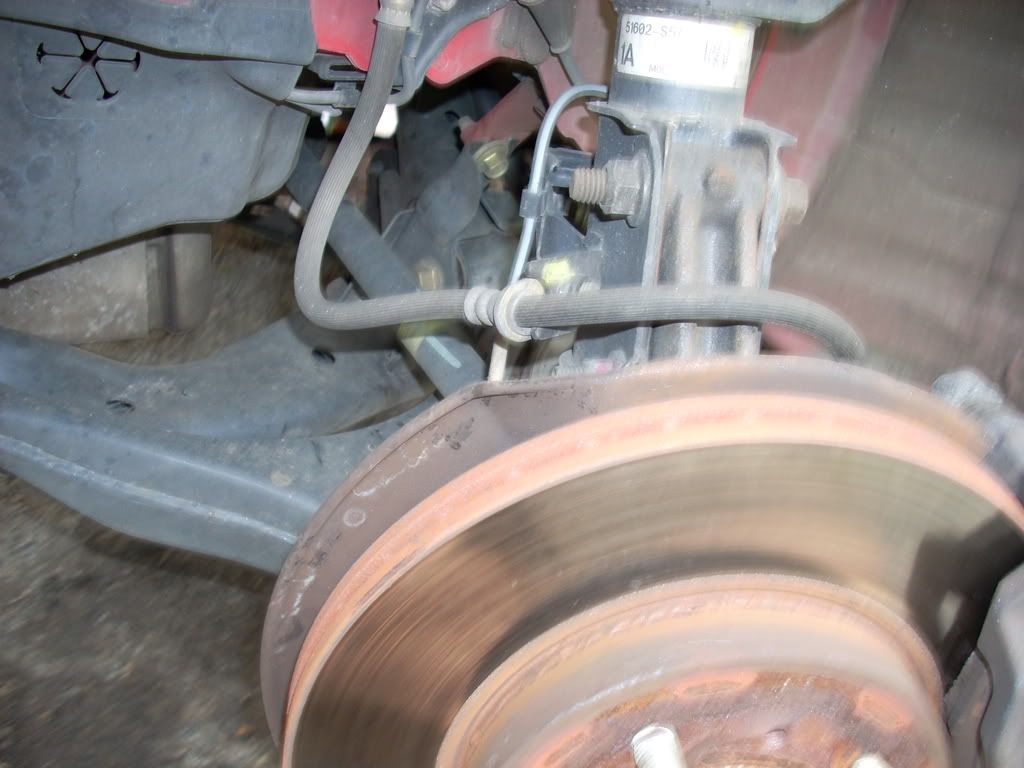
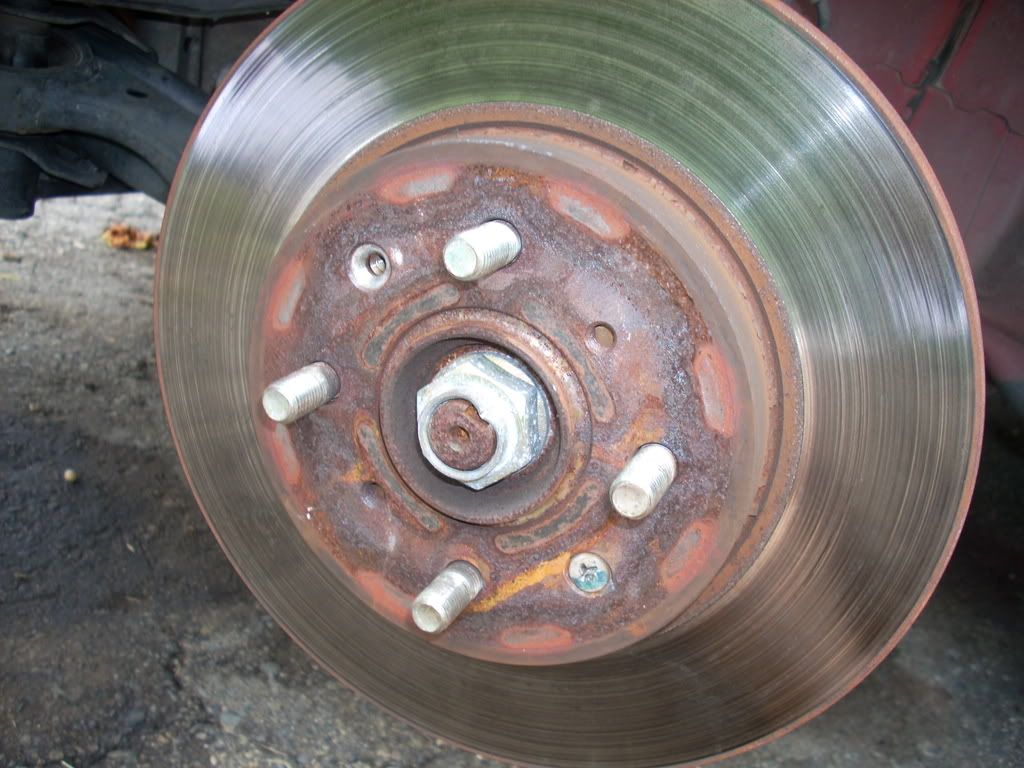
Use an impact screw driver to remove the 2 screws holding on the brake disk. You MUST use an impact screw driver. If you try to use a regular Phillips head you WILL strip the screw. If you don�t have one they are only $15-$20 and very useful. I think I picked mine up from Advance Auto. After loosening the screws, then use a regular screw driver to remove them.
With the 2 screws removed the disk should slide right off. If it is stuck on there are 2 solutions. Either use 2 bolts (8 x 1.25 mm / there are threaded holes on the rotor for this) and push the rotor off. Or, you can take a ballpeen hammer, set it on the inner section of the disk, and hit the 1st hammer from the back with another hammer. Rotate your strikes around and the stuck disk will slide right off after 3 or 4 taps. This is safe. It spreads the force out by using 2 hammers, and not actually striking the rotor. Just don�t swing like your trying to knock it out of the park.
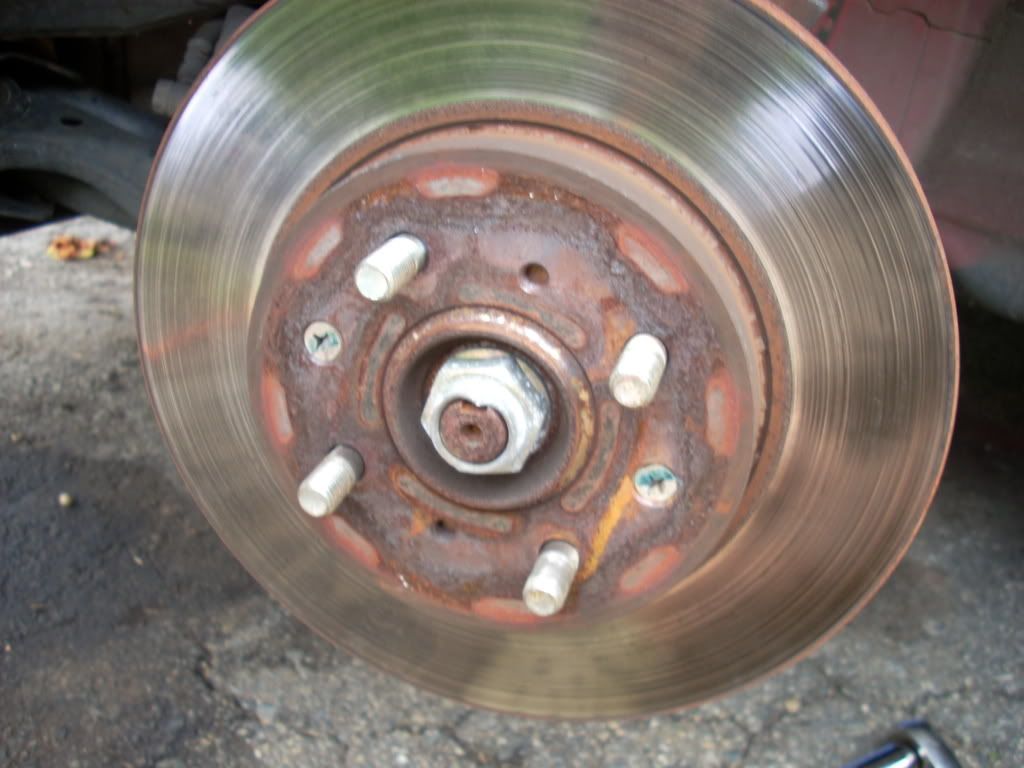
So now you get a good look at the dust shield for the 1st time. Unfortunately Honda decided to design it so that you have to remove the hub to take it off, including replacing the 1-time-use spindle nuts. This was unacceptable, I was looking for a free brake upgrade, and I�m sure those spindle nuts aren�t cheap. So here is where I veered from the beaten path.
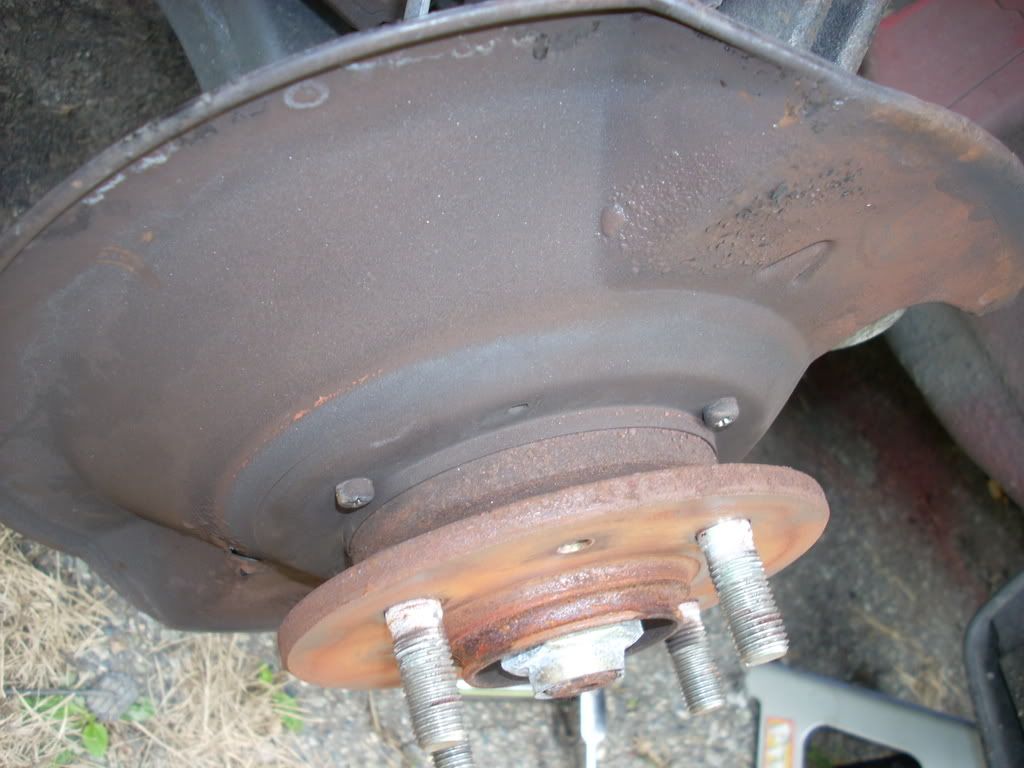
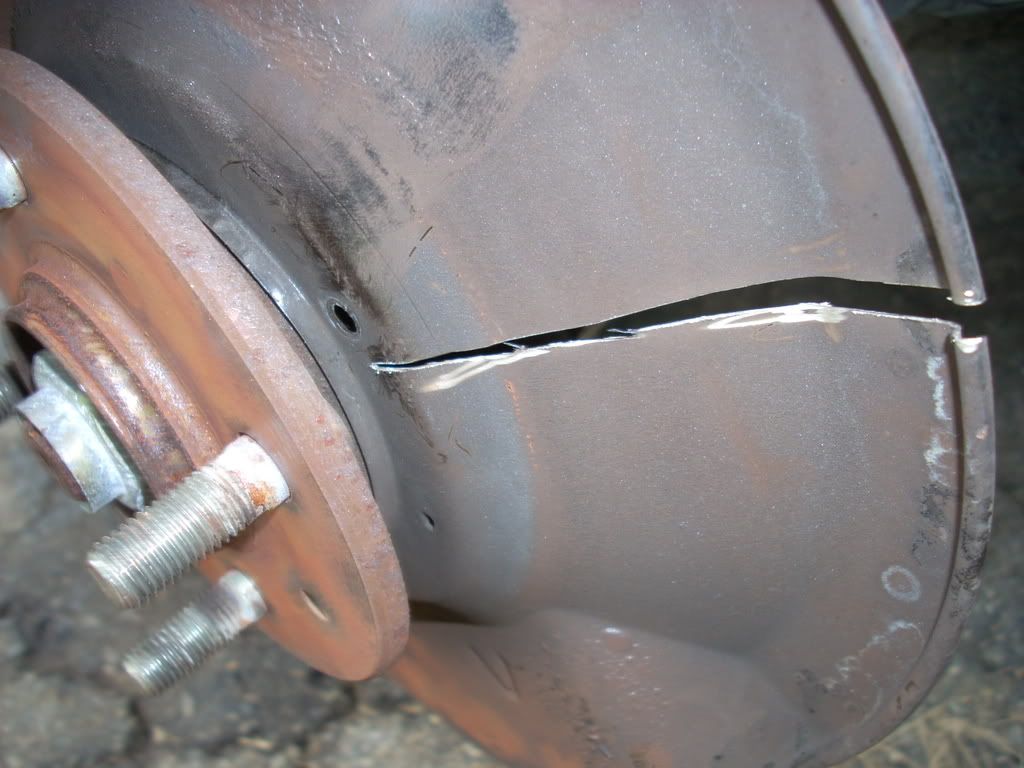
There are 3 screws that hold on the dust shield, but it wraps all the way around the axle, and its hole is smaller then the hub. Also, the three screws are behind the hub, so you can�t get to them with a screwdriver.
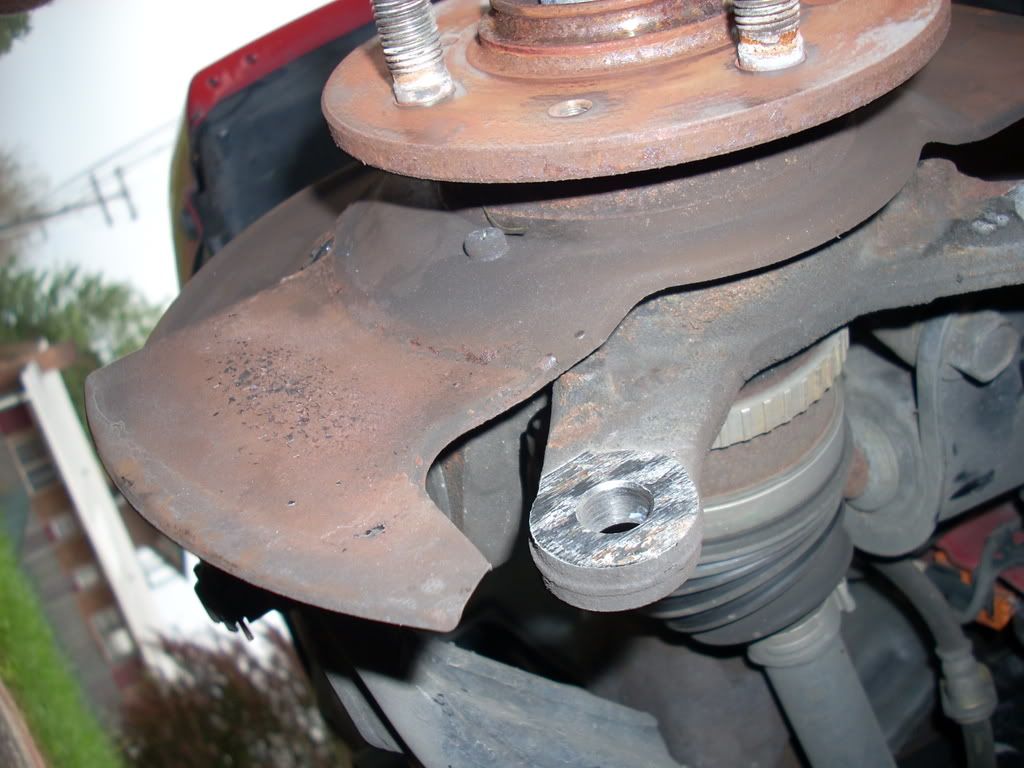
So break out your Dremmel and some cutting disks. I made 2 cuts where the disk is very narrow at the rear of the car. Be careful you don�t cut anything *extra*
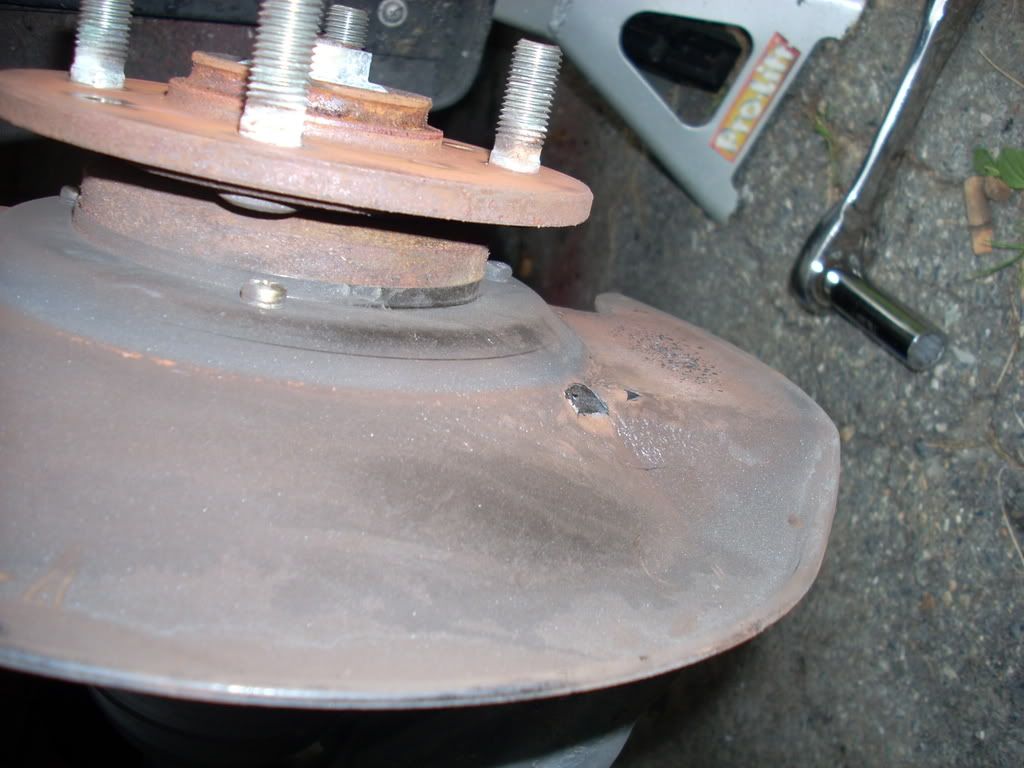
Now use a set of vice-grips and unscrew the 3 screws holding the dust shield on. The shield is still sturdy enough that you can�t quite remove it. So spin it around 180 deg. (the wheel sensor is behind the front, and you don�t want to accidentally cut that). And make a slice down the thick side (you don�t need to cut all the way, just most of it).
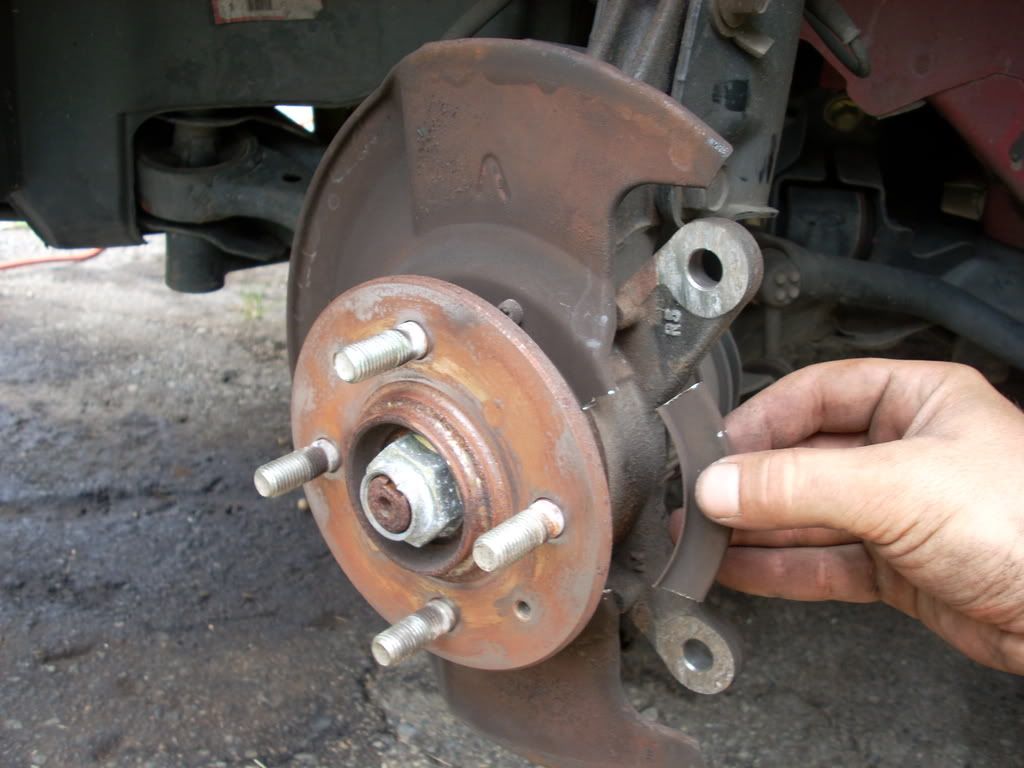
Now you can bend the metal and pull it right off. Note: I recommend wearing gloves when dealing with pieces of cut metal. It�s easy to slice your hand opened.
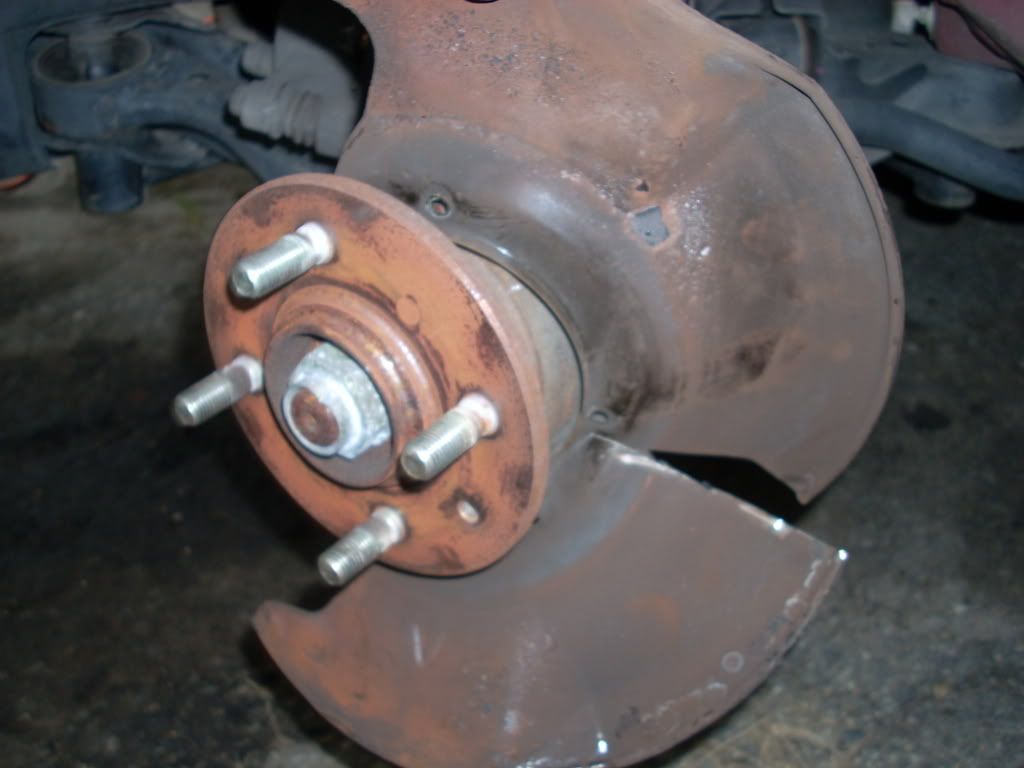
I threw the screws that held on the dust shield into the tool box. They didn�t have any other purpose, and not reinstalling them will save you some weight, haha.
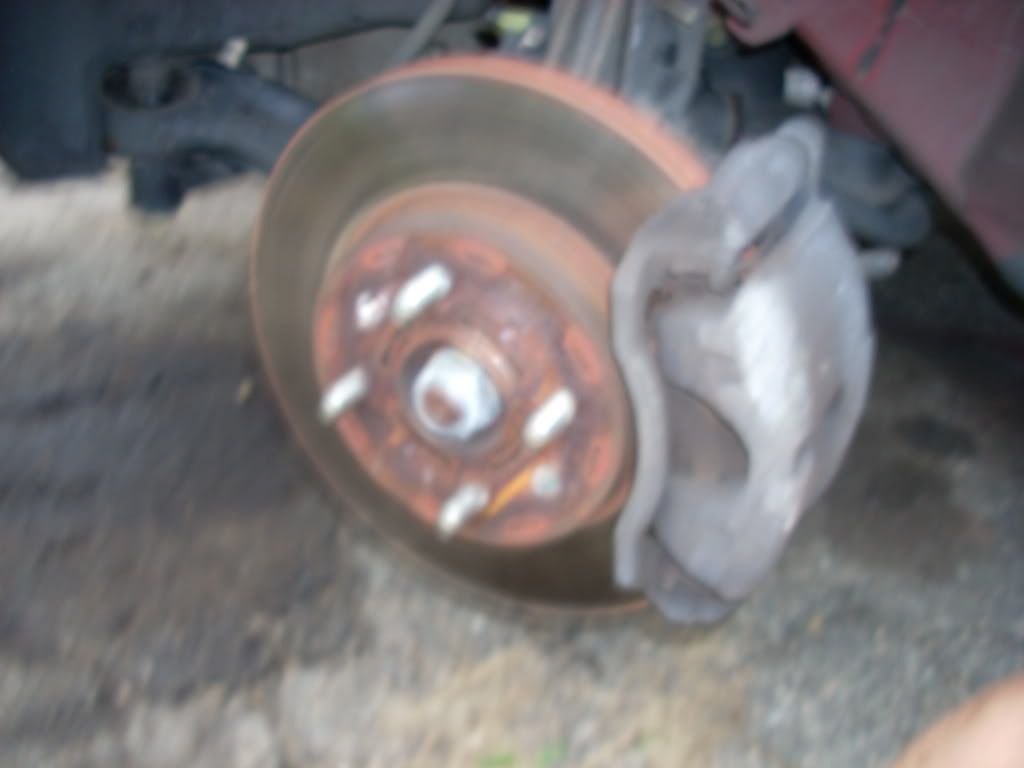
Put the rotor back on and install the 2 screws that hold it in place.
Put the caliper back on and reinstall the 2 bolts.
Reconnect the brake line bracket.
Put the tire back on and go do the other side!!
Tools used:
�� breaker bar
�� ratchet
17mm socket
12mm socket
Jack
2 jack stands
Lug wrench
Impact screwdriver
Phillips head
Vice grips
2 hammers, 1 of them ballpeen (or 1 hammer and two 8 x 1.25 mm bolts and the appropriate socket)
Dremmel with a few cut off disks . . . AND SAFETY GLASSES, DON�T **** YOUR EYES UP!!!
It wasn�t hard at all. Took less then 1.5 hrs at a slow pace, beer in hand.
BTW, this was done on my 02 EX Coupe.
Loosen the lug nuts, chuck the rear wheels, jack up the front of the car and secure it on jack stands. I recommend lifting both front tires. You�ll have to do the other side anyway, and this way you can turn the wheels in either direction to make it easier to get to different parts. Remove the wheels.
Disconnect the brake line bracket. It is a 12mm bolt.
Remove the brake caliper. There are 2 bolts that hold it on from the back. They are both 17mm. Note: NOT the bolts at the top and bottom visible in the 1st pic. These are used to change the brake pads. Instead, the 2 bolts just behind them, shown in the other pictures.
Here is a pic of the breaker bar on the top bolt.
Off
Instead of hanging the brake caliper I like to just set it on part of the suspension. Do not put pressure, kinks, or twists into the brake line.
Use an impact screw driver to remove the 2 screws holding on the brake disk. You MUST use an impact screw driver. If you try to use a regular Phillips head you WILL strip the screw. If you don�t have one they are only $15-$20 and very useful. I think I picked mine up from Advance Auto. After loosening the screws, then use a regular screw driver to remove them.
With the 2 screws removed the disk should slide right off. If it is stuck on there are 2 solutions. Either use 2 bolts (8 x 1.25 mm / there are threaded holes on the rotor for this) and push the rotor off. Or, you can take a ballpeen hammer, set it on the inner section of the disk, and hit the 1st hammer from the back with another hammer. Rotate your strikes around and the stuck disk will slide right off after 3 or 4 taps. This is safe. It spreads the force out by using 2 hammers, and not actually striking the rotor. Just don�t swing like your trying to knock it out of the park.
So now you get a good look at the dust shield for the 1st time. Unfortunately Honda decided to design it so that you have to remove the hub to take it off, including replacing the 1-time-use spindle nuts. This was unacceptable, I was looking for a free brake upgrade, and I�m sure those spindle nuts aren�t cheap. So here is where I veered from the beaten path.
There are 3 screws that hold on the dust shield, but it wraps all the way around the axle, and its hole is smaller then the hub. Also, the three screws are behind the hub, so you can�t get to them with a screwdriver.
So break out your Dremmel and some cutting disks. I made 2 cuts where the disk is very narrow at the rear of the car. Be careful you don�t cut anything *extra*
Now use a set of vice-grips and unscrew the 3 screws holding the dust shield on. The shield is still sturdy enough that you can�t quite remove it. So spin it around 180 deg. (the wheel sensor is behind the front, and you don�t want to accidentally cut that). And make a slice down the thick side (you don�t need to cut all the way, just most of it).
Now you can bend the metal and pull it right off. Note: I recommend wearing gloves when dealing with pieces of cut metal. It�s easy to slice your hand opened.
I threw the screws that held on the dust shield into the tool box. They didn�t have any other purpose, and not reinstalling them will save you some weight, haha.
Put the rotor back on and install the 2 screws that hold it in place.
Put the caliper back on and reinstall the 2 bolts.
Reconnect the brake line bracket.
Put the tire back on and go do the other side!!
Tools used:
�� breaker bar
�� ratchet
17mm socket
12mm socket
Jack
2 jack stands
Lug wrench
Impact screwdriver
Phillips head
Vice grips
2 hammers, 1 of them ballpeen (or 1 hammer and two 8 x 1.25 mm bolts and the appropriate socket)
Dremmel with a few cut off disks . . . AND SAFETY GLASSES, DON�T **** YOUR EYES UP!!!
It wasn�t hard at all. Took less then 1.5 hrs at a slow pace, beer in hand.
BTW, this was done on my 02 EX Coupe.


 09-09-2008
#5
Registered!!

Join Date: Sep 2008
Posts: 1
Likes: 0
Received 0 Likes
on
0 Posts
Rep Power: 0 
Re: DIY: Removing Brake Dust Shields
Nice post... I've actually been using safety goggles instead of safety glasses. Way more comfy when you're under the car and they seal against my face way better.
09-12-2008
#6
Registered!!

Join Date: May 2008
Age: 41
Posts: 41
Likes: 0
Received 0 Likes
on
0 Posts
Rep Power: 0 Re: DIY: Removing Brake Dust Shields
dust shields prevent a majority of keeping rocks and debri from getting stuck in the back of caliper, i wouldn't suggest removing them as they don't do anything to rob you of performance. If they have a problem with rubbing just bend them back out.

Thread
Thread Starter
Honda Civic Forum
Replies
Last Post
DAC
Wheels, Tires & Brakes Modifications
1
06-18-2015 10:00 PM
BootyDo
Fuel, Oil, Cleaners & Other Maintenance
1
05-08-2015 05:36 PM
Civic4ever1996
Mechanical Problems/Vehicle Issues and Fix-it Forum
1
04-16-2015 08:30 PM

