Diy: How to mold a screen (or anything for that matter)
 03-20-2009
#1
Banished to the Depths of Rice.
Thread Starter
iTrader: (3)
Join Date: Jun 2005
Location: SoCal 714/909/626
Posts: 9,196
Likes: 0
Received 1 Like
on
1 Post
Rep Power: 327 

alright people.... i am at it again.....never happy with what i have and always want more and more....
haha i also enjoy working on my car...
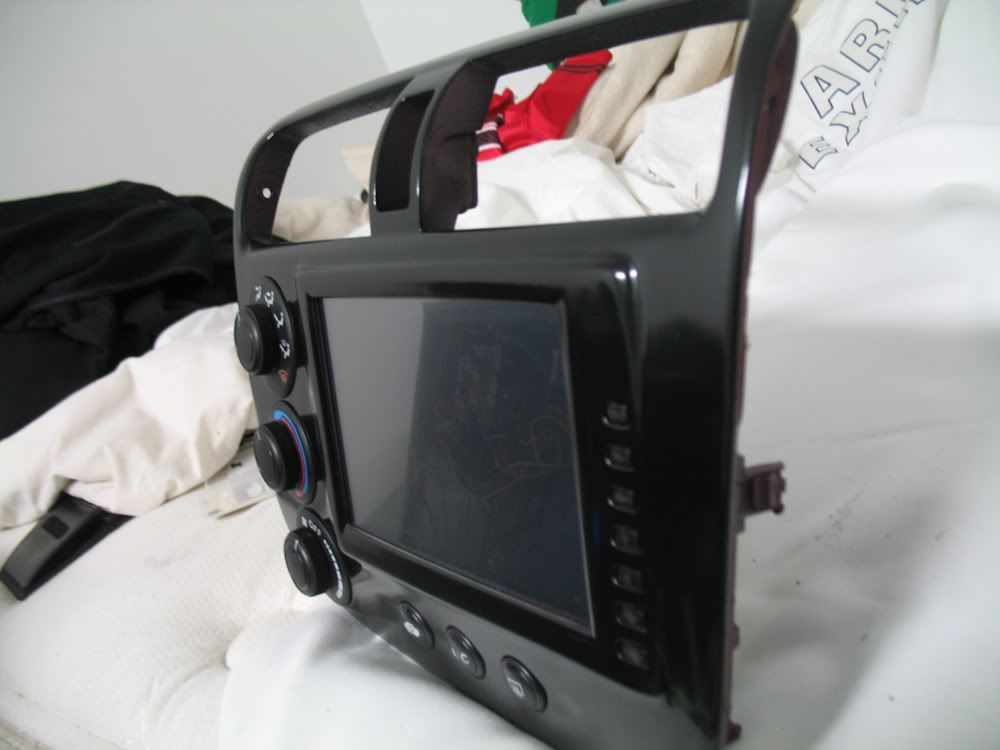
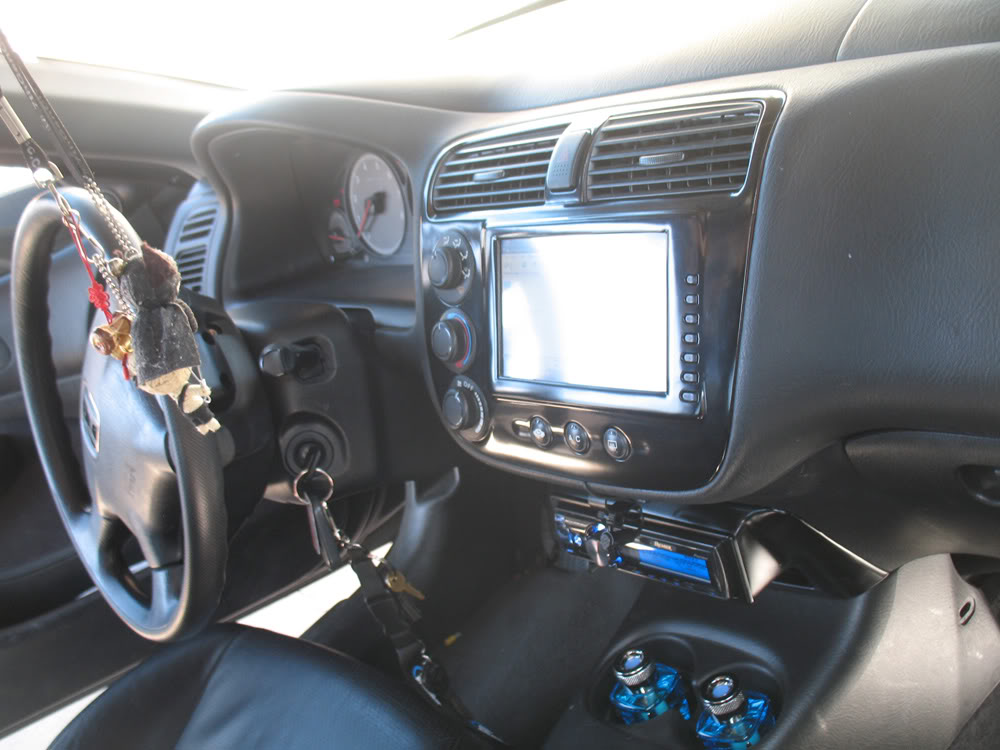
i have molded a few screens to cars but this is one of my recent ones:
to be continue... i have alot of pixs still... ill finish tomorrow.
and here, i will teach you how to mold a screen to u dash....its easy. just takes time, patience.....and a bit of imagination and skill.
THINGS YOU NEED:
120 grit sand paper
400 grit sand paper
1000 grit (only if ur super **** like me)
2000 grit sand paper for final sanding
a can of primer (i suggest u get gray)
a can of paint (what ever color you want, you ricers....)
bondo body filler (easier to sand/work with)
or.....bondo glass w/ fiberglass (a bit stronger since it has Fibglass)
a pack of razors (like 5)
blue painter's tape
DREMEL w/ cutting disc. (YOU NEED THIS OR AN EQUIVALENT)
eproxy (make sure its strong) i highly suggest JB WELD. or JB QWIK
PREPARATION:
take ur screen apart so that you have just the front bezzel/cover of the screen.
CUTTING THE DASH:
this is simple. cut the dash as close to the outside as possible to fit the screen with a DREMEL....
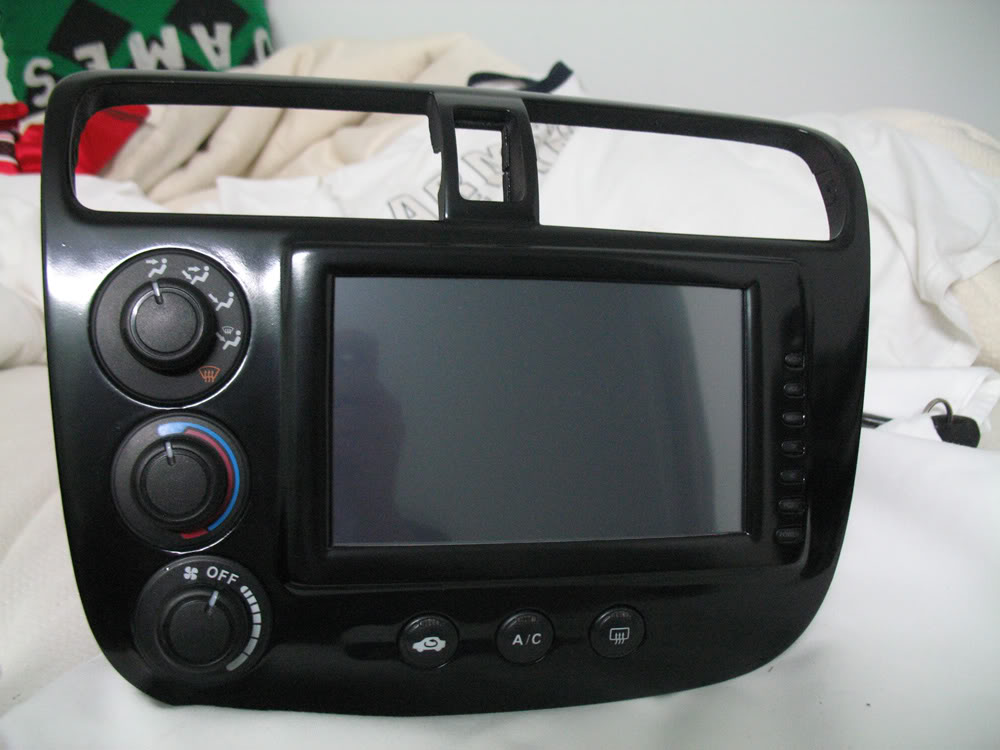
then you will FIT YOUR SCREEN ON THE DASH to see how you want it.
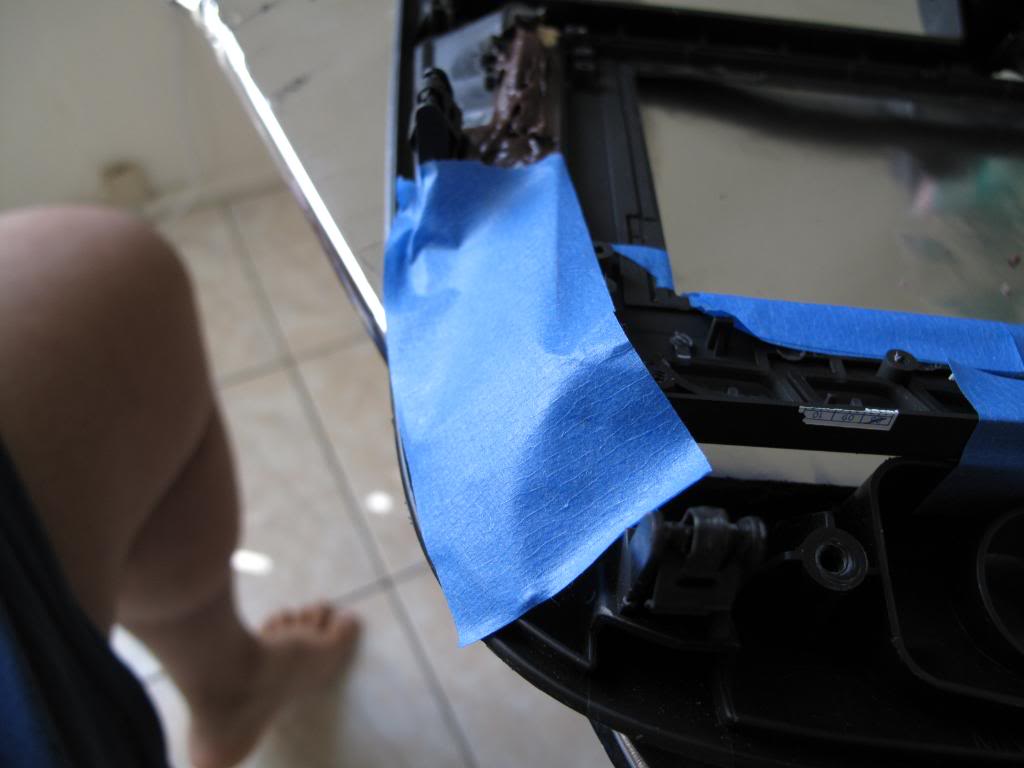
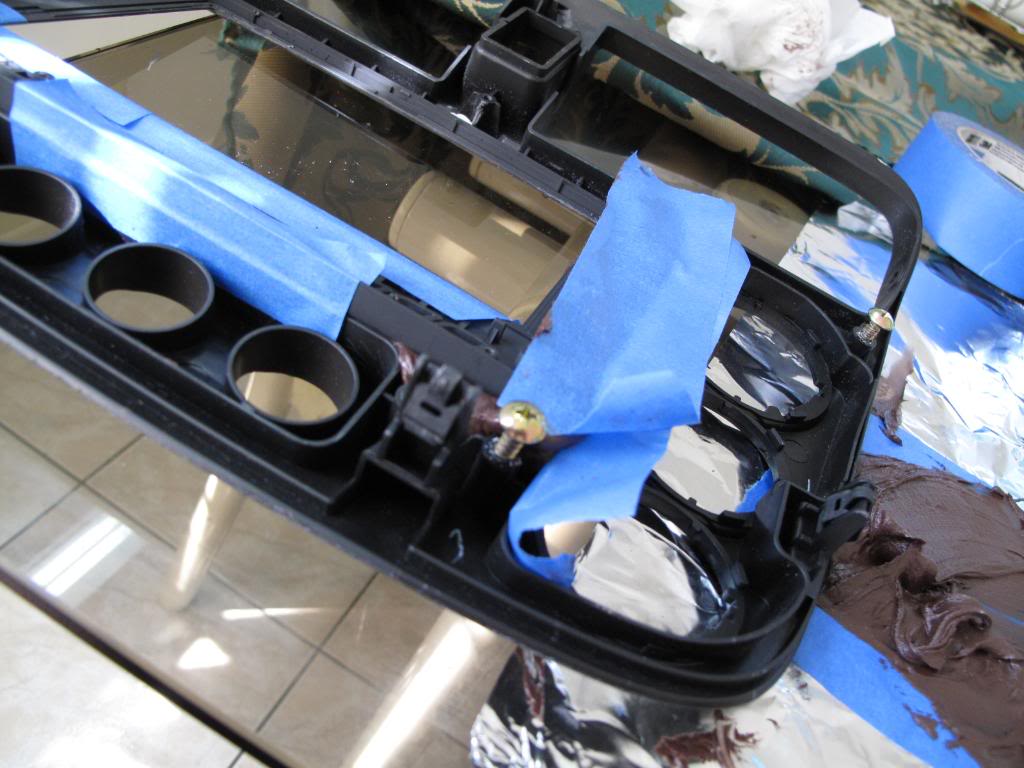
after seeing how you want the screen tape it to the dash.
here, i put tape at the bottom of the screen. and taped the back of the screen to the back of the dash to hold the screen.
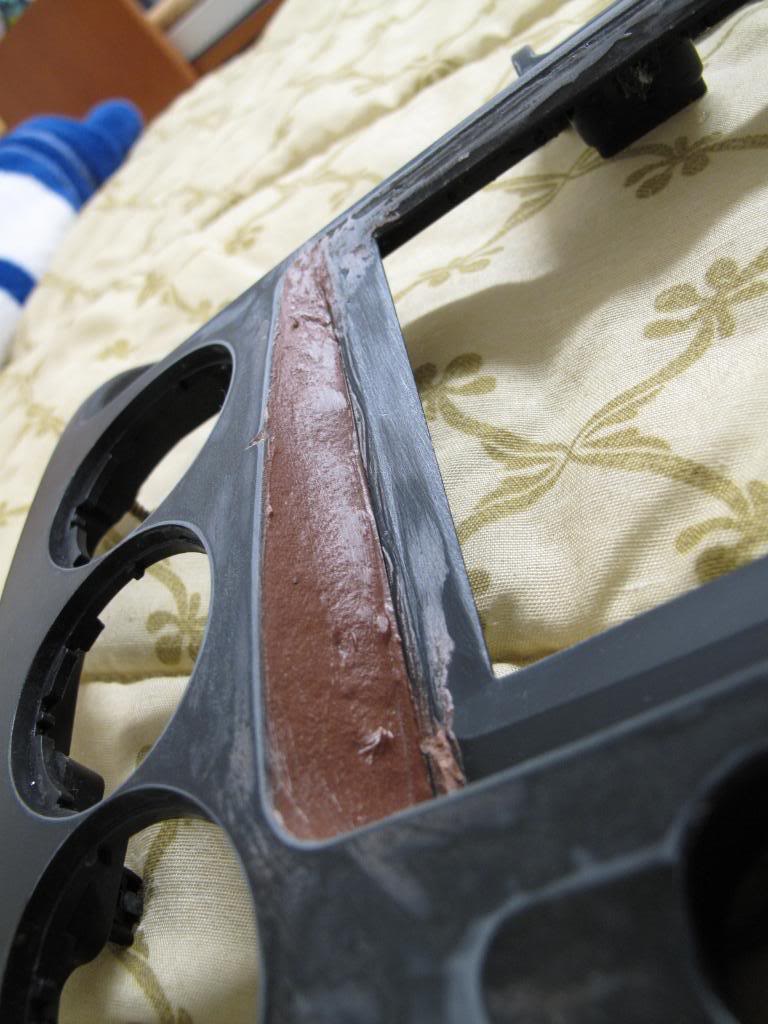
i put glue on the top of the bezzel where it meets the dash. its a dark gray color:
let it dry for 15-24hours (depending on eproxy)
AND DONT TOUCH IT OR ELSE YOU WILL F**K UP THE POSITION.
MOLDING:
after the glue is dry, its time for the fun part. MOLDING!
MAKE SURE YOU ARE IN A WELL VENTED PLACE... I LOST ALOT OF BRAIN CELLS DOING IT IN MY ROOM....
put some alu foil on a desk, and put tape over it (this will be ur mixing plate)
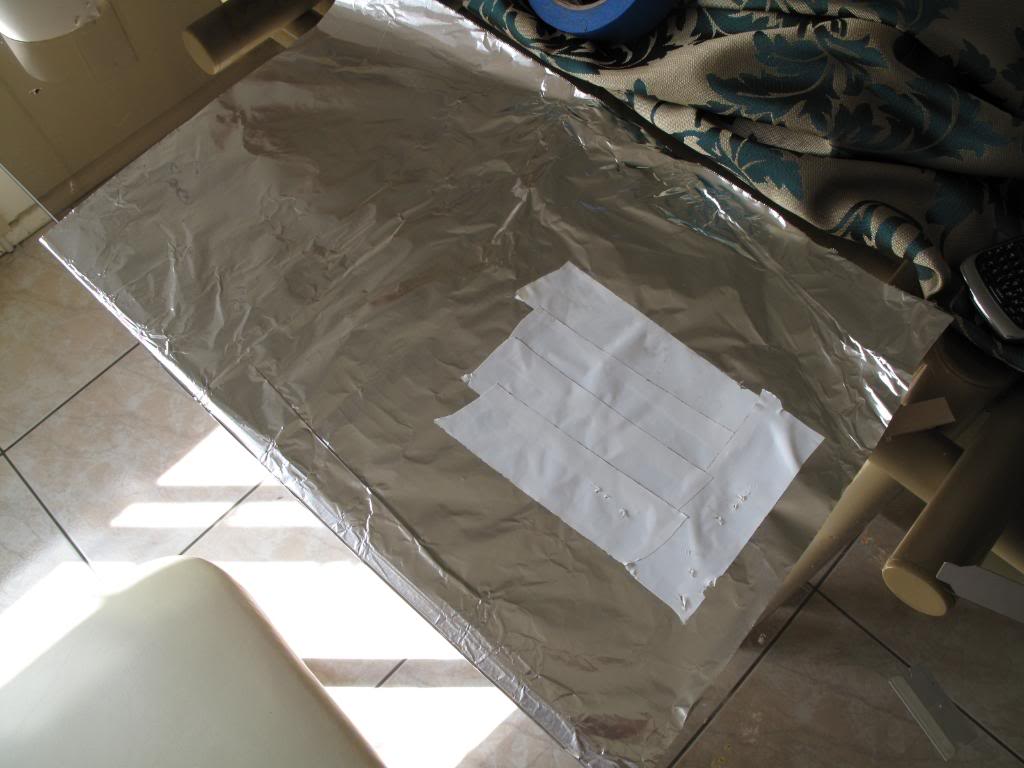
i forgot to put tape and i ripped through the foil...and smeared the glass table... not good.
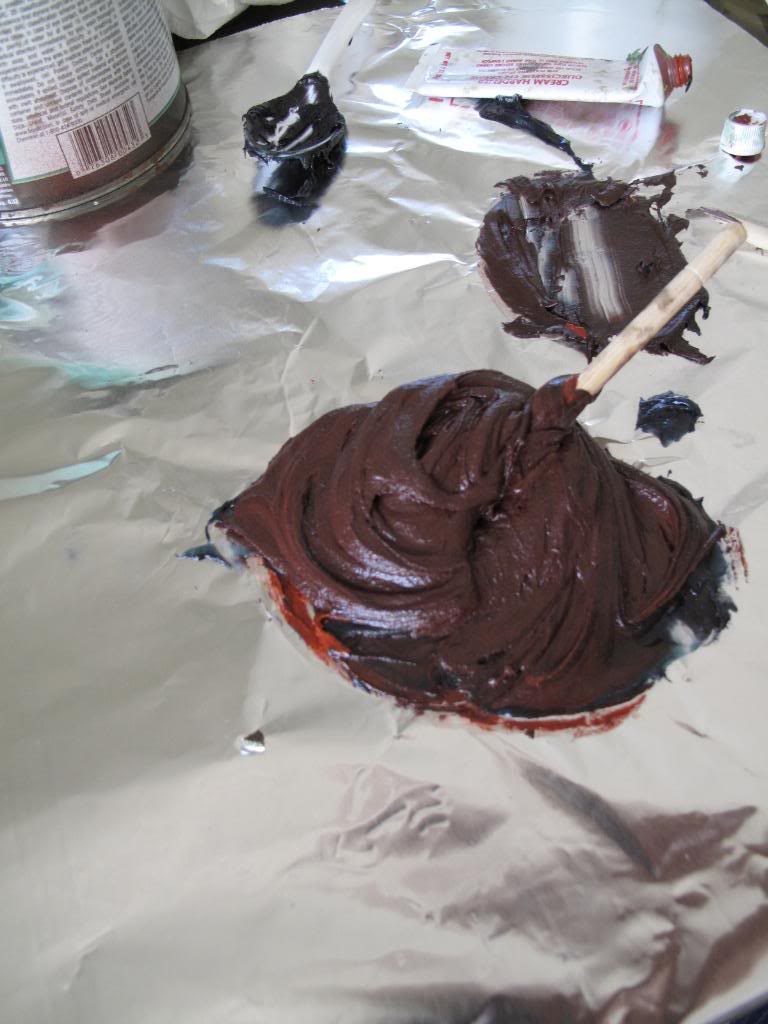
mixing bondo is easy. you put a nice blob on the mixing area, and just add a line of hardener on top, and MIX!!!
(there is a proper way to mix bondo)
how to mix: watch @ 1:40
http://www.youtube.com/watch?v=DU4rL...eature=related
the REAL proper way to mix: this method takes out all air bubles
http://www.youtube.com/watch?v=A8gsOlw_gSI
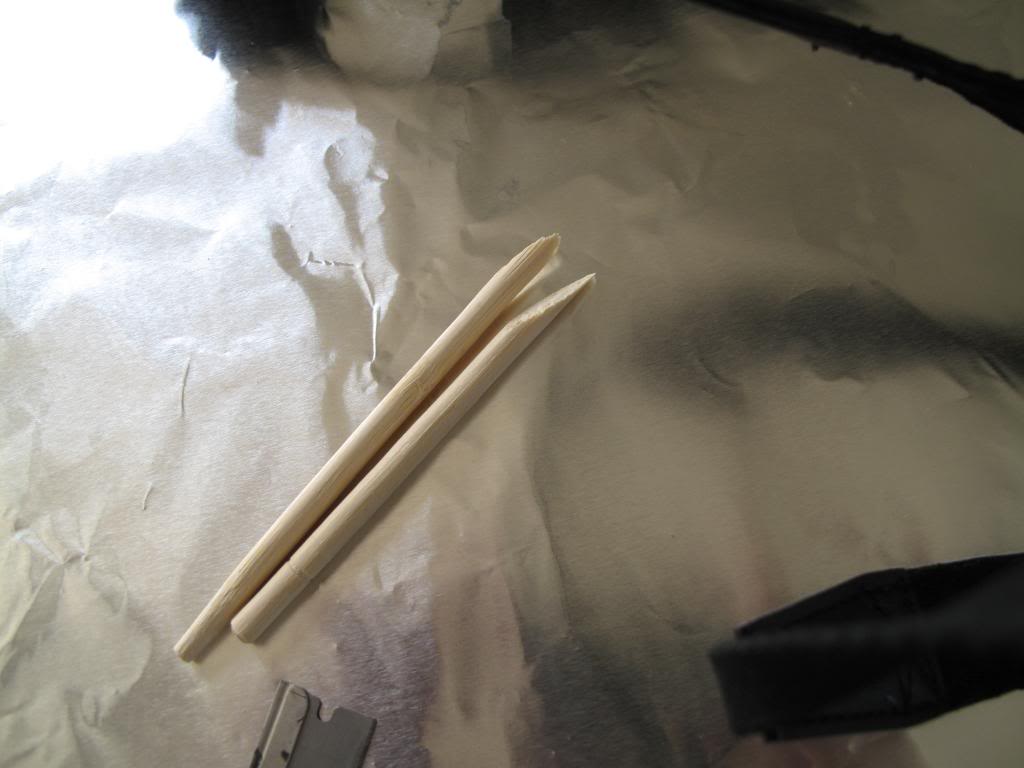
if you are asian like me, you should have more chopsticks in ur house than you have grass outside... so im sure i can spare a few.
here i cut a wooden chopstick at an angle to use it as a mixing stick...but anything else would do... (plastic knives work great) you just want something disposable.
mix it, and mix it well.
you have aprox 2mins before it hardens up (i used a lil bit too much hardener, thats why)
APPLYING BONDO/MOLD:
the first step is just to get a nice base and shape, dont worry about it being 100% smooth...but try to get a decent shape out of it. it will save you time...
ONLY WORK SMALL SECTIONS AT A TIME. DO NOT TRY TO DO THE WHOLE MOLD IN ONE MIX!!!!!!!
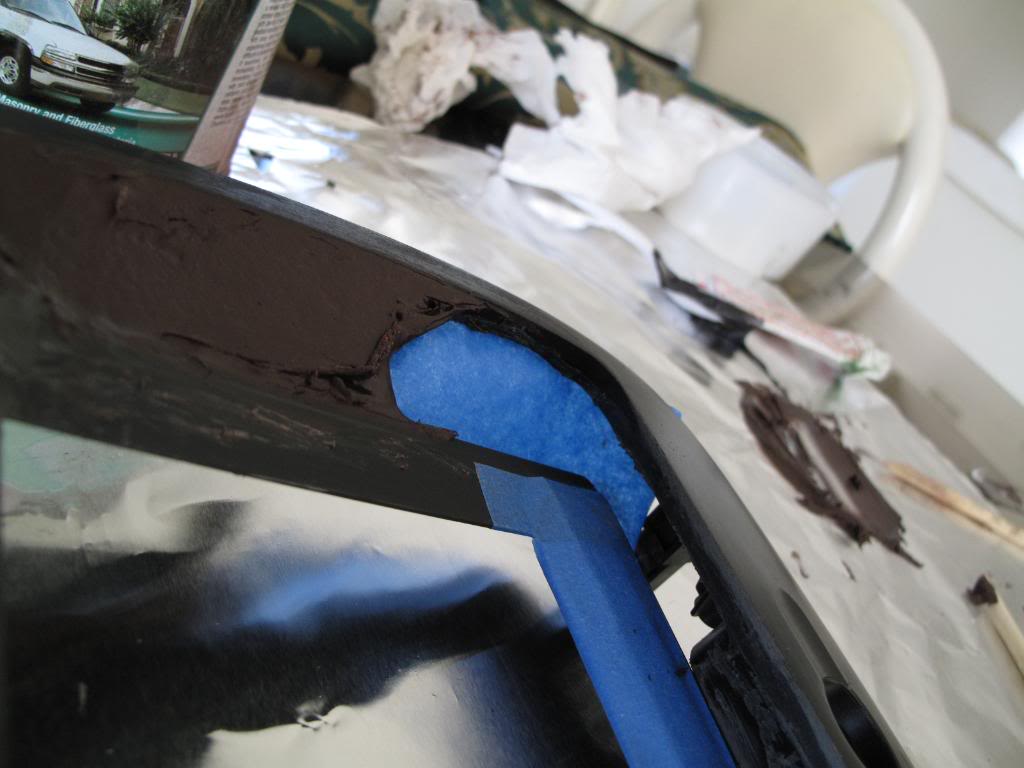
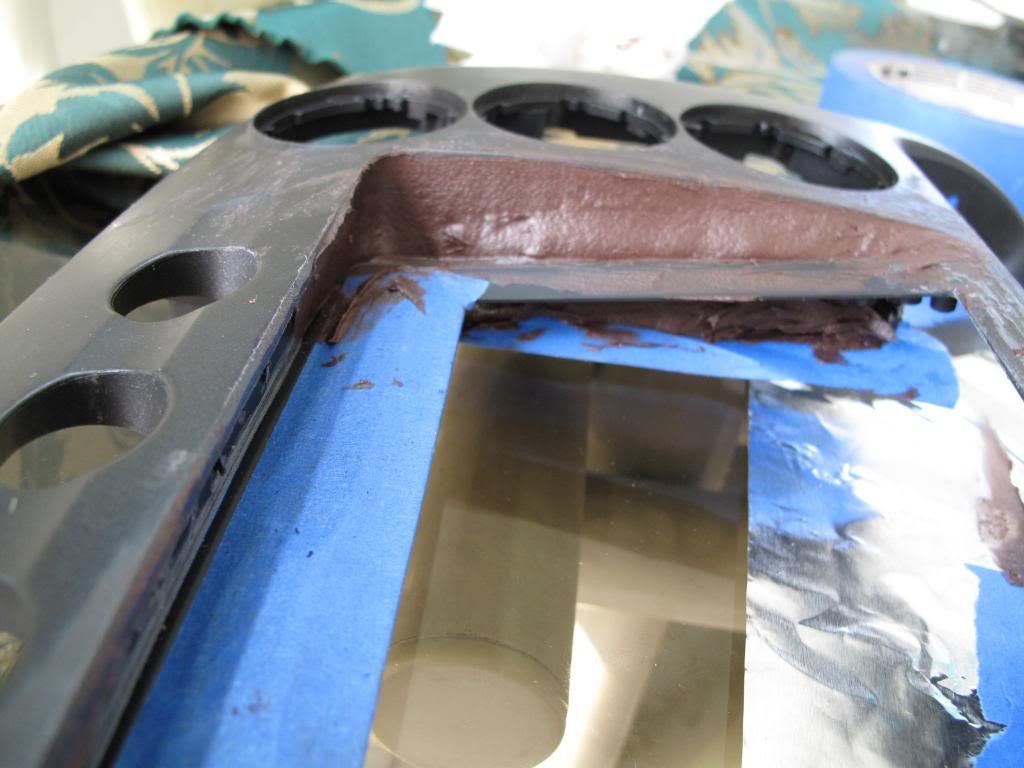
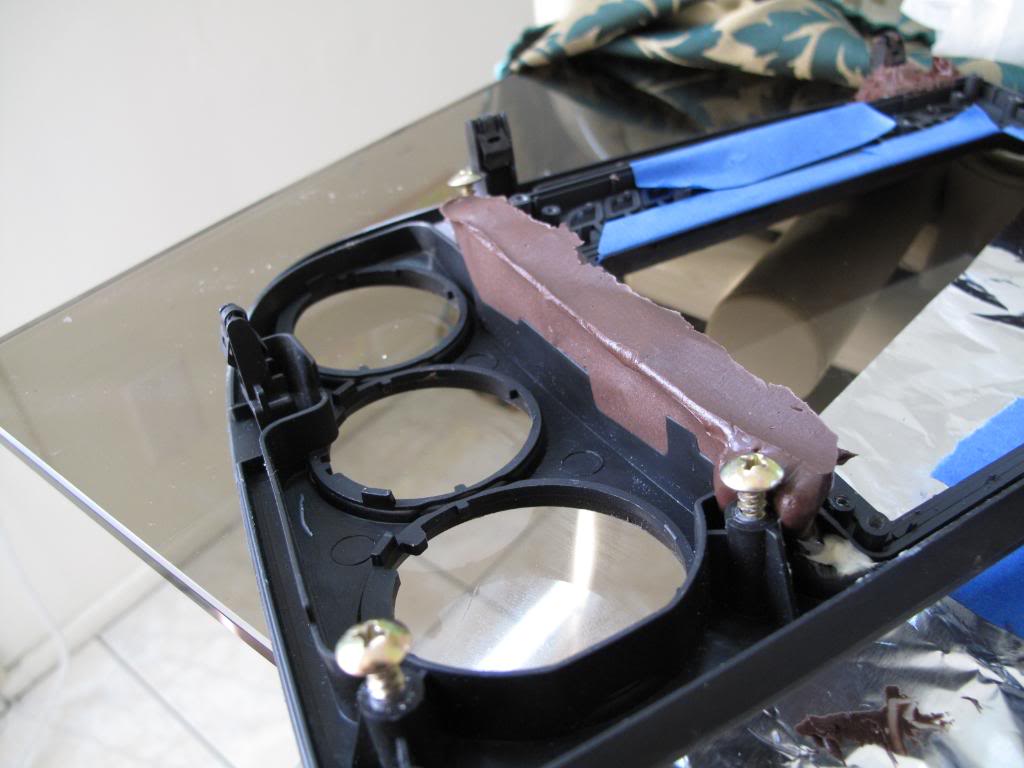
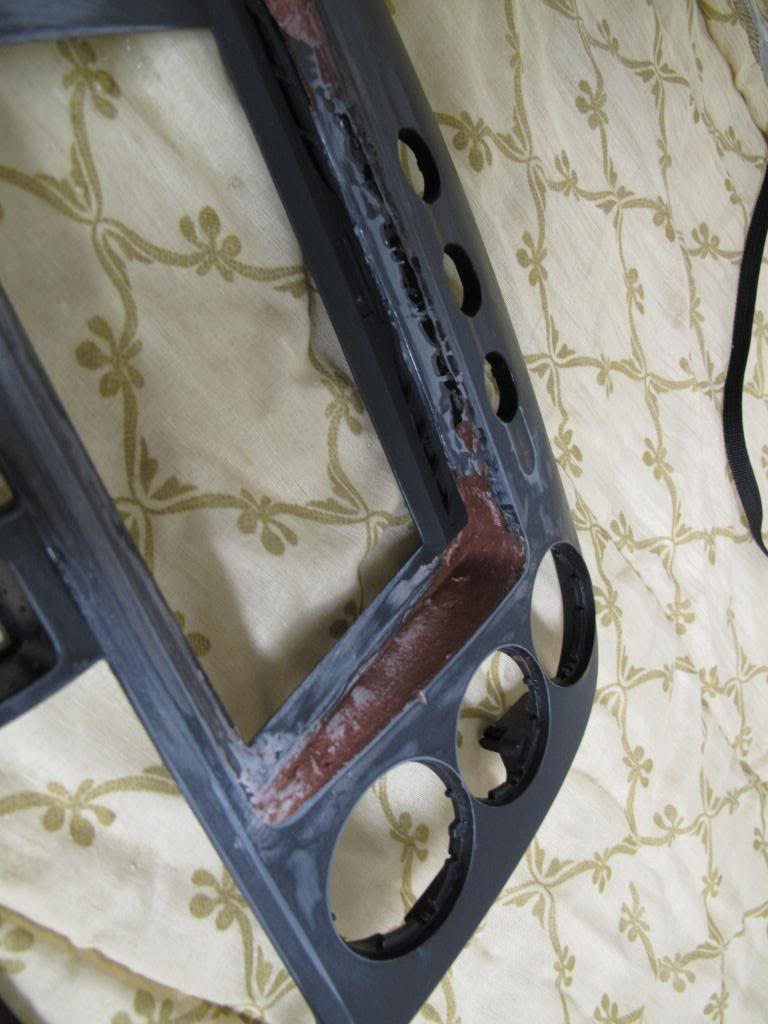
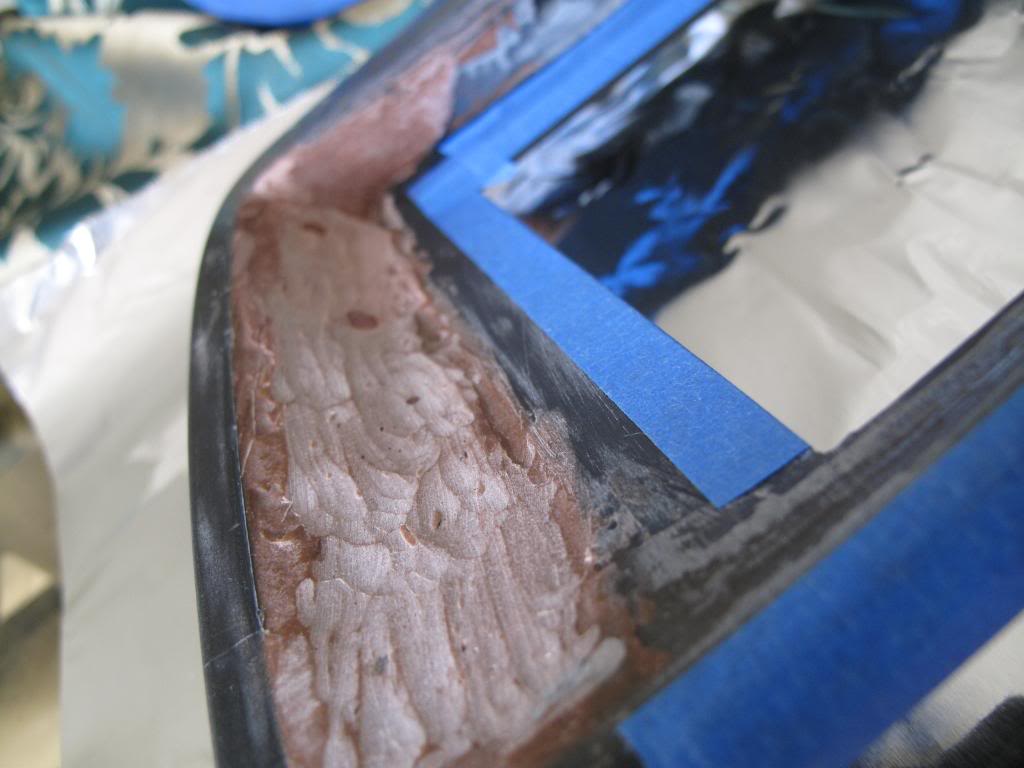
i did the top right corner first.
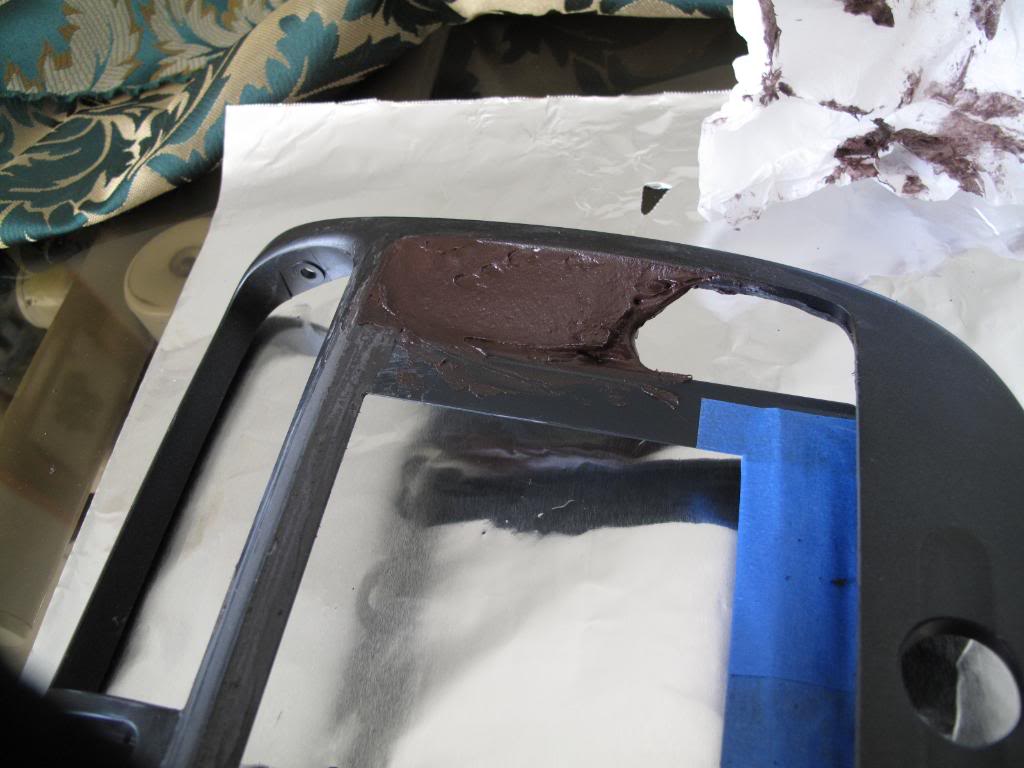
same corner, diff angle
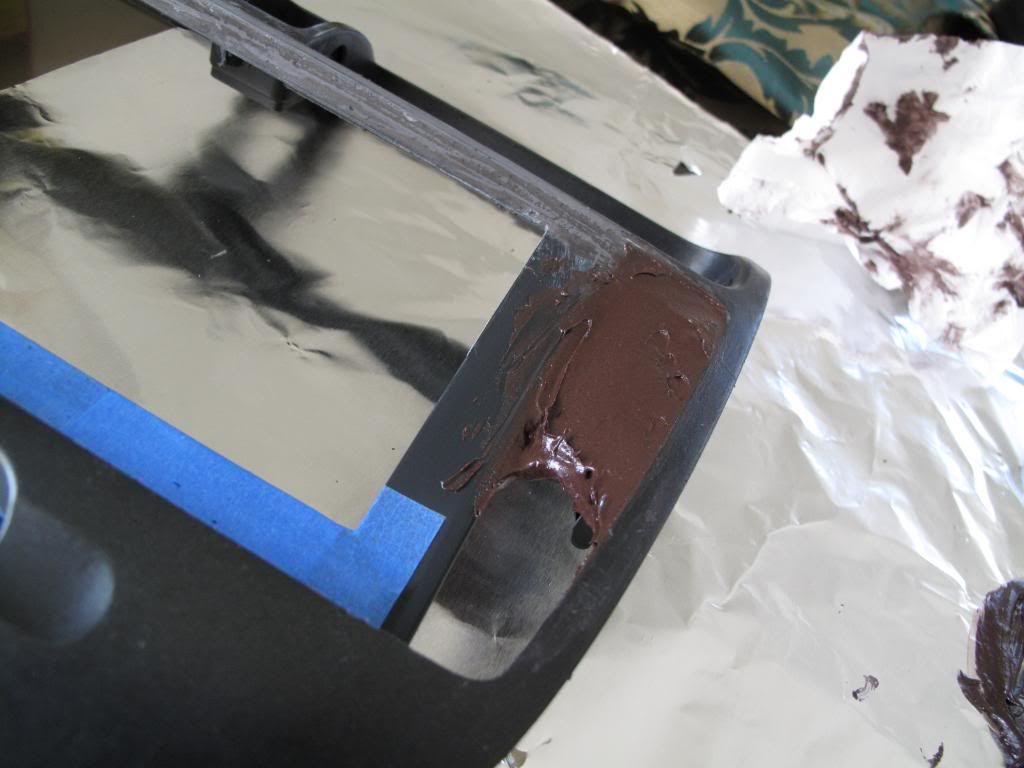
i used a razor blade and scrapped of to make it as "ideal" as possible.
get the idea????
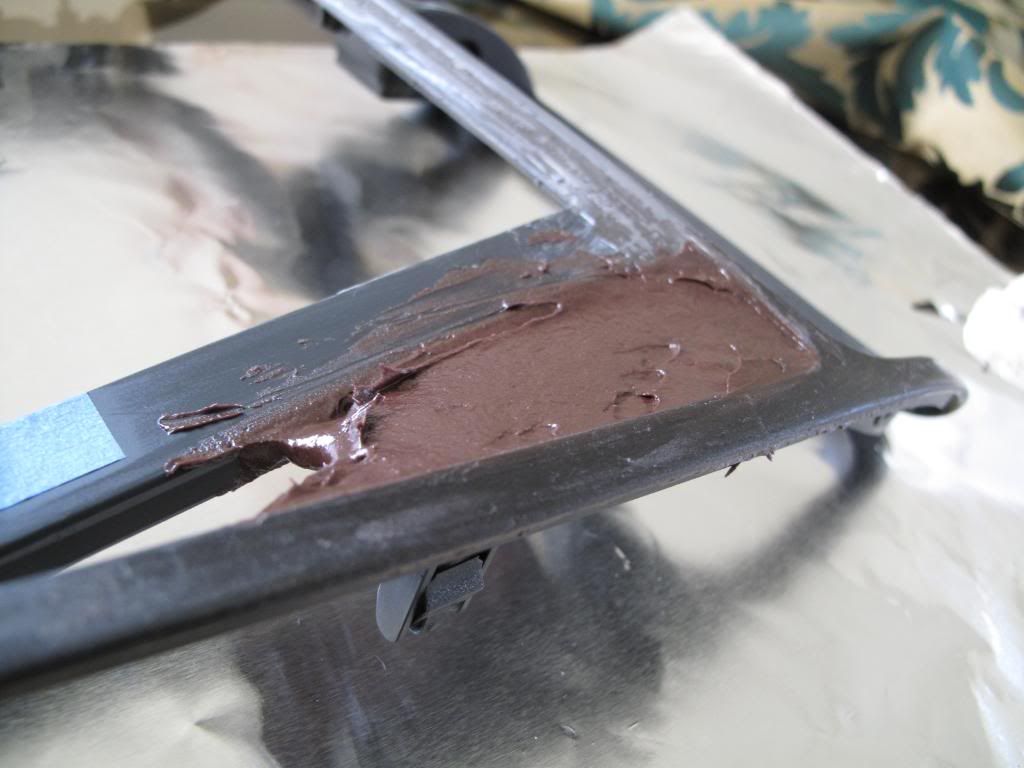
now here is a shot of the back:
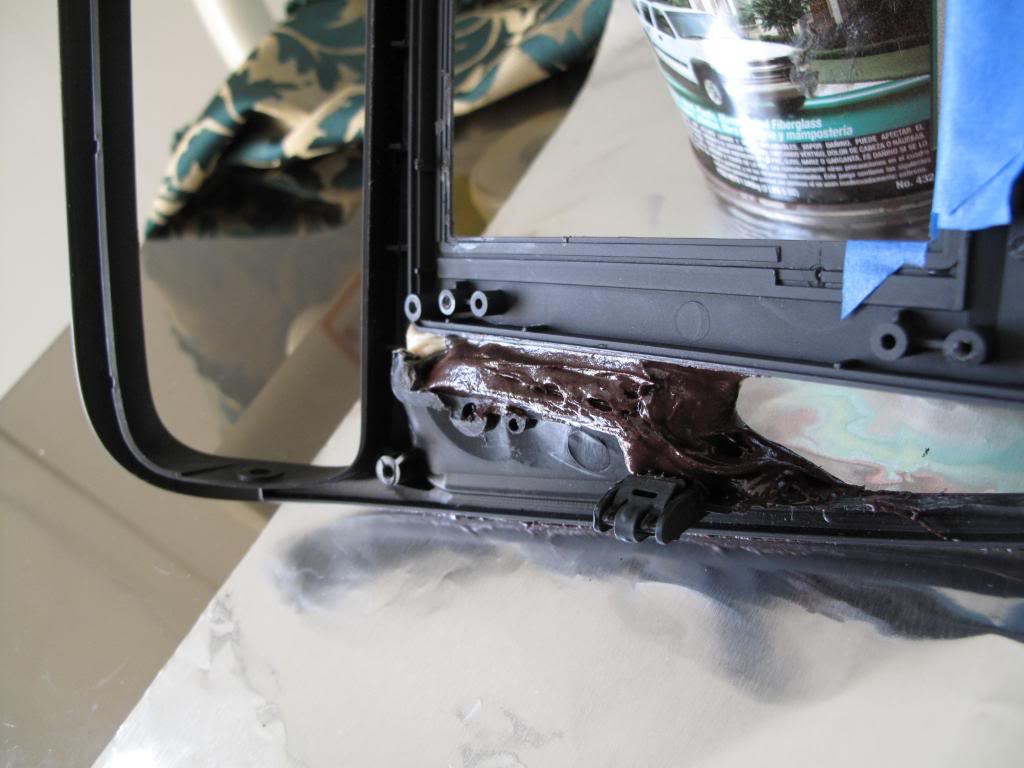
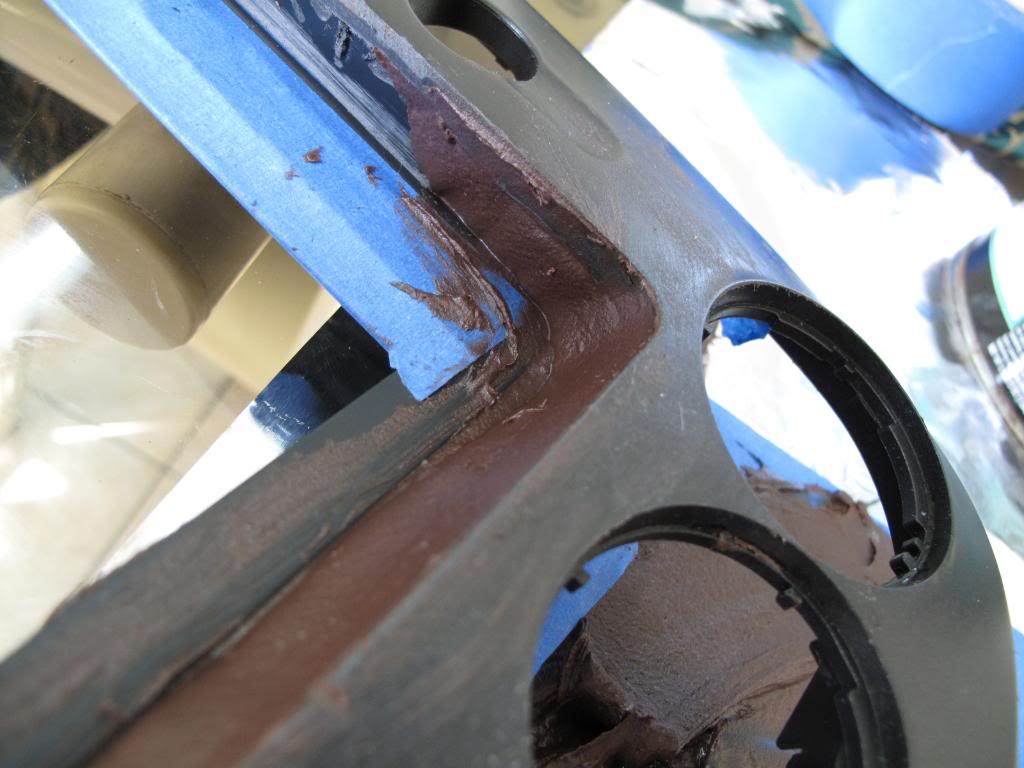
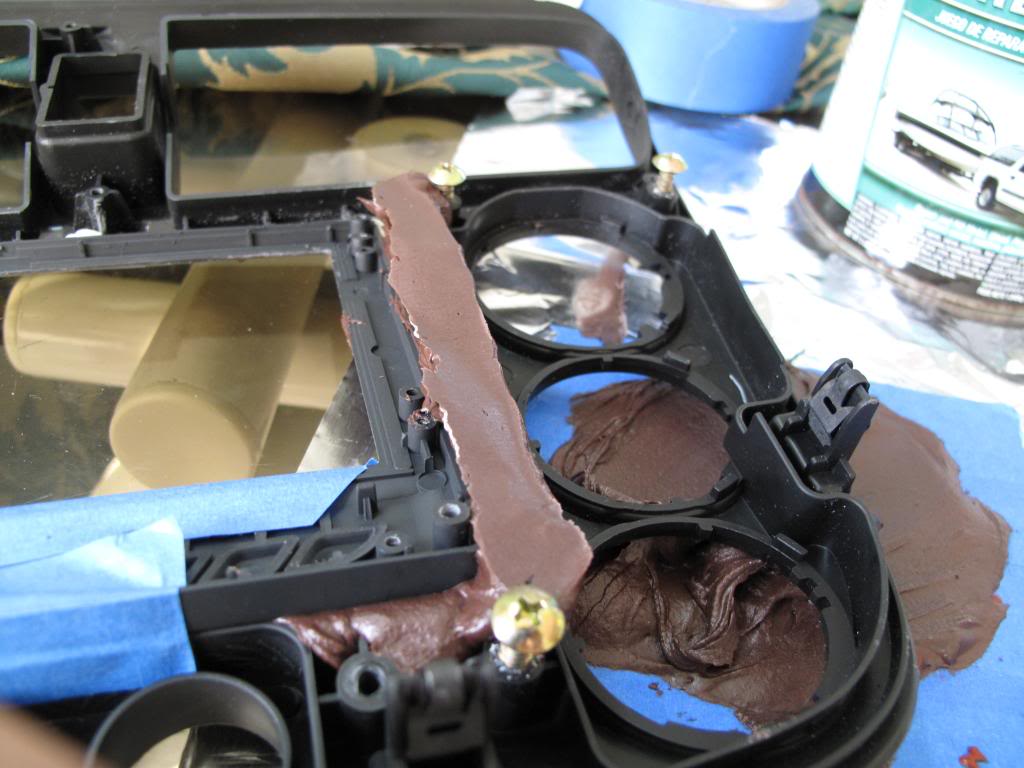
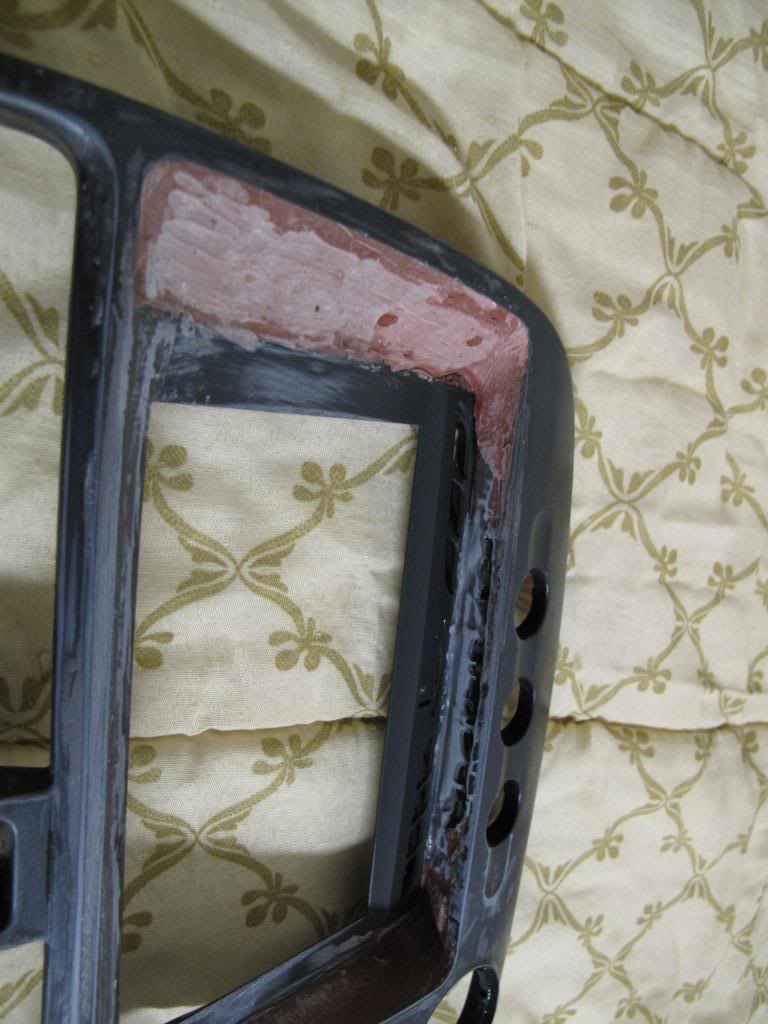
NOW, time to do the lower right portion...
if you are **** like me, you will take the bottom/back to create a bowl...plus you can control how much bondo you put in and it wont drip everywhere or get messy.
front view:
put some bondo down on the lower right.
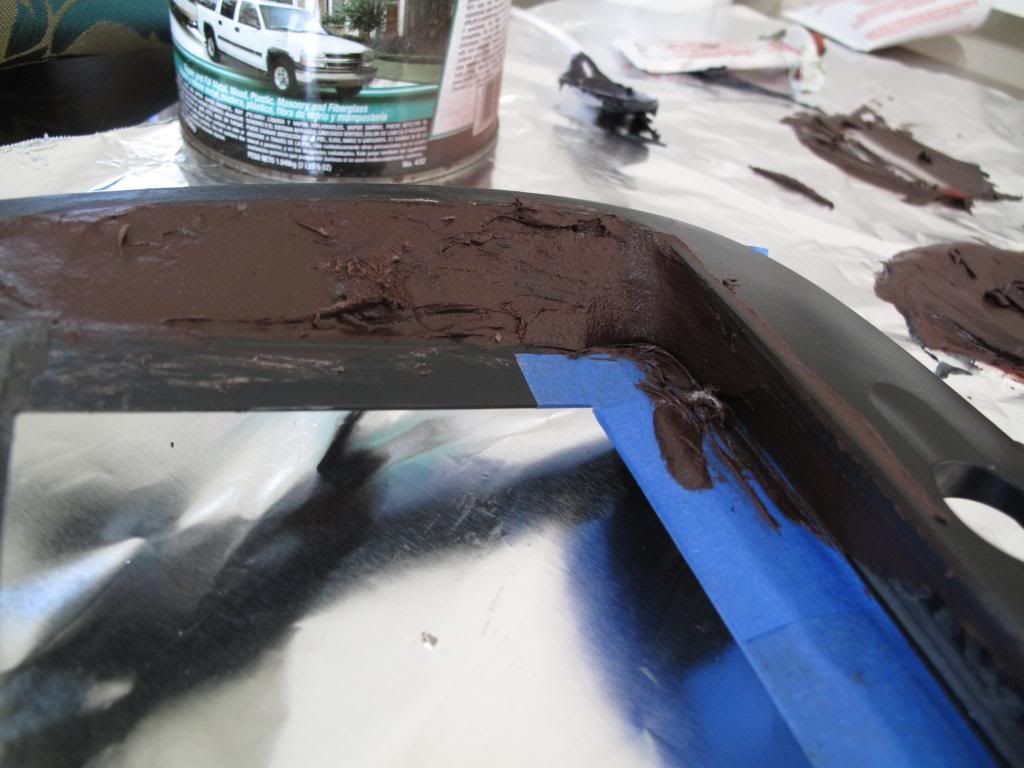
i skipped the bottom area for now, and went ahead and went to the other side:
here i taped the back again, so it doesnt go everywhere.

then i put some bondo on that ISH!
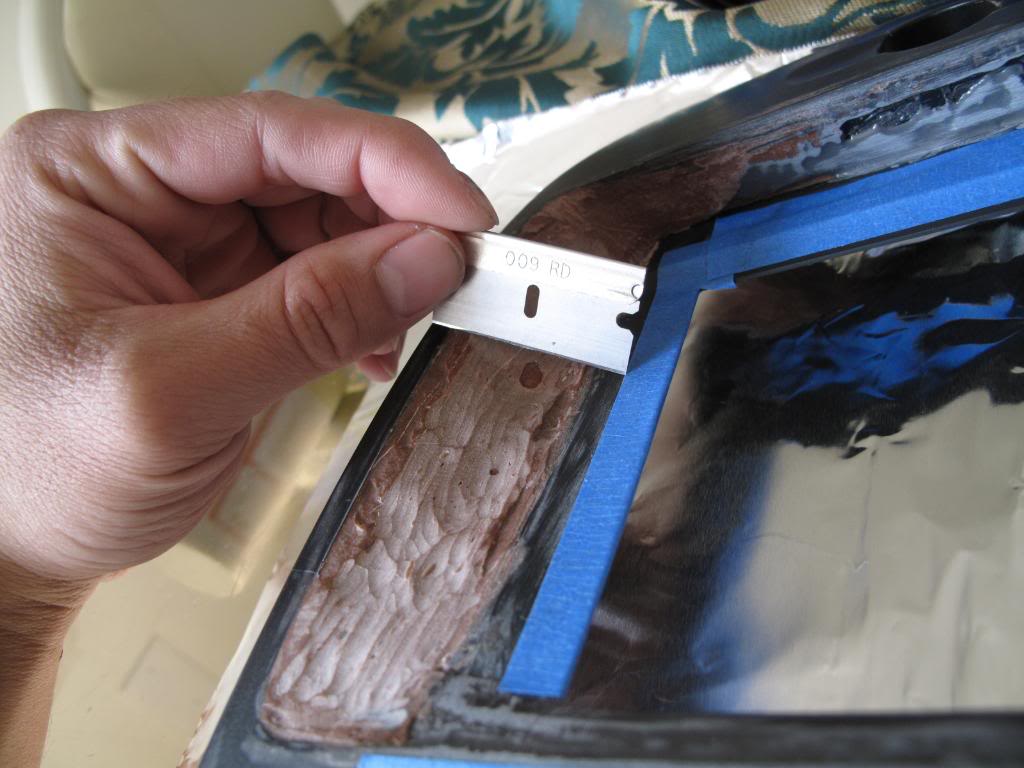
again, i used a razor blade to shapen the mold. and to straighten it.
remember that it doesnt have to be perfect......yet

picture of the back and the tape:
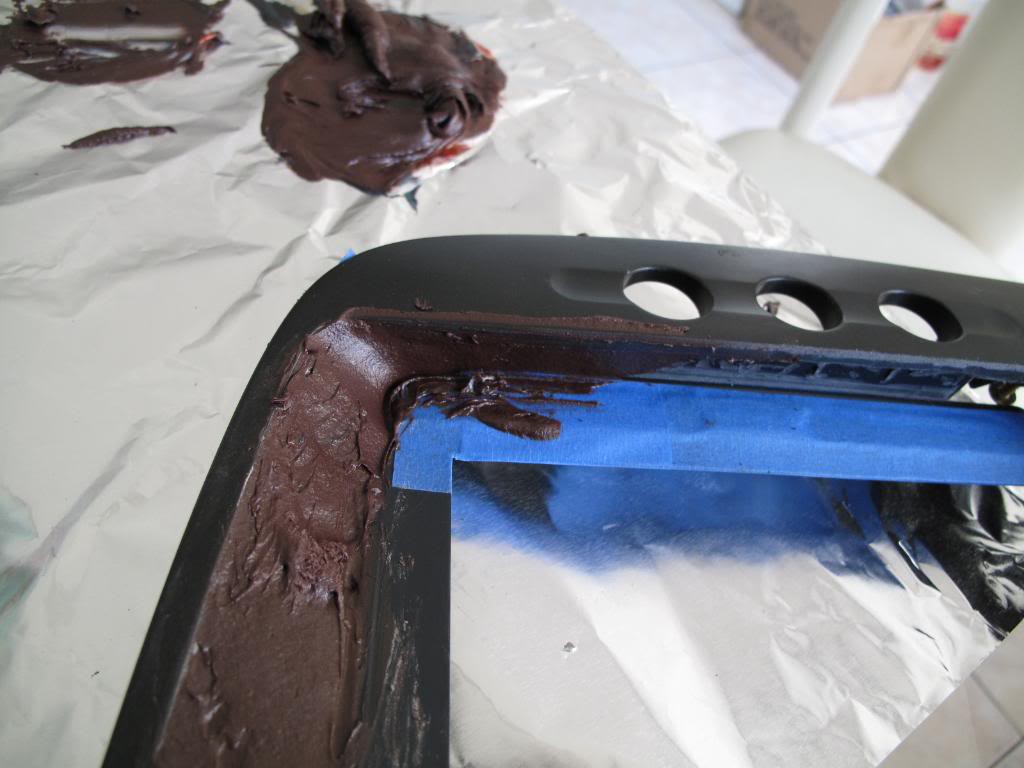
peel the tape off, and you get a nice molding...haha
take a razor and shave some of it off, so it will chear the screen...for now... you will dremel alot of it off later...
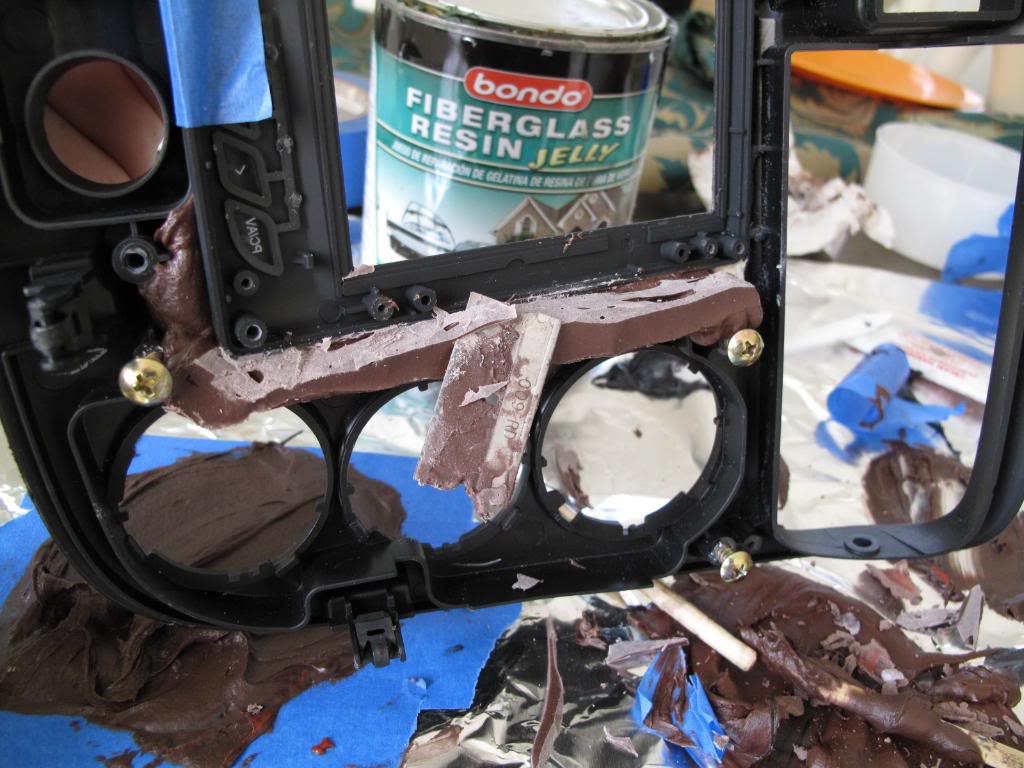
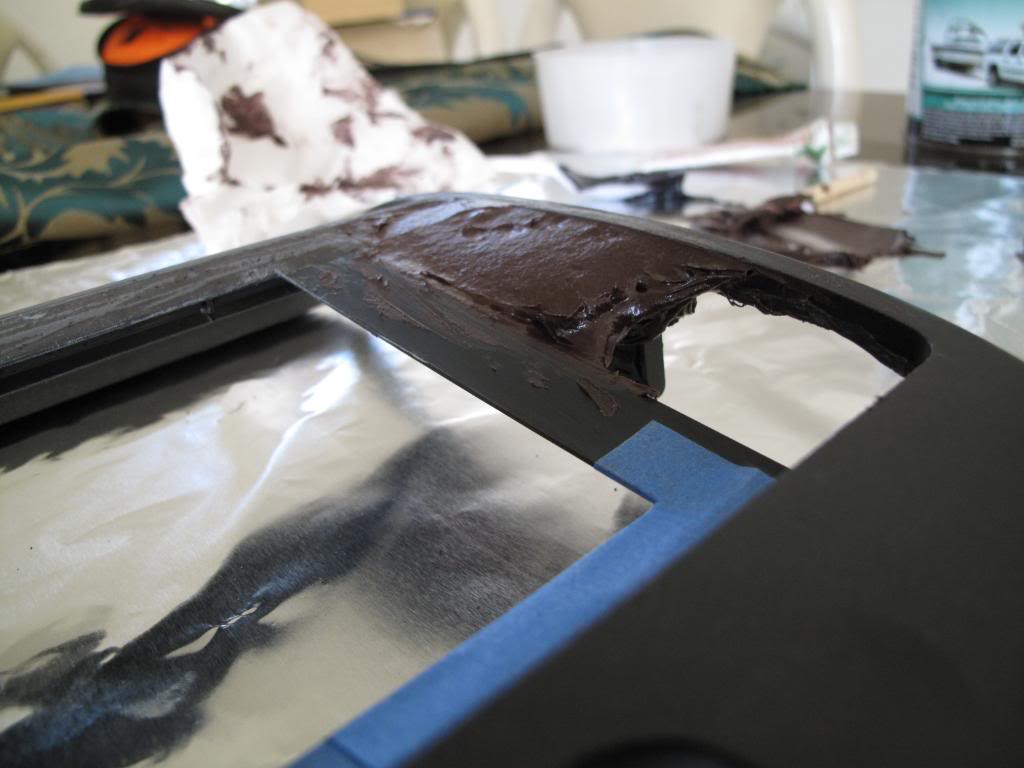
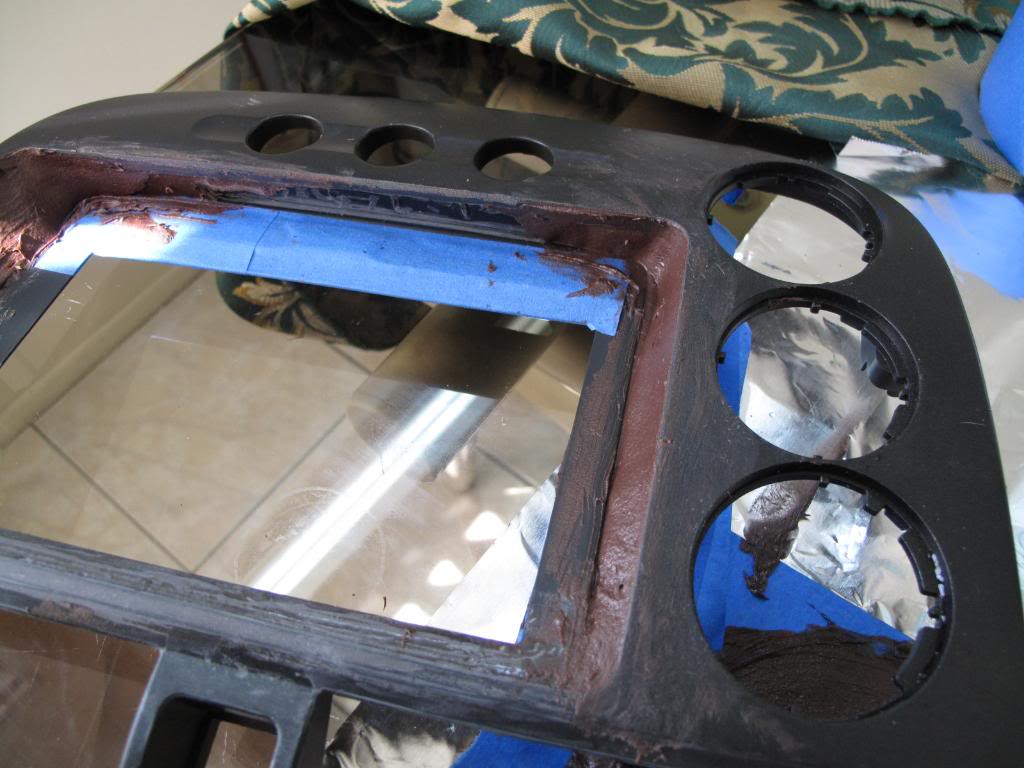
HERE IS WHAT YOU HAVE SO FAR:
i also nicked off some bondo, to create a ruff surface to put the final layer of bondo (not untill way later)
i havnt touched the bottom or top yet.
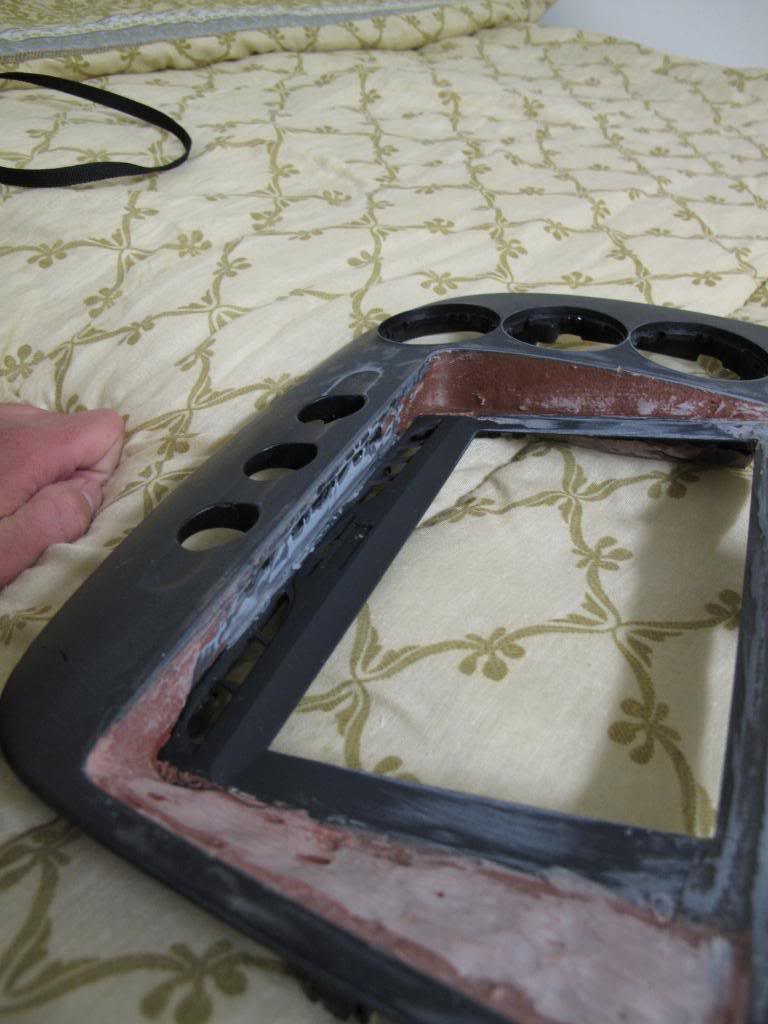
notice that the glue (JB WELD) that i first put to hold the bezzle to the dash.
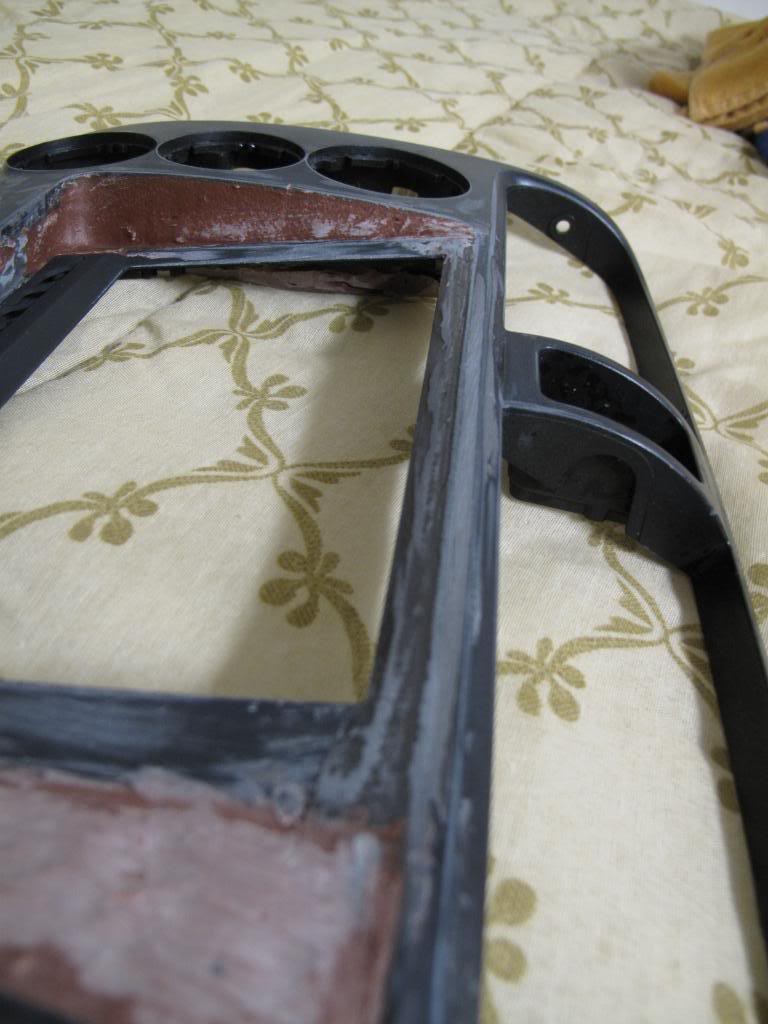
see how its not perfect...? but doesnt look too bad either
NOW ITS TIME TO MOLD THE TOP/BOTTOM:
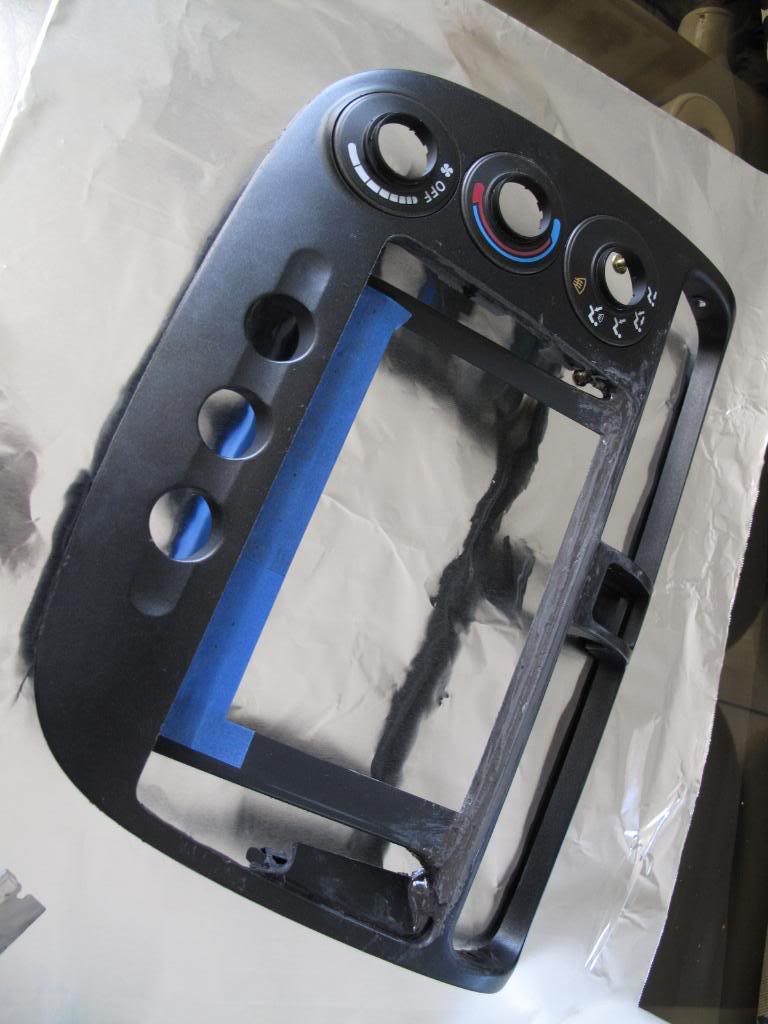
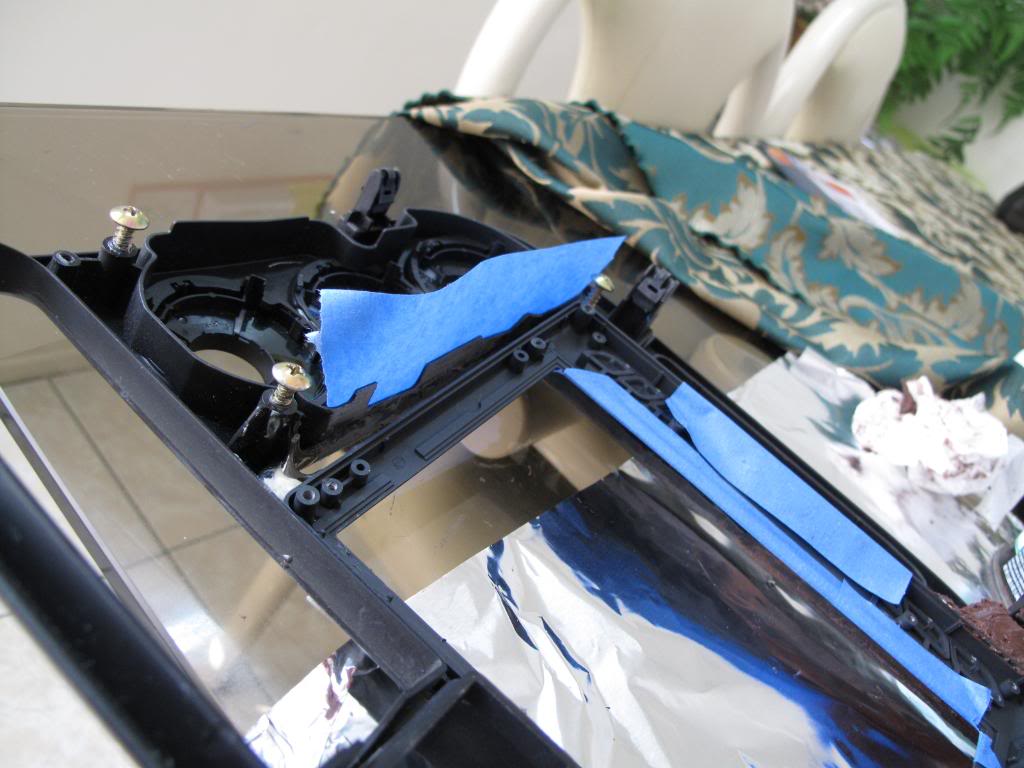
put some tape over the top half of the screen so excess bondo wont go on it...less cleanup later
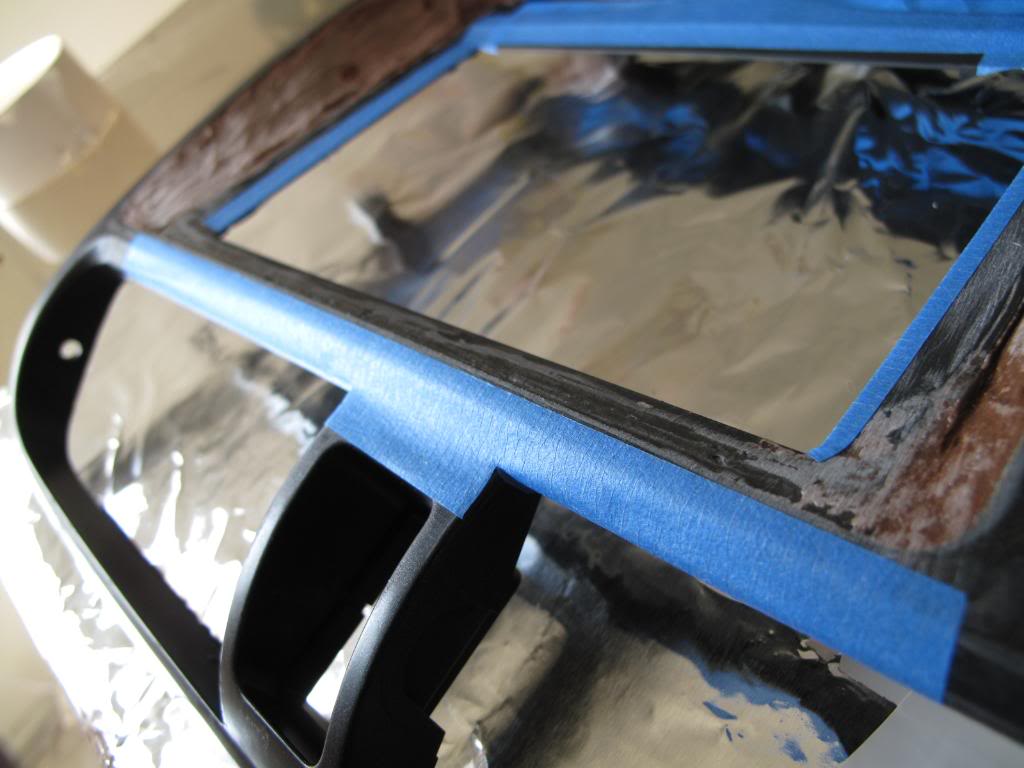
and some tape on the bottom as well:
cover the buttons (that you took out already) less clean up later.
put tape on the inside as frame as well. less clean up later.
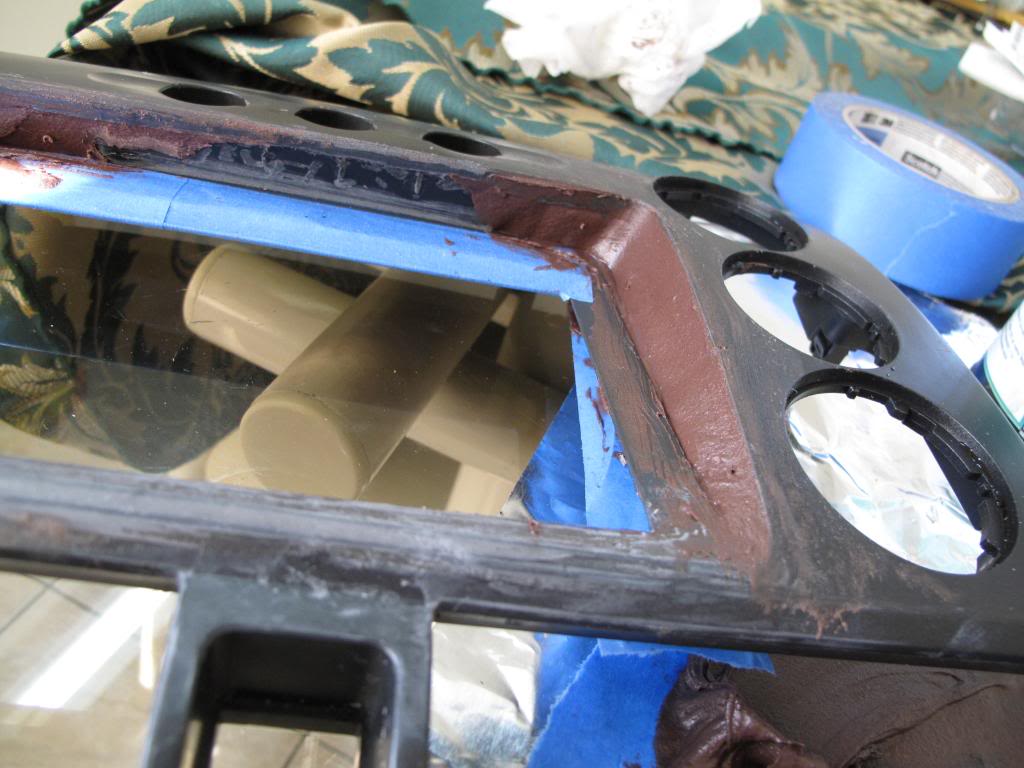
apply some bondo on top
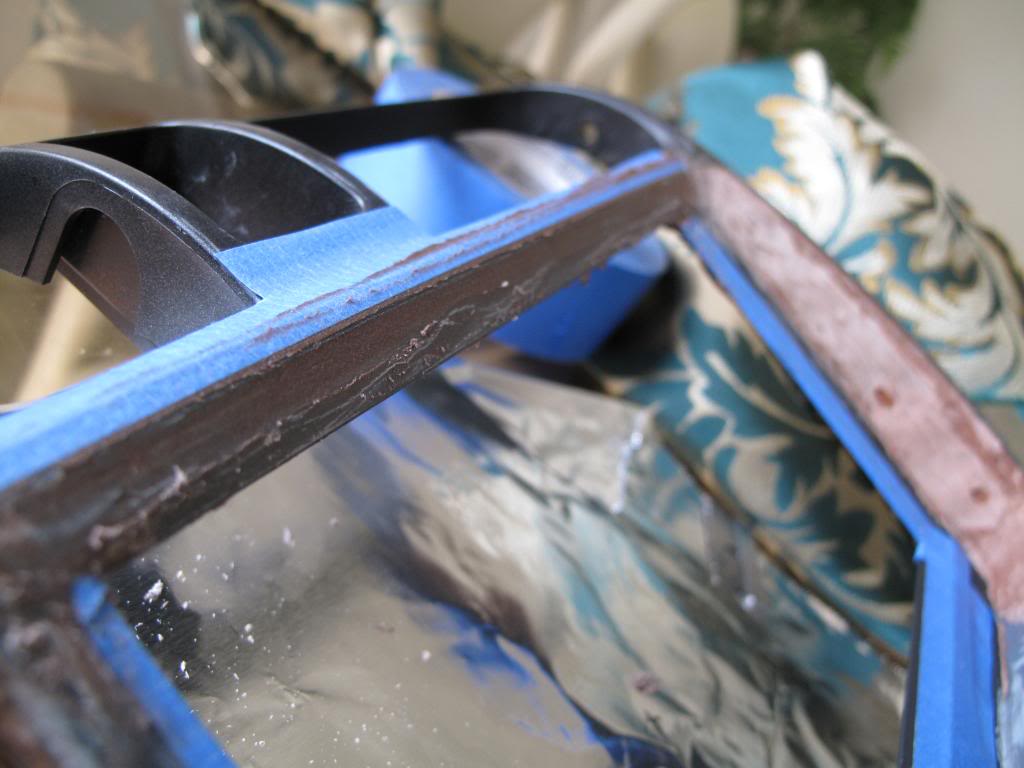
then some on bottom:
haha i also enjoy working on my car...
i have molded a few screens to cars but this is one of my recent ones:
to be continue... i have alot of pixs still... ill finish tomorrow.
and here, i will teach you how to mold a screen to u dash....its easy. just takes time, patience.....and a bit of imagination and skill.
THINGS YOU NEED:
120 grit sand paper
400 grit sand paper
1000 grit (only if ur super **** like me)
2000 grit sand paper for final sanding
a can of primer (i suggest u get gray)
a can of paint (what ever color you want, you ricers....)
bondo body filler (easier to sand/work with)
or.....bondo glass w/ fiberglass (a bit stronger since it has Fibglass)
a pack of razors (like 5)
blue painter's tape
DREMEL w/ cutting disc. (YOU NEED THIS OR AN EQUIVALENT)
eproxy (make sure its strong) i highly suggest JB WELD. or JB QWIK
PREPARATION:
take ur screen apart so that you have just the front bezzel/cover of the screen.
CUTTING THE DASH:
this is simple. cut the dash as close to the outside as possible to fit the screen with a DREMEL....
then you will FIT YOUR SCREEN ON THE DASH to see how you want it.
after seeing how you want the screen tape it to the dash.
here, i put tape at the bottom of the screen. and taped the back of the screen to the back of the dash to hold the screen.
i put glue on the top of the bezzel where it meets the dash. its a dark gray color:
let it dry for 15-24hours (depending on eproxy)
AND DONT TOUCH IT OR ELSE YOU WILL F**K UP THE POSITION.
MOLDING:
after the glue is dry, its time for the fun part. MOLDING!
MAKE SURE YOU ARE IN A WELL VENTED PLACE... I LOST ALOT OF BRAIN CELLS DOING IT IN MY ROOM....
put some alu foil on a desk, and put tape over it (this will be ur mixing plate)
i forgot to put tape and i ripped through the foil...and smeared the glass table... not good.
mixing bondo is easy. you put a nice blob on the mixing area, and just add a line of hardener on top, and MIX!!!
(there is a proper way to mix bondo)
how to mix: watch @ 1:40
http://www.youtube.com/watch?v=DU4rL...eature=related
the REAL proper way to mix: this method takes out all air bubles
http://www.youtube.com/watch?v=A8gsOlw_gSI
if you are asian like me, you should have more chopsticks in ur house than you have grass outside... so im sure i can spare a few.
here i cut a wooden chopstick at an angle to use it as a mixing stick...but anything else would do... (plastic knives work great) you just want something disposable.
mix it, and mix it well.
you have aprox 2mins before it hardens up (i used a lil bit too much hardener, thats why)
APPLYING BONDO/MOLD:
the first step is just to get a nice base and shape, dont worry about it being 100% smooth...but try to get a decent shape out of it. it will save you time...
ONLY WORK SMALL SECTIONS AT A TIME. DO NOT TRY TO DO THE WHOLE MOLD IN ONE MIX!!!!!!!
i did the top right corner first.
same corner, diff angle
i used a razor blade and scrapped of to make it as "ideal" as possible.
get the idea????
now here is a shot of the back:
NOW, time to do the lower right portion...
if you are **** like me, you will take the bottom/back to create a bowl...plus you can control how much bondo you put in and it wont drip everywhere or get messy.
front view:
put some bondo down on the lower right.
i skipped the bottom area for now, and went ahead and went to the other side:
here i taped the back again, so it doesnt go everywhere.
then i put some bondo on that ISH!
again, i used a razor blade to shapen the mold. and to straighten it.
remember that it doesnt have to be perfect......yet
picture of the back and the tape:
peel the tape off, and you get a nice molding...haha
take a razor and shave some of it off, so it will chear the screen...for now... you will dremel alot of it off later...
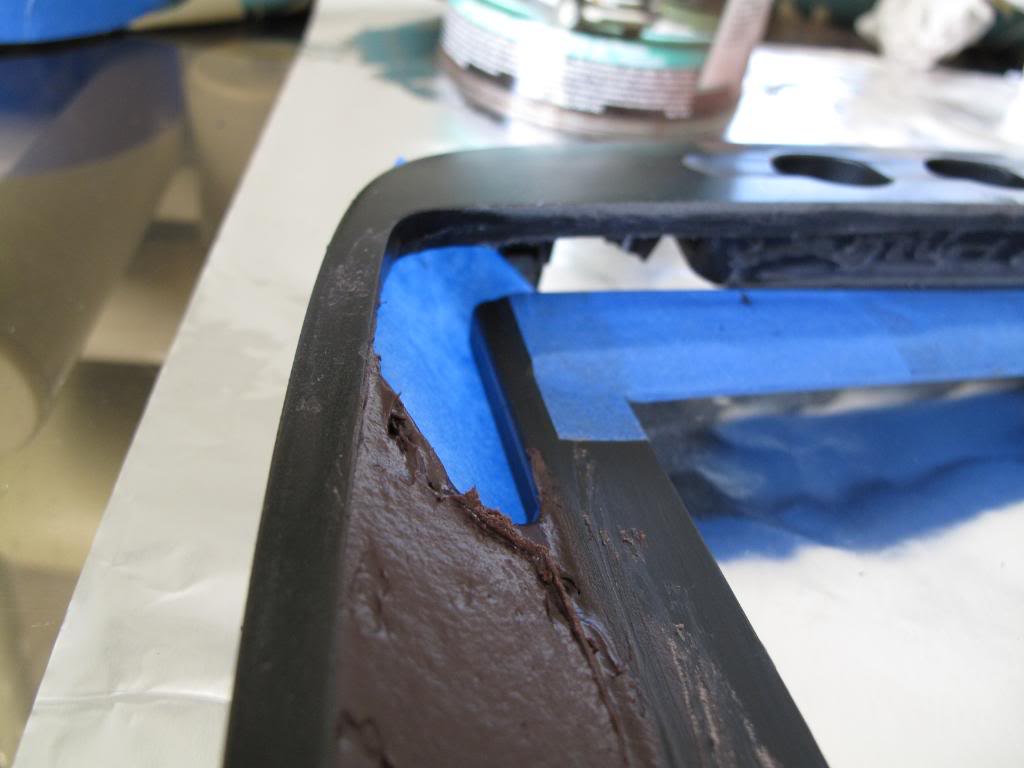
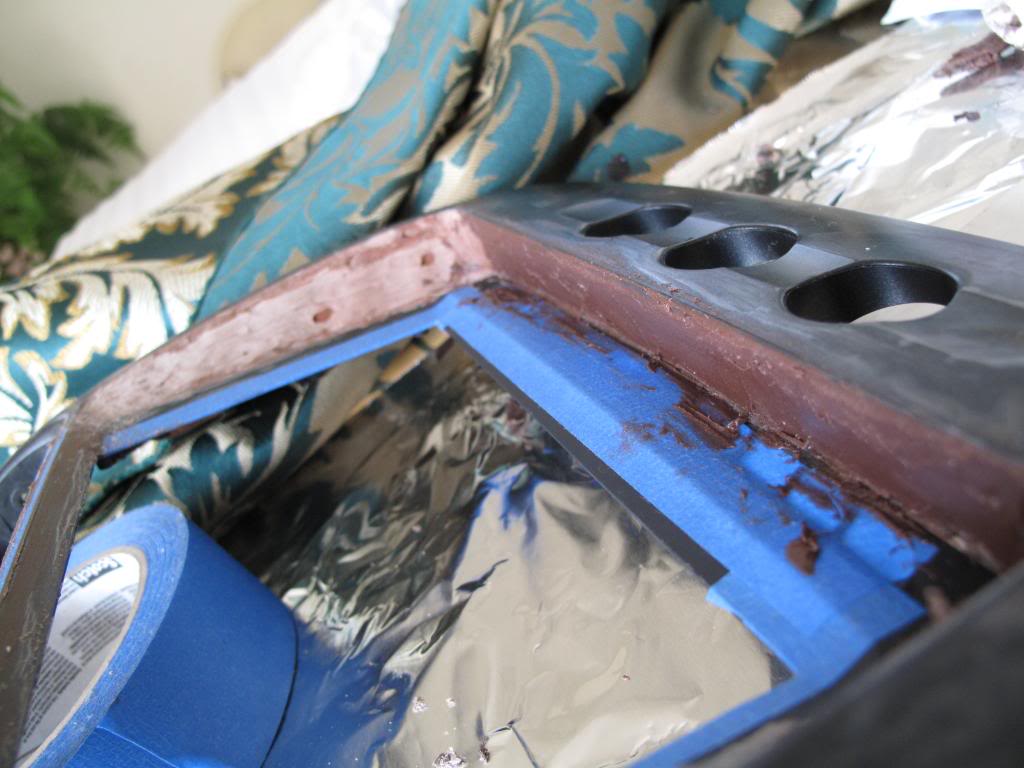
HERE IS WHAT YOU HAVE SO FAR:
i also nicked off some bondo, to create a ruff surface to put the final layer of bondo (not untill way later)
i havnt touched the bottom or top yet.
notice that the glue (JB WELD) that i first put to hold the bezzle to the dash.
see how its not perfect...? but doesnt look too bad either
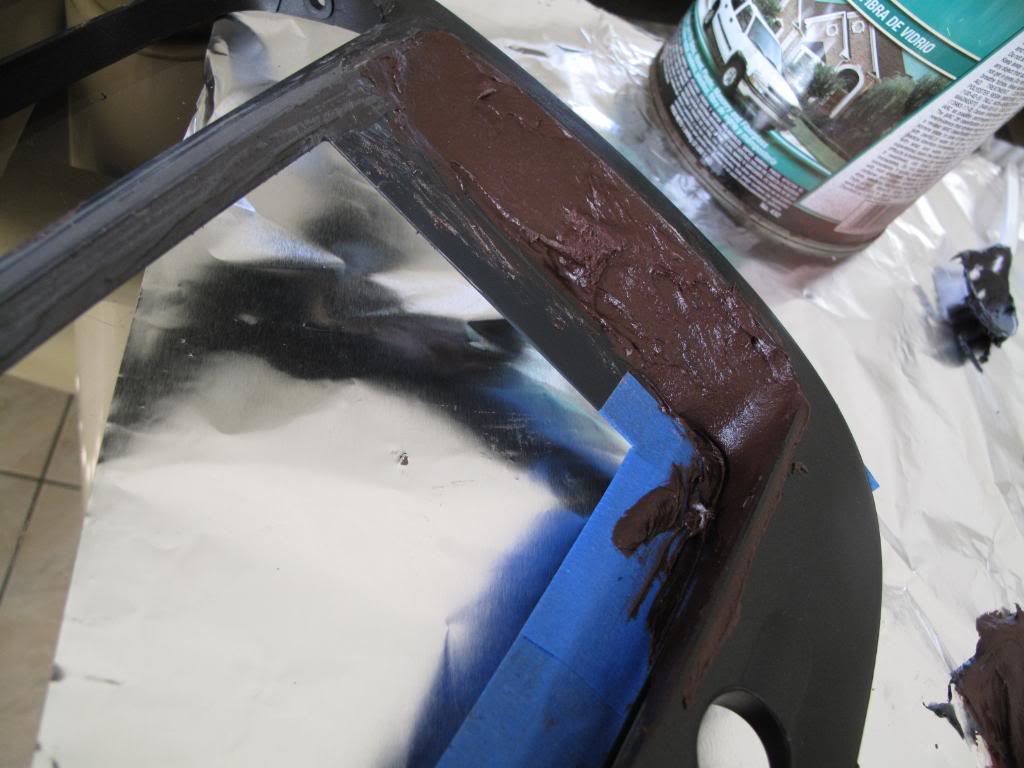
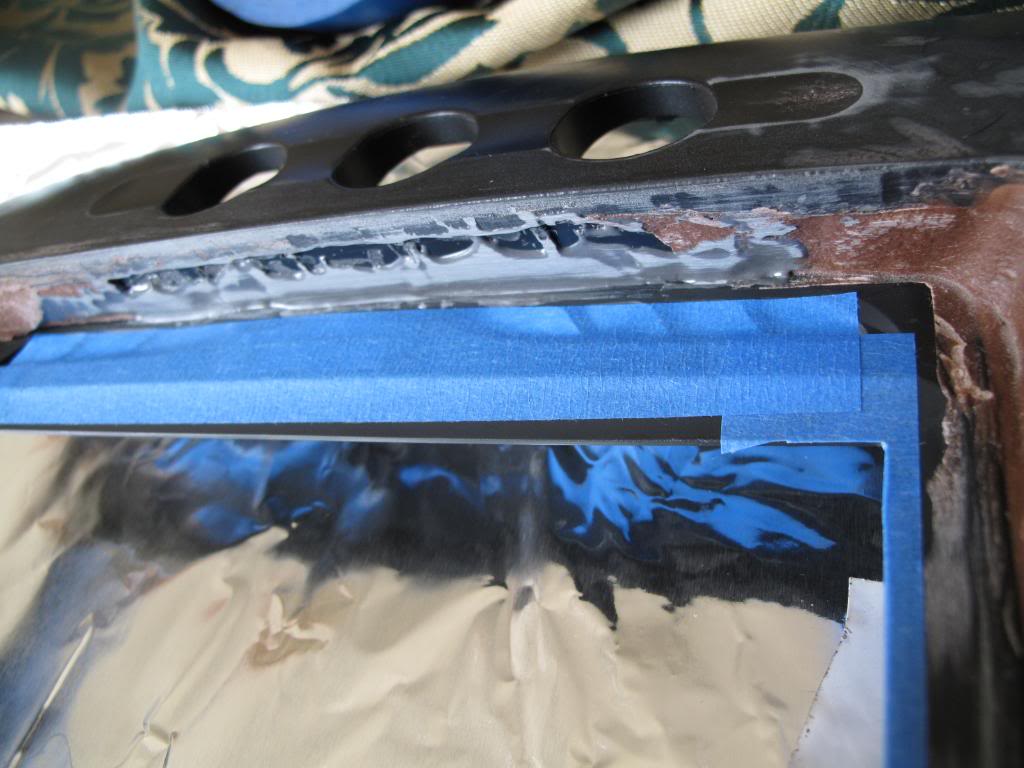
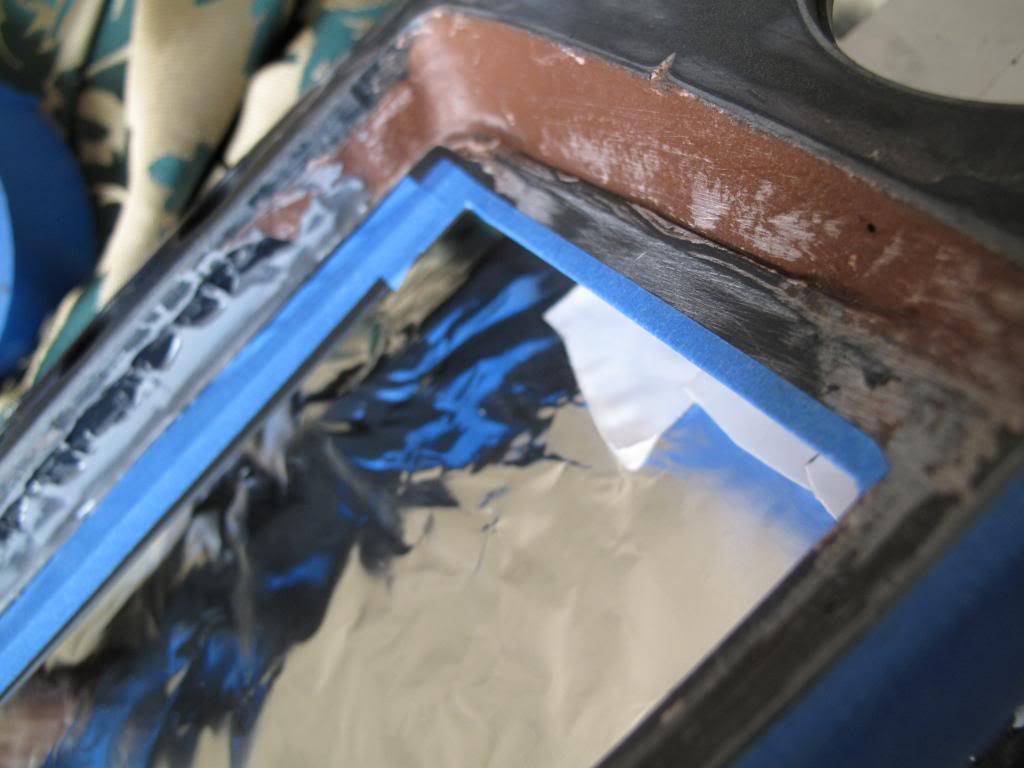
NOW ITS TIME TO MOLD THE TOP/BOTTOM:
put some tape over the top half of the screen so excess bondo wont go on it...less cleanup later
and some tape on the bottom as well:
cover the buttons (that you took out already) less clean up later.
put tape on the inside as frame as well. less clean up later.
apply some bondo on top
then some on bottom:
Last edited by sl33pyriceboi; 03-20-2009 at 09:08 PM.
 03-20-2009
#6
You VTEC...I-VTEC
Hey! Look At Me!! I'm a Supporting Member!!
iTrader: (8)
Join Date: Apr 2006
Location: Phoenix, AZ
Age: 39
Posts: 1,266
Likes: 0
Received 0 Likes
on
0 Posts
Rep Power: 232 Re: Diy: How to mold a screen (or anything for that matter)
oh sure now after i buy your screen you show me how to make it
I did have one question for you on this screen...is the screen glued in or can i take it off somehow to repaint the molding...i havent looked at it yet but saw this and was curious
I did have one question for you on this screen...is the screen glued in or can i take it off somehow to repaint the molding...i havent looked at it yet but saw this and was curious
03-21-2009
#7
Banished to the Depths of Rice.
Thread Starter
iTrader: (3)
Join Date: Jun 2005
Location: SoCal 714/909/626
Posts: 9,196
Likes: 0
Received 1 Like
on
1 Post
Rep Power: 327 Re: Diy: How to mold a screen (or anything for that matter)
which makes me selling my old screen to you pointless (from my point of view) hahah
but i guess i like doing this kinda stuff n working on my car.
anyways, only ur FRONT is glued/molded to the bezzel (like in these pixs)
just flip ur dash around, there should be 4 philip screws, take em off...and you can prob figure out the rest.
just be very very careful. it is delicate.
03-21-2009
#8

 03-21-2009
#9
Banished to the Depths of Rice.
Thread Starter
iTrader: (3)
Join Date: Jun 2005
Location: SoCal 714/909/626
Posts: 9,196
Likes: 0
Received 1 Like
on
1 Post
Rep Power: 327 Re: Diy: How to mold a screen (or anything for that matter)
nope. not at all. especially with the fiberglass strans... plus its reenforced with JBweld as a glue/frame
08-01-2011
#10
Registered!!

Join Date: Aug 2010
Location: Japan
Posts: 15
Likes: 0
Received 0 Likes
on
0 Posts
Rep Power: 0 
Re: Diy: How to mold a screen (or anything for that matter)
I've done this many times and it's a pain to get a super smooth straight finish. I find that trimming the panel in leather or pleather gives a great finish although you are limited to colours. If you're interested come check the results of my DIY. http://www.cardomain.com/ride/439565...a-civic/page-2

Thread
Thread Starter
Honda Civic Forum
Replies
Last Post
dlg1985
8th & 9th Generation Civic 2006 - 2015
9
07-23-2017 10:03 PM


