DIY: Brake pad replacement (the correct way)
 03-30-2011
#1
Premium Member
Hey! Look At Me!! I'm a Supporting Member!!
Thread Starter
iTrader: (14)
Join Date: Aug 2006
Location: Portland, Oregon
Age: 39
Posts: 8,362
Likes: 0
Received 1 Like
on
1 Post
Rep Power: 364 

DIY: Brake pad replacement (the correct way)
I've been doing brakes for a long time and I see lots of questions every day about brake issues. Everyone thinks they know how to do a brake pad replacement, but lots of people do it wrong, even shops that people think they can trust. Do it yourself, save yourself some money and make sure its done right.
I apologize for the lack of pictures, I probably wont be posting any. I've done brake jobs so many times its just not complex enough to warrant pictures. The good news is pretty much all brake systems are the same between carollas, civics, xterras, camrys, mazdas, tsxs, and the like...
Here is a quick guide that lays out how to do a brake job correctly the first time. This originated as a post in a thread (hence not really caring about the spelling mistakes) and I figgured it'd be more useful as its own thread. Post any questions you have and I'll do the best to get back to you.
1) Disassemble the caliper as miuch as you can- take the brake pads out, the retainers, and the pins with the dust boots removed as well. Clean everything with a can of brake kleen (you'll probably use most of a can the first time if you never did this, and then barely any down the line with repeated cleanings. CONTACT POINTS- clean them, make sure there is no rust and no brake dust built up. I sometimes use a scotch green scrubbing pad on them to make it easier. lightly grease both sides of the retainer (and the gap the retainer fits into.
2) Pins.. wipe the old greese off the pins, reinsert, pull it out, wipe it off... get as much of the old grease as you can out. Relube the pins, stick them in, pull them out, get all the grease out. use one of the pins to get the old grease out of the dust boot (thats what I call the rubber boot between the caliper and the pin, if your wondering). regreese the pins, side the dust boot over the pin and insert it... HERE IS THE TRICK TO MAKE SURE CALIPERS DONT STICK TO THE ROTOR... push the dust boot on the caliper first, then fit it on the bolt. this way there is some air in there and naturally pushes the caliper back out. I repeat, connect the dust boot to the caliper first, then the pin second. Clean the rotor with some break kleen and a paper towel just like the other parts of the brake. You dont want oils from your hands, anti seize, lube, or dirt and grime from the previous pads to contaminate the new pads. If the rotor is scored, get it resurfaced or better yet replaced. I replace rotors in pairs to keep everything balanced but I'm sure most people dont alyways do this since brake rotors are also sold individually. Its up to you.
3) breakpads... use anti squeel between the back of the pad and the OEM shim. grease the sides of the pad that touch the retainer/caliper when installed. Slap the pads in there, push the piston back in with a C-clamp or the correct piston tool if you got it. Torque to spec. You should also bleed your brakes as well, but thats a process for a different DIY. so look it up. Brake fluid should look like new motor oil if its new, or like diet cola if its old and needs to be replaced- it doesnt get as dark as motor oil when its dirty.
4) break the pads in correctly based on the mfgs specs or just by driving around and doing hard stops from slower speeds to almost stops up to faster speeds to almost stops (like 5-10mph) and back down. The worst thing you can do when breaking pads in is overheat them in the begining (by dragging your foot on the break as in down a steep hill) or breaking and holding the pad on the rotor like while at a light. Once your done the break in, park the car, let them cool to room temp, and then take the car out for a regular drive around the neighborhood to make sure there isnt any squeeks.
If you followed this guide correctly, you shouldnt have any brake problems.
 03-31-2011
#2
Registered!!
iTrader: (2)
Join Date: Apr 2007
Location: New York
Posts: 2,018
Likes: 0
Received 2 Likes
on
2 Posts
Rep Power: 229 Re: DIY: Brake pad replacement (the correct way)
Good post, I find most people dont regrease slid pins which is the biggest mistake. Also I might add, instead of using a clamp and pushing fluid back into the m/c you can clamp off the brake hose and open the bleeder and just blees a wee bit out. I dont know if it matters but its just something I was told to do.
03-31-2011
#3
Re: DIY: Brake pad replacement (the correct way)
Would be a great addition to
https://www.civicforums.com/forums/1...out-clamp.html
Lol
Feel free to utilize the pictures
https://www.civicforums.com/forums/1...out-clamp.html
Lol
Feel free to utilize the pictures
 07-31-2015
#5
Registered!!

Join Date: Oct 2009
Posts: 54
Likes: 0
Received 0 Likes
on
0 Posts
Rep Power: 178 Re: DIY: Brake pad replacement (the correct way)
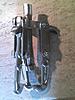
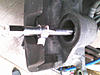
For compressing the brake piston so it will fit over the new pads on my 2003 Civic, I used a puller with the legs removed. See pics.


Thread
Thread Starter
Honda Civic Forum
Replies
Last Post
ayoitzjulesdx98
Wheels, Tires & Brakes Modifications
2
05-14-2015 08:29 AM
edgenet
8th & 9th Generation Civic 2006 - 2015
3
04-28-2015 07:49 PM
thesushiboy
Mechanical Problems/Vehicle Issues and Fix-it Forum
6
04-12-2015 02:54 AM

